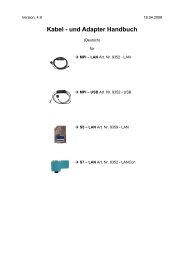
- Page 1 and 2: Version: 5.0 30.11.2009 Cable and a
- Page 3 and 4: 4.7.2. Ports.......................
- Page 5 and 6: 1.1. Description The MPI-LAN cable
- Page 7 and 8: MPI-LAN connected with the computer
- Page 9 and 10: 1.4. Installation Hardware Connect
- Page 11 and 12: . Default display (Menu Messages) F
- Page 13 and 14: 1.6. Operating instructions Be sure
- Page 15 and 16: a. PG 2000 (v4.41) 1. Start the PG
- Page 17 and 18: TCP/IP RFC1006 Communication 6. Cli
- Page 19 and 20: TCP/IP RFC1006 Configuration 16. Fo
- Page 21 and 22: 8. Now you should expand in the „
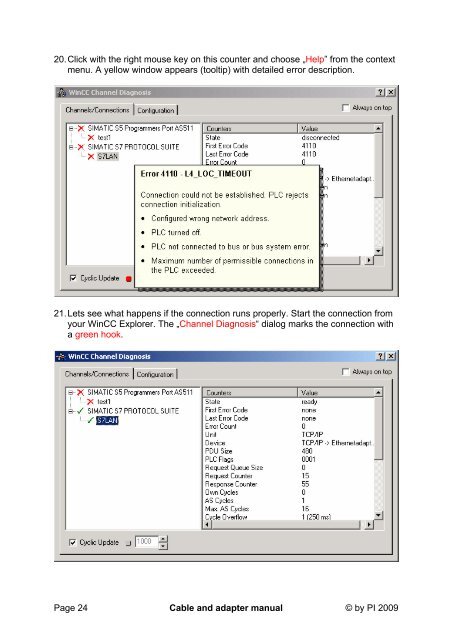
- Page 23: To clean up errors faster the WinCC
- Page 27 and 28: 9. Press the button „Transfer“
- Page 29 and 30: 10. If you want to transfer you pro
- Page 31 and 32: If you skipped the point b („Set
- Page 33 and 34: 7. In the registry path „Local De
- Page 35 and 36: i. S7 for Windows v5.02 Please be s
- Page 37 and 38: 1.6.4. Merge two PLCs together by u
- Page 39 and 40: Data exchanging with the help of th
- Page 41 and 42: 1.6.5. CP - Mode with ProTool/Pro C
- Page 43 and 44: 1.6.6. Option Watchdog With this Op
- Page 45 and 46: int main(int argc, char* argv[]) {
- Page 47 and 48: � °Config° MPI-BUS° MPI interf
- Page 49 and 50: • Protocol Change the protocol ve
- Page 51 and 52: 1.8. Technical data Type Technical
- Page 53 and 54: 2. S7-LAN Ord. No. 9352-LANCon © b
- Page 55 and 56: 2.3. Connection possibilities S7-LA
- Page 57 and 58: S7 - LAN connection possibilities w
- Page 59 and 60: 2.5. Control elements LED for the n
- Page 61 and 62: 2.6.1. Using the PLC-VCOM software
- Page 63 and 64: 6. Now the software is ready to est
- Page 65 and 66: TCP/IP RFC1006 Communication 6. Cli
- Page 67 and 68: TCP/IP RFC1006 Configuration 16. Fo
- Page 69 and 70: 8. Now you should expand in the „
- Page 71 and 72: To clean up errors faster the WinCC
- Page 73 and 74: e. Windows Control Center flexible
- Page 75 and 76:
9. Press the button „Transfer“
- Page 77 and 78:
10. If you want to transfer you pro
- Page 79 and 80:
If you skipped the point b („Set
- Page 81 and 82:
7. Confirm your settings with „OK
- Page 83 and 84:
i. S7 for Windows v5.02 Please be s
- Page 85 and 86:
2.6.3. Direct communication using T
- Page 87 and 88:
10. Type in the edit box “Name“
- Page 89 and 90:
17. Select the registry card “Ass
- Page 91 and 92:
24. A new window opens (the hardwar
- Page 93 and 94:
28. Right click on “CPU 312“ in
- Page 95 and 96:
33. After you have saved the networ
- Page 97 and 98:
2.6.4. Merge two PLCs together by u
- Page 99 and 100:
� Format of TXERRRDY and RXERRRDY
- Page 101 and 102:
the station supports routing (CPUs
- Page 103 and 104:
The S7/MPI-LAN sends only data when
- Page 105 and 106:
2.7. Technical data Type Technical
- Page 107 and 108:
TS-Function Switches the TeleServic
- Page 109 and 110:
MPI/PROFIBUS The MPI/PROFIBUS needs
- Page 111 and 112:
Display In this Dialog you could re
- Page 113 and 114:
Address Format Input Description FB
- Page 115 and 116:
The following operands are possible
- Page 117 and 118:
Password Description General Access
- Page 119 and 120:
4.1. Description The S5-LAN++ modul
- Page 121 and 122:
S5-LAN++ module connected to the co
- Page 123 and 124:
4.4. Installation Hardware The S5-L
- Page 125 and 126:
2. To start the driver installation
- Page 127 and 128:
4.6. Operating instructions Be sure
- Page 129 and 130:
4.6.3. Using a PLC software a. PG 2
- Page 131 and 132:
. SIMATIC Step© 5 Manager (v5.2 +
- Page 133 and 134:
c. Windows Control Center (WinCC) (
- Page 135 and 136:
d. Windows Control Center flexible
- Page 137 and 138:
9. Press the button „Transfer“
- Page 139 and 140:
7. In the main window start the Tra
- Page 141 and 142:
5. After the software is configured
- Page 143 and 144:
8. Select the network interface car
- Page 145 and 146:
4.6.5. S5 - Gateway communication R
- Page 147 and 148:
4.6.5.1. Specifications of the conf
- Page 149 and 150:
In the following example the DB20 w
- Page 151 and 152:
4.7.2. Ports Port Type Description
- Page 153 and 154:
5.1. Description The MPI-USB cable
- Page 155 and 156:
MPI-USB connected to the computer v
- Page 157 and 158:
5.4. Installation Hardware Normal i
- Page 159 and 160:
. Default Display (Menu Messages) F
- Page 161 and 162:
5.6. Operating instructions Be sure
- Page 163 and 164:
a. PG 2000 (v4.41) 1. Start the PG
- Page 165 and 166:
6. Back in the „Set PG/PC interfa
- Page 167 and 168:
c. SIMATIC Step© 7 Manager (v5.2 +
- Page 169 and 170:
e. Windows Control Center flexible
- Page 171 and 172:
9. Press the button „Transfer“
- Page 173 and 174:
8. In the main window start the Tra
- Page 175 and 176:
If you skipped the point b („Set
- Page 177 and 178:
7. In the registry path „Local De
- Page 179 and 180:
i. S7 for Windows v5.02 Please be s
- Page 181 and 182:
5.6.4. Configuring the operator pan
- Page 183 and 184:
. Info Select the menu “Info“ t
- Page 185 and 186:
the cables menu) “Lock” in the
- Page 187 and 188:
5.8. Technical data Type Technical
- Page 189 and 190:
6. PLC - VCom 6.1. Description The
- Page 191 and 192:
to go on. 7. After the driver has b
- Page 193 and 194:
© by PI 2009 Cable and adapter man
- Page 195 and 196:
6.3. Operating instructions Beside
- Page 197 and 198:
2 3 4 Press configure in the PLC -
- Page 199 and 200:
3 4 5 S5 - Gateway Connections…:
- Page 201 and 202:
6.5. MPI-LAN Manager On start up th
- Page 203 and 204:
2. Search and click onto your purch
- Page 205 and 206:
7.3. Interface Assignment The MPI_D
- Page 207 and 208:
6. Select the correct baudrate of t
- Page 209 and 210:
7.6. Diagnostics Pressing the butto
- Page 211 and 212:
8. Troubleshooting 8.1. Frequently