Index - ndd Medical Technologies
Index - ndd Medical Technologies
Index - ndd Medical Technologies

You also want an ePaper? Increase the reach of your titles
YUMPU automatically turns print PDFs into web optimized ePapers that Google loves.
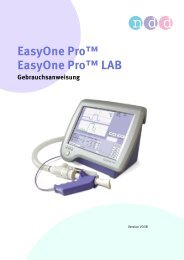
EasyOne Pro<br />
EasyOne Pro LAB<br />
Operator's Manual<br />
Version V03B
<strong>ndd</strong><br />
Medizintechnik AG<br />
Technoparkstrasse 1<br />
CH-8005 Zürich, Switzerland<br />
Tel: +41(44) 445 2530<br />
Fax: +41(44) 445 2531<br />
www.<strong>ndd</strong>.ch<br />
Note<br />
The information in this manual only applies to software<br />
version V01.04. It does not apply to earlier software<br />
versions.<br />
Due to continuing product innovation, specifications in this<br />
manual are subject to change without notice.<br />
© <strong>ndd</strong> Medizintechnik AG, Zürich, Switzerland. All rights<br />
reserved.<br />
No part of this manual may be reproduced without written<br />
permission from <strong>ndd</strong>.<br />
<strong>ndd</strong>, the <strong>ndd</strong> logo, EasyOne Pro, barriette and<br />
spirette are trademarks owned by <strong>ndd</strong> Medizintechnik AG.<br />
This manual describes the product EasyOne Pro and its<br />
variant EasyOne Pro LAB. The safety information and all<br />
operating instructions apply to both devices. Safety<br />
information and operating instructions that apply only to<br />
EasyOne Pro LAB are accompanied by the symbol shown<br />
at left and by the word LAB.<br />
2 EasyOne Pro / EasyOne Pro LAB<br />
USA Office<br />
<strong>ndd</strong> <strong>Medical</strong> <strong>Technologies</strong><br />
2 Dundee Park<br />
Andover, MA 01810<br />
Tel: 1 978 470 0923<br />
Fax: 1 978 470 0924<br />
www.<strong>ndd</strong>med.com
Contents<br />
1 Introduction 5<br />
1.1 CE Marking Information 5<br />
1.2 Revision History 6<br />
1.3 Manual Purpose 6<br />
1.4 Intended Audience 6<br />
1.5 Styles 6<br />
1.6 Safety Information 6<br />
1.7 Intended Use 14<br />
1.8 Contraindications to Performing DLCO Tests 14<br />
1.9 Additional Functions of EasyOne Pro LAB 14<br />
1.10 Components and Functional Description<br />
of EasyOne Pro 15<br />
1.11 EasyOne Pro Flow Sensor Design and Operation 16<br />
1.12 Test Gas Requirements 17<br />
2 Start-up and Initial Preparation 19<br />
2.1 Unpacking, Environmental Conditions 19<br />
2.2 Equipment Description 20<br />
2.3 Preparing the Device 22<br />
2.4 Gas Supply 25<br />
2.5 Connecting the Keyboard and the Mouse 30<br />
2.6 Connecting the Printer 30<br />
2.7 Power 32<br />
2.8 Inserting the One-Way Valve, DLCO barriette/<br />
FRC barriette and spirette 33<br />
2.9 Switching the Device On, Functional Test 37<br />
3 Performing a Test 40<br />
3.1 Selecting/Adding a Patient 40<br />
3.2 Selecting a Test 44<br />
3.3 Forced Vital Capacity (FVC/FVL) 45<br />
3.4 Vital Capacity (SVC) 55<br />
3.5 Maximum Voluntary Ventilation (MVV) 57<br />
3.6 Quick Test 59<br />
3.7 CO Diffusing Capacity (DLCO) 59<br />
3.8 FRC Test (EasyOne Pro LAB only) 64<br />
3.9 Ending the Test 66<br />
3.10 Retrieving/Printing Stored Tests 66<br />
3.11 Trend View 69<br />
4 Editing Patient Data 71<br />
5 Quality Messages and Quality Grades 72<br />
5.1 FVC/FVL Quality Messages and Quality Grades 72<br />
5.2 SVC Quality Messages and Quality Grades 75<br />
5.3 DLCO Quality Messages and Quality Grades 76<br />
EasyOne Pro / EasyOne Pro LAB 3
Contents<br />
5.4 FRC Quality Messages 80<br />
5.5 System Interpretation 82<br />
5.6 Retrospective Test Assessment, Entering Comments 82<br />
5.7 Definition of Important Parameters 85<br />
6 Switching the Device Off 88<br />
7 Hygiene, Cleaning, Maintenance, Disposal 89<br />
8 System Settings 99<br />
9 Troubleshooting Tips 116<br />
10 Specifications 117<br />
11 Order Information 119<br />
12 Appendix 120<br />
12.1 Interpretation 120<br />
12.2 Predicted Values 123<br />
12.3 GDT Interface 124<br />
12.4 Introduction to Adjustment of DLCO<br />
Measurements 130<br />
12.5 How to interpret TLC from a single breath<br />
maneuver 132<br />
12.6 Report Designer 134<br />
12.7 Electromagnetic Compatibility (EMC) 138<br />
12.8 Microsoft Software License Terms<br />
for Windows® XP Embedded Runtime 143<br />
12.9 Quick Reference Guide to the Screen Displays 149<br />
12.10 Literature 164<br />
4 EasyOne Pro / EasyOne Pro LAB
1 Introduction<br />
1.1 CE Marking Information<br />
Introduction<br />
� The product EasyOne Pro bears the CE marking CE-120 (notified body<br />
SGS) indicating its compliance with the provisions of the Council<br />
Directive 93/42/EEC about medical devices and fulfills the essential<br />
requirements of Annex I of this directive.<br />
� The flow sensor has been assigned to class IIa as specified in Annex IX of<br />
the Directive 93/42/EEC.<br />
� The device fulfills the requirements of standard EN 60601-1 "<strong>Medical</strong><br />
electrical equipment, Part 1: General requirements for basic safety and<br />
essential performance" as well as the electromagnetic immunity<br />
requirements of standard EN 60601-1-2 "Electromagnetic compatibility<br />
– <strong>Medical</strong> electrical equipment".<br />
� The radio-interference emitted by EasyOne Pro is within the limits<br />
specified in EN 55011, class B.<br />
� The CE marking covers only the accessories listed in the Order<br />
Information chapter.<br />
� Magnetic and electrical fields are capable of interfering with the proper<br />
performance of the device. For this reason make sure that all external<br />
devices operated in the vicinity of the equipment comply with the<br />
relevant EMC requirements. X-ray equipment, MRI devices, radio<br />
systems, and cellular telephones are possible sources of interference as<br />
they may emit higher levels of electromagnetic radiation. Keep the<br />
equipment away from these devices and verify its performance before<br />
use.<br />
� The device is suitable for continuous operation.<br />
� The product fulfills the requiremens of the following standards:<br />
� EN ISO 14971<br />
� IEC60601-1: 2005<br />
� EN 60601-1: 2006<br />
� EN 60601-1-2: 2007<br />
� EN 60601-1-6: 2007<br />
� The country of manufacture is indicated on the device label.<br />
EasyOne Pro / EasyOne Pro LAB 5
1.2 Revision History<br />
1.3 Manual Purpose<br />
Introduction<br />
This manual contains the instructions necessary to employ the product<br />
safely and in accordance with its function and intended use.<br />
1.4 Intended Audience<br />
1.5 Styles<br />
This manual is geared for clinical professionals. Clinical professionals are<br />
expected to have working knowledge of medical procedures, practices, and<br />
terminology as required for completing these examinations.<br />
Keys (softkeys and hardware elements) are represented in bold print, e.g.<br />
New Patient, Select Patient.<br />
Terms appearing on the display and product names are italicized, e.g. Last<br />
Name, First Name, EasyOne Pro.<br />
1.6 Safety Information<br />
General Information<br />
Edition Date Comment<br />
Version V01.01 2008-07-22 Initial Release<br />
Version V01.02 2009-11-23 Revised Edition<br />
Version V02 2010-04-06 Revised Edition<br />
Version V03 2011-11-29 Revised Edition<br />
Version V03A 2012-01-27 Revised Edition<br />
Version V03B 2012-05-23 Revised Edition<br />
� This manual is an integral part of the device. It should be available to the<br />
equipment operator at all times. Close observance of the information<br />
given in the manual is a prerequisite for proper device performance and<br />
correct operation and ensures patient and operator safety. Please note<br />
that information pertinent to several chapters is given only once.<br />
Therefore, read the manual once in its entirety.<br />
� To ensure patient safety, the specified measuring accuracy, and<br />
interference-free operation, we recommend using only original<br />
6 EasyOne Pro / EasyOne Pro LAB
Introduction<br />
accessories available through <strong>ndd</strong>. The user is responsible if using non<strong>ndd</strong><br />
accessories.<br />
� <strong>ndd</strong> is responsible for the effects on safety, reliability, and performance<br />
of the device, only if<br />
� assembly operations, extensions, readjustments, modifications, or<br />
repairs are carried out by <strong>ndd</strong> or by <strong>ndd</strong>-authorized personnel<br />
� the device is used in accordance with the instructions given in this<br />
manual.<br />
� The warranty does not cover damage resulting from the use of unsuitable<br />
accessories and consumables from other manufacturers.<br />
� Always consult with <strong>ndd</strong>, if you intend to connect equipment not<br />
mentioned in this manual.<br />
� Components and accessories must comply with the applicable IEC<br />
60601 safety standards and/or the configured system must comply with<br />
the collateral standard IEC 60601-1-1 "Requirements for the safety of<br />
medical electrical systems".<br />
� The power cord must be an approved type acceptable to the authorities<br />
in the country where the equipment is used.<br />
� All publications are in conformity with the device specifications and<br />
standards on safety of electromedical equipment valid at the time of<br />
printing. All rights are reserved for devices, circuits, techniques, software<br />
programs, and names appearing in this manual.<br />
� The illustrations in this manual are only examples. They are not binding<br />
in any way.<br />
� No part of this manual may be reproduced without written permission<br />
from <strong>ndd</strong>.<br />
© 2012 <strong>ndd</strong> Medizintechnik AG, Technoparkstr. 1, CH-8005 Zürich,<br />
Switzerland<br />
EasyOne Pro / EasyOne Pro LAB 7
Definitions<br />
Safety Notices<br />
Introduction<br />
In this manual the safety information is classified as follows:<br />
Danger<br />
indicates an imminent hazard. If not avoided, the hazard will<br />
result in death or serious injury.<br />
Warning<br />
indicates a hazard. If not avoided, the hazard can result in<br />
death or serious injury.<br />
Caution<br />
indicates a potential hazard. If not avoided, the hazard may<br />
result in minor injury and/or product/property damage.<br />
Danger<br />
Explosion Hazard—EasyOne Pro is not designed for use in<br />
areas of medical locations where an explosion hazard may<br />
exist. Explosion hazards may result from the use of<br />
flammable anesthetics, skin cleansing agents or<br />
disinfectants. Great care must be exercised when the system<br />
is used in an oxygen-enriched atmosphere. The atmosphere<br />
is considered to be oxygen-enriched when the room air<br />
contains more than 25% of oxygen or nitrous oxide.<br />
8 EasyOne Pro / EasyOne Pro LAB
Warning<br />
Shock Hazard—<br />
Introduction<br />
� Before using the system, make sure that it is in correct<br />
working order and operating condition. Check the cables<br />
and connectors, in particular, for signs of damage.<br />
Replace damaged cables and connectors immediately,<br />
before use.<br />
� Do not expose EasyOne Pro to direct sunlight to<br />
prevent system components from reaching inadmissible,<br />
high temperatures. Furthermore, EasyOne Pro has no<br />
additional protection against the ingress of humidity.<br />
� When disconnecting the device from the power line,<br />
remove the plug from the wall outlet first, before<br />
disconnecting the cable from the device. Otherwise there<br />
is a risk of coming in contact with line voltage by<br />
inadvertently introducing metal parts in the sockets of the<br />
power cord.<br />
� Do not use multiple portable socket outlets (MPSO) to<br />
connect the devices to the power line.<br />
� Printers operated in the patient vicinity must meet the<br />
requirements of IEC 60601. If they do not, they must be<br />
modified and be connected to earth ground (PE, potential<br />
equalization).<br />
� All devices of a system must be connected to the same<br />
power supply circuit. Devices that are not connected to<br />
the same circuit must be electrically isolated when<br />
operated, e.g., with an isolated RS232 interface (this is<br />
not a requirement in the USA).<br />
� Devices may be connected to other devices or to parts of<br />
systems only when it has been made certain that there is<br />
no danger to the patient, the operators, or the<br />
environment as a result. In those instances where there is<br />
any element of doubt concerning the safety of connected<br />
equipment, the user must contact the manufacturers<br />
concerned or other informed experts to find out whether<br />
there is any possible danger to the patient, the operator,<br />
or the environment as a result of the proposed<br />
combination of equipment. Standards IEC 60601-1-1/<br />
EN60601-1-1 must be complied with in all cases.<br />
EasyOne Pro / EasyOne Pro LAB 9
Introduction<br />
� Liquids must not be allowed to enter the device or the<br />
sensor. Devices and sensors into which liquids have<br />
penetrated must be immediately cleaned and checked by<br />
a service technician, before they can be reused.<br />
� Do not open the device or the sensor. There are no userreplaceable<br />
components inside the device or the sensor.<br />
� Do not insert objects of any kind into the device. They<br />
may touch live components and you might suffer an<br />
electric shock, cause fire, or damage the device.<br />
Warning<br />
Patient Hazard—The operator must be trained in the use of<br />
the device.<br />
Patient Hazard—Before performing any tests on patients,<br />
refer to the ATS/ERS Taskforce recommendations (literature<br />
[11] ("Literature" on page 164).<br />
Patient Hazard—Custom configured reports bear the label<br />
Custom Report at the bottom of each page. The user is<br />
responsible for the content and use of all custom configured<br />
reports.<br />
Patient Hazard—Do not touch the accessible contacts of<br />
connectors located at the rear panel and the patient at the<br />
same time.<br />
Patient Hazard, Equipment Damage—Do not modify<br />
EasyOne Pro in any way.<br />
Patient Hazard—When used at 230-240 V, 60 Hz equipment<br />
must be connected to a center-tapped 240 V single phase<br />
transformer (US requirement).<br />
Risk of Infection—Follow all cleaning procedures carefully, and<br />
thoroughly inspect the components after they are cleaned and<br />
before each patient is tested. Cleaning residue, particulate<br />
matter, and other contaminates (including pieces of torn or<br />
broken components) in the breathing circuit create a safety<br />
risk to the patient during test procedures. Aspiration of<br />
contaminates can be potentially life-threatening.<br />
Risk of Infection—Proper use of the spirette and the DLCO<br />
barriette/FRC barriette provides a reliable infection<br />
barrier. The use of other accessories is not permitted.<br />
Cross Contamination Between Patients—The spirette and<br />
the DLCO barriette/FRC barriette are intended for<br />
10 EasyOne Pro / EasyOne Pro LAB
Introduction<br />
single patient use. Use a new one for each patient to prevent<br />
cross contamination between patients.<br />
Risk of Poisoning—Observe all information provided by the<br />
manufacturers of chemical products required for the use and<br />
care of the product. Always keep these chemical products in<br />
their original containers to avoid any confusion which may<br />
have severe consequences.<br />
RF Interference—Known RF sources, such as cell phones,<br />
radio or TV stations, and two-way radios, may cause<br />
unexpected or adverse operation of this device. Check the<br />
device performance before each use.<br />
Risk to Persons—If the display is broken, avoid contact with<br />
the liquid crystal.<br />
Suffocation Hazard—Dispose of the packaging material,<br />
observing the applicable waste-control regulations. Keep the<br />
packaging material out of children's reach.<br />
Caution<br />
Equipment Damage—Before connecting the device to the<br />
power line, check that the voltage and frequency ratings of<br />
your power line match the values indicated on the device<br />
nameplate.<br />
Equipment Damage—Protect the equipment from viruses,<br />
malware, etc. Always check the USB flash drive for viruses,<br />
before connecting it to the equipment.<br />
Equipment Damage—Do not set up EasyOne Pro in the<br />
direct vicinity of a window. Rain, humidity and sunlight may<br />
damage EasyOne Pro. Do not operate EasyOne Pro in<br />
the vicinity of heating appliances (radiators). Do not block air<br />
vents and do not place any objects on the device.<br />
Equipment Damage—Do not drop EasyOne Pro.<br />
Equipment Damage—For equipment transport, switch off<br />
EasyOne Pro and store it in its original packing.<br />
Restricted Sale—U.S. Federal law restricts this device to sale<br />
by or on the order of a physician.<br />
EasyOne Pro / EasyOne Pro LAB 11
EasyOne Pro LAB only<br />
Danger<br />
Explosion Hazard—<br />
Introduction<br />
� Ensure that persons working with oxygen have undergone<br />
special training and are aware of the particular properties<br />
of oxygen to guarantee safe handling of oxygen without<br />
accidents. Furthermore, these persons must be familiar<br />
with this operator manual and must have understood its<br />
content.<br />
� Do not use hand cream or other skin care products.<br />
� Oxygen intensively promotes combustion; therefore,<br />
flammable substances must be kept away from oxygen.<br />
� Unintended release of oxygen in confined spaces<br />
increases risk of fire; smoking and open flames are<br />
prohibited. Possible sources of ignition must be<br />
eliminated. Rooms must be well ventilated.<br />
� The oxygen inlet must periodically be checked for leaks<br />
(at least once a month).<br />
� Use only fittings approved for use with oxygen; these<br />
fittings must be properly connected. All fittings,<br />
downstream lines and devices must be free of oil and<br />
grease.<br />
� Connect a pressure relief valve to the pressurized gas<br />
cylinder before opening it! Before connecting the<br />
pressure relief valve, check the connection sleeve of the<br />
pressurized gas cylinder for contamination. Contaminated<br />
connections must be cleaned with a clean cloth. The valve<br />
of the pressurized gas cylinder may be opened only if the<br />
connected fittings are closed. Open the valve of the<br />
compressed gas cylinder very slowly.<br />
12 EasyOne Pro / EasyOne Pro LAB
Equipment Symbols<br />
0120<br />
Introduction<br />
Observe the information given in the operator manual.<br />
Do not reuse (single patient use).<br />
CE marked per the <strong>Medical</strong> Device Directive 93/42/EEC of<br />
the European Union.<br />
Product certification for the USA and Canada.<br />
Connection to power line ON (mains power switch).<br />
Connection to power line OFF (mains power switch).<br />
Temperature and humidity sensor.<br />
Potential equalization pin.<br />
Alternating voltage.<br />
Gas inlet for DLCO gas.<br />
Gas inlet for O2 (oxygen).<br />
The number found under this symbol is the date of<br />
manufacture in the YYYY-MM format.<br />
Manufacturer<br />
Type BF applied part<br />
EasyOne Pro / EasyOne Pro LAB 13
1.7 Intended Use<br />
Introduction<br />
The <strong>ndd</strong> EasyOne Pro Respiratory Analysis System is designed for<br />
conducting lung function measurements in general or specialist practices or<br />
in hospitals.<br />
The EasyOne Pro Respiratory Analysis System can also be used outside of<br />
the laboratory when performing lung function screenings or measurements<br />
in occupational medicine.<br />
The EasyOne Pro Respiratory Analysis System is used to conduct lung<br />
function measurements on adults and children starting at age 4, except<br />
measurements of Diffusing Capacity of the lung based on CO (DLCO), which<br />
can be performed on adults and children starting at age 6.<br />
1.8 Contraindications to Performing DLCO Tests<br />
Do not perform a DLCO test<br />
This symbol indicates that the waste of electrical and<br />
electronic equipment must not be disposed as unsorted<br />
municipal waste and must be collected separately. Consult<br />
Operator Manual!<br />
Hardware revision.<br />
� in the presence of carbon monoxide toxicity<br />
� in case of dangerous levels of oxyhemoglobin desaturation without<br />
supplemental oxygen<br />
1.9 Additional Functions of EasyOne Pro LAB<br />
EasyOne Pro LAB includes the measurement of the FRC (Functional<br />
Residual Capacity) based on the Multiple Breath Nitrogen (N 2) Washout<br />
method. This method is based on washing out the N 2 from the lungs, while<br />
the patient breathes 100% oxygen. The analysis of the expired N 2 trace is<br />
used to compute the FRC and other parameters like LCI (Lung Clearance<br />
<strong>Index</strong>) that are used to quantify distribution inhomogeneities of the lung.<br />
The test is based on tidal breathing only and can easily be performed in<br />
adults and children starting at age 4.<br />
14 EasyOne Pro / EasyOne Pro LAB
Introduction<br />
1.10 Components and Functional Description of EasyOne Pro<br />
Fig. 1-1 EasyOne Pro, block diagram<br />
A Mains connector<br />
B Power supply unit<br />
C Hard disk<br />
D Storage disk (backup)<br />
E Industrial standard PC<br />
F PC ports (USB, LAN, etc.)<br />
G Automatic data acquisition<br />
H Sensor for ambient temperature and<br />
humidity<br />
I Pump<br />
J Pneumatic system<br />
K Demand valve<br />
L CO sensor<br />
M Molar mass sensor<br />
N Display with touch screen<br />
O Replaceable filter pack<br />
P Gas supply tubing<br />
Q DLCO valve<br />
R Motor block<br />
S Sensor<br />
T Gas cylinder for DLCO tests<br />
U Oxygen cylinder for FRC test or wall<br />
outlet (EasyOne Pro LAB only)<br />
V Oxygen supply unit (EasyOne Pro<br />
LAB only)<br />
EasyOne Pro / EasyOne Pro LAB 15
Introduction<br />
EasyOne Pro consists of a compact main unit and a hand-held flow<br />
sensor S with removable DLCO valve unit Q. The hand-held sensor is<br />
electrically connected to the device. For DLCO tests, a gas supply tube P<br />
delivers gas to the DLCO valve. The sensor measures flow velocity, volume<br />
and molar mass of the gases that the patient inhales and exhales.<br />
The mains connector A connects the device to line power. The gas cylinder T<br />
supplies the medical gas mixture that is required to perform DLCO tests<br />
(normally 0.3% CO, 10% He, 21% O2 in N2 ).<br />
A temperature and humidity sensor H measures the temperature and<br />
humidity in the examination room.<br />
The device contains an industrial standard PC E (Windows XP embedded)<br />
that performs data acquisition, data analysis and storage of test results.<br />
The user interface for display and control consists of a flat panel display<br />
with touch screen N. If required a keyboard and/or a mouse can be<br />
connected to the PC. A pneumatic system J delivers gas to the patient,<br />
allows flushing of the DLCO gas delivery hose and draws gas samples from<br />
the patient's inspiratory and expiratory breath. The side stream flow used<br />
for gas analysis is driven by a pump I. CO gas is analyzed by a sensor based<br />
on infrared absorption L. A molar mass sensor M based on ultrasound<br />
transit time measurement determines the helium content of the respired air.<br />
The oxygen supply unit V required by the EasyOne Pro LAB version is<br />
located on the left side of the device.<br />
Note<br />
EasyOne Pro includes the Touch-It Virtual Keyboard developped<br />
by Chessware SA.<br />
1.11 EasyOne Pro Flow Sensor Design and Operation<br />
The ultrasound flow sensor measures the transit time to determine flow<br />
velocity, volume and molar mass of the gas (molecular weight x<br />
concentration). The illustration below explains the measuring principle: two<br />
ultrasound sensors emit very short ultrasound pulses that travel along the<br />
transmission path to the opposite ultrasound transducer. Measuring the<br />
transit times allows the flow velocity to be determined very accurately and<br />
independently of temperature, humidity and molar mass of the gas. Since<br />
the measuring principle is based on a digital measurement technique, the<br />
sensor requires only one single calibration. The sensor calibration does not<br />
change during the sensor's lifetime.<br />
16 EasyOne Pro / EasyOne Pro LAB
1.12 Test Gas Requirements<br />
DLCO Test Gas<br />
integrated mouthpiece<br />
Fig. 1-2 Flow sensor<br />
Introduction<br />
ultrasound sensor 2<br />
ultrasound sensor 1<br />
Caution<br />
Patient Hazard, Incorrect Measurements—<br />
Observe local regulations. Use only medical-grade gases, if<br />
required.<br />
Make sure that only <strong>ndd</strong>-approved gas mixtures are used. If<br />
the gases used do not meet the <strong>ndd</strong> specifications,<br />
equipment malfunction may occur and the test results may<br />
be incorrect.<br />
Gas mixture: 10% helium, accuracy +10 %; 0.3% carbon monoxide,<br />
accuracy +10 %;18 to 25% oxygen, balance nitrogen<br />
DLCO simulator test require gas mixtures with an accuracy
Introduction<br />
Warning<br />
Improper handling of gas cylinders represents a major risk to<br />
persons and the environment. The relevant regulations must<br />
be observed without exception. Protect the gas cylinders<br />
from falling. The content and fill level must be clearly visible<br />
at all times. Valves, fittings, connections and tubing must be<br />
free of oil and grease. Have the cylinder inspected regularly<br />
by an official test authority. The user is liable for any<br />
damage. Close the main valve whenever the gas cylinder is<br />
not in use!<br />
FRC Gas (100% O 2 ), EasyOne Pro LAB only<br />
<strong>Medical</strong> grade oxygen; 100 % O 2 . From compressed gas cylinders or the<br />
hospital's oxygen supply system.<br />
Note<br />
When using the wall outlet, please observe the hospital's inhouse<br />
instructions and requirements.<br />
18 EasyOne Pro / EasyOne Pro LAB
Start-up and Initial Preparation<br />
2 Start-up and Initial Preparation<br />
2.1 Unpacking, Environmental Conditions<br />
Transport Damage<br />
Upon arrival, immediately check that the shipment is complete and<br />
undamaged. If you have a complaint, promptly notify the shipping agent<br />
and your local <strong>ndd</strong> dealer.<br />
Check each of the following items:<br />
� the housing<br />
Cleaning Before Initial Use<br />
Ambient Conditions<br />
� the sensor and its connection cable<br />
� the valve unit including the overpressure valves and the one-way<br />
valve<br />
� the gas supply tube<br />
� the power cord<br />
� the gas cylinder fittings.<br />
EasyOne Pro does not require cleaning before its first use.<br />
The gas supply tube and the valve unit are cleaned before shipping, but not<br />
disinfected. These parts can be thoroughly cleaned as described in chapter<br />
"Hygiene, Cleaning, Maintenance, Disposal" on page 89.<br />
Excessive amounts of dust, lint, and miscellaneous clutter around the<br />
instrument could result in malfunctions due to internal tubing blockages,<br />
overheating of components, clogged ventilation ports, etc.<br />
EasyOne Pro can be operated under the following ambient conditions:<br />
� temperature +5 to +40 °C (41 to 104 °F)<br />
(LAB: 10 to 40 °C (50 to 104 °F))<br />
� relative humidity 15 to 95%, no condensation<br />
(LAB: 30 to 75%, no condensation)<br />
� atmospheric pressure 700 to 1060 hPa.<br />
Note<br />
Also observe the information given in section<br />
"Electromagnetic Compatibility (EMC)" on page 138.<br />
EasyOne Pro / EasyOne Pro LAB 19
2.2 Equipment Description<br />
Fig. 2-1 EasyOne Pro<br />
a Sensor holder, extendible<br />
b Sensor cable connection<br />
c Connection for gas supply tube to<br />
sensor<br />
Start-up and Initial Preparation<br />
a b c d e<br />
f<br />
d ON/OFF switch<br />
e Touch stylus<br />
f Sensor (see Fig. 2-3)<br />
20 EasyOne Pro / EasyOne Pro LAB
Fig. 2-2 EasyOne Pro, rear panel<br />
g USB ports (keyboard, mouse, printer)<br />
h Memory card slot cover (Flash card,<br />
see "Data Backup on Memory Card" on<br />
page 91)<br />
i LAN ports (printer)<br />
j Monitor<br />
k Serial RS232 ports<br />
l Connection for temperature and<br />
humidity sensor<br />
Start-up and Initial Preparation<br />
g h i j k l m n o p q r<br />
m Connection for tube from DLCO gas<br />
cylinder<br />
n Potential equalization pin<br />
o Screw to secure the filter pack (must be<br />
removed before the filter can be<br />
replaced)<br />
p Nameplate<br />
q Mains connector, mains power switch<br />
r Connection for O 2 gas supply system<br />
(EasyOne Pro LAB only)<br />
EasyOne Pro / EasyOne Pro LAB 21
Fig. 2-3 Sensor<br />
s Coupling ring for the gas supply tube<br />
t Overpressure valves<br />
u One-way valve<br />
2.3 Preparing the Device<br />
Start-up and Initial Preparation<br />
s t u v w x<br />
� Connect the sensor cable to the device.<br />
Fig. 2-4 Connecting the sensor cable<br />
22 EasyOne Pro / EasyOne Pro LAB<br />
v DLCO barriette or for LAB FRC<br />
barriette<br />
w Motor block, release button<br />
x spirette
Start-up and Initial Preparation<br />
� Connect the gas supply tube to the valve unit:<br />
Note<br />
Be sure to connect the side of the tube with the colored<br />
coupling ring to the device.<br />
� Slip tubing connector onto connection at sensor<br />
� Screw coupling ring tight.<br />
Fig. 2-5 Connect gas supply tube to valve unit<br />
� Connect the other end of the gas supply tube to the device and tighten<br />
the coupling ring.<br />
Fig. 2-6 Connecting the gas supply tube to the device<br />
EasyOne Pro / EasyOne Pro LAB 23
Start-up and Initial Preparation<br />
� Attach the valve unit to the sensor (aligning the arrow) and advance the<br />
valve unit until you hear it click into place (press button a to unlock).<br />
Note<br />
The valve unit must be mounted on the sensor only for DLCO<br />
and FRC tests. All other tests are performed without the valve<br />
unit.<br />
Fig. 2-7 Attaching the valve unit to the sensor<br />
� Pull out the sensor holder on the left side of the device (a, Fig. 2-1) and<br />
place the sensor in the holder.<br />
If you are working with the sensor stand (optional accessory), you can<br />
position the sensor such that the patient is not required to hold it during the<br />
tests.<br />
� Using the clamp, screw the sensor stand to the table top.<br />
� Open the catch and insert the sensor.<br />
� Close the catch.<br />
Fig. 2-8 Inserting the sensor in its stand<br />
24 EasyOne Pro / EasyOne Pro LAB<br />
a
2.4 Gas Supply<br />
DLCO Gas<br />
Start-up and Initial Preparation<br />
� Connect the temperature and humidity sensor.<br />
Note<br />
Ensure that the sensor is exposed to the normal room<br />
temperature and that it will not measure incorrect values<br />
because of exposure to a draft from the blower, to lamps or<br />
direct sunlight.<br />
Fig. 2-9 Temperature and humidity sensor<br />
Note<br />
It is very important to comply with the information given in<br />
chapter "Test Gas Requirements" on page 17.<br />
The gas cylinder fittings (pressure relief valve) must meet the<br />
following minimum requirements:<br />
� input pressure on primary side: 150 to 300 bar (depending on<br />
max. cylinder pressure)<br />
� output pressure on secondary side: 0 to 6 bar<br />
� flow rate: 6 L/s minimum<br />
You can purchase all necessary gases and cylinders as well<br />
as the fittings from your local <strong>ndd</strong> dealer.<br />
Equipment not intended for mobile use can also be used<br />
with large gas cylinders.<br />
Use only the supplied original tubing to connect the gas<br />
cylinder to the device.<br />
Use only the original gas supply tube to connect the valve<br />
unit to the device.<br />
EasyOne Pro / EasyOne Pro LAB 25
Start-up and Initial Preparation<br />
Warning<br />
Improper handling of gas cylinders represents a major risk to<br />
persons and the environment. The relevant regulations must<br />
be observed without exception. Protect the gas cylinders<br />
from falling. The content and fill level must be clearly visible<br />
at all times. Valves, fittings, connections and tubing must be<br />
free of oil and grease. Have the cylinder inspected regularly<br />
by an official test authority. The user is liable for any<br />
damage. Close the main valve whenever the gas cylinder is<br />
not in use!<br />
� Check that the gas meets <strong>ndd</strong> specifications.<br />
� Check that the main valve a and the pressure relief valve c are closed.<br />
Fig. 2-10 Gas cylinder fittings<br />
a Gas cylinder main valve<br />
b Manometer, primary side<br />
c Pressure relief valve, secondary side<br />
a b c d e<br />
� Connect the tube to the DLCO gas port on EasyOne Pro: push the tube<br />
onto the stud, exerting sufficient force to overcome the initial resistance;<br />
then advance the tube as far as it will go.<br />
Note<br />
It is important to slide the tube at least 19 mm onto the stud.<br />
To remove the tube, push the bushing ring back and pull the<br />
tube off the stud.<br />
26 EasyOne Pro / EasyOne Pro LAB<br />
d Manometer, secondary side<br />
e Port for EasyOne Pro connection tube<br />
(DLCO gas)
Start-up and Initial Preparation<br />
If the tube end shows signs of mechanical damage<br />
(grooves), cut off the damaged portion.<br />
Fig. 2-11 Connection for tube from DLCO gas cylinder<br />
� Connect the other end of the tube to the pressure relief valve c.<br />
� Open the main valve a of the gas cylinder completely.<br />
� Slowly open the pressure relief valve c and set the manometer d to a<br />
secondary pressure of 4 to 5 bar.<br />
Note<br />
A DLCO overpressure valve that opens at 7.5 bar is integrated<br />
in the device. If you select a higher secondary pressure, the<br />
overpressure valve will open and gas will escape.<br />
Exchange the gas cylinder if the primary pressure drops<br />
below 10 bar!<br />
Warning<br />
Be sure not to confuse the DLCO gas inlet and the FRC gas<br />
inlet.<br />
EasyOne Pro / EasyOne Pro LAB 27
Start-up and Initial Preparation<br />
FRC Gas (100% O2), EasyOne Pro LAB only<br />
<strong>Medical</strong> grade oxygen is used for FRC measurements with EasyOne Pro<br />
LAB.<br />
Secondary pressure: 3 bar<br />
Flow: > 0.7 l/s (at 3 bar)<br />
Warning<br />
Improper handling of gas cylinders represents a major risk to<br />
persons and the environment. The relevant regulations must<br />
be observed without exception. Protect the gas cylinders<br />
from falling. The content and fill level must be clearly visible<br />
at all times. Valves, fittings, connections and tubing must be<br />
free of oil and grease. Have the cylinder inspected regularly<br />
by an official test authority. The user is liable for any<br />
damage. Close the main valve whenever the gas cylinder is<br />
not in use!<br />
� Check that the main valve a and the pressure relief valve c are closed.<br />
Fig. 2-12 Gas cylinder fittings<br />
a Gas cylinder main valve<br />
b Manometer, primary side<br />
c Pressure relief valve, secondary side<br />
a b c d e<br />
28 EasyOne Pro / EasyOne Pro LAB<br />
d Manometer, secondary side<br />
e Port for EasyOne Pro LAB connection<br />
tube (FRC gas)
Start-up and Initial Preparation<br />
� Connect the tube to the FRC gas inlet at the EasyOne Pro LAB (Fig.<br />
2-13): push the tube onto the stud, exerting sufficient force to overcome<br />
the initial resistance; then advance the tube until the stop.<br />
Note<br />
It is important to slide the tube at least 19 mm onto the stud.<br />
To remove the tube, push the bushing ring back and pull the<br />
tube off the stud.<br />
If the tube end shows signs of mechanical damage<br />
(grooves), cut off the damaged portion.<br />
Fig. 2-13 Connection for tube from FRC gas cylinder<br />
� Connect the other end of the tube to the pressure relief valve c.<br />
� Open the main valve a of the gas cylinder completely.<br />
� Slowly open the pressure relief valve c and set the manometer d to a<br />
secondary pressure of 3 bar.<br />
Danger<br />
Explosion Hazard—An FRC overpressure valve that opens at<br />
5 bar, is integrated in the device. If you select a higher<br />
secondary pressure, the overpressure valve will open and<br />
gas will escape.<br />
Note<br />
Exchange the gas cylinder if the primary pressure drops<br />
below 10 bar!<br />
EasyOne Pro / EasyOne Pro LAB 29
Start-up and Initial Preparation<br />
2.5 Connecting the Keyboard and the Mouse<br />
EasyOne Pro is equipped with a touch screen display and can thus be<br />
operated without a keyboard or a mouse. However, if you prefer working<br />
with a keyboard and a mouse, connect them to a USB port (g, Fig. 2-2).<br />
2.6 Connecting the Printer<br />
Depending on the printer used, connect it to one of the USB ports (g, Fig.<br />
2-2) or to one of the LAN ports i.<br />
Note<br />
Preinstalled and compatible printer models (please contact<br />
your <strong>ndd</strong> dealer to find out about other options):<br />
� HP Deskjet 6988<br />
� HP Deskjet 6940<br />
� HP Officejet H470<br />
� HP Universal Printing PCL5 (see below).<br />
� In the main menu, select Utilities -> Configuration -> Printer.<br />
� Open the printer list and select the printer.<br />
Fig. 2-14 Printer tab<br />
Printing with HP Universal Printing PCL5 (network printer)<br />
� In the drop-down list, select "HP Universal Printing PCL" and confirm with<br />
OK.<br />
30 EasyOne Pro / EasyOne Pro LAB
� Select the test to print.<br />
Start-up and Initial Preparation<br />
Fig. 2-15 Test selection<br />
� Press Print: the printer window will appear.<br />
Fig. 2-16 Printer window<br />
� Select Search for Network printers....<br />
Fig. 2-17 Printer window<br />
� Select the printer to use.<br />
EasyOne Pro / EasyOne Pro LAB 31
2.7 Power<br />
Start-up and Initial Preparation<br />
Caution<br />
Equipment Damage—Before connecting the device to the<br />
power line, verify that the ratings of your local power line are<br />
those indicated on the device nameplate.<br />
Warning<br />
Shock Hazard—Do not use this equipment unless it is<br />
properly connected to earth ground.<br />
Use only the original <strong>ndd</strong> power cord supplied with the<br />
device.<br />
If the device is used within a medical system, it must be<br />
connected with the room's central potential equalization<br />
system (pin a, Fig. 2-18).<br />
Using improperly grounded equipment could result in<br />
serious injury or death and severe damage to the equipment<br />
and interconnected equipment. Grounding reliability and<br />
leakage current suppression can only be assured when the<br />
power connectors are properly connected to earth-grounded<br />
receptacles.<br />
Note<br />
EasyOne Pro meets the safety requirements of UL, NFPA,<br />
LACTL, CSA, TUV, BSI, and IEC-60601 for leakage currents.<br />
The device is checked for leakage current before shipment.<br />
The <strong>ndd</strong> service representative (or distributor representative)<br />
will assist hospital personnel in verification, if requested.<br />
Leave the mains power switch c on all the time and use the<br />
ON/OFF switch on the front panel to switch the device on and<br />
off. Turn off power with the mains power switch only when<br />
the device will not be used for some time.<br />
� Connect the power cord to connector b, then plug it into the wall outlet.<br />
32 EasyOne Pro / EasyOne Pro LAB
Fig. 2-18 Mains connection<br />
a Potential equalization pin<br />
b Mains connector<br />
Start-up and Initial Preparation<br />
2.8 Inserting the One-Way Valve, DLCO barriette/FRC<br />
barriette and spirette<br />
One-Way Valve, DLCO barriette<br />
a b c<br />
c Mains power switch<br />
Note<br />
The valve unit is only required for DLCO and FRC tests. All<br />
other tests are performed without the valve unit. The device<br />
is to be operated only with the original <strong>ndd</strong> DLCO<br />
barriette.<br />
Warning<br />
Cross Contamination Between Patients—The DLCO<br />
barriette is intended for single patient use. Use a new one<br />
for each patient to prevent cross contamination between<br />
patients.<br />
EasyOne Pro / EasyOne Pro LAB 33
Start-up and Initial Preparation<br />
� Attach the one-way valve to the valve unit (aligning the arrows) as shown<br />
in Fig. 2-19 and turn it clockwise as far as possible.<br />
Fig. 2-19 Attaching the one-way valve<br />
� Insert the DLCO barriette in the one-way valve (aligning the arrows) as<br />
shown in Fig. 2-20 and check that it sits tight.<br />
Fig. 2-20 Inserting the DLCO barriette<br />
34 EasyOne Pro / EasyOne Pro LAB
Start-up and Initial Preparation<br />
FRC barriette (EasyOne Pro LAB only)<br />
Fig. 2-21 Inserting the FRC barriette<br />
Note<br />
The FRC barriette is required only when also FRC tests will<br />
be performed with the EasyOne Pro LAB. If the EasyOne<br />
Pro LAB is used for DLCO testing, the DLCO barriette will<br />
also have to be attached here.<br />
The device is to be operated only with the original <strong>ndd</strong> FRC<br />
barriette.<br />
Warning<br />
Cross Contamination Between Patients—The FRC barriette<br />
is intended for single patient use. Use a new one for each<br />
patient to prevent cross contamination between patients.<br />
EasyOne Pro / EasyOne Pro LAB 35
spirette<br />
Start-up and Initial Preparation<br />
Note<br />
The device is to be operated only with the original <strong>ndd</strong><br />
spirette.<br />
Warning<br />
Cross Contamination Between Patients—The spirette is<br />
intended for single patient use. Use a new one for each<br />
patient to prevent cross contamination between patients.<br />
� Tear open the plastic bag containing the spirette and fold the bag back<br />
so that you can insert the spirette in the flow sensor. Ensure that the<br />
plastic bag protects the mouthpiece of the spirette until you hand the<br />
flow sensor over to the patient.<br />
This approach not only ensures perfectly hygienic conditions, it also keeps<br />
the spirette closed for subsequent setting of the baseline.<br />
� Insert the spirette - as shown in the illustration - into the flow sensor<br />
as far as possible. When doing this, please ensure that the arrow on the<br />
spirette is lined up with the arrow on the flow sensor.<br />
� You remove the spirette by pushing it out of the sensor from below.<br />
Fig. 2-22 Inserting the spirette<br />
36 EasyOne Pro / EasyOne Pro LAB
Start-up and Initial Preparation<br />
2.9 Switching the Device On, Functional Test<br />
� Open the main valve of the gas cylinder(s) completely.<br />
� Check the secondary pressure: for DLCO gas , it must be 4 to 5 bar, and<br />
for FRC gas, it must be 3 bar (EasyOne Pro LAB only).<br />
� Turn on the mains power switch on the rear panel of the device.<br />
� Turn on the device with the power button: the green indicator is<br />
illuminated.<br />
Fig. 2-23 Power button<br />
After a short start-up phase, the initial screen will be displayed.<br />
Note<br />
If the initial screen appears and no error messages display, the<br />
device is in perfect operating condition.<br />
EasyOne Pro / EasyOne Pro LAB 37
Fig. 2-24 Initial Screen<br />
a Selected patient<br />
b Practice, office, hospital (see "General<br />
Tab" on page 100 for details about<br />
entering the data)<br />
c Click to select a patient or add a new<br />
patient<br />
d Click to perform a test<br />
e Click to review the results from<br />
Start-up and Initial Preparation<br />
a b c d e fghi j<br />
Note<br />
EasyOne Pro is equipped with a touch screen display. You<br />
activate a button by touching it on the display.<br />
(h, Fig. 2-24) is used to display and remove the touch<br />
keypad that allows you to make all entries.<br />
Before the first test, you should follow the instructions given<br />
in "System Settings" on page 99 and<br />
� enter the practice/office or hospital name<br />
� select the language<br />
� select the test types and parameters<br />
Note<br />
After each exchange of the gas cylinder, check whether the<br />
gas concentration in the program corresponds to the<br />
specifications on the cylinder. Follow these steps:<br />
38 EasyOne Pro / EasyOne Pro LAB<br />
previous tests<br />
f Click to view the setup screen<br />
g Sensor status (sensor icon, if sensor is<br />
connected)<br />
h Click to display the keypad<br />
i Help button<br />
j Click to quit the program
Start-up and Initial Preparation<br />
� Select Utilities -> Configuration -> Test -> DLCO.<br />
� Compare the displayed values with the data on the gas cylinder.<br />
� Close the tab with OK.<br />
Fig. 2-25 DLCO tab<br />
EasyOne Pro / EasyOne Pro LAB 39
3 Performing a Test<br />
Performing a Test<br />
Note<br />
Before performing a test, you should do the following:<br />
� select the test details<br />
(e.g. only expiratory or inspiratory and expiratory FVC<br />
measurement, predicted value calculation, etc., see "Test Tab" on<br />
page 105)<br />
� select a patient from the database as described below, or enter a<br />
new patient in the database. As an alternative you can perform a<br />
Quick Test which will be saved to the database with an<br />
automatically assigned ID (e.g. Q_0033) (see "Quick Test" on<br />
page 59).<br />
3.1 Selecting/Adding a Patient<br />
� Click Select Patient.<br />
The patient list will be displayed.<br />
a b c d e f g h i j k<br />
Fig. 3-1 Patient list<br />
a Selected patient<br />
b Bar cursor for patient selection<br />
c Click to add a new patient<br />
d Click to perform a test with the selected<br />
patient<br />
e Click to view the selected patient's test<br />
results<br />
f Click to edit the selected patient's data<br />
g Click to delete the data of the selected<br />
40 EasyOne Pro / EasyOne Pro LAB<br />
patient<br />
h Help button<br />
i Filter Last Name; by entering one or<br />
more letters, you limit the number of<br />
patients to those meeting the filter<br />
criteria<br />
j Additional parameters<br />
k Back to main menu
Selecting the Patient<br />
Performing a Test<br />
The displayed patients can be sorted by<br />
� Patient ID<br />
� Last Name<br />
� First Name<br />
� Date of Last Test.<br />
� To do so, click on the appropriate title in the column headers.<br />
� To search for a specific patient, you enter the first letter(s) of the<br />
patient's last name at h.<br />
� You select a patient by clicking in the corresponding line of the list: the<br />
bar cursor highlights the selected patient. At the same time, the<br />
patient's name appears at a.<br />
Note<br />
Click to view the patient data. Click again to close<br />
the window.<br />
Fig. 3-2 Window showing patient data<br />
EasyOne Pro / EasyOne Pro LAB 41
Adding a New Patient<br />
� Click New Patient.<br />
Performing a Test<br />
� Enter a patient ID and press the TAB key or the Enter key (click to<br />
enter an automatically generated ID).<br />
� Enter the last and first names in the same way.<br />
� Click a (Fig. 3-3) to select the gender and press the TAB key.<br />
� Also, select the ethnic origin b.<br />
� Enter the date of birth, height and weight.<br />
Note<br />
The information regarding gender, age, height, weight and<br />
ethnic origin must be correct, because it is used to calculate<br />
the predicted values and to interpret the acquired data.<br />
Additional information can be entered on the Smoking<br />
History (see Fig. 3-4), History and Comment tabs c.<br />
� Close the window with OK.<br />
The patient list will be displayed and the new patient is selected.<br />
Fig. 3-3 Patient data window<br />
a b c<br />
42 EasyOne Pro / EasyOne Pro LAB
Fig. 3-4 Smoking History tab<br />
Merging a Patient’s Data Records<br />
Performing a Test<br />
You can merge data records for one and the same patient, for example, if<br />
they were acquired with different tests or if different spellings of the patient's<br />
name exist. Use Drag & Drop (right mouse button) to merge data<br />
records.<br />
Fig. 3-5 Merging a patient’s data records<br />
EasyOne Pro / EasyOne Pro LAB 43
3.2 Selecting a Test<br />
Performing a Test<br />
The test selection screen will appear either directly after entry of the patient<br />
data or it can be accessed from the initial screen with Perform Test.<br />
Fig. 3-6 Test selection screen<br />
Note<br />
If the unit selected is EasyOne (see "Device Tab"<br />
on page 111), you will see Fig. 3-7.<br />
Observe the instructions shown on the monitor screen and<br />
on the display of the EasyOne when performing tests and<br />
the subsequent synchronization.<br />
Refer to the EasyOne tab (see "EasyOne Tab" on page 112) for configuration<br />
options.<br />
Fig. 3-7 Selection screen when the selected device is EasyOne<br />
44 EasyOne Pro / EasyOne Pro LAB
Performing a Test<br />
3.3 Forced Vital Capacity (FVC/FVL)<br />
� Click FVL (ex/in).<br />
The acquisition screen will be displayed.<br />
Note<br />
The scale for the flow-volume loop depends on the selected<br />
test (only expiratory or inspiratory and expiratory, tidal<br />
breathing yes/no).<br />
Expiratory FVC Measurement<br />
a b c d e f g h i j<br />
k<br />
Fig. 3-8 Expiratory FVC acquisition screen<br />
a Selected test parameters<br />
b Predicted values, past test results of<br />
the patient<br />
c Flow-volume loop area<br />
d Start button<br />
e Scaling<br />
f Displayed curve selection: best trial,<br />
best trial and pre trial, all trials<br />
g Show/hide the animation program for<br />
Preparations<br />
children (incentive)<br />
h Show/hide expanded parameter list<br />
i Volume-time curve area<br />
j Test information and system<br />
interpretation area<br />
k Click to perform a new test, to view the<br />
patient's test list, to select a new<br />
patient and to print a test<br />
The patient should be relaxed and should not wear tight clothing. The<br />
patient may stand or sit during the test. In exceptional cases, the patient<br />
may feel dizzy when performing the test. Therefore, watch your patients<br />
closely, if they are standing for the test.<br />
EasyOne Pro / EasyOne Pro LAB 45
Performing a Test<br />
Explain that the purpose of the test is to determine how much air a person’s<br />
lungs can hold and how quickly that air can be expelled. Since the<br />
spirometry test requires active participation by the patient, it is very<br />
important to explain the test maneuver:<br />
� take the spirette into the mouth with the lips sealing around the<br />
spirette, taking care not to block its opening with the tongue or bite<br />
down excessively on the spirette<br />
� breathe calmly<br />
� fill lungs completely<br />
� exhale as hard and fast as possible<br />
� continue blowing out until the lungs are completely empty<br />
� breathe in again.<br />
If you perform spirometry tests with EasyOne Pro on patients for the first<br />
time, you should practice testing yourself and others prior to testing<br />
patients. You will learn to recognize the cause of problems by interpreting<br />
the Quality Messages displayed by the program after each effort and how to<br />
avoid these problems. After a poor effort explain to your patient how to<br />
improve the maneuver.<br />
Fig. 3-9 Patient using the sensor<br />
Caution<br />
Risk of Injury—Pulmonary function tests require maximum<br />
effort on the part of the patient and may lead to dizziness.<br />
Risk of Infection—The spirette is designed for single use.<br />
Use a fresh spirette for each new patient.<br />
Risk of Infection—Clean the nose clip after each patient.<br />
46 EasyOne Pro / EasyOne Pro LAB
Measurement<br />
Performing a Test<br />
� Insert the new spirette in the sensor.<br />
� Attach the nose clip to the patient.<br />
� Press Start.<br />
The device advises you to keep the spirette closed until the test start<br />
prompt is displayed. This is necessary to set the baseline correctly.<br />
Note<br />
<strong>ndd</strong> recommends leaving the spirette packaging in place<br />
until after the baseline has been set.<br />
� Block off the spirette on one end and confirm the message with OK.<br />
� When the start test prompt is displayed, hand the sensor over to your<br />
patient and instruct him or her to perform the maneuver as explained<br />
earlier.<br />
Note<br />
If the "Manual Test Stop" option was selected in the<br />
configuration (see "Test Tab" on page 105), the operator<br />
must terminate the measurement by clicking the Test End<br />
button or by pressing the space bar or the Enter key.<br />
During the test, you will see the flow-volume loop and the volume-time<br />
curve on the display. All curves and measured values will be displayed after<br />
the test.<br />
EasyOne Pro / EasyOne Pro LAB 47
Fig. 3-10 Acceptable FVC test<br />
a Predicted values<br />
b Test results<br />
c Area for review comments<br />
d Click to perform a post-test (see<br />
"Bronchodilation (Post-Tests)" on<br />
page 52)<br />
e Test information, system interpretation<br />
Performing a Test<br />
a b c a d e f g<br />
In order to assess the patient's pulmonary function, it is necessary to<br />
achieve acceptable test quality. The test quality depends on the cooperation<br />
of the patient which, in turn, depends on the quality of the<br />
physician's instructions. EasyOne Pro incorporates an automatic quality<br />
control function. This function analyzes the test quality and displays a<br />
message to inform you as to whether the maneuver was acceptable or not<br />
(see "System Interpretation" on page 82). This function also allows the<br />
physician to improve patient instructions.<br />
48 EasyOne Pro / EasyOne Pro LAB<br />
f Click for a retrospective test evaluation<br />
or to expand the parameter list (see<br />
"Retrospective Test Assessment,<br />
Entering Comments" on page 82)<br />
g Click to view more test information and<br />
system interpretation statements
Performing a Test<br />
When three acceptable maneuvers have been performed, the message<br />
Session complete! appears. If, even after repeated attempts, it is not<br />
possible to obtain an adequate number of good maneuvers, you should take<br />
a break, depending on how the patient feels, or stop the measurement. Even<br />
after a break, the measurement results remain stored.<br />
� Click Add Trial for each subsequent spirometry maneuver.<br />
A review comment can be entered in area c or the results can be edited (do<br />
not forget to give the reviewer's name).<br />
When three acceptable tests have been performed, the message Session<br />
complete! appears and a quality grade from A (optimal) to F a is displayed.<br />
a b c<br />
Fig. 3-11 Acquisition screen after three acceptable, expiratory FVC tests<br />
a Quality grade<br />
c Area for review comments<br />
b Click to perform a post-trial (see<br />
"Bronchodilation (Post-Tests)" on<br />
page 52)<br />
Note<br />
If FEV6 is selected (instead of FVC), the measurement will<br />
stop automatically after 6 seconds.<br />
EasyOne Pro / EasyOne Pro LAB 49
%Pred Graph<br />
Fig. 3-12 %Pred graph<br />
Fig. 3-13 Menu<br />
Performing a Test<br />
The %Pred graph is a three-segment bar. The left segment a indicates a<br />
value below the lower limit of normal, the middle segment b represents a<br />
value between the lower limit and the predicted value and the right<br />
segment c indicates a value above the predicted value. FVC, FEV1 and<br />
FEV1/FVC are displayed in color, all other parameters are grey.<br />
Adding a Spirometry Trial<br />
If you would like to add trials to a previous test, e.g. if the patient needed a<br />
break or if other patients were tested in between, please proceed as<br />
follows. Remember, however, that it is only possible to add a trial to a<br />
previous test that was performed on the same day.<br />
� Select the patient.<br />
� Click Perform Test.<br />
� Select the test, e.g. FVC.<br />
A menu will appear.<br />
a b c<br />
� Click Add Trial or Add Post.<br />
The acquisition screen will be displayed.<br />
� Perform the new spirometry maneuvers.<br />
50 EasyOne Pro / EasyOne Pro LAB
Performing a Test<br />
FVL Test (inspiratory and expiratory measurement)<br />
Ambient Conditions<br />
The ATPS values (Ambient Temperature Pressure Saturated = spirometer<br />
conditions) of inspiratory measurements must be converted to BTPS values<br />
(Body Temperature Pressure Saturated = body conditions). For this<br />
conversion, the system needs the following data:<br />
� relative humidity<br />
� room temperature<br />
� atmospheric pressure or altitude.<br />
Before the inspiratory test can be started, a window pops up with these<br />
data. Check the data. For the pending test you can now edit the data, if<br />
necessary, or confirm them, if they are correct.<br />
Fig. 3-14 Window showing the ambient conditions<br />
a Conversion factors<br />
b Box for entry of the humidity<br />
c Box for entry of the ambient temperature<br />
d Box for entry of the altitude (atmospheric<br />
pressure)<br />
a b c d e f<br />
e Click to recalculate the BTPS factor (if the<br />
ambient conditions were modified)<br />
f Click to confirm and accept the values<br />
� Edit the values, if necessary, and click Confirm >> to close the window.<br />
Warning<br />
Erroneous Measurement Results—Incorrect entries may lead<br />
to erroneous test readings and incorrect system<br />
interpretations. The specified measuring accuracy is ensured<br />
only when all entries are correct.<br />
EasyOne Pro / EasyOne Pro LAB 51
Performing a Test<br />
The inspiratory and expiratory FVL test acquisition screen appears.<br />
Measurement<br />
� Prepare the patient (see "Preparations" on page 45) and explain the test<br />
maneuvers to him or her:<br />
� take the spirette into the mouth with the lips sealing around the<br />
spirette, taking care not to block its opening with the tongue or bite<br />
down excessively on the spirette<br />
� breathe calmly<br />
� fill lungs completely<br />
� exhale as hard and fast as possible<br />
� continue blowing out until the lungs are completely empty<br />
� inhale as hard and fast as possible.<br />
� Conduct the tests as described in section "Measurement" on page 47.<br />
Note<br />
The volume-time curve (Fig. 3-16) does not display the<br />
forced inspiration at the end of the maneuver.<br />
Bronchodilation (Post-Tests)<br />
The Post test is usually performed to determine the patient's response to<br />
bronchodilating asthma medication. This is done by administering a<br />
bronchodilator to the patient after he or she has performed a spirometry<br />
test (Pre-Test). Approximately 10 to 20 minutes after the medication (when<br />
bronchodilator shows effect, refer to medication labelling) a second<br />
spirometry test is performed. After the test the Pre and Post results are<br />
compared. Post tests can only be added to previous tests performed on the<br />
same day.<br />
� Select the patient.<br />
� Select the test, then click Add Post to close the window.<br />
52 EasyOne Pro / EasyOne Pro LAB
Performing a Test<br />
The window with the patient's existing tests appears. With (Fig. 3-15<br />
left) you display the detailed results of the Pre tests (Fig. 3-15 right).<br />
Fig. 3-15 Detailed test results<br />
� Conduct the tests as described in section "Measurement" on page 47.<br />
As soon as three acceptable trials have been performed, the message<br />
Session complete! appears and a quality grade from A (optimal) to F is<br />
displayed (see "Quality Messages and Quality Grades" on page 72).<br />
Fig. 3-16 Acquisition screen after three acceptable post-trials<br />
EasyOne Pro / EasyOne Pro LAB 53
Animation Program for Children<br />
Performing a Test<br />
An animation program for children is available for FVC, FVL and SVC tests.<br />
You can choose between two animations: Balloon and Monkey. When the<br />
animation program is activated, we recommend disabling the manual test<br />
stop and working with the automatic test stop (see "General Tab" on<br />
page 100).<br />
Fig. 3-17 Balloon animation program for children, test start, successful test<br />
Fig. 3-18 Monkey animation program for children, test start<br />
The Monkey animation can be viewed in full-screen mode .<br />
54 EasyOne Pro / EasyOne Pro LAB
3.4 Vital Capacity (SVC)<br />
Performing a Test<br />
Slow vital capacity measurements determine the vital capacity, starting<br />
from tidal breathing. (You can configure the device for direct measurement<br />
of the vital capacity, i.e., without initial tidal breathing (see "SVC Tab" on<br />
page 108). For this test type, too, the ATPS values (Ambient Temperature<br />
Pressure Saturated = spirometer conditions) must be converted to BTPS<br />
values ( Body Temperature Pressure Saturated = body conditions) (see<br />
"Ambient Conditions" on page 51).<br />
After three acceptable trials, the message Session complete! appears.<br />
� Select the patient (see "Selecting/Adding a Patient" on page 40).<br />
� Prepare the patient (see "Preparations" on page 45) and explain the test<br />
maneuvers to him or her:<br />
� take the spirette into the mouth with the lips sealing around the<br />
spirette, taking care not to block its opening with the tongue or bite<br />
down excessively on the spirette<br />
� breathe calmly in and out<br />
� when the start test prompt appears, take a maximum inspiration<br />
followed by an immediate, but unhurried, exhalation.<br />
� Select SVC.<br />
The slow vital capacity acquisition screen appears.<br />
EasyOne Pro / EasyOne Pro LAB 55
Performing a Test<br />
a b c d e f g h<br />
Fig. 3-19 Slow vital capacity acquisition screen<br />
a Selected test parameters<br />
b Predicted values<br />
c Volume-time curve area<br />
d Start button<br />
e Test information and system<br />
interpretation area<br />
f Click for a retrospective test evaluation<br />
or to expand the parameter list (see<br />
� Conduct the tests as described in section "Measurement" on page 47.<br />
56 EasyOne Pro / EasyOne Pro LAB<br />
"Retrospective Test Assessment,<br />
Entering Comments" on page 82)<br />
g Click to view additional information<br />
h Click to perform a new test, to view the<br />
patient's test list, to select a new<br />
patient and to print a test
Performing a Test<br />
When three acceptable trials have been performed, the message Session<br />
complete! appears and a quality grade from A (optimal) to F is displayed<br />
(see "Quality Messages and Quality Grades" on page 72).<br />
Fig. 3-20 Acquisition screen after three acceptable SVC trials<br />
3.5 Maximum Voluntary Ventilation (MVV)<br />
In these tests, the maximum ventilation volume over an uninterrupted<br />
period of 12 seconds is measured. For this test type, too, the ATPS values<br />
(Ambient Temperature Pressure Saturated = spirometer conditions) must<br />
be converted to BTPS values ( Body Temperature Pressure Saturated = body<br />
conditions) (see "Ambient Conditions" on page 51).<br />
� Select the patient (see "Selecting/Adding a Patient" on page 40).<br />
� Prepare the patient (see "Preparations" on page 45) and explain the test<br />
maneuvers to him or her:<br />
� take the spirette into the mouth with the lips sealing around the<br />
spirette, taking care not to block its opening with the tongue or bite<br />
down excessively on the spirette<br />
� when the test start prompt is displayed, breathe in and out as deeply<br />
and as fast as possible over a period of 12 seconds.<br />
� Select MVV.<br />
The MVV acquisition screen appears.<br />
EasyOne Pro / EasyOne Pro LAB 57
Performing a Test<br />
a b c d e f g h<br />
Fig. 3-21 MVV acquisition screen<br />
a Selected test parameters<br />
b Predicted values<br />
c Volume-time curve area<br />
d Start button<br />
e Test information and system<br />
interpretation area<br />
f Click for a retrospective test evaluation<br />
or to expand the parameter list (see<br />
� Conduct the tests as described in section "Measurement" on page 47.<br />
Fig. 3-22 Acquisition screen after two acceptable MVV tests<br />
58 EasyOne Pro / EasyOne Pro LAB<br />
"Retrospective Test Assessment,<br />
Entering Comments" on page 82)<br />
g Click to view additional information<br />
h Click to perform a new test, to view the<br />
patient's test list, to select a new<br />
patient and to print a test
3.6 Quick Test<br />
Fig. 3-23 Menu<br />
Performing a Test<br />
You have the option to perform a quick test without entering patient data.<br />
When Quick Test is selected, no predicted values are available, because<br />
they are calculated on the basis of the patient data.<br />
� In the main menu, select Perform Test.<br />
A menu will appear.<br />
� Click Quick Test and perform the test as usual.<br />
Note<br />
It is not possible to edit the predicted values retrospectively<br />
once measurements have been taken.<br />
The Quick Test feature is not available for DLCO tests.<br />
3.7 CO Diffusing Capacity (DLCO)<br />
Note<br />
Before conducting the DLCO test, the valve unit must be<br />
attached to the sensor (see Fig. 2-7). Furthermore, a new<br />
barriette and, in case of a new patient, a new spirette<br />
must be inserted (see "Inserting the One-Way Valve, DLCO<br />
barriette/FRC barriette and spirette" on page 33).<br />
Before performing the first DLCO test, check that the valve<br />
unit is properly attached and that the metal coupling ring of<br />
the motor is tight.<br />
Before performing a DLCO test, you should measure the vital<br />
capacity.<br />
It is recommended to perform two DLCO tests. The pause<br />
between the two tests must be at least 4 minutes. However,<br />
do not perform more than five consecutive DLCO tests on<br />
one patient (ATS/ERS Taskforce recommendations, literature<br />
[11] ("Literature" on page 164).<br />
� Select the patient (see "Selecting/Adding a Patient" on page 40).<br />
EasyOne Pro / EasyOne Pro LAB 59
Performing a Test<br />
� Attach the nose clip to the patient and explain the test maneuvers to him<br />
or her:<br />
� Select DLCO.<br />
� In the BTPS window, confirm the values for relative humidity,<br />
temperature and atmospheric pressure with Confirm.<br />
� Check that the patient sits fully upright and wears the nose clip.<br />
� Instruct the patient to hold the sensor straight (not at an angle) in front of<br />
his or her mouth without taking the spirette into the mouth yet.<br />
Fig. 3-24 shows the patient during a test, using the sensor stand (optional<br />
accessory).<br />
Fig. 3-24 Patient using the sensor (with optional stand)<br />
� Press Start on the acquisition screen. EasyOne Pro will automatically<br />
complete a start-up routine in about 15 seconds.<br />
� Initialization<br />
� Test preparation<br />
� Tidal breathing<br />
� When you see the message Start tidal breathing, instruct the patient to<br />
take the sensor into the mouth with the lips sealing around the<br />
spirette and to start the tidal breathing maneuver.<br />
� After 3 or 4 breaths, the Activate button appears. Now instruct the<br />
patient to fully exhale.<br />
60 EasyOne Pro / EasyOne Pro LAB
Performing a Test<br />
� During exhalation, press the Activate button: the valve will automatically<br />
close at the end of exhalation. it is also possible to manually close the<br />
valve by pressing the Manual Close button.<br />
� Now instruct the patient to fully inhale (the patient is expected to inhale<br />
85% of their vital capacity within 2 to 4 seconds) and then hold their<br />
breath for 10 seconds.<br />
� After the 10 seconds, the valve opens and the patient is required to<br />
exhale quickly, but avoiding forced breathing, and continue tidal<br />
breathing until the test stops.<br />
After a successful test, the message Good effort will be displayed.<br />
EasyOne Pro / EasyOne Pro LAB 61
Performing a Test<br />
a bc d e f g h i j k l m<br />
Fig. 3-25 DLCO test<br />
a Tidal breathing<br />
b Complete exhalation<br />
c Holding breath for 10 seconds<br />
d Collection bar (its width depends on<br />
the selected sampling volume m)<br />
e Complete exhalation<br />
f Keys to expand the curve (to check the<br />
collection bar for artifacts)<br />
g Click to show/hide more curves (mouth<br />
pressure, flow)<br />
The collection bar identifies the range that was analyzed.<br />
With the + button f, you can expand the curve to check the collection bar<br />
range for artifacts (click - to reset the bar to its original width).<br />
62 EasyOne Pro / EasyOne Pro LAB<br />
h Box for comments (touch to display the<br />
keypad)<br />
i Click to show and hide control buttons<br />
for the collection bar<br />
j Click to reset the collection bar<br />
k Click to move the collection bar to the<br />
right<br />
l Click to adjust the DLCO measurement<br />
(see "Introduction to Adjustment of<br />
DLCO Measurements" on page 130)<br />
m Click to select the sampling volume
Performing a Test<br />
With Collection Bar i you can show and hide control buttons for the<br />
collection bar (j, k, m).<br />
With > k you can move the collection bar to the right. The resulting, new<br />
values will immediately be calculated and displayed.<br />
With I
Performing a Test<br />
3.8 FRC Test (EasyOne Pro LAB only)<br />
FRC measurement is based on the nitrogen (N 2) washout method where N 2<br />
is washed out from the lungs while the patient breathes 100% oxygen. The<br />
test is performed during tidal breathing within the range indicated at a (Fig.<br />
3-26). After a (configurable) number of breaths, the measurement starts<br />
automatically or it can be started manually with the Activate button.<br />
Note<br />
Before conducting the FRC test, the valve unit must be<br />
attached to the flow sensor (see Fig. 2-7). Furthermore, a new<br />
FRC barriette and, if a new patient is tested, a new spirette<br />
must be inserted (see "Inserting the One-Way Valve,<br />
DLCO barriette/FRC barriette and spirette" on page 33).<br />
Before performing the first FRC test, check that the valve unit is<br />
properly attached and that the metal coupling ring of the<br />
motor is tight.<br />
Inform patients that they may experience a feeling of dryness<br />
during inhalation. Also, they will hear oxygen escape during<br />
the washout phase.<br />
There is a manual mode and an automatic mode, see "FRC<br />
(mbw) Tab" on page 110.<br />
The patient wears a nose clip during the measurement and the<br />
lips must seal around the mouthpiece to prevent ambient air<br />
from being inhaled.<br />
� Attach the FRC barriette (see "FRC Test (EasyOne Pro LAB only)" on<br />
page 64).<br />
� Select the patient (see "Selecting/Adding a Patient" on page 40).<br />
� Select the test with FRC.<br />
� The FRC test acquisition screen appears.<br />
� Explain the test maneuver to the patient and prepare him or her for the<br />
test:<br />
� attach the nose clip<br />
� take the spirette into the mouth with the lips sealing around the<br />
spirette , taking care not to bite down excessively on the spirette<br />
� sit upright<br />
� during the test, the patient should breathe quietly and steadily. The<br />
respiratory flow should not exceed the displayed range (a , Fig. 3-26).<br />
In automatic mode, the test starts automatically after the "Number of<br />
breaths before test start" and ends automatically when the measured concentration<br />
drops repeatedly below the limit of 2 % (as configured under<br />
"FRC (mbw) Tab" on page 110).<br />
64 EasyOne Pro / EasyOne Pro LAB
Fig. 3-26 FRC Test<br />
a Tidal breathing<br />
b Measuring curve<br />
c Test results<br />
d Enter comment<br />
Performing a Test<br />
In manual mode, beginning and end of the Washout phase must be manually<br />
determined.<br />
After a successful test, the message Good effort will be displayed.<br />
a b c d e<br />
e Tracer curve (logarithmic<br />
representation, see "FRC (mbw) Tab"<br />
on page 110)<br />
EasyOne Pro / EasyOne Pro LAB 65
3.9 Ending the Test<br />
Performing a Test<br />
At the end of the test, push the spirette out of the sensor from below.<br />
Dispose of it and do not reuse. Also, replace the barriette after each<br />
patient. Refer to section "Hygiene, Cleaning, Maintenance, Disposal" on<br />
page 89 for sensor cleaning instructions.<br />
Warning<br />
Risk of Infection—<br />
� spirette and DLCO barriette/FRC barriette are<br />
intended for single patient use. Use new ones for each<br />
new patient.<br />
� After tests on patients with an infection of the respiratory<br />
tract or patients with a suspected infection of the<br />
respiratory tract, it is recommended to clean all parts<br />
(outside of the sensor) that were touched during the test,<br />
before testing a new patient (see "Hygiene, Cleaning,<br />
Maintenance, Disposal" on page 89).<br />
3.10 Retrieving/Printing Stored Tests<br />
EasyOne Pro saves all tests. Old measurements can be called up at any<br />
time to<br />
� perform a new test with the same patient<br />
� add a spirometry trial<br />
� add a post-medication test<br />
� review or print the results.<br />
Note<br />
It is only possible to add a trial to a previous test that was<br />
performed on the same day (see "Adding a Spirometry Trial"<br />
on page 50).<br />
� Select the patient (see "Selecting/Adding a Patient" on page 40).<br />
66 EasyOne Pro / EasyOne Pro LAB
Performing a Test<br />
� Click the History button (Fig. 3-27).<br />
Fig. 3-27 Retrieving/printing stored tests<br />
Fig. 3-28 Test list<br />
A window listing all tests stored for this patient will appear.<br />
The displayed tests can be sorted by<br />
� test protocol (Base, Pre, Post)<br />
� test type (FVC, SVC, MVV)<br />
� test date<br />
� comment.<br />
� To do so, click on the appropriate title in the column headers.<br />
� Highlight the test to view.<br />
� Click View Test to view the test, Print Preview to view the test before<br />
printing it, Print to print the test, or Trend to view the trend display (see<br />
"Trend View" on page 69). Click Patients to display the patient list and<br />
click New Test to display the test selection menu.<br />
EasyOne Pro / EasyOne Pro LAB 67
Performing a Test<br />
Note<br />
Alternative: Double-click on a test to display it.<br />
Examinations for which a Post-test exist, are identified by a<br />
small arrow symbol .<br />
When you select Print Preview, you will see the print preview of the test:<br />
� select b to display the test report menu (report layout)<br />
� select c to print the test (select the printer)<br />
� select d to change the display scale.<br />
a b c d<br />
Fig. 3-29 Print preview of the test<br />
a Window showing the currently selected<br />
test report<br />
b Click to open the layout selection menu<br />
68 EasyOne Pro / EasyOne Pro LAB<br />
c Click to print the displayed report<br />
d Click to access a submenu with options<br />
for zooming, exporting, viewing,<br />
printer selection and additional print<br />
functions
3.11 Trend View<br />
Performing a Test<br />
The trend views allow you to observe the measured parameter values over a<br />
period of time. You can choose between two different views:<br />
� One of the views simultaneously presents up to four parameters,<br />
allowing them to be compared. Each parameter has its own vertical<br />
axis and scale.<br />
� In the second view, a single parameter can be compared with the<br />
predicted normals.<br />
a b c d<br />
Fig. 3-30 Trend view of multiple parameters<br />
a Option buttons for selection of the view<br />
b Displayed parameter labels<br />
c Click to select a parameter<br />
d Icon to initiate the trend printout<br />
EasyOne Pro / EasyOne Pro LAB 69
Performing a Test<br />
Fig. 3-31 Trend view of a single parameter and its predicted normals<br />
70 EasyOne Pro / EasyOne Pro LAB
4 Editing Patient Data<br />
Editing Patient Data<br />
� On the initial screen, click Select Patient.<br />
� Select the patient.<br />
� Click Edit Patient.<br />
The patient data window will appear.<br />
Fig. 4-1 Patient data window<br />
� Change or add data.<br />
� Click Update existing tests to close the window (for example, if the<br />
entered patient data were incorrect and the tests need to be<br />
recalculated) or close the window with OK if you want to apply the edited<br />
data to future tests only.<br />
EasyOne Pro / EasyOne Pro LAB 71
Quality Messages and Quality Grades<br />
5 Quality Messages and Quality Grades<br />
5.1 FVC/FVL Quality Messages and Quality Grades<br />
Some Basic Facts<br />
End-of-Test criteria, quality criteria and quality grading are based upon the<br />
following published standards:<br />
[1] Standardization of Spirometry. 1994 Update, Am J Respir Crit Care<br />
Med, Vol 152.<br />
[2] Office Spirometry for Lung Health Assessment in Adults: A<br />
Consensus Statement from the National Lung Health Education<br />
Program. Respir Care, 2000, Vol 45, No 5.<br />
[3] ATS/ERS Task Force: Standardization of Lung Function Testing. Eur<br />
Respir J 2005; 26.<br />
[4] An Official American Thoracic Society/European Respiratory Society<br />
Statement: Pulmonary Function Testing in Preschool Children. Am J<br />
Respir Crit Care Med, 2007, Vol 175.<br />
The quality grading is based on [2], [3] and [4].<br />
Additional remarks<br />
� The main articles [2] and [3] do not numerically define the minimum<br />
expiratory peak flow time (PEFT) that is required for an acceptable test. In<br />
this case, 160 ms is used.<br />
� The end-of-test criteria for FVC tests are as follows: A test ends when the<br />
volume change during the last 2 seconds is 150 ml is detected. This end-of-test criterion slightly differs from<br />
the published criterion in [3] which is 25 ml in the last second. Reason:<br />
When the 25 ml in 1 second criterion is applied to the 24 waveforms also<br />
defined in [1] and [2], several curves will end too early, and these tests<br />
might fail. We therefore decided to slightly change the criterion to 45 ml<br />
in 2 seconds.<br />
� In the following tables the quality messages and the quality criteria are<br />
detailed.<br />
The end-of-test criterion for an FVC test is as follows: A test ends when the<br />
volume change during the last 2 seconds is 150 ml is detected. When this end-of-test criterion is met, the following<br />
quality messages are checked:<br />
72 EasyOne Pro / EasyOne Pro LAB
FVC/FVL Quality Messages<br />
Quality Messages and Quality Grades<br />
Message Criterion Recommended action<br />
Don’t hesitate … Back-extrapolated volume greater<br />
than 150 ml or 5% of FVC<br />
whichever is greater (for age �6:<br />
80 ml or 12.5% of FVC whichever<br />
is greater)<br />
Blast out faster … Time until peak flow greater than<br />
160 ms<br />
Blow out longer … Expiration time less than 2<br />
seconds OR volume in the last 0.5<br />
seconds of the expiration larger<br />
than 100 ml<br />
Test Abrupt End! FVC Test only: Expiration time less<br />
than 2 seconds OR volume during<br />
last 0.5 seconds >40 ml when<br />
expiration time is 25 ml<br />
when end-of-test was initiated by<br />
an inspiration.<br />
Good effort, do next<br />
…<br />
Do not start too<br />
early!<br />
Cough detected. Try<br />
again…<br />
The patient must exhale all air at<br />
once and not exhale in short<br />
bursts.<br />
The patient must exhale more<br />
explosively and as firmly and<br />
quickly as possible.<br />
The patient stopped exhaling too<br />
early. The patient must exhale still<br />
further and force as much air as<br />
possible out of his or her lungs.<br />
The patient stopped exhaling too<br />
early. The patient must exhale still<br />
further and force as much air as<br />
possible out of his or her lungs.<br />
Test meets above criteria. Good trial. Only one to two more<br />
good trials and the test is<br />
complete.<br />
The time to peak flow (PEFT) is<br />
less than 30 ms or flow detected<br />
before sensor was initialized (Wait<br />
until 'Start Maneuver …' is<br />
displayed)<br />
A cough has been detected (PEF or<br />
PIF >19 l/s)<br />
Deeper breath … FEV1 or FVC* not reproducible.<br />
Difference with respect to best<br />
test greater than 150 ml or 100 ml<br />
if FVC is < 1.0L (for age �6: 100 ml<br />
or 10% of FEV1 or FVC* whichever<br />
is greater)<br />
Instruct the patient to wait until<br />
the baseline setting is finished<br />
and the device signals that the<br />
trial can start ('Start maneuver …')<br />
Instruct the patient to avoid<br />
coughing during the<br />
measurement. Repeat the test.<br />
The test differs greatly from<br />
previous tests. The patient can<br />
inhale even more deeply and<br />
exhale even more air.<br />
EasyOne Pro / EasyOne Pro LAB 73
Quality Messages and Quality Grades<br />
Message Criterion Recommended action<br />
No maneuver<br />
detected!<br />
Session Complete!<br />
Great Job!<br />
*When using FEV6 instead of FVC, FEV6 is also used for the determination of<br />
the quality message.<br />
FVC/FVL Quality Grades<br />
Rating Criteria<br />
No parameter calculation possible Instruct the patient to perform the<br />
maneuver according to its<br />
definition.<br />
QC grade A or B reached. The test is complete. An adequate<br />
number of good tests is available.<br />
A At least 3 acceptable tests (for age �6: 2 acceptable) AND the difference between the<br />
best two FEV1 and FVC values is equal to or less than 100 ml (80 ml if FVC < 1.0 l) (for<br />
age �6: 80 ml or 8% of FVC whichever is greater)<br />
B At least 3 acceptable tests (for age �6: 2 acceptable) AND the difference between the<br />
best two FEV1 and FVC values is equal to or less than 150 ml (100 ml if FVC < 1.0 l)<br />
(for age �6: 100 ml or 10% of FVC whichever is greater)<br />
C At least 2 acceptable tests AND the difference between the best two FEV1 and FVC<br />
values is equal to or less than 200 ml (150 ml if FVC < 1.0 l) (for age��6: 150 ml or<br />
15% of FVC whichever is greater)<br />
D (1) At least 2 acceptable trials but the results are not reproducible according to 'C'.<br />
Quality message: "Result not reproducible" OR only one acceptable trial. Quality<br />
message: "Only one acceptable trial".<br />
D (2) Only one acceptable trial<br />
F No acceptable trial available<br />
74 EasyOne Pro / EasyOne Pro LAB
Quality Messages and Quality Grades<br />
5.2 SVC Quality Messages and Quality Grades<br />
SVC Quality Messages<br />
The quality grading is based on [3].<br />
The end-of-test criterion for an SVC test is the same as for an FVC test: A test<br />
ends when the volume change during the last 2 seconds is �30 ml (test<br />
time �6 s) �45 ml (test time > 6 s) or if an inspiratory volume >120 ml is<br />
detected.<br />
When this end-of-test criterion is met, the following quality messages are<br />
checked:<br />
Message Criterion Recommended action<br />
Deeper breath VC of the two largest, accepted<br />
trials are not reproducible.<br />
Difference with respect to best<br />
test greater than 150 ml.<br />
No Steady-Tidal<br />
breathing detected<br />
Maneuver<br />
incomplete<br />
Do not start too<br />
early!<br />
All end-inspiratory volumes of the<br />
last 3 breaths within 200 ml.<br />
No ERV and/or no IRV could be<br />
calculated due an incomplete<br />
maneuver session.<br />
The test differs greatly from<br />
previous tests. The patient can<br />
inhale even more deeply and<br />
exhale even more air.<br />
Instruct patient to breathe quietly<br />
and steadily.<br />
Perform SVC test according to<br />
ERS/ATS recommendation.<br />
Too early, flow detected. Instruct the patient to wait until<br />
the baseline setting is finished<br />
and the device signals that the<br />
trial can start ('Start maneuver …')<br />
Good effort, do next Test meets above criteria. Good trial. Only one to two more<br />
good trials and the test is<br />
complete.<br />
Session Complete!<br />
Great Job!<br />
QC grade A, VC variability �150 ml<br />
and at least 3 acceptable trials<br />
available.<br />
The test is complete. An adequate<br />
number of good tests is available.<br />
EasyOne Pro / EasyOne Pro LAB 75
SVC Quality Grades<br />
Rating Criteria<br />
Quality Messages and Quality Grades<br />
A At least 3 acceptable tests AND the difference between the best VC values is equal to<br />
or less than 150 ml.<br />
B At least 2 acceptable tests AND the difference between the best VC values is equal to<br />
or less than 150 ml.<br />
D (1) At least 2 acceptable trials but the results are not reproducible according to 'B'.<br />
D (2) Only one acceptable trial<br />
F No acceptable trial available<br />
5.3 DLCO Quality Messages and Quality Grades<br />
DLCO Quality Messages<br />
The quality grading is based on ATS/ERS Guidelines [3].<br />
Message Criterion Recommended action<br />
Breath Hold Time out<br />
of Range<br />
Maneuver not<br />
acceptable. Breath<br />
Hold Time is outside<br />
the 8-12 seconds<br />
range<br />
Parameter out of<br />
Range<br />
Test cannot be<br />
evaluated; sensor<br />
signals do not pass<br />
QC check<br />
Breath-hold time outside 8 to 12<br />
seconds<br />
A parameter is out of range, e.g. a<br />
gas concentration is higher or<br />
lower than permitted<br />
1) Helium concentration out of<br />
range<br />
2) CO at zero not within 80 ppm<br />
3) CO at DLCO test gas not<br />
within 500 ppm<br />
4) Alveolar CO out of range<br />
5) Expiratory CO out of range<br />
6) VA out of range<br />
7) DLCO out of range<br />
76 EasyOne Pro / EasyOne Pro LAB<br />
Exhale immediately when the<br />
valve opens<br />
Check for leaks; make sure<br />
concentrations of gas cylinder are<br />
entered correctly
Low Inspiratory<br />
Volume<br />
Maneuver not<br />
acceptable.<br />
Inspiratory volume<br />
too low<br />
Inspiratory Time Too<br />
Long<br />
Maneuver not<br />
acceptable.<br />
Inspiration time<br />
exceeds the<br />
maximum of 4<br />
seconds<br />
Sampling volume at<br />
this position too<br />
large<br />
Quality Messages and Quality Grades<br />
Message Criterion Recommended action<br />
Difference<br />
Preparation and<br />
Maneuver<br />
Test cannot be<br />
evaluated; gas<br />
sensor signals do<br />
not pass QC check,<br />
possibly due to leaks<br />
Sampling volume at<br />
maximum position<br />
Test cannot be<br />
evaluated; exhaled<br />
volume too small<br />
DLCO-Warning: High<br />
inspiratory CO during<br />
tidal breathing!<br />
Breath-Num<br />
Test cannot be<br />
evaluated; DLCO<br />
maneuver cannot be<br />
detected<br />
The inspiratory volume is smaller<br />
than 85% FVC/VC/Predicted<br />
Make sure to perform a full<br />
expiration before the valve closes,<br />
and then a full inhalation of test<br />
gas<br />
Inspiratory time > 4 seconds Inhale test gas faster<br />
Sample volume not correctly<br />
determined<br />
Reference gas measurement and<br />
inspiratory gas measurements do<br />
not match within 80 ppm. This<br />
means that most probably there is<br />
a leak in the DLCO hose<br />
Can happen when very small<br />
volumes are exhaled<br />
Collection bar is beyond rightmost<br />
position<br />
An increased CO level was<br />
detected during the tidal<br />
breathing phase.<br />
Breath number of DLCO expiration<br />
could not be detected<br />
Reduce sample volume<br />
Check for leaks; check gas supply<br />
Exhale fully after the breath hold<br />
Check the DLCO valve unit.<br />
If the error occurs repeatedly then<br />
please contact service.<br />
Perform the DLCO maneuver with<br />
full effort<br />
EasyOne Pro / EasyOne Pro LAB 77
CO-Calib<br />
CO calibration could<br />
not be performed: no<br />
gas connected to the<br />
system or Instrument<br />
failure<br />
Delay Error<br />
Test cannot be<br />
evaluated; gas<br />
signals do not pass<br />
QC check, automatic<br />
delay correction<br />
failed<br />
Quality Messages and Quality Grades<br />
Message Criterion Recommended action<br />
End-Insp-Exp<br />
Test cannot be<br />
evaluated; no tidal<br />
breathing detected<br />
prior to DLCO<br />
maneuver<br />
CO-Insp Drift<br />
Maneuver not<br />
acceptable; no stable<br />
CO signal during<br />
breath-hold<br />
CO calibration could not be<br />
performed: Instrument failure<br />
and/or no gas connected to the<br />
system<br />
Automatic time delay correction<br />
failed<br />
No tidal breathing has been<br />
detected before the test<br />
During breath-hold, CO signal<br />
drifts up or down<br />
78 EasyOne Pro / EasyOne Pro LAB<br />
Make sure the gas supply is<br />
connected and open<br />
Repeat test correctly<br />
Repeat test correctly<br />
Check spirette und barriette<br />
position, check connections,<br />
check DLCO valve unit
Quality Messages and Quality Grades<br />
DLCO Acceptability and Quality Grades<br />
The implemented quality grades are designed to provide guidance for<br />
determining the quality of DLCO test sessions.<br />
Score VI [%] BHT [s] Sample<br />
Volume [l]<br />
DLCO Var. [ml/<br />
min/mmHg]<br />
Inspiratory<br />
Time [s]<br />
Accept.<br />
Trials<br />
A >95% 9.0 - 11.0 0.5 - 1.0 90% 8.5 - 11.5 0.5 - 1.0 85% 8.0 - 12.0 0.5 - 1.0
Quality Messages and Quality Grades<br />
5.4 FRC Quality Messages<br />
Message Criterion Recommended action<br />
FRC(MBW) Warning:<br />
Extrapolated volume<br />
computation failed<br />
(set to zero)!<br />
FRC(MBW) Warning:<br />
Extrapolated volume<br />
computation too<br />
high (set to zero)!<br />
FRC(MBW) Warning:<br />
Inspiratory gas leak!<br />
FRC(MBW) Warning:<br />
In- or expiratory pressure<br />
too high!<br />
FRC(MBW) Warning:<br />
Side-Stream Flow out<br />
of range!<br />
FRC(MBW) Warning:<br />
CO2 sensor scaling<br />
warning!<br />
FRC(MBW) Warning:<br />
Tracer concentration<br />
at test end too high!<br />
The extrapolated volume could<br />
not be calculated.<br />
The extrapolated volume (i.e., the<br />
volume that would be washed out<br />
after cancellation of the test) is<br />
greater than 1 liter.<br />
Air entered from outside during<br />
inspiration.<br />
The end-inspiratory molar mass<br />
deviates from the tracer gas molar<br />
mass by more than 0.2 g/mol.<br />
This is indicative of air drawn in<br />
from outside during inspiration.<br />
Pressure in sensor tube is too<br />
high.<br />
The pressure in the sensor tube<br />
exceeds ±5 mbar; possible reasons<br />
are:<br />
1) Insufficient pressure at the O2<br />
gas port.<br />
2) Patient's breaths are too deep;<br />
the respiratory resistance and<br />
thus the pressure drop increase<br />
from about 2 l/s.<br />
During the test, the gas extraction<br />
was not within the limits of 7.5<br />
and 13 ml/s.<br />
Automatic scaling of the CO 2 signal<br />
failed.<br />
No breath with an N 2 concentration<br />
below 2% was measured.<br />
80 EasyOne Pro / EasyOne Pro LAB<br />
Contact service.<br />
Do not stop too soon.<br />
Check FRC barriette: are valves<br />
jammed or was the FRC barriette<br />
not been properly inserted?<br />
Check position of spirette and<br />
of nose clip.<br />
Ask patient to breathe calmly.<br />
Check O2 gas supply: Is the inlet<br />
pressure 3 bar? Only minimal<br />
pressure variations are allowed<br />
during the test.<br />
Is the patient's breathing too<br />
deep/too fast?<br />
Ask the patient to breathe within<br />
the limits of ±1.5 l/s.<br />
Contact service.<br />
Contact service.<br />
Repeat test.
FRC(MBW) Error: No<br />
start of washout<br />
detected!<br />
FRC(MBW) Error:<br />
Error in Gas Signal<br />
Delay Correction!<br />
FRC(MBW) Error: Not<br />
enough breaths for<br />
washout computation!<br />
Quality Messages and Quality Grades<br />
Message Criterion Recommended action<br />
FRC(MBW) Error:<br />
Error in Tracer Gas<br />
Concentration!<br />
FRC(MBW) Error:<br />
Error in Alveolar<br />
Curve Computation!<br />
FRC(MBW) Error:<br />
DLCO Valve Unit NOT<br />
mounted on handle<br />
sensor!<br />
Multi Breath Washout not found. Perform washout procedure correctly.<br />
An error occurred during the automatic<br />
determination of the delay<br />
between gas signals and flow (i.e.,<br />
the delay is not within the desired<br />
range).<br />
The number of breaths required<br />
for calculation of FRC was not<br />
reached.<br />
The molar mass change caused by<br />
the tracer gas does not correspond<br />
to the theoretical values.<br />
An error occurred during calculation<br />
of the alveolar gas curve<br />
(from the first breaths of the<br />
washout).<br />
Check FRC barriette position.<br />
Contact service.<br />
FRC test was stopped prematurely.<br />
Check whether O2 is used.<br />
Check gas connections for leaks.<br />
Check FRC barriette position.<br />
Check that the test is correctly<br />
performed.<br />
Check position of spirette and<br />
of nose clip.<br />
Contact service.<br />
Mount valve unit and repeat procedure.<br />
EasyOne Pro / EasyOne Pro LAB 81
5.5 System Interpretation<br />
Quality Messages and Quality Grades<br />
In assessing the system interpretation, it is important to consider the<br />
quality grade b of the test. Quality grades A to C indicate a reliable result. A<br />
quality grade of D or F indicates inadequate test quality. The result must<br />
then be interpreted with caution (see section "Interpretation" on page 120<br />
for details).<br />
You can view the test result on the monitor as soon as you see message<br />
Session Complete! after performing a test.<br />
Fig. 5-1 Test results, system interpretation<br />
a Pre-medication test results<br />
b Quality grade<br />
5.6 Retrospective Test Assessment, Entering Comments<br />
Changing the Trial Acceptability<br />
a b c d<br />
Note<br />
You must be logged in as a user to be able to enter a test<br />
assessment and comments.<br />
The trial acceptability and ranking of tests can be changed retrospectively.<br />
This means that you can make tests unacceptable that the system judged<br />
acceptable and vice versa. You can also change the trial ranking (rank 1, 2 or<br />
3).<br />
� Click a (Fig. 5-2).<br />
82 EasyOne Pro / EasyOne Pro LAB<br />
c System interpretation<br />
d Post-medication test results and<br />
deviation from Pre-test results
Quality Messages and Quality Grades<br />
The test assessment icons b appear on the test results screen.<br />
Fig. 5-2 Changing the trial acceptability<br />
Follow these steps to make a test acceptable that the system judged<br />
unacceptable:<br />
� Click the icon.<br />
� In the ensuing window, select the Acceptable check box.<br />
Fig. 5-3 Changing the trial ranking<br />
To assign the highest rank to a test<br />
� click the icon and<br />
� in the ensuing window, click Set Highest Ranked (Fig. 5-4).<br />
EasyOne Pro / EasyOne Pro LAB 83<br />
b<br />
a
Fig. 5-4 Changing the trial ranking<br />
Entering comments<br />
Quality Messages and Quality Grades<br />
Note<br />
To assign ranks 1, 2 and 3, please start with rank 3, etc.<br />
� Click in the comment area or click .<br />
� Enter a user ID, followed by the comment.<br />
� Close the window with Save.<br />
The text will be shown in the comment window, including the user ID and<br />
the date.<br />
Fig. 5-5 Entering comments<br />
84 EasyOne Pro / EasyOne Pro LAB
Quality Messages and Quality Grades<br />
5.7 Definition of Important Parameters<br />
FVC Forced Vital Capacity<br />
(expiratory)<br />
FIVC Forced Vital Capacity<br />
(inspiratory)<br />
FEV1 Forced Expiratory Volume<br />
(1 s)<br />
FEV6 Forced Expiratory Volume<br />
(6 s)<br />
forced expiratory vital<br />
capacity<br />
forced inspiratory vital<br />
capacity<br />
forced expiratory volume<br />
after 1 second<br />
forced expiratory volume<br />
after 6 seconds<br />
FEV1/FVC ratio of FEV1 to FVC<br />
FEV1/VCmax ratio of FEV1 to VCmax FEV1/FEV6 ratio of FEV1 to FEV6<br />
FEF 50<br />
(MEF 50)<br />
Mid-Expiratory Flow (50%) flow at 50% of expiratory<br />
vital capacity<br />
FEF 25-75 Mid-Expiratory Flow (25%-<br />
75%)<br />
flow at 25% to 75% of<br />
expiratory vital capacity<br />
PEF Peak Expiratory Flow peak expiratory flow<br />
PIF Peak Inspiratory Flow peak inspiratory flow<br />
VT Tidal Volume Tidal volume at rest<br />
ERV Expiratory Reserve Volume expiratory reserve volume<br />
IRV Inspiratory Reserve<br />
Volume<br />
inspiratory reserve volume<br />
VCmax Maximum Vital Capacity maximum vital capacity of<br />
an SVC, FVC, FVL or DLCO<br />
test<br />
VCex Expiratory Vital Capacity expiratory vital capacity of<br />
a slow spirometric test<br />
VI Inspiratory Vital Capacity inspiratory vital capacity of<br />
a slow spirometric test<br />
IC Inspiratory Capacity inspiratory capacity<br />
(VT + IRV)<br />
EasyOne Pro / EasyOne Pro LAB 85
Quality Messages and Quality Grades<br />
MVV Maximum Voluntary<br />
Ventilation<br />
Note<br />
The parameter names used are those standardized by ATS<br />
and ERS. See literature references [14] and [11] ("Literature"<br />
on page 164).<br />
86 EasyOne Pro / EasyOne Pro LAB<br />
maximum ventilation<br />
volume per minute<br />
LLN Lower Limit of Normal lower limit of normal<br />
Lung Age lung age, see section<br />
"Predicted Values" on<br />
page 123 [8]<br />
DLCO CO diffusing capacity<br />
(ml/min/mmHg)<br />
TLCO CO diffusing capacity<br />
(mmol/min/kPa)<br />
DLadj Diffusing capacity<br />
adjusted (Hb, PaO 2, COhb,<br />
altitude)<br />
CO diffusing capacity<br />
(ml/min/mmHg)<br />
CO diffusing capacity<br />
(mmol/min/kPa)<br />
adjusted diffusing<br />
capacity<br />
VA Alveolar volume (BTPS) alveolar volume (BTPS)<br />
DLCO/VA Krogh Factor Krogh factor<br />
TLC Total Lung Capacity total lung capacity
FRC<br />
Quality Messages and Quality Grades<br />
FRCMB Functional Residual Capacity<br />
LCI Lung Clearance <strong>Index</strong> (equals CEV<br />
divided by FRC at 1/40th of initial<br />
tracer concentration (2% N2), see<br />
"Literature" on page 164 [16])<br />
CEV Cumulative Expired Volume<br />
VT Tidal Volume<br />
VT/kg Tidal Volume/kg<br />
f Breathing Frequency<br />
M0 Moment Value (see "Literature" on<br />
page 164 [15])<br />
MR1 Moment Ratio 1 (see "Literature"<br />
on page 164 [15])<br />
MR2 Moment Ratio 2 (see "Literature"<br />
on page 164 [15])<br />
EasyOne Pro / EasyOne Pro LAB 87
Switching the Device Off<br />
6 Switching the Device Off<br />
Fig. 6-1<br />
Caution<br />
Loss of Data—Be sure to correctly terminate the program<br />
before switching EasyOne Pro off with the mains power<br />
switch on the back.<br />
� Close the main valve of the gas cylinder.<br />
� Close the main valve of the O2 gas cylinder or disconnect the wall outlet.<br />
Note<br />
When using the wall outlet, please observe the hospital's inhouse<br />
instructions and requirements.<br />
� Quit the program with .<br />
� Switch off EasyOne Pro with OK, or release gas pressure with Release<br />
pressure, if you need to replace a gas cylinder. Then click OK to confirm<br />
the message. EasyOne Pro will automatically switch off.<br />
Caution<br />
The device will switch off, but it remains connected to line<br />
power. Only with the mains power switch at the back will<br />
EasyOne Pro be disconnected from line power.<br />
88 EasyOne Pro / EasyOne Pro LAB
Hygiene, Cleaning, Maintenance, Disposal<br />
7 Hygiene, Cleaning, Maintenance, Disposal<br />
Hygiene<br />
Cleaning<br />
Caution<br />
Risk of Infection—<br />
� Users with open wounds or contagious diseases on their<br />
hands must wear gloves.<br />
� Wash your hands after each patient to protect yourself<br />
and to prevent cross contamination.<br />
� The spirette and the barriette must be properly<br />
disposed of immediately after use.<br />
Warning<br />
Shock Hazard—Disconnect the device from the power line<br />
before cleaning.<br />
� Wipe the device surface down with a cloth moistened with alcohol (70%<br />
max.), avoiding the display, the rear panel and the temperature and<br />
humidity sensor. Do not let liquid enter the device.<br />
� To clean the rear panel and the temperature and humidity sensor, simply<br />
wipe them off with a dry cloth.<br />
� The display is also cleaned with a soft, dry cloth. In case of major<br />
contamination, you can use a cloth moistened with alcohol (50% max.).<br />
� Wipe the sensor, the valve unit, the gas supply tube and the power cord<br />
down with a cloth moistened with alcohol (70% max.). Do not let liquid<br />
enter the parts. Replace the gas supply tube each year.<br />
� The connecting tube to the gas cylinder and the touch stylus can be<br />
cleaned with a cloth moistened with alcohol (70% max.).<br />
� The one-way valve can be rubbed down with a cloth moistened with<br />
alcohol (50% max.). Clean only the side facing the barriette and the<br />
housing. The one-way valve must be replaced each year.<br />
EasyOne Pro / EasyOne Pro LAB 89
Maintenance<br />
Before each use<br />
Hygiene, Cleaning, Maintenance, Disposal<br />
Before each use, visually inspect the device, the cables, the tubing and the<br />
sensor for signs of mechanical damage. Particularly inspect the gas<br />
cylinder(s) and fittings.<br />
If you detect damage or impaired functions that may adversely affect the<br />
safety of the patient or user, do not use EasyOne Pro before it has been<br />
repaired.<br />
Once a year<br />
The following parts must be replaced once a year (see "Start-up and Initial<br />
Preparation" on page 19):<br />
� the gas supply tube<br />
� the one-way valve.<br />
Every three years<br />
� The filter pack at the back of the device must be replaced every three<br />
years. It consists of the air inlet with filter and a Nafion tube to dry the<br />
sampled gas. Open the screw on the right to replace the filter pack<br />
(Fig. 7-1).<br />
Fig. 7-1 Screw to replace the filter pack<br />
90 EasyOne Pro / EasyOne Pro LAB
Data Backup on Memory Card<br />
Hygiene, Cleaning, Maintenance, Disposal<br />
Each time the device shuts down, the patient and configuration data are<br />
saved to a memory card (Flash card) (h, Fig. 2-2). In case of equipment<br />
failure, the memory card can be inserted into another device and you can<br />
continue working with the same patient database and equipment<br />
configuration.<br />
Follow these steps to exchange the memory card:<br />
� Quit the program with and switch off EasyOne Pro with OK<br />
(see "Switching the Device Off" on page 88).<br />
� Open the two screws and take off the cover.<br />
� Grasp the tab of the memory card and remove the card from device.<br />
� Insert the memory card into the backup device.<br />
� When the backup device starts up, confirm loading the data from the<br />
memory card.<br />
Fig. 7-2 Screws for removing the cover<br />
Data Backup on External Media<br />
To prevent loss of data, we recommend to backup the data on a regular<br />
basis, using the Export function<br />
� On the initial screen, select Utilities -> Advanced and enter the password<br />
(EOPTM or 8005).<br />
� Choose Export and select the files for the backup.<br />
� Click Export to backup the data.<br />
EasyOne Pro / EasyOne Pro LAB 91
Software Update<br />
Hygiene, Cleaning, Maintenance, Disposal<br />
The files necessary for a software update are made available by <strong>ndd</strong>. For a<br />
detailed description of the installation procedure, please go to www.<strong>ndd</strong>.ch,<br />
Application Note “Update EasyOne Pro Firmware” or “Update EasyOne Pro-<br />
LAB Firmware”.<br />
Note<br />
Before installing the update, close Adobe Reader or the<br />
Operator's Manual.<br />
These are the steps of the installation procedure:<br />
1. Data backup<br />
� Save the patient data to a USB flash drive (memory stick).<br />
2. Preparation<br />
� Download the most recent revision of the EasyOne Pro software from<br />
the <strong>ndd</strong> website:<br />
http://www.<strong>ndd</strong>.ch/Downloads/Software.aspx and copy the data to a<br />
USB flash drive (memory stick).<br />
3. Software Update<br />
� Connect the USB flash drive to EasyOne Pro.<br />
� Click Utilities -> Advanced.<br />
� Enter the password (EOPTM or 8005).<br />
� Click Software Update and double-click the update file on the USB<br />
flash drive.<br />
� Follow the on-screen instructions.<br />
4. Check settings<br />
� Check whether the sensor symbol is displayed.<br />
5. Check function<br />
Calibrating the Touch Screen<br />
� Perform a calibration test (Utilities -> Calibration test).<br />
When you notice that you are no longer able to activate system functions by<br />
touching the keys or fields on the display or that the positions have moved,<br />
it is necessary to calibrate the touch screen:<br />
� On the initial screen, select Utilities -> Advanced and enter the password<br />
(EOPTM or 8005).<br />
� Select Touch calibration.<br />
� In the ensuing window, select Configure -> Standard Configuration and<br />
follow the displayed prompts.<br />
92 EasyOne Pro / EasyOne Pro LAB
Technical Inspections<br />
Hygiene, Cleaning, Maintenance, Disposal<br />
Caution: When you miss the correct spots, the window will disappear. In<br />
this case you have to restart the device and the calibration procedure.<br />
For safety, the device requires regular maintenance. To ensure functional and<br />
operational safety of the device, Technical Inspections should be carried out<br />
on an annual basis.<br />
These checks should be performed by persons with adequate training and<br />
experience.<br />
The inspections include the following checks:<br />
Check Measuring Accuracy<br />
� Visually inspect the device and the accessories for signs of<br />
mechanical damage that may impair the device functions.<br />
� Check that the device safety labelling is legible.<br />
� Run a functional test.<br />
� Check measuring accuracy (see following section).<br />
Calibration Check with Syringe<br />
Note<br />
As an alternative, the calibration can be checked with a test<br />
subject (see "Calibration Check with Test Subject" on<br />
page 96).<br />
The EasyOne Pro calibration can be checked with a syringe using the<br />
calibration check function. The American Thoracic Society (ATS)<br />
recommends that the spirometer calibration be checked on a regular basis.<br />
Owing to the ultrasound technology used in the flow sensor, the device<br />
requires no calibration, even if used frequently. To comply with the<br />
recommendations, you can check the calibration as follows:<br />
You need the <strong>ndd</strong> calibration adapter and a calibration syringe (order<br />
number 2030-2).<br />
� Using the calibration adapter, connect the sensor to the syringe as<br />
shown below. Ensure that the piston is fully inserted and at the stop<br />
position.<br />
� In the Utilities menu, click Calibration Check, then select Syringe<br />
Calibration Check.<br />
� On the test screen, click Start.<br />
� Wait until the baseline has been set.<br />
� Now execute one full inspiratory pump stroke followed by one full<br />
expiratory pump stroke at moderate speed.<br />
EasyOne Pro / EasyOne Pro LAB 93
Hygiene, Cleaning, Maintenance, Disposal<br />
� Three full trials are required for the Single Flow calibration check,<br />
whereas three tests comprising three trials each with different flow rates<br />
are required for the Multiflow calibration check.<br />
After you perform the maneuver, you will see the text Accuracy confirmed<br />
and, beneath it, the percentage deviation and the average flow velocity of<br />
the pump stroke.<br />
You can repeat the test, print the result or quit the program. The calibration<br />
test remains stored and can also be viewed or printed out later.<br />
If you do not reach ±3% accuracy, please follow the troubleshooting<br />
instructions in chapter "Troubleshooting Tips" on page 116. Should you not<br />
be able to remedy the defect by following these instructions either, please<br />
consult <strong>ndd</strong> or one of their representatives.<br />
Fig. 7-3 Calibration syringe<br />
DLCO Calibration Check<br />
The American Thoracic Society (ATS) recommends checking DLCO<br />
calibration on a weekly basis or whenever irregularities are suspected. DLCO<br />
calibration can be checked with a DLCO simulator (see following section) or<br />
with a test subject (see "Calibration Check with Test Subject" on page 96).<br />
In addition, the ATS/ERS guidelines (Literature [11], page 164) describe a<br />
third method for checking DLCO calibration for which a 3-L syringe is used.<br />
94 EasyOne Pro / EasyOne Pro LAB
Hygiene, Cleaning, Maintenance, Disposal<br />
Calibration Check with DLCO Simulator<br />
In the Utilities menu, click Calibration check, then select DLCO simulator.<br />
The test procedure is the same as in a human test ("CO Diffusing Capacity<br />
(DLCO)" on page 59). For correct handling of the DLCO simulator, please<br />
read the manual of the simulator manufacturer.<br />
Note<br />
We strongly recommend using only DLCO simulators<br />
manufactured by Hans Rudolph (DLCO Simulator, 5560<br />
Series).<br />
Also refer to the DLCO simulator operator manual or to the<br />
training clip at www.<strong>ndd</strong>.ch.<br />
As an alternative to checking calibration with a DLCO<br />
simulator, the calibration can be checked with a test subject<br />
(see "Calibration Check with Test Subject" on page 96).<br />
Make sure the gas concentrations of the test gas AND the<br />
Simulator Test Gas are entered correctly as shown in Fig.<br />
8-13.<br />
FRC Calibration Check<br />
The American Thoracic Society (ATS) recommends that testing of biological<br />
controls should be performed at least monthly.<br />
For that purpose use a biological subject and the standard trending<br />
functionality.<br />
EasyOne Pro / EasyOne Pro LAB 95
Hygiene, Cleaning, Maintenance, Disposal<br />
Calibration Check with Test Subject<br />
Some Basic Facts<br />
Instead of a syringe a Biological Standard subject with known spirometry<br />
values (BioCal Subject) performs a series of spirometry tests or DLCO tests.<br />
These tests are observed and statistically controlled, if they are within an<br />
expected range.<br />
The data is collected on individual healthy, non-smoking BioCal Subjects<br />
(e.g. physician, respiratory therapist, …).<br />
Note<br />
Also refer to www.<strong>ndd</strong>.ch. Application Note "DLCO Bio-<br />
Calcheck EasyOne Pro".<br />
a b c d e f g h<br />
Fig. 7-4 BioCal Check main screen<br />
a Sensor selection<br />
b Parameter value tabs<br />
c Deselect tests (remove check mark)<br />
d Click to conduct a new test<br />
96 EasyOne Pro / EasyOne Pro LAB<br />
e Click to select the BioCal Subject<br />
f Click to select a parameter<br />
g Click to display the graphic trends<br />
h Click to add a new BioCal Subject
Hygiene, Cleaning, Maintenance, Disposal<br />
Selecting a Test Subject and Performing the Calibration Check<br />
� Start the program.<br />
� Select the Utilities menu.<br />
� Open the Calibration Test menu and select Biological Calibration<br />
Check.<br />
The Biological Calibration Check menu (BioCal-Check main screen) is open.<br />
� Select the device according to its serial number a (check label on<br />
sensor).<br />
� Select the BioCal Test Subject e. If the subject is not in the list, press Add<br />
New BioCal Subject h and select the subject or add a new one.<br />
Recommendation: Set the Patient ID to "Bio-1", "Bio-2", …<br />
� Afterwards return to the BioCal-Check main screen.<br />
� Click Add New Test d.<br />
� Perform the test (test selection: FVC, FVL, DLCO, Test-End, … according to<br />
configuration settings)<br />
Recommendation: Try to blow a QC grade "A" test.<br />
Recommendation: Perform only one BioCal-Check test a day.<br />
� Press Finish Test.<br />
� To show the graphic trend, click the Graph button g.<br />
� To select another review parameter, change the selection in Displayed<br />
Parameter Selection f.<br />
� If you selected a spirometry parameter, the spirometry BioCal quality<br />
grades will be displayed. If you selected a DLCO parameter, the DLCO<br />
BioCal quality grades will be displayed.<br />
The parameter values are divided into two tab sheets b: Baseline Values<br />
(used to calculate warning levels) and Control Values (controlled values for<br />
BioCal-Check QC grade calculation).<br />
To deselect a Test (Baseline and Control Values) remove the check mark c of<br />
the corresponding test. A deselected test is not used for calculations any<br />
more. This means also that by deselecting a baseline value, the first control<br />
value is moved to the baseline values, because a minimum number (20) of<br />
baseline tests is required for a valid analysis.<br />
EasyOne Pro / EasyOne Pro LAB 97
Disposal<br />
Hygiene, Cleaning, Maintenance, Disposal<br />
Detailed Description<br />
FEV1, FVC and FEV6 are the spirometry parameters used for BioCal-Check<br />
quality control. The software will establish a baseline mean value (precision<br />
range) for each BioCal Subject and sensor from trials repeated daily for 20<br />
days. This baseline will then be used to trend all subsequent BioCal-Check<br />
sessions for the BioCal Subject and sensor. Immediate quality feedback will<br />
be provided by the software in accordance with the BioCal-Check QC grades<br />
alerting the user of quality warning conditions for the parameters collected.<br />
The BioCal-Check data will be plotted against time. The BioCal-Check<br />
reference lines will be mean (precision range), upper limit and lower limit.<br />
The upper and lower limits are +/- 2 SD (Standard Deviation).<br />
Specifications of the BioCal-Check QC Grades<br />
For each parameter (FEV1, FVC, FEV6, DLCO, VI, VA) an individual BioCal-<br />
Check QC grade is calculated. Additionally the lowest grade of all<br />
parameters is reported.<br />
Bio-QC<br />
Grade<br />
Limitation Additional Limitation<br />
BA - -<br />
BB 1 value outside ±2SD -<br />
BC 1 value outside ±3SD -<br />
BD<br />
>= 4 values outside ±1SD only consecutive values on<br />
same side of mean<br />
>= 2 values outside ±2SD only consecutive values on<br />
same side of mean<br />
> 1 value outside ±3SD -<br />
>= 10 values, consecutive<br />
values on same side of<br />
mean<br />
BF < 20 baseline values -<br />
The product described in this operator manual must not be disposed as<br />
unsorted municipal waste and must be collected separately. Please contact<br />
an authorized representative of the manufacturer for information<br />
concerning the decommissioning of your equipment.<br />
98 EasyOne Pro / EasyOne Pro LAB<br />
-
8 System Settings<br />
System Settings Menu<br />
System Settings<br />
The system settings menu is displayed with Utilities on the initial screen.<br />
The menu offers the following option keys:<br />
� Configuration (general settings)<br />
� Check Calibration (measuring accuracy check, see "Check Measuring<br />
Accuracy" on page 93)<br />
� Advanced (password-protected (EOPTM or 8005): installation of<br />
software updates, data export, touch screen calibration).<br />
Fig. 8-1 System settings menu<br />
Configuration<br />
These are the tabs of the configuration menu:<br />
� General<br />
� Test<br />
� Device<br />
� Report<br />
� Printer<br />
� EMR<br />
� Environment<br />
Fig. 8-2 Configuration menu, General tab<br />
EasyOne Pro / EasyOne Pro LAB 99
General Tab<br />
System Settings<br />
These are the tabs of the General tab:<br />
� Header<br />
� Storage<br />
� System Settings<br />
� Administrator<br />
� User Handling<br />
Header Tab<br />
On this tab<br />
� you enter the hospital/practice name (will appear on the initial screen<br />
and all printed reports) a<br />
� you can add and remove an illustration (e.g. a logo, maximum size of<br />
the bitmap: 260x80 pixels) b<br />
� you open a window with information about the software program c.<br />
Fig. 8-3 Header tab<br />
a Fields for entry of the hospital/practice<br />
name<br />
b Click to display an illustration (logo)<br />
a b c<br />
100 EasyOne Pro / EasyOne Pro LAB<br />
c Click to display information about the<br />
software program
System Settings<br />
Storage Tab<br />
This tab is protected with a password (password EOPTM or 8005). On this<br />
tab, you can:<br />
� create a new database folder a<br />
� import a database b<br />
� copy data (from/to a storage medium) c<br />
� perform a data backup e<br />
� Select a target folder for the current tests f (path and name are shown<br />
at d).<br />
a b c d e f<br />
Fig. 8-4 Storage tab<br />
a Click to create a new database folder<br />
b Click to import a database<br />
c Click to copy data from/to a storage<br />
medium<br />
d Path and name of the currently used<br />
database folder<br />
e Click to perform a data backup<br />
f Click to select the database folder<br />
EasyOne Pro / EasyOne Pro LAB 101
System Settings Tab<br />
On this tab<br />
System Settings<br />
� you select the units for length, temperature and weight a<br />
� you choose whether or not the cursor is always visible and whether a<br />
beep is to sound when you click a button b<br />
� you select the regional settings (e.g., the data and time format) c<br />
� you select date and time d<br />
� you select the language e<br />
� you select the keyboard layout f<br />
� you select whether the program will prompt you for the patient's age<br />
or date of birth g<br />
� you select the width of the scroll bar h<br />
� you select the volume for the audio signals i.<br />
a b c d e f g h i<br />
Fig. 8-5 System Settings tab<br />
a Click option button to select the units<br />
b Select check box to always show the<br />
cursor, or deselect; select check box to<br />
hear a beep for each key click, or<br />
deselect<br />
c Click to select the regional settings<br />
(date and time format)<br />
102 EasyOne Pro / EasyOne Pro LAB<br />
d Click to select the date and time<br />
e Click to select the language<br />
f Click to select the keyboard layout<br />
g Select option button for age or birth<br />
date<br />
h Select the scroll bar width<br />
i Adjust the volume
System Settings<br />
Administrator Tab<br />
On this tab you can do the following (password-protected (EOPTM or 8005):<br />
� map a network drive a<br />
� disconnect a network drive b<br />
� enter an IP address c.<br />
Fig. 8-6 Administrator tab<br />
a Click to map a network drive<br />
b Click to disconnect a network drive<br />
a b c<br />
c Click to enter an IP address<br />
EasyOne Pro / EasyOne Pro LAB 103
System Settings<br />
User Handling Tab<br />
This tab is protected with a password (password EOPTM or 8005). On this<br />
tab you can enter an ID for each user. To start the system, users are then<br />
required to log on with their ID. Condition: the function is enabled with<br />
"Enable user handling" (c, Fig. 8-7). All tests will be annotated with the user<br />
who performed the test.<br />
The ID of the user who is logged on is shown next to the time.<br />
a b c<br />
Fig. 8-7 User Handling tab<br />
a Select line to edit logged on users<br />
b Select to enter a new user<br />
104 EasyOne Pro / EasyOne Pro LAB<br />
c Select check box to enable/disable the<br />
function
Test Tab<br />
System Settings<br />
The tab comprises the following sub-menus<br />
� General<br />
� FVC/FVL<br />
� SVC<br />
� MVV<br />
� DLCO<br />
� FRC (mbw)<br />
� Cal-Check.<br />
General Tab<br />
a b c d e f g h i<br />
Fig. 8-8 General tab<br />
a Option buttons to select the value (Best<br />
Value/Best Trial)<br />
b Click to select the predicted values for<br />
children<br />
c Click to select the predicted values for<br />
adults<br />
d Select/deselect the system<br />
interpretation<br />
e Curve selection criteria<br />
f Select this check box, if you want to<br />
stop tests manually<br />
g Select the check box to display the ratio<br />
parameter as a percentage value<br />
h Select the check box to display the<br />
percentage deviation from predicted<br />
for bronchodilation tests; otherwise,<br />
remove the check mark by clicking<br />
again<br />
i Boxes for entry of correction factors<br />
(see Note below)<br />
Note<br />
The predicted normal is corrected by the factor i, if no<br />
specific calculation is defined for the ethnic group in the<br />
selected predicted normal publication.<br />
EasyOne Pro / EasyOne Pro LAB 105
System Settings<br />
Note<br />
The settings selected here affect the predicted normals, the<br />
interpretation and the displayed parameter readings.<br />
Note<br />
When the "Best Value" option is selected, the values for the<br />
"Best" column are selected as follows:<br />
For the parameters listed below, the best value is the highest<br />
value from all accepted trials:<br />
The IC, IRV, VT and ERV parameters are calculated from the<br />
average of all accepted trials.<br />
For PEF, PIF and the volume parameters, the best value is the<br />
highest value from all accepted trials:<br />
Ratios such as FEV1/FVC, FEF50 / VCmax , MTC1 are<br />
recalculated.<br />
Other parameters are taken from the highest ranked trial<br />
(= 1).<br />
For DLCO tests, the "Best Value" / "Best Trial" selection is<br />
irrelevant. The values are calculated from the average of all<br />
accepted trials.<br />
FVC/FVL Tab<br />
Fig. 8-9 FVC / FVL tab<br />
a Select FVC/FEC6<br />
b Select the test type<br />
c Click to select a parameter<br />
a b c d e<br />
106 EasyOne Pro / EasyOne Pro LAB<br />
d Predicted values are represented by<br />
points or as a range<br />
e Select one of the options if you wish to<br />
print the lung age
System Settings<br />
Note<br />
Additional information for FVC-FEV6 selection: FEV6<br />
indicates the exhaled volume after 6 seconds. When set to<br />
FEV6, the program stops the measurement after 6 seconds.<br />
Several parameters such as FEF25, FEF50, FEF75 and FEF25-<br />
75 are not reported in that setting.<br />
Note<br />
The settings selected here affect the predicted normals, the<br />
interpretation and the displayed parameter readings.<br />
With Parameter Select c you open a window for selection of the parameters<br />
to be calculated. Different parameters can be selected for the display and<br />
for the printout.<br />
� Choose a parameter in the "Available" list a.<br />
� Click b to transfer it to the "Selected" list.<br />
Follow these steps to remove a parameter from the list<br />
� select it in the "Selected" list c<br />
� click d to remove it from the list.<br />
Click e to scroll the list up and down.<br />
Note<br />
The parameter selection relates to the current test only.<br />
Different parameters can be selected for each test.<br />
Fig. 8-10 FVC parameters tab<br />
a b c d e a b c d e<br />
EasyOne Pro / EasyOne Pro LAB 107
SVC Tab<br />
Fig. 8-11 SVC tab<br />
Fig. 8-12 MVV tab<br />
System Settings<br />
On this screen you determine the start condition for measurement of the<br />
vital capacity: after a phase of tidal breathing or directly without an initial<br />
tidal breathing phase.<br />
You also select the parameters for the SVC measurement.<br />
MVV Tab<br />
On this screen, you select the parameters for the MVV measurement.<br />
108 EasyOne Pro / EasyOne Pro LAB
DLCO Tab<br />
System Settings<br />
On this tab, you set up the device for DLCO tests.<br />
a b c d e f g h i j<br />
Fig. 8-13 DLCO tab<br />
a Selected gas concentration. Compare<br />
the displayed values with the data on<br />
the gas cylinder. The concentration<br />
must be within the range indicated in<br />
parentheses.<br />
b Click to select the predicted values for<br />
children<br />
c Click to select the predicted values for<br />
adults<br />
d Select check box to automatically<br />
determine the discard volume<br />
e Click to select a parameter (see Fig.<br />
8-10)<br />
f Click to update the predicted values<br />
(e.g., after selecting another predicted<br />
value formula)<br />
g System dead space<br />
h Anatomic dead space<br />
i Discarded volume<br />
j Selected concentration of the simulator<br />
test gas. Compare the displayed values<br />
with the data on the gas cylinder. The<br />
concentration must be within the range<br />
indicated in parentheses.<br />
Warning<br />
Inaccurate Test Results—Incorrect gas concentration entries<br />
cause inaccurate test results.<br />
EasyOne Pro / EasyOne Pro LAB 109
FRC (mbw) Tab<br />
System Settings<br />
On this tab, you set up the device for FRC tests.<br />
a b c<br />
d e<br />
Fig. 8-14 FRC tab<br />
a Gas concentration for automatic termination<br />
of the test (default 2 %)<br />
b After the number of breaths specified<br />
at c the test either starts automatically<br />
or the "Activate" button will be<br />
displayed for manually starting the test<br />
110 EasyOne Pro / EasyOne Pro LAB<br />
c Minimum number of breaths before the<br />
washout phase<br />
d Click to select parameters (see Fig.<br />
8-10)<br />
e Choose the tracer curve format
Device Tab<br />
System Settings<br />
The tab comprises the following sub-menus<br />
� EasyOnePro<br />
� Easy on-PC sensor (USB connector)<br />
� EasyOne<br />
� Selection<br />
EasyOne Pro Tab<br />
This tab presents detailed information about the device and the CO sensor<br />
a.<br />
Additionally, you can:<br />
� release the gas pressure c<br />
� switch the pump on and off b<br />
� open and close the DLCO valve d.<br />
Fig. 8-15 EasyOne Pro tab<br />
a Detailed information about the device<br />
and the CO sensor<br />
b Click to switch the pump manually off<br />
and on<br />
c Click to release pressure if the gas<br />
cylinder has to be exchanged<br />
a b c d<br />
e<br />
d Click button to open or close the DLCO<br />
valve<br />
e Click to select the sensor port from the<br />
dropdown list<br />
EasyOne Pro / EasyOne Pro LAB 111
EasyOne Tab<br />
Fig. 8-16 EasyOne tab<br />
System Settings<br />
The tab comprises the following sub-menus<br />
� Status<br />
� Test Configuration<br />
� General Configuration<br />
� Report Configuration<br />
Consult the EasyOne operator manual for details.<br />
Selection Tab<br />
Fig. 8-17 Selection tab<br />
Select your preferred sensor type on this tab.<br />
112 EasyOne Pro / EasyOne Pro LAB
Report Tab<br />
On the Report tab, you can:<br />
System Settings<br />
� display the Report Designer (Layout Editor, see "Report Designer" on<br />
page 134)<br />
� load layouts (Load layout, also refer to www.<strong>ndd</strong>.ch. Application Note<br />
"EasyOne Pro import Layout")<br />
� save layouts (Export layout)<br />
Printer Tab<br />
Fig. 8-18 Printer tab<br />
After connection of the printer you select the printer driver on this tab (see<br />
"Connecting the Printer" on page 30).<br />
a Press to open the printer list<br />
b Press to update the printer list<br />
EMR Tab<br />
a b c<br />
c Select the default printer<br />
Here you select the EMR system and the corresponding settings (see "GDT<br />
Interface" on page 124).<br />
EasyOne Pro / EasyOne Pro LAB 113
Fig. 8-19 EMR tab<br />
a Enter the GDT ID.<br />
b Select the EMR system from the list.<br />
c Select the character set from the list.<br />
System Settings<br />
a b c d e<br />
114 EasyOne Pro / EasyOne Pro LAB<br />
d Press button to search for the GDT<br />
folder.<br />
e Click to install a new PCS system.
Environment Tab<br />
System Settings<br />
On this tab you enter the ambient conditions. These will be overwritten by<br />
values entered prior to the test (see "FVL Test (inspiratory and expiratory<br />
measurement)" on page 51).<br />
a b c d e f g h i j<br />
Fig. 8-20 Environment tab<br />
a Select check box to use the values<br />
entered at b for BTPS calculation<br />
b Boxes for entry of room temperature,<br />
relative humidity and altitude (above<br />
sea level) of the examination site<br />
c Measured values for room<br />
temperature, relative humidity and<br />
altitude (above sea level)<br />
d Case temperature<br />
e BTPS conversion factor<br />
f ATPS values will be used, yes/no (no<br />
BTPS conversion)<br />
g Select the check box, if you do not want<br />
to enter ambient conditions for two<br />
hours or until a restart. Otherwise,<br />
remove the check mark by clicking<br />
again.<br />
h Sensor case temperature<br />
i Click to close the window, saving the<br />
data<br />
j Recalculate BTPS conversion factor<br />
(e.g. after a change of the ambient<br />
conditions)<br />
EasyOne Pro / EasyOne Pro LAB 115
9 Troubleshooting Tips<br />
Troubleshooting Tips<br />
Should you encounter problems operating your system, please consult the<br />
table below for troubleshooting tips.<br />
When the EasyOne<br />
Pro is switched<br />
on, you see the<br />
following error<br />
message on the<br />
display<br />
When you start a<br />
test, you see the<br />
message Check<br />
spirette insertion.<br />
Calibration check<br />
outside ±3.5%.<br />
Self-test failed Quit the program and<br />
restart. If you receive<br />
the same message<br />
again, contact your<br />
<strong>ndd</strong> dealer.<br />
The spirette is not<br />
correctly positioned.<br />
The spirette is not<br />
correctly positioned.<br />
You have not used an<br />
<strong>ndd</strong> adapter.<br />
There are leaks in the<br />
syringe connection.<br />
The specified syringe<br />
volume differs from<br />
the actual syringe<br />
volume.<br />
Note<br />
The most recent information and frequently asked questions<br />
can be found on our web site at www.<strong>ndd</strong>.ch.<br />
116 EasyOne Pro / EasyOne Pro LAB<br />
Ensure that the<br />
triangle on the<br />
spirometer is lined up<br />
with the triangle on the<br />
spirette<br />
Insert the<br />
spirette as<br />
described in section<br />
"Inserting the One-Way<br />
Valve, DLCO<br />
barriette/FRC<br />
barriette and<br />
spirette" on<br />
page 33.<br />
Use the <strong>ndd</strong><br />
calibration adapter.<br />
Check the<br />
connections.<br />
Choose the correct<br />
syringe volume via<br />
Configuration > Test ><br />
Cal-Check.
10 Specifications<br />
Specifications<br />
Dimensions 270 x 335 x 270 mm 3 (h x w x d)<br />
Weight [kg] < 8 kg, LAB < 9 kg<br />
Flow/volume<br />
measurement<br />
Molar mass<br />
analyzer<br />
Carbon<br />
monoxide<br />
analyzer<br />
CO2 analyzer<br />
(LAB only)<br />
Mouth<br />
pressure<br />
transducer<br />
Predicted<br />
values<br />
(spirometry)<br />
Accuracy, volume: ±2% or 0.050 l<br />
Accuracy, flow: ±2% or 0.020 l/s<br />
(except PEF)<br />
Accuracy, PEF: ±5% or 0.200 l<br />
Accuracy, MVV: ±5% or 5 l/min<br />
Resolution, volume >1 ml<br />
Resolution, flow >4 ml/s<br />
Measuring range, volume ±12 l<br />
Measuring range, flow ±16 l/s<br />
Resistance
Predicted<br />
values (lung<br />
capacity and<br />
DLCO)<br />
Operating<br />
conditions<br />
Storage/<br />
transport<br />
Specifications<br />
Ayers, Burrows, Crapo, Goldman & Becklake, Knudson,<br />
McGrath & Thompson, Miller, Gutierrez (Canada),<br />
NHANES, Polgar, ERS, Zapletal, Roca, Hedenström,<br />
Gulsvik, Pereira 2008, Thompson (see "Predicted<br />
Values" on page 123)<br />
Temperature 5 to 40 °C (41 to 104 °F)<br />
LAB: 10 to 40 °C<br />
(50 to 104 °F)<br />
Relative humidity 15% to 95%,<br />
no condensation<br />
LAB: 30% to 75%,<br />
no condensation<br />
Atmospheric pressure 700 to 1060 hPa<br />
Temperature -20 to 50 °C (-4 to +122 °F)<br />
Relative humidity 5% to 95%, no<br />
condensation<br />
Atmospheric pressure 500 to 1060 hPa<br />
Certifications CE Declaration of conformity<br />
Device<br />
classification<br />
Operating<br />
voltage range<br />
Power<br />
consumption<br />
[max.]<br />
Protection class I<br />
Type BF applied part<br />
Furthermore the device is not intended to be used in<br />
the presence of oxygen rich environments. However,<br />
where the device contains oxygen rich environments,<br />
it complies with applicable requirements for fire<br />
prevention.<br />
100 to 240 V, 50 to 60 Hz<br />
80 VA<br />
Life time 7 years<br />
118 EasyOne Pro / EasyOne Pro LAB
11 Order Information<br />
Accessories<br />
Order Information<br />
2050-1 spirette , pkg. of 50<br />
2050-3 spirette with lip seal, pkg. of 40<br />
2050-5 spirette , pkg. of 200<br />
3050-1 DLCO barriette, pkg. of 50<br />
3050-2 DLCO barriette, pkg. of 100<br />
3150-1 FRC barriette, pkg. of 40 (for EasyOne Pro LAB<br />
only)<br />
3000-60.1 Stand<br />
3000-60.2 Carry bag<br />
Spare Parts<br />
3000-50.1SP Filter pack<br />
3000-50.2SP Motor block<br />
3000-50.3SP DLCO valve<br />
3000-50.4SP Pressure tube DLCO<br />
3100-50.8SP Pressure tube FRC (for EasyOne Pro LAB only)<br />
3000-50.4.1SP Quick Connect fitting for gas pressure regulator<br />
3000-50.5SP Flow sensor<br />
3000-50.6SP Touch stylus<br />
3000-50.7SP Temperature sensor<br />
3000-50.8SP Gas supply tube<br />
3000-50.9SP One-way valve<br />
EasyOne Pro / EasyOne Pro LAB 119
12 Appendix<br />
12.1 Interpretation<br />
Appendix<br />
The automatic system interpretation can be selected and deselected on the<br />
configuration tab (see "General Tab" on page 100).<br />
GOLD-Hardie Interpretation<br />
The following diagram outlines the criteria EasyOne Pro applies in the<br />
automatic interpretation after GOLD/HARDIE (see "Literature" on page 164<br />
[12], [13]).<br />
120 EasyOne Pro / EasyOne Pro LAB
NLHEP Interpretation<br />
Appendix<br />
The following diagram outlines the criteria EasyOne Pro applies in the<br />
automatic interpretation after NLHEP (see "Literature" on page 164, [4]).<br />
Note: 1. LLN = Lower limit of normal<br />
2. If FEV6 is selected instead of FVC, FEV6 will be used for the interpretation<br />
instead of FVC.<br />
3. If the selected predicted value publication does not define a lower<br />
limit of normal (LLN), LLN is calculated as predicted value - 1.645 x<br />
RSD (residual standard deviation). If RSD is not defined, the LLN for<br />
FEV1/FVC is set at 90% of the predicted value, the LLN for FEV1 at<br />
80% of the predicted value and the LLN for FVC at 80% of the predicted<br />
value.<br />
4. If the quality grade is D and the results are within the limits, the following<br />
interpretation will be output: "normal spirometry, insufficient<br />
test quality, data not suitable for comparison".<br />
EasyOne Pro / EasyOne Pro LAB 121
NICE Interpretation<br />
Appendix<br />
Predominantly used in Great Britain. Source unknown.<br />
1) FER = FEV1/FVC<br />
122 EasyOne Pro / EasyOne Pro LAB
Appendix<br />
System Interpretation Messages<br />
Reference Printed Text<br />
No Interpretation No interpretation, not enough acceptable maneuvers<br />
Normal Spirometry Normal Spirometry<br />
Mild Obstruction Mild Obstruction<br />
Moderate Obstruction Moderate Obstruction<br />
Severe Obstruction Severe Obstruction<br />
Very Severe Obstruction Very Severe Obstruction<br />
Possible Restriction Restriction probable; further examinations<br />
recommended.<br />
Normal Spirometry, At COPD risk Normal Spirometry; at COPD risk<br />
No predicted values No interpretation, no predicted values<br />
12.2 Predicted Values<br />
Note<br />
For the most recent predicted value sets and other pertinent<br />
information, please visit our website at http://www.<strong>ndd</strong>.ch.<br />
EasyOne Pro / EasyOne Pro LAB 123
12.3 GDT Interface<br />
Introduction<br />
Appendix<br />
The following describes the interface set up to facilitate the data<br />
communication between EasyOne Pro and an Electronic <strong>Medical</strong> Record<br />
System (EMR). As an example the integration of the German GDT standard is<br />
described.<br />
Software Settings<br />
The following settings need to be made in the Configuration menu:<br />
Parameter Description<br />
GDT Folder The GDT folder of the EMR system. This may also be a folder in a network<br />
drive. For convenient path entry the Browse button may be used. The<br />
GDT file will be written to this folder and read in from this folder.<br />
Computer Name Name of the EMR computer.<br />
Export single<br />
measurement value<br />
If this check box is selected, additionally the best values will be included<br />
as single measurement values.<br />
124 EasyOne Pro / EasyOne Pro LAB
Appendix<br />
Example: EMR Application "TurboMed"<br />
TurboMed Software Settings<br />
The following settings have to be applied only when the EMR interface is<br />
used.<br />
� Start TurboMed software and select the record of a patient.<br />
� In the patient record select "Konsultationen / Geräteanbindung".<br />
� Select "Gerät anbinden".<br />
� Enter the following:<br />
Field Entry Description<br />
Name EasyOne Pro Name of equipment<br />
Program c:\<strong>ndd</strong>med\EasyWarePro.exe Complete path of EasyWare software.<br />
Export File c:\<strong>ndd</strong>med\<strong>ndd</strong>turbomed.gdt Name and path of the export file.<br />
Import File c:\<strong>ndd</strong>med\turbomed<strong>ndd</strong>.gdt Name and path of the import file. The path (in<br />
the example c:\<strong>ndd</strong>med\) must be identical<br />
with the export file path.<br />
Type 2 Version of the GDT / EMR interface<br />
� Confirm the entry with: Save.<br />
� Confirm the Geräte anbinden dialog with End.<br />
These adjustments are sufficient for the set up of the EMR software. Now<br />
proceed with the set up of EasyOne Pro.<br />
Setup EasyOne Pro Software<br />
When the EMR interface is used for the first time, the following settings have<br />
to be made:<br />
� Start EasyOne Pro.<br />
� Open the menu Utilities / Configuration / EMR.<br />
� Enter the path of the EMR folder according to the export path set in EMR<br />
TurboMed (in the above example c:\<strong>ndd</strong>med\).<br />
� Enter the EMR computer name as "TurboMed".<br />
� Confirm the dialog with OK.<br />
� Close EasyOne Pro.<br />
EasyOne Pro / EasyOne Pro LAB 125
Appendix<br />
Performing a Measurement<br />
The following describes the test procedure.<br />
� Start TurboMed, select a patient and open that file.<br />
� Select Konsultationen / Geräteanbindung.<br />
� Select EasyOne Pro and then Start.<br />
The patient data entry window appears automatically.<br />
� Enter the required data.<br />
� Confirm with OK.<br />
� Select the appropriate test type (FVC, FVL, SVC, MVV) and confirm with<br />
Enter.<br />
� Perform a complete test with the patient.<br />
� Print a report if required.<br />
� Finish EMR (sends data to EMR and closes EasyOne Pro).<br />
TurboMed now receives the data.<br />
� Confirm with OK.<br />
� Close the program now with Ende.<br />
Data accepted by EasyOne Pro from EMR / GDT<br />
The following data is read in by EasyOne Pro from the GDT interface. The<br />
data that is actually transmitted depends on the EMR (GDT) system used.<br />
Excessive data is ignored by EasyOne Pro.<br />
GDT Field ID Description Comment<br />
8000 Record ID<br />
8316 GDT-ID of EMR<br />
3000 Patient ID The ID may include letters and<br />
numbers. Maximum length: 15<br />
3101 Name Last Name, maximum number of<br />
characters: 47<br />
3102 First Name First name, maximum number of<br />
characters: 47<br />
3103 Date of Birth<br />
3110 Gender (1 = male)<br />
126 EasyOne Pro / EasyOne Pro LAB
3622 Height (in cm)<br />
3623 Weight (in kg)<br />
Appendix<br />
Here is an example of a GDT file (<strong>ndd</strong>PCS.gdt), received from an EMR with<br />
the name PCS:<br />
� 014810000202<br />
� 01380006302<br />
� 0158315Extern<br />
� 0128316PCS<br />
� 014921802.00<br />
� 01030001<br />
� 0093100<br />
� 0143101Meier<br />
� 0163102Manfred<br />
� 017310301011966<br />
� 0093104<br />
� 019310624106 Kiel<br />
� 0203107Schulstr. 1<br />
� 01031101<br />
� 0123622185<br />
� 011362363<br />
In addition to some GDT specific information the file contains the following<br />
patient information: Name, date of birth, gender, height in cm, weight in kg.<br />
EasyOne Pro / EasyOne Pro LAB 127
Appendix<br />
View of tests with EasyOne Pro<br />
View test via GDT record type 6311 with patient name, ID and date and<br />
time of test<br />
As of EasyWare V2.8 GDT record type 6311 is supported. In the<br />
transmission of test results using GDT record type 6310, record type 8432<br />
(date) and 8439 (time) are always included:<br />
8432ddmmyyyy (day, month, year)<br />
8439hhmmss (hours, minutes, seconds)<br />
In case of a recall via GDT record type 6311 the test can be identified by<br />
name, ID, date and time and will be shown.<br />
Example "forced expiratory spirometry"<br />
Here the example transmission GDT Export with a forced loop test (FVL). The<br />
data marked grey will be exported only when the "Export single<br />
measurement value" check box is selected.<br />
01380006310<br />
014810001385<br />
0128315EDV<br />
0128316NDD<br />
014921802.00<br />
01230006-0<br />
0183101Appeldorn<br />
0173102Heinrich<br />
017310323101945<br />
01031101<br />
0123622178<br />
011362366<br />
0158402LUFU02<br />
017620024042008<br />
017843224042008<br />
017843918210004<br />
0366228Your FEV1 / Predicted: 103%<br />
0096228<br />
0436228----------------------------------<br />
0436228 Pre<br />
0436228Parameter Pred Best %Pred<br />
0436228----------------------------------<br />
0436228FVC L 4.72 4.03 85<br />
0436228FEV1 L 3.55 3.67 103<br />
0436228FEV1/FVC 0.75 0.91 121<br />
0436228FEF25-75% L/s 2.88 5.55 193<br />
128 EasyOne Pro / EasyOne Pro LAB
Appendix<br />
0436228PEF L/s 9.09 10.60 117<br />
0436228FET s - 4.12 -<br />
0436228FIVC L 4.72 3.67* 78<br />
0436228PIF L/s - 9.38 -<br />
0586228* indicates: below LLN or significant post change.<br />
0096228<br />
0408410SN:DT 200076:633446580643340000<br />
0348470Predicted Set: NHANES III<br />
0378470System Interpretation Set: -<br />
0096227<br />
0128410FVC<br />
0128411FVC<br />
01384204.03<br />
0108421L<br />
0138410FEV1<br />
0138411FEV1<br />
01384203.67<br />
0108421L<br />
0178410FEV1/FVC<br />
0178411FEV1/FVC<br />
01384200.91<br />
0098421<br />
0188410FEF25-75%<br />
0188411FEF25-75%<br />
01384205.55<br />
0128421L/s<br />
0128410PEF<br />
0128411PEF<br />
014842010.60<br />
0128421L/s<br />
0128410FET<br />
0128411FET<br />
01384204.12<br />
0108421s<br />
0138410FIVC<br />
0138411FIVC<br />
01484203.67*<br />
0108421L<br />
0128410PIF<br />
0128411PIF<br />
01384209.38<br />
0128421L/s<br />
EasyOne Pro / EasyOne Pro LAB 129
Appendix<br />
12.4 Introduction to Adjustment of DLCO Measurements<br />
Adjustments of DLCO measurements are described in detail in the 2005<br />
ERS/ATS statement.<br />
In the paper, however, the adjustment is described as a change of the DLCO<br />
predicted values. After several discussions with opinion leaders, we have to<br />
conclude that it is more common to compute a DLadj value that is computed<br />
from the measured DLCO value. This DLadj value is then compared to the<br />
(unchanged) predicted values. The following table describes this:<br />
Comment Parameter Predicted % Predicted<br />
ERS/ATS statement<br />
As can be seen from the table above, the %Predicted is the same if � = 1 /<br />
�.<br />
This means that the equations of the ERS/ATS statement have to be inverted<br />
(e.g. factor is multiplied instead of divided). If compared to the original<br />
formulas in the ERS/ATS statement the following formulas are therefore<br />
‘inverted’ (multiplication instead of division and vice versa).<br />
Adjustment for hemoglobin<br />
DLCO meas DLCO pred DLCO pred / DLCO meas<br />
DLCO meas DLCO pred × � DLCO pred × ����DLCO meas<br />
EasyOne Pro DL adj = DLCO x � DLCO pred DLCO pred / (DLCO meas x ��<br />
The following formula is applied to correct for hemoglobin:<br />
Male adults (age > 15): DLadj = DLCO / (1.7 × Hb / (10.22 + Hb))<br />
Hb in g/dl<br />
Female and children (age < 15): DLadj = DLCO/ (1.7× Hb / (9.38 + Hb))<br />
Hb in g/dl<br />
Unit conversion: Hb [g/dl] = Hb [mmol/l]/0.616<br />
130 EasyOne Pro / EasyOne Pro LAB<br />
(according to other sources, the factor is 0.6206)<br />
Allowed range for Hb: 0 to 100 g/dl<br />
Default value male adults<br />
(age > 15): 14.6 g/dl (9.00 mmol/l)<br />
Default value female and children<br />
(age < 15): 13.4 g/dl (8.26 mmol/l
Adjustment for P AO2 or Altidue<br />
Appendix<br />
The following formula for DLadj is applied if the patient uses supplemental<br />
O2: DLadj = DLCO × (1 + 0.0035 × (PAO2 – 100)) PAO2 in mm Hg<br />
If no supplemental O2 is applied the following formula is always applied to<br />
correct for altitude. The partial pressure of O2 in the lungs is computed by<br />
subtracting the water vapor pressure in the lungs (47 mmHg) from the ambient<br />
pressure and multiplying it with the O2 concentration:<br />
DLadj = DLCO × (1 + 0.0031 × (PIO2 – 150)) PIO2 in mmHg<br />
PIO2 = (Pamb – 47) × 0.20942 Pamb and PH2O in mm Hg<br />
Unit conversion: P [mm Hg] = P [mbar] × 0.750<br />
0 0065 h<br />
Pressure at altitude:<br />
P<br />
amb<br />
760 1<br />
Pamb in mm Hg, h in m<br />
Allowed range for P: 100 to 750 mm Hg<br />
� ,<br />
5 255<br />
� – ------------------------------- �<br />
� 288 �<br />
,<br />
= �<br />
Adjustment for COHb concentration and CO back pressure<br />
Adjustment for carboxyhaemoglobin is performed as follows:<br />
DLadj = DLCO / (102 % - CO-Hb%) CO-Hb in %<br />
Allowed range for CO-Hb: 0 bis 100 %<br />
Default value: 2 % (at this value DLadj equals DCLO)<br />
Example of DLCO adjustment<br />
The following example can be used to test the DLCO adjustment feature.<br />
Factor Adjustment for<br />
men<br />
Adjustment for<br />
women and children<br />
(< 15 J)<br />
Hemoglobin 32.4675 mmol/l 0.7023 0.69292<br />
P A02 400 mbar 1.7 1.7<br />
CO-Hb 30 % 1.38889 1.38889<br />
Total correction factor 1.6582 1.6361<br />
EasyOne Pro / EasyOne Pro LAB 131
Appendix<br />
12.5 How to interpret TLC from a single breath maneuver<br />
Instruments for lung volume measurement (Body Plethysmography, Multibreath<br />
Nitrogen Washout or Helium equilibration methods) today require<br />
well trained personnel, stable conditions and significant maintenance to<br />
provide reliable results. Therefore, these tests are normally performed in larger,<br />
hospital based lung function laboratories.<br />
It has been shown that a total lung capacity (TLC) measured from a single<br />
breath maneuver (TLCsb) systematically underestimates the TLC when compared<br />
to Body Plethysmography (TLCpleth) or Multibreath washout (TLCwash)<br />
methods. The degree of underestimation has been shown to increase<br />
as airflow obstruction worsens.<br />
A study by Punjabi, et al [1] shows that an approximation of the TLCpleth<br />
and TLCwash is possible by applying a simple correction formula to the single<br />
breath TLCsb:<br />
Without correction Punjabi showed:<br />
� there is a very good correlation between TLCsb and TLCpleth (r=0.97-<br />
0.99) in patients with FEV1/FVC >70%. Therefore, no correction of the<br />
TLCsb was necessary in patients without obstructive patterns.<br />
� in patients with FEV1/FVC
Appendix<br />
the decision. Note below, that in the both decision nodes, where the<br />
TLCsb > LLN, the diagnosis would be “Obstruction”.<br />
� In the case that an uncorrected single breath TLCsb is below the lower<br />
limit of normal there is a risk of incorrectly concluding a “Restriction” or a<br />
“Mixed Defect” (Obstruction AND Restriction) when none is actually present.<br />
If the FEV1/FVC ratio is < 70%, the regression equation can be used<br />
to correct the TLCsb to a value more consistent with the TLCpleth or TLCwash,<br />
reducing the possibility of an incorrect decision.<br />
EasyOne Pro / EasyOne Pro LAB 133
12.6 Report Designer<br />
Starting the Report Designer<br />
Fig. 12-1: Report tab<br />
Appendix<br />
� On the initial screen, select Utilities.<br />
� Select Configuration.<br />
� In the Configuration menu, select the Report tab.<br />
� On the Report tab, select the Layout Editor.<br />
Adding a Logo to an Existing Test<br />
� On the Report Designer tab, select New Report (Fig. 12-2: left).<br />
Fig. 12-2: New Report button (left), test selection (right)<br />
� Select the test to which you want to add the logo (Fig. 12-2: right).<br />
134 EasyOne Pro / EasyOne Pro LAB
Appendix<br />
� Select the Picture Box (Fig. 12-3:).<br />
Fig. 12-3: Picture Box button<br />
� Insert the frame in the appropriate position (Fig. 12-4:).<br />
Fig. 12-4: Positioning the frame<br />
EasyOne Pro / EasyOne Pro LAB 135
Fig. 12-5: Image button<br />
Appendix<br />
� Select Image and click to open the Explorer (Fig. 12-5:) .<br />
� Select the logo (Fig. 12-5:). The logo will appear in the frame.<br />
� Save the test under a new name.<br />
Configuring the Graphic Representation of an Existing Test<br />
� Select the test via New Report or Open.<br />
Fig. 12-6: New Report, Open buttons<br />
� Select Windows and then Report Explorer (Fig. 12-7:).<br />
� Select Detail Report Graph (Fig. 12-7:).<br />
� Click graphVT1.<br />
136 EasyOne Pro / EasyOne Pro LAB
Appendix<br />
Fig. 12-7: Windows, Report Explorer, Detail Report Graph buttons<br />
� Click the small arrow in the upper right corner of the Detail Report Graph<br />
window (Fig. 12-7:).<br />
� Click Run Designer. The Spiro Graph Configuration window will be displayed<br />
(Fig. 12-9:).<br />
Fig. 12-8: Detail Report Graph window<br />
� Select Test Type.<br />
� Choose options in the Trial Selection pane.<br />
� Choose options in the Appearance pane.<br />
Fig. 12-9: Spiro Graph Configuration window<br />
� Close the window with OK.<br />
� Save the test under a new name.<br />
EasyOne Pro / EasyOne Pro LAB 137
Appendix<br />
12.7 Electromagnetic Compatibility (EMC)<br />
Changes or modifications to the EasyOne Pro not expressly approved by<br />
<strong>ndd</strong> could cause EMC issues with this or other equipment. EasyOne Pro is<br />
designed to comply with applicable regulations regarding EMC. Its<br />
compliance with these requirements has been verified. It needs to be<br />
installed and put into service according to the EMC information stated as<br />
follows.<br />
Warning<br />
� Use of portable phones or other radio frequency (RF)<br />
emitting equipment near the system may cause<br />
unexpected or adverse operation.<br />
� The equipment or system should not be used adjacent to,<br />
or stacked with, other equipment. If adjacent or stacked<br />
use is necessary, the equipment or system should be<br />
tested to verify normal operation in the configuration in<br />
which it is being used.<br />
Guidance and Manufacturer’s Declaration – Electromagnetic Emissions<br />
EasyOne Pro is intended for use in the electromagnetic environment specified below.<br />
It is the responsibility of the customer or user to ensure that EasyOne Pro is used in<br />
such an environment.<br />
Emissions Test Compliance Electromagnetic Environment - Guidance<br />
RF emissions to EN 55011 Group 1 EasyOne Pro uses RF energy only for its<br />
internal function. Therefore, its RF<br />
emissions are very low and are not likely to<br />
cause any interference in nearby electronic<br />
equipment.<br />
RF emissions to EN 55011 Class B EasyOne Pro is suitable for use in all<br />
Harmonic emissions to<br />
EN61000-3-2/IEC61000-3-2<br />
Voltage fluctuations/flicker<br />
to EN61000-3-3/IEC 61000-<br />
3-3<br />
not<br />
applicable<br />
not<br />
applicable<br />
138 EasyOne Pro / EasyOne Pro LAB<br />
establishments, including domestic and<br />
those directly connected to the public lowvoltage<br />
power supply network that supplies<br />
buildings used for domestic purposes.
Appendix<br />
Guidance and Manufacturer’s Declaration – Electromagnetic Immunity<br />
EasyOne Pro is intended for use in the electromagnetic environment specified below.<br />
It is the responsibility of the customer or user to ensure that EasyOne Pro is used in<br />
such an environment.<br />
Immunity Test IEC 60601 Test Level Compliance<br />
Level<br />
Electrostatic<br />
discharge (ESD)<br />
to EN 61000-4-2<br />
Electrical fast<br />
transient/burst<br />
to EN 61000-4-4<br />
Surge to EN<br />
61000-4-5<br />
Voltage dips,<br />
short<br />
interruptions<br />
and voltage<br />
variations on<br />
power supply<br />
input lines to EN<br />
61000-4-11<br />
Power frequency<br />
(50/60 Hz)<br />
magnetic field to<br />
EN 61000-4-8<br />
± 6 kV contact<br />
± 8 kV air<br />
± 2 kV for power<br />
supply lines<br />
± 1 kV for input/<br />
output lines<br />
± 1 kV differential<br />
mode<br />
± 2 kV common<br />
mode<br />
< 5% U T<br />
(>95% dip in U T) for<br />
0.5 cycles<br />
40% U T<br />
(60% dip in U T ) for 5<br />
cycles<br />
70% U T<br />
(30% dip in U T ) for<br />
25 cycles<br />
< 5% U T<br />
(>95% dip in U T) for<br />
5 s<br />
± 6 kV<br />
± 8 kV<br />
the product<br />
has no power<br />
cords or input/<br />
output lines<br />
the product<br />
has no power<br />
cords<br />
the product<br />
has no power<br />
cords<br />
Electromagnetic Environment -<br />
Guidance<br />
Floors should be wood,<br />
concrete or ceramic tile. If<br />
floors are covered with<br />
synthetic material, the relative<br />
humidity should be at least<br />
30%.<br />
3 A/m passed Power frequency magnetic<br />
fields should be at levels<br />
characteristics of a typical<br />
location in a typical<br />
commercial or hospital<br />
environment.<br />
NOTE U T is the AC mains voltage prior to application of the test level.<br />
EasyOne Pro / EasyOne Pro LAB 139
Appendix<br />
Guidance and Manufacturer’s Declaration – Electromagnetic Immunity<br />
EasyOne Pro is intended for use in the electromagnetic environment specified below.<br />
It is the responsibility of the customer or user to ensure that EasyOne Pro is used in<br />
such an environment.<br />
Immunity Test IEC 60601 Test Level Compliance<br />
Level<br />
Conducted RF to<br />
EN 61000-4-6<br />
Radiated RF to<br />
EN 61000-4-3<br />
3 Vrms<br />
150 kHz to 80 MHz<br />
3 V/m<br />
80 MHz to 2.5 GHz<br />
3 V<br />
3 V/m<br />
140 EasyOne Pro / EasyOne Pro LAB<br />
Electromagnetic<br />
Environment - Guidance<br />
Portable and mobile RF<br />
communications equipment<br />
should be used no closer to<br />
any part of EasyOne Pro,<br />
including cables, than the<br />
recommended separation<br />
distance calculated from the<br />
equation applicable to the<br />
frequency of the transmitter.<br />
Recommended separation<br />
distance:<br />
d = 1.2<br />
d = 1.2 for 80 MHz to 800<br />
MHz<br />
d = 2.3 for 800 MHz to 2.5<br />
GHz<br />
where P is the maximum<br />
output power rating of the<br />
transmitter in watts (W)<br />
according to the transmitter<br />
manufacturer and d is the<br />
recommended separation<br />
distance in meters (m).<br />
Field strengths from fixed RF<br />
transmitters, as determined by<br />
an electromagnetic site survey<br />
a , should be less than the<br />
compliance level in each<br />
frequency rangeb P<br />
P<br />
P<br />
.<br />
Interference may occur in the<br />
vicinity of equipment marked<br />
with the following symbol<br />
NOTE 1 At 80 MHz and 800 MHz, the higher frequency range applies.<br />
NOTE 2 These guidelines may not apply in all situations. Electromagnetic propagation is<br />
affected by absorption and reflection from structures, objects, and people.
Appendix<br />
a) Field strengths from fixed transmitters, such as base stations for radio (cellular/<br />
cordless) telephones and land mobile radio, AM and FM radio broadcast and TV<br />
broadcast cannot be predicted theoretically with accuracy. To assess the<br />
electromagnetic environment due to fixed RF transmitters, an electromagnetic site<br />
survey should be considered. If the measured field strength in the location in which<br />
EasyOne Pro is used exceeds the applicable RF compliance level above, EasyOne<br />
Pro should be observed to verify normal operation. If abnormal performance is<br />
observed, additional measures may be necessary, such as re-orienting or relocating<br />
EasyOne Pro.<br />
b) Over the frequency range 150 kHz to 80 MHz, field strengths should be less than 3 V/<br />
m.<br />
Recommended separation distances between portable and mobile<br />
RF communication equipment and EasyOne Pro<br />
EasyOne Pro is intended for use in the electromagnetic environment on which<br />
radiated RF disturbances are controlled. The customer or the user of EasyOne Pro can<br />
help prevent electromagnetic interference by maintaining a minimum distance between<br />
portable and mobile RF communications equipment (transmitters) and EasyOne Pro<br />
as recommended below, according to the maximum output power of the<br />
communications equipment<br />
rated<br />
maximum<br />
output<br />
power<br />
of<br />
transmitter<br />
[W]<br />
separation distance according to frequency of transmitter<br />
[m]<br />
150 kHz to 80 MHz 80 MHz to 800 MHz 800 MHz to 2.5 GHz<br />
d = 1.2 P d = 1.2 P d = 2.3 P<br />
0.01 0.12 0.12 0.23<br />
0.1 0.38 0.38 0.73<br />
1 1.2 1.2 2.3<br />
10 3.8 3.8 7.3<br />
100 12 12 23<br />
EasyOne Pro / EasyOne Pro LAB 141
Appendix<br />
For transmitters rated at a maximum output power not listed above, the recommended<br />
separation distance d in meters (m) can be estimated using the equation applicable to<br />
the frequency of the transmitter, where P is the maximum output power rating of the<br />
transmitter in watts (W) according to the transmitter manufacturer.<br />
NOTE 1: At 80 MHz and 800 MHz, the higher frequency range applies.<br />
NOTE 2: These guidelines may not apply in all situations. Electromagnetic propagation<br />
is affected by absorption and reflection from structures, objects, and people.<br />
Compliant Cables and Accessories<br />
Warning<br />
The use of accessories, transducers and cables other than<br />
those specified may result in increased emissions or<br />
decreased immunity performance of the equipment or<br />
system<br />
The table below lists cables, transducers, and other applicable accessories<br />
with which <strong>ndd</strong> claims EMC compliance.<br />
Note<br />
Any supplied accessories that do not affect EMC compliance are<br />
not included.<br />
Ethernet cable, 1.5 m, shielded<br />
USB cable, 2 m, shielded<br />
VGA cable including 2 ferrites, 1.8 m, shielded<br />
Sensor cable, 1.7 m, shielded<br />
Temperature / humidity sensor cable, 0.4 m, shielded<br />
142 EasyOne Pro / EasyOne Pro LAB
Appendix<br />
12.8 Microsoft Software License Terms for Windows ® XP<br />
Embedded Runtime<br />
These license terms are an agreement between you and <strong>ndd</strong><br />
Medizintechnik AG. Please read them. They apply to the software included<br />
on this device. The software also includes any separate media on which you<br />
received the software.<br />
The software on this device includes software licensed from Microsoft<br />
Corporation or its affiliate.<br />
The terms also apply to any Microsoft<br />
� Updates,<br />
� Supplements,<br />
� Internet-based services, and<br />
� Support services<br />
for this software, unless other terms accompany those items. If so, those<br />
terms apply. If you obtain updates or supplements directly from Microsoft,<br />
then Microsoft, and not <strong>ndd</strong> Medizintechnik AG, licenses those to you.<br />
As described below, using some features also operates as your consent<br />
to the transmission of certain standard computer information for<br />
Internet-based services.<br />
By using the software, you accept these terms. If you do not accept<br />
them, do not use or copy the software. Instead, contact <strong>ndd</strong><br />
Medizintechnik AG to determine its return policy for a refund or credit.<br />
If you comply with these license terms, you have the rights below.<br />
1. Use Rights.<br />
You may use the software on the device with which you acquired the<br />
software.<br />
2. Additional Licensing Requirements and/or Use Rights.<br />
� Specific Use. <strong>ndd</strong> Medizintechnik AG designed this device for a<br />
specific use. You may only use the software for that use.<br />
� Other Software. You may use other programs with the software as<br />
long as the other programs<br />
� Directly support the manufacturer's specific use for the device, or<br />
� Provide system utilities, resource management, or anti-virus or<br />
similar protection.<br />
Software that provides consumer or business tasks or processes may<br />
not be run on the device. This includes email, word processing,<br />
spreadsheet, database, scheduling and personal finance software.<br />
The device may use terminal services protocols to access such<br />
software running on a server.<br />
EasyOne Pro / EasyOne Pro LAB 143
� Device Connections.<br />
Appendix<br />
� You may use terminal services protocols to connect the device to<br />
another device running business task or processes software such<br />
as email, word processing, scheduling or spreadsheets.<br />
� You may allow up to ten other devices to access the software to<br />
use<br />
� File Services,<br />
� Print Services,<br />
� Internet Information Services, and<br />
� Internet Connection Sharing and Telephony Services.<br />
The ten connection limit applies to devices that access the software<br />
indirectly through "multiplexing" or other software or hardware that<br />
pools connections. You may use unlimited inbound connections at<br />
any time via TCP/IP.<br />
3. Scope of License. The software is licensed, not sold. This agreement<br />
only gives you some rights to use the software. <strong>ndd</strong> Medizintechnik AG<br />
and Microsoft reserve all other rights. Unless applicable law gives you<br />
more rights despite this limitation, you may use the software only as<br />
expressly permitted in this agreement. In doing so, you must comply<br />
with any technical limitations in the software that allow you to use it<br />
only in certain ways. For more information, see the software<br />
documentation or contact <strong>ndd</strong> Medizintechnik AG. Except and only to<br />
the extent permitted by applicable law despite these limitations, you<br />
may not:<br />
� Work around any technical limitations in the software;<br />
� Reverse engineer, decompile or disassemble the software;<br />
� Make more copies of the software than specified in this agreement;<br />
� Publish the software for others to copy;<br />
� Rent, lease or lend the software; or<br />
� Use the software for commercial software hosting services.<br />
Except as expressly provided in this agreement, rights to access the<br />
software on this device do not give you any right to implement Microsoft<br />
patents or other Microsoft intellectual property in software or devices<br />
that access this device.<br />
You may use remote access technologies in the software such as Remote<br />
Desktop to access the software remotely from another device. You are<br />
responsible for obtaining any licenses required for use of these protocols<br />
to access other software.<br />
� Remote Boot Feature. If the <strong>ndd</strong> Medizintechnik AG enabled the<br />
device Remote Boot feature of the software, you may<br />
� use the Remote Boot Installation Service (RBIS) tool only to<br />
install one copy of the software on your server and to deploy the<br />
software on licensed devices as part of the Remote Boot process;<br />
and<br />
144 EasyOne Pro / EasyOne Pro LAB
Appendix<br />
� use the Remote Boot Installation Service only for deployment of<br />
the software to devices as part of the Remote Boot process; and<br />
� download the software to licensed devices and use it on them.<br />
For more information, please refer to the device documentation or<br />
contact <strong>ndd</strong> Medizintechnik AG.<br />
� Internet-Based Services. Microsoft provides Internet-based services<br />
with the software. Microsoft may change or cancel them at any time.<br />
� Consent for Internet-Based Services. The software features<br />
described below connect to Microsoft or service provider<br />
computer systems over the Internet. In some cases, you will not<br />
receive a separate notice when they connect. You may switch off<br />
these features or not use them. For more information about these<br />
features, visit<br />
http://www.microsoft.com/windowsxp/downloads/updates/<br />
sp2/docs/privacy.mspx.<br />
By using these features, you consent to the transmission of this<br />
information. Microsoft does not use the information to identify or<br />
contact you.<br />
� Computer Information. The following features use Internet protocols,<br />
which send to the appropriate systems computer information, such as<br />
your Internet protocol address, the type of operating system, browser<br />
and name and version of the software you are using, and the<br />
language code of the device where you installed the software.<br />
Microsoft uses this information to make the Internet-based services<br />
available to you.<br />
� Web Content Features. Features in the software can retrieve<br />
related content from Microsoft and provide it to you. To provide<br />
the content, these features send to Microsoft the type of operating<br />
system, name and version of the software you are using, type of<br />
browser and language code of the device where the software was<br />
installed. Examples of these features are clip art, templates,<br />
online training, online assistance and Appshelp. These features<br />
only operate when you activate them. You may choose to switch<br />
them off or not use them.<br />
� Digital Certificates. The software uses digital certificates. These<br />
digital certificates confirm the identity of Internet users sending<br />
X.509 standard encrypted information. The software retrieves<br />
certificates and updates certificate revocation lists. These security<br />
features operate only when you use the Internet.<br />
� Auto Root Update. The Auto Root Update feature updates the list<br />
of trusted certificate authorities. You can switch off the Auto Root<br />
Update feature.<br />
�Windows Media Player. When you use Windows Media Player, it<br />
checks with Microsoft for<br />
EasyOne Pro / EasyOne Pro LAB 145
Appendix<br />
�Compatible online music services in your region;<br />
�New versions of the player; and<br />
�Codecs if your device does not have the correct ones for playing<br />
content. You can switch off this feature. For more information, go<br />
to:<br />
http://microsoft.com/windows/windowsmedia/mp10/<br />
privacy.aspx.<br />
� Windows Media Digital Rights Management. Content owners<br />
use Windows Media digital rights management technology<br />
(WMDRM) to protect their intellectual property, including<br />
copyrights. This software and third party software use WMDRM to<br />
play and copy WMDRM-protected content. If the software fails to<br />
protect the content, content owners may ask Microsoft to revoke<br />
the software's ability to use WMDRM to play or copy protected<br />
content. Revocation does not affect other content. When you<br />
download licenses for protected content, you agree that Microsoft<br />
may include a revocation list with the licenses. Content owners<br />
may require you to upgrade WMDRM to access their content.<br />
Microsoft software that includes WMDRM will ask for your consent<br />
prior to the upgrade. If you decline an upgrade, you will not be<br />
able to access content that requires the upgrade. You may switch<br />
off WMDRM features that access the Internet. When these features<br />
are off, you can still play content for which you have a valid<br />
license.<br />
� Misuse of Internet-based Services. You may not use these services<br />
in any way that could harm them or impair anyone else's use of them.<br />
You may not use the services to try to gain unauthorized access to any<br />
service, data, account or network by any means.<br />
4. Windows Update Agent (also known as Software Update Services).<br />
The software on the device includes Windows Update Agent ("WUA")<br />
functionality that may enable your device to connect to and access<br />
updates ("Windows Updates") from a server installed with the required<br />
server component. Without limiting any other disclaimer in this<br />
Microsoft Software License Terms or any EULA accompanying a<br />
Windows Update, you acknowledge and agree that no warranty is<br />
provided by MS, Microsoft Corporation or their affiliates with respect to<br />
any Windows Update that you install or attempt to install on your<br />
device.<br />
5. Product Support. Contact <strong>ndd</strong> Medizintechnik AG for support options.<br />
Refer to the support number provided with the device.<br />
6. Backup Copy. You may make one backup copy of the software. You<br />
may use it only to reinstall the software on the device.<br />
7. Proof Of License. If you acquired the software on the device, or on a<br />
disc or other media, a genuine Certificate of Authenticity label with a<br />
genuine copy of the software identifies licensed software. To be valid,<br />
this label must be affixed to the device, or included on or in <strong>ndd</strong><br />
146 EasyOne Pro / EasyOne Pro LAB
Appendix<br />
Medizintechnik AG's software packaging. If you receive the label<br />
separately, it is not valid. You should keep the label on the device or<br />
packaging to prove that you are licensed to use the software. To<br />
identify genuine Microsoft software, see http://www.howtotell.com.<br />
8. Transfer to a Third Party. You may transfer the software only with the<br />
device, the Certificate of Authenticity label, and these license terms<br />
directly to a third party. Before the transfer, that party must agree that<br />
these license terms apply to the transfer and use of the software. You<br />
may not retain any copies of the software including the backup copy.<br />
9. Not Fault Tolerant. The software is not fault tolerant. <strong>ndd</strong><br />
Medizintechnik AG installed the software on the device and is<br />
responsible for how it operates on the device.<br />
10. Restricted Use. The Microsoft software was designed for systems that<br />
do not require fail-safe performance. You may not use the Microsoft<br />
software in any device or system in which a malfunction of the software<br />
would result in foreseeable risk of injury or death to any person. This<br />
includes operation of nuclear facilities, aircraft navigation or<br />
communication systems and air traffic control.<br />
11. No Warranties for the Software. The software is provided "as is".<br />
You bear all risks of using it. Microsoft gives no express<br />
warranties, guarantees or conditions. Any warranties you receive<br />
regarding the device or the software do not originate from, and are<br />
not binding on, Microsoft or its affiliates. When allowed by your<br />
local laws, <strong>ndd</strong> Medizintechnik AG and Microsoft exclude implied<br />
warranties of merchantability, fitness for a particular purpose and<br />
non-infringement.<br />
12. Liability Limitations. You can recover from Microsoft and its<br />
affiliates only direct damages up to two hundred fifty U.S. Dollars<br />
(U.S. $250.00). You cannot recover any other damages, including<br />
consequential, lost profits, special, indirect or incidental damages.<br />
This limitation applies to:<br />
� Anything related to the software, services, content (including<br />
code) on third party internet sites, or third party programs; and<br />
� Claims for breach of contract, breach of warranty, guarantee or<br />
condition, strict liability, negligence, or other tort to the extent<br />
permitted by applicable law.<br />
It also applies even if Microsoft should have been aware of the<br />
possibility of the damages. The above limitation may not apply to you<br />
because your country may not allow the exclusion or limitation of<br />
incidental, consequential or other damages.<br />
13. Export Restrictions. The software is subject to United States export<br />
laws and regulations. You must comply with all domestic and<br />
international export laws and regulations that apply to the software.<br />
EasyOne Pro / EasyOne Pro LAB 147
Appendix<br />
These laws include restrictions on destinations, end users and end<br />
use. For additional information, see www.microsoft.com/exporting.<br />
148 EasyOne Pro / EasyOne Pro LAB
Appendix<br />
12.9 Quick Reference Guide to the Screen Displays<br />
Initial Screen<br />
Click to select a patient or<br />
add a new patient<br />
Selected<br />
patient<br />
Click to perform a test<br />
Click to modify the<br />
system settings<br />
Also refer to<br />
"Safety Information" on page 6<br />
"Start-up and Initial Preparation" on page 19<br />
"Performing a Test" on page 40<br />
"System Settings" on page 99<br />
"<strong>Index</strong>" on page 167<br />
Click to review the results from<br />
previous tests<br />
'Sensor connected'<br />
indicator<br />
Help button<br />
Click to quit<br />
the program<br />
EasyOne Pro / EasyOne Pro LAB 149
Bar cursor for<br />
patient<br />
selection<br />
Click to add a<br />
new patient<br />
Appendix<br />
Selecting/Adding a Patient<br />
Click to delete<br />
the patient data<br />
Filter Last Name; by entering one or more letters,<br />
you limit the number of patients to those meeting<br />
the filter criteria<br />
Click to view all the<br />
patient's tests<br />
Click to perform a test<br />
with the selected patient<br />
Click to edit the patient data<br />
Also refer to<br />
"Selecting/Adding a Patient" on page 40<br />
"Editing Patient Data" on page 71<br />
"Selecting a Test" on page 44<br />
"<strong>Index</strong>" on page 167<br />
150 EasyOne Pro / EasyOne Pro LAB<br />
Click to clear the filter criterion<br />
'Sensor<br />
connected'<br />
indicator<br />
Help button<br />
Click to display<br />
the menu<br />
options
Press the TAB or Enter<br />
key after each entry<br />
Adding a Patient<br />
Click to open<br />
other tabs<br />
Appendix<br />
Click to select<br />
the gender<br />
Click to close the window<br />
without saving the data<br />
Click to close the<br />
window, saving the<br />
data<br />
Also refer to<br />
"Selecting/Adding a Patient" on page 40<br />
"Editing Patient Data" on page 71<br />
"Selecting a Test" on page 44<br />
"<strong>Index</strong>" on page 167<br />
'Sensor<br />
connected'<br />
indicator<br />
Click to select the<br />
ethnic origin<br />
Click to generate<br />
an automatic<br />
patient ID<br />
Help button<br />
Click to display<br />
the menu<br />
options<br />
EasyOne Pro / EasyOne Pro LAB 151
Selected<br />
patient<br />
Test Menu<br />
Appendix<br />
Note<br />
The content of this menu depends on the device<br />
configuration.<br />
Test selection<br />
Click to view patient data<br />
'Sensor connected'<br />
indicator<br />
Also refer to<br />
"Selecting a Test" on page 44<br />
"Forced Vital Capacity (FVC/FVL)" on page 45<br />
"Vital Capacity (SVC)" on page 55<br />
"Maximum Voluntary Ventilation (MVV)" on page 57<br />
"CO Diffusing Capacity (DLCO)" on page 59<br />
"<strong>Index</strong>" on page 167<br />
152 EasyOne Pro / EasyOne Pro LAB<br />
Help button<br />
Back to main<br />
menu
Appendix<br />
Viewing Ambient Conditions<br />
Ambient conditions<br />
Selected<br />
patient<br />
Click to view<br />
patient data<br />
Click to recalculate BTPS<br />
Click to close the window,<br />
saving the data<br />
Click to close the window<br />
without saving the data<br />
Help button<br />
Back to main<br />
menu<br />
'Sensor connected'<br />
indicator<br />
Also refer to<br />
"FVL Test (inspiratory and expiratory measurement)" on page 51<br />
"Components and Functional Description of EasyOne Pro" on page 15<br />
"<strong>Index</strong>" on page 167<br />
EasyOne Pro / EasyOne Pro LAB 153
Test with Post-test data<br />
Selected<br />
patient<br />
Click to conduct<br />
a new test<br />
Click to view the test<br />
Appendix<br />
Retrieving/Printing Stored Tests<br />
Click to view<br />
patient data<br />
Click column header to sort the list<br />
Click to print the test<br />
Also refer to<br />
"Retrieving/Printing Stored Tests" on page 66<br />
"Quality Messages and Quality Grades" on page 72<br />
"Connecting the Printer" on page 30<br />
"<strong>Index</strong>" on page 167<br />
154 EasyOne Pro / EasyOne Pro LAB<br />
Help button<br />
Click to view trend<br />
information<br />
Click to display<br />
the menu options<br />
Click to view the<br />
patient list
Predicted<br />
values<br />
Selected<br />
patient<br />
FVC Test Result<br />
Click to select the<br />
displayed curve<br />
Click to<br />
select<br />
the scale<br />
Click to view<br />
patient data<br />
Click to view the test<br />
Appendix<br />
Click to select a new<br />
patient<br />
Click to enter a<br />
test evaluation<br />
Also refer to<br />
"Retrieving/Printing Stored Tests" on page 66<br />
"System Settings" on page 99<br />
"Quality Messages and Quality Grades" on page 72<br />
"Connecting the Printer" on page 30<br />
"<strong>Index</strong>" on page 167<br />
Click to conduct a<br />
new test<br />
Click to view the<br />
test list<br />
Help button<br />
Back to<br />
main menu<br />
'Sensor connected'<br />
indicator<br />
EasyOne Pro / EasyOne Pro LAB 155
DLCO Test Result<br />
Complete exhalation<br />
Tidal<br />
breathing<br />
Selected<br />
patient<br />
Click to view<br />
patient data<br />
Appendix<br />
Click to change<br />
the scale<br />
Holding breath for 10 seconds<br />
Complete exhalation<br />
Click to enter a test<br />
evaluation<br />
'Sensor connected'<br />
indicator<br />
Also refer to<br />
"Retrieving/Printing Stored Tests" on page 66<br />
"System Settings" on page 99<br />
"Quality Messages and Quality Grades" on page 72<br />
"Connecting the Printer" on page 30<br />
"<strong>Index</strong>" on page 167<br />
156 EasyOne Pro / EasyOne Pro LAB<br />
Click to show more curves<br />
Click to show/hide<br />
the keypad<br />
Click to display the<br />
collection bar control<br />
buttons<br />
Help<br />
button<br />
Back to<br />
main menu
FRC Test Result<br />
Measurement curve<br />
Tidal<br />
breathing<br />
Selected<br />
patient<br />
Click to view<br />
patient data<br />
Click to enter<br />
a test<br />
evaluation<br />
Appendix<br />
Click to enter a<br />
comment<br />
'Sensor connected'<br />
indicator<br />
Also refer to<br />
"Retrieving/Printing Stored Tests" on page 66<br />
"System Settings" on page 99<br />
"Quality Messages and Quality Grades" on page 72<br />
"Connecting the Printer" on page 30<br />
"<strong>Index</strong>" on page 167<br />
Click to recalculate<br />
the curve<br />
Tracer curve<br />
Help<br />
button<br />
Click to show/hide<br />
the keypad<br />
Back to<br />
main menu<br />
EasyOne Pro / EasyOne Pro LAB 157
Selected test report<br />
Selected<br />
patient<br />
Print Preview<br />
Click to select other<br />
report layouts<br />
Click to view<br />
patient data<br />
Appendix<br />
'Sensor connected'<br />
indicator<br />
Also refer to<br />
"Retrieving/Printing Stored Tests" on page 66<br />
"System Settings" on page 99<br />
"Quality Messages and Quality Grades" on page 72<br />
"Connecting the Printer" on page 30<br />
"<strong>Index</strong>" on page 167<br />
158 EasyOne Pro / EasyOne Pro LAB<br />
Click to print the report<br />
Click to display a submenu<br />
with zoom, export, viewing<br />
and print functions<br />
Help<br />
button<br />
Click to show/hide<br />
the keypad<br />
Back to<br />
main menu
Trend Display<br />
Option buttons for selection of the view<br />
Displayed parameter labels<br />
Appendix<br />
Click to select a parameter<br />
Selected<br />
patient<br />
Click to view<br />
patient data<br />
'Sensor connected'<br />
indicator<br />
Also refer to<br />
"Trend View" on page 69<br />
"Definition of Important Parameters" on page 85<br />
"<strong>Index</strong>" on page 167<br />
Icon to initiate the trend<br />
printout<br />
Help button<br />
EasyOne Pro / EasyOne Pro LAB 159
System Settings Menu<br />
Click to install software updates<br />
Click to export data<br />
Click to display the<br />
configuration menu<br />
Selected<br />
patient<br />
Click to view<br />
patient data<br />
Also refer to<br />
"System Settings" on page 99<br />
"<strong>Index</strong>" on page 167<br />
Appendix<br />
Click to perform the<br />
calibration check<br />
XML Export<br />
wBreath<br />
program<br />
Click to perform<br />
a data backup<br />
Click to<br />
calibrate the<br />
touch screen<br />
160 EasyOne Pro / EasyOne Pro LAB<br />
Remote support<br />
Click to display the lower<br />
group of control buttons<br />
(password-protected)<br />
Help button<br />
Back to<br />
main menu<br />
'Sensor connected' indicator
Selected<br />
patient<br />
Configuration Menu<br />
Click to open more tabs<br />
Text boxes for entry of<br />
the header texts<br />
Click to view<br />
patient data<br />
Also refer to<br />
"System Settings" on page 99<br />
"<strong>Index</strong>" on page 167<br />
Appendix<br />
Click to search for an<br />
illustration to be<br />
added<br />
'Sensor connected'<br />
indicator<br />
Click to view information<br />
about the software program<br />
Help button<br />
Back to main<br />
menu<br />
EasyOne Pro / EasyOne Pro LAB 161
Selected<br />
patient<br />
Calibration Check<br />
Calibration check<br />
with syringe<br />
Click to view<br />
patient data<br />
Appendix<br />
'Sensor connected'<br />
indicator<br />
Also refer to<br />
"Calibration Check" on page 162<br />
"EasyOne Pro Flow Sensor Design and Operation" on page 16<br />
"Specifications" on page 117<br />
"<strong>Index</strong>" on page 167<br />
162 EasyOne Pro / EasyOne Pro LAB<br />
Calibration check<br />
with test subject DLCO simulator check<br />
Click to show/hide<br />
the keypad<br />
Help button<br />
Back to<br />
main menu
Selected<br />
patient<br />
Appendix<br />
Calibration Check with Test Subject<br />
Select the sensor Click to select the BioCal<br />
Subject<br />
Click to select the parameter<br />
for display<br />
Deselect a test<br />
(remove check mark)<br />
Click to view<br />
patient data<br />
Click to conduct a new test<br />
Click to display the<br />
reference / control values<br />
Click to add a new<br />
BioCal Subject<br />
Click to display the graphic<br />
trends<br />
Help button<br />
Back to main menu<br />
Also refer to<br />
"Calibration Check with Test Subject" on page 163<br />
"EasyOne Pro Flow Sensor Design and Operation" on page 16<br />
"Specifications" on page 117<br />
"<strong>Index</strong>" on page 167<br />
EasyOne Pro / EasyOne Pro LAB 163
12.10 Literature<br />
Appendix<br />
[1] American Thoracic Society. Standardization of Spirometry: 1994<br />
Update, Nov. 11,1994. Am J Resp Crit Care Med 1995; 152:1107-<br />
1136.<br />
[2] Occupational Health and Safety Administration (OSHA), Pulmonary<br />
Function Standards for Cotton Dust, 29 CFR: 1910.1043 Appendix D.<br />
[3] Social Security Administration Disability (SSD) Guidelines, CFR404:<br />
Appendix 1 to Subpart P.<br />
[4] Ferguson GT, Enright PL, Buist AS, et al. Office spirometry for lung<br />
health assessment in adults: A consensus statement from the<br />
National Lung Health Education Program. Chest 2000; 117:1146-<br />
1161.<br />
[5] ATS Pulmonary Function Laboratory Management and Procedure<br />
Manual, American Thoracic Society, New York, NY 10019.<br />
[6] Enright PL, Hyatt RE. Office Spirometry. Lea & Febiger, Philadelphia,<br />
1987.<br />
[7] Hyatt, RE, Scanlon PD, Nakamura M. Interpretation of Pulmonary<br />
Function Tests - A Practical Guide. Lippincott - Raven, Philadelphia,<br />
1997.<br />
[8] American Thoracic Society. Lung Function Testing: Selection of<br />
Reference Values and Interpretative Strategies, Am Rev Respir Dis<br />
1991; 144:1202-1218.<br />
[9] Morris JF, Temple W. Short Report: Spirometric "Lung Age"<br />
Estimation for Motivating Smoking Cessation, Preventive Medicine<br />
14. 655-662 (1985).<br />
[10] Polgar, Promadhat, Pulmonary Function Testing in Children:<br />
Techniques and Standards. W.B. Saunders Co., Philadelphia, 1971.<br />
[11] M.R. Miller, R. Crapo, J. Hankinson, et al. ATS/ERS Task Force:<br />
Standardization of Lung Function Testing. Numbers 1 to 5. Eur Respir<br />
J 2005; 26: 153-161, 319-338, 511-522, 720-735, 948-968.<br />
[12] Global Strategy For The Diagnosis, Management, And Prevention Of<br />
Chronic Obstructive Pulmonary Disease, Executive Summary,<br />
Updated 2003 (GOLD).<br />
[13] Hardie et.al., "Risk of over-diagnosis of COPD in asymptomatic<br />
elderly never-smokers" Eur Respir J2002;20: 1117-1122.<br />
[14] ATS/ERS Task Force: Standardization of Lung Function Testing; Eur<br />
Respir J 2005;26:153–161.<br />
[15] Shao H, Sandberg K, Sjoqvist BA, Hjalmarson O.: Moment analysis<br />
of multibreath nitrogen washout in healthy preterm infants. Pediatr<br />
Pulmonol 1998: 25(1): 52-58.<br />
164 EasyOne Pro / EasyOne Pro LAB
Appendix<br />
[16] Wanger, J.L. Clausen et al.; ATS/ERS Task Force: Standardization of<br />
Lung Function Testing. Standardisation of the measurement of lung<br />
volumes. Eur Respir J 2005; 26:511-522.<br />
[17] N. Beydon, S.D. Davis et al.; An Official American Thoracic Society/<br />
European Respiratory Society Statement: Pulmonary Function<br />
Testing in Preschool Children. Am J Respir Crit Care Med Vol 175. pp<br />
1304–1345, 2007.<br />
EasyOne Pro / EasyOne Pro LAB 165
Appendix<br />
166 EasyOne Pro / EasyOne Pro LAB
<strong>Index</strong><br />
A<br />
Administrator tab . . . . . . . . . . . . . . . . 103<br />
Ambient conditions . . . . . . . . . . . . . . . 19<br />
Ambient conditions, enter . . . . . . . . . 115<br />
Animation program for children. . . . . . 54<br />
ATPS values. . . . . . . . . . . . . . . . . . . . . . 51<br />
B<br />
Backup . . . . . . . . . . . . . . . . . . . . . . . . . 91<br />
BioCal Check. . . . . . . . . . . . . . . . . . . . . 96<br />
BioCal Check QC grades. . . . . . . . . . . . 98<br />
Bronchodilation . . . . . . . . . . . . . . . . . . 52<br />
BTPS values. . . . . . . . . . . . . . . . . . . . . . 51<br />
C<br />
Calibration adapter. . . . . . . . . . . . . . . . 93<br />
Calibration check with DLCO simulator95<br />
Calibration syringe . . . . . . . . . . . . . . . . 93<br />
Calibration with test subject . . . . . . . . 96<br />
Caution (definition) . . . . . . . . . . . . . . . . 8<br />
CE marking . . . . . . . . . . . . . . . . . . . . . . . 5<br />
Changing the Trial Acceptability . . . . . 82<br />
Check Measuring Accuracy . . . . . . . . . 93<br />
Cleaning . . . . . . . . . . . . . . . . . . . . . . . . 89<br />
Cleaning before initial use . . . . . . . . . . 19<br />
CO diffusing capacity . . . . . . . . . . . . . . 59<br />
Components and Operation. . . . . . . . . 15<br />
Configuration tabs . . . . . . . . . . . . . . . . 99<br />
Contraindications, DLCO tests. . . . . . . 14<br />
D<br />
Danger (definition) . . . . . . . . . . . . . . . . . 8<br />
Data backup . . . . . . . . . . . . . . . . . . . . 101<br />
Data backup on external media. . . . . . 91<br />
Data, copy . . . . . . . . . . . . . . . . . . . . . . 101<br />
Database folder, create . . . . . . . . . . . 101<br />
Date format, select . . . . . . . . . . . . . . . 102<br />
Date, set . . . . . . . . . . . . . . . . . . . . . . . 102<br />
Definition of the parameters . . . . . . . . 85<br />
Device tab . . . . . . . . . . . . . . . . . . . . . . 111<br />
Device, preparation . . . . . . . . . . . . . . . 22<br />
Disposal . . . . . . . . . . . . . . . . . . . . . . . . 98<br />
DLCO acceptability and quality grades 79<br />
DLCO barriette. . . . . . . . . . . . . . . . . . . . 33<br />
DLCO Calibration check . . . . . . . . . . . . 94<br />
DLCO gas supply. . . . . . . . . . . . . . . . . . 25<br />
DLCO measurements, adjustment. . . 130<br />
DLCO quality messages and grades . .76<br />
DLCO tab . . . . . . . . . . . . . . . . . . . . . . 109<br />
DLCO test . . . . . . . . . . . . . . . . . . . . . . . .59<br />
DLCO test gas requirements . . . . . . . . .17<br />
DLCO test, contraindications . . . . . . . .14<br />
E<br />
EasyOne Pro LAB . . . . . . . . . . . . . . . . . .12<br />
EasyOne Pro LAB, functions . . . . . . . . .14<br />
EasyOne Pro tab . . . . . . . . . . . . . . . . 111<br />
EasyOne Pro flow sensor. . . . . . . . . .16<br />
EasyOne tab. . . . . . . . . . . . . . . . . . . . 112<br />
Electromagnetic Compatibility . . . . . 138<br />
EMC . . . . . . . . . . . . . . . . . . . . . . . . . . 138<br />
EMR tab . . . . . . . . . . . . . . . . . . . . . . . 113<br />
Entering comments . . . . . . . . . . . . . . . .82<br />
Environment tab . . . . . . . . . . . . . . . . 115<br />
Equipment checks before each use. . .90<br />
Equipment symbols . . . . . . . . . . . . . . .13<br />
Expiratory FVC measurement . . . . . . . .45<br />
F<br />
FEV6 . . . . . . . . . . . . . . . . . . . . . . . . . . . .49<br />
Filter pack, replace . . . . . . . . . . . . . . . .90<br />
Forced vital capacity . . . . . . . . . . . . . . .45<br />
FRC (mbw) tab . . . . . . . . . . . . . . . . . . 110<br />
FRC barriette . . . . . . . . . . . . . . . . . . . . .35<br />
FRC calibration check . . . . . . . . . . . . . .95<br />
FRC gas requirements . . . . . . . . . . . . . .18<br />
FRC gas supply . . . . . . . . . . . . . . . . . . .28<br />
FRC quality messages . . . . . . . . . . . . . .80<br />
FRC test . . . . . . . . . . . . . . . . . . . . . . . . .64<br />
Functional test. . . . . . . . . . . . . . . . . . . .37<br />
FVC . . . . . . . . . . . . . . . . . . . . . . . . . . . . .45<br />
FVC/FVL quality messages and grades 72<br />
FVC/FVL tab . . . . . . . . . . . . . . . . . . . . 106<br />
FVL test (inspiratory and expiratory<br />
measurement) . . . . . . . . . . . . . . . . . .51<br />
G<br />
Gas cylinder fittings . . . . . . . . . . . 26, 28<br />
Gas supply, DLCO gas . . . . . . . . . . . . . .25<br />
Gas supply, FRC gas . . . . . . . . . . . . . . .28<br />
GDT Interface . . . . . . . . . . . . . . . . . . . 124<br />
General tab . . . . . . . . . . . . . . . . 100, 105<br />
EasyOne Pro / EasyOne Pro LAB 167
H<br />
Header tab . . . . . . . . . . . . . . . . . . . . . 100<br />
Hospital name, enter . . . . . . . . . . . . . 100<br />
Hygiene . . . . . . . . . . . . . . . . . . . . . . . . . 89<br />
I<br />
Illustration (logo) . . . . . . . . . . . . . . . . 100<br />
Incentive, animation program for children<br />
54<br />
Initial screen . . . . . . . . . . . . . . . . . . . . . 37<br />
Intended Use. . . . . . . . . . . . . . . . . . . . . 14<br />
Interpretation . . . . . . . . . . . . . . . . . . . 120<br />
Interpretation, NICE . . . . . . . . . . . . . . 122<br />
Interpretation, NLHEP. . . . . . . . . . . . . 121<br />
K<br />
Keyboard layout . . . . . . . . . . . . . . . . . 102<br />
Keyboard, mouse, connect . . . . . . . . . 30<br />
Keypad, display/remove . . . . . . . . . . . 38<br />
L<br />
LAN ports. . . . . . . . . . . . . . . . . . . . . . . . 21<br />
Language, select. . . . . . . . . . . . . . . . . 102<br />
Leakage current . . . . . . . . . . . . . . . . . . 32<br />
Literature. . . . . . . . . . . . . . . . . . . . . . . 164<br />
Logo, add to test. . . . . . . . . . . . . . . . . 134<br />
Lung function test, select. . . . . . . . . . 105<br />
M<br />
Maintenance . . . . . . . . . . . . . . . . . . . . . 90<br />
Maximum Voluntary Ventilation . . . . . 57<br />
Memory card, exchange . . . . . . . . . . . . 91<br />
Merging patient records . . . . . . . . . . . . 43<br />
MVV . . . . . . . . . . . . . . . . . . . . . . . . . . . . 57<br />
MVV tab. . . . . . . . . . . . . . . . . . . . . . . . 108<br />
N<br />
New patient, add . . . . . . . . . . . . . . . . . 42<br />
NICE Interpretation . . . . . . . . . . . . . . . 122<br />
NLHEP Interpretation . . . . . . . . . . . . . 121<br />
O<br />
Order Information . . . . . . . . . . . . . . . . 119<br />
P<br />
Parameter definitions. . . . . . . . . . . . . . 85<br />
Parameter, select . . . . . . . . . . . . . . . . 107<br />
Parameters, definition . . . . . . . . . . . . . 85<br />
Patient data, edit . . . . . . . . . . . . . . . . . 71<br />
Patient, selection . . . . . . . . . . . . . .40, 41<br />
168 EasyOne Pro / EasyOne Pro LAB<br />
Post-test. . . . . . . . . . . . . . . . . . . . . . . . .52<br />
Power . . . . . . . . . . . . . . . . . . . . . . . . . . .32<br />
Predicted values . . . . . . . . . . . . . . . . 123<br />
Pre-test. . . . . . . . . . . . . . . . . . . . . . . . . .52<br />
Printer driver, select . . . . . . . . . . . . . 113<br />
Printer tab . . . . . . . . . . . . . . . . . . . . . 113<br />
Printer, connect . . . . . . . . . . . . . . . . . . .30<br />
Q<br />
Quality grade . . . . . . . . . . . . . . . . . . . . .49<br />
Quality grades . . . . . . . . . . . . . . . . . . . .72<br />
Quality messages . . . . . . . . . . . . . . . . .72<br />
Quick Test . . . . . . . . . . . . . . . . . . . . . . .59<br />
R<br />
Rear panel . . . . . . . . . . . . . . . . . . . . . . .21<br />
Report tab . . . . . . . . . . . . . . . . . . . . . 113<br />
Revision history. . . . . . . . . . . . . . . . . . . .6<br />
S<br />
Safety Information. . . . . . . . . . . . . . . . . .8<br />
Screen displays, quick reference . . . 149<br />
Selection tab . . . . . . . . . . . . . . . . . . . 112<br />
Serial RS232 ports . . . . . . . . . . . . . . . .21<br />
Software. . . . . . . . . . . . . . . . . . . . . . . 100<br />
Software update . . . . . . . . . . . . . . . . . .92<br />
Specifications . . . . . . . . . . . . . . . . . . 117<br />
spirette. . . . . . . . . . . . . . . . . . . . . . . . . .36<br />
spirette, insertion . . . . . . . . . . . . . 33, 36<br />
Spirometry trial, add . . . . . . . . . . . . . . .50<br />
Stand . . . . . . . . . . . . . . . . . . . . . . . . . . .60<br />
Storage tab . . . . . . . . . . . . . . . . . . . . 101<br />
SVC. . . . . . . . . . . . . . . . . . . . . . . . . . . . .55<br />
SVC quality messages and grades. . . .75<br />
SVC tab . . . . . . . . . . . . . . . . . . . . . . . 108<br />
System interpretation . . . . . . . . . . . . . .82<br />
System Settings tab . . . . . . . . . . . . . 102<br />
T<br />
Technical inspections . . . . . . . . . . . . . .93<br />
Test selection . . . . . . . . . . . . . . . . . . . .44<br />
Test tab . . . . . . . . . . . . . . . . . . . . . . . 105<br />
Test, end . . . . . . . . . . . . . . . . . . . . . . . .66<br />
Test, print. . . . . . . . . . . . . . . . . . . . . . . .66<br />
Test, retrieve . . . . . . . . . . . . . . . . . . . . .66<br />
Time, set . . . . . . . . . . . . . . . . . . . . . . 102<br />
Touch screen . . . . . . . . . . . . . . . . . . . . .38<br />
Touch screen, calibrate. . . . . . . . . . . . .92<br />
Transport damage . . . . . . . . . . . . . . . . .19
Trend view . . . . . . . . . . . . . . . . . . . . . . . 69<br />
Troubleshooting . . . . . . . . . . . . . . . . . 116<br />
U<br />
Units, select . . . . . . . . . . . . . . . . . . . . 102<br />
Update of the software. . . . . . . . . . . . . 92<br />
USB ports . . . . . . . . . . . . . . . . . . . . . . . 21<br />
User Handling tab. . . . . . . . . . . . . . . . 104<br />
V<br />
Volume . . . . . . . . . . . . . . . . . . . . . . . . 102<br />
W<br />
Warning (definition) . . . . . . . . . . . . . . . . 8<br />
Warranty . . . . . . . . . . . . . . . . . . . . . . . . . 7<br />
EasyOne Pro / EasyOne Pro LAB 169
<strong>ndd</strong> <strong>Medical</strong> <strong>Technologies</strong><br />
Two Dundee Park<br />
Andover, MA 01810<br />
USA<br />
www.<strong>ndd</strong>med.com<br />
<strong>ndd</strong> Medizintechnik AG<br />
Technoparkstr. 1<br />
CH-8005 Zürich<br />
Switzerland<br />
www.<strong>ndd</strong>.ch