

Web_Designer_UK__May_2018

You also want an ePaper? Increase the reach of your titles
YUMPU automatically turns print PDFs into web optimized ePapers that Google loves.
Developer tutorials<br />
Automate your workflow with Gulp<br />
method accepts two parameters, a task name and a<br />
function specifying what it should do. In the function, we<br />
then simply tell it to delete the directory we’ve assigned<br />
tothe‘dist’variableusingthe‘del’functionwe’vejust<br />
imported.Inthesnippet,there’salsoahelpfulemoticonpowered‘console.log’whichwillsendfeedbacktothe<br />
Terminal.Thefirstofmany.<br />
gulp.task(‘deleteDist’, function(){<br />
console.log(`Deleting old ‘${dist}’<br />
directory `);<br />
return del(dist);<br />
});<br />
7. CompileSASSwithGulp–part1<br />
Asmentioned,Gulpcanbeusedwiththepreprocessor<br />
SASS to automate the compiling of SCSS files into CSS. To<br />
do this, we’ll be installing more dependencies. ‘gulp-sass’<br />
isagulpwrapperfornode-sass.‘gulp-sass-glob’enables<br />
ustouseglobbingpatternsinourSASStoimportmany<br />
filesatonceusingwildcardcharacters(See‘/dev/sass/<br />
main.scss’).Finally,‘gulp-autoprefixer’addsvendor<br />
prefixestothecompiledCSSbasedonbrowserusage<br />
data.Addthemallintheusualmanner,asbelow.<br />
npm install gulp-sass gulp-sass-glob<br />
gulp-autoprefixer -D<br />
Thenaddittoourlistofdependencyimports.<br />
const sass = require(‘gulp-sass’);<br />
const sassGlob = require(‘gulp-sass-glob’);<br />
const autoprefixer = require<br />
(‘gulp-autoprefixer’);<br />
8. Compile SASS with Gulp – part 2<br />
Now we’ve installed the SASS dependencies, create a new<br />
task called ‘sass’. Within it, use Gulp’s ‘src()’ method to grab<br />
all the SCSS files from our root ‘sassDev’ directory, and<br />
Running tasks<br />
At any point in this tutorial, if you need to test that a<br />
Gulp task is working correctly, run it by typing ‘gulp<br />
my-task-name’ in the Terminal.<br />
then — using Node’s ‘pipe()’ method — pass them to<br />
sassGlob so their own SASS imports can be parsed in<br />
preparation for compile.<br />
gulp.task(‘sass’, function() {<br />
console.log(‘Compiling SASS ’)<br />
return gulp.src(`${sassDev}/*.scss`)<br />
.pipe(sassGlob())<br />
});<br />
9. Compile SASS with Gulp – part 3<br />
Next, pipe our stylesheet to gulp-if, which looks at the<br />
truthiness of the minify variable from Step 4, and then<br />
compiles the SASS either in a compressed (AKA minified)<br />
state or an expanded state. Let’s then pipe the compiled<br />
CSS to the rename dependency, which will add a ‘.min’<br />
filename prefix if required.<br />
.pipe(gulpif(minify, sass({outputStyle:<br />
‘compressed’, precision: 8}), sass<br />
({outputStyle: ‘expanded’, precision: 8})))<br />
.pipe(gulpif(minify, rename({ suffix: ‘.min’<br />
})))<br />
If ‘minify’ is true, we’ll have a stylesheet called ‘main.min.<br />
css’ in the Node.js stream. If there were compile errors, it’s<br />
important that we print these to the Terminal with the<br />
‘.on()’ method. Pipe the stylesheet to autoprefixer for<br />
vendor prefixing, and then finally send it to gulp’s ‘dest()’<br />
method, which places it in the correct ‘dist’ directory, as<br />
defined back in Step 3.<br />
.on(‘error’, sass.logError)<br />
.pipe(autoprefixer({<br />
browsers: [‘last 2 version’],<br />
cascade: false<br />
}))<br />
.pipe(gulp.dest(sassDist))<br />
10. Implementing UnCSS<br />
With Gulp, we can also leverage a powerful plugin called<br />
UnCSS, which analyses HTML files and then removes any<br />
unused styles from our CSS. Among other advantages,<br />
this is great way to reduce stylesheet file sizes. As usual,<br />
install the dependency like so:<br />
npm install gulp-uncss -D<br />
Then add UnCSS to our list of dependency imports.<br />
const uncss = require(‘gulp-uncss’);<br />
Now create a new Gulp task called ‘uncss’ and grab any<br />
CSS files from the ‘sassDist’ directory using ‘src()’. Next,<br />
after piping these to UnCSS, we have to tell the plugin<br />
where our HTML is located so that it can be analysed,<br />
before sending the edited CSS files back to ‘sassDist’<br />
using the ‘dest()’ method.<br />
gulp.task(‘uncss’, function() {<br />
console.log(‘Removing unused CSS ’)<br />
return gulp.src(`${sassDist}/*.css`)<br />
.pipe(uncss({<br />
html: [`${htmlDist}/*.html`]<br />
}))<br />
.pipe(gulp.dest(sassDist))<br />
});<br />
11. Image optimisation<br />
Another useful thing we can automate in Gulp is lossless<br />
image optimisation. It requires ‘gulp-imagemin’, which we<br />
should install in the usual way and then include in the<br />
gulpfile as a dependency called ‘imagemin’. Create a new<br />
task called ‘images’, use ‘src()’ to grab any bitmap images,<br />
and then pass these to imagemin.<br />
gulp.task(‘images’, function(){<br />
console.log(‘Optimising bitmaps ’);<br />
return gulp.src<br />
(`${imgDev}/*.+(png|jpg|jpeg|gif)`)<br />
.pipe(imagemin([<br />
imagemin.jpegtran({progressive: true}),<br />
imagemin.optipng({optimizationLevel: 5})<br />
], { verbose: true }))<br />
.pipe(gulp.dest(imgDist));<br />
});<br />
12. Bundling JavaScript – part 1<br />
If you open ‘/dev/js/main.js’ you’ll see ‘require’ statements,<br />
which import project functionality. We can automate the<br />
bundling of these into one concatenated, minified file<br />
using Browserify. Using Babelify, we can also auto<br />
transpile any ES6 JavaScript into JS, which older browsers<br />
can understand. Let’s install some dependencies.<br />
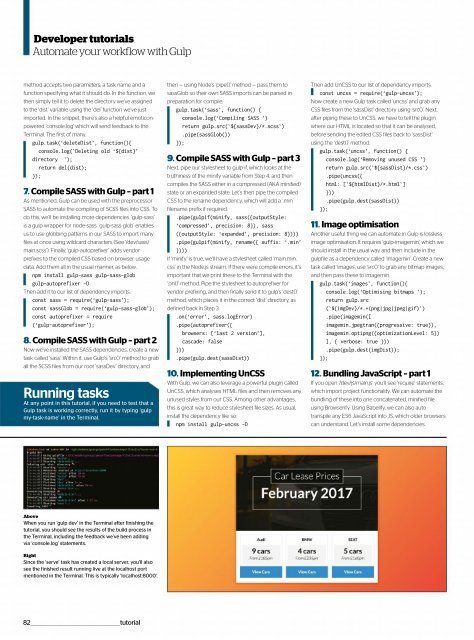
Above<br />
When you run ‘gulp dev’ in the Terminal after finishing the<br />
tutorial, you should see the results of the build process in<br />
the Terminal, including the feedback we’ve been adding<br />
via ‘console.log’ statements.<br />
Right<br />
Since the ‘serve’ task has created a local server, you’ll also<br />
see the finished result running live at the localhost port<br />
mentioned in the Terminal. This is typically ‘localhost:8000’.<br />
82__________________________________________________tutorial