

QUILTsocial Issue 14
While exploring and playing with the Brother Luminaire XP1 and the Husqvarna Viking Designer EPIC sewing machines, we're after what is original in quilting ideas. In this issue we show you how to piece fabric using decorative stitches instead of the typical quarter inch seam. We use traditional quilt blocks to make a modern quilt, show you how to use the flip and stitch technique of quilt making, the golden 5 steps to add a flange to a binding to give the quilt edge some pop of color. Many free patterns and inspiring new quilting ideas!sew
While exploring and playing with the Brother Luminaire XP1 and the Husqvarna Viking Designer EPIC sewing machines, we're after what is original in quilting ideas. In this issue we show you how to piece fabric using decorative stitches instead of the typical quarter inch seam. We use traditional quilt blocks to make a modern quilt, show you how to use the flip and stitch technique of quilt making, the golden 5 steps to add a flange to a binding to give the quilt edge some pop of color. Many free patterns and inspiring new quilting ideas!sew

Create successful ePaper yourself
Turn your PDF publications into a flip-book with our unique Google optimized e-Paper software.
Fold in half lengthwise, wrong sides<br />
together and press.<br />
Take care that the raw edges are even.<br />
Put the standard sewing foot back on<br />
your machine and lengthen your stitch<br />
length to as long as it will go.<br />
Leave a long tail and stitch a row of<br />
basting stitches all the way around the<br />
loop about ¼” away from the raw edge.<br />
Stitch a second row of basting stitches<br />
just to the inside of the first.<br />
By using a matching thread color I won’t<br />
have to worry about taking out the<br />
basting stitches later.<br />
Machine baste the ruffle in place using a<br />
slightly shorter basting stitch.<br />
Baste the ruffle to the cushion front.<br />
The finish line<br />
With the right sides together and the<br />
raw edges even pin the first half of your<br />
cushion backing to the cushion front.<br />
Repeat for the opposite side.<br />
Your backing pieces will overlap in the<br />
center.<br />
Take care not to catch the loose edge of<br />
the ruffle piece.<br />
I used my standard sewing foot but you<br />
can use a walking foot if you prefer.<br />
Turn right sides out, press and insert the<br />
18” Fairfield Decorator’s Choice pillow form.<br />
Completed designer cushion back<br />
Thanks for joining me for this week’s<br />
project.<br />
I hope you enjoy your new designer<br />
cushion quilted with Gütermann Dekor<br />
rayon thread.<br />
I just know you’ll get many requests to<br />
say it with free motion quilting!<br />
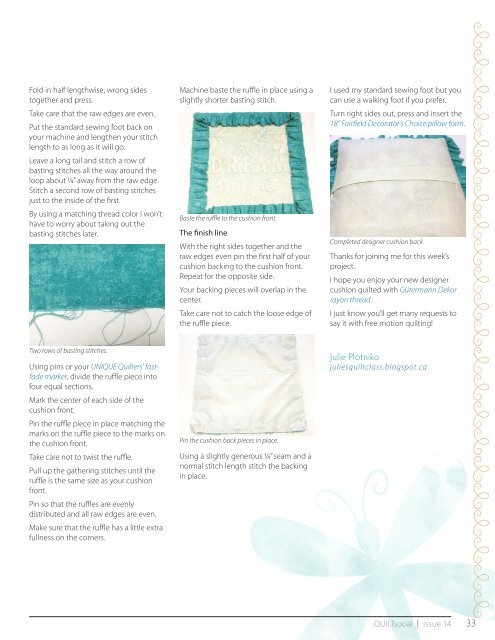
Two rows of basting stitches.<br />
Using pins or your UNIQUE Quilters’ fastfade<br />
marker, divide the ruffle piece into<br />
four equal sections.<br />
Mark the center of each side of the<br />
cushion front.<br />
Pin the ruffle piece in place matching the<br />
marks on the ruffle piece to the marks on<br />
the cushion front.<br />
Take care not to twist the ruffle.<br />
Pull up the gathering stitches until the<br />
ruffle is the same size as your cushion<br />
front.<br />
Pin so that the ruffles are evenly<br />
distributed and all raw edges are even.<br />
Make sure that the ruffle has a little extra<br />
fullness on the corners.<br />
Pin the cushion back pieces in place.<br />
Using a slightly generous ¼” seam and a<br />
normal stitch length stitch the backing<br />
in place.<br />
Julie Plotniko<br />
juliesquiltclass.blogspot.ca<br />
<strong>QUILTsocial</strong> | issue <strong>14</strong><br />
33


