Accela Pump Hardware Manual
Accela Pump Hardware Manual
Accela Pump Hardware Manual

You also want an ePaper? Increase the reach of your titles
YUMPU automatically turns print PDFs into web optimized ePapers that Google loves.
2 Installation<br />
Connecting the Low-Pressure Solvent Lines<br />
2. Place the label A sticker onto one of the four solvent reservoir bottle caps.<br />
3. Pass one end of the inlet line for solvent A through the solvent reservoir bottle cap<br />
labeled A. Terminate the inlet line with one of the solvent reservoir filters included in the<br />
system accessory kit (see Figure 10).<br />
Note Four Teflon end-of-line filters come with the <strong>Accela</strong> System Kit (Solvent<br />
Interconnect Kit). These filters thread onto the solvent lines. Only use non-metallic<br />
filters on solvent lines.<br />
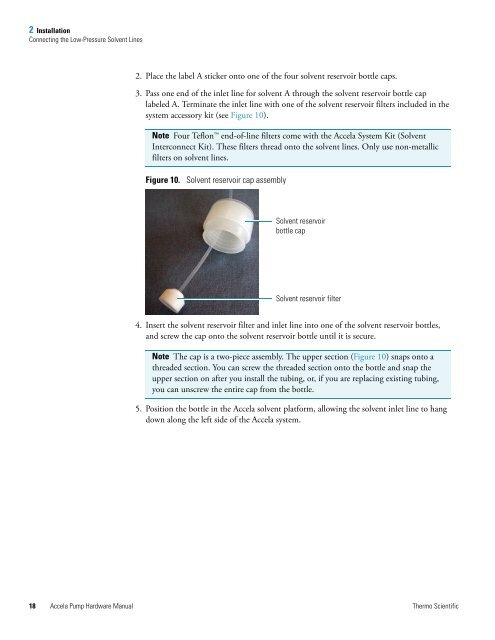
Figure 10. Solvent reservoir cap assembly<br />
Solvent reservoir<br />
bottle cap<br />
Solvent reservoir filter<br />
4. Insert the solvent reservoir filter and inlet line into one of the solvent reservoir bottles,<br />
and screw the cap onto the solvent reservoir bottle until it is secure.<br />
Note The cap is a two-piece assembly. The upper section (Figure 10) snaps onto a<br />
threaded section. You can screw the threaded section onto the bottle and snap the<br />
upper section on after you install the tubing, or, if you are replacing existing tubing,<br />
you can unscrew the entire cap from the bottle.<br />
5. Position the bottle in the <strong>Accela</strong> solvent platform, allowing the solvent inlet line to hang<br />
down along the left side of the <strong>Accela</strong> system.<br />
18 <strong>Accela</strong> <strong>Pump</strong> <strong>Hardware</strong> <strong>Manual</strong> Thermo Scientific