Bell & Howell - Projector - Filmosound 641 - 642 ... - Cine Information
Bell & Howell - Projector - Filmosound 641 - 642 ... - Cine Information
Bell & Howell - Projector - Filmosound 641 - 642 ... - Cine Information

Create successful ePaper yourself
Turn your PDF publications into a flip-book with our unique Google optimized e-Paper software.
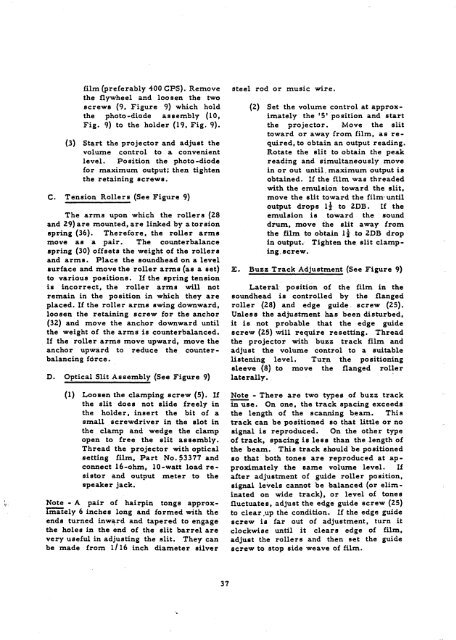
film (preferably 400 CPS). Remove<br />
the flywheel and loosen the two<br />
screws (9, Figure 9) which hold<br />
the photo-diode assembly (10,<br />
Fig. 9) to the holder (19, Fig. 9).<br />
(.3) Start the projector and adjust the<br />
volume control to a convenient<br />
level. Position the photo-diode<br />
for maximum output; then tighten<br />
the retaining screws.<br />
C. Tension Rollers (See Figure 9)<br />
The arms upon which the rollers (28<br />
and 29) are mounted, are linked by a torsion<br />
spring (36). Therefore, the roller arms<br />
move as a pair. The counterbalance<br />
spring (30) offsets the weight of the rollers<br />
and arms. Place the soundhead on a level<br />
surface and move the roller arms (as a set)<br />
to various positions. If the spring tension<br />
is incorrect, the roller arms will not<br />
remain in the position in which they are<br />
placed. If the roller arms swing downward,<br />
loosen the retaining screw for the anchor<br />
(32) and move the anchor downward until<br />
the weight of the arms is counterbalanced.<br />
If the roller arms move upward, move the<br />
anchor upward to reduce the counterbalancing<br />
force.<br />
D. Optical Slit Assembly (See Figure 9)<br />
(1) Loosen the clamping screw (5). If<br />
the slit does not slide freely in<br />
the holder, insert the bit of a<br />
small screwdriver in the slot in<br />
the clamp and wedge the clamp<br />
open to free the slit assembly.<br />
Thread the projector with optical<br />
setting film, Part No. 53377 and<br />
connect 16-ohm, 10-watt load resistor<br />
and output meter to the<br />
speaker jack.<br />
Note - A pair of hairpin tongs approximately<br />
6 inches long and formed with the<br />
ends turned inward and tapered to engage<br />
the holes in the end of the slit barrel are<br />
very useful in adjusting the slit. They can<br />
be made from 1 /16 inch diameter silver<br />
37<br />
steel rod or music wire.<br />
(2) Set the volume control at approximately<br />
the '5' position and start<br />
the projector. Move the slit<br />
toward or away from film, as required,<br />
to obtain an output reading.<br />
Rotate the slit to obtain the peak<br />
reading and simultaneously move<br />
in or out until, maximum output is<br />
obtained. If the film was threaded<br />
with the emulsion toward the slit,<br />
move the slit toward the film-until<br />
output drops if to 2DB. If the<br />
emulsion is toward the sound<br />
drum, move the slit away from<br />
the film to obtain ij to 2DB drop<br />
in output. Tighten the slit clamping,<br />
screw.<br />
E, Buzz Track Adjustment (See Figure 9)<br />
Lateral position of the film in the<br />
soundhead is controlled by the flanged<br />
roller (28) and edge guide, screw (25).<br />
Unless the adjustment has been disturbed,<br />
it is not probable that the edge guide<br />
screw (25) will require resetting. Thread<br />
the projector with buzz track film and<br />
adjust the volume control to a suitable<br />
listening level. Turn the positioning<br />
sleeve (8) to move the flanged roller<br />
laterally.<br />
Note - There are two types of buzz track<br />
in use. On one, the track spacing exceeds<br />
the length of the scanning beam. This<br />
track can be positioned so that little or no<br />
signal is reproduced. On the other type<br />
of track, spacing is less than the length of<br />
the beam. This track should be positioned<br />
so that both tones are reproduced at approximately<br />
the same volume level. If<br />
after adjustment of guide roller position,<br />
signal levels cannot be balanced (or eliminated<br />
on wide track), or level of tones<br />
fluctuates, adjust the edge guide screw (25)<br />
to clear up the condition. If the edge guide<br />
screw is far out of adjustment, turn it<br />
clockwise until it clears edge of film,<br />
adjust the rollers and then set the guide<br />
screw to stop side weave of film.