You also want an ePaper? Increase the reach of your titles
YUMPU automatically turns print PDFs into web optimized ePapers that Google loves.
VPS ASSEMBLY INSTRUCTIONS<br />
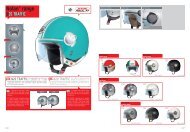
To assemble the VPS, open or disassemble the helmet visor and make sure the side<br />
slider is in upward position (Fig. 7B).<br />
Insert the VPS left end into the left side guide until the grip pawl is hooked in shell<br />
housing.<br />
Repeat the same steps on the right side (Fig. 9).<br />
Press the VPS slightly inwards near its upper grip pawl. At the same time press the<br />
VPS in the seat obtained between the outer and inner shells (Fig. 8).<br />
Push the VPS upwards, making sure that the side slider is moving upwards (Fig. 7B).<br />
Check the correct VPS operation by moving the left side slider downwards (Fig.<br />
7A) and upwards (Fig. 7B) until you hear the clicks meaning that it is in the relevant<br />
positions.<br />
If necessary, repeat the above-mentioned steps.<br />
- If the visor and/or VPS opening/closing mechanisms are damaged or malfunctioning,<br />
please contact a <strong>Nolan</strong> authorised dealer.<br />
- Do not use the helmet if the VPS has not been assembled properly.<br />
WARNING<br />
- The VPS doesn’t replace the protection guaranteed by the visor.<br />
• REMOVABLE INNER COMFORT PADDING<br />
1 DISASSEMBLY<br />
1 Open the chin strap (see specific instructions), remove the roll-neck flap from the<br />
cheek pad (Fig. 10), pull the front part of the left cheek pad towards the inside of<br />
the helmet and pull out the left fastening chin strap from the slot on the cheek pad<br />
(Fig. 11). Repeat the same operation on the right side of the helmet.<br />
2 Release the roll-neck eyelet from the frame fixed to the outer shell (Fig. 12).<br />
3 Release the left rear fastening flap from the support fixed to the inner shell by<br />
slightly deforming the shell sealing edge and slightly pulling the comfort padding<br />
in the helmet neck-ring area towards the inside (Fig. 13).<br />
Then repeat the same steps to remove the central flap as well as the right rear<br />
flap.<br />
4 Hold the left front part of the liner and pull it upwards in order to remove the liner<br />
flap from the support fixed to the inner polystyrene shell (Fig. 14). Repeat the<br />
same steps to remove the central and right front flap.<br />
5 Completely remove the liner from the helmet.<br />
2 ASSEMBLY<br />
2.1 Insert the liner correctly into the helmet and fit it well against the base.<br />
2.2 Insert the left front flap into the seat on the support fixed to the polystyrene inner<br />
shell and push it slightly downwards until it is completely locked (Fig. 14). Follow<br />
the same steps for the central and right front flap.<br />
17


