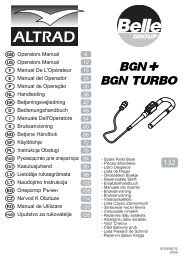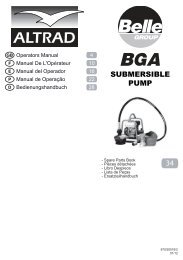
Operators Manual Operators Manual Manuel De L ... - Belle Group
Operators Manual Operators Manual Manuel De L ... - Belle Group
Operators Manual Operators Manual Manuel De L ... - Belle Group

Create successful ePaper yourself
Turn your PDF publications into a flip-book with our unique Google optimized e-Paper software.
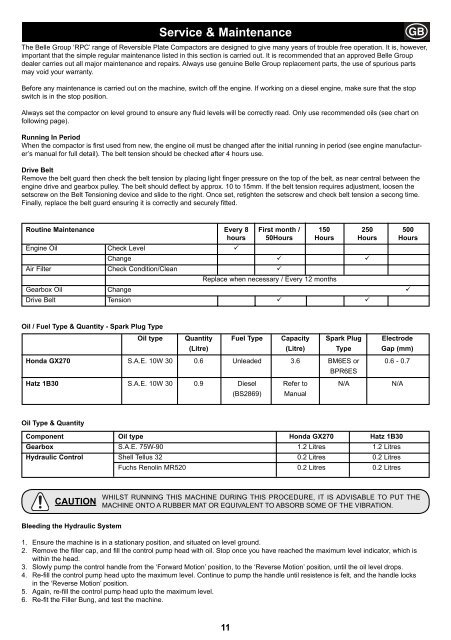
Service & Maintenance<br />
GB<br />
The <strong>Belle</strong> <strong>Group</strong> ‘RPC’ range of Reversible Plate Compactors are designed to give many years of trouble free operation. It is, however,<br />
important that the simple regular maintenance listed in this section is carried out. It is recommended that an approved <strong>Belle</strong> <strong>Group</strong><br />
dealer carries out all major maintenance and repairs. Always use genuine <strong>Belle</strong> <strong>Group</strong> replacement parts, the use of spurious parts<br />
may void your warranty.<br />
Before any maintenance is carried out on the machine, switch off the engine. If working on a diesel engine, make sure that the stop<br />
switch is in the stop position.<br />
Always set the compactor on level ground to ensure any uid levels will be correctly read. Only use recommended oils (see chart on<br />
following page).<br />
Running In Period<br />
When the compactor is rst used from new, the engine oil must be changed after the initial running in period (see engine manufacturer’s<br />
manual for full detail). The belt tension should be checked after 4 hours use.<br />
Drive Belt<br />
Remove the belt guard then check the belt tension by placing light nger pressure on the top of the belt, as near central between the<br />
engine drive and gearbox pulley. The belt should deect by approx. 10 to 15mm. If the belt tension requires adjustment, loosen the<br />
setscrew on the Belt Tensioning device and slide to the right. Once set, retighten the setscrew and check belt tension a secong time.<br />
Finally, replace the belt guard ensuring it is correctly and securely tted.<br />
Routine Maintenance Every 8 First month / 150 250 500<br />
hours 50Hours Hours Hours Hours<br />
Engine Oil Check Level <br />
Change <br />
Air Filter Check Condition/Clean <br />
Replace when necessary / Every 12 months<br />
Gearbox Oil Change <br />
Drive Belt Tension <br />
Oil / Fuel Type & Quantity - Spark Plug Type<br />
Oil type Quantity Fuel Type Capacity Spark Plug Electrode<br />
(Litre) (Litre) Type Gap (mm)<br />
Honda GX270 S.A.E. 10W 30 0.6 Unleaded 3.6 BM6ES or 0.6 - 0.7<br />
BPR6ES<br />
Hatz 1B30 S.A.E. 10W 30 0.9 Diesel Refer to N/A N/A<br />
(BS2869) <strong>Manual</strong><br />
Oil Type & Quantity<br />
Component Oil type Honda GX270 Hatz 1B30<br />
Gearbox S.A.E. 75W-90 1.2 Litres 1.2 Litres<br />
Hydraulic Control Shell Tellus 32 0.2 Litres 0.2 Litres<br />
Fuchs Renolin MR520 0.2 Litres 0.2 Litres<br />
CAUTION<br />
WHILST RUNNING THIS MACHINE DURING THIS PROCEDURE, IT IS ADVISABLE TO PUT THE<br />
MACHINE ONTO A RUBBER MAT OR EQUIVALENT TO ABSORB SOME OF THE VIBRATION.<br />
Bleeding the Hydraulic System<br />
1. Ensure the machine is in a stationary position, and situated on level ground.<br />
2. Remove the ller cap, and ll the control pump head with oil. Stop once you have reached the maximum level indicator, which is<br />
within the head.<br />
3. Slowly pump the control handle from the ‘Forward Motion’ position, to the ‘Reverse Motion’ position, until the oil level drops.<br />
4. Re-ll the control pump head upto the maximum level. Continue to pump the handle until resistence is felt, and the handle locks<br />
in the ‘Reverse Motion’ position.<br />
5. Again, re-ll the control pump head upto the maximum level.<br />
6. Re-t the Filler Bung, and test the machine.<br />
11