

Sony DSC-TX9 - DSC-TX9 Istruzioni per l'uso Inglese
Sony DSC-TX9 - DSC-TX9 Istruzioni per l'uso Inglese
Sony DSC-TX9 - DSC-TX9 Istruzioni per l'uso Inglese

You also want an ePaper? Increase the reach of your titles
YUMPU automatically turns print PDFs into web optimized ePapers that Google loves.
Receiving images using TransferJet<br />
1 Press the (Playback) button to turn on the camera.<br />
2 Closely align the (TransferJet) marks on the camera and sending<br />
device to receive images.<br />
A notification sound is emitted when connection is made.<br />
Notes<br />
• Only images that can be played back on the camera can be sent or received.<br />
• This camera can receive only JPEG and MPO files.<br />
• If an Image Database File error occurs during saving, a Recover Image Database File screen will appear.<br />
• Play images that cannot be registered in the Image Database File using [Folder view (Still)].<br />
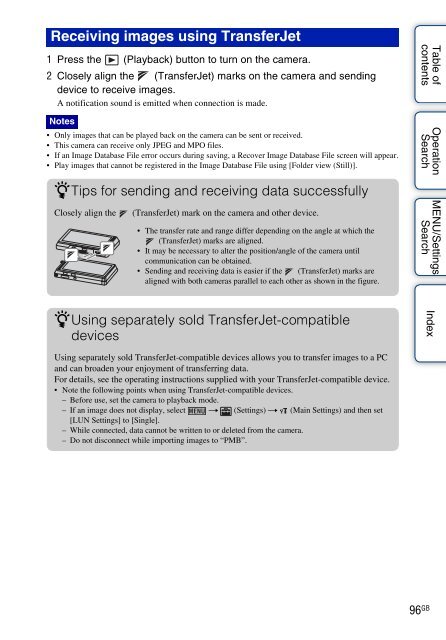
zTips for sending and receiving data successfully<br />
Closely align the<br />
(TransferJet) mark on the camera and other device.<br />
• The transfer rate and range differ depending on the angle at which the<br />
(TransferJet) marks are aligned.<br />
• It may be necessary to alter the position/angle of the camera until<br />
communication can be obtained.<br />
• Sending and receiving data is easier if the (TransferJet) marks are<br />
aligned with both cameras parallel to each other as shown in the figure.<br />
Table of<br />
contents<br />
O<strong>per</strong>ation<br />
Search<br />
MENU/Settings<br />
Search<br />
zUsing separately sold TransferJet-compatible<br />
devices<br />
Index<br />
Using separately sold TransferJet-compatible devices allows you to transfer images to a PC<br />
and can broaden your enjoyment of transferring data.<br />
For details, see the o<strong>per</strong>ating instructions supplied with your TransferJet-compatible device.<br />
• Note the following points when using TransferJet-compatible devices.<br />
– Before use, set the camera to playback mode.<br />
– If an image does not display, select t (Settings) t (Main Settings) and then set<br />
[LUN Settings] to [Single].<br />
– While connected, data cannot be written to or deleted from the camera.<br />
– Do not disconnect while importing images to “PMB”.<br />
96 GB


