DSR 9900 PVR - Radix
DSR 9900 PVR - Radix
DSR 9900 PVR - Radix

Erfolgreiche ePaper selbst erstellen
Machen Sie aus Ihren PDF Publikationen ein blätterbares Flipbook mit unserer einzigartigen Google optimierten e-Paper Software.
Further details of the above mentioned recording functions are described in this manual.<br />
note: Recording of copyright protected TV and radio program material is permitted only for personal use.<br />
In order to avoid infringements of copyright laws please observe the existing regulations in your<br />
country.<br />
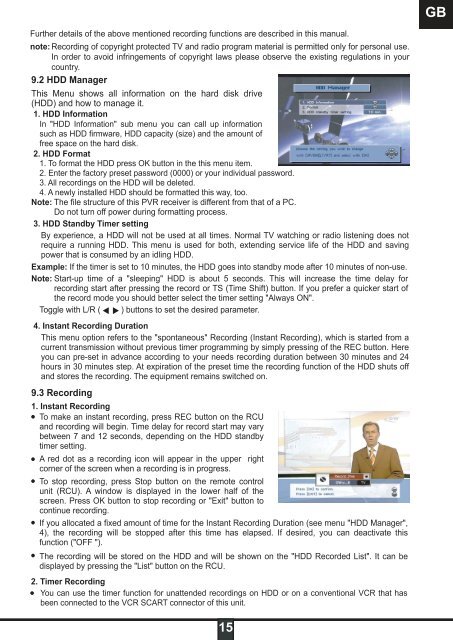
9.2 HDD Manager<br />
This Menu shows all information on the hard disk drive<br />
(HDD) and how to manage it.<br />
1. HDD Information<br />
In "HDD Information" sub menu you can call up information<br />
such as HDD firmware, HDD capacity (size) and the amount of<br />
free space on the hard disk.<br />
2. HDD Format<br />
1. To format the HDD press OK button in the this menu item.<br />
2. Enter the factory preset password (0000) or your individual password.<br />
3. All recordings on the HDD will be deleted.<br />
4. A newly installed HDD should be formatted this way, too.<br />
Note: The file structure of this <strong>PVR</strong> receiver is different from that of a PC.<br />
Do not turn off power during formatting process.<br />
3. HDD Standby Timer setting<br />
By experience, a HDD will not be used at all times. Normal TV watching or radio listening does not<br />
require a running HDD. This menu is used for both, extending service life of the HDD and saving<br />
power that is consumed by an idling HDD.<br />
Example: If the timer is set to 10 minutes, the HDD goes into standby mode after 10 minutes of non-use.<br />
Note: Start-up time of a "sleeping" HDD is about 5 seconds. This will increase the time delay for<br />
recording start after pressing the record or TS (Time Shift) button. If you prefer a quicker start of<br />
the record mode you should better select the timer setting "Always ON".<br />
Toggle with L/R ( ) buttons to set the desired parameter.<br />
4. Instant Recording Duration<br />
This menu option refers to the "spontaneous" Recording (Instant Recording), which is started from a<br />
current transmission without previous timer programming by simply pressing of the REC button. Here<br />
you can pre-set in advance according to your needs recording duration between 30 minutes and 24<br />
hours in 30 minutes step. At expiration of the preset time the recording function of the HDD shuts off<br />
and stores the recording. The equipment remains switched on.<br />
9.3 Recording<br />
1. Instant Recording<br />
To make an instant recording, press REC button on the RCU<br />
and recording will begin. Time delay for record start may vary<br />
between 7 and 12 seconds, depending on the HDD standby<br />
timer setting.<br />
A red dot as a recording icon will appear in the upper right<br />
corner of the screen when a recording is in progress.<br />
To stop recording, press Stop button on the remote control<br />
unit (RCU). A window is displayed in the lower half of the<br />
screen. Press OK button to stop recording or "Exit" button to<br />
continue recording.<br />
If you allocated a fixed amount of time for the Instant Recording Duration (see menu "HDD Manager",<br />
4), the recording will be stopped after this time has elapsed. If desired, you can deactivate this<br />
function ("OFF ").<br />
The recording will be stored on the HDD and will be shown on the "HDD Recorded List". It can be<br />
displayed by pressing the "List" button on the RCU.<br />
2. Timer Recording<br />
You can use the timer function for unattended recordings on HDD or on a conventional VCR that has<br />
been connected to the VCR SCART connector of this unit.<br />
15<br />
GB