DSR 9900 PVR - Radix
DSR 9900 PVR - Radix
DSR 9900 PVR - Radix

Erfolgreiche ePaper selbst erstellen
Machen Sie aus Ihren PDF Publikationen ein blätterbares Flipbook mit unserer einzigartigen Google optimierten e-Paper Software.
GB<br />
You also can use the timer function for automatically switching your receiver ON / OFF or changing the<br />
TV program at a preset time in case you don't want to miss the start of a program but want to watch<br />
another channel until then.<br />
The timer function allows you to set up a list with all the required timer settings in which you can enter<br />
the date and time for the receiver to be switched on and off, the program and if necessary daily or<br />
weekly repeat of each switching operation.<br />
If you are currently watching a program and timer switching operation is pending, the receiver reminds<br />
you by overlaying a massage that the timer switching operation will take place in one minute. When this<br />
time is reached, the receiver switches over to the required channel and REC is displayed on the front<br />
display. After the preset time has expired, the receiver switches back to the original channel.<br />
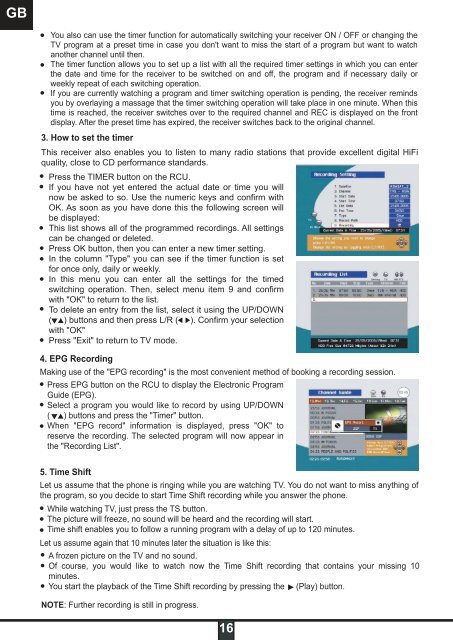
3. How to set the timer<br />
This receiver also enables you to listen to many radio stations that provide excellent digital HiFi<br />
quality, close to CD performance standards.<br />
Press the TIMER button on the RCU.<br />
If you have not yet entered the actual date or time you will<br />
now be asked to so. Use the numeric keys and confirm with<br />
OK. As soon as you have done this the following screen will<br />
be displayed:<br />
This list shows all of the programmed recordings. All settings<br />
can be changed or deleted.<br />
Press OK button, then you can enter a new timer setting.<br />
In the column "Type" you can see if the timer function is set<br />
for once only, daily or weekly.<br />
In this menu you can enter all the settings for the timed<br />
switching operation. Then, select menu item 9 and confirm<br />
with "OK" to return to the list.<br />
To delete an entry from the list, select it using the UP/DOWN<br />
( ) buttons and then press L/R ( ). Confirm your selection<br />
with "OK"<br />
Press "Exit" to return to TV mode.<br />
4. EPG Recording<br />
Making use of the "EPG recording" is the most convenient method of booking a recording session.<br />
Press EPG button on the RCU to display the Electronic Program<br />
Guide (EPG).<br />
Select a program you would like to record by using UP/DOWN<br />
( ) buttons and press the "Timer" button.<br />
When "EPG record" information is displayed, press "OK" to<br />
reserve the recording. The selected program will now appear in<br />
the "Recording List".<br />
5. Time Shift<br />
Let us assume that the phone is ringing while you are watching TV. You do not want to miss anything of<br />
the program, so you decide to start Time Shift recording while you answer the phone.<br />
While watching TV, just press the TS button.<br />
The picture will freeze, no sound will be heard and the recording will start.<br />
Time shift enables you to follow a running program with a delay of up to 120 minutes.<br />
Let us assume again that 10 minutes later the situation is like this:<br />
A frozen picture on the TV and no sound.<br />
Of course, you would like to watch now the Time Shift recording that contains your missing 10<br />
minutes.<br />
You start the playback of the Time Shift recording by pressing the (Play) button.<br />
NOTE: Further recording is still in progress.<br />
16