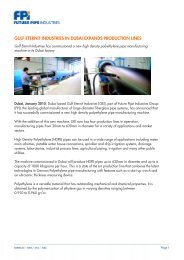
Untitled - Future Pipe Industries
Untitled - Future Pipe Industries
Untitled - Future Pipe Industries

Create successful ePaper yourself
Turn your PDF publications into a flip-book with our unique Google optimized e-Paper software.
7.7.2: Final test (method 2)<br />
After the completion of the hydrostatic test on each individual coupling and after backfilling has been achieved, a final hydrostatic<br />
test shall be applied to the whole length of the pipeline in accordance with section 7.6<br />
7.8: <strong>Pipe</strong>line commissioning<br />
After completing the hydraulic test, the line must be thoroughly flushed out and disinfected (in case of potable water lines),<br />
as specified by the engineer or local regulations. In the absence of any such regulations, the following guidelines may be followed.<br />
Disinfecting potable water lines is normally performed using either of the following chemical mediums:<br />
• Liquid Chlorine<br />
• Sodium Hypochlorite solution<br />
• Calcium Hypochlorite granules or tables<br />
This gives a solution containing at least 20 to 25 mg/l of free chlorine initially. The disinfecting period is normally 24 hours<br />
after which the residual chlorine should not be less than 10 mg/l. After the 24 hour disinfecting period, the line is flushed<br />
and filled with potable water.<br />
When commissioning a pipeline, first ensure that all air valves are fully opened to release entrapped air. Fill the line very<br />
slowly and evenly at velocities not exceeding 1 ft/s. Do not open valves quickly and fully during filling. After releasing all<br />
air, close air valves and hydrants and open inlet valve fully. If the line is coupled to a pump, the inlet valve should be closed<br />
when the pump starts running. Later on, the inlet valve shall be opened slowly. The discharge valve should be closed slowly<br />
before shutting down the pump.<br />
7.9: Pressure testing gravity lines<br />
Two methods are available for testing gravity lines, a low-pressure air test or a low head water test.<br />
7.9.1: Air test<br />
The Contractor should plug both ends of the pipeline section (between two manholes) with suitable plugs. The plugs should<br />
have connections for air and a manometer or air pressure gauge. Air shall be pumped into the line until a pressure of 3.5<br />
psig is indicated on the manometer or air pressure gauge. After a 5 minute stabilization period, air may be added to restore<br />
the pressure up to 3.5 psi gage. During the test period shown in table 13 (in minutes), if the pressure drop does not exceed<br />
0.5 psi, the line shall be considered as having passed the air test.<br />
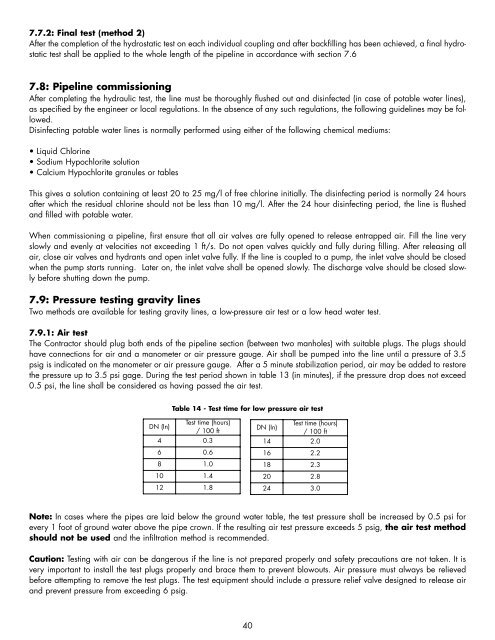
Table 14 - Test time for low pressure air test<br />
Test time (hours)<br />
DN (In)<br />
/ 100 ft<br />
4 0.3<br />
6 0.6<br />
8 1.0<br />
10 1.4<br />
12 1.8<br />
DN (In)<br />
Test time (hours)<br />
/ 100 ft<br />
14 2.0<br />
16 2.2<br />
18 2.3<br />
20 2.8<br />
24 3.0<br />
Note: In cases where the pipes are laid below the ground water table, the test pressure shall be increased by 0.5 psi for<br />
every 1 foot of ground water above the pipe crown. If the resulting air test pressure exceeds 5 psig, the air test method<br />
should not be used and the infiltration method is recommended.<br />
Caution: Testing with air can be dangerous if the line is not prepared properly and safety precautions are not taken. It is<br />
very important to install the test plugs properly and brace them to prevent blowouts. Air pressure must always be relieved<br />
before attempting to remove the test plugs. The test equipment should include a pressure relief valve designed to release air<br />
and prevent pressure from exceeding 6 psig.<br />
40