Semaphore WebForm Studio Manual - ioSelect
Semaphore WebForm Studio Manual - ioSelect
Semaphore WebForm Studio Manual - ioSelect

You also want an ePaper? Increase the reach of your titles
YUMPU automatically turns print PDFs into web optimized ePapers that Google loves.
<strong>WebForm</strong> <strong>Studio</strong><br />
Getting started
Disclaimer<br />
Every effort has been made to ensure the accuracy of the information in this guide. However,<br />
SEMAPHORE assumes no responsibility for the accuracy of the information. Product information is<br />
subject to change without notice.<br />
For any question, contact support@cse-semaphore.com.<br />
<strong>WebForm</strong> <strong>Studio</strong>, T, TWinSoft and A are registered trademark of SEMAPHORE.<br />
Windows ’98, 2000, XP, 2003 are trademark of Microsoft Corp.<br />
Internet Explorer & Front Page Express are trademark of Microsoft Corp.<br />
Excel is trademark of Microsoft Corp.<br />
Copyright<br />
© 2000-2008 by<br />
Chaussée de Bruxelles, 732a<br />
B-1410 Waterloo<br />
Edition: April 14, 2008<br />
Version <strong>WebForm</strong> <strong>Studio</strong>: 10.00<br />
Author: Jean Burton<br />
<strong>WebForm</strong> <strong>Studio</strong> 10.00 - Getting Started 2
Table of Contents<br />
1. INTRODUCTION..........................................................................................................................5<br />
1.1. THIS MANUAL ............................................................................................................................7<br />
2. STARTING WEBFORM STUDIO ..............................................................................................8<br />
2.1. SYSTEM REQUIREMENTS.............................................................................................................8<br />
2.2. STARTING FROM TWINSOFT.......................................................................................................9<br />
2.3. STARTING FROM 'START' MENU ..................................................................................................9<br />
2.4. FILES: .TWF , .HTM, TEMPLATE.............................................................................................13<br />
2.4.1. The Template..................................................................................................................................13<br />
3. CREATING A WEBFORM........................................................................................................15<br />
3.1. FORM PROPERTIES ....................................................................................................................15<br />
4. CREATING OBJECTS ...............................................................................................................16<br />
4.1. TEXT ........................................................................................................................................17<br />
4.2. BUTTON....................................................................................................................................18<br />
4.3. DYNAMIC LABELS ....................................................................................................................20<br />
4.3.1. 'General' properties .......................................................................................................................21<br />
4.3.2. 'Format' properties.........................................................................................................................22<br />
4.3.3. 'Appearance' properties .................................................................................................................23<br />
4.3.4. 'Write' properties............................................................................................................................24<br />
4.4. GRID.........................................................................................................................................25<br />
4.4.1. General configuration....................................................................................................................26<br />
4.4.2. Column configuration ....................................................................................................................27<br />
4.5. TABLE OF ALARMS...................................................................................................................29<br />
4.5.1. 'List of Alarms' properties..............................................................................................................30<br />
4.6. CHART......................................................................................................................................31<br />
4.6.1. General configuration....................................................................................................................32<br />
4.6.2. Configuring an historic..................................................................................................................33<br />
4.6.3. Download .......................................................................................................................................33<br />
4.6.4. Toolbar of a chart ..........................................................................................................................34<br />
4.6.5. Data View / Export.........................................................................................................................35<br />
4.7. DYNAMIC CHRONOLOGY LIST..................................................................................................36<br />
4.7.1. Configuration in TWinSoft .............................................................................................................37<br />
4.7.2. Configuration of the dynamic chronology .....................................................................................38<br />
4.8. DYNAMIC SAMPLING LIST........................................................................................................39<br />
4.8.1. Sampling Table Toolbar.................................................................................................................39<br />
<strong>WebForm</strong> <strong>Studio</strong> 10.00 - Getting Started 3
4.9. TIMER ...................................................................................................................................... 40<br />
4.9.1. Timer configuration........................................................................................................................40<br />
4.9.2. Script ..............................................................................................................................................40<br />
5. CATALOGUE.............................................................................................................................. 41<br />
5.1. OPEN A CATALOGUE................................................................................................................. 41<br />
5.2. IMPORT OF AN OBJECT INTO A CATALOGUE .............................................................................. 42<br />
5.3. RENAME AN OBJECT IN A CATALOGUE...................................................................................... 42<br />
5.4. EXPORT OF AN OBJECT FROM A CATALOGUE ............................................................................ 42<br />
6. ACCESS PROTECTION............................................................................................................43<br />
6.1. LOGIN ...................................................................................................................................... 43<br />
6.1.1. TCP/IP connection .........................................................................................................................43<br />
6.1.2. With <strong>WebForm</strong> <strong>Studio</strong> ....................................................................................................................43<br />
6.2. DISPLAY ACCESS LEVEL ........................................................................................................... 43<br />
6.2.1. Simulation of Display access levels................................................................................................43<br />
6.3. WRITE ACCESS LEVEL .............................................................................................................. 44<br />
7. COMMUNICATION................................................................................................................... 45<br />
7.1. COMMUNICATION WHILE EDITING ............................................................................................ 45<br />
7.1.1. Simulation from the <strong>WebForm</strong> <strong>Studio</strong> ............................................................................................46<br />
7.1.2. Simulation from Internet Explorer .................................................................................................46<br />
7.2. LOCAL COMMUNICATION ......................................................................................................... 47<br />
7.2.1. Installation on the PC. ...................................................................................................................47<br />
7.3. DIAL-UP COMMUNICATION....................................................................................................... 48<br />
7.3.1. PC not equipped with TWinSoft .....................................................................................................48<br />
7.3.2. PC equipped with TWinSoft ...........................................................................................................48<br />
8. TBOX DIAL IT !.......................................................................................................................... 49<br />
8.1. INSTALLATION.......................................................................................................................... 49<br />
8.2. STARTING TBOX DIAL IT ! ....................................................................................................... 49<br />
8.3. CONFIGURATION ...................................................................................................................... 50<br />
8.3.1. ‘Dial’ page .....................................................................................................................................50<br />
8.3.2. ‘Address Book’ page ......................................................................................................................51<br />
8.3.3. The file PhoneBook.dat ..................................................................................................................51<br />
8.4. DIALING TBOX......................................................................................................................... 52<br />
8.5. ADVANCED USE OF TBOX DIAL IT!.......................................................................................... 54<br />
<strong>WebForm</strong> <strong>Studio</strong> 10.00 - Getting Started 4
1. Introduction<br />
TBox is Internet compatible.<br />
One of the most important feature of A is the TCP/IP protocol as an embedded protocol;<br />
without any supplementary software, making the A a real Web Server. It is also able to<br />
send e-mail and files to a FTP site.<br />
All models of A RTU acts as WebServer: CPU3, TBox-MS, TBox-LITE, and TBox-<br />
LowPower<br />
Internet Explorer<br />
Modem - PSTN<br />
TA - ISDN<br />
Example through direct dial-up modem<br />
ISP<br />
W.W.W<br />
Example through Internet<br />
"PUBLIC" IP address<br />
ADSL<br />
Internet Explorer<br />
Router<br />
HTM<br />
HTM<br />
HTM<br />
pages<br />
pages<br />
pages<br />
HTM<br />
HTM pages<br />
HTM pages<br />
pages<br />
HUB<br />
"PRIVATE" IP address<br />
<strong>WebForm</strong> <strong>Studio</strong> 10.00 - Getting Started 5
The 3 Internet features that A offers:<br />
• Web Server<br />
A contains HTML pages and is directly accessible from any Internet Browser. The HTML<br />
pages must be created with a specific HTML editor, dedicated to A: the <strong>WebForm</strong><br />
<strong>Studio</strong>. It can be started from the folder ‘Web & Report files’ from the Project workspace of<br />
TWinSoft.<br />
Any files can be associated to the HTML pages (.GIF, .JPEG, .BMP, …) knowing that the more<br />
you will put into the image, the longer downloading image will be. Think of it when<br />
communicating through modem.<br />
• E-mail<br />
A is able to send e-mail, with a text message or a full report and an attached file with data<br />
logging. Sending of e-mail is launched with an alarm condition and a specific alarm recipient.<br />
You need to subscribe an e-mail account to a local ISP.<br />
The reports are created directly from TWinSoft from the folder ‘Web & Report files’.<br />
If A is configured to do data logging, the data are sent together with the e-mail as an<br />
attached file. This file represents an image of the A memory (with its configuration and its<br />
data).<br />
It can be used directly in an e-mail or collected by T to update an historical database.<br />
• FTP<br />
A is able to send a file to a FTP site on an alarm condition with the help of a specific<br />
alarm recipient.<br />
The idea is to refresh, on a regular base a FTP site with HTML pages of the A.<br />
Afterwards, anyone can visit the site with a Browser (in HTTP) to display the situation of each<br />
A.<br />
You are then able to build your own Portal of A stations.<br />
T can also collect data sent by A using FTP.<br />
To understand exactly what are the A capabilities, related to Internet, you can read the<br />
manual ‘TBox & Internet’. Please call your distributor, or go to the Web Site: www.tbox.biz<br />
page ‘Support’.<br />
<strong>WebForm</strong> <strong>Studio</strong> 10.00 - Getting Started 6
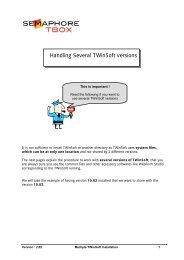
1.1. This <strong>Manual</strong><br />
This manual relates to the Web Server functionality and to the creation of HTML pages. The<br />
tool used is the <strong>WebForm</strong> <strong>Studio</strong>, and it can be used for all models or A RTU: CPU3,<br />
TBox-MS, TBox-LITE, and TBox-LowPower. For making reading easy, we’ll mention A<br />
all along the manual.<br />
At chapter 8 of this manual, TBox Dial It ! utility is presented. It makes dialing and connection<br />
very easy.<br />
A good knowledge of TWinSoft is required to the understanding of <strong>WebForm</strong><br />
configuration.<br />
This manual explains how to create HTML pages dedicated to A. A HTML page sent to<br />
A is made of a ‘Form’ and a ‘Template’. Both are combined by the <strong>WebForm</strong> <strong>Studio</strong> to<br />
form the final A .HTM page.<br />
The <strong>WebForm</strong> <strong>Studio</strong> allows creating ‘<strong>WebForm</strong>s’ (equivalent to ‘Forms’ in programming<br />
languages).<br />
On the 'Form' you will place pre-defined objects, A oriented, that will display the<br />
situation of your process, and will let you monitor the A. It can be under the form of<br />
digital 'Color spots', buttons, display of analog values, …<br />
The display of a chart and of a list of the A alarms is also available.<br />
The 'Template' is the background page on which the 'Form' is placed. It contains general<br />
information like background color, logo, …A Template is not indispensable, but if needed must<br />
be created with a standard HTML editor.<br />
Demo applications are installed in the sub-directory of TWinSoft \Samples\<br />
<strong>WebForm</strong> <strong>Studio</strong> 10.00 - Getting Started 7
2. Starting <strong>WebForm</strong> <strong>Studio</strong><br />
2.1. System requirements<br />
• For TWinSoft:<br />
Hardware: Pentium or higher.<br />
Memory: 16-MB minimum. We recommend 32 MB.<br />
Hard Disk: 50 MB required plus the application files.<br />
Display: VGA, SVGA with a minimum resolution of 640 x 480. We recommend 800 x 600.<br />
Mouse: any Windows compatible mouse.<br />
Parallel port: required in case of parallel dongle license.<br />
USB port: required in case of USB dongle license.<br />
Serial port: required for a local connection to A or for an external modem.<br />
Modem: any modem properly configured in Windows.<br />
Operating system: Windows ’98, 2000, XP, 2003.<br />
• To Browse A:<br />
Internet Browser: as ActiveX is used, Microsoft Internet Explorer (MSIE) only can be used.<br />
TBox Dial It ! needs version 5.00 or higher.<br />
The CD-ROM of TWinSoft includes MSIE version 5.00<br />
<strong>WebForm</strong> <strong>Studio</strong> 10.00 - Getting Started 8
The <strong>WebForm</strong> <strong>Studio</strong> can be started on 2 ways:<br />
2.2. Starting from TWinSoft<br />
In the folder ‘Web & Report files’ of the Project workspace, you click ‘Add a Web or Report<br />
file’. Select the option ‘New Web form’.<br />
You give a name (with A CPU3, long names are authorized as of OS 54xx) and save<br />
in order to create the HTML page.<br />
This action creates 2 files, a .TWF and a .HTM (see chapter 2.4. Files: .TWF, .HTM,<br />
Template).<br />
Example: creation of the Form 'Test':<br />
Clicking the .TWF file automatically starts the <strong>WebForm</strong> <strong>Studio</strong> .<br />
Clicking the .HTM file automatically starts the Internet Browser installed on your PC.<br />
2.3. Starting from 'Start' menu<br />
A shortcut <strong>WebForm</strong> <strong>Studio</strong> is installed in the group of programs where TWinSoft has been<br />
installed. The default group is ‘Techno Trade’.<br />
<strong>WebForm</strong> <strong>Studio</strong> 10.00 - Getting Started 9
Catalogue<br />
Standard<br />
Objects<br />
VU meter<br />
Set Point<br />
<strong>WebForm</strong> <strong>Studio</strong> 10.00 - Getting Started 10<br />
FORM<br />
Hyperlink<br />
Color<br />
Spots
This page is blank<br />
<strong>WebForm</strong> <strong>Studio</strong> 10.00 - Getting Started 11
The picture of page 10 shows the main features of the <strong>WebForm</strong> <strong>Studio</strong>:<br />
• The Form (see chapter 3: ‘Creating a Form’).<br />
• The list of your pre-defined objects (button, color spots, VU meter, Gauge, …, see chapter 4:<br />
‘Creating objects’).<br />
• The catalogue of custom objects. You can create your own catalogues with your proper<br />
objects (or group of objects, see chapter 5: ‘Catalogues’).<br />
• On-line editing capabilities. While editing a 'Form', you see the values 'on line'.<br />
Other feature available:<br />
• On-line simulation of the display with ‘Microsoft Internet Explorer’ (see chapter 7:<br />
‘Communication’).<br />
<strong>WebForm</strong> <strong>Studio</strong> 10.00 - Getting Started 12
2.4. Files: .TWF , .HTM, Template.<br />
When saving a ‘'Form’ with the <strong>WebForm</strong> <strong>Studio</strong>, 2 files are created:<br />
• the .TWF: which contains all the definitions of the ‘'Form’. It represents the link to the<br />
A. It is composed of texts and objects linked to the variables of A.<br />
• the .HTM: which contains all that must be displayed. It includes a reference to a .TWF, to a<br />
Template if defined, to possible .GIF, .BMP, …<br />
2.4.1. The Template<br />
The Template is the background of the .HTM pages sent to A. It is associated to the 'Form'<br />
(see chapter 3: ‘Creating a Form’), meaning the ‘Form’ will be placed on the Template.<br />
The Template is a standard HTML file created with a standard HTML editor.<br />
The Template includes general information that should be displayed on every .HTM page, like a<br />
background color, the logo of your company, title, text, hyperlink,…any information that will be<br />
in the final .HTM page sent to A.<br />
At the place where you wish the ‘Form’ to be inserted, you must type a specific notification:<br />
• %TBOX_FORM% (or %WEB_FORM%): will be replaced by the ‘Form’.<br />
The title of the 'Form' can also be displayed with the help of the notification:<br />
• %TITLE%: At the position where it is typed, the title of the ‘Form’ will appear. It can also<br />
be typed as ‘title’ in the properties of the Page in order to display the title of the current<br />
‘Form’ in the Title bar of the Internet Browser (see next).<br />
Example of a Template:<br />
<strong>WebForm</strong> <strong>Studio</strong> 10.00 - Getting Started 13
This Template is created with ‘Front Page Express’. It includes a A logo (.GIF file) and a<br />
blue background (.GIF file).<br />
All the external files used in the Template must be added to the folder of ‘Web & Report<br />
files’ in order to be sent together with the HTM files to the A. The Template file must not<br />
be added to the list ‘Web & Report file’.<br />
At the place of %TBOX_FORM% the ‘Form’ will be displayed.<br />
At the place of %TITLE% the title of the ‘Form’ will be displayed.<br />
Example of properties of the template (Page properties):<br />
In the ‘Title’ field, you type any text including %TITLE%. In this way, the title of the ‘Form’<br />
will be available in the 'Title bar' of your Internet Browser and displayed in the ‘History’ list.<br />
The HTML pages must end with extension .HTM.<br />
<strong>WebForm</strong> <strong>Studio</strong> 10.00 - Getting Started 14
3. Creating a <strong>WebForm</strong><br />
A ‘<strong>WebForm</strong>’ can be created on 2 ways:<br />
• As mentioned in chapter 2.2 ‘Starting from TWinSoft’ by adding a Form in the folder of<br />
'Web & Report files'.<br />
• From the <strong>WebForm</strong> <strong>Studio</strong>, click on ‘File’ ‘New’ or from the main toolbar, click the<br />
icon .<br />
Clicking a .TWF file from the ‘Web & Report files’ folder automatically opens the<br />
<strong>WebForm</strong> <strong>Studio</strong> with the associated ‘Form’.<br />
3.1. Form properties<br />
Before inserting objects in the ‘Form’, you have to configure the properties of the ‘Form’:<br />
• Form Title: name that will appear in the Title bar of the Form. It is also the name that will<br />
replace the notification %TITLE% defined in the Template.<br />
• Default station file (*.tws): in order to display values or status of the A, we associate<br />
the TWinSoft document to the ‘Form’ This gives you direct access to the Tags of the<br />
TWinSoft document (see chapter 4: ‘Creating objects’).<br />
The reference to a TWinSoft document is also needed to establish communication with a<br />
A.<br />
• HTML Template file: The template associated to the ‘Form’. The ‘Form’ will be placed at<br />
the position of the %TBOX_FORM% notification of the Template.<br />
If no Template is selected, the ‘Form’ is associated to a white background template.<br />
<strong>WebForm</strong> <strong>Studio</strong> 10.00 - Getting Started 15
4. Creating objects<br />
To make configuration easy, specific objects are available to display values and status of<br />
A .<br />
In ‘Edit view’ mode, a Toolbar is available with the following principal icons:<br />
To select an object.<br />
To insert a Text. The possible actions are: 'Set point' and 'Hyperlink'.<br />
To insert a Button. The possible actions are: 'Set point' and 'Hyperlink'.<br />
Dynamic Label: Text. Used to display a digital or analog Tag in a Text Format.<br />
Dynamic Label: Gauge. Used to display an analog Tag.<br />
Dynamic Label: VU meter. Used to display an analog Tag.<br />
Dynamic Label: Color Spot. Used to display a digital Tag.<br />
To insert a Grid. The grid displays a series of Tags. Column, size and Tags can be<br />
configured.<br />
To insert a standard table of alarms. It includes alarm parameters (start time, message,<br />
addressee number, …).<br />
To insert a Chart. Several Tags can be configured in one chart. This object allows<br />
downloading database of A.<br />
Time: Used to display the current time in A.<br />
Date: Used to display the current date in A.<br />
Dynamic chronology list: To list chronology data in a table with description and state or<br />
unit<br />
Dynamic sampling list: To list historical data in several columns, listed per time<br />
Timer: Provide a Tik event at periodical rate (originally implemented for <strong>WebForm</strong> for<br />
T)<br />
To insert a bitmap.<br />
WARNING: check the memory of A for HTML pages doing a TWinSoft compilation.<br />
The possible actions are: 'Set point' and 'Hyperlink'.<br />
To define a HotSpot on the ‘Form'. The Hotspot is an area that becomes selectable. The<br />
possible actions on the Hotspot are 'Set point' and 'Hyperlink'.<br />
<strong>WebForm</strong> <strong>Studio</strong> 10.00 - Getting Started 16
4.1. Text<br />
To type a text, select the icon from the Toolbar. Draw a rectangle on the 'Form' at the place<br />
you want to display the text. Fonts, colors, grid, … can be modified from the 'Font Bar':<br />
To edit a ‘Text’, select it (it is then surrounded with small green squares) and type a new text.<br />
1. You cannot make any style changes to the Text (font, size, …) while in Edit mode of the<br />
text.<br />
2. Before changing a text, the 'object' must be selected (surrounded with small green<br />
squares).<br />
One ‘Action’ can be defined for a ‘Text’ object. From the context menu (right clicking the<br />
object) the ‘actions type’ menu is available.<br />
Two actions are available (see next chapter for more details):<br />
• Set point: when clicking the text, a value can be changed in A.<br />
• Link: when clicking the text, you jump to another HTML page (Hyperlink action).<br />
<strong>WebForm</strong> <strong>Studio</strong> 10.00 - Getting Started 17
4.2. Button<br />
To draw a button, select the icon from the Toolbar. Draw a rectangle in the ‘Form’ at the<br />
place you want to insert the button.<br />
Font and colors can be changed with the help of the ‘Font Bar’ (see chapter 4.1: ‘Text’).<br />
To edit the text of a ‘Button’, select it (it is then surrounded with small green squares) and type a<br />
new text.<br />
One ‘Action’ can be defined on a button. From the context menu (right clicking the object) the<br />
‘Action type’ menu is available:<br />
<strong>WebForm</strong> <strong>Studio</strong> 10.00 - Getting Started 18
Two actions are available:<br />
• Set point: when clicking the text, a value can be changed in A. The value can be<br />
changed in different ways:<br />
If the associated Tag is digital:<br />
- Choice menu: a choice box with a ON and OFF status is displayed.<br />
- Toggle value: the status is automatically inverted when clicking the button.<br />
- On / Off: you select a fixed status (ON or OFF) when clicking the button.<br />
If the associated Tag is analog:<br />
- Choice menu: different values are stored in a table, from which you select one value.<br />
- Edit box: you can write a value within a configurable range.<br />
- No user input: only a fixed value is written in the Tag.<br />
• Link: when clicking the text, you jump to another HTML page (Hyperlink action).<br />
1. The extension must be .HTM.<br />
2. All files must be located in the same directory (A has no idea of directory).<br />
<strong>WebForm</strong> <strong>Studio</strong> 10.00 - Getting Started 19
4.3. Dynamic Labels<br />
A dynamic label is a display of a Tag of the A. It can be displayed with different<br />
appearances.<br />
For each, a specific icon is available:<br />
Text<br />
VU meter<br />
Gauge<br />
Color spot<br />
To insert a ‘Dynamic Label’, select the proper icon from the Toolbar. Draw a rectangle in the<br />
‘Form’ at the place you want to insert it.<br />
To enter the properties of the ‘Label’, double-click the object, when it is in Edit mode<br />
(surrounded with small green squares and with the 'double arrow' cursor).<br />
Font and colors can be changed with the help of the ‘Font’ and ‘Colors’ tabs, but also from the<br />
‘Tools’ of the Standard toolbar (see chapter 4.1: Text).<br />
The ‘Properties’ menus are the same for each type of dynamic label.<br />
<strong>WebForm</strong> <strong>Studio</strong> 10.00 - Getting Started 20
4.3.1. 'General' properties<br />
The first Tab concerns the general information of the object:<br />
The Tag associated to the object can be selected from its name or from its ModBus address.<br />
• Select Tag: you browse the list of Tags of the TWinSoft document associated to the<br />
Form (see chapter 3: ‘Creating a Form’).<br />
If a Tag is missing, you can return to TWinSoft and create it, without leaving the<br />
<strong>WebForm</strong> <strong>Studio</strong>. Be sure to save the document, for Tags to be available.<br />
It displays the value of the Tag.<br />
• Select Address: if the Tag has not been created, but you still wish to visualize it, you can<br />
type its ModBus address. It is also useful for objects you wish to save in a catalogue (see<br />
chapter 5: ‘Catalogue’).<br />
Address and type must fit together.<br />
It displays the value at the ModBus address.<br />
• Indirect addressing: if ‘Indirect addressing’ is checked, the value displayed is the value<br />
contained in the address specified.<br />
Example :<br />
Tag ‘Register0’ = 22016 (22016 is the ModBus address of the seconds).<br />
WITHOUT indirect addressing: displays the value 22016<br />
WITH indirect addressing: displays the seconds of A.<br />
This function allows displaying various information in a field by changing its address in<br />
the A program.<br />
By default, the address of the analog special register ‘Second’ is selected (address: 22016).<br />
<strong>WebForm</strong> <strong>Studio</strong> 10.00 - Getting Started 21
4.3.2. 'Format' properties<br />
The second Tab concerns the format of the object:<br />
• If the Tag is digital:<br />
Value: displays 0 or 1.<br />
Custom texts: you type the text you want to display for ON and OFF states.<br />
On/Off: displays ON or OFF<br />
Engineer: displays the text defined in the 'Tags Minitel/Terminal' in TWinSoft.<br />
• If the Tag is analog:<br />
Value: numeric display of the value.<br />
Text and Value: a text can be added to the value. Format specification strings are<br />
allowed.<br />
Examples:<br />
1. the seconds are displayed with 1 digit between 0 9. To display them always on<br />
2 digits type in the text: %02u<br />
- '0' indicates the leading character.<br />
- '2' indicates the number of characters.<br />
- 'u' = Unsigned.<br />
2. to display the year in four digits: 200%u (example: 2002)<br />
3. to display a Floating point with 3 decimals: %3.3f (example: 123.456)<br />
Day: day of the week. The Regional setting of the PC determines the language used.<br />
Month: The Regional setting of the PC determines the language used.<br />
Time: display in hh:mm format of an analog Tag (value 0 1439 = number of minutes<br />
in 1 day)<br />
Binary: display of 32 bits.<br />
Wide String: the Tag is the first of a series of successive Tags (see Length below).<br />
The display shows the selected Tag followed by the consecutive ModBus addresses.<br />
This format is used to display the Tag in Text format (ASCII).<br />
Length: the number of characters you want to display. Each character corresponds to<br />
one ModBus address. Each ModBus address contains the ASCII code of the<br />
character.<br />
Engineer (A CPU3): The value is displayed according to the scaling declared in<br />
the ‘Terminal Tag’ definition in TWinSoft.<br />
<strong>WebForm</strong> <strong>Studio</strong> 10.00 - Getting Started 22
4.3.3. 'Appearance' properties<br />
The third Tab concerns the appearance of the object. It is automatically selected according to the<br />
icon selected: Text, VU meter, Gauge or Color spot.<br />
• If the Tag is digital:<br />
Text: text displayed according to the format specified (see here above).<br />
Color spot: colors can be adjusted (see Tab ‘Colors’). Default colors are:<br />
OFF: red<br />
ON: green<br />
Invisible: When programming VB script in Web Form, it is sometime needed to access<br />
a Tag of A without displaying it.<br />
This parameter is an ActiveX parameter. When looking at the ‘Object properties’, to<br />
the tab ‘Normal’, the ‘Visible’ parameter is still ‘True’. In this way, even when the<br />
object is not displayed (depending on the ActiveX parameter), it is still available and<br />
dynamic for VB script programming.<br />
• If the Tag is analog:<br />
Text: text displayed according to the format specified (see above).<br />
Gauge: colors can be adjusted (see Tab ‘Colors’). Minimum and maximum values are<br />
configurable. Orientation depends on the shape of the object (long or high).<br />
VU meter: colors can be adjusted (see Tab ‘Colors’). Minimum and maximum values<br />
are configurable. In case the value is under or over the range, the arrow is in red<br />
color and fixed at the minimum or maximum side.<br />
Invisible: When programming VB script in Web Form, it is sometime needed to access<br />
a Tag of A without displaying it (for detail, see above in ‘the Tag is digital’).<br />
<strong>WebForm</strong> <strong>Studio</strong> 10.00 - Getting Started 23
4.3.4. 'Write' properties<br />
The fourth Tab concerns the ‘write access level’ option of the object. In case a write level has<br />
been assigned to a ‘Label’, a ‘Set point’ action is added to the display function. Three access<br />
levels are possible:<br />
• Write protected: the value cannot be changed, no ‘Set point’ available.<br />
• Read/Write: only a user logged as Engineer or Read/Write can change the value of the Tag<br />
associated to the object.<br />
Engineer: only a user logged as Engineer can change the value of the Tag associated to the<br />
object.<br />
The access levels correspond to those used by TWinSoft to access A.<br />
In order to simulate the access level: you need to:<br />
- protect the A.<br />
- do a 'Login' (from the menu ‘Tools’).<br />
- put <strong>WebForm</strong> <strong>Studio</strong> in ‘Simulate’ mode. From the menu ‘View’, clear the option ‘Edit<br />
view’ (accelerator key ).<br />
For details, see chapter 7.1.1: 'Simulation from the <strong>WebForm</strong> <strong>Studio</strong>'.<br />
<strong>WebForm</strong> <strong>Studio</strong> 10.00 - Getting Started 24
4.4. Grid<br />
A ‘Grid’ is a table used to display a list of variables. Size, number of lines and columns can be<br />
configured.<br />
To draw a ‘Grid’, select the icon from the Toolbar. Draw a rectangle on the 'Form' at the<br />
place you want to display the 'Grid'.<br />
To enter the properties of the ‘Grid’, double-click the object, when it is in edit mode<br />
(surrounded with small green squares and with the 'double arrow' cursor).<br />
<strong>WebForm</strong> <strong>Studio</strong> 10.00 - Getting Started 25
There are 2 groups of configuration:<br />
4.4.1. General configuration<br />
• Tab ‘General’: you declare the columns you want to display. To access the column<br />
configuration, select a column and click 'Properties'.<br />
• Tab ‘Layout’: you configure the number of rows and general display parameters of the<br />
columns.<br />
<strong>WebForm</strong> <strong>Studio</strong> 10.00 - Getting Started 26
4.4.2. Column configuration<br />
• Tab ‘General’:<br />
You declare the title, the size and the increment of addresses of the column.<br />
The Column displays values of successive addresses. The fist cell displays the value of the<br />
variable declared in the field 'Tag' or 'Address', the following cells display the value of the<br />
following ModBus addresses according to the increment specified.<br />
Example:<br />
You wish to display 3 'FLOW' values. All 3 Tags must have successive addresses, example<br />
AIR06, AIR07 and AIR08. You declare in the Tag (or address) field, the one concerning the<br />
first FLOW and an increment of '1'.<br />
• Tab ‘Format’:<br />
If the Tag is digital:<br />
Value: displays 0 or 1.<br />
Custom texts: you type the text you want to display for ON and OFF states.<br />
On/Off: displays ON or OFF<br />
Engineer: displays the text defined in the 'Tags Minitel/Terminal' in TWinSoft.<br />
If the Tag is analog:<br />
Value: numeric display of the value.<br />
Text and Value: a text can be added to the value. Format specification strings are<br />
allowed.<br />
Examples:<br />
1. the seconds are displayed with 1 digit between 0 9. To display them always on<br />
2 digits: %02u<br />
- '0' indicates the leading character.<br />
- '2' indicates the number of characters.<br />
- 'u' = Unsigned.<br />
2. to display the year in four digits: 200%u (example: 2002)<br />
3. to display a Floating point with 3 decimals: %3.3f (example: 123.456)<br />
Day: day of the week. The Regional setting of the PC determines the language used.<br />
Month: The Regional setting of the PC determines the language used.<br />
Time: display in hh:mm format of an analog Tag (value 0 1439 = number of minutes<br />
in 1 day)<br />
Binary: display of 32 bits.<br />
Wide String: the Tag is the first of a serie of successive Tags (see Length following).<br />
The display shows the selected Tag followed by the consecutive ModBus addresses.<br />
This format is used to display Tag in Text format (ASCII).<br />
Length: the number of character you want to display. Each character corresponds to<br />
one ModBus address. Each ModBus address contains the ASCII code of the<br />
character.<br />
Engineer (A CPU3): The value is displayed according to the scaling declared in<br />
the ‘ Terminal Tag’ definition in TWinSoft.<br />
<strong>WebForm</strong> <strong>Studio</strong> 10.00 - Getting Started 27
• Tab ‘Write’:<br />
It concerns the 'write access level' option of the column. In case a write level has been<br />
assigned to a column, each cell will have a 'Set point' action added to the display function.<br />
Three access levels are possible:<br />
Write protected: the value cannot be changed, no 'Set point' available.<br />
Read/Write: only user logged as Engineer or Read/Write can change the value of the Tag<br />
associated to the object.<br />
Engineer: only user logged as Engineer can change the value of the Tag associated to the<br />
object.<br />
The access levels correspond to those used by TWinSoft to access A.<br />
In order to simulate the access level: you need to:<br />
- protect the A.<br />
- do a 'Login' (from the menu 'Tools').<br />
- put <strong>WebForm</strong> <strong>Studio</strong> in 'Simulate' mode. From the menu 'View', clear the option 'Edit view'.<br />
(accelerator key ).<br />
For details, see chapter 7.1.1: 'Simulation from the <strong>WebForm</strong> <strong>Studio</strong>').<br />
• Tab ‘Layout’:<br />
To configure colors of cells and text.<br />
<strong>WebForm</strong> <strong>Studio</strong> 10.00 - Getting Started 28
4.5. Table of Alarms<br />
The Alarms object displays the alarm stack of RTU (maximum 48 alarms for A CPU3 and<br />
can be adjusted in application for TBox-MS, TBox-LITE, and TBox-LowPower).<br />
It includes for each alarm the following parameters:<br />
- start time<br />
- end time (TBox-MS, TBox-LITE, and TBox-LowPower only)<br />
- message<br />
- index of the alarms<br />
- name of the recipient (10 characters maximum)<br />
- status of the alarm<br />
To draw a ‘List of alarms’, select the icon from the Toolbar. Draw a rectangle on the<br />
'Form' at the place you want to display the 'List'.<br />
Example with a TBox CPU3<br />
Example with a TBox LP300<br />
The ‘Loudspeaker’ at the beginning of the line indicates the status of the alarm on a visual way:<br />
ON, OFF, acknowledged or Auto-acknowledged.<br />
The list can be sorted on each item, ascending or descending.<br />
To enter the properties of the ‘List of Alarms’, double click the object, when it is in edit mode<br />
(surrounded with small green squares and with the ‘double arrow’ cursor).<br />
<strong>WebForm</strong> <strong>Studio</strong> 10.00 - Getting Started 29
4.5.1. 'List of Alarms' properties<br />
• Enable printing: display the ‘Printer’ button on the Toolbar.<br />
• Display toolbar: toolbar with the ‘Acknowledge’ and ‘Printer’ button.<br />
Here you define the level needed to acknowledge alarms: Read only (acknowledge not allowed),<br />
Read/Write level or Engineer level).<br />
<strong>WebForm</strong> <strong>Studio</strong> 10.00 - Getting Started 30
Data box<br />
4.6. Chart<br />
A chart is a specific object used to display historical values of 1 or several Tags of a A.<br />
The data are downloaded on the PC and automatically displayed. It is not possible to save the<br />
data in the PC.<br />
Saving data on the PC requires the software T (please call your A distributor).<br />
The Toolbar gives options to improve data analysis: display of a data box, display of cursor,<br />
zoom, export…<br />
To draw a 'Chart', select the icon from the Toolbar. Draw a rectangle in the 'Form' at the<br />
place you want to display the 'Chart'.<br />
Export<br />
Markers<br />
Cursors Tracking Moving<br />
Zooms<br />
<strong>WebForm</strong> <strong>Studio</strong> 10.00 - Getting Started 31<br />
Export
A configuration is needed to indicate which Tags you wish to download.<br />
To enter the properties of the 'Chart', double click the object, when it is in edit mode<br />
(surrounded with small green squares and with the 'double arrow' cursor).<br />
There are 2 groups of configuration:<br />
4.6.1. General configuration<br />
• Tab ‘General’:<br />
Displays a list of historic data already configured. To access the configuration of a<br />
selected ‘historic’, click 'Properties'.<br />
• Tab ‘Layout’:<br />
To configure the default period displayed: automatic or adjustable.<br />
To define a TITLE for the chart. When printing the chart, it is easier to distinguish.<br />
• Tab ‘Colors’: to configure the colors of the window.<br />
<strong>WebForm</strong> <strong>Studio</strong> 10.00 - Getting Started 32
4.6.2. Configuring an historic<br />
• Tab ‘Logged Tag’: you declare :<br />
The descriptive name of the historic.<br />
The comment which will appear to the scale of values.<br />
The Tag of A. Only Tags declared in A data logging are available to be<br />
downloaded.<br />
• Tab ‘Layout’: you configure the parameters on the line and of the scale of values.<br />
4.6.3. Download<br />
• In edit mode: when the Web Form is opened, the historical associated to the object are<br />
automatically downloaded.<br />
• At the opening: being in simulation (see chapter 7.1.1: 'Simulation from <strong>WebForm</strong><br />
<strong>Studio</strong>'), or when you display a chart with the help of Internet Explorer, download is carried<br />
out automatically at the opening of the Web Form. Data are then frozen.<br />
• Context menu: To execute a new download, click anywhere on the chart with right button<br />
of the mouse and select option ‘Download’:<br />
<strong>WebForm</strong> <strong>Studio</strong> 10.00 - Getting Started 33
4.6.4. Toolbar of a chart<br />
Display a Data box. This box displays different values according to the<br />
definition of the cursors (see below).<br />
In display mode, one can access the data box by a double click anywhere on<br />
the chart.<br />
Print out of the chart, as it appears on the screen.<br />
Export of a chart.<br />
The available formats are: Bitmap (.bmp), Metafile (.wmf), and jpeg (.jpg).<br />
To export data in file, see ‘Data view’ next section.<br />
Displays markers. Each dot corresponds to a record.<br />
Choice of cursors : 0, 1 or 2 cursors.<br />
Tracking is associated to the use of cursors (see above).<br />
It allows to move a cursor from dot to dot, meaning from record to record.<br />
The scales can be defined either ‘automatic’ (adjusted to the values<br />
downloaded) or adjustable (see chapter 4.6.1 and 4.6.2) .<br />
Possible options :<br />
- Moving on the scale of values.<br />
- Moving on the scale of time.<br />
It is also possible to move with the help of the mouse ; by pressing the right<br />
button and moving on the chart.<br />
Zooms are carried out from the center of the chart.<br />
Zoom +: a specific part of the chart can also be displayed by drawing a<br />
rectangle with the help of the cursor. One draws a rectangle starting at the<br />
top left corner.<br />
Zoom -: to come back to the default display, one draws a rectangle starting at<br />
the bottom right corner.<br />
Data View: opens a list with historic data (see ‘Data View / Export’ following).<br />
<strong>WebForm</strong> <strong>Studio</strong> 10.00 - Getting Started 34
4.6.5. Data View / Export<br />
Opening the list might take several seconds as data need to be sorted.<br />
The available features from the ‘List’ display are:<br />
• From the combo box, you can select the Tag(s) you want to display.<br />
• You can export data, as they are displayed, to a text file. Two formats are supported:<br />
CSV (values separated by a comma)<br />
TXT (values separated by a ‘tab’).<br />
• You can copy data into the clipboard. They are then available for any Windows program,<br />
with the help of a simple ‘Paste’ action; for instance Excel.<br />
<strong>WebForm</strong> <strong>Studio</strong> 10.00 - Getting Started 35
4.7. Dynamic Chronology List<br />
This object allows displaying chronology in a table with psecific comments and value formats:<br />
- with A CPU3: in the ‘Web/Minitel/Terminal’ Tags of TWinSoft.<br />
- with TBox-MS, TBox-LITE, and TBox-LowPower: in the Tag ‘Presentation’ of TWinSoft..<br />
This gives you a possibility to display ‘Events’, with date and time, ‘status’ of digital Tags and<br />
‘units’ and description of the Tags<br />
To draw a ‘dynamic chronology’, select the icon from the Toolbar. Draw a rectangle in the<br />
‘Form’ at the place you want to display the table.<br />
Example:<br />
<strong>WebForm</strong> <strong>Studio</strong> 10.00 - Getting Started 36
4.7.1. Configuration in TWinSoft<br />
The Tags you want to display in such a table must be configured in the list of chronologies of<br />
TWinSoft.<br />
The information associated to the Tags is defined in the Web/Minitel/Terminal Tags of<br />
TWinSoft:<br />
Example for A CPU3<br />
The ‘Comments’ of Terminal Tags will be used as ‘Description’ in the Chronology table<br />
The ‘States’ and ‘Units’ of Terminal Tags will be used as ‘Value’ in the Chronology table.<br />
Example with TBox-MS<br />
‘Presentation’ configuration for a Digital<br />
Tag.<br />
<strong>WebForm</strong> <strong>Studio</strong> 10.00 - Getting Started 37
4.7.2. Configuration of the dynamic chronology<br />
A configuration is needed to indicate which Tags you wish to display.<br />
To enter the properties of the 'Dynamic chronology', double click the object, when it is in edit<br />
mode (surrounded with small green squares and with the 'double arrow' cursor).<br />
Chronology selection: you select which type of data you want to display: analog or digital.<br />
You cannot combine both types. When needed, you have to create<br />
2 tables, one for analog and one for digital<br />
ModBus range: you filter the Tags you want to display using range(s) of ModBus<br />
addresses.<br />
By default, it displays all Tags, from ModBus address 0 to 32767.<br />
<strong>WebForm</strong> <strong>Studio</strong> 10.00 - Getting Started 38
4.8. Dynamic Sampling List<br />
This object allows displaying several historical data in several columns. The title of the column<br />
can be adapted for each series (see Series configuration)<br />
A configuration is needed to indicate which Tags you wish to display.<br />
To draw a Dynamic Sampling table, select the icon from the Toolbar. Draw a rectangle on<br />
the 'Form' at the place you want to display the table.<br />
Double click the object to change its configuration and Add any logged Tag in the RTU (either<br />
in Chronology or Sampling Table).<br />
4.8.1. Sampling Table Toolbar<br />
The Toolbar gives option to improve the analyze of the data:<br />
Allows saving the data in .TXT or .CSV file.<br />
Print out of the table, as it appears on the screen.<br />
Export of a table.<br />
The available formats are: Bitmap (.bmp), Metafile (.wmf), and<br />
jpeg (.jpg).<br />
To export data in file, see 'Save' above.<br />
Refresh the table.<br />
<strong>WebForm</strong> <strong>Studio</strong> 10.00 - Getting Started 39
4.9. Timer<br />
This object has been implement to activate a timer within the <strong>WebForm</strong> for T.<br />
It requires using VB Script to access ‘Events’.<br />
Timer starts running when the <strong>WebForm</strong> it contains is opened.<br />
When the period has elapsed, the EventTik is activated.<br />
4.9.1. Timer configuration<br />
4.9.2. Script<br />
Example of script on event ‘EventTik’<br />
You give the Timer a period.<br />
At the end of the period, the<br />
‘EventTik’ will be activated<br />
(see next)<br />
<strong>WebForm</strong> <strong>Studio</strong> 10.00 - Getting Started 40
5. Catalogue<br />
The catalogue contains your own specific objects (or groups of objects) saved with their<br />
configuration.<br />
Those objects are saved in an external file (the catalogue) and can be exported to be used in any<br />
new ‘Form’.<br />
Examples:<br />
- Title with a specific font, color and underline.<br />
- Groups of time variable to display date and time information.<br />
By default the catalogue window is displayed at the left side of the <strong>WebForm</strong> <strong>Studio</strong>.<br />
5.1. Open a catalogue<br />
Right click in the Catalogue window (yellow window).<br />
Select “open” (or new if you have not created any yet).<br />
<strong>WebForm</strong> <strong>Studio</strong> 10.00 - Getting Started 41
5.2. Import of an object into a catalogue<br />
Be sure a catalogue is opened.<br />
Select the object (or a group of objects).<br />
Press and drag the selection to the Catalogue window.<br />
5.3. Rename an object in a catalogue<br />
In the catalogue window, select an object.<br />
When the object is selected, single-click on the name.<br />
It can now be edited.<br />
5.4. Export of an object from a catalogue<br />
Open a catalogue.<br />
Select an object.<br />
Drag the object with the left button to the ‘Form’.<br />
The object can now be resized and edited in the ‘Form’ if needed.<br />
<strong>WebForm</strong> <strong>Studio</strong> 10.00 - Getting Started 42
6. Access Protection<br />
The goal of the protection is to protect objects from being displayed, or in the case of an<br />
‘Action’, objects to be ‘write’ protected.<br />
It relates to ‘A access protection’ explained in ‘TBox User’s Guide’.<br />
6.1. Login<br />
Access protection is activated when connected to a protected A locally or through modem.<br />
In that case, you need to ‘login’ to get an access level.<br />
6.1.1. TCP/IP connection<br />
The login, are the name and password you enter when dialing.<br />
6.1.2. With <strong>WebForm</strong> <strong>Studio</strong><br />
While developing with <strong>WebForm</strong> <strong>Studio</strong> connected to a communication port of A which<br />
is protected, one must login before starting: from the main menu ‘Tools’ ‘Login’.<br />
6.2. Display access level<br />
When creating an object, a display access level is always assigned to each object. By default, it<br />
is the ‘Read’ only level. This means that the object can be seen by anyone.<br />
Three access levels are supported, which correspond to the protection of communication port of<br />
the A: Engineer, Read/Write and Read only (see TWinSoft).<br />
Example:<br />
All objects defined with access level ‘Engineer’, will not be visible for a user logged in with<br />
‘Read/Write’ or ‘Read’ level.<br />
6.2.1. Simulation of Display access levels<br />
While editing, to display the ‘Form’ with a specific access level to simulate the ‘Run Time’<br />
display, go from the main menu: ‘View’ ‘Access Level’ and select a level:<br />
<strong>WebForm</strong> <strong>Studio</strong> 10.00 - Getting Started 43
6.3. Write access level<br />
For an object assigned with an ‘Action’ (Set point or Link), a write access level can be defined<br />
in the properties of the object.<br />
See chapter 4: ‘Creating an object’.<br />
When the <strong>WebForm</strong> <strong>Studio</strong> is in simulation mode (see chapter 7: ‘Communication’), those<br />
access levels can be tested.<br />
Before testing access levels, the port of A must be protected (see TWinSoft).<br />
From the <strong>WebForm</strong> <strong>Studio</strong> you can log yourself from the ‘Communication’ menu of the main<br />
Tool Bar. When logged, your access level is displayed in the status bar.<br />
<strong>WebForm</strong> <strong>Studio</strong> 10.00 - Getting Started 44
7. Communication<br />
7.1. Communication while editing<br />
Two situations are possible:<br />
• The <strong>WebForm</strong> <strong>Studio</strong> has been started from TWinSoft, by clicking a .TWF file.<br />
In this case, the communication port has been already captured by TWinSoft, but <strong>WebForm</strong><br />
<strong>Studio</strong> is also able to communicate, at the same time .<br />
• The <strong>WebForm</strong> <strong>Studio</strong> has been started from the ‘Start’ menu and then of course TWinSoft<br />
is not online.<br />
In that case, communication is carried out by the <strong>WebForm</strong> <strong>Studio</strong>.<br />
As for TWinSoft, the communication of the COM port of the PC must be configured to fit with<br />
the configuration of the COM port used in the A. The <strong>WebForm</strong> <strong>Studio</strong> allows local<br />
communication only, for testing and simulation.<br />
From the main menu bar, click ‘Communication’ ‘PC Communication Setup’.<br />
When communication is started with A, the ‘Access level’ is displayed in the status Bar<br />
(Engineer, Read/write or Read only). The ‘Form’ is then refreshed automatically.<br />
<strong>WebForm</strong> <strong>Studio</strong> 10.00 - Getting Started 45
7.1.1. Simulation from the <strong>WebForm</strong> <strong>Studio</strong><br />
In order to test the final view of the ‘Form’, and to test the ‘Actions’ and the access levels, you<br />
must quit the ‘Edit view’ mode.<br />
From the ‘View’ menu, clear the option<br />
‘Edit View’.<br />
The accelerator key will<br />
toggle modes (Edit, Simulation)<br />
7.1.2. Simulation from Internet Explorer<br />
In the same ‘View’, the option ‘Preview in browser’ opens the default browser of your PC<br />
(which must be Microsoft Internet Explorer) and display the real HTM files, as it will be for a<br />
dial-up connection.<br />
You are then able to display the 'Form' and its associated ‘Template’.<br />
1. As of Version 7.1 (of TWinSoft and <strong>WebForm</strong> <strong>Studio</strong>) a new mechanism of communication<br />
has been developed that allows simultaneous communication of different software. It<br />
means that TWinSoft, <strong>WebForm</strong> <strong>Studio</strong> and Internet Explorer are able to communicate at the<br />
same time, with the same local communication port.<br />
However, if one of those is having communication error, it will penalize the communication<br />
of the others (caused by the multi-tasking of Windows).<br />
2. From TWinSoft and <strong>WebForm</strong> <strong>Studio</strong>, you can toggle between Online and Offline with the<br />
accelerator keys: .<br />
<strong>WebForm</strong> <strong>Studio</strong> 10.00 - Getting Started 46
7.2. Local communication<br />
HTM pages can be displayed locally.<br />
It means that HTM pages are located on the PC and refreshed by a local connection to a<br />
A. As URL of Internet Explorer, you select the location on the PC where the HTM pages<br />
have been saved.<br />
Examples: C:\Program Files\Techno Trade\Samples\WebServer\index.htm<br />
The connection can be either a point to point connection (RS232) or a LAN connection (via the<br />
Ethernet interface of A).<br />
7.2.1. Installation on the PC.<br />
On the PC, the utility <strong>WebForm</strong>Viewer must be installed, to display the specific objects defined<br />
in the Web Forms. It is available from the CD-ROM of TWinSoft. It installs the ActiveX library<br />
and the communication utility (see next).<br />
As of version 7.1, the configuration of communication is available from the Web Form itself.<br />
Right clicking the Web Form, opens a menu where the ‘PC communication Setup’ menu can be<br />
accessed.<br />
You can then select the media used to access A (local-RS232 or LAN-Ethernet). A<br />
modem connection is also possible, but with HTM pages inside A (see chapter 7.3: Dialup<br />
communication)<br />
<strong>WebForm</strong> <strong>Studio</strong> 10.00 - Getting Started 47
7.3. Dial-up communication<br />
This is the final step.<br />
In order to dial-up a Web Server, a ‘dial-up networking’ configuration is needed.<br />
The utility TBox Dial It! allows you to create a list of A to dial. It handles dialing,<br />
connection and IP identification.<br />
Therefore, you don’t need to create ‘network connection’ configuration.<br />
Working with Windows XP, you should check some properties of the ‘network<br />
connection’ (see details in TBox Dial It! manual available in group of Programs ‘Techno Trade’<br />
‘Documentation’)<br />
We usually don't connect to A through the WWW, but in point to point connection: the PC<br />
calls the A. A WWW connection requires a permanent connection between a Provider and<br />
the A; very expensive !<br />
Two situations are possible:<br />
• You call the A with a PC that is not equipped with TWinSoft (see chapter 7.3.1: 'PC<br />
not equipped with TWinSoft').<br />
• You call with a PC equipped with TWinSoft (see chapter 7.3.2: 'PC equipped with<br />
TWinSoft').<br />
7.3.1. PC not equipped with TWinSoft<br />
Imagine you develop the A application on your PC, but different operators need to call<br />
A as Web Server, to monitor the process.<br />
In case TWinSoft has not been installed on the PC Browser, supplementary software must be<br />
installed: <strong>WebForm</strong>View.exe.<br />
It must be copied on the PC, then be executed. It installs ActiveX library of specific A<br />
objects. This utility is available on the CD-ROM of TWinSoft, or from our Web Site<br />
www.tbox.biz page ‘Support’ → ‘Software’.<br />
The dial-up procedure entry can be automatically handled by the TBox Dial It! utility (see<br />
chapter 8).<br />
7.3.2. PC equipped with TWinSoft<br />
The dial-up procedure entry can be automatically handled by the TBox Dial It! utility (see<br />
chapter 8).<br />
<strong>WebForm</strong> <strong>Studio</strong> 10.00 - Getting Started 48
8. TBox Dial It !<br />
TBox Dial It ! is a utility dedicated to dialing A ‘Web Server’. It is used directly from<br />
Internet Explorer and makes dial-up A very easy and friendly !<br />
TBox Dial It ! has the following features:<br />
• Automatic creation of 'dial-up entry'. It is not needed anymore to create the dial-up<br />
entry, or .INS file from TWinSoft.<br />
• Creation of an address book with the list of A to dial.<br />
• Dial of A.<br />
• When connected, automatic identification of the IP address and loading of index<br />
HTML page (standard) or a specific URL.<br />
• Within a standard HTML page, possibility to create hyperlink to dail a A.<br />
Internet Explorer 5.00 minimum needed.<br />
8.1. Installation<br />
As of TWinSoft 8.00, TBox Dial It ! is automatically installed with the <strong>WebForm</strong> Viewer, also<br />
installed together with TWinSoft.<br />
In case you only need to dial A, to display HTML pages, you install the <strong>WebForm</strong> Viewer<br />
only. It contains the ActiveX dedicated to A and the utility TBox Dial It ! .<br />
The installation can be carried out from the CD-ROM of TWinSoft or from our Web Site<br />
www.tbox.biz page ‘Support’ → ‘Software’.<br />
8.2. Starting TBox Dial It !<br />
TBox Dial It ! is accessible directly from Internet Explorer.<br />
A TBox Dial It ! toolbar button is available. It is automatically inserted in the ‘Standard button’<br />
toolbar.<br />
Clicking the button, opens an Explorer window at the left side of Internet Explorer window.<br />
According to the version of Windows and Internet Explorer, the button might not be installed<br />
automatically. In such case, you can do it manually from the menu ‘View’ → ‘Toolbars’ →<br />
‘Customize’. Then you select the button ‘TBox Dial It!’<br />
<strong>WebForm</strong> <strong>Studio</strong> 10.00 - Getting Started 49
8.3. Configuration<br />
TBox Dial It ! is composed of several HTML pages:<br />
‘Dial’ page Where the list of A appears.<br />
It can also be used to dial a TBox manually, without any configuration.<br />
‘Address Book’ page Where you create the A stations with their tel. number, …<br />
‘Preference’ page Where you select a language (Français, English, Deutsch, …).<br />
You can also change the modem selection.<br />
‘Help’ page Where the use of TBox Dial It ! is explained.<br />
8.3.1. ‘Dial’ page<br />
When TBox Dial It ! has been started from the ‘Start’ button of Windows, under the ‘Programs’<br />
folder, the following HTML page is opened.<br />
List of Stations.<br />
To dial a A manually,<br />
without any configuration<br />
Clicking ‘Address Book’ allows you to create the A stations.<br />
<strong>WebForm</strong> <strong>Studio</strong> 10.00 - Getting Started 50
8.3.2. ‘Address Book’ page<br />
From the Address Book, you create the station (A you wish to dial).<br />
Click ‘Click here to create a new station’ or ‘New Station’ from the list to open the following<br />
page:<br />
8.3.3. The file PhoneBook.dat<br />
Name which appears in the List.<br />
It cannot start with a number.<br />
Each station configuration is saved in the text file ‘PhoneBook.dat’.<br />
This file is located in the personnal directory of the PC user:<br />
..\Document s and Settings\\Application Data\TBox DialIt!).<br />
HTML page opened when connected.<br />
When left empty the ‘index.htm’ is<br />
opened<br />
The advantage to have this configuration in a separate file allows you to create the address book<br />
on one PC and to transfer it to another PC.<br />
For instance you are integrator, and you install regularly new station. Each time you install a new<br />
A ‘Web Server’, you add it to the address book, and send the file ‘PhoneBook.dat’ to your<br />
customer to keep him updated.<br />
<strong>WebForm</strong> <strong>Studio</strong> 10.00 - Getting Started 51
8.4. Dialing TBox<br />
After creation of the stations, they are available in a list on the ‘Dial’ page.<br />
Example with opening of the Explorer Bar ‘TBox Dial It!’ at the left side of the screen, using the<br />
toolbar button ‘TBox Dial It!’.<br />
1.<br />
Selection of the station.<br />
Dial of the station.<br />
2.<br />
When connected, automatic<br />
identification of the IP<br />
3.<br />
Loading of ‘index.htm’ or of the<br />
page declared as URL<br />
<strong>WebForm</strong> <strong>Studio</strong> 10.00 - Getting Started 52
The procedure is the following:<br />
1. Selection of the station in the list window.<br />
Opening of the ‘connection’ dialog box where you can enter your name and password<br />
(in case A is protected).<br />
Important : Depending on the version of Windows, you have to type a name and<br />
password, even if the RTU is not protected. In some case Windows requires a name and<br />
password to continue the connection procedure.<br />
2. When the PC is connected to A, Internet Explorer automatically identifies the IP<br />
address of the A it is connected to and copies it as URL in the Address bar.<br />
3. Loading of the HTML page declared as URL (optional).<br />
In case there is no URL declared, the default ‘index.htm’ is loaded.<br />
<strong>WebForm</strong> <strong>Studio</strong> 10.00 - Getting Started 53
8.5. Advanced use of TBox Dial It!<br />
TBox Dial It ! introduces its own syntax in URL’s. It can be used from any standard HTML page<br />
or directly from the Address bar to access a page.<br />
Syntax: tbox:<br />
tbox:dial Opens the ‘Dial’ page.<br />
tbox:config Opens the ‘Address Book’ page.<br />
tbox:preferences Opens the ‘Preferences’ page.<br />
tbox:help Opens the ‘Help’ page.<br />
tbox:Oostend Dial the TBox Station ‘Oostend’ (from the address book).<br />
tbox:0451234567 <strong>Manual</strong> Dial to the A with tel. number 0451234567.<br />
tbox:=AB3030 <strong>Manual</strong> Dial to the A with tel. number 3030. The sign ‘=’ allows<br />
to insert letters in telephone number. The URL is then not considered as<br />
a Station name but as a telephone number.<br />
Example:<br />
In an HTML page, the URL referring to Station name, or telephone number can be used as<br />
hyperlink, to access the stations by simply clicking an objects in an image, or on area on a map<br />
for instance.<br />
Link to :<br />
http://192.168.1.99<br />
(TBox on the local network)<br />
Link to :<br />
tbox:Westend<br />
Link to :<br />
tbox:Oostend<br />
<strong>WebForm</strong> <strong>Studio</strong> 10.00 - Getting Started 54
<strong>WebForm</strong> <strong>Studio</strong> 10.00 - Getting Started 55
<strong>WebForm</strong> <strong>Studio</strong> 10.00 - Getting Started 56