Manual Laser Marking Software Magic Mark
Manual Laser Marking Software Magic Mark
Manual Laser Marking Software Magic Mark

Create successful ePaper yourself
Turn your PDF publications into a flip-book with our unique Google optimized e-Paper software.
Program description<br />
3.7.4 Graphic window<br />
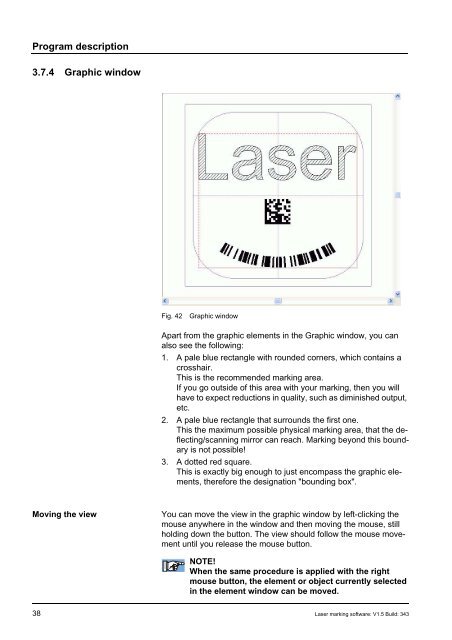
Fig. 42 Graphic window<br />
Apart from the graphic elements in the Graphic window, you can<br />
also see the following:<br />
1. A pale blue rectangle with rounded corners, which contains a<br />
crosshair.<br />
This is the recommended marking area.<br />
If you go outside of this area with your marking, then you will<br />
have to expect reductions in quality, such as diminished output,<br />
etc.<br />
2. A pale blue rectangle that surrounds the first one.<br />
This the maximum possible physical marking area, that the deflecting/scanning<br />
mirror can reach. <strong><strong>Mark</strong>ing</strong> beyond this boundary<br />
is not possible!<br />
3. A dotted red square.<br />
This is exactly big enough to just encompass the graphic elements,<br />
therefore the designation "bounding box".<br />
Moving the view You can move the view in the graphic window by left-clicking the<br />
mouse anywhere in the window and then moving the mouse, still<br />
holding down the button. The view should follow the mouse movement<br />
until you release the mouse button.<br />
NOTE!<br />
When the same procedure is applied with the right<br />
mouse button, the element or object currently selected<br />
in the element window can be moved.<br />
38 <strong>Laser</strong> marking software: V1.5 Build: 343