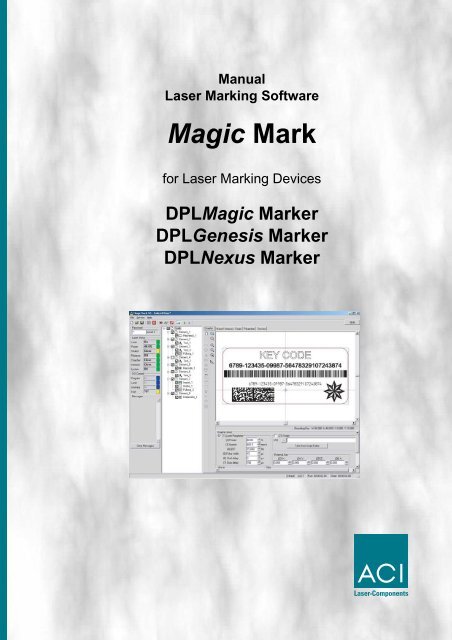
Manual Laser Marking Software Magic Mark
Manual Laser Marking Software Magic Mark
Manual Laser Marking Software Magic Mark

Create successful ePaper yourself
Turn your PDF publications into a flip-book with our unique Google optimized e-Paper software.
<strong>Manual</strong><br />
<strong>Laser</strong> <strong><strong>Mark</strong>ing</strong> <strong>Software</strong><br />
<strong>Magic</strong> <strong>Mark</strong><br />
for <strong>Laser</strong> <strong><strong>Mark</strong>ing</strong> Devices<br />
DPL<strong>Magic</strong> <strong>Mark</strong>er<br />
DPLGenesis <strong>Mark</strong>er<br />
DPLNexus <strong>Mark</strong>er
Copyright and Protection Rights<br />
Manufacturer: ACI <strong>Laser</strong> GmbH<br />
Österholzstraße 9<br />
D-99428 Nohra<br />
Fon: +49 3643 4152-0<br />
Fax: +49 3643 4152-77<br />
Internet: www.ACI-<strong>Laser</strong>.de<br />
E-Mail: info@ACI-<strong>Laser</strong>.de<br />
This publication, or the software described therein, respectively, may not be reproduced either partially<br />
or in its entirety in any form, nor translated or saved to a retrieving system without the express<br />
written permission of the manufacturer.<br />
The manufacturer does not assume any guarantee regarding the content of this publication or for<br />
the software described therein in particular and denies any suggestion of a guarantee for the marketability<br />
or the suitability of the publication contents nor for the software for any particular purpose.<br />
The manufacturer assumes no liability for any indirect damages, resulting damages or certain other<br />
damage, other than that caused by malice or gross negligence, which has arisen because of or in<br />
connection with the content of these instructions or the software described therein, be it on the basis<br />
of impermissible action, contract-related or another matter.<br />
We are constantly working on the further development.<br />
Please understand that we must reserve the right to make changes to the scope of delivery in form,<br />
equipment and technology at all times.<br />
The manufacturer expressly reserves all copyright rights in accordance with the law.
Contents<br />
1 Delivery . . . . . . . . . . . . . . . . . . . . . . . . . . . . . . . . . . . . . . . . . . . . . . 11<br />
1.1 Scope of delivery . . . . . . . . . . . . . . . . . . . . . . . . . . . . . . . . . . . . . . 11<br />
1.2 <strong>Software</strong> manual . . . . . . . . . . . . . . . . . . . . . . . . . . . . . . . . . . . . . . 11<br />
1.3 Manufacturer . . . . . . . . . . . . . . . . . . . . . . . . . . . . . . . . . . . . . . . . . 11<br />
1.4 Warranty . . . . . . . . . . . . . . . . . . . . . . . . . . . . . . . . . . . . . . . . . . . . . 11<br />
2 Installation . . . . . . . . . . . . . . . . . . . . . . . . . . . . . . . . . . . . . . . . . . . 12<br />
2.1 System requirements. . . . . . . . . . . . . . . . . . . . . . . . . . . . . . . . . . . 12<br />
2.2 Installation requirements . . . . . . . . . . . . . . . . . . . . . . . . . . . . . . . 12<br />
Windows XP. . . . . . . . . . . . . . . . . . . . . . . . . . . . . . . . . . . . . . . . . 12<br />
Windows 2000 . . . . . . . . . . . . . . . . . . . . . . . . . . . . . . . . . . . . . . . 12<br />
2.3 Installation sequence. . . . . . . . . . . . . . . . . . . . . . . . . . . . . . . . . . . 12<br />
2.4 <strong>Software</strong> installation . . . . . . . . . . . . . . . . . . . . . . . . . . . . . . . . . . . 13<br />
2.5 Dongle . . . . . . . . . . . . . . . . . . . . . . . . . . . . . . . . . . . . . . . . . . . . . . . 15<br />
2.6 <strong>Laser</strong> connection . . . . . . . . . . . . . . . . . . . . . . . . . . . . . . . . . . . . . . 16<br />
2.7 Program start . . . . . . . . . . . . . . . . . . . . . . . . . . . . . . . . . . . . . . . . . 17<br />
2.8 Specific parameters . . . . . . . . . . . . . . . . . . . . . . . . . . . . . . . . . . . . 17<br />
2.9 Exit program . . . . . . . . . . . . . . . . . . . . . . . . . . . . . . . . . . . . . . . . . . 17<br />
2.10 Uninstalling. . . . . . . . . . . . . . . . . . . . . . . . . . . . . . . . . . . . . . . . . . . 18<br />
2.11 Help . . . . . . . . . . . . . . . . . . . . . . . . . . . . . . . . . . . . . . . . . . . . . . . . . 18<br />
2.12 Release . . . . . . . . . . . . . . . . . . . . . . . . . . . . . . . . . . . . . . . . . . . . . . 18<br />
2.13 Language settings . . . . . . . . . . . . . . . . . . . . . . . . . . . . . . . . . . . . . 18<br />
3 Program description . . . . . . . . . . . . . . . . . . . . . . . . . . . . . . . . . . . 19<br />
3.1 Program start . . . . . . . . . . . . . . . . . . . . . . . . . . . . . . . . . . . . . . . . . 20<br />
Command line parameter . . . . . . . . . . . . . . . . . . . . . . . . . . . . . . 20<br />
Offline state . . . . . . . . . . . . . . . . . . . . . . . . . . . . . . . . . . . . . . . . . 20<br />
Connect . . . . . . . . . . . . . . . . . . . . . . . . . . . . . . . . . . . . . . . . . . . . 20<br />
3.2 <strong>Software</strong> user interface . . . . . . . . . . . . . . . . . . . . . . . . . . . . . . . . . 21<br />
3.3 Entry elements . . . . . . . . . . . . . . . . . . . . . . . . . . . . . . . . . . . . . . . . 22<br />
Text box . . . . . . . . . . . . . . . . . . . . . . . . . . . . . . . . . . . . . . . . . . . . 22<br />
Multi line text box . . . . . . . . . . . . . . . . . . . . . . . . . . . . . . . . . . . . . 22<br />
Numerical input box . . . . . . . . . . . . . . . . . . . . . . . . . . . . . . . . . . . 22<br />
List box. . . . . . . . . . . . . . . . . . . . . . . . . . . . . . . . . . . . . . . . . . . . . 22<br />
Check box . . . . . . . . . . . . . . . . . . . . . . . . . . . . . . . . . . . . . . . . . . 23<br />
3.4 Access rights . . . . . . . . . . . . . . . . . . . . . . . . . . . . . . . . . . . . . . . . . 23<br />
Enter password . . . . . . . . . . . . . . . . . . . . . . . . . . . . . . . . . . . . . . 23<br />
Change passwords . . . . . . . . . . . . . . . . . . . . . . . . . . . . . . . . . . . 23<br />
3.5 File management . . . . . . . . . . . . . . . . . . . . . . . . . . . . . . . . . . . . . . 24<br />
New file . . . . . . . . . . . . . . . . . . . . . . . . . . . . . . . . . . . . . . . . . . . . 24<br />
Open file. . . . . . . . . . . . . . . . . . . . . . . . . . . . . . . . . . . . . . . . . . . . 24<br />
Save File . . . . . . . . . . . . . . . . . . . . . . . . . . . . . . . . . . . . . . . . . . . 25<br />
Print file . . . . . . . . . . . . . . . . . . . . . . . . . . . . . . . . . . . . . . . . . . . . 26<br />
<strong>Laser</strong> marking software: V1.5 Build: 343 1
Contents<br />
3.6 <strong>Laser</strong> control. . . . . . . . . . . . . . . . . . . . . . . . . . . . . . . . . . . . . . . . . . 26<br />
Switching the laser on and off . . . . . . . . . . . . . . . . . . . . . . . . . . . 26<br />
Lock shutter . . . . . . . . . . . . . . . . . . . . . . . . . . . . . . . . . . . . . . . . . 27<br />
Switching the pilot laser on and off . . . . . . . . . . . . . . . . . . . . . . . 27<br />
Showing the bounding box. . . . . . . . . . . . . . . . . . . . . . . . . . . . . . 27<br />
Start marking . . . . . . . . . . . . . . . . . . . . . . . . . . . . . . . . . . . . . . . . 28<br />
Stop marking . . . . . . . . . . . . . . . . . . . . . . . . . . . . . . . . . . . . . . . . 28<br />
Enable external start . . . . . . . . . . . . . . . . . . . . . . . . . . . . . . . . . . 28<br />
I/O control. . . . . . . . . . . . . . . . . . . . . . . . . . . . . . . . . . . . . . . . . . . 28<br />
Message window . . . . . . . . . . . . . . . . . . . . . . . . . . . . . . . . . . . . . 28<br />
3.7 Graphic area . . . . . . . . . . . . . . . . . . . . . . . . . . . . . . . . . . . . . . . . . . 29<br />
Element window . . . . . . . . . . . . . . . . . . . . . . . . . . . . . . . . . . . . . . 29<br />
Status line graphic window. . . . . . . . . . . . . . . . . . . . . . . . . . . . . . 29<br />
Parameter area - graphic . . . . . . . . . . . . . . . . . . . . . . . . . . . . . . . 30<br />
3.7.1 Element window . . . . . . . . . . . . . . . . . . . . . . . . . . . . . . . . . . . . . . . . 31<br />
Coordinate systems . . . . . . . . . . . . . . . . . . . . . . . . . . . . . . . . . . . 31<br />
Elements and objects. . . . . . . . . . . . . . . . . . . . . . . . . . . . . . . . . . 31<br />
Enable element . . . . . . . . . . . . . . . . . . . . . . . . . . . . . . . . . . . . . . 32<br />
PopUp menu . . . . . . . . . . . . . . . . . . . . . . . . . . . . . . . . . . . . . . . . 32<br />
Drag & Drop . . . . . . . . . . . . . . . . . . . . . . . . . . . . . . . . . . . . . . . . . 32<br />
3.7.2 Graphic toolbar. . . . . . . . . . . . . . . . . . . . . . . . . . . . . . . . . . . . . . . . . 33<br />
New element . . . . . . . . . . . . . . . . . . . . . . . . . . . . . . . . . . . . . . . . 33<br />
Line . . . . . . . . . . . . . . . . . . . . . . . . . . . . . . . . . . . . . . . . . . . . . . . 33<br />
Rectangle . . . . . . . . . . . . . . . . . . . . . . . . . . . . . . . . . . . . . . . . . . . 33<br />
Ellipse. . . . . . . . . . . . . . . . . . . . . . . . . . . . . . . . . . . . . . . . . . . . . . 33<br />
Text . . . . . . . . . . . . . . . . . . . . . . . . . . . . . . . . . . . . . . . . . . . . . . . 33<br />
Barcode . . . . . . . . . . . . . . . . . . . . . . . . . . . . . . . . . . . . . . . . . . . . 33<br />
Datamatrix . . . . . . . . . . . . . . . . . . . . . . . . . . . . . . . . . . . . . . . . . . 33<br />
PDF417 . . . . . . . . . . . . . . . . . . . . . . . . . . . . . . . . . . . . . . . . . . . . 34<br />
Import . . . . . . . . . . . . . . . . . . . . . . . . . . . . . . . . . . . . . . . . . . . . . . 34<br />
Move . . . . . . . . . . . . . . . . . . . . . . . . . . . . . . . . . . . . . . . . . . . . . . 34<br />
Size . . . . . . . . . . . . . . . . . . . . . . . . . . . . . . . . . . . . . . . . . . . . . . . 34<br />
Rotation . . . . . . . . . . . . . . . . . . . . . . . . . . . . . . . . . . . . . . . . . . . . 34<br />
Mirror . . . . . . . . . . . . . . . . . . . . . . . . . . . . . . . . . . . . . . . . . . . . . . 35<br />
Polar. . . . . . . . . . . . . . . . . . . . . . . . . . . . . . . . . . . . . . . . . . . . . . . 35<br />
Fill. . . . . . . . . . . . . . . . . . . . . . . . . . . . . . . . . . . . . . . . . . . . . . . . . 35<br />
Wobble . . . . . . . . . . . . . . . . . . . . . . . . . . . . . . . . . . . . . . . . . . . . . 35<br />
Pfad . . . . . . . . . . . . . . . . . . . . . . . . . . . . . . . . . . . . . . . . . . . . . . . 35<br />
3.7.3 Zoom toolbar . . . . . . . . . . . . . . . . . . . . . . . . . . . . . . . . . . . . . . . . . . 36<br />
Zoom to marking area . . . . . . . . . . . . . . . . . . . . . . . . . . . . . . . . . 36<br />
Zoom to bounding box . . . . . . . . . . . . . . . . . . . . . . . . . . . . . . . . . 36<br />
Zoom plus . . . . . . . . . . . . . . . . . . . . . . . . . . . . . . . . . . . . . . . . . . 36<br />
Zoom minus . . . . . . . . . . . . . . . . . . . . . . . . . . . . . . . . . . . . . . . . . 36<br />
Zoom window . . . . . . . . . . . . . . . . . . . . . . . . . . . . . . . . . . . . . . . . 36<br />
Measurement . . . . . . . . . . . . . . . . . . . . . . . . . . . . . . . . . . . . . . . . 37<br />
3.7.4 Graphic window . . . . . . . . . . . . . . . . . . . . . . . . . . . . . . . . . . . . . . . . 38<br />
Moving the view . . . . . . . . . . . . . . . . . . . . . . . . . . . . . . . . . . . . . . 38<br />
3.7.5 Graphic parameter area . . . . . . . . . . . . . . . . . . . . . . . . . . . . . . . . . . 39<br />
2 <strong>Laser</strong> marking software: V1.5 Build: 343
Contents<br />
3.7.5.1 Graphic parameter . . . . . . . . . . . . . . . . . . . . . . . . . . . . . . . . . . . . . 39<br />
<strong>Laser</strong> parameter. . . . . . . . . . . . . . . . . . . . . . . . . . . . . . . . . . . . . . 39<br />
Move . . . . . . . . . . . . . . . . . . . . . . . . . . . . . . . . . . . . . . . . . . . . . . 39<br />
Size . . . . . . . . . . . . . . . . . . . . . . . . . . . . . . . . . . . . . . . . . . . . . . . 39<br />
Rotation . . . . . . . . . . . . . . . . . . . . . . . . . . . . . . . . . . . . . . . . . . . . 39<br />
Mirror . . . . . . . . . . . . . . . . . . . . . . . . . . . . . . . . . . . . . . . . . . . . . . 39<br />
Script file . . . . . . . . . . . . . . . . . . . . . . . . . . . . . . . . . . . . . . . . . . . 39<br />
External axis . . . . . . . . . . . . . . . . . . . . . . . . . . . . . . . . . . . . . . . . 40<br />
3.7.5.2 Element parameter. . . . . . . . . . . . . . . . . . . . . . . . . . . . . . . . . . . . . 40<br />
<strong>Laser</strong> parameter. . . . . . . . . . . . . . . . . . . . . . . . . . . . . . . . . . . . . . 40<br />
External axis . . . . . . . . . . . . . . . . . . . . . . . . . . . . . . . . . . . . . . . . 40<br />
Move . . . . . . . . . . . . . . . . . . . . . . . . . . . . . . . . . . . . . . . . . . . . . . 40<br />
Passes . . . . . . . . . . . . . . . . . . . . . . . . . . . . . . . . . . . . . . . . . . . . . 40<br />
Array . . . . . . . . . . . . . . . . . . . . . . . . . . . . . . . . . . . . . . . . . . . . . . 40<br />
3.7.5.3 Line parameter. . . . . . . . . . . . . . . . . . . . . . . . . . . . . . . . . . . . . . . . 41<br />
3.7.5.4 Rectangle parameter . . . . . . . . . . . . . . . . . . . . . . . . . . . . . . . . . . . 41<br />
BaseRef . . . . . . . . . . . . . . . . . . . . . . . . . . . . . . . . . . . . . . . . . . . . 41<br />
Dimension . . . . . . . . . . . . . . . . . . . . . . . . . . . . . . . . . . . . . . . . . . 41<br />
Corner radius . . . . . . . . . . . . . . . . . . . . . . . . . . . . . . . . . . . . . . . . 41<br />
3.7.5.5 Ellipse parameter . . . . . . . . . . . . . . . . . . . . . . . . . . . . . . . . . . . . . . 42<br />
BaseRef . . . . . . . . . . . . . . . . . . . . . . . . . . . . . . . . . . . . . . . . . . . . 42<br />
Radius X, Y . . . . . . . . . . . . . . . . . . . . . . . . . . . . . . . . . . . . . . . . . 42<br />
Angle . . . . . . . . . . . . . . . . . . . . . . . . . . . . . . . . . . . . . . . . . . . . . . 42<br />
3.7.5.6 Text parameter. . . . . . . . . . . . . . . . . . . . . . . . . . . . . . . . . . . . . . . . 42<br />
BaseRef . . . . . . . . . . . . . . . . . . . . . . . . . . . . . . . . . . . . . . . . . . . . 42<br />
Text . . . . . . . . . . . . . . . . . . . . . . . . . . . . . . . . . . . . . . . . . . . . . . . 43<br />
Font . . . . . . . . . . . . . . . . . . . . . . . . . . . . . . . . . . . . . . . . . . . . . . . 43<br />
Additional settings . . . . . . . . . . . . . . . . . . . . . . . . . . . . . . . . . . . . 43<br />
3.7.5.7 Barcode parameter . . . . . . . . . . . . . . . . . . . . . . . . . . . . . . . . . . . . 43<br />
BaseRef . . . . . . . . . . . . . . . . . . . . . . . . . . . . . . . . . . . . . . . . . . . . 43<br />
Type . . . . . . . . . . . . . . . . . . . . . . . . . . . . . . . . . . . . . . . . . . . . . . . 43<br />
Data . . . . . . . . . . . . . . . . . . . . . . . . . . . . . . . . . . . . . . . . . . . . . . . 43<br />
Barcode height. . . . . . . . . . . . . . . . . . . . . . . . . . . . . . . . . . . . . . . 44<br />
Module parameter . . . . . . . . . . . . . . . . . . . . . . . . . . . . . . . . . . . . 44<br />
3.7.5.8 Datamatrix parameter . . . . . . . . . . . . . . . . . . . . . . . . . . . . . . . . . . 44<br />
BaseRef . . . . . . . . . . . . . . . . . . . . . . . . . . . . . . . . . . . . . . . . . . . . 44<br />
Data . . . . . . . . . . . . . . . . . . . . . . . . . . . . . . . . . . . . . . . . . . . . . . . 44<br />
Module parameter . . . . . . . . . . . . . . . . . . . . . . . . . . . . . . . . . . . . 44<br />
3.7.5.9 PDF417 parameter. . . . . . . . . . . . . . . . . . . . . . . . . . . . . . . . . . . . . 45<br />
BaseRef . . . . . . . . . . . . . . . . . . . . . . . . . . . . . . . . . . . . . . . . . . . . 45<br />
Data . . . . . . . . . . . . . . . . . . . . . . . . . . . . . . . . . . . . . . . . . . . . . . . 45<br />
Code parameter . . . . . . . . . . . . . . . . . . . . . . . . . . . . . . . . . . . . . . 45<br />
Module parameter . . . . . . . . . . . . . . . . . . . . . . . . . . . . . . . . . . . . 45<br />
3.7.5.10 Import parameter . . . . . . . . . . . . . . . . . . . . . . . . . . . . . . . . . . . . . . 46<br />
BaseRef . . . . . . . . . . . . . . . . . . . . . . . . . . . . . . . . . . . . . . . . . . . . 46<br />
Import file . . . . . . . . . . . . . . . . . . . . . . . . . . . . . . . . . . . . . . . . . . . 46<br />
File types . . . . . . . . . . . . . . . . . . . . . . . . . . . . . . . . . . . . . . . . . . . 47<br />
Load/Reload. . . . . . . . . . . . . . . . . . . . . . . . . . . . . . . . . . . . . . . . . 47<br />
Vectors. . . . . . . . . . . . . . . . . . . . . . . . . . . . . . . . . . . . . . . . . . . . . 47<br />
<strong>Laser</strong> marking software: V1.5 Build: 343 3
Contents<br />
Import options . . . . . . . . . . . . . . . . . . . . . . . . . . . . . . . . . . . . . . . 47<br />
Apply options . . . . . . . . . . . . . . . . . . . . . . . . . . . . . . . . . . . . . . . . 47<br />
3.7.5.11 Move parameter . . . . . . . . . . . . . . . . . . . . . . . . . . . . . . . . . . . . . . . 47<br />
3.7.5.12 Size parameter . . . . . . . . . . . . . . . . . . . . . . . . . . . . . . . . . . . . . . . . 47<br />
3.7.5.13 Rotation parameter. . . . . . . . . . . . . . . . . . . . . . . . . . . . . . . . . . . . . 48<br />
3.7.5.14 Mirror parameter. . . . . . . . . . . . . . . . . . . . . . . . . . . . . . . . . . . . . . . 48<br />
3.7.5.15 Polar parameter . . . . . . . . . . . . . . . . . . . . . . . . . . . . . . . . . . . . . . . 48<br />
3.7.5.16 Fill parameter . . . . . . . . . . . . . . . . . . . . . . . . . . . . . . . . . . . . . . . . . 49<br />
3.7.5.17 Wobble parameter . . . . . . . . . . . . . . . . . . . . . . . . . . . . . . . . . . . . . 49<br />
3.7.5.18 Path parameter. . . . . . . . . . . . . . . . . . . . . . . . . . . . . . . . . . . . . . . . 49<br />
3.8 Script area. . . . . . . . . . . . . . . . . . . . . . . . . . . . . . . . . . . . . . . . . . . . 50<br />
3.8.1 Script samples . . . . . . . . . . . . . . . . . . . . . . . . . . . . . . . . . . . . . . . . . 51<br />
3.8.1.1 Serial numbers . . . . . . . . . . . . . . . . . . . . . . . . . . . . . . . . . . . . . . . . 51<br />
Graphic part . . . . . . . . . . . . . . . . . . . . . . . . . . . . . . . . . . . . . . . . . 51<br />
Script part. . . . . . . . . . . . . . . . . . . . . . . . . . . . . . . . . . . . . . . . . . . 52<br />
Main program . . . . . . . . . . . . . . . . . . . . . . . . . . . . . . . . . . . . . . . . 52<br />
CallBack function . . . . . . . . . . . . . . . . . . . . . . . . . . . . . . . . . . . . . 52<br />
3.8.1.2 Excel content . . . . . . . . . . . . . . . . . . . . . . . . . . . . . . . . . . . . . . . . . 53<br />
Graphic part . . . . . . . . . . . . . . . . . . . . . . . . . . . . . . . . . . . . . . . . . 53<br />
Script part. . . . . . . . . . . . . . . . . . . . . . . . . . . . . . . . . . . . . . . . . . . 54<br />
Main program . . . . . . . . . . . . . . . . . . . . . . . . . . . . . . . . . . . . . . . . 54<br />
CallBack function . . . . . . . . . . . . . . . . . . . . . . . . . . . . . . . . . . . . . 54<br />
3.9 Parameter area . . . . . . . . . . . . . . . . . . . . . . . . . . . . . . . . . . . . . . . . 55<br />
<strong>Laser</strong> . . . . . . . . . . . . . . . . . . . . . . . . . . . . . . . . . . . . . . . . . . . . . . 55<br />
Auto start . . . . . . . . . . . . . . . . . . . . . . . . . . . . . . . . . . . . . . . . . . . 56<br />
Measurement unit . . . . . . . . . . . . . . . . . . . . . . . . . . . . . . . . . . . . 56<br />
I/O control. . . . . . . . . . . . . . . . . . . . . . . . . . . . . . . . . . . . . . . . . . . 56<br />
Default and test values. . . . . . . . . . . . . . . . . . . . . . . . . . . . . . . . . 57<br />
<strong><strong>Mark</strong>ing</strong> field. . . . . . . . . . . . . . . . . . . . . . . . . . . . . . . . . . . . . . . . . 58<br />
3.10 Service area . . . . . . . . . . . . . . . . . . . . . . . . . . . . . . . . . . . . . . . . . . 59<br />
<strong>Laser</strong> . . . . . . . . . . . . . . . . . . . . . . . . . . . . . . . . . . . . . . . . . . . . . . 59<br />
Jump delays . . . . . . . . . . . . . . . . . . . . . . . . . . . . . . . . . . . . . . . . . 60<br />
Corner delay. . . . . . . . . . . . . . . . . . . . . . . . . . . . . . . . . . . . . . . . . 61<br />
First pulse suppression . . . . . . . . . . . . . . . . . . . . . . . . . . . . . . . . 61<br />
4 Programming . . . . . . . . . . . . . . . . . . . . . . . . . . . . . . . . . . . . . . . . . 62<br />
4.1 Basics . . . . . . . . . . . . . . . . . . . . . . . . . . . . . . . . . . . . . . . . . . . . . . . 62<br />
General information . . . . . . . . . . . . . . . . . . . . . . . . . . . . . . . . . . . 62<br />
Program documentation. . . . . . . . . . . . . . . . . . . . . . . . . . . . . . . . 62<br />
4.2 The script programming window . . . . . . . . . . . . . . . . . . . . . . . . . 62<br />
4.2.1 File handling . . . . . . . . . . . . . . . . . . . . . . . . . . . . . . . . . . . . . . . . . . . 62<br />
New . . . . . . . . . . . . . . . . . . . . . . . . . . . . . . . . . . . . . . . . . . . . . . . 62<br />
Open . . . . . . . . . . . . . . . . . . . . . . . . . . . . . . . . . . . . . . . . . . . . . . 63<br />
Save . . . . . . . . . . . . . . . . . . . . . . . . . . . . . . . . . . . . . . . . . . . . . . . 63<br />
Save All . . . . . . . . . . . . . . . . . . . . . . . . . . . . . . . . . . . . . . . . . . . . 63<br />
Print . . . . . . . . . . . . . . . . . . . . . . . . . . . . . . . . . . . . . . . . . . . . . . . 63<br />
4.2.2 Edit . . . . . . . . . . . . . . . . . . . . . . . . . . . . . . . . . . . . . . . . . . . . . . . . . . 63<br />
Cut . . . . . . . . . . . . . . . . . . . . . . . . . . . . . . . . . . . . . . . . . . . . . . . . 63<br />
4 <strong>Laser</strong> marking software: V1.5 Build: 343
Contents<br />
Copy. . . . . . . . . . . . . . . . . . . . . . . . . . . . . . . . . . . . . . . . . . . . . . . 63<br />
Paste . . . . . . . . . . . . . . . . . . . . . . . . . . . . . . . . . . . . . . . . . . . . . . 64<br />
Undo . . . . . . . . . . . . . . . . . . . . . . . . . . . . . . . . . . . . . . . . . . . . . . 64<br />
Redo . . . . . . . . . . . . . . . . . . . . . . . . . . . . . . . . . . . . . . . . . . . . . . 64<br />
4.2.3 Object Catalogue . . . . . . . . . . . . . . . . . . . . . . . . . . . . . . . . . . . . . . . 64<br />
Display object. . . . . . . . . . . . . . . . . . . . . . . . . . . . . . . . . . . . . . . . 64<br />
4.2.4 Start/Stop . . . . . . . . . . . . . . . . . . . . . . . . . . . . . . . . . . . . . . . . . . . . . 65<br />
Start/Continue . . . . . . . . . . . . . . . . . . . . . . . . . . . . . . . . . . . . . . . 65<br />
Pause. . . . . . . . . . . . . . . . . . . . . . . . . . . . . . . . . . . . . . . . . . . . . . 65<br />
End. . . . . . . . . . . . . . . . . . . . . . . . . . . . . . . . . . . . . . . . . . . . . . . . 65<br />
4.2.5 Program Testing. . . . . . . . . . . . . . . . . . . . . . . . . . . . . . . . . . . . . . . . 65<br />
Breakpoint On/Off . . . . . . . . . . . . . . . . . . . . . . . . . . . . . . . . . . . . 65<br />
Evaluate Expression . . . . . . . . . . . . . . . . . . . . . . . . . . . . . . . . . . 65<br />
Edit Point . . . . . . . . . . . . . . . . . . . . . . . . . . . . . . . . . . . . . . . . . . . 66<br />
Jumping in (individual step) . . . . . . . . . . . . . . . . . . . . . . . . . . . . . 66<br />
Skip (procedure step). . . . . . . . . . . . . . . . . . . . . . . . . . . . . . . . . . 66<br />
Jump out (Finish procedure) . . . . . . . . . . . . . . . . . . . . . . . . . . . . 66<br />
4.2.6 User Dialog . . . . . . . . . . . . . . . . . . . . . . . . . . . . . . . . . . . . . . . . . . . 66<br />
Edit user dialog . . . . . . . . . . . . . . . . . . . . . . . . . . . . . . . . . . . . . . 66<br />
4.3 Programming language . . . . . . . . . . . . . . . . . . . . . . . . . . . . . . . . . 67<br />
4.3.1 Variables . . . . . . . . . . . . . . . . . . . . . . . . . . . . . . . . . . . . . . . . . . . . . 67<br />
General information . . . . . . . . . . . . . . . . . . . . . . . . . . . . . . . . . . . 67<br />
Naming Variables. . . . . . . . . . . . . . . . . . . . . . . . . . . . . . . . . . . . . 67<br />
Byte . . . . . . . . . . . . . . . . . . . . . . . . . . . . . . . . . . . . . . . . . . . . . . . 67<br />
Boolean . . . . . . . . . . . . . . . . . . . . . . . . . . . . . . . . . . . . . . . . . . . . 68<br />
Integer . . . . . . . . . . . . . . . . . . . . . . . . . . . . . . . . . . . . . . . . . . . . . 68<br />
Long . . . . . . . . . . . . . . . . . . . . . . . . . . . . . . . . . . . . . . . . . . . . . . . 68<br />
Single . . . . . . . . . . . . . . . . . . . . . . . . . . . . . . . . . . . . . . . . . . . . . . 68<br />
Double . . . . . . . . . . . . . . . . . . . . . . . . . . . . . . . . . . . . . . . . . . . . . 68<br />
Currency . . . . . . . . . . . . . . . . . . . . . . . . . . . . . . . . . . . . . . . . . . . 69<br />
Date . . . . . . . . . . . . . . . . . . . . . . . . . . . . . . . . . . . . . . . . . . . . . . . 69<br />
String . . . . . . . . . . . . . . . . . . . . . . . . . . . . . . . . . . . . . . . . . . . . . . 69<br />
Variant . . . . . . . . . . . . . . . . . . . . . . . . . . . . . . . . . . . . . . . . . . . . . 69<br />
4.3.2 Constants . . . . . . . . . . . . . . . . . . . . . . . . . . . . . . . . . . . . . . . . . . . . . 71<br />
4.3.3 Fields . . . . . . . . . . . . . . . . . . . . . . . . . . . . . . . . . . . . . . . . . . . . . . . . 71<br />
4.3.4 Loops . . . . . . . . . . . . . . . . . . . . . . . . . . . . . . . . . . . . . . . . . . . . . . . . 73<br />
For Next . . . . . . . . . . . . . . . . . . . . . . . . . . . . . . . . . . . . . . . . . . . . 73<br />
While . . . . . . . . . . . . . . . . . . . . . . . . . . . . . . . . . . . . . . . . . . . . . . 73<br />
Do . . . . . . . . . . . . . . . . . . . . . . . . . . . . . . . . . . . . . . . . . . . . . . . . 74<br />
4.3.5 Branching . . . . . . . . . . . . . . . . . . . . . . . . . . . . . . . . . . . . . . . . . . . . . 75<br />
If Then Else . . . . . . . . . . . . . . . . . . . . . . . . . . . . . . . . . . . . . . . . . 75<br />
Select Case . . . . . . . . . . . . . . . . . . . . . . . . . . . . . . . . . . . . . . . . . 76<br />
4.3.6 Procedures and Functions . . . . . . . . . . . . . . . . . . . . . . . . . . . . . . . . 77<br />
Procedures. . . . . . . . . . . . . . . . . . . . . . . . . . . . . . . . . . . . . . . . . . 77<br />
Functions . . . . . . . . . . . . . . . . . . . . . . . . . . . . . . . . . . . . . . . . . . . 78<br />
4.3.7 Editing Texts . . . . . . . . . . . . . . . . . . . . . . . . . . . . . . . . . . . . . . . . . . 78<br />
Len . . . . . . . . . . . . . . . . . . . . . . . . . . . . . . . . . . . . . . . . . . . . . . . . 79<br />
<strong>Laser</strong> marking software: V1.5 Build: 343 5
Contents<br />
Left . . . . . . . . . . . . . . . . . . . . . . . . . . . . . . . . . . . . . . . . . . . . . . . . 79<br />
Mid . . . . . . . . . . . . . . . . . . . . . . . . . . . . . . . . . . . . . . . . . . . . . . . . 79<br />
Right. . . . . . . . . . . . . . . . . . . . . . . . . . . . . . . . . . . . . . . . . . . . . . . 80<br />
Str. . . . . . . . . . . . . . . . . . . . . . . . . . . . . . . . . . . . . . . . . . . . . . . . . 80<br />
StrReverse . . . . . . . . . . . . . . . . . . . . . . . . . . . . . . . . . . . . . . . . . . 81<br />
UCase . . . . . . . . . . . . . . . . . . . . . . . . . . . . . . . . . . . . . . . . . . . . . 81<br />
4.3.8 Mathematical Operations . . . . . . . . . . . . . . . . . . . . . . . . . . . . . . . . . 81<br />
Sin, Cos, Tan, Atn . . . . . . . . . . . . . . . . . . . . . . . . . . . . . . . . . . . . 81<br />
Exp, Log, Sqr . . . . . . . . . . . . . . . . . . . . . . . . . . . . . . . . . . . . . . . . 82<br />
Abs, Fix, Int, Round, Sgn . . . . . . . . . . . . . . . . . . . . . . . . . . . . . . . 82<br />
4.3.9 Operators . . . . . . . . . . . . . . . . . . . . . . . . . . . . . . . . . . . . . . . . . . . . . 83<br />
4.3.10 Type Conversion Functions . . . . . . . . . . . . . . . . . . . . . . . . . . . . . . . 84<br />
4.3.11 Working with Files . . . . . . . . . . . . . . . . . . . . . . . . . . . . . . . . . . . . . . 85<br />
File names . . . . . . . . . . . . . . . . . . . . . . . . . . . . . . . . . . . . . . . . . . 85<br />
4.3.12 Sequential Files . . . . . . . . . . . . . . . . . . . . . . . . . . . . . . . . . . . . . . . . 86<br />
Open . . . . . . . . . . . . . . . . . . . . . . . . . . . . . . . . . . . . . . . . . . . . . . 86<br />
Close . . . . . . . . . . . . . . . . . . . . . . . . . . . . . . . . . . . . . . . . . . . . . . 86<br />
Print . . . . . . . . . . . . . . . . . . . . . . . . . . . . . . . . . . . . . . . . . . . . . . . 86<br />
Write. . . . . . . . . . . . . . . . . . . . . . . . . . . . . . . . . . . . . . . . . . . . . . . 86<br />
Input . . . . . . . . . . . . . . . . . . . . . . . . . . . . . . . . . . . . . . . . . . . . . . . 87<br />
Line Input . . . . . . . . . . . . . . . . . . . . . . . . . . . . . . . . . . . . . . . . . . . 88<br />
4.3.13 Files with Direct Access . . . . . . . . . . . . . . . . . . . . . . . . . . . . . . . . . . 88<br />
Put . . . . . . . . . . . . . . . . . . . . . . . . . . . . . . . . . . . . . . . . . . . . . . . . 88<br />
Get . . . . . . . . . . . . . . . . . . . . . . . . . . . . . . . . . . . . . . . . . . . . . . . . 89<br />
4.3.14 Creating User Dialog Windows. . . . . . . . . . . . . . . . . . . . . . . . . . . . . 89<br />
Edit user dialog . . . . . . . . . . . . . . . . . . . . . . . . . . . . . . . . . . . . . . 89<br />
Menu bar . . . . . . . . . . . . . . . . . . . . . . . . . . . . . . . . . . . . . . . . . . . 91<br />
Editing properties . . . . . . . . . . . . . . . . . . . . . . . . . . . . . . . . . . . . . 91<br />
View of elements . . . . . . . . . . . . . . . . . . . . . . . . . . . . . . . . . . . . . 92<br />
Select . . . . . . . . . . . . . . . . . . . . . . . . . . . . . . . . . . . . . . . . . . . . . . 92<br />
Add group box . . . . . . . . . . . . . . . . . . . . . . . . . . . . . . . . . . . . . . . 92<br />
Add text . . . . . . . . . . . . . . . . . . . . . . . . . . . . . . . . . . . . . . . . . . . . 92<br />
Add text box . . . . . . . . . . . . . . . . . . . . . . . . . . . . . . . . . . . . . . . . . 93<br />
Add check box . . . . . . . . . . . . . . . . . . . . . . . . . . . . . . . . . . . . . . . 94<br />
Add options button . . . . . . . . . . . . . . . . . . . . . . . . . . . . . . . . . . . . 95<br />
Add list box. . . . . . . . . . . . . . . . . . . . . . . . . . . . . . . . . . . . . . . . . . 96<br />
Add droplist box . . . . . . . . . . . . . . . . . . . . . . . . . . . . . . . . . . . . . . 97<br />
Add combo box . . . . . . . . . . . . . . . . . . . . . . . . . . . . . . . . . . . . . . 98<br />
Add picture . . . . . . . . . . . . . . . . . . . . . . . . . . . . . . . . . . . . . . . . . . 98<br />
Add buttons . . . . . . . . . . . . . . . . . . . . . . . . . . . . . . . . . . . . . . . . . 99<br />
Dialog function . . . . . . . . . . . . . . . . . . . . . . . . . . . . . . . . . . . . . . 100<br />
4.3.15 Dialog Box . . . . . . . . . . . . . . . . . . . . . . . . . . . . . . . . . . . . . . . . . . . 102<br />
Input box . . . . . . . . . . . . . . . . . . . . . . . . . . . . . . . . . . . . . . . . . . 102<br />
Message Box . . . . . . . . . . . . . . . . . . . . . . . . . . . . . . . . . . . . . . . 102<br />
PopUp menu . . . . . . . . . . . . . . . . . . . . . . . . . . . . . . . . . . . . . . . 104<br />
4.3.16 Handling of Errors. . . . . . . . . . . . . . . . . . . . . . . . . . . . . . . . . . . . . . 106<br />
On Error Goto. . . . . . . . . . . . . . . . . . . . . . . . . . . . . . . . . . . . . . . 106<br />
On Error Resume Next. . . . . . . . . . . . . . . . . . . . . . . . . . . . . . . . 107<br />
6 <strong>Laser</strong> marking software: V1.5 Build: 343
Contents<br />
4.4 <strong>Laser</strong> specific script extensions. . . . . . . . . . . . . . . . . . . . . . . . . 107<br />
4.4.1 Callback procedures . . . . . . . . . . . . . . . . . . . . . . . . . . . . . . . . . . . 107<br />
LC_CleanUp() . . . . . . . . . . . . . . . . . . . . . . . . . . . . . . . . . . . . . . 108<br />
LC_OnError() . . . . . . . . . . . . . . . . . . . . . . . . . . . . . . . . . . . . . . . 108<br />
LC_LifeTick() . . . . . . . . . . . . . . . . . . . . . . . . . . . . . . . . . . . . . . . 108<br />
LC_AckMessage(...) . . . . . . . . . . . . . . . . . . . . . . . . . . . . . . . . . 108<br />
LC_RecMessage(...) . . . . . . . . . . . . . . . . . . . . . . . . . . . . . . . . . 108<br />
LC_GrafikEntry() . . . . . . . . . . . . . . . . . . . . . . . . . . . . . . . . . . . . 108<br />
LC_GrafikExit() . . . . . . . . . . . . . . . . . . . . . . . . . . . . . . . . . . . . . 108<br />
LC_ElementEntry(...) . . . . . . . . . . . . . . . . . . . . . . . . . . . . . . . . . 108<br />
LC_ElementExit(...) . . . . . . . . . . . . . . . . . . . . . . . . . . . . . . . . . . 108<br />
LC_ElementBefore<strong>Laser</strong>(...) . . . . . . . . . . . . . . . . . . . . . . . . . . . 109<br />
LC_<strong>Mark</strong>Idle(...) . . . . . . . . . . . . . . . . . . . . . . . . . . . . . . . . . . . . . 109<br />
LC_Formatter(...) . . . . . . . . . . . . . . . . . . . . . . . . . . . . . . . . . . . . 109<br />
LC_ExternAxis(...) . . . . . . . . . . . . . . . . . . . . . . . . . . . . . . . . . . . 109<br />
4.4.2 Internal extensions (LC.) . . . . . . . . . . . . . . . . . . . . . . . . . . . . . . . . 109<br />
Get<strong>Laser</strong>Configuration. . . . . . . . . . . . . . . . . . . . . . . . . . . . . . . . 109<br />
GetAppPathName . . . . . . . . . . . . . . . . . . . . . . . . . . . . . . . . . . . 109<br />
GetAppPath . . . . . . . . . . . . . . . . . . . . . . . . . . . . . . . . . . . . . . . . 110<br />
GetAppName . . . . . . . . . . . . . . . . . . . . . . . . . . . . . . . . . . . . . . . 110<br />
Hide . . . . . . . . . . . . . . . . . . . . . . . . . . . . . . . . . . . . . . . . . . . . . . 110<br />
Show . . . . . . . . . . . . . . . . . . . . . . . . . . . . . . . . . . . . . . . . . . . . . 110<br />
ApplicationExit . . . . . . . . . . . . . . . . . . . . . . . . . . . . . . . . . . . . . . 110<br />
LifeTickInterval. . . . . . . . . . . . . . . . . . . . . . . . . . . . . . . . . . . . . . 110<br />
TimerStart . . . . . . . . . . . . . . . . . . . . . . . . . . . . . . . . . . . . . . . . . 110<br />
TimerStop . . . . . . . . . . . . . . . . . . . . . . . . . . . . . . . . . . . . . . . . . 111<br />
StartRecMessage . . . . . . . . . . . . . . . . . . . . . . . . . . . . . . . . . . . 111<br />
StopRecMessage. . . . . . . . . . . . . . . . . . . . . . . . . . . . . . . . . . . . 111<br />
SendMessage . . . . . . . . . . . . . . . . . . . . . . . . . . . . . . . . . . . . . . 111<br />
LoadFile . . . . . . . . . . . . . . . . . . . . . . . . . . . . . . . . . . . . . . . . . . . 111<br />
SaveFile . . . . . . . . . . . . . . . . . . . . . . . . . . . . . . . . . . . . . . . . . . . 112<br />
GetFileName . . . . . . . . . . . . . . . . . . . . . . . . . . . . . . . . . . . . . . . 112<br />
StatusText . . . . . . . . . . . . . . . . . . . . . . . . . . . . . . . . . . . . . . . . . 112<br />
<strong>Mark</strong> . . . . . . . . . . . . . . . . . . . . . . . . . . . . . . . . . . . . . . . . . . . . . . 112<br />
Stop<strong>Mark</strong> . . . . . . . . . . . . . . . . . . . . . . . . . . . . . . . . . . . . . . . . . . 112<br />
SetMoveOffset . . . . . . . . . . . . . . . . . . . . . . . . . . . . . . . . . . . . . . 112<br />
SetPowerOffset . . . . . . . . . . . . . . . . . . . . . . . . . . . . . . . . . . . . . 113<br />
GetBooleanValue. . . . . . . . . . . . . . . . . . . . . . . . . . . . . . . . . . . . 113<br />
GetNumericValue. . . . . . . . . . . . . . . . . . . . . . . . . . . . . . . . . . . . 113<br />
GetNumericValue_mm. . . . . . . . . . . . . . . . . . . . . . . . . . . . . . . . 113<br />
GetNumericValue_mil . . . . . . . . . . . . . . . . . . . . . . . . . . . . . . . . 113<br />
GetNumericValue_inch . . . . . . . . . . . . . . . . . . . . . . . . . . . . . . . 113<br />
GetStringValue. . . . . . . . . . . . . . . . . . . . . . . . . . . . . . . . . . . . . . 114<br />
SetBooleanValue . . . . . . . . . . . . . . . . . . . . . . . . . . . . . . . . . . . . 114<br />
SetNumericValue . . . . . . . . . . . . . . . . . . . . . . . . . . . . . . . . . . . . 114<br />
SetNumericValue_mm . . . . . . . . . . . . . . . . . . . . . . . . . . . . . . . . 114<br />
SetNumericValue_mil . . . . . . . . . . . . . . . . . . . . . . . . . . . . . . . . 114<br />
SetNumericValue_inch . . . . . . . . . . . . . . . . . . . . . . . . . . . . . . . 115<br />
SetStringValue . . . . . . . . . . . . . . . . . . . . . . . . . . . . . . . . . . . . . . 115<br />
<strong>Laser</strong> marking software: V1.5 Build: 343 7
Contents<br />
Refresh. . . . . . . . . . . . . . . . . . . . . . . . . . . . . . . . . . . . . . . . . . . . 115<br />
SetCheck . . . . . . . . . . . . . . . . . . . . . . . . . . . . . . . . . . . . . . . . . . 115<br />
GetCheck . . . . . . . . . . . . . . . . . . . . . . . . . . . . . . . . . . . . . . . . . . 115<br />
BoundingBox . . . . . . . . . . . . . . . . . . . . . . . . . . . . . . . . . . . . . . . 115<br />
ShowBoundingBox. . . . . . . . . . . . . . . . . . . . . . . . . . . . . . . . . . . 115<br />
GetBBMinX . . . . . . . . . . . . . . . . . . . . . . . . . . . . . . . . . . . . . . . . 116<br />
GetBBMaxX . . . . . . . . . . . . . . . . . . . . . . . . . . . . . . . . . . . . . . . . 116<br />
GetBBMinY . . . . . . . . . . . . . . . . . . . . . . . . . . . . . . . . . . . . . . . . 116<br />
GetBBMaxY . . . . . . . . . . . . . . . . . . . . . . . . . . . . . . . . . . . . . . . . 116<br />
ZoomBoundingBox. . . . . . . . . . . . . . . . . . . . . . . . . . . . . . . . . . . 116<br />
ZoomAll . . . . . . . . . . . . . . . . . . . . . . . . . . . . . . . . . . . . . . . . . . . 116<br />
4.4.3 External Extensions (EX.). . . . . . . . . . . . . . . . . . . . . . . . . . . . . . . . 116<br />
Formatter . . . . . . . . . . . . . . . . . . . . . . . . . . . . . . . . . . . . . . . . . . 116<br />
ReadIniFormat . . . . . . . . . . . . . . . . . . . . . . . . . . . . . . . . . . . . . . 116<br />
WriteIniFormat . . . . . . . . . . . . . . . . . . . . . . . . . . . . . . . . . . . . . . 117<br />
ReadXmlFormat . . . . . . . . . . . . . . . . . . . . . . . . . . . . . . . . . . . . . 117<br />
WriteXmlFormat . . . . . . . . . . . . . . . . . . . . . . . . . . . . . . . . . . . . . 117<br />
SerOpen. . . . . . . . . . . . . . . . . . . . . . . . . . . . . . . . . . . . . . . . . . . 117<br />
SerClose . . . . . . . . . . . . . . . . . . . . . . . . . . . . . . . . . . . . . . . . . . 117<br />
SerCloseAll . . . . . . . . . . . . . . . . . . . . . . . . . . . . . . . . . . . . . . . . 118<br />
SerChangeBaudRate . . . . . . . . . . . . . . . . . . . . . . . . . . . . . . . . . 118<br />
SerWrite . . . . . . . . . . . . . . . . . . . . . . . . . . . . . . . . . . . . . . . . . . . 118<br />
SerWriteByte . . . . . . . . . . . . . . . . . . . . . . . . . . . . . . . . . . . . . . . 118<br />
SerWritePending . . . . . . . . . . . . . . . . . . . . . . . . . . . . . . . . . . . . 118<br />
SerWritePendingWait. . . . . . . . . . . . . . . . . . . . . . . . . . . . . . . . . 118<br />
SerRead . . . . . . . . . . . . . . . . . . . . . . . . . . . . . . . . . . . . . . . . . . . 118<br />
SerReadByte . . . . . . . . . . . . . . . . . . . . . . . . . . . . . . . . . . . . . . . 119<br />
SerReadWait . . . . . . . . . . . . . . . . . . . . . . . . . . . . . . . . . . . . . . . 119<br />
SerReadUntil . . . . . . . . . . . . . . . . . . . . . . . . . . . . . . . . . . . . . . . 119<br />
SerReadUntilWait. . . . . . . . . . . . . . . . . . . . . . . . . . . . . . . . . . . . 119<br />
SerReadPending . . . . . . . . . . . . . . . . . . . . . . . . . . . . . . . . . . . . 119<br />
4.4.4 ScannerControl extensions (SC.). . . . . . . . . . . . . . . . . . . . . . . . . . 120<br />
A_GetStatusDigital. . . . . . . . . . . . . . . . . . . . . . . . . . . . . . . . . . . 120<br />
A_GetStatusAnalog . . . . . . . . . . . . . . . . . . . . . . . . . . . . . . . . . . 120<br />
A_Set<strong>Laser</strong>State . . . . . . . . . . . . . . . . . . . . . . . . . . . . . . . . . . . . 120<br />
A_SetShutterState . . . . . . . . . . . . . . . . . . . . . . . . . . . . . . . . . . . 121<br />
A_LockShutter . . . . . . . . . . . . . . . . . . . . . . . . . . . . . . . . . . . . . . 121<br />
A_SetPilotState . . . . . . . . . . . . . . . . . . . . . . . . . . . . . . . . . . . . . 121<br />
A_GetBufferEmptyState. . . . . . . . . . . . . . . . . . . . . . . . . . . . . . . 121<br />
A_ReadyForNextSyncCmd . . . . . . . . . . . . . . . . . . . . . . . . . . . . 121<br />
A_Stop . . . . . . . . . . . . . . . . . . . . . . . . . . . . . . . . . . . . . . . . . . . . 121<br />
A_GetGeneralInputDigital . . . . . . . . . . . . . . . . . . . . . . . . . . . . . 122<br />
A_SetGeneralOutputDigital . . . . . . . . . . . . . . . . . . . . . . . . . . . . 122<br />
A_ResGeneralOutputDigital. . . . . . . . . . . . . . . . . . . . . . . . . . . . 122<br />
A_ClrGeneralOutputDigital. . . . . . . . . . . . . . . . . . . . . . . . . . . . . 122<br />
A_GetGeneralOutputDigital . . . . . . . . . . . . . . . . . . . . . . . . . . . . 122<br />
A_GetPower. . . . . . . . . . . . . . . . . . . . . . . . . . . . . . . . . . . . . . . . 123<br />
S_Power. . . . . . . . . . . . . . . . . . . . . . . . . . . . . . . . . . . . . . . . . . . 123<br />
S_Speed . . . . . . . . . . . . . . . . . . . . . . . . . . . . . . . . . . . . . . . . . . 123<br />
8 <strong>Laser</strong> marking software: V1.5 Build: 343
Contents<br />
S_QSF . . . . . . . . . . . . . . . . . . . . . . . . . . . . . . . . . . . . . . . . . . . . 123<br />
S_QSF_PW . . . . . . . . . . . . . . . . . . . . . . . . . . . . . . . . . . . . . . . . 123<br />
S_SetStartStopDelay . . . . . . . . . . . . . . . . . . . . . . . . . . . . . . . . . 123<br />
S_Pos . . . . . . . . . . . . . . . . . . . . . . . . . . . . . . . . . . . . . . . . . . . . 124<br />
P_SetRotation . . . . . . . . . . . . . . . . . . . . . . . . . . . . . . . . . . . . . . 124<br />
P_SetSize . . . . . . . . . . . . . . . . . . . . . . . . . . . . . . . . . . . . . . . . . 124<br />
P_SetMove . . . . . . . . . . . . . . . . . . . . . . . . . . . . . . . . . . . . . . . . 124<br />
P_SetClip . . . . . . . . . . . . . . . . . . . . . . . . . . . . . . . . . . . . . . . . . . 124<br />
P_SetMirror . . . . . . . . . . . . . . . . . . . . . . . . . . . . . . . . . . . . . . . . 125<br />
4.4.5 HighlevelGraphics extensions (HG.) . . . . . . . . . . . . . . . . . . . . . . . 125<br />
InitVectorArray . . . . . . . . . . . . . . . . . . . . . . . . . . . . . . . . . . . . . . 125<br />
FreeVectorArray. . . . . . . . . . . . . . . . . . . . . . . . . . . . . . . . . . . . . 125<br />
SendToSC . . . . . . . . . . . . . . . . . . . . . . . . . . . . . . . . . . . . . . . . . 125<br />
GetBoundingBox . . . . . . . . . . . . . . . . . . . . . . . . . . . . . . . . . . . . 126<br />
GetBoundingBoxLast . . . . . . . . . . . . . . . . . . . . . . . . . . . . . . . . . 126<br />
Vector. . . . . . . . . . . . . . . . . . . . . . . . . . . . . . . . . . . . . . . . . . . . . 126<br />
Ellipse . . . . . . . . . . . . . . . . . . . . . . . . . . . . . . . . . . . . . . . . . . . . 126<br />
Rectangle. . . . . . . . . . . . . . . . . . . . . . . . . . . . . . . . . . . . . . . . . . 127<br />
Text . . . . . . . . . . . . . . . . . . . . . . . . . . . . . . . . . . . . . . . . . . . . . . 127<br />
TextInfo . . . . . . . . . . . . . . . . . . . . . . . . . . . . . . . . . . . . . . . . . . . 127<br />
Barcode . . . . . . . . . . . . . . . . . . . . . . . . . . . . . . . . . . . . . . . . . . . 128<br />
Datamatrix . . . . . . . . . . . . . . . . . . . . . . . . . . . . . . . . . . . . . . . . . 128<br />
PDF417 . . . . . . . . . . . . . . . . . . . . . . . . . . . . . . . . . . . . . . . . . . . 129<br />
HPGL . . . . . . . . . . . . . . . . . . . . . . . . . . . . . . . . . . . . . . . . . . . . . 129<br />
Draw. . . . . . . . . . . . . . . . . . . . . . . . . . . . . . . . . . . . . . . . . . . . . . 129<br />
Fill . . . . . . . . . . . . . . . . . . . . . . . . . . . . . . . . . . . . . . . . . . . . . . . 130<br />
Move . . . . . . . . . . . . . . . . . . . . . . . . . . . . . . . . . . . . . . . . . . . . . 130<br />
Size . . . . . . . . . . . . . . . . . . . . . . . . . . . . . . . . . . . . . . . . . . . . . . 130<br />
Rotation . . . . . . . . . . . . . . . . . . . . . . . . . . . . . . . . . . . . . . . . . . . 130<br />
Mirror . . . . . . . . . . . . . . . . . . . . . . . . . . . . . . . . . . . . . . . . . . . . . 130<br />
Polar. . . . . . . . . . . . . . . . . . . . . . . . . . . . . . . . . . . . . . . . . . . . . . 131<br />
Clip. . . . . . . . . . . . . . . . . . . . . . . . . . . . . . . . . . . . . . . . . . . . . . . 131<br />
4.5 References . . . . . . . . . . . . . . . . . . . . . . . . . . . . . . . . . . . . . . . . . . 131<br />
4.5.1 BaseRef . . . . . . . . . . . . . . . . . . . . . . . . . . . . . . . . . . . . . . . . . . . . . 131<br />
4.5.2 Format specifications . . . . . . . . . . . . . . . . . . . . . . . . . . . . . . . . . . . 132<br />
4.5.3 Special format specifications . . . . . . . . . . . . . . . . . . . . . . . . . . . . . 133<br />
4.5.4 Barcode specification . . . . . . . . . . . . . . . . . . . . . . . . . . . . . . . . . . . 134<br />
5 Index . . . . . . . . . . . . . . . . . . . . . . . . . . . . . . . . . . . . . . . . . . . . . . . 135<br />
<strong>Laser</strong> marking software: V1.5 Build: 343 9
Contents<br />
10 <strong>Laser</strong> marking software: V1.5 Build: 343
1 Delivery<br />
1.1 Scope of delivery<br />
1.2 <strong>Software</strong> manual<br />
1.3 Manufacturer<br />
1.4 Warranty<br />
Delivery<br />
The software is supplied on CD.<br />
Please make a backup copy before you work with this software. Instructions<br />
on how to do this are located in your Windows manual or<br />
in the Windows Online Help file.<br />
This software manual is part of the software. Please keep it in a safe<br />
place. It contains useful information regarding the program creation<br />
and the optimum operation of the connected laser.<br />
Please submit this documentation together with the software if the<br />
software should be sold.<br />
The vendor reserves the right to update this software manual at any<br />
time and without prior notification, in keeping with technical<br />
progress.<br />
This manual was created in accordance with the currently valid technical<br />
status.<br />
Please study the manual thoroughly.<br />
See the back of the cover sheet.<br />
The vendor, programmers and author have applied the greatest<br />
possible care in the creation of the software and the manual. Nevertheless,<br />
the vendor, programmers and author do not assume any<br />
guarantee for the software and the manual. In particular, the vendor,<br />
programmers and author offer no guarantee that this software corresponds<br />
to the demands of the customers, or that the software is<br />
entirely without errors. In no case can the vendor, programmers or<br />
author be made liable for any errors, destruction or resulting damage<br />
that can be derived from the use of the software.<br />
<strong>Laser</strong> marking software: V1.5 Build: 343 11
Installation<br />
2 Installation<br />
2.1 System requirements<br />
The following configuration is recommended for the successful application<br />
of this software:<br />
• IBM-compatible Pentium 4 PC > 2 GHz,<br />
• Windows 2000/XP operating system,<br />
• 512 MB main memory,<br />
• 100 MB free hard disk capacity,<br />
• CD ROM drive,<br />
• 2 free USB 2.0 interfaces (for the device and for the dongle),<br />
• monitor (recommendation: 17 inch),<br />
• keyboard, mouse.<br />
2.2 Installation requirements<br />
Windows XP No particular requirements.<br />
However, the latest Service Pack is recommended.<br />
Windows 2000 The latest Service Pack is recommended.<br />
2.3 Installation sequence<br />
NOTE!<br />
Consider absolutely the installation sequence described<br />
in the following!<br />
1. Inserting the installation CD into the CD drive assembly.<br />
2. Installation of the laser marking software from CD.<br />
3. First putting of the delivereded dongle into an available USB<br />
port and installing the associated software component.<br />
4. First connecting of the laser device with the computer and<br />
Installing the associated software component.<br />
12 <strong>Laser</strong> marking software: V1.5 Build: 343
2.4 <strong>Software</strong> installation<br />
Installation<br />
NOTE!<br />
Administrator rights are required to install this software!<br />
To install the software, use the following procedure:<br />
1. Start the computer and your operating system.<br />
2. Insert the installation CD.<br />
3. Should the installation not start automatically, initialise the file<br />
setup_343.exe in the main folder on the CD.<br />
4. This software requires Microsoft .NET Framework. If this is not<br />
installed on your PC, then .NET Framework must be installed<br />
before the actual installation.<br />
An installation of the Microsoft Installer takes place automatically.<br />
In this case, follow the instructions displayed on the monitor.<br />
Fig. 1 Setup .NETFramework<br />
5. This software also requires Microsoft Direct(X) runtime components.<br />
If this is not installed on your PC, then it must be installed<br />
before the actual installation.<br />
In this case, follow the instructions displayed on the monitor.<br />
<strong>Laser</strong> marking software: V1.5 Build: 343 13
Installation<br />
Fig. 2 Setup Direct(X) runtime components<br />
6. Now the actual installation procedure for the software can take<br />
place.<br />
Fig. 3 Setup Window<br />
7. Click on the Next button.<br />
14 <strong>Laser</strong> marking software: V1.5 Build: 343
2.5 Dongle<br />
Fig. 4 Selection of the installation folder<br />
Installation<br />
8. Select the desired program folder with the help of the Browse<br />
button or use the default setting.<br />
9. Click on Next.<br />
10. Follow further instructions.<br />
The installation can be terminated at any time by pressing the<br />
Esc key or with the Cancel button.<br />
11. Once the installation is complete, the message Installation<br />
Complete will appear.<br />
12. Finish by clicking on the Close button.<br />
The software will run now in Demo mode.<br />
1. Plug the delivered dongle into an available USB port.<br />
The software will only run in Demo mode without the dongle.<br />
2. Because of the new hardware component an assistent to<br />
install the required software is started.<br />
Follow the installation instructions.<br />
<strong>Laser</strong> marking software: V1.5 Build: 343 15
Installation<br />
2.6 <strong>Laser</strong> connection<br />
Fig. 5 Assistent to install the dongle software<br />
1. Plug the connection cable of the laser device into an available<br />
USB port, connect the laser with the current supply and switch<br />
it on.<br />
The software will only run in Demo mode without the dongle.<br />
2. Because of the new hardware component an assistent to<br />
install the required software is started.<br />
Follow the installation instructions.<br />
Fig. 6 Assistent to install the laser software<br />
The installation is complete now.<br />
16 <strong>Laser</strong> marking software: V1.5 Build: 343
2.7 Program start<br />
2.8 Specific parameters<br />
2.9 Exit program<br />
Installation<br />
The setup generates an entry under: Start → Programs…, use this<br />
entry to call up the program.<br />
NOTE!<br />
The laser-specific parameters, which are enclosed with<br />
the laser, are imported via Service → Import Parameter.<br />
Fig. 7 Service menu<br />
Using the Import Parameter option, the laser-specific parameters,<br />
which are enclosed with the laser, import these.<br />
If you have changed the parameters, these can be saved with Export<br />
Parameter.<br />
Fig. 8 File menu/Taskbar menu<br />
End the program via: File → Exit.<br />
You can also end the program using the X or by using the taskbar<br />
menu in the lower right.<br />
If you merely want the program to run without a visible window, then<br />
select Hide, then you can only see the program as a task bar icon.<br />
In order to display the program window again, use the context menu<br />
(right mouse button) of the task bar icon and select Open Program.<br />
<strong>Laser</strong> marking software: V1.5 Build: 343 17
Installation<br />
2.10 Uninstalling<br />
2.11 Help<br />
2.12 Release<br />
2.13 Language settings<br />
If necessary, uninstall the software via the operating system:<br />
Start → Settings → Control Panel → <strong>Software</strong>...<br />
Fig. 9 Help menu<br />
If the software manual is not at hand, the same information can be<br />
found by clicking on Help. You can also call up Help by pressing the<br />
F1 key. In this case Help is dependent on content, so that you, when<br />
it is possible, can be automatically guided to the right place.<br />
Fig. 10 Help menu<br />
Information about the installed program version can be obtained by<br />
clicking on Help → Info after the program has been started.<br />
The information window shows the version and build number of the<br />
program.<br />
The program adapts to the language that is set in the Control Panel.<br />
If no corresponding language version is on hand, the English version<br />
will be used.<br />
18 <strong>Laser</strong> marking software: V1.5 Build: 343
3 Program description<br />
Program description<br />
This software is designed for the creation of marking programs as<br />
well as for the monitoring and control of a laser or a manufacturing<br />
cell, respectively.<br />
The program was developed to make the integration of one or more<br />
lasers with a manufacturing cell possible.<br />
The most important functions of the software are:<br />
• The control of several lasers with only one PC:<br />
• The program is executed independently for each laser.<br />
• Each laser can exchange messages with other lasers.<br />
• The number of lasers is solely dependent on the power of the<br />
PC.<br />
• A license is required for each laser!<br />
• Integration with the manufacturing cell:<br />
• High performance scripting language for controlling machine<br />
processes (handling systems)<br />
• Can be operated as a task bar symbol without a visible window.<br />
• Among other things, can communicate with other programs<br />
via a socket interface or file support.<br />
• Communication with external instruments via various interfaces.<br />
• Accesses databases.<br />
• Integration with host computer.<br />
• Administration of all laser parameters:<br />
• Power output.<br />
• Speed.<br />
• Frequency.<br />
• Delays.<br />
• Interfaces.<br />
• Graphic objects:<br />
• Precise input of parameters.<br />
• Fonts with single lines and all TrueType fonts.<br />
• Polar and multi line texts.<br />
• Various formats for numbers, date, time, etc.<br />
• 1D (normal) and 2D (data matrix) barcodes.<br />
• Basic objects (line, circle, rectangle).<br />
• Import of graphic images in various formats (DWG, DXF,<br />
HPGL, BMP, JPG and GIF).<br />
• Filling of all polygon-based objects.<br />
• Rotation of all objects.<br />
• Changes the size of all objects.<br />
• Moves all objects.<br />
<strong>Laser</strong> marking software: V1.5 Build: 343 19
Program description<br />
3.1 Program start<br />
1. Start up the PC and the operating system.<br />
2. Switch on the line voltage on the laser<br />
3. Start the marking software via Start → Programs →...<br />
4. The visual software interface is displayed.<br />
The software generally starts with the standard default configuration.<br />
See also Current configuration on page 21.<br />
Command line parameter If you want to use a different configuration, then you must pass a<br />
command line parameter (/L:) followed by the name of the configuration<br />
to the software.<br />
This usually takes place by using a shortcut.<br />
So to use a configuration with the name <strong>Laser</strong>1, give: /L:<strong>Laser</strong>1 as<br />
the parameter.<br />
NOTE!<br />
If two or more lasers are to be operated simultaneously,<br />
each laser (configuration) requires its own license!<br />
Offline state If the software cannot establish a connection to the laser or an existing<br />
connection is interrupted, the software shows this with the offline<br />
mode.<br />
Connect<br />
Fig. 11 <strong>Laser</strong> Status in the Offline mode<br />
In this case the operating elements for controlling the laser are deactivated.<br />
Should this have happened unintentionally, check or correct the interface<br />
settings in the parameter area, see Parameter area on<br />
page 55.<br />
Fig. 12 Service menu<br />
With the Connect command, the software establishes a connection<br />
to the laser.<br />
20 <strong>Laser</strong> marking software: V1.5 Build: 343
3.2 <strong>Software</strong> user interface<br />
1 2 3 4 5 6 7 8 9 10 11 12<br />
Program description<br />
13 14 15 16 17 18 19 20 21 22<br />
23 24<br />
1 Title bar 13 Button to clear messages<br />
2 Menu bar 14 Message window<br />
3 File toolbar 15 I/O control display<br />
4 Password group 16 Graphic toolbar<br />
5 <strong>Laser</strong> toolbar 17 Zoom toolbar<br />
6 <strong>Laser</strong> status group 18 Parameter area graphic<br />
7 Element window 19 Designation of the laser/number of the device<br />
8 Graphic area 20 Current configuration<br />
9 Script area 21 Run time timer<br />
10 Parameter area 22 User timer<br />
11 Service area 23 Version/build number of the software<br />
12 Graphic window 24 Status line graphic window<br />
<strong>Laser</strong> marking software: V1.5 Build: 343 21
Program description<br />
3.3 Entry elements<br />
Text box<br />
Multi line text box<br />
Numerical input box<br />
List box<br />
Fig. 13 Text box<br />
The text box is primarily for entering texts, such as the font type, as<br />
is shown here.<br />
Fig. 14 Multi line text box<br />
The multi line text box can accept several lines of text.<br />
It has two scroll bars that are automatically activated when the lines<br />
cannot be directly shown.<br />
Fig. 15 Numerical input box<br />
Normally numerical values are entered here.<br />
The numerical values can be changed with the + and - keys.<br />
If you activate the Shift key in addition, then the change takes place<br />
in larger increments (coarser).<br />
On the other hand, if the Ctrl key is activated, then the changes are<br />
smaller (more precise).<br />
If the mouse pointer is located within the entry field, then the numerical<br />
values can be changed with the arrow keys up and down as well<br />
as with the Page up and Page down keys.<br />
The Shift and Ctrl keys also work the same way in this case.<br />
If you are using a wheel mouse, then this can also be used to<br />
change the values.<br />
The Shift and Ctrl keys also work in this case.<br />
Fig. 16 List box<br />
No values or texts are entered in this field, but a list with possible values<br />
from which you make a selection is displayed after clicking on<br />
the arrow key.<br />
22 <strong>Laser</strong> marking software: V1.5 Build: 343
Check box<br />
3.4 Access rights<br />
Enter password<br />
Change passwords<br />
Fig. 17 Activation field<br />
Program description<br />
If the check mark is visible, then the relevant function is activated.<br />
A click of the mouse changes the status (deactivated).<br />
Fig. 18 Password group<br />
The access rights are awarded in 4 levels via password entry.<br />
Service: Access to all functions including the service area.<br />
Level 1: Access to all functions.<br />
Default setting: L1.<br />
Level 2: Only the execution of laser marking.<br />
Default setting: L2.<br />
No password: Only cancelling of marking.<br />
1. Write the corresponding password into the left entry window.<br />
2. The correct entry is confirmed by display of the corresponding<br />
level in the right window.<br />
3. The allocated functions are enabled.<br />
Fig. 19 Service menu<br />
Click on Edit Passwords.<br />
The authorised passwords for the respective level are displayed for<br />
editing.<br />
<strong>Laser</strong> marking software: V1.5 Build: 343 23
Program description<br />
3.5 File management<br />
New file<br />
Open file<br />
Fig. 20 Dialog window for changing the password for levels 1 and 2, with the<br />
passwords following the first installation<br />
Enter the desired new passwords and the names to be displayed<br />
and confirm with OK.<br />
Fig. 21 File toolbar<br />
Fig. 22 File menu<br />
Click on the New icon or on New in the file menu.<br />
A new file is created in the element window (tree structure). See also<br />
Graphic parameter on page 39.<br />
Click on the Open icon or on Open in the file menu.<br />
The dialog box Open File is displayed.<br />
24 <strong>Laser</strong> marking software: V1.5 Build: 343
Save File<br />
Fig. 23 Open file dialog<br />
Here the file to be opened is selected.<br />
Program description<br />
Click on the Save icon or on Save in the file menu.<br />
If the file has never been saved, then the Save File dialog box<br />
opens.<br />
Fig. 24 Save file dialog<br />
Here the file is given the desired name.<br />
If the file has been saved at least once before, then it will be saved<br />
under its own name without the Save file dialog being shown.<br />
If the file should be saved under a different name, then select Save<br />
As … in the file menu.<br />
<strong>Laser</strong> marking software: V1.5 Build: 343 25
Program description<br />
Print file<br />
3.6 <strong>Laser</strong> control<br />
Switching the laser on and off<br />
To print a file, select the menu option Print… in the file menu.<br />
The Print dialog is displayed<br />
Fig. 25 Print file dialog<br />
Here you select the printer to be used and start the print output.<br />
What is just being displayed in the graphic window is output on the<br />
printer.<br />
At this time the selection is adjusted to the print medium, whereby<br />
the output from the printer depicts a somewhat larger selection.<br />
Fig. 26 <strong>Laser</strong> toolbar<br />
1. Click on the icon <strong>Laser</strong> ON or OFF in order to switch the laser<br />
on or off, respectively.<br />
Activating the laser ON button is only possible with a level 2<br />
password or higher!<br />
NOTE!<br />
For security purposes, the password many only be<br />
known to authorised persons. By no means should it be<br />
written down on the monitor, PC, keyboard, laser, etc.<br />
The laser is activated.<br />
It is possible that a warm-up period is required, depending on<br />
the ambient temperature, before the full operating readiness of<br />
the system is reached. When the operating readiness is<br />
attained, the laser status display switches from Off to On and<br />
the colour changes from red to green. The laser is operative. OK<br />
is displayed in green in System.<br />
26 <strong>Laser</strong> marking software: V1.5 Build: 343
Lock shutter<br />
Switching the pilot laser on<br />
and off<br />
Showing the bounding box<br />
Fig. 27 <strong>Laser</strong> status display<br />
Program description<br />
2. To switch the laser off click on the laser OFF icon.<br />
The laser is deactivated.<br />
NOTE!<br />
In this case it means an electronic switch off. The system<br />
is not disconnected from the line voltage.<br />
Further points in the <strong>Laser</strong> Status Display:<br />
Power: Shows laser power output in %.<br />
Shutter: Shows shutter is open or closed.<br />
Pilot laser: Shows pilot laser is on or off.<br />
Interlock: Shows if the interlock is open or closed.<br />
Diode: Shows the temperature state of the diode.<br />
OOR Temperature out of range.<br />
OK Temperature within the limit.<br />
Crystal: Shows the temperature state of the crystal.<br />
OOR Temperature out of range.<br />
OK Temperature within the limit.<br />
System: Shows the system state.<br />
Click on the ShutterLock icon to close and lock the shutter.<br />
Click on the Pilot laser icon to switch the pilot laser on or off, respectively.<br />
Click on the Bounding box icon to switch the output of the bounding<br />
box by the laser (pilot laser) on or off.<br />
<strong>Laser</strong> marking software: V1.5 Build: 343 27
Program description<br />
Start marking<br />
Stop marking<br />
Enable external start<br />
I/O control<br />
Message window<br />
Click on the icon Run to start the marking process.<br />
NOTE!<br />
If a script is accessible, then this will start.<br />
Otherwise the graphic image will be output directly.<br />
Click on the Stop icon to stop the marking process.<br />
If the icon ExternStart is activated, the laser/the marking program<br />
can be started by means of an external signal.<br />
Fig. 28 I/O control<br />
The state of the output and input signals (ExternStart) is displayed<br />
in the I/O control window.<br />
Fig. 29 Messages<br />
All of the software messages are displayed in the message window.<br />
These can be messages regarding the condition of the laser or also<br />
problems when opening the configuration files, etc.<br />
Clicking on the Clear Messages button clears the displayed messages.<br />
28 <strong>Laser</strong> marking software: V1.5 Build: 343
3.7 Graphic area<br />
Element window<br />
Status line graphic window<br />
Fig. 30 Graphic area<br />
Program description<br />
The graphic area is for creating graphic elements.<br />
The image is displayed in the graphic window and is continuously<br />
updated.<br />
Fig. 31 Element window<br />
The elements, objects and modifiers are clearly arranged as shown<br />
in the element window.<br />
Fig. 32 Status line graphic window<br />
There is a status line below the graphic window.<br />
<strong>Laser</strong> marking software: V1.5 Build: 343 29
Program description<br />
Parameter area - graphic<br />
Fig. 33 Display result of measurement<br />
Here is where the result of a completed measurement is shown:<br />
L: length of the measured segment.<br />
X,Y: length along the X or Y axis, respectively.<br />
Fig. 34 Current pointer position<br />
This area shows the current pointer position when the pointer is over<br />
the graphic window.<br />
Fig. 35 Area bounding box<br />
The area bounding box shows the measurements of the bounding<br />
box surrounding the graphic:<br />
B: width of the box.<br />
H: height of the box.<br />
X,Y: midpoint coordinates of the box.<br />
Fig. 36 Parameter area - graphic<br />
Different parameter input masks are displayed, depending on the<br />
selected branch in the element window, in the parameter area.<br />
30 <strong>Laser</strong> marking software: V1.5 Build: 343
3.7.1 Element window<br />
Coordinate systems<br />
Fig. 37 Element window<br />
Program description<br />
The element window is for the clear, structured management of the<br />
graphic Elements, Objects and Modifiers.<br />
Object designates: Rectangle, Barcode, Text, ...<br />
Modifiers are: Rotation, Filling, Mirroring, ...<br />
Elements combine Objects and Modifiers in one unit.<br />
NOTE!<br />
Elements provide their own local coordinate system for<br />
the objects and modifiers contained in them. These are<br />
displayed by means of a small crosshair in the graphic<br />
window.<br />
NOTE!<br />
Element branches can contain either other element<br />
branches or objects and modifiers, but not both at the<br />
same time!<br />
Fig. 38 Display coordinate system<br />
With these symbols the coordinate system 0-point of the graphic element<br />
or the normal elements is shown in the graphic window.<br />
The higher order graphic element is constantly displayed, the 0point<br />
of the other elements are only shown if an element or an object<br />
contained therein is selected.<br />
The higher order graphic element with its coordinate system represents<br />
the reference point for all lower order elements.<br />
An element that contains objects represents the reference system<br />
of just these objects.<br />
Elements and objects Use elements to combine objects or objects and modifiers that<br />
form a unit, respectively<br />
Example:<br />
In order to generate a filled text, first create an element followed by<br />
a text object and fill modifier.<br />
The element now represents the complete text.<br />
Now the element can be moved to any position in the marking field.<br />
<strong>Laser</strong> marking software: V1.5 Build: 343 31
Program description<br />
Enable element<br />
PopUp menu<br />
By adding or removing this check mark, the corresponding branch<br />
of the tree structure is activated or deactivated, respectively.<br />
A deactivated branch is not shown and also not output.<br />
It is only possible to output a deactivated branch using script control.<br />
Fig. 39 Element window PopUp menu<br />
A popup menu opens by right-clicking on the mouse in the element<br />
window.<br />
The top menu item is Collapse or Extend, depending on whether or<br />
not the branch of the tree structure is extended or collapsed.<br />
By activating this menu item, the depiction of the tree structure can<br />
be influenced.<br />
Cut, Copy and Paste enables you to remove a branch of the tree<br />
structure or to paste it in a new place.<br />
Delete deletes the selected branch permanently.<br />
Export saves a branch to a file for later use.<br />
Import imports a branch or an entire program to the selected position.<br />
If you want to give a branch a new name, then use Rename.<br />
Drag & Drop The so-called Drag and Drop function is also supported.<br />
You can drag branches to new positions or copy them in.<br />
Procedure:<br />
1. Keep the left mouse key pressed above the branch that you<br />
want to move or copy.<br />
2. Keeping the left mouse key pressed, drag the branch to the desired<br />
position.<br />
3. To move it, release the left mouse key.<br />
To copy activate the Ctrl key before releasing the left mouse<br />
key. You will then see a small + sign at the mouse pointer.<br />
Target positions that are not possible or not permitted are shown as<br />
a prohibiting sign instead of the mouse pointer. If the left mouse key<br />
is released on these occasions, the process is terminated.<br />
32 <strong>Laser</strong> marking software: V1.5 Build: 343
3.7.2 Graphic toolbar<br />
New element<br />
Line<br />
Rectangle<br />
Ellipse<br />
Text<br />
Barcode<br />
Datamatrix<br />
Fig. 40 Graphic toolbar (shown here in a horizontal position)<br />
Program description<br />
Click on this icon to create a new element in the tree structure of the<br />
element window. See also Element parameter on page 40.<br />
Click on this icon to insert the object line into the tree structure of the<br />
element window. See also Line parameter on page 41.<br />
Click on this icon to insert the object rectangle into the tree structure<br />
of the element window. See also Rectangle parameter on page 41.<br />
Click on this icon to insert the object ellipse into the tree structure of<br />
the element window. See also Ellipse parameter on page 42.<br />
Click on this icon to insert the object text into the tree structure of<br />
the element window. See also Text parameter on page 42.<br />
Click on this icon to insert the object barcode in the tree structure of<br />
the element window. See also Barcode parameter on page 43.<br />
Click on this icon to insert the object datamatrix in the tree structure<br />
of the element window. See also Datamatrix parameter on page 44.<br />
<strong>Laser</strong> marking software: V1.5 Build: 343 33
Program description<br />
PDF417<br />
Import<br />
Move<br />
Size<br />
Rotation<br />
Click on this icon to insert the object PDF417 in the tree structure of<br />
the element window. See also PDF417 parameter on page 45.<br />
NOTE!<br />
You need a special license to use the PDF417 code!<br />
Click on this icon to insert the object import in the tree structure of<br />
the element window.<br />
Import enables you to import image files that have been created by<br />
external programs. See also Import parameter on page 46.<br />
Click on this icon to insert the Move modifier in the tree structure of<br />
the element window.<br />
All objects that are located in the same element in front of this modifier<br />
can be moved by the indicated value. See also Move parameter<br />
on page 47.<br />
Click on this icon to insert the Size modifier in the tree structure of<br />
the element window.<br />
All objects that are located in the same element in front of this modifier<br />
can be changed in size. See also Size parameter on page 47.<br />
Click on this icon to insert the Rotation modifier in the tree structure<br />
of the element window.<br />
All objects that are located in the same element in front of this modifier<br />
can be rotated around a defined point. See also Rotation parameter<br />
on page 48.<br />
34 <strong>Laser</strong> marking software: V1.5 Build: 343
Mirror<br />
Polar<br />
Fill<br />
Wobble<br />
Pfad<br />
Program description<br />
Click on this icon to insert the Mirror modifier in the tree structure of<br />
the element window.<br />
All objects that are located in the same element in front of this modifier<br />
can be mirrored on the X- and/or Y-axis of a virtual coordinate<br />
system. See also Mirror parameter on page 48.<br />
Click on this icon to insert the polar marking in the tree structure of<br />
the element window.<br />
All objects that are located in the same element in front of this modifier<br />
can be aligned to a virtual circle. See also Polar parameter on<br />
page 48.<br />
Click on this icon to insert the Fill modifier in the tree structure of the<br />
element window.<br />
All objects that are located in the same element in front of this modifier<br />
can be filled. See also Fill parameter on page 49.<br />
NOTE!<br />
Fillings can only be applied to closed polygons (continuous<br />
lines).<br />
If fillings are applied to other structures, there may be<br />
unexpected results.<br />
Click on this icon to insert the Wobble modifier in the tree structure<br />
of the element window.<br />
For all objects that are located in the same element in front of this<br />
modifier the lines can be changed in his width and structure.<br />
See also Wobble parameter on page 49.<br />
Click on this icon to insert the Path modifier in the tree structure of<br />
the element window.<br />
All objects that are located in the same element in front of this modifier<br />
the lines can be aligned at a wavy path.<br />
See also Path parameter on page 49.<br />
<strong>Laser</strong> marking software: V1.5 Build: 343 35
Program description<br />
3.7.3 Zoom toolbar<br />
Zoom to marking area<br />
Zoom to bounding box<br />
Zoom plus<br />
Zoom minus<br />
Zoom window<br />
Fig. 41 Zoom toolbar<br />
A click on this icon results in the graphic window showing the entire<br />
marking area.<br />
A click on this icon results in the graphic window showing the content<br />
of the bounding box in a frame-filling way.<br />
A click on this icon increases the zoom factor.<br />
A click on this icon decreases the zoom factor.<br />
After activating this icon a rectangle can be drawn with the mouse<br />
that depicts the new zoom area.<br />
The icon remains active until you complete the action or you click on<br />
it again.<br />
The first click with the left mouse button defines the first corner of the<br />
zoom rectangle, the second click defines the concluding second corner.<br />
36 <strong>Laser</strong> marking software: V1.5 Build: 343
Measurement<br />
Program description<br />
NOTE!<br />
If you are using a wheel mouse, you can also zoom using<br />
the wheel.<br />
The values in the entry fields can also be changed in<br />
this manner.<br />
Also use the Shift and Ctrl keys with the entry fields to<br />
influence the changes.<br />
After activating this symbol you can draw a line in the graphic window<br />
with the mouse.<br />
The icon remains active until you complete the action or click on the<br />
icon again.<br />
The first click with the left mouse button defines the beginning of the<br />
line, the second click defines the end of the line.<br />
The length of the line, as well as the lengths along the X- and Y-axes<br />
are shown in the status line of the graphic window.<br />
<strong>Laser</strong> marking software: V1.5 Build: 343 37
Program description<br />
3.7.4 Graphic window<br />
Fig. 42 Graphic window<br />
Apart from the graphic elements in the Graphic window, you can<br />
also see the following:<br />
1. A pale blue rectangle with rounded corners, which contains a<br />
crosshair.<br />
This is the recommended marking area.<br />
If you go outside of this area with your marking, then you will<br />
have to expect reductions in quality, such as diminished output,<br />
etc.<br />
2. A pale blue rectangle that surrounds the first one.<br />
This the maximum possible physical marking area, that the deflecting/scanning<br />
mirror can reach. <strong><strong>Mark</strong>ing</strong> beyond this boundary<br />
is not possible!<br />
3. A dotted red square.<br />
This is exactly big enough to just encompass the graphic elements,<br />
therefore the designation "bounding box".<br />
Moving the view You can move the view in the graphic window by left-clicking the<br />
mouse anywhere in the window and then moving the mouse, still<br />
holding down the button. The view should follow the mouse movement<br />
until you release the mouse button.<br />
NOTE!<br />
When the same procedure is applied with the right<br />
mouse button, the element or object currently selected<br />
in the element window can be moved.<br />
38 <strong>Laser</strong> marking software: V1.5 Build: 343
3.7.5 Graphic parameter area<br />
3.7.5.1 Graphic parameter<br />
Fig. 43 Graphic parameter<br />
Program description<br />
This parameter group is part of the root branch of the tree structure<br />
in the element window and is therefore contained in every graphic.<br />
All parameters apply universally, i.e. to the entire image.<br />
<strong>Laser</strong> parameter If this group is active, it determines the settings for the laser. If it is<br />
inactive, then the default and test values from the parameter area<br />
are applied.<br />
See Default and test values on page 57.<br />
Move With this the entire graphic can be moved in the X- or Y-directions.<br />
Size This group permits a minor size adjustment.<br />
Rotation The graphic can be rotated around a point.<br />
Mirror The graphic can be mirrored on the axes of a virtual coordinate system.<br />
Script file By specifying a script file and setting the activating check mark, the<br />
graphic can be linked with a script file (*.bas).<br />
Clicking on the button opens a file dialog for easy selection of<br />
the file.<br />
With Take from Script Editor the currently active script program<br />
can be adopted.<br />
If the graphic file (*las) is loaded and no other script is loaded, then<br />
the script indicated here will be loaded into the script editor.<br />
<strong>Laser</strong> marking software: V1.5 Build: 343 39
Program description<br />
External axis The setting values here are passed to a script program for processing<br />
by means of a Call-Back function.<br />
See LC_ExternAxis(...) on page 109.<br />
3.7.5.2 Element parameter<br />
Fig. 44 Element parameters<br />
The parameter area of the element branch is available at the beginning<br />
of each group of graphic objects and their modifiers.<br />
<strong>Laser</strong> parameter Here, too, you have the possibility of assigning the laser new parameters.<br />
The individual activation boxes permit you to determine exactly,<br />
which parameters you want to change.<br />
External axis Here you can specify the position of up to four external axes as well.<br />
These values are sent to a script program for processing.<br />
See LC_ExternAxis(...) on page 109.<br />
Move The graphic that belongs to this element can be moved in X- and Y-<br />
directions.<br />
NOTE!<br />
The move can also be executed by clicking and dragging<br />
it in the graphic window with the right mouse button!<br />
Passes This value determines the number of marking passes.<br />
Normally 1, however if you wish to engrave the material more deeply,<br />
then the value can be increased.<br />
Array With this you can define an array of your marking.<br />
You can define the distance (Offset) and count independently for the<br />
X and Y direction.<br />
40 <strong>Laser</strong> marking software: V1.5 Build: 343
3.7.5.3 Line parameter<br />
3.7.5.4 Rectangle parameter<br />
Fig. 45 Line parameter<br />
Program description<br />
Because a line has a beginning and an end, these values can be entered<br />
separately.<br />
NOTE!<br />
By clicking and dragging in the graphic window with the<br />
right mouse button, you can change both values simultaneously<br />
and in doing so move the line.<br />
Fig. 46 Rectangle parameter<br />
BaseRef The BaseRef group enables you to establish which point of the object<br />
is to be fixed to which coordinates. See BaseRef on page 131.<br />
NOTE!<br />
The BaseRef can be changed by clicking and dragging<br />
in the graphic window the right mouse button.<br />
Dimension Here is where you enter the width and height of your rectangle.<br />
Corner radius To create a rectangle with rounded corners, enter the desired radii<br />
here.<br />
NOTE!<br />
Both text fields must contain a radius > 0 to generate an<br />
acceptable rectangle.<br />
Both values are usually the same.<br />
<strong>Laser</strong> marking software: V1.5 Build: 343 41
Program description<br />
3.7.5.5 Ellipse parameter<br />
BaseRef The BaseRef group enables you to establish which point of the object<br />
is to be fixed to which coordinates. See BaseRef on page 131.<br />
NOTE!<br />
The BaseRef can be changed by clicking and dragging<br />
the right mouse button in the graphic window.<br />
Radius X, Y Stating the two radii results in the ellipse.<br />
A circle results from equal radii.<br />
Angle If you want an ellipse/circle segment, then you determine the segment<br />
with the beginning or end angle.<br />
3.7.5.6 Text parameter<br />
Fig. 47 Ellipse parameter<br />
Fig. 48 Text parameter<br />
BaseRef The BaseRef group enables you to establish which point of the object<br />
is to be fixed to which coordinates. See BaseRef on page 131.<br />
NOTE!<br />
The BaseRef can be changed by clicking and dragging<br />
the right mouse button in the graphic window.<br />
42 <strong>Laser</strong> marking software: V1.5 Build: 343
Program description<br />
Text The text to be output is entered in this entry field.<br />
A multi line text is also possible.<br />
For special data, such as date or time, see Format specifications on<br />
page 132.<br />
Font In the Font group the font to be used is determined.<br />
Press the key to open the font selection dialog.<br />
Additional settings Line space: Determines the line spacing in multi line texts.<br />
Spacing: Is a factor with which the character spacing can be<br />
changed.<br />
Codepage: Permits the specification of a codepage for special<br />
cases, e.g. Asian characters.<br />
3.7.5.7 Barcode parameter<br />
Fig. 49 Barcode parameter<br />
BaseRef The BaseRef group enables you to establish which point of the object<br />
is to be fixed to which coordinates. See BaseRef on page 131.<br />
NOTE!<br />
The BaseRef can be changed by clicking and dragging<br />
the right mouse button in the graphic window.<br />
Type Selection of the barcode type to be applied.<br />
Data The barcode content is entered in these entry fields.<br />
The text box AddOn is only used for barcodes with additional data.<br />
For special data, such as date or time, see Format specifications on<br />
page 132.<br />
For information on the abilities of the individual barcodes, see Barcode<br />
specification on page 134.<br />
<strong>Laser</strong> marking software: V1.5 Build: 343 43
Program description<br />
Barcode height For the definition of the barcode heights see Barcode specification<br />
on page 134.<br />
Module parameter By Module Width, the width of the narrowest barcode bar is meant.<br />
With Fill Distance you determine the distance at which the laser<br />
draws the lines necessary for filling.<br />
3.7.5.8 Datamatrix<br />
parameter<br />
CAUTION!<br />
The fill spacing might also be slightly changed by the<br />
program in order to comply with the required module<br />
width.<br />
If this is not desired on critical materials, it can be prevented<br />
by setting the module width to a whole number<br />
multiple of the fill distance.<br />
Inverse is selected if the laser generates light instead of dark lines.<br />
In this case the spaces in the barcode are then lasered.<br />
Fig. 50 Datamatrix parameter<br />
BaseRef The BaseRef group enables you to establish which point of the object<br />
is to be fixed to which coordinates. See BaseRef on page 131.<br />
NOTE!<br />
The BaseRef can be changed by clicking and dragging<br />
the right mouse button in the graphic window.<br />
Data The barcode content is entered in this text box.<br />
For special data, like date or time, see Format specifications on<br />
page 132.<br />
Module parameter Choose the required version of the datamatrix barcode under Type.<br />
Size fixes the size of an individual point of the datamatrix code.<br />
The total size results from the number of points that comprises the<br />
datamatrix code, multiplied by the stated Size.<br />
With Fill Distance you determine the distance at which the laser<br />
draws the lines necessary for filling.<br />
44 <strong>Laser</strong> marking software: V1.5 Build: 343
3.7.5.9 PDF417 parameter<br />
Program description<br />
CAUTION!<br />
The fill spacing might also be slightly changed by the<br />
program in order to comply with the required module<br />
width.<br />
If this is not desired on critical materials, it can be prevented<br />
by setting the module width to a whole number<br />
multiple of the fill distance.<br />
Fig. 51 PDF417 parameter<br />
CAUTION!<br />
A special license is required to use the PDF417 code!<br />
BaseRef The BaseRef group enables you to establish which point of the object<br />
is to be fixed to which coordinates. See BaseRef on page 131.<br />
NOTE!<br />
The BaseRef can be changed by clicking and dragging<br />
the right mouse button in the graphic window.<br />
Data The barcode content is entered in this text field.<br />
For special data, like date or time see Format specifications on<br />
page 132.<br />
Code parameter By specifying Rows and/or Columns, the number of rows or columns,<br />
respectively, can be predetermined.<br />
ECC determines the degree of error tolerance.<br />
Module parameter A few different versions of PDF417 barcodes are available under<br />
Type.<br />
By Module Width, the width of the narrowest barcode bar.<br />
With Fill Distance you determine the distance at which the laser<br />
draws the lines necessary for filling.<br />
<strong>Laser</strong> marking software: V1.5 Build: 343 45
Program description<br />
3.7.5.10 Import parameter<br />
CAUTION!<br />
The fill spacing might also be slightly changed by the<br />
program in order to comply with the required module<br />
width.<br />
If this is not desired on critical materials, it can be prevented<br />
by setting the module width to a whole number<br />
multiple of the fill distance.<br />
Inverse is selected if the laser generates light instead of dark lines.<br />
In this case the spaces in the barcode are then lasered.<br />
Fig. 52 Import parameter<br />
BaseRef The BaseRef group enables you to establish which point of the object<br />
is to be fixed to which coordinates. See BaseRef on page 131.<br />
NOTE!<br />
The BaseRef can be changed by clicking and dragging<br />
the right mouse button in the graphic window.<br />
Import file In this text field the files to be imported are entered.<br />
Activating the key opens an import dialog.<br />
Fig. 53 Import dialog<br />
Select the file to be imported and click on Open.<br />
46 <strong>Laser</strong> marking software: V1.5 Build: 343
File types DWG: AutoCAD Format.<br />
DXF: AutoCAD Format.<br />
HPGL: HPGL Format.<br />
BMP: Bitmap Format.<br />
JPG: JPG-Bitmap Format.<br />
GIF: CompuServe Bitmap.<br />
Program description<br />
Load/Reload Clicking this button reloads the graphic image once more, in case it<br />
has been altered in the meantime.<br />
Vectors For inforrmation about the file to import the number of existing vectors<br />
is shown here.<br />
Import options Here you can defin, if vector files should be optimised for the laser<br />
output and how to do this.<br />
Sort. vectors: Reducing the number of vectors.<br />
You can set the parameters min. length of a<br />
vector and max. angle of vectors border on<br />
each other.<br />
Combine vectors: Combining of vectors to realise compact areas.<br />
You can set the parameter max. distance between<br />
two vector points.<br />
Apply options Clicking this button the choosed import parameters are applied.<br />
3.7.5.11 Move parameter<br />
3.7.5.12 Size parameter<br />
Fig. 54 Move parameter<br />
Specifying the X- and Y-values moves the graphic by the indicated<br />
distance.<br />
Fig. 55 Size parameter<br />
<strong>Laser</strong> marking software: V1.5 Build: 343 47
Program description<br />
3.7.5.13 Rotation parameter<br />
3.7.5.14 Mirror parameter<br />
3.7.5.15 Polar parameter<br />
It is possible to change the size of a graphic (X-size, Y-size) around<br />
a fixed point (X-centre Y-centre) with the Size modifier.<br />
It is possible to give an relative factor or an absolute size value.<br />
Fig. 56 Rotation parameter<br />
You can rotate a graphic around a fixed point X-centre Y-centre by<br />
a certain angle.<br />
Fig. 57 Mirror parameter<br />
By specifying a centre point (X-centre, Y-centre) of a virtual coordinate<br />
system, you can mirror the graphic at the axes of this coordinate<br />
system.<br />
Fig. 58 Polar parameter<br />
The graphic is aligned to the circumference of a virtual circle, which<br />
you have specified with (X-centre, Y-centre and radius).<br />
Max Length defines the maximum length of a straight-running line<br />
section.<br />
1 mm is normally a good value.<br />
In special cases it may be necessary to change this value.<br />
48 <strong>Laser</strong> marking software: V1.5 Build: 343
3.7.5.16 Fill parameter<br />
3.7.5.17 Wobble parameter<br />
3.7.5.18 Path parameter<br />
Fig. 59 Polar parameter<br />
Program description<br />
A graphic can be filled using the Fill modifier.<br />
To execute this, the software looks for closed polygon figures (continuous<br />
lines) and then draws parallel lines in them at the specified<br />
distance and angles.<br />
There are two sets of line distances and angles at your disposal.<br />
If you activate the box Delete Graphic, then only the fill lines remain,<br />
the original graphic is deleted.<br />
By activating Bi-directional, then every second line is marked in reversed<br />
direction.<br />
NOTE!<br />
Fillings can only be applied on closed polygons (continuous<br />
lines).<br />
If fillings are applied to other structures, the results can<br />
be unexpected.<br />
Fig. 60 Wobble parameter<br />
With the modifier Wobble a line can shown with lined up polygones.<br />
You can set the width and the distance of the polygones and the<br />
number of polygon points. So the width and the structure of the line<br />
are defined.<br />
Fig. 61 Path parameter<br />
A graphic or text element can lined up on a wavy path using the Path<br />
modifier.<br />
For the wave style you can set the values X-Center, Y-Center, Max.<br />
Length, Period and Amplitude.<br />
<strong>Laser</strong> marking software: V1.5 Build: 343 49
Program description<br />
3.8 Script area<br />
Fig. 62 Script area<br />
In the script area you can do all the things that go beyond the simple<br />
output of graphic objects.<br />
Beginning with the creation of a simple process over the recurring<br />
output of a drawing as a reaction to a control entry, up to the control<br />
of a complete system with conveyor belt, various interfaces and possibly<br />
several lasers.<br />
Information that applies to the script program window can be found<br />
under Programming on page 62.<br />
Details regarding the programming language used is in Programming<br />
on page 62<br />
And the special language extensions of this software are under <strong>Laser</strong><br />
specific script extensions on page 107.<br />
50 <strong>Laser</strong> marking software: V1.5 Build: 343
3.8.1 Script samples<br />
Program description<br />
3.8.1.1 Serial numbers You can find this example in the installation directory inside the folder<br />
Samples\SerialNumber.<br />
Graphic part<br />
Fig. 63 Graphic example serial numbers<br />
The text in the multi line text field (SerialNumber:#SerNo1=9999#)<br />
is comprised of two parts:<br />
1. A fixed text (SerialNumber:) and<br />
2. a format specification (#SerNo1=9999#).<br />
For further information about format commands see also Format<br />
specifications on page 132 and Special format specifications on<br />
page 133.<br />
The part in front of the = (SerNo1) is for identification purposes and<br />
the part behind the = (9999) is the default value.<br />
As the script isn't running, or doesn't even yet exist at the time the<br />
graphic view is being calculated, the default value is displayed.<br />
The script program now has the task of pulling a serial number from<br />
a file and to make it available on demand at runtime.<br />
Finally the serial number is increased by one and written back into<br />
the file.<br />
<strong>Laser</strong> marking software: V1.5 Build: 343 51
Program description<br />
Script part<br />
'Version 1.0<br />
Option Explicit<br />
Dim SerNo1 As Long<br />
Sub Main<br />
SerNo1 = CLng(EX.ReadXmlFormat("SerNo1", "1", "C:\SerNumber.xml"))<br />
LC.<strong>Mark</strong>("", True)<br />
SerNo1 = SerNo1 + 1<br />
EX.WriteXmlFormat("SerNo1", CStr(SerNo1), "C:\SerNumber.xml")<br />
End Sub<br />
Public Function LC_Formatter(sFormat As String, sString As String,<br />
sDefault As String) As String<br />
If(sString = "SerNo1") Then LC_Formatter = Format(SerNo1, "000000")<br />
End Function<br />
Sample 1 Serial numbers<br />
Main program The first line is a comment and gives information about the version<br />
of this script program.<br />
The second line, if at hand, forces the programmer to also declare<br />
all variables used in the program (Dim...), this procedure can only be<br />
recommended!<br />
In the next line a variable (SerNo1) is declared, because it will take<br />
up the actual serial number later.<br />
The actual program consists of two parts:<br />
1. The main program Main and<br />
2. the CallBack function LC_Formatter... See also<br />
LC_Formatter(...) on page 109.<br />
Main is called up (started) when the program is started and carries<br />
out the following actions:<br />
1. Reading out the serial number from an XML file.<br />
2. Starts the actual marking (LC<strong>Mark</strong>("", True)).<br />
3. After the marking is completed the serial number is increased by<br />
one and finally,<br />
4. written back into the XML file.<br />
CallBack function The CallBack function (LC_Formatter...) is called up automatically<br />
during the marking and works as follows:<br />
In the header (LC_Formatter(sFormat As String, sString As String, sDefault<br />
As String) As String) three values are passed:<br />
1. In sFormat is the entire format string (#SerNo1=9999#).<br />
2. In sString is the identification (SerNo1).<br />
3. and in sDefault is the default value (9999).<br />
The CallBack function now checks whether or not the identification<br />
is the one that is determined for that serial number (If(sString =<br />
"SerNo1") Then).<br />
If yes, then the CallBack function passes the formatted serial number<br />
as a string (LC_Formatter = Format(SerNo1, "0000")).<br />
52 <strong>Laser</strong> marking software: V1.5 Build: 343
Program description<br />
In addition, further test outputs (Debug.Print...) were added to the<br />
example program that is on your computer, to enable you to get an<br />
overview more easily.<br />
3.8.1.2 Excel content You will find this example in the Samples\Excel folder in the installation<br />
directory.<br />
Graphic part<br />
NOTE!<br />
Microsoft Excel must be installed on your computer in<br />
order to execute this example program!<br />
Fig. 64 Graphic Excel example<br />
The text in the multi line text box (Cell A1:#A1#) or (Cell A2:#A2#)<br />
does not have a default value in this example, that is why none is<br />
shown in the graphic window.<br />
However, this has no effect on the function.<br />
In this case the text of each line contains the following components:<br />
1. A fixed text (Cell A1:) and<br />
2. a format specification (#A1#)<br />
For further information on format commands see also Format specifications<br />
on page 132 and Special format specifications on<br />
page 133.<br />
In this case the script program has the task of reading out the cell<br />
that was specified by the format specification, from an Excel table;<br />
in this case the A1 and A2 cells.<br />
<strong>Laser</strong> marking software: V1.5 Build: 343 53
Program description<br />
Script part<br />
'Version 1.0<br />
Option Explicit<br />
Dim objExcel As Object<br />
Sub Main<br />
Set objExcel = CreateObject("Excel.Application")<br />
objExcel.Workbooks.Open("C:\Test.xls")<br />
LC.<strong>Mark</strong>("", True)<br />
objExcel.Quit<br />
End Sub<br />
Public Function LC_Formatter(sFormat As String, sString As String,<br />
sDefault As String) As String<br />
LC_Formatter = CStr(objExcel.Range(sString & ":" & sString).Value)<br />
End Function<br />
Sample 2 Excel dates<br />
Main program The first line is a comment and gives information about the version<br />
of this script program.<br />
The second line, if at hand, forces the programmer to also declare<br />
all variables used in the program (Dim ...), this procedure can only<br />
be recommended!<br />
An object (objExcel) is declared in the next line, this will be used later<br />
to access Excel.<br />
The actual program consists of two parts:<br />
1. The main program Main and<br />
2. The CallBack function LC_Formatter. See also<br />
LC_Formatter(...) on page 109.<br />
Main is called up (started) when the program is started and carries<br />
out the following actions:<br />
1. Initialising the Excel object.<br />
2. Opening the Excel file.<br />
3. Starting the actual marking (LC.<strong>Mark</strong>("",True)).<br />
4. Closing Excel.<br />
CallBack function The CallBack function (LC_Formatter...) is called up automatically<br />
during the marking and works as follows:<br />
In the header (LC_Formatter(sFormat As String, sString As String, sDefault<br />
As String) As String) three values are passed:<br />
1. In sFormat is the entire format string (#A1#) or (#A2#), respectively.<br />
2. In sString is the identification (A1) or (A2), respectively.<br />
3. And in sDefault is the default value () or (), respectively.<br />
In this case empty character strings.<br />
In the CallBack function the required Excel cell is read out (objExcel.Range(sString<br />
& ":" & sString).Value) and then passed<br />
(LC_Formatter = CStr(objExcel.Range(sString & ":" & sString).Value))<br />
to the CallBack function as a character string (CStr(...).<br />
54 <strong>Laser</strong> marking software: V1.5 Build: 343
3.9 Parameter area<br />
<strong>Laser</strong><br />
Program description<br />
In addition, further test outputs (Debug.Print...) were added to the<br />
example program that is on your computer, to enable you to get an<br />
overview more easily.<br />
Furthermore, the program on your computer also writes the date and<br />
time in the Excel cells A1 and A2.<br />
Fig. 65 Parameter area<br />
The Parameter Area can be fully accessed with a Level 1 password<br />
and permits making settings for various laser parameters.<br />
Fig. 66 <strong>Laser</strong> parameter<br />
The type of the laser used and the connection ports, with which the<br />
software establishes the connection to the laser, are determined in<br />
the laser parameter:<br />
COM-Port: If activated, then the COM port to be used can<br />
be set here.<br />
LPT-Port: Selection of an optional LPT port to accelerate<br />
the marking.<br />
Annotation:The respective connections are only active if the corresponding<br />
box is marked with a check mark.<br />
<strong>Laser</strong> marking software: V1.5 Build: 343 55
Program description<br />
Auto start<br />
Measurement unit<br />
I/O control<br />
Fig. 67 Auto start<br />
These settings influence the starting behavior of the software.<br />
File: The file specified here is loaded after the software<br />
has been started.<br />
This file can be either a script (*.bas) or a<br />
graphic file (*.las).<br />
To browse for the file, use the button.<br />
Auto start: If Auto Start is selected, then the file specified<br />
under File will start once it has been loaded.<br />
Hidden on<br />
Startup: If the program is to start without a visible window,<br />
activate Hidden on StartUp.<br />
Fig. 68 Measurement unit<br />
Here you can select the measurement unit with which you want to<br />
work.<br />
In detail, the following can be set:<br />
µm: µm (1/1000 mm) is used as the measurement<br />
unit.<br />
mm: mm is used as the measurement unit.<br />
mil: mil (1/1000 inch) is used as the measurement<br />
unit.<br />
inch: inch (25.4 mm) is used as the measurement<br />
unit.<br />
Fig. 69 I/O control<br />
If you want the software to convey information on various states to<br />
the outside world, then you can configure the corresponding ports<br />
here accordingly.<br />
56 <strong>Laser</strong> marking software: V1.5 Build: 343
Default and test values<br />
Program description<br />
Program state: State of the program. If the software is running,<br />
the selected outlet is set to 1.<br />
<strong>Laser</strong> state: If the following conditions are fulfilled:<br />
The laser must be switched on!<br />
The chamber and interlock must be closed!<br />
There may be no current errors!<br />
Then the outlet is set to 1.<br />
Working: This outlet is set to 1 for the duration of the<br />
marking process.<br />
Extern start: The marking process is started when there is a<br />
logical change from 0 to 1 at this inlet.<br />
The prerequisite is that ExternStart has been<br />
activated.<br />
NOTE!<br />
In DEMO MODE the program outlet is fixed at 0!<br />
Fig. 70 Default and test values<br />
On the one hand, the values specified here are default values for<br />
new graphic objects parameters and, on the other hand, serve as laser<br />
parameters for the text output of the <strong><strong>Mark</strong>ing</strong> field group.<br />
In detail the following settings can be set:<br />
Power: <strong>Laser</strong> output in %.<br />
Speed: The speed at which the laser beam is guided<br />
over the surface.<br />
QSF: The frequency in Hz, which determines the<br />
pulse repetition frequency of the laser.<br />
This parameter is only available with YAG lasers.<br />
Pulse width: Specifies the laser pulse width.<br />
This parameter is only available with YAG lasers.<br />
Start delay: The delay from the beginning of the mirror motion<br />
until the activation of the laser.<br />
Stop delay: Time extension, at which the laser remains<br />
switched on, beginning with the braking of the<br />
mirror motion.<br />
<strong>Laser</strong> marking software: V1.5 Build: 343 57
Program description<br />
<strong><strong>Mark</strong>ing</strong> field<br />
Fig. 71 <strong><strong>Mark</strong>ing</strong> field<br />
The laser type and the parameters for the marking field are determined<br />
in the <strong><strong>Mark</strong>ing</strong> field group:<br />
Pincushion<br />
Adjustment: With ()->|| and )(->|| the pillow- or barrelshaped<br />
distortions can be compensated.<br />
Offset X and Y serve to align unequally shaped<br />
distortions.<br />
To check the settings you can laser a large<br />
rectangle with Draw a Test Rectangle.<br />
Field<br />
Adjustment: With the help of Draw a Test Figure, which lasers<br />
a test image, the Mirror X- and -Y as well<br />
as Rotation can be set in such a way, that the<br />
test figure is output according to your wishes.<br />
If your laser is equipped with a pilot laser, then<br />
this can be set with Pilot-X and -Y in such a<br />
way that it precisely hits the small circle in the<br />
centre of the test figure.<br />
The Field size is set in the following manner:<br />
1. Output test figure.<br />
2. Measure X and Y and<br />
3. enter at Measured X and Y.<br />
4. Activate Compute and set new field size.<br />
To check you can now laser the test figure<br />
again, the X and Y lengths should now be exactly<br />
50 mm or 2".<br />
58 <strong>Laser</strong> marking software: V1.5 Build: 343
3.10 Service area<br />
<strong>Laser</strong><br />
Fig. 72 Service area<br />
Program description<br />
The Service area is only accessible with password level Service<br />
and permits the setting of various laser-specific parameters.<br />
Fig. 73 <strong>Laser</strong><br />
The <strong>Laser</strong> area permits the setting of various laser-specific parameters:<br />
ON Hours: The laser's runtime hours. By pressing Clr. the<br />
display can be set to 0.<br />
Power min.: Lowest power value, which should be set at the<br />
desired power output of 0 %.<br />
Power max.: Maximum power output value, which should be<br />
applied at the desired power output of 100 %.<br />
<strong>Laser</strong> marking software: V1.5 Build: 343 59
Program description<br />
Jump delays<br />
Power setting<br />
time: The time that should elapse when the power<br />
setting of the laser changes.<br />
The time entered here is the time for a power<br />
jump from 0 % to 100 %.<br />
Corresponding less time elapses with smaller<br />
power jumps.<br />
Shutter: The shutter can be activated for testing purposes.<br />
Cooler: When the laser is switched off, the cooling system<br />
can be switched on for testing purposes.<br />
RF-Generator: The RF generator can be switched on or off, respectively,<br />
for testing purposes.<br />
Fig. 74 Jump delays<br />
In the group Jump delays all jump relevant parameters of the scanning<br />
control are defined.<br />
Speed: If a new position is to be run to by means of a<br />
vector, then the speed set here is applied.<br />
> 1/xxxx: Delays in µs, which are inserted after a jump or<br />
a vector used for positioning.<br />
> 1/2: is shown for a positioning that is larger<br />
than half of the marking field. The further values<br />
stand for correspondingly smaller jumps.<br />
Vector: If Vector is selected, then a positioning (the laser<br />
is deactivated at this time) by means of a<br />
vector (line) takes place with the speed stated<br />
in Speed.<br />
If the relevant delay is set to 0, then there will<br />
also be a positioning by means of a vector, but<br />
the "normal" marking speed then applies.<br />
Otherwise, the laser is positioned at the new<br />
position with a jump.<br />
60 <strong>Laser</strong> marking software: V1.5 Build: 343
Corner delay<br />
First pulse suppression<br />
Fig. 75 Corner delay<br />
Program description<br />
The Corner delay group is for setting the delays that can be set if<br />
the angle between to vectors is too acute.<br />
Break angle: The delay becomes applicable for angles that<br />
are smaller (more acute) than are entered here.<br />
Break delay: The delay to be inserted.<br />
Fig. 76 First pulse suppression<br />
The First pulse suppression group permits influencing the first 16<br />
pulses of a YAG laser.<br />
Activate: Time in µs that the laser must be off, in order for<br />
the influence to be activated.<br />
Pulse x: Separate setting possibilities for the pulse suppression<br />
of the first 16 pulses of a vector in %.<br />
The last value should normally be 0 %, as all<br />
following pulses are oriented toward the last<br />
one in this list.<br />
<strong>Laser</strong> marking software: V1.5 Build: 343 61
Programming<br />
4 Programming<br />
4.1 Basics<br />
General information The script programming language is compatible with Visual Basic<br />
Version 6.<br />
Using this language, complex program sequences can be created<br />
with little effort.<br />
The following description will explain the most important commands<br />
used in the context of laser marking.<br />
Program documentation Each program should be documented adequately. This makes troubleshooting,<br />
later changes or adaptations by other persons easier.<br />
Specifically, tasks and characteristics of variables should be described<br />
adequately.<br />
Comments are introduced with the " ' " symbol.<br />
4.2 The script programming window<br />
4.2.1 File handling<br />
New<br />
Option Explicit 'so all variables must be declared<br />
Sub Main<br />
LC.TimerStart() 'Start the user timer<br />
Wait 3 'Wait some Time<br />
LC.TimerStop() 'Stop the user timer<br />
End Sub<br />
Sample 3 Comments<br />
Fig. 77 Script toolbar<br />
Fig. 78 New macro menu<br />
This manual focuses mainly on creating a new executable program<br />
(new macro).<br />
The code, object and class modules are object-oriented program<br />
62 <strong>Laser</strong> marking software: V1.5 Build: 343
Open<br />
Save<br />
Save All<br />
Print<br />
4.2.2 Edit<br />
Cut<br />
Copy<br />
Programming<br />
modules which do not represent programs that are executable on<br />
their own.<br />
Click on the Open icon.<br />
Select the intended file from the program folder. An existing project<br />
will be opened.<br />
Click on the Save icon.<br />
If the project has not yet been assigned a name, a name must be<br />
entered before saving. If the project already has a name, it can be<br />
saved without any acknowledgement.<br />
Click on the Save All icon for saving all open programs.<br />
If a project has not been assigned a name yet, a name must be entered<br />
before saving. If a project already has a name, it can be saved<br />
without any acknowledgement.<br />
Click on the Print icon.<br />
The current project will be output to the standard printer connected<br />
under Windows.<br />
Click on the Cut icon.<br />
High-lighted parts of the program are deleted and transferred to the<br />
clipboard.<br />
Click on the Copy icon.<br />
High-lighted parts of the program are transferred to the clipboard.<br />
<strong>Laser</strong> marking software: V1.5 Build: 343 63
Programming<br />
Paste<br />
Undo<br />
Redo<br />
4.2.3 Object Catalogue<br />
Display object<br />
Click on the Paste icon.<br />
The content of the clipboard is inserted at the cursor position.<br />
Click on the Undo icon.<br />
The last action is undone. The command can be repeated until the<br />
status of the last Save has been reached.<br />
Click on the Redo icon.<br />
The action cancelled last is performed again. If you have cancelled<br />
too many changes, they can be restored by using the Redo command.<br />
Click on the Show Object icon.<br />
The object catalogue is opened with its object libraries, class libraries,<br />
classes, methods, characteristics, events and constants which<br />
can be used in the code. In addition, the modules and procedures<br />
are shown which have been defined for the project.<br />
Fig. 79 Object catalogue<br />
64 <strong>Laser</strong> marking software: V1.5 Build: 343
4.2.4 Start/Stop<br />
Start/Continue<br />
Pause<br />
End<br />
4.2.5 Program Testing<br />
Breakpoint On/Off<br />
Evaluate Expression<br />
Programming<br />
Click on the Start/Continue icon.<br />
The current project is started under the development environment or<br />
continued to be executed after a stop.<br />
Click on Pause icon.<br />
If a program was started under the development environment, the<br />
activation of this command interrupts the program in the current location.<br />
Click on the End icon.<br />
The current program is closed and a change to the design mode is<br />
made.<br />
In order to be able to test every single instruction during the execution<br />
of the program, there is an auxiliary test mode (debugger).<br />
Among others, it checks the content of variables and the correctness<br />
of the program sequence, and serves for locating programming errors.<br />
Click on the Breakpoint On/Off icon.<br />
A breakpoint is inserted or deleted at the cursor position.<br />
Click on the Evaluate Expression icon.<br />
In the break mode, the current value is shown.<br />
<strong>Laser</strong> marking software: V1.5 Build: 343 65
Programming<br />
Edit Point<br />
Jumping in (individual step)<br />
Skip (procedure step)<br />
Jump out (Finish procedure)<br />
4.2.6 User Dialog<br />
Edit user dialog<br />
Click on the Show next statement icon.<br />
If the program is processed in the testing mode, this icon signals the<br />
current edit point.<br />
Click on the Jump In icon or on F8.<br />
The program can be processed step by step. If the program contains<br />
procedures, it branches into them. These procedures or functions<br />
are processed step by step.<br />
Click on the Skip icon.<br />
The program can be processed step by step. Any procedures and<br />
functions contained will be executed.<br />
In break mode, click on the Jump Out icon.<br />
The current procedure is executed and stopped again at the next<br />
program line to be executed.<br />
Click on the Edit user dialog icon.<br />
The User Dialog Editor box opens.<br />
66 <strong>Laser</strong> marking software: V1.5 Build: 343
4.3 Programming language<br />
4.3.1 Variables<br />
Fig. 80 User Dialog Editor<br />
Programming<br />
This mode is an important tool for creating user-specific programs.<br />
By using it, proprietary user interfaces in the Windows format can be<br />
created.<br />
A detailed description is found at Edit user dialog on page 89.<br />
General information Variables are values marked with a name whose content is changeable.<br />
They are required for saving and/or further processing of results of<br />
calculations or entries from the program user.<br />
Each variable should be declared; i.e., assigned a variable type<br />
(string, integer etc.)<br />
In order to force the declaration of all variables and thus exclude<br />
sources of error, the Option Explicit command is used.<br />
Naming Variables The name of a variable should be explicit so that the function of the<br />
variable can be deduced from its name alone.<br />
Byte Integer according to ASCII character set.<br />
Value range:<br />
0 to 255<br />
<strong>Laser</strong> marking software: V1.5 Build: 343 67
Programming<br />
Size:<br />
1 byte<br />
Boolean Status True/False<br />
Value range:<br />
True/False<br />
Size:<br />
2 bytes<br />
Integer Integer without decimals.<br />
Value range:<br />
-32768 to +32767<br />
Size:<br />
2 bytes<br />
Long Integer without decimals with greater value range as integer.<br />
Value range:<br />
-2 147 438 648 to +2 147 483 647<br />
Size:<br />
4 bytes<br />
Single Floating point for calculations with decimals.<br />
Value range:<br />
-3.402823*1038 to -1.401298*10-45 1.401298*10 -45 to 3.402823*10 38<br />
Size:<br />
4 bytes<br />
Double Floating point for calculations with decimals.<br />
Value range:<br />
-1.79769313486232*10308 to -4.94065645841247*10-324 4.94065645841247*10 -324 to 1.79769313486232*10 308<br />
Size:<br />
8 bytes<br />
68 <strong>Laser</strong> marking software: V1.5 Build: 343
Programming<br />
Currency Mix of integers and floating point for calculations up to the fourth<br />
decimal after the point.<br />
Value range:<br />
-922 337 203 685 477.5808 to 922 337 203 685 477.5807<br />
Size:<br />
8 bytes<br />
Date Utilisation for date and time.<br />
Date value range:<br />
01.01.100 to 31.12. 9999<br />
Time value range:<br />
00:00:00 to 23:59:59 (8 bytes)<br />
String String format, any length.<br />
Size:<br />
10 byte + 2 byte/character<br />
Variant Standard type which can assume any other type. In the process, the<br />
variables are converted automatically. This declaration is used<br />
when the type may change during the execution of the program.<br />
Numerical value size:<br />
16 bytes<br />
String size:<br />
22 byte + 2 byte/character<br />
Declaration description<br />
Dim Number As Integer Declares number as an integer<br />
Dim Symbol As String Declares symbol as a string<br />
Dim Value Declares value as a variable of the variant type<br />
Sample 4 Variable declaration<br />
<strong>Laser</strong> marking software: V1.5 Build: 343 69
Programming<br />
Variables can also be declared through icons:<br />
Symbol Variable type<br />
% Integer<br />
& Long<br />
! Single<br />
# Double<br />
@ Currency<br />
$ String<br />
Declaration Description<br />
Dim number% Declares number as integer<br />
Dim symbol$ Declares symbol as a string<br />
Sample 5 Declaration of variables with icons<br />
Examples for the importance of declaring variables:<br />
Option Explicit 'so all variables must be declared<br />
Sub Main<br />
Dim Number!<br />
Dim Result!<br />
Number! = 2.5<br />
Result! = Number! * Number!<br />
Debug.Print "Result = " & Result!<br />
End Sub<br />
Result = 6.25<br />
Sample 6 Program with variable declaration<br />
Option Explicit 'so all variables must be declared<br />
Sub Main<br />
Dim Number%<br />
Dim Result!<br />
Number% = 2.5<br />
Result! = Number% * Number%<br />
Debug.Print "Result = " & Result!<br />
End Sub<br />
Result = 4<br />
Sample 7 Program with variable declaration<br />
The two programs lead to different results due to the different declaration<br />
of variables. In Sample 6 floating points are multiplied with<br />
each other, while in integers are Sample 7 multiplied with each other.<br />
When doing so, values up to x.50 are rounded down.<br />
70 <strong>Laser</strong> marking software: V1.5 Build: 343
4.3.2 Constants<br />
4.3.3 Fields<br />
Programming<br />
Constants are named values whose content cannot be changed.<br />
They may assume any type.<br />
Const Pi! = 3.14: The constant Pi is assigned the value 3.14.<br />
Const Pi% = 3.14: The constant Pi is assigned the fixed value 3.<br />
Sample 8 Definition of constants<br />
Fields are lists of variables.<br />
Fields can be one- or multi-dimensional.<br />
If the value of a field is constant during object time, it is called a static<br />
field.<br />
Option Explicit 'so all variables must be declared<br />
Sub Main<br />
Dim Text(5) As String<br />
Text(0) = "Part A"<br />
Text(1) = "Part B"<br />
Text(2) = "Part C"<br />
Text(3) = "Part D"<br />
Text(4) = "Part E"<br />
Debug.Print Text(0)<br />
Debug.Print Text(1)<br />
Debug.Print Text(2)<br />
Debug.Print Text(3)<br />
Debug.Print Text(4)<br />
End Sub<br />
Part A<br />
Part B<br />
Part C<br />
Part D<br />
Part E<br />
Sample 9 Using a one-dimensional field<br />
In Sample 9 the one-dimensional Text field has been assigned five<br />
elements of the String type.<br />
x 0 1 2 3 4<br />
Value Text(x) Part A Part B Part C Part D Part E<br />
<strong>Laser</strong> marking software: V1.5 Build: 343 71
Programming<br />
Option Explicit 'so all variables must be declared<br />
Sub Main<br />
Dim x, y As Integer<br />
Dim Product(3,4) As Integer<br />
for x = 0 to 2<br />
for y = 0 to 3<br />
Product(x,y) = x * y<br />
Debug.Print Product(x,y)<br />
next y<br />
next x<br />
End Sub<br />
0<br />
0<br />
0<br />
0<br />
0<br />
1<br />
2<br />
3<br />
0<br />
2<br />
4<br />
6<br />
Sample 10 Multiplication<br />
In Sample 10 the two-dimensional Product field has been assigned<br />
3 times 4 elements of the type Integer.<br />
y<br />
0<br />
x<br />
1 2<br />
0 0 0 0<br />
1 0 1 2<br />
2 0 2 4<br />
3 0 3 6<br />
Option Explicit 'so all variables must be declared<br />
Sub Main<br />
Dim Field(2) As Variant<br />
Field(0) = "This is a text"<br />
Field(1) = 100<br />
Field(0) = Field(0) & " and not a number"<br />
Field(1) = Field(1) * 5<br />
Debug.Print Field(0)<br />
Debug.Print Field(1)<br />
End Sub<br />
This is a text and not a number<br />
500<br />
Sample 11 Using the Variant variable type<br />
72 <strong>Laser</strong> marking software: V1.5 Build: 343
4.3.4 Loops<br />
Programming<br />
For Next The For-next loop is a counting loop.<br />
It is defined by a start value, end value, and optionally, by the step<br />
size.<br />
The step size may be positive or negative; i.e., it is counted up or<br />
down. If no step size is stipulated, it will be set to the value of 1.<br />
By using the Exit command, the loop can be exited prematurely<br />
when a certain criterion occurs.<br />
Syntax:<br />
For Variable = Start To End [Step Step size]<br />
...<br />
[Exit]<br />
...<br />
Next Variable<br />
Option Explicit 'so all variables must be declared<br />
Sub Main<br />
Dim x!<br />
Dim Result!<br />
For x! = 0 To 1 Step 0.2<br />
Result! = x! * x!<br />
Debug.Print Result!<br />
Next x!<br />
End Sub<br />
0<br />
0.04<br />
0.16<br />
0.36<br />
0.64<br />
1<br />
Sample 12 For Next loop<br />
While The While loop is a Boolean loop.<br />
The loop is repeated as long as the statement is true.<br />
It may occur that the loop is never left.<br />
A practical application example is waiting for a <strong>Laser</strong> Start signal<br />
which initiates the marking procedure.<br />
Syntax:<br />
While condition<br />
...<br />
Wend<br />
<strong>Laser</strong> marking software: V1.5 Build: 343 73
Programming<br />
Option Explicit 'so all variables must be declared<br />
Sub Main<br />
Dim i%<br />
i% = 5<br />
While i% > 2<br />
i% = i% - 1<br />
Debug.Print i%<br />
Wend<br />
End Sub<br />
4<br />
3<br />
2<br />
Sample 13 While loop<br />
Do The Do loop is a Boolean loop.<br />
The loop is repeated as long as the statement is true. I.e, it will be<br />
executed at least once.<br />
It may occur that the loop is never left.<br />
Syntax:<br />
Do<br />
...<br />
[Exit]<br />
Loop Until Condition<br />
Option Explicit 'so all variables must be declared<br />
Sub Main<br />
Dim i%<br />
i% = 5<br />
Do<br />
i% = i% - 1<br />
Debug.Print i%<br />
Loop Until i%
4.3.5 Branching<br />
Programming<br />
This loop should be avoided since it makes a controlled<br />
program exit impossible.<br />
Branches serve to distinguish cases during object time.<br />
If Then Else The If-Then-Else branch is a Yes/No decision.<br />
Syntax 1:<br />
If condition Then instruction<br />
...<br />
End If<br />
Syntax 2:<br />
If condition Then instruction Else instruction<br />
...<br />
End If<br />
Syntax 3:<br />
If condition Then<br />
...<br />
Else if Condition Then<br />
...<br />
Else<br />
...<br />
End If<br />
<strong>Laser</strong> marking software: V1.5 Build: 343 75
Programming<br />
Option Explicit 'so all variables must be declared<br />
Sub Main<br />
Dim i!<br />
i! = 5<br />
While i! > -2<br />
If i! > 2 Then<br />
Debug.Print "i is " & i! & "; thus greater than 2!"<br />
Else<br />
Debug.Print "i is " & i! & "; thus smaller than 2!"<br />
End If<br />
i! = i! - 1.5<br />
Wend<br />
End Sub<br />
i is 5; thus greater than 2!<br />
i is 3.5; thus greater than 2!<br />
i is 2; thus smaller than 2!<br />
i is 0.5; thus smaller than 2!<br />
i is -1; thus smaller than 2!<br />
Sample 15 Branching with If Then Else<br />
Select Case The Select-Case decision is a decision between several options.<br />
Syntax:<br />
Select Case expression<br />
Case 1<br />
...<br />
case 2<br />
...<br />
Case 3<br />
...<br />
Case Else<br />
...<br />
End Select<br />
76 <strong>Laser</strong> marking software: V1.5 Build: 343
4.3.6 Procedures and Functions<br />
Option Explicit 'so all variables must be declared<br />
Sub Main<br />
Dim Workpiece As Integer<br />
Workpiece = 1 'selection no. 1<br />
Select Case Workpiece<br />
Case 1<br />
<strong><strong>Mark</strong>ing</strong>1 '<strong><strong>Mark</strong>ing</strong>1 function call<br />
Case 2<br />
<strong><strong>Mark</strong>ing</strong>2 '<strong><strong>Mark</strong>ing</strong>2 function call<br />
Case 3<br />
<strong><strong>Mark</strong>ing</strong>3 '<strong><strong>Mark</strong>ing</strong>3 function call<br />
End Select<br />
End Sub<br />
Sub <strong><strong>Mark</strong>ing</strong>1<br />
'Branch to marking1<br />
End Sub<br />
Sub <strong><strong>Mark</strong>ing</strong>2<br />
'Branch to marking2<br />
End Sub<br />
Sub <strong><strong>Mark</strong>ing</strong>3<br />
'Branch to marking3<br />
End Sub<br />
Sample 16 Labelling depends on the Workpiece variable<br />
Programming<br />
In order to make the program code clearer, grouping self-contained<br />
program parts into functions or procedures is recommended. The individual<br />
functions should be kept clear and short.<br />
A function or procedure can often be divided into small functions or<br />
procedures.<br />
Advantages:<br />
• Programmers can find their way around in the code fast.<br />
• Errors can be delimited fast.<br />
• Program extensions can be realised easily.<br />
• Functions and procedures can be used multiple times.<br />
Procedures Variables can be transferred to the procedures.<br />
Syntax:<br />
Sub Procedure name (Param1 As ... - ParamN As...)<br />
...<br />
End Sub<br />
<strong>Laser</strong> marking software: V1.5 Build: 343 77
Programming<br />
In Sample 16 several procedures were used:<br />
In the main program, the <strong><strong>Mark</strong>ing</strong>1 procedure is invoked. This is<br />
where the program branches into the <strong><strong>Mark</strong>ing</strong>1 procedure and executes<br />
it.<br />
Functions Functions are procedures which return a value.<br />
4.3.7 Editing Texts<br />
Option Explicit 'so all variables must be declared<br />
Sub Main<br />
Dim Radius%<br />
Radius%=15<br />
<strong><strong>Mark</strong>ing</strong>1(Radius%) '<strong><strong>Mark</strong>ing</strong>1 function call<br />
End Sub<br />
Sub <strong><strong>Mark</strong>ing</strong>1(Radius%)<br />
Debug.Print Radius%<br />
End Sub<br />
15<br />
Sample 17 Transfer of the Radius variable to the <strong><strong>Mark</strong>ing</strong>1 procedure<br />
Option Explicit 'so all variables must be declared<br />
Sub Main<br />
Dim i%<br />
Dim Result As Double<br />
i% = 10<br />
Result = Sqr (Sum(i%)) 'root of the function Sum<br />
Debug.Print "Result = " & Result<br />
End Sub<br />
Function Sum(i%)<br />
Sum = i% + i%<br />
Debug.Print i%<br />
End Function<br />
10<br />
Result = 4.47213595499958<br />
Sample 18 Function<br />
In our example, the square root of the returned value of the sum<br />
function is calculated. In this function then the sum of the variable i<br />
with itself is calculated.<br />
The functions described are important for editing and manipulating<br />
text. They represent only a portion of the full functional scope.<br />
78 <strong>Laser</strong> marking software: V1.5 Build: 343
Len Calculates the length of a string.<br />
Syntax:<br />
Len (String)<br />
Type:<br />
String<br />
Option Explicit 'so all variables must be declared<br />
Sub Main<br />
Dim Value As Integer<br />
Debug.Print Len("<strong>Laser</strong>")<br />
Value = Len("<strong>Laser</strong>")* 2<br />
Debug.Print Value<br />
End Sub<br />
5<br />
10<br />
Sample 19 Calculating the length of a string<br />
Left Creates a string of the length Len, starting on the left.<br />
Syntax:<br />
Left (String, Len)<br />
Type:<br />
String<br />
Option Explicit 'so all variables must be declared<br />
Sub Main<br />
Debug.Print Left("<strong>Laser</strong>",2)<br />
End Sub<br />
La<br />
Sample 20 Creation of a string starting on the left<br />
Programming<br />
Mid Creates a string of the length Len, starting at the Index position.<br />
Syntax:<br />
Mid (String,Index,[Len])<br />
Type:<br />
String<br />
<strong>Laser</strong> marking software: V1.5 Build: 343 79
Programming<br />
Option Explicit 'so all variables must be declared<br />
Sub Main<br />
Debug.Print Mid("<strong>Laser</strong>",3,2)<br />
End Sub<br />
se<br />
Sample 21 Creation of a string starting from any location<br />
Right Creates a string of the length Len, starting on the right.<br />
Syntax:<br />
Right (String,Len)<br />
Type:<br />
String<br />
Option Explicit 'so all variables must be declared<br />
Sub Main<br />
Debug.Print Right("<strong>Laser</strong>",2)<br />
End Sub<br />
er<br />
Sample 22 Creation of a string starting on the right<br />
Str Creates a string from a numerical variable.<br />
Syntax:<br />
Str (Num)<br />
Type:<br />
String<br />
Option Explicit 'so all variables must be declared<br />
Sub Main<br />
Debug.Print Str(-5*8)<br />
End Sub<br />
-40<br />
Sample 23 Creation of a string from a numerical variable<br />
80 <strong>Laser</strong> marking software: V1.5 Build: 343
StrReverse Creates a string inverse to the start string.<br />
Syntax:<br />
StrReverse (String)<br />
Type:<br />
String<br />
UCase Converts all lower case letters of a string into upper case.<br />
Syntax:<br />
UCase (string)<br />
Type:<br />
String<br />
4.3.8 Mathematical Operations<br />
Option Explicit 'so all variables must be declared<br />
Sub Main<br />
Debug.Print StrReverse("<strong>Laser</strong>")<br />
End Sub<br />
resaL<br />
Sample 24 Creation of an inverse string<br />
Option Explicit 'so all variables must be declared<br />
Sub Main<br />
Debug.Print UCase("<strong>Laser</strong>")<br />
End Sub<br />
LASER<br />
Sample 25 Conversion of lower case letters into upper case<br />
Programming<br />
Sin, Cos, Tan, Atn These functions return the trigonometric functions of numerical values.<br />
Syntax:<br />
Sin (Num)<br />
Cos (Num)<br />
Tan (Num)<br />
Atn (Num)<br />
<strong>Laser</strong> marking software: V1.5 Build: 343 81
Programming<br />
Option Explicit 'so all variables must be declared<br />
Sub Main<br />
Debug.Print Sin(1)<br />
Debug.Print Cos(1)<br />
Debug.Print Tan(1)<br />
Debug.Print Atn(1)<br />
End Sub<br />
0.841470984807897<br />
0.54030230586814<br />
1.5574077246549<br />
0.785398163397448<br />
Sample 26 Calculation of trigonometric functions<br />
Exp, Log, Sqr Calculation of the following functions:<br />
• Exponential function,<br />
• Logarithmic function,<br />
• Square root.<br />
Syntax:<br />
Exp (Num)<br />
Log (Num)<br />
Sqr (Num)<br />
Option Explicit 'so all variables must be declared<br />
Sub Main<br />
Debug.Print Exp(1)<br />
Debug.Print Log(1)<br />
Debug.Print Sqr(81)<br />
End Sub<br />
2.71828182845905<br />
0<br />
9<br />
Sample 27 Calculation of exponent, logarithm and square root<br />
Abs, Fix, Int, Round, Sgn Abs: Forms the absolute value.<br />
Fix: Forms an integer variable by removing all decimals.<br />
Int: Forms an integer variable by rounding.<br />
Round: Rounds a numerical value to the number of decimals<br />
required.<br />
Sgn: Returns an Algebraic sign value.<br />
82 <strong>Laser</strong> marking software: V1.5 Build: 343
4.3.9 Operators<br />
Syntax:<br />
Abs (Num)<br />
Fix (Num)<br />
Int (Num)<br />
Round (Num,[Digits])<br />
Sgn (Num)<br />
Option Explicit 'so all variables must be declared<br />
Sub Main<br />
Debug.Print Abs(-100)<br />
Debug.Print Fix(-100.2)<br />
Debug.Print Int(-100.8)<br />
Debug.Print Round(-100.88,1)<br />
End Sub<br />
100<br />
-100<br />
-101<br />
-100.9<br />
Sample 28 Calculation of Abs, Fix, Int, Round<br />
Programming<br />
n: Numeric value<br />
s: String<br />
- n1 Change of algebraic sign from n1.<br />
n1 ^ n2 Takes n1 to the power of 2.<br />
n1 * n2 Multiplies n1 and n2.<br />
n1 / n2 Divides n1 by n2.<br />
n1 \ n2 Divides the integer value of n1 by the integer value of<br />
n2.<br />
n1 + n2 Adds n1 and n2.<br />
s1 + s2 Connects s1 with s2.<br />
n1 - n2 Subtracts n2 from n1.<br />
n1 & n2 Connects n1 to n2.<br />
n1 < n2 Returns True if n1 less than n2.<br />
n1 n2 Returns True if n1 greater than n2.<br />
n1 >= n2 Returns True if n1 greater than or equal n2.<br />
n1 = n2 Returns True if n1 equal n2.<br />
n1 n2 Returns True if n1 unequal n2.<br />
s1 = s2 Returns True if s1 equal s2.<br />
s1 s2 Returns True if s1 unequal s2.<br />
n1 And n2 Bitwise AND conjunction of n1 with n2.<br />
n1 Or n2 Bitwise OR conjunction of n1 with n2.<br />
<strong>Laser</strong> marking software: V1.5 Build: 343 83
Programming<br />
4.3.10 Type Conversion Functions<br />
Option Explicit 'so all variables must be declared<br />
Sub Main<br />
Dim N1,N2 As Integer<br />
Dim S1$,S2$<br />
N1 = 10<br />
N2 = 3<br />
S1$ = "asdfg"<br />
S2$ = "hjkl"<br />
Debug.Print -N1 '-10<br />
Debug.Print N1 ^ N2 '1000<br />
Debug.Print N1 * N2 '30<br />
Debug.Print N1 / N2 '3.3333333333333<br />
Debug.Print N1 \ N2 '3<br />
Debug.Print N1 + N2 '13<br />
Debug.Print S1$ + S2$ '"asdfghjkl"<br />
Debug.Print N1 - N2 '7<br />
Debug.Print N1 & N2 '"103"<br />
Debug.Print N1 < N2 'False<br />
Debug.Print N1 = N2 'True<br />
Debug.Print N1 = N2 'False<br />
Debug.Print N1 N2 'True<br />
Debug.Print S1$ = S2$ 'False<br />
Debug.Print S1$ S2$ 'True<br />
Debug.Print N1 And N2 '2<br />
Debug.Print N1 Or N2 '11<br />
End Sub<br />
Sample 29 Working with Operators<br />
These functions convert expressions into certain data types.<br />
If the value of an expression lies outside the range of the data type<br />
into which it is to be converted, an error will occur.<br />
Syntax:<br />
Conversion function (expression)<br />
Function Return Type Range of the Expression argument<br />
CBool Boolean A valid string or a valid numerical expression.<br />
CByte byte 0 to 255.<br />
CCur Currency -922 337 203 685 477.5808 to<br />
922 337 203 685 477.5807.<br />
CDate Date Any valid date expression.<br />
CDbl Double -1.79769313486231E308 to<br />
-4.94065645841247E-324 for negative values;<br />
4.94065645841247E-324 to<br />
1.79769313486232E308 for positive values.<br />
84 <strong>Laser</strong> marking software: V1.5 Build: 343
4.3.11 Working with Files<br />
Programming<br />
Function Return Type Range of the Expression argument<br />
CDec Decimal +/-79 228 162 514 264 337 593 543 950 335 for<br />
scaled integers; i.e., numbers without decimals.<br />
For numbers with 28 decimals the range... is<br />
valid<br />
+/-7.9228162514264337593543950335.<br />
The smallest possible number unequal Zero is<br />
0.0000000000000000000000000001.<br />
CInt Integer -32 768 to 32 767;<br />
Decimals are rounded.<br />
CLng Long -2 147 483 648 to 2 147 483 647;<br />
Decimals are rounded.<br />
CSng Single -3.402823E38 to -1.401298E-45 for negative<br />
values;<br />
1.401298E-45 to 3.402823E38 for positive values.<br />
Cvar Variant Numerical values in the range of the Double<br />
type.<br />
Non-numerical values in the range of the String<br />
type.<br />
CStr String Return for CStr depends on Expression argument.<br />
A file is a structured amount of data which, e.g., can be stored on the<br />
hard drive of a computer.<br />
In order to be able to access the records of a file for input and/or output,<br />
it must be opened.<br />
Access to files allows, e.g., logging marking processes in files or using<br />
data from files for laser marking.<br />
File names The Script language executes input and output operations by<br />
means of file numbers. This number is assigned to a file or unit when<br />
it is opened using the Open command.<br />
The physical file is described by a string.<br />
Syntax:<br />
[Unit:] [Path] File name<br />
Parameter:<br />
Unit: Input/Output unit<br />
Path: Path, directory in which the file is located.<br />
File name: File name<br />
<strong>Laser</strong> marking software: V1.5 Build: 343 85
Programming<br />
4.3.12 Sequential Files<br />
Open Opens or creates a File<br />
Close Closes a file<br />
Sequential files can be easily created.<br />
The data is stored in the order it is transferred.<br />
When reading from such a file, the file must be processed from the<br />
beginning. This is an essential disadvantage of sequential files.<br />
Syntax:<br />
Open File For Mode As # File Number [record length]<br />
Parameter:<br />
Mode: Output File is opened for writing or<br />
created,<br />
content is deleted.<br />
Append File is opened for adding.<br />
Input File is opened for reading,<br />
error if file does not exist.<br />
Random Access to entire records,<br />
length of sentence must be stated.<br />
Syntax:<br />
Close # File number<br />
Print Writes records to an opened file.<br />
Write Writes records to an opened file.<br />
Syntax:<br />
Print # File number Expression list<br />
The values of the list of expressions are written to the file consecutively<br />
without separators, as one record.<br />
Syntax:<br />
Write # File number Expression list<br />
The values of the list of expressions are written to the file, consecutively<br />
with commas as separators, as one record.<br />
86 <strong>Laser</strong> marking software: V1.5 Build: 343
Option Explicit 'so all variables must be declared<br />
Sub Main<br />
Dim A As Integer<br />
A=5<br />
Open "c:\temp\<strong>Mark</strong>.txt" For Output As #1<br />
Print #1,"A=";",";A<br />
Close #1<br />
End Sub<br />
Sample 30 Open a file, write a record and close the file<br />
Fig. 81 Result file for Sample 30<br />
Option Explicit 'so all variables must be declared<br />
Sub Main<br />
Dim B As Integer<br />
B=10<br />
Open "c:\temp\<strong>Mark</strong>.txt" For Append As #1<br />
Print #1,"B=";",";B<br />
Close #1<br />
End Sub<br />
Sample 31 Open a file, add a record and close the file<br />
Fig. 82 Result file for Sample 31<br />
Input Reads a line in an opened file.<br />
Programming<br />
Syntax:<br />
Input # File number List of variables<br />
The parts of the line divided by commas are transferred to the variables<br />
of the list of variables.<br />
<strong>Laser</strong> marking software: V1.5 Build: 343 87
Programming<br />
Line Input Reads a line in an opened file.<br />
4.3.13 Files with Direct Access<br />
Syntax:<br />
Line Input # File number Variable<br />
The content of the line is transferred to the variable.<br />
Option Explicit 'so all variables must be declared<br />
Sub Main<br />
Dim Text$<br />
Dim Value%<br />
Dim Lines$<br />
Open "c:\temp\<strong>Mark</strong>.txt" For Input As #1<br />
While Not EOF(1)<br />
Input #1,Text$,Value%<br />
Line Input #1,Lines$<br />
Debug.Print Text$;Value%<br />
Debug.Print Lines$<br />
Wend<br />
Close #1<br />
End Sub<br />
A= 5<br />
B=, 10<br />
Sample 32 Reading of the lines of the file created in Sample 31<br />
Files with direct access allow access to selected records via a<br />
record number.<br />
Put Writes the content of a variable into a record of a file.<br />
Syntax:<br />
Put File Number, [Record Number], Variable<br />
Option Explicit 'so all variables must be declared<br />
Sub Main<br />
Dim V As Variant<br />
V="Text;"<br />
Open "C:\temp\sample.txt" For Random As #1 Len=15<br />
Put #1,1,V<br />
Put #1,2,V<br />
Put #1,3,V<br />
Close #1<br />
End Sub<br />
Sample 33 Generating a file with direct access.<br />
88 <strong>Laser</strong> marking software: V1.5 Build: 343
Get Reads the record content in a variable<br />
4.3.14 Creating User Dialog Windows<br />
Edit user dialog<br />
Fig. 83 Result file for Sample 33<br />
Syntax<br />
Get File number, [Record number], Variable<br />
Option Explicit 'so all variables must be declared<br />
Sub Main<br />
Dim V As Variant<br />
Open "c:\temp\Beispiel.txt" For Random As #1 Len=15<br />
Get #1,1, V<br />
Debug.Print V<br />
Close #1<br />
End Sub<br />
Text;<br />
Sample 34 Read out the 1st record form the file of Sample 33<br />
Click on the Edit user dialog icon.<br />
The User Dialog Editor box will open.<br />
Programming<br />
<strong>Laser</strong> marking software: V1.5 Build: 343 89
Programming<br />
Fig. 84 User dialog editor<br />
Example for creation of a simple user dialog box:<br />
1. Create a new Basic project.<br />
1. Click on the Edit user dialog icon.<br />
2. The User Dialog Editor box will open.<br />
3. On the left hand side, there is a number of controls. Click on the<br />
Add Ok button icon.<br />
4. The mouse cursor will change into a cross hair. Move the mouse<br />
into the position of the window in which the button is to be inserted.<br />
Left-click on the mouse and define any size for the button.<br />
Release the mouse when the size appears correct.<br />
5. If you would like to keep the window defined, click the Accept<br />
button.<br />
6. The Editor will close, and you are back in program code. A few<br />
lines were inserted automatically for defining the window.<br />
Option Explicit 'so all variables must be declared<br />
Sub Main<br />
Begin Dialog UserDialog 400,203 '%GRID:10,7,1,1<br />
OKButton 110,98,180,49<br />
End Dialog<br />
Dim dlg As UserDialog<br />
Dialog dlg<br />
End Sub<br />
Sample 35 Program code for a simple user dialog window<br />
When the program is executed, the defined dialog window will open<br />
and will wait for an acknowledgement via a mouse click on the OK<br />
button.<br />
90 <strong>Laser</strong> marking software: V1.5 Build: 343
Menu bar<br />
Editing properties<br />
Fig. 85 Menu bar of the user dialog editor<br />
Programming<br />
Highlight a control or the entire options box (happens automatically<br />
if no control is highlighted).<br />
Click on the Edit Properties icon.<br />
The Edit Properties dialog box opens.<br />
The window can also be opened by double-clicking on an element.<br />
Fig. 86 Edit Properties dialog box for the user dialog<br />
Centred: If the check box is activated, the dialog box will<br />
be centred.<br />
Left/Top: Dialog box position (with centring turned off.)<br />
Width/Height: Window size.<br />
Caption: Name of window.<br />
Quoted: If the check box is activated, the text entered<br />
under Caption will appear as a string. Otherwise,<br />
the text entered under Caption will represent<br />
a variable.<br />
Dialog function: Supports execution of complex functions.<br />
Comment: Any comment may be entered.<br />
<strong>Laser</strong> marking software: V1.5 Build: 343 91
Programming<br />
View of elements<br />
Select<br />
Add group box<br />
Add text<br />
Fig. 87 Toolbar view of elements<br />
If several elements are used in a dialog box, the functions of the Element<br />
view provide a clearer representation. If several elements<br />
overlap, the element which comes first in the program will be the top<br />
element during processing.<br />
The Select function allows choosing or highlighting controls.<br />
This element serves to organise controls. The box can be assigned<br />
a name consisting of fixed text or a variable.<br />
This element serves to the output of text in the user dialog window.<br />
Fixed or variable text content can be given.<br />
Fig. 88 Edit Text Properties dialog box<br />
The text can be formatted (left justified, right justified, centred).<br />
Graphically, the <strong>Laser</strong> script is represented as a string. If the Quoted<br />
check box is deactivated, <strong>Laser</strong> will become a variable. Then the<br />
content of this variable will be depicted.<br />
92 <strong>Laser</strong> marking software: V1.5 Build: 343
Add text box<br />
Option Explicit 'so all variables must be declared<br />
Sub Main<br />
Dim <strong>Laser</strong> As String<br />
<strong>Laser</strong> = "5345"<br />
Begin Dialog UserDialog 400,203<br />
OKButton 110,133,160,49<br />
Text 140,28,100,35,"<strong>Laser</strong>",.Text1,2<br />
Text 140,77,100,35,<strong>Laser</strong>,.Text2,2<br />
End Dialog<br />
Dim dlg As UserDialog<br />
Dialog dlg<br />
End Sub<br />
Sample 36 Declaration of the marking as string or variable<br />
Fig. 89 Result of Sample 36<br />
This element allows entering data during run time.<br />
Fig. 90 Edit Text Box Properties dialog box<br />
Programming<br />
The content entered will be written into a variable with the name assigned<br />
under Field. In the further processing of the program, this<br />
variable can be accessed.<br />
<strong>Laser</strong> marking software: V1.5 Build: 343 93
Programming<br />
Add check box<br />
Option Explicit 'so all variables must be declared<br />
Sub Main<br />
Dim Radius As String<br />
Begin Dialog UserDialog 380,175,"Circle"<br />
OKButton 130,112,130,49<br />
TextBox 230,56,60,21,.Variable<br />
Text 70,56,160,21,"Radius:",.Text1<br />
End Dialog<br />
Dim dlg As UserDialog<br />
Dialog dlg<br />
MsgBox (dlg.Variable)<br />
End Sub<br />
Sample 37 Output and Input of text<br />
Fig. 91 User dialog box for Sample 37<br />
The check box allows the user to activate or deactivate various options<br />
during program processing.<br />
A check box can assume exactly two states, true or false. If the<br />
check box is activated, the status will change to True; otherwise, the<br />
False status will remain.<br />
94 <strong>Laser</strong> marking software: V1.5 Build: 343
Add options button<br />
Option Explicit 'so all variables must be declared<br />
Sub Main<br />
Selection<br />
End Sub<br />
Programming<br />
Function Selection<br />
Begin Dialog UserDialog 400,203,"CheckBox"<br />
CheckBox 240,70,90,14,"Circle",.CheckBox1<br />
CheckBox 240,105,90,14,"Rectangle",.CheckBox2<br />
OKButton 120,140,180,35<br />
End Dialog<br />
Dim dlg As UserDialog<br />
Dialog dlg<br />
If dlg.checkbox1 = 0 and dlg.checkbox2 = 0<br />
Then MsgBox ("nothing")<br />
If dlg.checkbox1 = 1 and dlg.checkbox2 = 0 Then MsgBox ("Circle")<br />
If dlg.checkbox1 = 0 and dlg.checkbox2 = 1 Then MsgBox ("Rectangle")<br />
If dlg.checkbox1 = 1 and dlg.checkbox2 = 1<br />
Then MsgBox ("both")<br />
End Function<br />
Sample 38 Selecting <strong><strong>Mark</strong>ing</strong>s Using Check Boxes<br />
Fig. 92 User dialog box to Sample 38<br />
A circle, rectangle, nothing or both may be selected. The query of<br />
the variables should occur correspondingly.<br />
The Options button is a switch which can assume only the states of<br />
True or False. In this context, however, all elements of a group are<br />
interdependent since they are linked by an OR-function. I.e., only<br />
one Option button out of a group may assume the status True; the<br />
other elements will remain on False.<br />
Any number of Option buttons may be organized into a group.<br />
<strong>Laser</strong> marking software: V1.5 Build: 343 95
Programming<br />
Add list box<br />
Option Explicit 'so all variables must be declared<br />
Sub Main<br />
Selection<br />
End Sub<br />
Function Selection<br />
Begin Dialog UserDialog 400,203,"Option Button"<br />
OKButton 120,140,180,35<br />
OptionGroup .Group1<br />
OptionButton 160,70,80,14,"Circle",.OptionButton1<br />
OptionButton 160,91,100,14,"Rectange",.OptionButton2<br />
End Dialog<br />
Dim dlg As UserDialog<br />
Dialog dlg<br />
If dlg.Group1 = 0 Then MsgBox ("Circle")<br />
If dlg.Group1 = 1 Then MsgBox ("Rectangle")<br />
End Function<br />
Sample 39 Selecting <strong><strong>Mark</strong>ing</strong>s Using Option Buttons<br />
Fig. 93 User dialog box to Sample 39<br />
Either a circle or a rectangle may be selected.<br />
Using the List box, lists may be shown. If the list contains more elements<br />
than can be shown, scroll bars will be added.<br />
A list element can be selected, but there is no option for adding elements.<br />
The List box is defined by a field.<br />
Access to the user’s selection is obtained by evaluating the variables<br />
assigned under Field; it contains the field number selected.<br />
96 <strong>Laser</strong> marking software: V1.5 Build: 343
Add droplist box<br />
Fig. 94 Edit ListBox Properties dialog box<br />
Option Explicit 'so all variables must be declared<br />
Sub Main<br />
Dim <strong>Mark</strong>(2) As String<br />
<strong>Mark</strong>(0)= "Circle"<br />
<strong>Mark</strong>(1)= "Rectangle"<br />
Begin Dialog UserDialog 400,203,"Listbox"<br />
OKButton 120,126,140,49<br />
ListBox 150,56,90,49,<strong>Mark</strong>(),.ListBox1<br />
End Dialog<br />
Dim dlg As UserDialog<br />
Dialog dlg<br />
If dlg.ListBox1 = 0 Then MsgBox ("Circle")<br />
If dlg.ListBox1 = 1 Then MsgBox ("Rectangle")<br />
End Sub<br />
Sample 40 Selecting <strong><strong>Mark</strong>ing</strong>s Using a List Box<br />
Fig. 95 User dialog box for Sample 40<br />
Either a circle or a rectangle may be selected.<br />
Programming<br />
Lists may be shown using the Droplist box. A line with scroll bars will<br />
be appear.<br />
A list element may be selected or a value may be entered.<br />
The List box is defined by a field.<br />
<strong>Laser</strong> marking software: V1.5 Build: 343 97
Programming<br />
Add combo box<br />
Add picture<br />
Access to the user’ selection is obtained by evaluating the variables<br />
assigned under Box; it contains the value entered or selected.<br />
Option Explicit 'so all variables must be declared<br />
Sub Main<br />
Dim <strong>Mark</strong>(2) As String<br />
<strong>Mark</strong>(0)= "Circle"<br />
<strong>Mark</strong>(1)= "Rectangle"<br />
Begin Dialog UserDialog 400,203,"DropListBox"<br />
OKButton 130,119,130,56<br />
DropListBox 150,56,90,49,<strong>Mark</strong>(),.DropListBox1,1<br />
End Dialog<br />
Dim dlg As UserDialog<br />
Dialog dlg<br />
MsgBox (dlg.DropListBox1)<br />
End Sub<br />
Sample 41 Selecting <strong><strong>Mark</strong>ing</strong>s Using a Droplist Box<br />
Fig. 96 User dialog box for Sample 41<br />
A circle or a rectangle may be selected, or different text may be entered.<br />
The Combo box corresponds to the Droplist box in its role; they differ<br />
in their representations.<br />
With the Combo box, the select box is permanently open; if necessary,<br />
you can scroll through this box.<br />
With the DropList box, the select box is not opened until activated.<br />
Using the Add Picture function, bitmap files may be linked to the<br />
user dialog box.<br />
98 <strong>Laser</strong> marking software: V1.5 Build: 343
Add buttons<br />
Fig. 97 Edit Picture Properties dialog box<br />
Option Explicit 'so all variables must be declared<br />
Programming<br />
Sub Main<br />
Begin Dialog UserDialog 400,203,"Picture"<br />
Picture 0,0,400,203,"c:\windows\blue lace 16.bmp",0,.Picture1<br />
OKButton 120,112,160,56<br />
End Dialog<br />
Dim dlg As UserDialog<br />
Dialog dlg<br />
End Sub<br />
Sample 42 Linking a Bitmap File as Background for a User Dialog Box<br />
Fig. 98 User dialog box for Sample 42<br />
Buttons are required for acknowledging entries or starting processes.<br />
Three different types are available:<br />
• OK button,<br />
• Cancel button,<br />
• Push button.<br />
NOTE!<br />
For an executable dialog window, at least one of these<br />
buttons must be supplied!<br />
<strong>Laser</strong> marking software: V1.5 Build: 343 99
Programming<br />
Option Explicit 'so all variables must be declared<br />
Sub Main<br />
Begin Dialog UserDialog 260,126,"Button"<br />
Text 60,28,140,28,"Please push a button"<br />
OKButton 10,91,60,21<br />
PushButton 90,91,60,21,"&Run"<br />
CancelButton 170,91,80,21<br />
End Dialog<br />
Dim dlg As UserDialog<br />
Debug.Print Dialog(dlg)<br />
End Sub<br />
Sample 43 User dialog box with three buttons<br />
Fig. 99 User dialog box for Sample 43<br />
Depending on the key pressed, Variable Dialog (dlg) will return the<br />
following results, which may be accessed when processing the program:<br />
OK OK-Button -1,<br />
Run Push-Button 1,<br />
Cancel Cancel-Button 0.<br />
Dialog function The Dialog function in the User Dialog menu may be used, among<br />
other things, for keeping a dialog box open permanently during program<br />
processing.<br />
100 <strong>Laser</strong> marking software: V1.5 Build: 343
Option Explicit 'so all variables must be declared<br />
Programming<br />
Sub Main<br />
Begin Dialog UserDialog 370,140,"Dialog",.DialogFuncStatus<br />
OKButton 220,42,90,42<br />
PushButton 70,28,110,35,"TestStart",.TestStart<br />
PushButton 70,63,110,35,"TestStop",.TestStop<br />
End Dialog<br />
Dim dlg As UserDialog<br />
Dialog dlg<br />
End Sub<br />
Function DialogFuncStatus%(DlgItem$, Action%, SuppValue%)<br />
Static TestRun As Boolean<br />
Select Case Action%<br />
Case 1<br />
Case 2<br />
If DlgItem$ = "TestStart" Then<br />
TestRun = True<br />
DialogFuncStatus% = True<br />
End If<br />
If DlgItem$ = "TestStop" Then<br />
TestRun = False<br />
DialogFuncStatus% = True<br />
End If<br />
Case 3<br />
Case 4<br />
Case 5<br />
If TestRun = True Then<br />
DOIT (TestRun)<br />
End If<br />
DialogFuncStatus% = True<br />
End Select<br />
End Function<br />
Sub DOIT (TestRun)<br />
MsgBox("This is where the marking can be done!")<br />
TestRun = False<br />
End Sub<br />
Sample 44 Dialog function<br />
Fig. 100 User dialog box for Sample 44<br />
By calling up User Dialog, the DialogFuncStatus dialog function is<br />
processed. In this context, a Select-Case branching will evaluate the<br />
user’s actions.<br />
<strong>Laser</strong> marking software: V1.5 Build: 343 101
Programming<br />
4.3.15 Dialog Box<br />
Input box Options for the user entering data.<br />
Syntax:<br />
Return Value = InputBox("Message"[, "Title"][, "Default"][, XPos,<br />
YPos])<br />
Parameter:<br />
Return Value:The String type variable is used to store text entered<br />
by the user.<br />
Message: Text which appears in the input box and prompts<br />
the user to act.<br />
Title: Input Box Designation<br />
Default: This is where an instruction for the user may be<br />
placed.<br />
XPos: X-position for the upper left corner of the Input<br />
box.<br />
YPos: Y-position for the upper left corner of the Input<br />
box.<br />
Option Explicit 'so all variables must be declared<br />
Sub Main<br />
Dim L$<br />
L$ = InputBox("Enter your name:", "Input box", "Ingmar Grote")<br />
Debug.Print L$<br />
End Sub<br />
Sample 45 Input box for entering a name which is then output<br />
Fig. 101 User dialog box for Sample 45<br />
Message Box The Message box shows a pre-defined output dialog. The button<br />
can be evaluated through the return value.<br />
Syntax:<br />
Return Value = MsgBox("Message"[, Buttons][, "Title"])<br />
or<br />
MsgBox"Message"[, Buttons][, "Title"]<br />
102 <strong>Laser</strong> marking software: V1.5 Build: 343
Programming<br />
Parameter:<br />
Return Value: The user input is returned in a variable of the Integer<br />
type.<br />
Return value Constant selected button<br />
1 vbOk OK<br />
2 vbCancel Cancel<br />
3 vbAbort Abort<br />
4 vbRetry Repeat<br />
5 vbIgnore Ignore<br />
6 vbYes Yes<br />
7 vbNo No<br />
Message: Text which appears in the input box and<br />
prompts the user to act.<br />
Buttons: Constants or values for buttons and icons to be<br />
represented.<br />
Constant Value Appearance<br />
vbOkOnly 0 OK<br />
vbOkCancel 1 OK, Cancel<br />
vbAbortRetryIgnore 2 Abort, Retry, Ignore<br />
vbYesNoCancel 3 Yes, No, Cancel<br />
vbYesNo 4 Yes, No<br />
vbRetryCancel 5 Retry, Cancel<br />
0 No icon<br />
vbCritical 16 Stop icon<br />
vbQuestion 32 Question symbol<br />
vbExclamation 48 Caution symbol<br />
vbInformation 64 Information symbol<br />
Title: Message Box designation.<br />
Option Explicit 'so all variables must be declared<br />
Sub Main<br />
'Buttons<br />
MsgBox("Program example",0,"Test")<br />
MsgBox("Program example",1,"Test")<br />
MsgBox("Program example",2,"Test")<br />
MsgBox("Program example",3,"Test")<br />
MsgBox("Program example",4,"Test")<br />
MsgBox("Program example",5,"Test")<br />
'Icons<br />
MsgBox("Program example",16,"Test")<br />
MsgBox("Program example",32,"Test")<br />
MsgBox("Program example",48,"Test")<br />
MsgBox("Program example",64,"Test")<br />
End Sub<br />
Sample 46 Appearance of different Message boxes<br />
<strong>Laser</strong> marking software: V1.5 Build: 343 103
Programming<br />
The selection made can be queried:<br />
Option Explicit 'so all variables must be declared<br />
Sub Main<br />
If MsgBox("Program example",4,"Query")= vbYes Then<br />
MsgBox("Yes pressed!",16,"Information")<br />
Else<br />
MsgBox("No pressed!",32,"Information")<br />
End If<br />
End Sub<br />
Sample 47 Querying the reaction to a Message box<br />
Fig. 102 User dialog boxes for Sample 47<br />
PopUp menu Various actions may be initiated using a PopUp menu.<br />
Syntax:<br />
Return Value = ShowPopupMenu (Field( ) [, Alignment][, XPos,<br />
YPos])<br />
Parameter:<br />
Return Value:The list number selected is returned as a variable<br />
of the Integer type.<br />
Field: In a one-dimensional field, all selection options are<br />
determined.<br />
104 <strong>Laser</strong> marking software: V1.5 Build: 343
Programming<br />
Alignment: Aligning the menu with the X- and Y-coordinates.<br />
PopupStyle Value Effect<br />
vbPopupLeftTopAlign 0 Basic Alignment<br />
position<br />
vbPopupUseLeftButton 1 Selection can be<br />
made only with the<br />
left mouse button.<br />
vbPopupUseRightButton 2 Selection can be<br />
made with the left or<br />
right mouse button<br />
vbPopupRightAlign 4 Menu is located on<br />
the right corner of<br />
the X-position.<br />
vbPopupCenterAlign 8 Menu is centred<br />
around the X-position.<br />
vbPopupVCenterAlign 16 Menu is centred<br />
around the Y-position.<br />
vbPopupBottomAlign 32 Menu button is in<br />
the Y-position<br />
Option Explicit 'so all variables must be declared<br />
Sub Main<br />
Dim Selection As Integer<br />
Dim Items(0 To 2) As String<br />
Items(0) = "&Circle"<br />
Items(1) = "&Rectangle"<br />
Items(2) = "&Vector"<br />
Selection = ShowPopupMenu (Items)<br />
If selection = 0 Then circle 'Popup menu with selection circle<br />
If selection = 1 Then rectangle 'Popup menu with selection rectangle<br />
If selection = 2 Then vector 'Popup menu with selection vector<br />
End Sub<br />
Function circle<br />
MsgBox ("Circle")<br />
End Function<br />
Function rectangle<br />
MsgBox ("Rectangle")<br />
End Function<br />
Function vector<br />
MsgBox ("Vector")<br />
End Function<br />
Sample 48 Popup menu for selecting a shape for output<br />
<strong>Laser</strong> marking software: V1.5 Build: 343 105
Programming<br />
4.3.16 Handling of Errors<br />
Errors may occur regularly during program processing. Therefore,<br />
during program development, care should be taken that the programs<br />
are able to tolerate potential errors.<br />
For this purpose, the On Error command is available which allows<br />
the program to be informed how it should respond when errors occur.<br />
In the context of this command, the commands Goto and Resume<br />
Next are used.<br />
On Error Goto If after entering the On Error Goto Target <strong>Mark</strong> command an error<br />
occurs, the program will jump to the target mark. This is where the<br />
user can be informed about the error that occurred.<br />
Syntax:<br />
On Error Goto Target <strong>Mark</strong><br />
...<br />
Target<br />
...<br />
Option Explicit 'so all variables must be declared<br />
Sub Main<br />
Calculation<br />
End Sub<br />
Function Calculation<br />
Dim a!,t!<br />
Dim Result As Single<br />
On Error GoTo Errors<br />
a!=InputBox ("Input number")<br />
t!=InputBox ("Input divisor")<br />
Result = a!/t!<br />
Debug.Print Result<br />
Exit Function<br />
Errors:<br />
MsgBox("An error occurred.", 48, "Error")<br />
End Function<br />
Sample 49 Error Detection and Information<br />
In the program example, input errors committed by the user are detected<br />
and reported. These may include:<br />
• Division by Zero,<br />
• Entering strings,<br />
• No entry.<br />
106 <strong>Laser</strong> marking software: V1.5 Build: 343
Programming<br />
On Error Resume Next This command causes the program line containing the error to be<br />
skipped. While this results in errors being avoided, it may also lead<br />
to false calculations.<br />
Syntax:<br />
On Error Resume Next<br />
...<br />
4.4 <strong>Laser</strong> specific script extensions<br />
4.4.1 Callback procedures<br />
Option Explicit 'so all variables must be declared<br />
Sub Main<br />
Calculation<br />
End Sub<br />
Function Calculation<br />
Dim a!,t!<br />
Dim Result As Single<br />
On Error Resume Next<br />
a!=InputBox ("Input number")<br />
t!=InputBox ("Input divisor")<br />
Result = a!/t!<br />
Debug.Print a!;t!;Result<br />
Exit Function<br />
End Function<br />
Sample 50 Skipping calculation when entry is faulty<br />
Callback procedures are automatically dealt with by the program to<br />
keep you informed about asynchronous events.<br />
To get access to templates of such procedures select LC in the Object:<br />
drop down list, and see all the available templates in the Proc:<br />
drop down list.<br />
Fig. 103 Script-Object-Proc<br />
<strong>Laser</strong> marking software: V1.5 Build: 343 107
Programming<br />
LC_CleanUp() Public Sub LC_CleanUp()<br />
Is applied every time the program is stopped by the user, so the<br />
program is not allowed to reach its normal end.<br />
In LC_CleanUp used resources should be freed.<br />
LC_OnError() Public Sub LC_OnError()<br />
Is called if the program detects an error initiated by the laser.<br />
LC_LifeTick() Public Sub LC_LifeTick()<br />
Is periodically activated every one second. The time can be<br />
adjusted using LiveTickIntervall(Intervall_ms As Integer).<br />
LC_AckMessage(...) Public Sub LC_AckMessage(Host As String, <strong>Laser</strong> As String,<br />
bError As Boolean)<br />
Is called if your Message is processed by the recipient.<br />
LC_RecMessage(...) Public Sub LC_RecMessage(Host As String, <strong>Laser</strong> As String,<br />
Message As String)<br />
Is called right after a message arrived for this program.<br />
LC_GrafikEntry() Public Sub LC_GrafikEntry()<br />
In the path of processing the graphic (output the graphic to the<br />
laser) this is called first.<br />
LC_GrafikExit() Public Sub LC_GrafikExit()<br />
This call concludes the processing of the graphical objects.<br />
LC_ElementEntry(...) Public Sub LC_ElementEntry(Label As String, ArrayX As Long,<br />
ArrayY As Long)<br />
Every time the processing of a new element starts,<br />
LC_ElementEntry is called.<br />
LC_ElementExit(...) Public Sub LC_ElementExit(Label As String)<br />
After all vectors of an element are send to the laser this callback<br />
is called.<br />
In Label you find the corresponding label assigned to the<br />
element.<br />
108 <strong>Laser</strong> marking software: V1.5 Build: 343
Programming<br />
LC_ElementBefore<strong>Laser</strong>(...) Public Sub LC_ElementBefore<strong>Laser</strong>(Label As String, ArrayX<br />
As Long, ArrayY As Long)<br />
Is called after all of the vectors are calculated, right before they<br />
are send to the laser.<br />
LC_<strong>Mark</strong>Idle(...) Public Sub LC_<strong>Mark</strong>Idle(Label As String)<br />
Every time the laser buffer is full, so the laser is not capable of<br />
accept additional vectors LC_<strong>Mark</strong>Idle is called.<br />
LC_Formatter(...) Public Function LC_Formatter(Format As String, Text As<br />
String, Default As String, <strong>Laser</strong> As Boolean) As String<br />
If you have used a user defined format string (#Test=123#)<br />
which can not be resolved by the system, LC_Formatter is<br />
called, so you can provide the necessary information.<br />
See also Format specifications on page 132.<br />
In Text you find the format text Test in this example.<br />
The default value (123) is stored in Default.<br />
If the variable <strong>Laser</strong> is true, than the callback is called during the<br />
laser process. If it is false than we are in preview.<br />
Use LC_Formatter = ... to define your answer, the result.<br />
For your Information: The complete format string (#Test=123#),<br />
as entered, is inside the Format variable.<br />
LC_ExternAxis(...) Public Sub LC_ExternAxis(AxisX As Long, AxisY As Long, AxisZ<br />
As Long, Axis4 As Long)<br />
Is called if one or more axis values has changed.<br />
Use the values provided in AxisX and AxisY to move your axis<br />
system to the desired positions.<br />
4.4.2 Internal extensions (LC.)<br />
Get<strong>Laser</strong>Configuration LC.Get<strong>Laser</strong>Configuration() As String<br />
Parameter: ---.<br />
Return: The name of the current <strong>Laser</strong> configuration.<br />
GetAppPathName LC.GetAppPathName() As String<br />
Parameter: ---.<br />
Return: Program path inclusive program name.<br />
<strong>Laser</strong> marking software: V1.5 Build: 343 109
Programming<br />
GetAppPath LC.GetAppPath() As String<br />
Parameter: ---.<br />
Return: Program path wo. name.<br />
GetAppName LC.GetAppName() As String<br />
Parameter: ---.<br />
Return: Program name wo. path.<br />
Hide LC.Hide()<br />
Parameter: ---.<br />
Return: ---.<br />
Function: Hide the program.<br />
Show LC.Show(Tab As Integer)<br />
Tab: No. of the area to activate (1=Graphic,<br />
2=Script, 3=Parameter, 4=Service).<br />
Return: ---.<br />
Function: Shows the Program and switches to the desired<br />
area.<br />
ApplicationExit LC.ApplicationExit()<br />
Parameter: ---.<br />
Return: ---.<br />
Function: Exit the program.<br />
LifeTickInterval LC.LifeTickInterval(Interval_ms As Integer)<br />
Interval_ms: Defined the time interval used to call Public<br />
Sub LC_LifeTick() in ms.<br />
Return: ---.<br />
TimerStart LC.TimerStart()<br />
Parameter: ---.<br />
Return: ---.<br />
Function: Activates the user timer, see also User timer<br />
on page 21 point 23.<br />
110 <strong>Laser</strong> marking software: V1.5 Build: 343
Programming<br />
TimerStop LC.TimerStop()<br />
Parameter: ---.<br />
Return: ---.<br />
Function: After call the user timer is stopped.<br />
See also User timer on page 21 point 23.<br />
StartRecMessage LC.StartRecMessage()<br />
Parameter: ---.<br />
Return: ---.<br />
Function: After call the program is ready to receive messages.<br />
Attention: After receiving a message, a callback procedure<br />
is called.<br />
See also Callback procedures on page 107<br />
This function uses socket ports from 10000 to<br />
19999.<br />
StopRecMessage LC.StopRecMessage()<br />
Parameter: ---.<br />
Return: ---.<br />
Function: The message reception is canceled after the<br />
call of this command.<br />
SendMessage LC.SendMessage(Host As String, <strong>Laser</strong> As String, Message As<br />
String)<br />
Host: The recipients computer name.<br />
Alternative the IP-Address.<br />
<strong>Laser</strong>: The recipients laser configurations name.<br />
Return: ---.<br />
Attention: After the reception of the message a callback is<br />
initiated.<br />
See also Callback procedures on page 107<br />
This function uses socket ports from 10000 to<br />
19999.<br />
LoadFile LC.LoadFile(FileName As String)<br />
FileName: The file name of the graphic file that should be<br />
loaded.<br />
Return: True, if successful.<br />
Attention: Is used to load a graphic file (*.LAS) at runtime.<br />
<strong>Laser</strong> marking software: V1.5 Build: 343 111
Programming<br />
SaveFile LC.SaveFile(FileName As String)<br />
FileName: The file name to which the graphic file will be<br />
saved (Save As). If the Filename is empty ("")<br />
the file will be saved using its own name<br />
(Save).<br />
Return: none.<br />
Attention: Is used to save a graphic file (*.LAS) at runtime.<br />
GetFileName LC.GetFileName() As String<br />
Return: The name and path of the current graphic file.<br />
StatusText LC.StatusText(Text As String)<br />
Text: The text to show in the status line.<br />
Return: ---.<br />
<strong>Mark</strong> LC.<strong>Mark</strong>(Label As String, Shutter As Boolean) As Boolean<br />
Label: The graphic or element name to start the output<br />
with.<br />
To output the complete graphic, set Label to an<br />
empty string ("").<br />
Shutter: If True, the shutter will be controlled automatically.<br />
Return: True, if successful.<br />
Stop<strong>Mark</strong> LC.Stop<strong>Mark</strong>()<br />
Function: Used to stop the graphic output asynchronously.<br />
Normally executed within a callback procedure.<br />
Return: ---.<br />
SetMoveOffset LC.SetMoveOffset(OffsetX As Long, OffsetY As Long)<br />
OffsetX, Y: Used to move the complete graphic by the given<br />
values in µm.<br />
Return: ---.<br />
Attention: This is a global command.<br />
112 <strong>Laser</strong> marking software: V1.5 Build: 343
Programming<br />
SetPowerOffset LC.SetPowerOffset(Offset As Double)<br />
Offset: The given value in % is added to the laser power.<br />
Return: ---.<br />
Attention: This is a global command.<br />
GetBooleanValue LC.GetBooleanValue(Label As String, ParameterNo As Integer)<br />
As Boolean<br />
Label: The name of the element, object or modifier.<br />
ParameterNo: The number of the parameter to read.<br />
Return: The value of the parameter.<br />
GetNumericValue LC.GetNumericValue(Label As String, ParameterNo As Integer)<br />
As Double<br />
Label: The name of the element, object or modifier.<br />
ParameterNo: The number of the parameter to read.<br />
Return: The value of the parameter.<br />
Attention: Size and position values are all in µm!<br />
GetNumericValue_mm LC.GetNumericValue_mm(Label As String, ParameterNo As Integer)<br />
As Double<br />
Label: The name of the element, object or modifier.<br />
ParameterNo: The number of the parameter to read.<br />
Return: The value of the parameter in mm.<br />
GetNumericValue_mil LC.GetNumericValue_mil(Label As String, ParameterNo As Integer)<br />
As Double<br />
Label: The name of the element, object or modifier.<br />
ParameterNo: The number of the parameter to read.<br />
Return: The value of the parameter in mil.<br />
GetNumericValue_inch LC.GetNumericValue_inch(Label As String, ParameterNo As<br />
Integer) As Double<br />
Label: The name of the element, object or modifier.<br />
ParameterNo: The number of the parameter to read.<br />
Return: The value of the parameter in inch.<br />
<strong>Laser</strong> marking software: V1.5 Build: 343 113
Programming<br />
GetStringValue LC.GetStringValue(Label As String, ParameterNo As Integer)<br />
As String<br />
Label: The name of the element, object or modifier.<br />
ParameterNo: The number of the parameter to read.<br />
Return: The value of the parameter as string.<br />
Attention: Size and position values are all in µm!<br />
SetBooleanValue LC.SetBooleanValue(Label As String, ParameterNo As Integer,<br />
Value As Boolean)<br />
Label: The name of the element, object or modifier.<br />
ParameterNo: The number of the parameter to modify.<br />
Value: The new state.<br />
Return: ---.<br />
SetNumericValue LC.SetNumericValue(Label As String, ParameterNo As Integer,<br />
Value As Double)<br />
Label: The name of the element, object or modifier.<br />
ParameterNo: The number of the parameter to modify.<br />
Value: The new value.<br />
Attention: Size and position values must be supplied in<br />
µm!<br />
Return: ---.<br />
SetNumericValue_mm LC.SetNumericValue_mm(Label As String, ParameterNo As Integer,<br />
Value As Double)<br />
Label: The name of the element, object or modifier.<br />
ParameterNo: The number of the parameter to modify.<br />
Value: The new value in mm.<br />
Return: ---.<br />
SetNumericValue_mil LC.SetNumericValue_mil(Label As String, ParameterNo As Integer,<br />
Value As Double)<br />
Label: The name of the element, object or modifier.<br />
ParameterNo: The number of the parameter to modify.<br />
Value: The new value in mil.<br />
Return: ---.<br />
114 <strong>Laser</strong> marking software: V1.5 Build: 343
Programming<br />
SetNumericValue_inch LC.SetNumericValue_inch(Label As String, ParameterNo As Integer,<br />
Value As Double)<br />
Label: The name of the element, object or modifier.<br />
ParameterNo: The number of the parameter to modify.<br />
Value: The new value in inch.<br />
Return: ---.<br />
SetStringValue LC.SetStringValue(Label As String, ParameterNo As Integer,<br />
Value As String)<br />
Label: The name of the element, object or modifier.<br />
ParameterNo: The number of the parameter to modify.<br />
Value: The new value as string.<br />
Return: ---.<br />
Refresh LC.Refresh()<br />
Return: ---.<br />
Function: Redraw’s the graphic screen.<br />
SetCheck LC.SetCheck(Label As String, State As Boolean)<br />
Label: The name of the element, object or modifier.<br />
State: The new checkbox state.<br />
Return: ---.<br />
Function: Used to enable or disable the element, object<br />
or modifier.<br />
GetCheck LC.GetCheck(Label As String) As Boolean<br />
Label: The name of the element, object or modifier.<br />
Return: The current checkbox value.<br />
BoundingBox LC.BoundingBox(Label As String) As Boolean<br />
Label: The name of the element.<br />
Function: Determined the bounding box around the objects<br />
inside the element.<br />
Return: True if successful.<br />
ShowBoundingBox LC.ShowBoundingBox(State As Boolean)<br />
State: Activate (true)/Deactivate (false) the output of<br />
the bounding box using the pilot laser.<br />
Return: ---.<br />
<strong>Laser</strong> marking software: V1.5 Build: 343 115
Programming<br />
GetBBMinX LC.GetBBMinX() As Long<br />
Return: The minimum X value of the bounding box.<br />
GetBBMaxX LC.GetBBMaxX() As Long<br />
Return: The maximum X value of the bounding box.<br />
GetBBMinY LC.GetBBMinY() As Long<br />
Return: The minimum Y value of the bounding box.<br />
GetBBMaxY LC.GetBBMaxY() As Long<br />
Return: The maximum Y value of the bounding box.<br />
ZoomBoundingBox LC.ZoomBoundingBox()<br />
Function: Zoom the graphic view to show the content of<br />
the bounding box.<br />
ZoomAll LC.ZoomAll()<br />
Function: Zoom the graphic view to show the content inside<br />
the marking area.<br />
4.4.3 External Extensions (EX.)<br />
Formatter EX.Formatter(Format As String) As String<br />
Format: The Format string to use, see also Format<br />
specifications on page 132.<br />
Return: The processed string.<br />
ReadIniFormat EX.ReadIniFormat(SectionName As String, KeyName As<br />
String, DefaultString As String, FileName As String) As String<br />
SectionName: The INI-File section to read.<br />
KeyName: The key inside the section to read.<br />
DefaultString: If it is not possible to read the INI-Value then<br />
the DefaultString is returned.<br />
FileName: The file to read.<br />
Return: The content of the key requested or the DefaultString.<br />
116 <strong>Laser</strong> marking software: V1.5 Build: 343
Programming<br />
WriteIniFormat EX.WriteIniFormat(SectionName As String, KeyName As<br />
String, ValueString As String, FileName As String)<br />
SectionName: The section to write.<br />
KeyName: The key to write.<br />
ValueString: The content to write.<br />
FileName: The file name to write to.<br />
Return: ---.<br />
ReadXmlFormat EX.ReadXmlFormat(NodeName As String, DefaultString As<br />
String, FileName As String) As String<br />
NodeName: The XML-Node to read.<br />
DefaultString: If the node doesn’t exist DefaultString is returned.<br />
FileName: The file to read.<br />
Return: The content of the node or the DefaultString.<br />
WriteXmlFormat EX.WriteXmlFormat(NodeName As String, ValueString As<br />
String, FileName As String)<br />
SectionName: The XML-Node to write to.<br />
ValueString: The content to write.<br />
FileName: The file to write to.<br />
Return: ---.<br />
SerOpen EX.SerOpen(PortNo As Integer, Param As String) As Boolean<br />
PortNo: The port number to open (1...64).<br />
Param: COM port parameter in the following format:<br />
Baud Rate, Parity, DataBits, StopBits (example:<br />
"38400, n, 8, 2").<br />
Return: True if successful.<br />
Attention: Reading from, and writing to the COM ports is<br />
done in background.<br />
The size of the send and receive buffer is<br />
10 KBytes.<br />
SerClose EX.SerClose(PortNo As Integer)<br />
PortNo: The port to close.<br />
Return: ---.<br />
<strong>Laser</strong> marking software: V1.5 Build: 343 117
Programming<br />
SerCloseAll EX.SerCloseAll()<br />
Parameter: ---.<br />
Return: ---.<br />
Function: All COM ports will be closed.<br />
SerChangeBaudRate EX.SerChangeBaudRate(PortNo As Integer, BaudRate As Integer)<br />
As Boolean<br />
PortNo: The port number to change.<br />
BaudRate: The new Baud rate (e.g.:19200).<br />
Return: True, if successful.<br />
SerWrite EX.SerWrite(PortNo As Integer, Data As String) As Integer<br />
PortNo: The port to write to.<br />
Data: The data to transmit.<br />
Return: The byte count actually send.<br />
SerWriteByte EX.SerWriteByte(PortNo As Integer, Data As Byte) As Integer<br />
PortNo: The port to write to.<br />
Data: The byte to send.<br />
Return: The byte count actually send.<br />
SerWritePending EX.SerWritePending(PortNo As Integer) As Boolean<br />
PortNo: The port number.<br />
Return: True if the write process is still pending.<br />
SerWritePendingWait EX.SerWritePendingWait(PortNo As Integer, TimeOut As Integer)<br />
As Boolean<br />
PortNo: The port number.<br />
TimeOut: Time in ms to wait to complete the writing.<br />
Return: True if the write process is still pending.<br />
SerRead EX.SerRead(PortNo As Integer, Count As Integer) As String<br />
PortNo: The port number.<br />
Count: The byte count to read.<br />
Return: The already read Byte count.<br />
118 <strong>Laser</strong> marking software: V1.5 Build: 343
Programming<br />
SerReadByte EX.SerReadByte(PortNo As Integer, TimeOut As Integer) As Integer<br />
PortNo: The port number.<br />
TimeOut: Time in ms to wait to complete the reading.<br />
Return: The read Byte or -1 if time out.<br />
SerReadWait EX.SerReadWait(PortNo As Integer, Count As Integer, TimeOut<br />
As Integer) As String<br />
PortNo: The port number.<br />
Count: The byte count to read.<br />
TimeOut: Time in ms to wait to complete the reading.<br />
Return: The read bytes.<br />
SerReadUntil EX.SerReadUntil(PortNo As Integer, Char As Byte) As String<br />
PortNo: The port number.<br />
Char: Byte to wait for.<br />
Return: The read bytes.<br />
SerReadUntilWait EX.SerReadUntilWait(PortNo As Integer, Char As Byte, Time-<br />
Out As Integer) As String<br />
PortNo: The port number.<br />
Char: The byte to wait for.<br />
TimeOut: Time in ms to wait to complete the reading.<br />
Return: The read bytes.<br />
SerReadPending EX.SerReadPending(PortNo As Integer) As Boolean<br />
PortNo: The port number.<br />
Return: True if the reading is still pending.<br />
<strong>Laser</strong> marking software: V1.5 Build: 343 119
Programming<br />
4.4.4 ScannerControl extensions (SC.)<br />
All the SC. commands have a leading character with the following<br />
meaning:<br />
A_: Asynchronous command.<br />
It is possible to use this command while output<br />
to the laser is in progress.<br />
S_: Synchronous command.<br />
This command is inserted in the buffer list of the<br />
laser.<br />
Before execution of such a command you<br />
should check if there is enough space in the<br />
buffer, use the A_ReadyForNextSyncCmd()<br />
to do so.<br />
P_: This is a parameter command.<br />
Use this command prior to all others.<br />
A_GetStatusDigital SC.A_GetStatusDigital(StatusBlock As Long) As Long<br />
StatusBlock: The block number you like to receive.<br />
Return: Bits 0...15 of the addressed block.<br />
Attention: Please ask your supplier for information about<br />
the block numbers and there meanings.<br />
A_GetStatusAnalog SC.A_GetStatusAnalog(StatusBlock As Long) As Long<br />
StatusBlock: The block number you like to get.<br />
Return: Value of the addressed block.<br />
Attention: Please ask your supplier for information about<br />
the block numbers and there meanings.<br />
A_Set<strong>Laser</strong>State SC.A_Set<strong>Laser</strong>State(State As Boolean)<br />
State: True means ON, False OFF.<br />
Return: ---.<br />
Function: Switches the <strong>Laser</strong> on or off.<br />
Attention: Using this command, it is possible to enable the<br />
laser without asking for a password.<br />
This is not allowed!!!<br />
This command must be used in conjunction<br />
with a password input box or an equivalent<br />
authorization scheme!!!<br />
120 <strong>Laser</strong> marking software: V1.5 Build: 343
Programming<br />
A_SetShutterState SC.A_SetShutterState(State As Boolean)<br />
State: True means open, False close.<br />
Return: ---.<br />
Function: Controls the state of the shutter.<br />
Attention: If the shutter is locked, the command has no effect!<br />
A_LockShutter SC.A_LockShutter(State As Boolean)<br />
State: True means locked, False unlocked.<br />
Return: ---.<br />
Function: After execution the shutter is closed and<br />
locked.<br />
A_SetPilotState SC.A_SetPilotState(State As Boolean)<br />
State: True means ON, False OFF.<br />
Return: ---.<br />
Function: Controls the pilot laser, if installed in the laser.<br />
A_GetBufferEmptyState SC.A_GetBufferEmptyState() As Boolean<br />
Parameter: ---.<br />
Return: The state of the internal buffer.<br />
True means buffer is empty.<br />
Function: Use this command to check if the marking is<br />
complete.<br />
A_ReadyForNextSyncCmd SC.A_ReadyForNextSyncCmd() As Boolean<br />
Parameter: ---.<br />
Return: The command returns True, if there is space<br />
for at least one additional sync command.<br />
A_Stop SC.A_Stop() As Boolean<br />
Parameter: ---.<br />
Return: True, if successful.<br />
Function: This command stops the running marking<br />
asynchronously.<br />
<strong>Laser</strong> marking software: V1.5 Build: 343 121
Programming<br />
A_GetGeneralInputDigital SC.A_GetGeneralInputDigital(BitNo As long) As Boolean<br />
BitNo: Number of the bit to read.<br />
Return: State of the bit.<br />
Function: Reads the state of the digital inputs.<br />
Attention: This command depends on hardware which<br />
must be installed in your system in order to use<br />
this command.<br />
A_SetGeneralOutputDigital SC.A_SetGeneralOutputDigital(BitNo As long)<br />
BitNo: Number of the bit to modify.<br />
Return: ---.<br />
Function: After execution of this command the addressed<br />
bit is set to true.<br />
Attention: This command depends on hardware which<br />
must be installed in your system in order to use<br />
this command.<br />
A_ResGeneralOutputDigital SC.A_ResGeneralOutputDigital(BitNo As long)<br />
BitNo: Number of the bit to modify.<br />
Return: ---.<br />
Function: After execution of this command the addressed<br />
bit is set to false.<br />
Attention: This command depends on hardware which<br />
must be installed in your system in order to use<br />
this command.<br />
A_ClrGeneralOutputDigital SC.A_ClrGeneralOutputDigital()<br />
Parameter: ---.<br />
Return: ---.<br />
Function: After execution of this command all of the digital<br />
output bits are set to false.<br />
Attention: This command depends on hardware which<br />
must be installed in your system in order to use<br />
this command.<br />
A_GetGeneralOutputDigital SC.A_GetGeneralOutputDigital(BitNo As Long) As Boolean<br />
BitNo: Number of the bit to read.<br />
Return: The state of the addressed bit.<br />
Function: Reads the state of the digital outputs.<br />
Attention: This command depends on hardware which<br />
must be installed in your system in order to use<br />
this command.<br />
122 <strong>Laser</strong> marking software: V1.5 Build: 343
A_GetPower SC.A_GetPower() As Double<br />
Parameter: ---.<br />
Return: The current laser power in use<br />
(0,0 %...100,0 %).<br />
Programming<br />
S_Power SC.S_Power(Power As Double, Wait As Long)<br />
Power: <strong>Laser</strong> power in % (0,0...100,0).<br />
Wait: Time used to settle the new power.<br />
The given time is for a 100 % jump, so normally<br />
the real used time will be shorter.<br />
Return: ---.<br />
Function: Change the marking power.<br />
S_Speed SC.S_Speed(Speed As Double)<br />
Speed: <strong><strong>Mark</strong>ing</strong> speed in mm/s.<br />
Return: ---.<br />
Function: Change the marking speed.<br />
S_QSF SC.S_QSF(QSF As Long)<br />
QSF: The laser pulse frequency.<br />
Return: ---.<br />
Function: Change the pulse frequency.<br />
S_QSF_PW SC.S_QSF_PW(QSF_PW As Long)<br />
QSF_PW: The pulse frequency pulse width in µs.<br />
Return: ---.<br />
Function: Change the pulse width.<br />
S_SetStartStopDelay SC.S_SetStartStopDelay(StartDelay As Long, StopDelay As<br />
Long)<br />
StartDelay: The time in µs between the start of the mirror<br />
movement and the first laser pulse.<br />
StopDelay: The time in µs after the mirror movement has<br />
stopped to the last laser pulse.<br />
Return: ---.<br />
Function: Changes the start and stop delay values.<br />
<strong>Laser</strong> marking software: V1.5 Build: 343 123
Programming<br />
S_Pos SC.S_Pos(X As Long, Y As Long)<br />
X, Y: Position in µm, to move the laser.<br />
Return: ---.<br />
Function: The laser (pilot laser) is positioned to the given<br />
coordinate.<br />
P_SetRotation SC.P_SetRotation(X As Long, Y As Long, Angle As Double)<br />
X, Y: The rotation 0 point in µm.<br />
Angle: The rotation angle, positive values results in<br />
CCW rotation.<br />
Return: ---.<br />
Attention: This is a global command.<br />
P_SetSize SC.P_SetSize(X As Long, Y As Long, SizeX As Double, SizeY<br />
As Double)<br />
X, Y: The size 0 point in µm.<br />
SizeX/Y: Size factor. (normal = 1.0).<br />
Return: ---.<br />
Attention: This is a global function.<br />
P_SetMove SC.P_SetMove(XOffset As Long, YOffset As Long)<br />
X, Y: Move offset in µm.<br />
Return: ---.<br />
Attention: This is a global function.<br />
P_SetClip SC.P_SetClip(Xmin As Long, Xmax As Long, Ymin As Long,<br />
Ymax As Long)<br />
Xmin: Minimum X position (left).<br />
Xmax: Maximum X position (right).<br />
Ymin: Minimum Y position (bottom).<br />
Ymax: Maximum Y position (top).<br />
Return: ---.<br />
Function: Use this command to define a clipping rectangle.<br />
Only vectors inside the clip rectangle are output<br />
by the laser.<br />
To release the clipping function set all values to<br />
0.<br />
Attention: This is a global function.<br />
124 <strong>Laser</strong> marking software: V1.5 Build: 343
Programming<br />
P_SetMirror SC.P_SetMirror(X As Long, Y As Long, MirrorX As Boolean,<br />
MirrorY As Boolean)<br />
X, Y: Defined the 0 point of the virtual coordinate system<br />
in µm used to mirror the vectors.<br />
MirrorX: If true, the X axis of the virtual coordinate system<br />
is used to mirror the vectors.<br />
MirrorY: If true, the Y axis of the virtual coordinate system<br />
is used to mirror the vectors.<br />
Return: ---.<br />
Attention: This is a global function.<br />
4.4.5 HighlevelGraphics extensions (HG.)<br />
InitVectorArray HG.InitVectorArray(InitCount As Long, IncCount As Long) As<br />
Boolean<br />
InitCount: The possible count of vectors right after command<br />
execution (10000).<br />
IncCount: If the capacity in the array is too low to hold all<br />
the vectors the array size is increased by IncCount<br />
(10000).<br />
Return: True, if the array is initialised successfully.<br />
Attention: You must use FreeVectorArray after you are<br />
finished with the vector array!<br />
FreeVectorArray HG.FreeVectorArray()<br />
Parameter: ---.<br />
Return: ---.<br />
Function: Releases the vector array.<br />
To every InitVectorArray you must use an<br />
FreeVectorArray!<br />
SendToSC HG.SendToSC()<br />
Parameter: ---.<br />
Return: ---.<br />
Function: The vector array is sent to the laser for processing.<br />
After this command you normally use FreeVectorArray<br />
to release the used memory.<br />
<strong>Laser</strong> marking software: V1.5 Build: 343 125
Programming<br />
GetBoundingBox HG.GetBoundingBox(ByRef Xmin As Long, ByRef Ymin As<br />
Long, ByRef Xmax As Long, ByRef Ymax As Long)<br />
Xmin: After execution Xmin contains the bounding<br />
box minimum X value in µm.<br />
Ymin: After execution Ymin contains the bounding<br />
box minimum Y value in µm.<br />
Xmax: After execution Xmax contains the bounding<br />
box maximum X value in µm.<br />
Ymax: After execution Ymax contains the bounding<br />
box maximum Y value in µm.<br />
Return: ---.<br />
Function: Returns the current graphic bounding box.<br />
GetBoundingBoxLast HG.GetBoundingBoxLast(ByRef Xmin As Long, ByRef Ymin As<br />
Long, ByRef Xmax As Long, ByRef Ymax As Long)<br />
Xmin: After execution Xmin contains the bounding<br />
box minimum X value in µm.<br />
Ymin: After execution Ymin contains the bounding<br />
box minimum Y value in µm.<br />
Xmax: After execution Xmax contains the bounding<br />
box maximum X value in µm.<br />
Ymax: After execution Ymax contains the bounding<br />
box maximum Y value in µm.<br />
Return: ---.<br />
Function: Returns the bounding box of the last added<br />
graphic.<br />
Vector HG.Vector(X1 As Long, Y1 As Long, X2 As Long, Y2 As Long)<br />
X1, Y1: Start point in µm of the vector.<br />
Y1, Y2: End point in µm of the vector.<br />
Return: ---.<br />
Function: Adds a vector to the vector array.<br />
Ellipse HG.Ellipse(BaseRef As Integer, X As Long, Y As Long, RadiusX<br />
As Long, RadiusY As Long, AlphaStart As Double, AlphaEnd<br />
As Double)<br />
BaseRef, X, Y: BaseRef in µm, see also BaseRef on page 131.<br />
RadiusX, Y: Radius in µm along the X and Y axis.<br />
AlphaStart: Start angle of the ellipse/circle.<br />
AlphaEnd: End angle.<br />
Return: ---.<br />
Function: Adds an ellipse/circle to the vector array.<br />
126 <strong>Laser</strong> marking software: V1.5 Build: 343
Programming<br />
Rectangle HG.Rectangle(BaseRef As Integer, X As Long, Y As Long,<br />
Width As Long, Height As Long, RadiusX As Long, RadiusY As<br />
Long)<br />
BaseRef, X, Y: BaseRef in µm, see also BaseRef on page 131.<br />
Width: The width of the rectangle in µm.<br />
Height: The height of the rectangle in µm.<br />
RadiusX, Y: Radius in µm along the X and Y axis of the corner<br />
radius.<br />
Return: ---.<br />
Function: Adds a rectangle to the vector array.<br />
Text HG.Text(BaseRef As Integer, X As Long, Y As Long, Text As<br />
String, FontName As String, Height As Long, FontWeight As<br />
Long, Italic As Boolean, LineDistance As Long, SpaceAdjust<br />
As Double, Quality As Integer, CodePage As Long)<br />
BaseRef, X, Y: BaseRef in µm, see also BaseRef on page 131.<br />
Text: The text to mark.<br />
FontName: The name of the font.<br />
Height: The height of the text in µm.<br />
FontWeight: 100 = small, 400 = normal, 800 = bold.<br />
Italic: If True, than the text is output in italic shape.<br />
LineDistance: Distance from one line to the next in µm.<br />
SpaceAdjust: Factor to modify the inter char distance, normally<br />
1.0.<br />
Quality: 0 = bad, 1 = good, 2 = very good.<br />
CodePage: The used code page to get access to special<br />
characters, normally 0.<br />
Return: ---.<br />
Function: Added text to the vector array.<br />
TextInfo HG.TextInfo(ByRef NextPosX As Long, ByRef NextPosY As<br />
Long)<br />
NextPosX, Y: This variable returns the next start point for additional<br />
text output.<br />
Return: ---.<br />
<strong>Laser</strong> marking software: V1.5 Build: 343 127
Programming<br />
Barcode HG.Barcode(BaseRef As Integer, X As Long, Y As Long, BarcodeType<br />
As Long, Data As String, AddOn As String, HeightMain<br />
As Long, HeightAddOn As Long, HeightLong As Long, Module-<br />
Width As Long, FillDistance As Long, Inverse As Boolean)<br />
BaseRef, X, Y: BaseRef in µm, see also BaseRef on page 131.<br />
BarcodeType: Type number of the barcode see Barcode<br />
specification on page 134.<br />
ModuleWidth: Width of the smallest bar in µm.<br />
Data: The content of the barcode. See also Barcode<br />
specification on page 134.<br />
AddOn: The contents of the add on area if available.<br />
HeightMain: The height of the barcode, see Barcode specification<br />
on page 134.<br />
HeightAddOn: The height of the add on area, see Barcode<br />
specification on page 134.<br />
HeightLong: The height of the long bars, see Barcode specification<br />
on page 134.<br />
FillDistance: The fill line distance in µm.<br />
Inverse: If True, then the output is inversed (light on<br />
dark).<br />
Return: ---.<br />
Function: Adds a barcode to the vector array.<br />
Datamatrix HG.Datamatrix(BaseRef As Integer, X As Long, Y As Long, Data<br />
As String, Rows As Long, Cols As Long, ECCType As Long,<br />
Style As Long, Format As Long, Border As Long, ModuleWidth<br />
As Long, FillDistance As Long)<br />
BaseRef, X, Y: BaseRef in µm, see also BaseRef on page 131.<br />
Data: The content of the barcode.<br />
Rows: Specifies the row count, 0 for automatic.<br />
Cols: Specifies the column count, 0 for automatic.<br />
ECCType: For ECC200 = 26.<br />
Style: 0 = normal, 1 = mirror mode.<br />
Format: Normally 6.<br />
Border: Normally 1.<br />
ModuleWidth: Width of the smallest dot in µm.<br />
FillDistance: The fill line distance in µm.<br />
Return: ---.<br />
Function: Adds a datamatrix barcode to the vector array.<br />
128 <strong>Laser</strong> marking software: V1.5 Build: 343
Programming<br />
PDF417 HG.PDF417(BaseRef As Integer, X As Long, Y As Long, Data As<br />
String, Rows As Long, Cols As Long, ECCLevel As Long, Style<br />
As Long, ModuleWidth As Long, FillDistance As Long, Inverse<br />
As Boolean)<br />
BaseRef, X, Y: BaseRef in µm, see also BaseRef on page 131.<br />
Data: The content of the barcode.<br />
Rows: Specifies the row count, 0 for automatic.<br />
Cols: Specifies the column count, 0 for automatic.<br />
ECCLevel: 0...8.<br />
Style: 0 = normal, 1 = truncated,<br />
0x0004...0x2004 = MicroPDF.<br />
ModuleWidth: Width of the smallest dot in µm.<br />
FillDistance: The fill line distance in µm.<br />
Inverse: If True, then the output is inversed (light on<br />
dark).<br />
Return: ---.<br />
Function: Adds a PDF417 barcode to the vector array.<br />
Attention: An additional DLL is required to use this barcode.<br />
HPGL HG.HPGL(BaseRef As Integer, X As Long, Y As Long, FileName<br />
As String, PenFlag As Long, HPGL_Inc As Double)<br />
BaseRef, X, Y: BaseRef in µm, see also BaseRef on page 131.<br />
FileName: The HPGL file name.<br />
PenFlag: This is a bit field, every bit can be used to prevent<br />
the output of the corresponding pen.<br />
0 = all pens are output.<br />
HPGL_Inc: The value that represents one HPGL unit in µm.<br />
Normally 25.0 sometimes 25.4.<br />
Function: Adds a HPGL drawing to the vector array.<br />
Draw HG.Draw(BaseRef As Integer, X As Long, Y As Long, ByRef<br />
VectorArray)<br />
BaseRef, X, Y: BaseRef in µm, see also BaseRef on page 131.<br />
VectorArray: Pointer to the vector array to output.<br />
Function: Adds a vector array to the vector array.<br />
<strong>Laser</strong> marking software: V1.5 Build: 343 129
Programming<br />
Fill HG.Fill(Mode As Long, ParameterArray As HG_FillParameter)<br />
Mode: Bit field:<br />
Bit 0 = false: Left original vectors in vector array.<br />
Bit 0 = true: Delete original vectors, so only the<br />
fill is left in the vector array.<br />
Bit 1 = false: Normal fill.<br />
Bit 1 = true: Bidirectional filling.<br />
ParameterArray: Array of fill parameter.<br />
The array consist of:<br />
FillDistance As Long<br />
Reserve As Long<br />
FillAngle As Double.<br />
Function: Fills all closed polygons inside the vector array.<br />
Move HG.Move(X As Long, Y As Long)<br />
X, Y: Moved the current vectors by the given value.<br />
Function: Moved all the vectors currently in the vector array.<br />
Size HG.Size(X As Long, Y As Long, SizeX As Double, SizeY As double)<br />
X, Y: Defines the 0 point in µm.<br />
SizeX, Y: Size factor, 1.0 results in no change.<br />
Function: Changes the size of the current drawing inside<br />
the vector array.<br />
Rotation HG.Rotation(X As Long, Y As Long, Angle As Double)<br />
X, Y: Defines the 0 point in µm.<br />
Angle: The rotation angle.<br />
A positive value result in a CCW rotation.<br />
Function: Rotates the current drawing inside the vector<br />
array around the given point.<br />
Mirror HG.Mirror(X As Long, Y As Long, MirrorX As Boolean, MirrorY<br />
As Boolean)<br />
X, Y: Defines the 0 point of the virtual coordinate system<br />
in µm used to mirror the vectors.<br />
MirrorX: If true, the X axis of the virtual coordinate system<br />
is used to mirror the vectors.<br />
MirrorY: If true, the Y axis of the virtual coordinate system<br />
is used to mirror the vectors.<br />
130 <strong>Laser</strong> marking software: V1.5 Build: 343
Programming<br />
Polar HG.Polar(X As Long, Y As Long, Radius As Long, MaxLength<br />
As Long)<br />
X, Y: Defines the 0 point of the virtual circle in µm.<br />
Radius: Defines the radius of the virtual circle in µm.<br />
MaxLength: Defines the maximum vector length allowed to<br />
left unbend. Useful value: 1000 µm.<br />
Function: All the vectors are bent using the defined virtual<br />
circle.<br />
The X axis of the normal coordinate system is<br />
bent to the given circle and than moved to the<br />
given 0 point.<br />
Example: You have a text along the X axis centred at the<br />
Y axis.<br />
Using polar you can generate a circle shape<br />
text, so you can laser the text onto a round<br />
piece of work.<br />
Clip HG.Clip(Xmin As Long, Xmax As Long, Ymin As Long, Ymax As<br />
Long) As Long<br />
Xmin: Minimum X position (left).<br />
Xmax: Maximum X position (right).<br />
Ymin: Minimum Y position (bottom).<br />
Ymax: Maximum Y position (top).<br />
Return: Count of the vectors left.<br />
Function: Use this command to define a clipping rectangle.<br />
Only vectors inside the clip rectangle are output<br />
by the laser.<br />
To release the clipping function set all values to<br />
0.<br />
Attention: This command is normally used inside the<br />
LC_ElementBefore<strong>Laser</strong> call back procedure.<br />
See also LC_ElementBefore<strong>Laser</strong>(...) on<br />
page 109.<br />
4.5 References<br />
4.5.1 BaseRef<br />
BaseRef defined the position used for the basis point of each graphical<br />
object:<br />
<strong>Laser</strong> marking software: V1.5 Build: 343 131
Programming<br />
4.5.2 Format specifications<br />
Fig. 104 BaseRef<br />
Example:<br />
If you have the mid point coordinate of a circle, than you set<br />
BaseRef to 9.<br />
Using left justified text than you like to use the 1.<br />
Use 8 if you like to have the text centred, etc.<br />
Format strings and the results:<br />
Writing Result Comment<br />
Time format<br />
#Time# 18:40:55 PC internal format<br />
#Time:# 18:40:55<br />
#Hour# 18<br />
#Minute# 40<br />
#Second# 55<br />
Date format<br />
#Date# 12/24/04 PC internal format<br />
#DateL# 24.12.2004<br />
#DateS# 24.12.04<br />
#YearL# 2004<br />
#YearS# 04<br />
#YearD# 358<br />
#Month# 12<br />
#Week# 51<br />
#Day# 24<br />
Serial number First output Sequence<br />
#SN=12# 12 12, 13, 14, 15, ...<br />
#SN=12,2# 12 12, 14, 16, 18, ...<br />
#SN=12,2,16,12# 12 12, 14, 16, 12, 14, ...<br />
#SN=0,1,10,0,2# 0 0, 0, 1, 1, 2, 2, 3, ...<br />
132 <strong>Laser</strong> marking software: V1.5 Build: 343
4.5.3 Special format specifications<br />
Writing Result Comment<br />
Programming<br />
#SND4=12# 0012 0012, 0013, 0014, ...<br />
#SND2=2,-1# 02 02, 01, 00, -01, ...<br />
#SNX4=9# 0009 0009, 000A, 000B, ...<br />
#SNx3=8,2# 008 008, 00a, 00c, ...<br />
All the time and date formats use the time/date at mark time.<br />
Using the serial numbers the characters after the #SN have the following<br />
meaning:<br />
D or d the number is shown in decimal notation.<br />
X the number is shown in hexadecimal notation<br />
(0,1,..,9,A,B,C,D,E,F,10,...).<br />
x as X but using lower case letters (9,a,b,...).<br />
If the letter is followed by a number, than the resulting serial number<br />
is preceded by 0, building a number with the giving character count.<br />
The numbers behind the = have the following meaning:<br />
1st number: Current serial number.<br />
2nd number: Step width (optional).<br />
3rd number: Max count (optional).<br />
4th number: Value after the maximum value has used.<br />
5th number: How many identical number should be generated (optional).<br />
Example using format strings:<br />
Writing Result<br />
Date: #DateL# Date: 24.12.2004<br />
Week #Week# in the year #YearS# Week 51 in the year 04<br />
Time: #Time:# Time: 18:40:55<br />
Hour: #Hour# Minute: #Minute# Hour: 18 Minute: 55<br />
Side by side with the normal (time and date) format strings you can<br />
use special format strings.<br />
These special format string are send to your program to get the result.<br />
See LC_Formatter(...) on page 109.<br />
You write special format strings like the following:<br />
#Value1=123,456#<br />
As the normal format strings the special begin and ends also with<br />
the # char.<br />
In front of the = you define the name of the format (Value1).<br />
after the = you can write an optional default value (123,456) used every<br />
time your program is not running, or there is no<br />
LC_Formmatter(...) call-back defined.<br />
<strong>Laser</strong> marking software: V1.5 Build: 343 133
Programming<br />
4.5.4 Barcode specification<br />
Definition of the barcode heights:<br />
Characteristics:<br />
LongHeight AddOnHeight<br />
No. Barcode type Numeric Character Length<br />
1 2 of 5 Yes No Variable<br />
2 Interleaved 2 of 5 Yes No Variable<br />
3 Code 39 Yes Uppercase Variable<br />
4 Code 93 Yes Uppercase Variable<br />
5 Codabar Yes No Variable<br />
6 EAN-8 Yes No 7<br />
7 EAN-13 Yes No 12<br />
8 UPC-A Yes No 11<br />
9 UPC-E Yes No 10<br />
10 EAN-128 A Yes Uppercase Variable<br />
11 EAN-128 B Yes Yes Variable<br />
12 EAN-128 C Yes No Equal<br />
count<br />
13 POSTNET(1.20) Yes No Variable<br />
14 Code-128 A Yes Uppercase Variable<br />
15 Code-128 B Yes Yes Variable<br />
16 Code-128 C Yes No Equal<br />
count<br />
21 EAN-8+2 Yes/Yes No/No 7/2<br />
22 EAN-8+5 Yes/Yes No/No 7/5<br />
23 EAN-13+2 Yes/Yes No/No 12/2<br />
24 EAN-13+5 Yes/Yes No/No 12/5<br />
25 UPC-A+2 Yes/Yes No/No 11/2<br />
26 UPC-A+5 Yes/Yes No/No 10/5<br />
27 UPC-E+2 Yes/Yes No/No 11/2<br />
28 UPC-E+5 Yes/Yes No/No 10/5<br />
134 <strong>Laser</strong> marking software: V1.5 Build: 343<br />
Height
5 Index<br />
Index<br />
Symbols<br />
µm ................................................................................................................ 56<br />
A<br />
A_ ............................................................................................................... 120<br />
A_ClrGeneralOutputDigital ........................................................................ 122<br />
A_GetBufferEmptyState ............................................................................. 121<br />
A_GetGeneralInputDigital .......................................................................... 122<br />
A_GetGeneralOutputDigital ....................................................................... 122<br />
A_GetPower ............................................................................................... 123<br />
A_GetStatusAnalog ................................................................................... 120<br />
A_GetStatusDigital ..................................................................................... 120<br />
A_LockShutter ........................................................................................... 121<br />
A_ReadyForNextSyncCmd ........................................................................ 121<br />
A_ResGeneralOutputDigital ....................................................................... 122<br />
A_SetGeneralOutputDigital ........................................................................ 122<br />
A_Set<strong>Laser</strong>State ........................................................................................ 120<br />
A_SetPilotState .......................................................................................... 121<br />
A_SetShutterState ..................................................................................... 121<br />
A_Stop ....................................................................................................... 121<br />
Abs ............................................................................................................... 82<br />
Access rights ................................................................................................ 23<br />
Activate ........................................................................................................ 61<br />
ApplicationExit ........................................................................................... 110<br />
Atn ................................................................................................................ 81<br />
Auto start ...................................................................................................... 56<br />
B<br />
Barcode ................................................................................................ 33, 128<br />
Barcode parameter ...................................................................................... 43<br />
Barcode specification ................................................................................. 134<br />
BaseRef ..................................................................................................... 131<br />
Boolean ........................................................................................................ 68<br />
Bounding box ............................................................................................... 27<br />
BoundingBox .............................................................................................. 115<br />
Branching ..................................................................................................... 75<br />
Break angle .................................................................................................. 61<br />
Break delay .................................................................................................. 61<br />
Breakpoint On/Off ........................................................................................ 65<br />
Byte .............................................................................................................. 67<br />
C<br />
Callback procedures .................................................................................. 107<br />
Cancel-Button ............................................................................................ 100<br />
CBool ........................................................................................................... 84<br />
CByte ........................................................................................................... 84<br />
CCur ............................................................................................................. 84<br />
CDate ........................................................................................................... 84<br />
<strong>Laser</strong> marking software: V1.5 Build: 343 135
Index<br />
CDbl ............................................................................................................. 84<br />
CDec ............................................................................................................ 85<br />
Check box .................................................................................................... 23<br />
CInt ............................................................................................................... 85<br />
Clear messages ........................................................................................... 28<br />
Clip ............................................................................................................. 131<br />
CLng ............................................................................................................. 85<br />
Close ............................................................................................................ 86<br />
Command line parameter ............................................................................. 20<br />
Comments .................................................................................................... 62<br />
COM-Port ..................................................................................................... 55<br />
Constants ..................................................................................................... 71<br />
Continue ....................................................................................................... 65<br />
Cooler ........................................................................................................... 60<br />
Coordinate systems ..................................................................................... 31<br />
Copy ............................................................................................................. 63<br />
Corner delay ................................................................................................. 61<br />
Cos ............................................................................................................... 81<br />
Creating User Dialog Windows .................................................................... 89<br />
CSng ............................................................................................................ 85<br />
CStr .............................................................................................................. 85<br />
Currency ....................................................................................................... 69<br />
Cut ................................................................................................................ 63<br />
Cvar .............................................................................................................. 85<br />
D<br />
Datamatrix ............................................................................................ 33, 128<br />
Datamatrix parameter .................................................................................. 44<br />
Date .............................................................................................................. 69<br />
Default and test values ................................................................................. 57<br />
Display object ............................................................................................... 64<br />
Do ................................................................................................................. 74<br />
Dongle .......................................................................................................... 15<br />
Double .......................................................................................................... 68<br />
Drag / Drop ................................................................................................... 32<br />
Draw ........................................................................................................... 129<br />
E<br />
Edit Point ...................................................................................................... 66<br />
Edit user dialog ............................................................................................ 66<br />
Editing Texts ................................................................................................ 78<br />
Element parameter ....................................................................................... 40<br />
Element window ........................................................................................... 31<br />
Elements and objects... ................................................................................ 31<br />
Ellipse ................................................................................................... 33, 126<br />
Ellipse parameter ......................................................................................... 42<br />
Enable element ............................................................................................ 32<br />
Enable external start .................................................................................... 28<br />
End ............................................................................................................... 65<br />
Enter password ............................................................................................ 23<br />
136 <strong>Laser</strong> marking software: V1.5 Build: 343
Index<br />
Evaluate Expression .................................................................................... 65<br />
Excel content ............................................................................................... 53<br />
Exit program ................................................................................................. 17<br />
Exp ............................................................................................................... 82<br />
Extern start ................................................................................................... 57<br />
F<br />
Field adjustment ........................................................................................... 58<br />
Fields ........................................................................................................... 71<br />
File ............................................................................................................... 56<br />
File management ......................................................................................... 24<br />
File names ................................................................................................... 85<br />
Files with Direct Access ............................................................................... 88<br />
Fill ........................................................................................................ 35, 130<br />
Fill parameter ............................................................................................... 49<br />
First pulse suppression ................................................................................ 61<br />
Fix ................................................................................................................ 82<br />
For Next ....................................................................................................... 73<br />
Format specifications ................................................................................. 132<br />
FreeVectorArray ......................................................................................... 125<br />
Functions ..................................................................................................... 78<br />
G<br />
General information ..................................................................................... 67<br />
Get ............................................................................................................... 89<br />
GetAppName ............................................................................................. 110<br />
GetAppPath ............................................................................................... 110<br />
GetAppPathName ...................................................................................... 109<br />
GetBBMaxX ............................................................................................... 116<br />
GetBBMaxY ............................................................................................... 116<br />
GetBBMinX ................................................................................................ 116<br />
GetBBMinY ................................................................................................ 116<br />
GetBooleanValue ....................................................................................... 113<br />
GetBoundingBox ........................................................................................ 126<br />
GetBoundingBoxLast ................................................................................. 126<br />
GetCheck ................................................................................................... 115<br />
GetFileName .............................................................................................. 112<br />
Get<strong>Laser</strong>Configuration ............................................................................... 109<br />
GetNumericValue ....................................................................................... 113<br />
GetNumericValue_inch .............................................................................. 113<br />
GetNumericValue_mil ................................................................................ 113<br />
GetNumericValue_mm ............................................................................... 113<br />
GetStringValue ........................................................................................... 114<br />
Graphic area ................................................................................................ 29<br />
Graphic parameter ....................................................................................... 39<br />
Graphic parameter area ............................................................................... 39<br />
Graphic toolbar ............................................................................................ 33<br />
Graphic window ........................................................................................... 38<br />
<strong>Laser</strong> marking software: V1.5 Build: 343 137
Index<br />
H<br />
Help .............................................................................................................. 18<br />
Hidden on startup ......................................................................................... 56<br />
Hide ............................................................................................................ 110<br />
HPGL ......................................................................................................... 129<br />
I<br />
I/O control ............................................................................................... 28, 56<br />
If Then Else .................................................................................................. 75<br />
Import ........................................................................................................... 34<br />
Import parameter .......................................................................................... 46<br />
inch ............................................................................................................... 56<br />
InitVectorArray ........................................................................................... 125<br />
Input ............................................................................................................. 87<br />
Installation .................................................................................................... 12<br />
Installation requirements .............................................................................. 12<br />
Installation sequence ................................................................................... 12<br />
Int ................................................................................................................. 82<br />
Integer .......................................................................................................... 68<br />
J<br />
Jump delays ................................................................................................. 60<br />
Jump In ........................................................................................................ 66<br />
Jump Out ...................................................................................................... 66<br />
Jump out (Finish procedure) ........................................................................ 66<br />
Jumping in (individual step) .......................................................................... 66<br />
L<br />
Language setting .......................................................................................... 18<br />
<strong>Laser</strong> ...................................................................................................... 55, 59<br />
<strong>Laser</strong> connection .......................................................................................... 16<br />
<strong>Laser</strong> control ................................................................................................ 26<br />
<strong>Laser</strong> specific script extensions ................................................................. 107<br />
<strong>Laser</strong> state ................................................................................................... 57<br />
<strong>Laser</strong> status display ..................................................................................... 27<br />
LC_AckMessage ........................................................................................ 108<br />
LC_Formatter ............................................................................................. 109<br />
LC_LifeTick ................................................................................................ 108<br />
LC_<strong>Mark</strong>Idle ............................................................................................... 109<br />
LC_OnError ................................................................................................ 108<br />
Left ............................................................................................................... 79<br />
Len ............................................................................................................... 79<br />
LifeTickInterval ........................................................................................... 110<br />
Line .............................................................................................................. 33<br />
Line Input ..................................................................................................... 88<br />
Line parameter ............................................................................................. 41<br />
List box ......................................................................................................... 22<br />
LoadFile ..................................................................................................... 111<br />
Lock shutter .................................................................................................. 27<br />
138 <strong>Laser</strong> marking software: V1.5 Build: 343
Index<br />
Log ............................................................................................................... 82<br />
Long ............................................................................................................. 68<br />
Loops ........................................................................................................... 73<br />
LPT-Port ....................................................................................................... 55<br />
M<br />
Manufacturer ................................................................................................ 11<br />
<strong>Mark</strong> ........................................................................................................... 112<br />
<strong><strong>Mark</strong>ing</strong> field ................................................................................................. 58<br />
Measurement ............................................................................................... 37<br />
Measurement unit ........................................................................................ 56<br />
Message Box ............................................................................................. 102<br />
Message window ......................................................................................... 28<br />
Mid ............................................................................................................... 79<br />
mil ................................................................................................................ 56<br />
Mirror .................................................................................................... 35, 130<br />
Mirror parameter .......................................................................................... 48<br />
mm ............................................................................................................... 56<br />
Move .................................................................................................... 34, 130<br />
Moving the view ........................................................................................... 38<br />
Multi line text box ......................................................................................... 22<br />
N<br />
Naming Variables ......................................................................................... 67<br />
New .............................................................................................................. 62<br />
New element ................................................................................................ 33<br />
New file ........................................................................................................ 24<br />
Numerical input box ..................................................................................... 22<br />
O<br />
OK-Button .................................................................................................. 100<br />
ON Hours ..................................................................................................... 59<br />
Open ...................................................................................................... 63, 86<br />
Open file ....................................................................................................... 24<br />
Operators ..................................................................................................... 83<br />
P<br />
P_SetClip ................................................................................................... 124<br />
P_SetMirror ................................................................................................ 125<br />
P_SetMove ................................................................................................ 124<br />
P_SetRotation ............................................................................................ 124<br />
P_SetSize .................................................................................................. 124<br />
Parameter area ...................................................................................... 30, 55<br />
Paste ............................................................................................................ 64<br />
Path .............................................................................................................. 35<br />
Path parameter ............................................................................................ 49<br />
Pause ........................................................................................................... 65<br />
PDF417 ................................................................................................ 34, 129<br />
Pilotlaser ...................................................................................................... 27<br />
Pincushion adjustment ................................................................................. 58<br />
<strong>Laser</strong> marking software: V1.5 Build: 343 139
Index<br />
Polar ..................................................................................................... 35, 131<br />
Polar parameter ........................................................................................... 48<br />
PopUp menu ................................................................................................ 32<br />
Power ........................................................................................................... 57<br />
Power max ................................................................................................... 59<br />
Power min .................................................................................................... 59<br />
Power settling time ....................................................................................... 60<br />
Print ........................................................................................................ 63, 86<br />
Print file ........................................................................................................ 26<br />
Procedures ................................................................................................... 77<br />
Program documentation ............................................................................... 62<br />
Program start ............................................................................................... 17<br />
Program state ............................................................................................... 57<br />
Program Testing ........................................................................................... 65<br />
Programming language ................................................................................ 67<br />
Puls width ..................................................................................................... 57<br />
Puls x ........................................................................................................... 61<br />
Push-Button ............................................................................................... 100<br />
Put ................................................................................................................ 88<br />
Q<br />
QSF .............................................................................................................. 57<br />
R<br />
ReadIniFormat ........................................................................................... 116<br />
ReadXmlFormat ......................................................................................... 117<br />
Rectangle ............................................................................................. 33, 127<br />
Rectangle parameter .................................................................................... 41<br />
Redo ............................................................................................................. 64<br />
Refresh ....................................................................................................... 115<br />
Release ........................................................................................................ 18<br />
RF-Generator ............................................................................................... 60<br />
Right ............................................................................................................. 80<br />
Rotation ................................................................................................ 34, 130<br />
Rotation parameter ...................................................................................... 48<br />
Round ........................................................................................................... 82<br />
Run ............................................................................................................... 28<br />
S<br />
S_ ............................................................................................................... 120<br />
S_Pos ......................................................................................................... 124<br />
S_Power ..................................................................................................... 123<br />
S_QSF ....................................................................................................... 123<br />
S_QSF_PW ................................................................................................ 123<br />
S_SetStartStopDelay ................................................................................. 123<br />
S_Speed .................................................................................................... 123<br />
Save ............................................................................................................. 63<br />
Save All ........................................................................................................ 63<br />
Save File ...................................................................................................... 25<br />
SaveFile ..................................................................................................... 112<br />
140 <strong>Laser</strong> marking software: V1.5 Build: 343
Index<br />
Scope of delivery ......................................................................................... 11<br />
Script area .................................................................................................... 50<br />
Script programming window ......................................................................... 62<br />
Script samples ............................................................................................. 51<br />
Select Case .................................................................................................. 76<br />
SendMessage ............................................................................................ 111<br />
SendToSC ................................................................................................. 125<br />
Sequential Files ........................................................................................... 86<br />
SerChangeBaudRate ................................................................................. 118<br />
SerClose .................................................................................................... 117<br />
Serial numbers ............................................................................................. 51<br />
SerOpen ..................................................................................................... 117<br />
SerRead ..................................................................................................... 118<br />
SerReadByte .............................................................................................. 119<br />
SerReadPending ........................................................................................ 119<br />
SerReadUntil .............................................................................................. 119<br />
SerReadUntilWait ...................................................................................... 119<br />
SerReadWait .............................................................................................. 119<br />
Service area ................................................................................................. 59<br />
SerWrite ..................................................................................................... 118<br />
SerWriteByte .............................................................................................. 118<br />
SerWritePending ........................................................................................ 118<br />
SerWritePendingWait ................................................................................. 118<br />
SetBooleanValue ....................................................................................... 114<br />
SetCheck ................................................................................................... 115<br />
SetMoveOffset ........................................................................................... 112<br />
SetNumericValue ....................................................................................... 114<br />
SetNumericValue_inch .............................................................................. 115<br />
SetNumericValue_mil ................................................................................ 114<br />
SetNumericValue_mm ............................................................................... 114<br />
SetPowerOffset .......................................................................................... 113<br />
SetStringValue ........................................................................................... 115<br />
Sgn ............................................................................................................... 82<br />
Show .......................................................................................................... 110<br />
Show next statement ................................................................................... 66<br />
Show Object ................................................................................................. 64<br />
ShowBoundingBox ..................................................................................... 115<br />
Showing the bounding box ........................................................................... 27<br />
Shutter ......................................................................................................... 60<br />
ShutterLock .................................................................................................. 27<br />
Sin ................................................................................................................ 81<br />
Single ........................................................................................................... 68<br />
Size ...................................................................................................... 34, 130<br />
Size parameter ............................................................................................. 47<br />
Skip .............................................................................................................. 66<br />
Skip (procedure step) ................................................................................... 66<br />
<strong>Software</strong> installation ..................................................................................... 13<br />
<strong>Software</strong> user interface ................................................................................ 21<br />
Special format specifications ..................................................................... 133<br />
<strong>Laser</strong> marking software: V1.5 Build: 343 141
Index<br />
Specific parameters ..................................................................................... 17<br />
Speed ..................................................................................................... 57, 60<br />
Sqr ................................................................................................................ 82<br />
Start .............................................................................................................. 65<br />
Start delay .................................................................................................... 57<br />
Start marking ................................................................................................ 28<br />
Start/Continue .............................................................................................. 65<br />
StartRecMessage ....................................................................................... 111<br />
Status line graphic window ........................................................................... 29<br />
StatusText .................................................................................................. 112<br />
Stop .............................................................................................................. 28<br />
Stop delay .................................................................................................... 57<br />
Stop marking ................................................................................................ 28<br />
Stop<strong>Mark</strong> .................................................................................................... 112<br />
StopRecMessage ....................................................................................... 111<br />
Str ................................................................................................................. 80<br />
String ............................................................................................................ 69<br />
StrReverse ................................................................................................... 81<br />
Switching the laser on and off ...................................................................... 26<br />
Switching the pilot laser on and off .............................................................. 27<br />
System requirements ................................................................................... 12<br />
T<br />
Tan ............................................................................................................... 81<br />
Text ...................................................................................................... 33, 127<br />
Text box ....................................................................................................... 22<br />
Text parameter ............................................................................................. 42<br />
TextInfo ...................................................................................................... 127<br />
TimerStart .................................................................................................. 110<br />
TimerStop ................................................................................................... 111<br />
Type Conversion Functions ......................................................................... 84<br />
U<br />
UCase .......................................................................................................... 81<br />
Undo ............................................................................................................. 64<br />
Uninstalling ................................................................................................... 18<br />
User Dialog Editor ........................................................................................ 66<br />
V<br />
Variables ...................................................................................................... 67<br />
Variant .......................................................................................................... 69<br />
Vector ................................................................................................... 60, 126<br />
W<br />
Warranty ....................................................................................................... 11<br />
While ............................................................................................................ 73<br />
Windows 2000 .............................................................................................. 12<br />
Windows XP ................................................................................................. 12<br />
Wobble ......................................................................................................... 35<br />
Wobble parameter ........................................................................................ 49<br />
142 <strong>Laser</strong> marking software: V1.5 Build: 343
Index<br />
Working ........................................................................................................ 57<br />
Write ............................................................................................................. 86<br />
WriteIniFormat ........................................................................................... 117<br />
WriteXmlFormat ......................................................................................... 117<br />
Z<br />
Zoom minus ................................................................................................. 36<br />
Zoom plus .................................................................................................... 36<br />
Zoom to bounding box ................................................................................. 36<br />
Zoom to marking area .................................................................................. 36<br />
Zoom toolbar ................................................................................................ 36<br />
Zoom window ............................................................................................... 36<br />
ZoomAll ...................................................................................................... 116<br />
ZoomBoundingBox .................................................................................... 116<br />
<strong>Laser</strong> marking software: V1.5 Build: 343 143
Index<br />
144 <strong>Laser</strong> marking software: V1.5 Build: 343
343<br />
Build: V1.5 <strong>Software</strong>: <strong><strong>Mark</strong>ing</strong><br />
ACI <strong>Laser</strong> GmbH<br />
Österholzstraße 9<br />
<strong>Laser</strong><br />
D-99428 Nohra<br />
Fon: +49 3643 4152-0 e-mail: info@ACI-<strong>Laser</strong>.de<br />
Fax: +49 3643 4152-77 Internet: www.ACI-<strong>Laser</strong>.de <strong>Manual</strong>