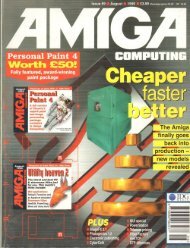
Amiga Computing - Commodore Is Awesome
Amiga Computing - Commodore Is Awesome
Amiga Computing - Commodore Is Awesome

Create successful ePaper yourself
Turn your PDF publications into a flip-book with our unique Google optimized e-Paper software.
Steve White explains<br />
how you can<br />
make your object<br />
brushes dance to<br />
your tune<br />
ples of picture design, backdrops and<br />
S special effects. This month, and for the<br />
Illl o next few issues, we will be looking at<br />
animation f principles and specific techniques<br />
applicable to animation,<br />
a<br />
Obviously, drawing single images is a lot less<br />
painless r than creating an animation, but most<br />
reputable w art packages include a plethora of differ<br />
e<br />
er en ha<br />
hell of a lot easier, and quicker, than that on<br />
<strong>Is</strong>oper. t o Unfortunately, understanding the techniques<br />
con take a while and even then, opplying<br />
fv<br />
them correctly can prove a recurring nightmare.<br />
So ue<br />
for simplicity's sake, I won't be going into the<br />
Nth ns<br />
dimension to explain these functions but will<br />
provide ct<br />
simple techniques with results so that you<br />
have ti u o head start for your own experimentation.<br />
od<br />
Just as with a single image, it is vitally important<br />
that you put your animation down on paper<br />
First<br />
ni<br />
in the form of storyboards_ Storyboords are<br />
smal s e roughs of the key elements, scenes and<br />
camera td<br />
angles within an animation. You don't<br />
need ht<br />
to draw in detail, just enough so that you<br />
personaly ah<br />
understand what it is you're planning<br />
and how it works.<br />
t e<br />
RENDERING mb<br />
OPTIONS<br />
The a<br />
next thing to do is work out what animated<br />
effects ks<br />
ore included and the best options for rendering<br />
e i (drawing) them, To pinpoint certain<br />
aspects ac<br />
I will be referring to the animation shown<br />
here in the screenshots. The techniques explained<br />
np<br />
can be employed in many different ways ond<br />
with ir<br />
any animation, not just the one I have<br />
supplied. mi<br />
an<br />
At the computer, the first thing to do is to design<br />
all tcthe<br />
objects that will make up your completed<br />
onim i<br />
(short for animation). Although lilt more<br />
appealing to aduolly design as you go, I can guarantee<br />
o-<br />
you'll eventually wish you hadn't. Create all<br />
the n objects and save them independently with<br />
suitable o filenames, If you end up with a lot of<br />
objects n and they're not properly labelled, you<br />
end a up wasting precious time and freaking Out<br />
regularly.<br />
c<br />
With the boring bits out of the way you<br />
con then simply click ,<br />
:;11<br />
o<br />
t h e<br />
cmFROM i e c e s START TO FINISH<br />
tpo g e t h<br />
eu r o<br />
When zooming objects in you'll quickly reah that the<br />
, t<br />
that make up the object turn 'blocky' as they are magnified.<br />
dThere<br />
- is a way around this which entails drawing the original<br />
object at its largest size. You can then set the animation position<br />
to the last frame in the zoom and render the brush zooming<br />
Out, but with the animation running backwards and with<br />
a positive value in the End z position.<br />
Both D e luxe Pa int<br />
and Brillia nce fe a ture<br />
a compre he nsive lot<br />
Of a nima tion<br />
functions, Good<br />
brush ma nipula tion is<br />
fi a t forspe e d<br />
and fle xibinty<br />
AMIGA COMPUTING<br />
FEBRUARY 1996<br />
Twist and<br />
turn it!<br />
you'l feel happier, and more confident, spending<br />
time getting the finished animation accurate.<br />
Both Deluxe Point and Brilliance have powerful<br />
Move functions They allow you to set the initial<br />
start position of the brush, the end position, os well<br />
as any rotations you want to occur throughout the<br />
procedure. There are three important values for<br />
both position and rotation and these are labelled x,<br />
y and z The x and y are the easiest to explain and<br />
understand. With x you con move your brush in the<br />
horizontal (left and right) and y allows you to move<br />
the brush in the vertical (up and down). If you are<br />
moving clouds or a ship you would use the x position,<br />
and to move a lift or a helicopter you would<br />
use y.<br />
Z is a different matter altogether. If you can<br />
imagine a line travelling straight through the centre<br />
of your screen, you will have discovered the z axis<br />
When you realise that z moves brushes<br />
closer and farther away it is easier to visualise this<br />
imaginary line. The position of a brush hos two<br />
uses - for moving objects or for camera pans. 11<br />
you move a car off screen horn a standstil then it<br />
will be clearly obvious that the abject has itself<br />
moved. However, if you move an entire scene off<br />
screen then it will appear that the camera has in<br />
fact moved (panned' rather than the scene. The<br />
Building a n<br />
animation is<br />
a re la tive ly<br />
painless<br />
procedure if<br />
you stick to<br />
the trie d a nd<br />
tested<br />
methods_<br />
Ignore theme<br />
methods a nd<br />
you're in<br />
trouble<br />
same principle also applies to z. You con appear to<br />
move an object closer or farther away but by moving<br />
the entire scene you give the impression that the<br />
camera is zooming in or out. Sorry to go on about x,<br />
y and z, but they need to be understood if you<br />
are maximise your potential with computer-aided<br />
animation.<br />
X, y and z also feature with rotation as well as<br />
position. Using rotation you can turn your brush in<br />
every angle while the brush is being moved through<br />
the position axis settings. Rotation is more difficult to<br />
grasp than position but if you can imagine the x, y<br />
and z position lines on your screen, rotation simply<br />
rotates the brush around the corresponding axis, like<br />
an apple skewered on a stick. I hove supplied a<br />
screensho indicating the position and rotation axis,<br />
so if you still can't quite grasp the idea take a look<br />
at it.<br />
This picture should ittustra te to you the<br />
m, y, a position a nd rota tion tine s using<br />
your monitor a . a n e xa mple