

TRITON Extreme Operation Guide - Platinum Audiolab
TRITON Extreme Operation Guide - Platinum Audiolab
TRITON Extreme Operation Guide - Platinum Audiolab

You also want an ePaper? Increase the reach of your titles
YUMPU automatically turns print PDFs into web optimized ePapers that Google loves.
42<br />
If you are using the <strong>TRITON</strong> <strong>Extreme</strong>’s Sequencer<br />
mode as a 16-track multi-timbral tone generator, set<br />
this parameter to INT or BTH. (☞”Status” PG p.72)<br />
In general, you should set “MIDI Channel” to different<br />
channels 1–16 for each track. Tracks that are sent to the<br />
same MIDI channel will sound simultaneously when<br />
either is recorded or played.<br />
4 Adjust the effect settings.<br />
Make settings for each effect in Sequencer P8: Insert<br />
Effect and P9: Master Effect. (☞p.105, PG p.95, 98)<br />
5 Set the tempo and time signature.<br />
Make these settings in Sequencer P0: Play/REC.<br />
“ (Tempo)” sets the tempo, and “Meter” sets the time<br />
signature. (☞PG p.55)<br />
6 As necessary, set “Reso” to specify the quantization<br />
resolution. (☞PG p.57)<br />
7 Make other settings as necessary.<br />
As necessary, make arpeggiator settings (Sequencer P7:<br />
Arpeggiator), MIDI filter settings (Sequencer P3: MIDI<br />
Filter) and Valve Force (Sequencer P9: Master Effect).<br />
(☞PG p.55–102)<br />
When you are finished making these settings, the basic<br />
setup is complete. Record as described in “Recording<br />
methods” and following sections.<br />
You can use the Tone Adjust page (Sequencer P5:<br />
Track Edit, Tone 1.2–5.6) to make adjustments to each<br />
program as appropriate for your song, for example<br />
by making the bass a bit more mellow, or by speeding<br />
up the attack of the strings. This lets you adjust the<br />
sound and keep those changes as part of the song<br />
data without having to move back to Program mode<br />
to edit and write the settings.<br />
[LOCATE] settings<br />
By pressing the [LOCATE] key you can move to a specified<br />
location.<br />
The location is specified by the Utility menu command<br />
“Set Location.” You can also hold down the [ENTER] key<br />
and press the [LOCATE] key to set the location even during<br />
playback (☞PG p.61).<br />
When you select a song, the “LOCATE” setting will automatically<br />
be set to 001:01.000.<br />
Normally you will leave this set to 001:01.000., to return<br />
you to the beginning of the song.<br />
Monitoring just a specific track/Muting<br />
just a specific track (Solo/Mute functions)<br />
The <strong>TRITON</strong> <strong>Extreme</strong> provides a Solo function that lets<br />
you listen to only specific tracks, and a Mute function that<br />
can silence specific tracks. These functions can be used in<br />
various ways. For example you can intentionally mute or<br />
solo specific tracks, or listen only to the rhythm section of<br />
the previously-recorded tracks while you record new<br />
tracks. Let’s try out the Mute and Solo functions.<br />
1 Load a song.<br />
As described on QS p.2, load the demo songs, and<br />
select any song.<br />
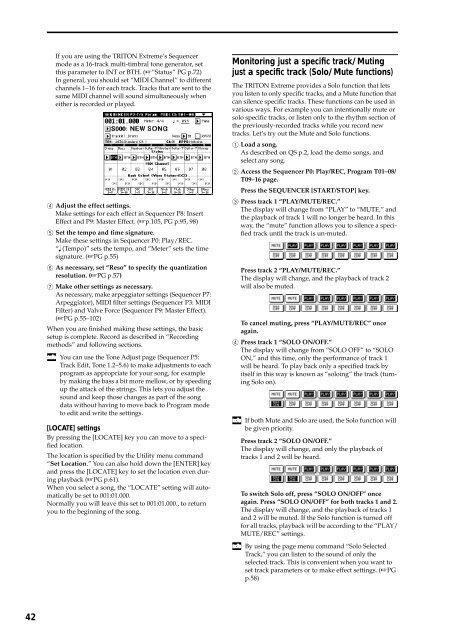
2 Access the Sequencer P0: Play/REC, Program T01–08/<br />
T09–16 page.<br />
Press the SEQUENCER [START/STOP] key.<br />
3 Press track 1 “PLAY/MUTE/REC.”<br />
The display will change from “PLAY” to “MUTE,” and<br />
the playback of track 1 will no longer be heard. In this<br />
way, the “mute” function allows you to silence a specified<br />
track until the track is un-muted.<br />
Press track 2 “PLAY/MUTE/REC.”<br />
The display will change, and the playback of track 2<br />
will also be muted.<br />
To cancel muting, press “PLAY/MUTE/REC” once<br />
again.<br />
4 Press track 1 “SOLO ON/OFF.”<br />
The display will change from “SOLO OFF” to “SOLO<br />
ON,” and this time, only the performance of track 1<br />
will be heard. To play back only a specified track by<br />
itself in this way is known as “soloing” the track (turning<br />
Solo on).<br />
If both Mute and Solo are used, the Solo function will<br />
be given priority.<br />
Press track 2 “SOLO ON/OFF.”<br />
The display will change, and only the playback of<br />
tracks 1 and 2 will be heard.<br />
To switch Solo off, press “SOLO ON/OFF” once<br />
again. Press “SOLO ON/OFF” for both tracks 1 and 2.<br />
The display will change, and the playback of tracks 1<br />
and 2 will be muted. If the Solo function is turned off<br />
for all tracks, playback will be according to the “PLAY/<br />
MUTE/REC” settings.<br />
By using the page menu command “Solo Selected<br />
Track,” you can listen to the sound of only the<br />
selected track. This is convenient when you want to<br />
set track parameters or to make effect settings. (☞PG<br />
p.58)


