
You also want an ePaper? Increase the reach of your titles
YUMPU automatically turns print PDFs into web optimized ePapers that Google loves.
DRAFT, February 18, 2003, Page 52<br />
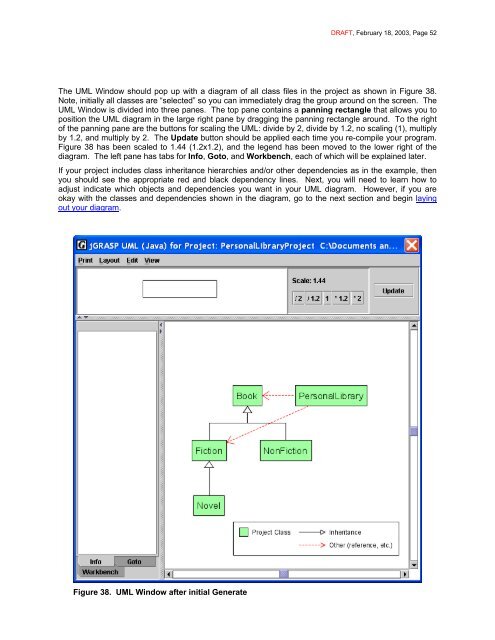
The UML Window should pop up with a diagram of all class files in the project as shown in Figure 38.<br />
Note, initially all classes are “selected” so you can immediately drag the group around on the screen. The<br />
UML Window is divided into three panes. The top pane contains a panning rectangle that allows you to<br />
position the UML diagram in the large right pane by dragging the panning rectangle around. To the right<br />
of the panning pane are the buttons for scaling the UML: divide by 2, divide by 1.2, no scaling (1), multiply<br />
by 1.2, and multiply by 2. The Update button should be applied each time you re-compile your program.<br />
Figure 38 has been scaled to 1.44 (1.2x1.2), and the legend has been moved to the lower right of the<br />
diagram. The left pane has tabs for Info, Goto, and Workbench, each of which will be explained later.<br />
If your project includes class inheritance hierarchies and/or other dependencies as in the example, then<br />
you should see the appropriate red and black dependency lines. Next, you will need to learn how to<br />
adjust indicate which objects and dependencies you want in your UML diagram. However, if you are<br />
okay with the classes and dependencies shown in the diagram, go to the next section and begin laying<br />
out your diagram.<br />
Figure 38. UML Window after initial Generate