

Operating Instructions And Parts Manual 8-inch Jointer
Operating Instructions And Parts Manual 8-inch Jointer
Operating Instructions And Parts Manual 8-inch Jointer

You also want an ePaper? Increase the reach of your titles
YUMPU automatically turns print PDFs into web optimized ePapers that Google loves.
IMPORTANT: When stock is longer than twice<br />
the length of the infeed and outfeed tables, an<br />
assistant or support table must be used to<br />
support the stock.<br />
Always use a hold down or<br />
push block when surfacing short stock or<br />
stock less than 3 <strong>inch</strong>es thick.<br />
Jointing Warped Surfaces<br />
If the wood to be jointed is dished or warped,<br />
take light cuts until the surface is flat. Avoid<br />
forcing such material down against the table;<br />
excessive pressure will spring it while passing<br />
the knives, and it will simply spring back and<br />
remain curved after the cut is completed.<br />
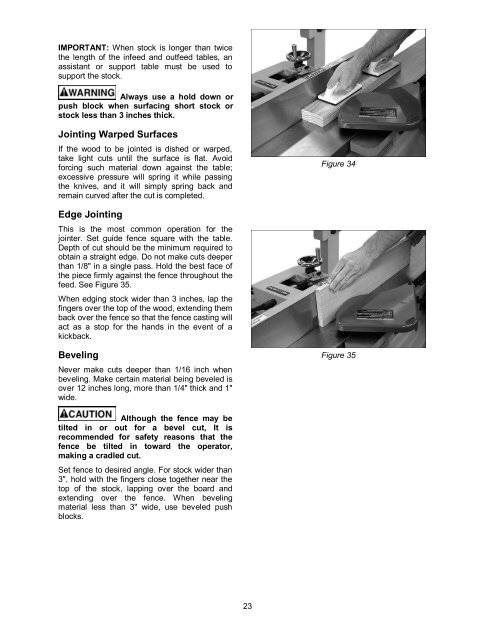
Edge Jointing<br />
This is the most common operation for the<br />
jointer. Set guide fence square with the table.<br />
Depth of cut should be the minimum required to<br />
obtain a straight edge. Do not make cuts deeper<br />
than 1/8" in a single pass. Hold the best face of<br />
the piece firmly against the fence throughout the<br />
feed. See Figure 35.<br />
When edging stock wider than 3 <strong>inch</strong>es, lap the<br />
fingers over the top of the wood, extending them<br />
back over the fence so that the fence casting will<br />
act as a stop for the hands in the event of a<br />
kickback.<br />
Beveling<br />
Never make cuts deeper than 1/16 <strong>inch</strong> when<br />
beveling. Make certain material being beveled is<br />
over 12 <strong>inch</strong>es long, more than 1/4" thick and 1"<br />
wide.<br />
Although the fence may be<br />
tilted in or out for a bevel cut, It is<br />
recommended for safety reasons that the<br />
fence be tilted in toward the operator,<br />
making a cradled cut.<br />
Set fence to desired angle. For stock wider than<br />
3", hold with the fingers close together near the<br />
top of the stock, lapping over the board and<br />
extending over the fence. When beveling<br />
material less than 3" wide, use beveled push<br />
blocks.<br />
23<br />
Figure 34<br />
Figure 35


