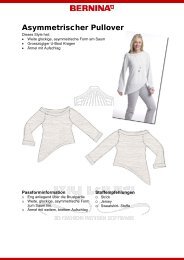
From Slip Dress to Top - My Label 3D Fashion Pattern Software
From Slip Dress to Top - My Label 3D Fashion Pattern Software
From Slip Dress to Top - My Label 3D Fashion Pattern Software

Create successful ePaper yourself
Turn your PDF publications into a flip-book with our unique Google optimized e-Paper software.
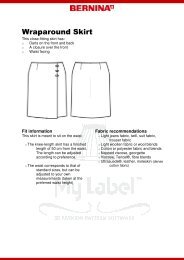
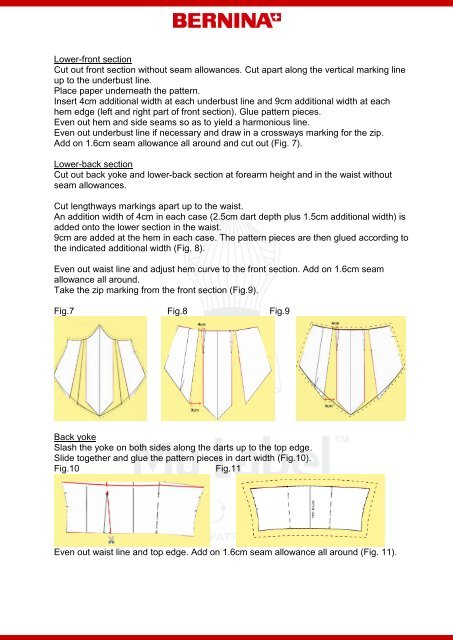
Lower-front section<br />
Cut out front section without seam allowances. Cut apart along the vertical marking line<br />
up <strong>to</strong> the underbust line.<br />
Place paper underneath the pattern.<br />
Insert 4cm additional width at each underbust line and 9cm additional width at each<br />
hem edge (left and right part of front section). Glue pattern pieces.<br />
Even out hem and side seams so as <strong>to</strong> yield a harmonious line.<br />
Even out underbust line if necessary and draw in a crossways marking for the zip.<br />
Add on 1.6cm seam allowance all around and cut out (Fig. 7).<br />
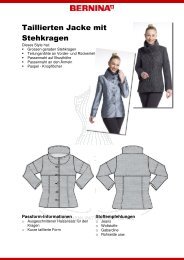
Lower-back section<br />
Cut out back yoke and lower-back section at forearm height and in the waist without<br />
seam allowances.<br />
Cut lengthways markings apart up <strong>to</strong> the waist.<br />
An addition width of 4cm in each case (2.5cm dart depth plus 1.5cm additional width) is<br />
added on<strong>to</strong> the lower section in the waist.<br />
9cm are added at the hem in each case. The pattern pieces are then glued according <strong>to</strong><br />
the indicated additional width (Fig. 8).<br />
Even out waist line and adjust hem curve <strong>to</strong> the front section. Add on 1.6cm seam<br />
allowance all around.<br />
Take the zip marking from the front section (Fig.9).<br />
Fig.7 Fig.8 Fig.9<br />
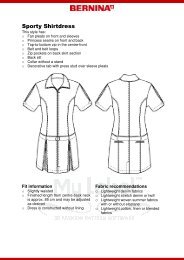
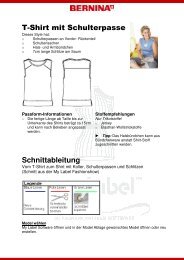
Back yoke<br />
Slash the yoke on both sides along the darts up <strong>to</strong> the <strong>to</strong>p edge.<br />
Slide <strong>to</strong>gether and glue the pattern pieces in dart width (Fig.10).<br />
Fig.10 Fig.11<br />
Even out waist line and <strong>to</strong>p edge. Add on 1.6cm seam allowance all around (Fig. 11).