From Slip Dress to Top - My Label 3D Fashion Pattern Software
From Slip Dress to Top - My Label 3D Fashion Pattern Software
From Slip Dress to Top - My Label 3D Fashion Pattern Software

Create successful ePaper yourself
Turn your PDF publications into a flip-book with our unique Google optimized e-Paper software.
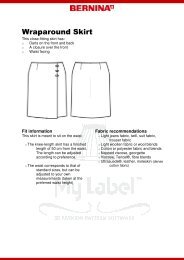
Sew <strong>to</strong>gether back lining and outer-fabric section along the <strong>to</strong>p edge. Trim and neaten<br />
seam allowance. Understitch the seam allowance <strong>to</strong>wards the lining and press (Figs.13<br />
and 14).<br />
Fig.13 Fig.14<br />
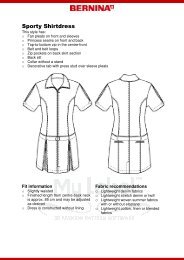
Join bodice with front section<br />
Close darts on lining and on outer fabric (Fig.15). If necessary, <strong>to</strong>pstitch the darts on the<br />
outer fabric so that the pleats don’t stick out.<br />
Mark the points of the bodice and lower-front section according <strong>to</strong> Fig. 16.<br />
Sew <strong>to</strong>gether lower-front section and bodice such that the additional widths are<br />
gathered, or adjusted <strong>to</strong> the underbust seam by means of gathering threads.<br />
Fig.15 Fig.16 Fig.17<br />
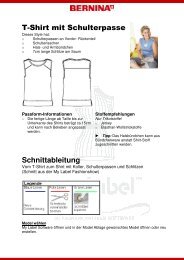
Tip: When sewing <strong>to</strong>gether the sections, begin at a side<br />
seam and sew up <strong>to</strong> the point marking in the centre-front (Fig. 17).<br />
Snip the point on the bodice up <strong>to</strong> 1mm short of the marking, then sew the second side.<br />
Trim and neaten seam allowances and press <strong>to</strong> the lining or outer fabric.<br />
Baste or understitch edges if necessary.<br />
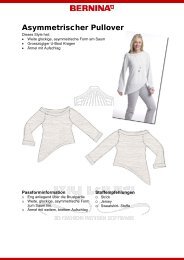
Sew lining- and outer-fabric sections <strong>to</strong>gether along the neckline edge.<br />
Trim seam allowances; snip in the neckline point, neaten if necessary, and iron <strong>to</strong> the<br />
bodice.<br />
Side seam<br />
Close left side of <strong>to</strong>p in one go; trim and press seam allowance.<br />
Tip: With very delicate fabrics, the seam can be sewn with an overlock rolled seam.<br />
Alternatively, neaten the seam allowances individually.