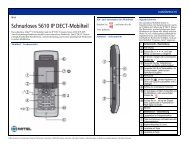
Mitel 5624 Wireless Handset User Guide - Mitel Edocs
Mitel 5624 Wireless Handset User Guide - Mitel Edocs
Mitel 5624 Wireless Handset User Guide - Mitel Edocs

You also want an ePaper? Increase the reach of your titles
YUMPU automatically turns print PDFs into web optimized ePapers that Google loves.
MITEL<br />
<strong>5624</strong> <strong>Wireless</strong> <strong>Handset</strong><br />
<strong>Mitel</strong> WiFi System (EMEA)<br />
<strong>User</strong> <strong>Guide</strong>
ii<br />
NOTICE<br />
The information contained in this document is believed to be accurate in all respects but is not warranted<br />
by <strong>Mitel</strong> Networks Corporation (MITEL ® ). The information is subject to change without notice and should<br />
not be construed in any way as a commitment by <strong>Mitel</strong> or any of its affiliates or subsidiaries. <strong>Mitel</strong> and its<br />
affiliates and subsidiaries assume no responsibility for any errors or omissions in this document. Revisions<br />
of this document or new editions of it may be issued to incorporate such changes.<br />
No part of this document can be reproduced or transmitted in any form or by any means - electronic or<br />
mechanical - for any purpose without written permission from <strong>Mitel</strong> Networks Corporation.<br />
Trademarks<br />
<strong>Mitel</strong> is registered trademark of <strong>Mitel</strong> Networks Corporation.<br />
Other product names mentioned in this document may be trademarks of their respective companies and<br />
are hereby acknowledged.<br />
<strong>Mitel</strong> WiFi System (EMEA)<br />
<strong>Mitel</strong> <strong>5624</strong> <strong>Wireless</strong> <strong>Handset</strong> <strong>User</strong> <strong>Guide</strong><br />
Release 5.0 UR1<br />
August 2012<br />
®, Trademark of <strong>Mitel</strong> Networks Corporation<br />
© Copyright 2012, <strong>Mitel</strong> Networks Corporation<br />
All rights reserved
Table of Contents<br />
About Your Phone . . . . . . . . . . . . . . . . . . . . . . . . . . . . . . . . . . . . . . . . . . . . . . . . . . . . . . . . . . . . . 1<br />
Elements of the <strong>Handset</strong> . . . . . . . . . . . . . . . . . . . . . . . . . . . . . . . . . . . . . . . . . . . . . . . . . . . . . . . 2<br />
Features and Functions . . . . . . . . . . . . . . . . . . . . . . . . . . . . . . . . . . . . . . . . . . . . . . . . . . . . . . . . 3<br />
Chargers . . . . . . . . . . . . . . . . . . . . . . . . . . . . . . . . . . . . . . . . . . . . . . . . . . . . . . . . . . . . . . . . . 4<br />
Contacting Emergency Services . . . . . . . . . . . . . . . . . . . . . . . . . . . . . . . . . . . . . . . . . . . . . . 5<br />
Tips for your Comfort and Safety . . . . . . . . . . . . . . . . . . . . . . . . . . . . . . . . . . . . . . . . . . . . . . 5<br />
Frequency Range . . . . . . . . . . . . . . . . . . . . . . . . . . . . . . . . . . . . . . . . . . . . . . . . . . . . . . . . . . 5<br />
Exposure to Radio Frequency Signals . . . . . . . . . . . . . . . . . . . . . . . . . . . . . . . . . . . . . . . . . . 6<br />
Environmental Requirements . . . . . . . . . . . . . . . . . . . . . . . . . . . . . . . . . . . . . . . . . . . . . . . . . 6<br />
Chemical Resistance . . . . . . . . . . . . . . . . . . . . . . . . . . . . . . . . . . . . . . . . . . . . . . . . . . . . . . . 7<br />
Icons and Text in the Display . . . . . . . . . . . . . . . . . . . . . . . . . . . . . . . . . . . . . . . . . . . . . . . . . . . . 7<br />
Keys and Buttons . . . . . . . . . . . . . . . . . . . . . . . . . . . . . . . . . . . . . . . . . . . . . . . . . . . . . . . . . . . . 11<br />
Off-hook Key . . . . . . . . . . . . . . . . . . . . . . . . . . . . . . . . . . . . . . . . . . . . . . . . . . . . . . . . . . . . . 11<br />
On-hook and On/Off Keys . . . . . . . . . . . . . . . . . . . . . . . . . . . . . . . . . . . . . . . . . . . . . . . . . . 11<br />
Navigation/Confirmation Key . . . . . . . . . . . . . . . . . . . . . . . . . . . . . . . . . . . . . . . . . . . . . . . . 11<br />
Sound Off Key . . . . . . . . . . . . . . . . . . . . . . . . . . . . . . . . . . . . . . . . . . . . . . . . . . . . . . . . . . . 11<br />
Mute and PTT Button . . . . . . . . . . . . . . . . . . . . . . . . . . . . . . . . . . . . . . . . . . . . . . . . . . . . . 11<br />
Key Lock and Upper/Lower Case Key . . . . . . . . . . . . . . . . . . . . . . . . . . . . . . . . . . . . . . . . . 11<br />
Soft Keys . . . . . . . . . . . . . . . . . . . . . . . . . . . . . . . . . . . . . . . . . . . . . . . . . . . . . . . . . . . . . . . 11<br />
Hot Keys . . . . . . . . . . . . . . . . . . . . . . . . . . . . . . . . . . . . . . . . . . . . . . . . . . . . . . . . . . . . . . . . 12<br />
Multifunction Button . . . . . . . . . . . . . . . . . . . . . . . . . . . . . . . . . . . . . . . . . . . . . . . . . . . . . . . 12<br />
Volume Button . . . . . . . . . . . . . . . . . . . . . . . . . . . . . . . . . . . . . . . . . . . . . . . . . . . . . . . . . . . 12<br />
Alphanumeric Keys . . . . . . . . . . . . . . . . . . . . . . . . . . . . . . . . . . . . . . . . . . . . . . . . . . . . . . . . . . 12<br />
Headsets . . . . . . . . . . . . . . . . . . . . . . . . . . . . . . . . . . . . . . . . . . . . . . . . . . . . . . . . . . . . . . . . . . 13<br />
Customizing Your Phone . . . . . . . . . . . . . . . . . . . . . . . . . . . . . . . . . . . . . . . . . . . . . . . . . . . . . . . 14<br />
Switch the <strong>Handset</strong> On . . . . . . . . . . . . . . . . . . . . . . . . . . . . . . . . . . . . . . . . . . . . . . . . . . . . . . . 14<br />
Switch the <strong>Handset</strong> Off . . . . . . . . . . . . . . . . . . . . . . . . . . . . . . . . . . . . . . . . . . . . . . . . . . . . . . . 14<br />
Log a Shared Phone On/Off . . . . . . . . . . . . . . . . . . . . . . . . . . . . . . . . . . . . . . . . . . . . . . . . . . .14<br />
Turn On/Off the Audible Signal . . . . . . . . . . . . . . . . . . . . . . . . . . . . . . . . . . . . . . . . . . . . . . . . .15<br />
Lock/Unlock the Keypad . . . . . . . . . . . . . . . . . . . . . . . . . . . . . . . . . . . . . . . . . . . . . . . . . . . . . . 15<br />
Lock/Unlock the <strong>Handset</strong> . . . . . . . . . . . . . . . . . . . . . . . . . . . . . . . . . . . . . . . . . . . . . . . . . . . . . . 16<br />
Making and Answering Calls . . . . . . . . . . . . . . . . . . . . . . . . . . . . . . . . . . . . . . . . . . . . . . . . . . . . 17<br />
Call List . . . . . . . . . . . . . . . . . . . . . . . . . . . . . . . . . . . . . . . . . . . . . . . . . . . . . . . . . . . . . . . . . . . 17<br />
Make a Call . . . . . . . . . . . . . . . . . . . . . . . . . . . . . . . . . . . . . . . . . . . . . . . . . . . . . . . . . . . . . . . . 17<br />
Pre-Dial . . . . . . . . . . . . . . . . . . . . . . . . . . . . . . . . . . . . . . . . . . . . . . . . . . . . . . . . . . . . . . . . . 17<br />
Dial Using a Pre-programmed Hot Key, Soft Key or Multifunction Button . . . . . . . . . . . . . . 17<br />
Dial a Number from the Call List . . . . . . . . . . . . . . . . . . . . . . . . . . . . . . . . . . . . . . . . . . . . . . 17<br />
Dial the Sender of a Message . . . . . . . . . . . . . . . . . . . . . . . . . . . . . . . . . . . . . . . . . . . . . . . 18<br />
iii
<strong>Mitel</strong> WiFi System (EMEA) <strong>User</strong> <strong>Guide</strong><br />
iv<br />
Dial a Number from the Local Phonebook . . . . . . . . . . . . . . . . . . . . . . . . . . . . . . . . . . . . . .18<br />
Dial a Name from the Central Phonebook . . . . . . . . . . . . . . . . . . . . . . . . . . . . . . . . . . . . . .18<br />
Dial a Number from the Company Phonebook . . . . . . . . . . . . . . . . . . . . . . . . . . . . . . . . . . .18<br />
Answer a Call . . . . . . . . . . . . . . . . . . . . . . . . . . . . . . . . . . . . . . . . . . . . . . . . . . . . . . . . . . . . . . .19<br />
Answer a Call . . . . . . . . . . . . . . . . . . . . . . . . . . . . . . . . . . . . . . . . . . . . . . . . . . . . . . . . . . . .19<br />
End a Call . . . . . . . . . . . . . . . . . . . . . . . . . . . . . . . . . . . . . . . . . . . . . . . . . . . . . . . . . . . . . . .19<br />
During a Call . . . . . . . . . . . . . . . . . . . . . . . . . . . . . . . . . . . . . . . . . . . . . . . . . . . . . . . . . . . . . . .19<br />
Adjust the Volume during a Call . . . . . . . . . . . . . . . . . . . . . . . . . . . . . . . . . . . . . . . . . . . . . .20<br />
Open Contacts during a Call . . . . . . . . . . . . . . . . . . . . . . . . . . . . . . . . . . . . . . . . . . . . . . . . .20<br />
Turn on/off the Microphone during a Call . . . . . . . . . . . . . . . . . . . . . . . . . . . . . . . . . . . . . . .20<br />
Lock/Unlock the Keypad during a Call . . . . . . . . . . . . . . . . . . . . . . . . . . . . . . . . . . . . . . . . .21<br />
Start a New Call during a Conversation . . . . . . . . . . . . . . . . . . . . . . . . . . . . . . . . . . . . . . . .21<br />
Call Handling . . . . . . . . . . . . . . . . . . . . . . . . . . . . . . . . . . . . . . . . . . . . . . . . . . . . . . . . . . . . . . . . 22<br />
Hold . . . . . . . . . . . . . . . . . . . . . . . . . . . . . . . . . . . . . . . . . . . . . . . . . . . . . . . . . . . . . . . . . . . . . .22<br />
Transfer to a New Call (Unsupervised) . . . . . . . . . . . . . . . . . . . . . . . . . . . . . . . . . . . . . . . . . . .22<br />
Supervised Transfer . . . . . . . . . . . . . . . . . . . . . . . . . . . . . . . . . . . . . . . . . . . . . . . . . . . . . . . . . .22<br />
Conference . . . . . . . . . . . . . . . . . . . . . . . . . . . . . . . . . . . . . . . . . . . . . . . . . . . . . . . . . . . . . . . .23<br />
Answer Call Waiting . . . . . . . . . . . . . . . . . . . . . . . . . . . . . . . . . . . . . . . . . . . . . . . . . . . . . . . . . .23<br />
Call Park . . . . . . . . . . . . . . . . . . . . . . . . . . . . . . . . . . . . . . . . . . . . . . . . . . . . . . . . . . . . . . . . . .24<br />
Messaging . . . . . . . . . . . . . . . . . . . . . . . . . . . . . . . . . . . . . . . . . . . . . . . . . . . . . . . . . . . . . . . . . . 25<br />
Message List . . . . . . . . . . . . . . . . . . . . . . . . . . . . . . . . . . . . . . . . . . . . . . . . . . . . . . . . . . . . . . .25<br />
Receive a Message . . . . . . . . . . . . . . . . . . . . . . . . . . . . . . . . . . . . . . . . . . . . . . . . . . . . . . . . . .25<br />
Incoming Message for the <strong>5624</strong> Services License . . . . . . . . . . . . . . . . . . . . . . . . . . . . . . . .25<br />
Incoming Message for all <strong>5624</strong>s except for the <strong>5624</strong> Services License . . . . . . . . . . . . . . . .25<br />
Read a Stored Message . . . . . . . . . . . . . . . . . . . . . . . . . . . . . . . . . . . . . . . . . . . . . . . . . . . .25<br />
Reply to a Message . . . . . . . . . . . . . . . . . . . . . . . . . . . . . . . . . . . . . . . . . . . . . . . . . . . . . . .26<br />
Delete a Message . . . . . . . . . . . . . . . . . . . . . . . . . . . . . . . . . . . . . . . . . . . . . . . . . . . . . . . . .26<br />
Forward a Message . . . . . . . . . . . . . . . . . . . . . . . . . . . . . . . . . . . . . . . . . . . . . . . . . . . . . . .26<br />
Call the Sender of the Message . . . . . . . . . . . . . . . . . . . . . . . . . . . . . . . . . . . . . . . . . . . . . .26<br />
Call a Number Included in a Message . . . . . . . . . . . . . . . . . . . . . . . . . . . . . . . . . . . . . . . . .27<br />
Save a Number . . . . . . . . . . . . . . . . . . . . . . . . . . . . . . . . . . . . . . . . . . . . . . . . . . . . . . . . . . .27<br />
Write and Send a Message . . . . . . . . . . . . . . . . . . . . . . . . . . . . . . . . . . . . . . . . . . . . . . . . .27<br />
Open a Sent Message . . . . . . . . . . . . . . . . . . . . . . . . . . . . . . . . . . . . . . . . . . . . . . . . . . . . .28<br />
Send a Message to Another Destination . . . . . . . . . . . . . . . . . . . . . . . . . . . . . . . . . . . . . . .28<br />
Receive a Message with Request for Answer . . . . . . . . . . . . . . . . . . . . . . . . . . . . . . . . . . . . . .28<br />
Accept/Reject the Message . . . . . . . . . . . . . . . . . . . . . . . . . . . . . . . . . . . . . . . . . . . . . . . . .28<br />
Message Queuing and Message Priority . . . . . . . . . . . . . . . . . . . . . . . . . . . . . . . . . . . . . . . . . .29<br />
Interactive Messaging . . . . . . . . . . . . . . . . . . . . . . . . . . . . . . . . . . . . . . . . . . . . . . . . . . . . . . . .30
Table of Contents<br />
Colored Messaging . . . . . . . . . . . . . . . . . . . . . . . . . . . . . . . . . . . . . . . . . . . . . . . . . . . . . . . . . . 31<br />
Mobile Data . . . . . . . . . . . . . . . . . . . . . . . . . . . . . . . . . . . . . . . . . . . . . . . . . . . . . . . . . . . . . . . . 31<br />
Send Mobile Data . . . . . . . . . . . . . . . . . . . . . . . . . . . . . . . . . . . . . . . . . . . . . . . . . . . . . . . . . 31<br />
Send Mobile Data with a Prefix . . . . . . . . . . . . . . . . . . . . . . . . . . . . . . . . . . . . . . . . . . . . . . 32<br />
Voice Mail . . . . . . . . . . . . . . . . . . . . . . . . . . . . . . . . . . . . . . . . . . . . . . . . . . . . . . . . . . . . . . . . . 32<br />
Receive a Voice Mail . . . . . . . . . . . . . . . . . . . . . . . . . . . . . . . . . . . . . . . . . . . . . . . . . . . . . .32<br />
Check the Voice Mail Inbox . . . . . . . . . . . . . . . . . . . . . . . . . . . . . . . . . . . . . . . . . . . . . . . . . 32<br />
One Key Voice Mail Access . . . . . . . . . . . . . . . . . . . . . . . . . . . . . . . . . . . . . . . . . . . . . . . . . 32<br />
Alarm Operation . . . . . . . . . . . . . . . . . . . . . . . . . . . . . . . . . . . . . . . . . . . . . . . . . . . . . . . . . . . . . . 33<br />
Push-button Alarm . . . . . . . . . . . . . . . . . . . . . . . . . . . . . . . . . . . . . . . . . . . . . . . . . . . . . . . . . . . 33<br />
Acoustic Location Signal . . . . . . . . . . . . . . . . . . . . . . . . . . . . . . . . . . . . . . . . . . . . . . . . . . . . . . 33<br />
Test Alarm . . . . . . . . . . . . . . . . . . . . . . . . . . . . . . . . . . . . . . . . . . . . . . . . . . . . . . . . . . . . . . . . . 33<br />
Alarm with Location Information . . . . . . . . . . . . . . . . . . . . . . . . . . . . . . . . . . . . . . . . . . . . . . . .33<br />
Alarm with Data . . . . . . . . . . . . . . . . . . . . . . . . . . . . . . . . . . . . . . . . . . . . . . . . . . . . . . . . . . 34<br />
Automatic Call after Alarm . . . . . . . . . . . . . . . . . . . . . . . . . . . . . . . . . . . . . . . . . . . . . . . . . . 34<br />
Menu Tree . . . . . . . . . . . . . . . . . . . . . . . . . . . . . . . . . . . . . . . . . . . . . . . . . . . . . . . . . . . . . . . . . . 35<br />
Customizing the Menu Tree . . . . . . . . . . . . . . . . . . . . . . . . . . . . . . . . . . . . . . . . . . . . . . . . . . . .35<br />
Calls . . . . . . . . . . . . . . . . . . . . . . . . . . . . . . . . . . . . . . . . . . . . . . . . . . . . . . . . . . . . . . . . . . . . . 36<br />
Contacts . . . . . . . . . . . . . . . . . . . . . . . . . . . . . . . . . . . . . . . . . . . . . . . . . . . . . . . . . . . . . . . . . . 37<br />
Profile . . . . . . . . . . . . . . . . . . . . . . . . . . . . . . . . . . . . . . . . . . . . . . . . . . . . . . . . . . . . . . . . . . . . 38<br />
Messaging . . . . . . . . . . . . . . . . . . . . . . . . . . . . . . . . . . . . . . . . . . . . . . . . . . . . . . . . . . . . . . . . . 39<br />
Services . . . . . . . . . . . . . . . . . . . . . . . . . . . . . . . . . . . . . . . . . . . . . . . . . . . . . . . . . . . . . . . . . . 40<br />
Short cuts<br />
Connections . . . . . . . . . . . . . . . . . . . . . . . . . . . . . . . . . . . . . . . . . . . . . . . . . . . . . . . . . . . . . . . 41<br />
Settings . . . . . . . . . . . . . . . . . . . . . . . . . . . . . . . . . . . . . . . . . . . . . . . . . . . . . . . . . . . . . . . . . . . 42<br />
In Call . . . . . . . . . . . . . . . . . . . . . . . . . . . . . . . . . . . . . . . . . . . . . . . . . . . . . . . . . . . . . . . . . . . . . 44<br />
Additional In Call Functions . . . . . . . . . . . . . . . . . . . . . . . . . . . . . . . . . . . . . . . . . . . . . . . . . 44<br />
Navigate the Menu . . . . . . . . . . . . . . . . . . . . . . . . . . . . . . . . . . . . . . . . . . . . . . . . . . . . . . . . . . . . 45<br />
Connections Menu . . . . . . . . . . . . . . . . . . . . . . . . . . . . . . . . . . . . . . . . . . . . . . . . . . . . . . . . . . . 45<br />
Headsets . . . . . . . . . . . . . . . . . . . . . . . . . . . . . . . . . . . . . . . . . . . . . . . . . . . . . . . . . . . . . . . 45<br />
In Charger . . . . . . . . . . . . . . . . . . . . . . . . . . . . . . . . . . . . . . . . . . . . . . . . . . . . . . . . . . . . . . . 46<br />
Calls Menu . . . . . . . . . . . . . . . . . . . . . . . . . . . . . . . . . . . . . . . . . . . . . . . . . . . . . . . . . . . . . . . . . 46<br />
Call List . . . . . . . . . . . . . . . . . . . . . . . . . . . . . . . . . . . . . . . . . . . . . . . . . . . . . . . . . . . . . . . . . 46<br />
Missed Calls . . . . . . . . . . . . . . . . . . . . . . . . . . . . . . . . . . . . . . . . . . . . . . . . . . . . . . . . . . . . . 47<br />
Push to Talk . . . . . . . . . . . . . . . . . . . . . . . . . . . . . . . . . . . . . . . . . . . . . . . . . . . . . . . . . . . . . 48<br />
Short Cuts Menu . . . . . . . . . . . . . . . . . . . . . . . . . . . . . . . . . . . . . . . . . . . . . . . . . . . . . . . . . . . . 50<br />
Define Soft Keys . . . . . . . . . . . . . . . . . . . . . . . . . . . . . . . . . . . . . . . . . . . . . . . . . . . . . . . . . . 50<br />
v
<strong>Mitel</strong> WiFi System (EMEA) <strong>User</strong> <strong>Guide</strong><br />
vi<br />
Define Hot Keys . . . . . . . . . . . . . . . . . . . . . . . . . . . . . . . . . . . . . . . . . . . . . . . . . . . . . . . . . .51<br />
Define Navigation Keys . . . . . . . . . . . . . . . . . . . . . . . . . . . . . . . . . . . . . . . . . . . . . . . . . . . .51<br />
Define the Multifunction or Alarm Button . . . . . . . . . . . . . . . . . . . . . . . . . . . . . . . . . . . . . . .52<br />
Services Menu . . . . . . . . . . . . . . . . . . . . . . . . . . . . . . . . . . . . . . . . . . . . . . . . . . . . . . . . . . . . . .52<br />
Add a Service . . . . . . . . . . . . . . . . . . . . . . . . . . . . . . . . . . . . . . . . . . . . . . . . . . . . . . . . . . . .52<br />
Edit a Service . . . . . . . . . . . . . . . . . . . . . . . . . . . . . . . . . . . . . . . . . . . . . . . . . . . . . . . . . . . .53<br />
Delete a Service . . . . . . . . . . . . . . . . . . . . . . . . . . . . . . . . . . . . . . . . . . . . . . . . . . . . . . . . . .53<br />
Messaging . . . . . . . . . . . . . . . . . . . . . . . . . . . . . . . . . . . . . . . . . . . . . . . . . . . . . . . . . . . . . . . . .53<br />
Inbox . . . . . . . . . . . . . . . . . . . . . . . . . . . . . . . . . . . . . . . . . . . . . . . . . . . . . . . . . . . . . . . . . . .53<br />
Write New Messages . . . . . . . . . . . . . . . . . . . . . . . . . . . . . . . . . . . . . . . . . . . . . . . . . . . . . .55<br />
Unsent Messages . . . . . . . . . . . . . . . . . . . . . . . . . . . . . . . . . . . . . . . . . . . . . . . . . . . . . . . . .55<br />
Sent Messages . . . . . . . . . . . . . . . . . . . . . . . . . . . . . . . . . . . . . . . . . . . . . . . . . . . . . . . . . . .55<br />
Profiles Menu . . . . . . . . . . . . . . . . . . . . . . . . . . . . . . . . . . . . . . . . . . . . . . . . . . . . . . . . . . . . . . .56<br />
Contacts Menu . . . . . . . . . . . . . . . . . . . . . . . . . . . . . . . . . . . . . . . . . . . . . . . . . . . . . . . . . . . . . .57<br />
Call a Contact . . . . . . . . . . . . . . . . . . . . . . . . . . . . . . . . . . . . . . . . . . . . . . . . . . . . . . . . . . . .57<br />
Add a Contact . . . . . . . . . . . . . . . . . . . . . . . . . . . . . . . . . . . . . . . . . . . . . . . . . . . . . . . . . . . .57<br />
Edit a Contact . . . . . . . . . . . . . . . . . . . . . . . . . . . . . . . . . . . . . . . . . . . . . . . . . . . . . . . . . . . .58<br />
Delete a Contact . . . . . . . . . . . . . . . . . . . . . . . . . . . . . . . . . . . . . . . . . . . . . . . . . . . . . . . . . .58<br />
Central Phonebook . . . . . . . . . . . . . . . . . . . . . . . . . . . . . . . . . . . . . . . . . . . . . . . . . . . . . . . .58<br />
Settings Menu . . . . . . . . . . . . . . . . . . . . . . . . . . . . . . . . . . . . . . . . . . . . . . . . . . . . . . . . . . . . . .59<br />
Sound and Alert Settings . . . . . . . . . . . . . . . . . . . . . . . . . . . . . . . . . . . . . . . . . . . . . . . . . . .59<br />
Phone Lock Settings . . . . . . . . . . . . . . . . . . . . . . . . . . . . . . . . . . . . . . . . . . . . . . . . . . . . . . .61<br />
Display Settings . . . . . . . . . . . . . . . . . . . . . . . . . . . . . . . . . . . . . . . . . . . . . . . . . . . . . . . . . .62<br />
Time and Date Settings . . . . . . . . . . . . . . . . . . . . . . . . . . . . . . . . . . . . . . . . . . . . . . . . . . . .63<br />
Answering . . . . . . . . . . . . . . . . . . . . . . . . . . . . . . . . . . . . . . . . . . . . . . . . . . . . . . . . . . . . . . .64<br />
Change Text Size for Messages . . . . . . . . . . . . . . . . . . . . . . . . . . . . . . . . . . . . . . . . . . . . . .65<br />
Change the Menu Language . . . . . . . . . . . . . . . . . . . . . . . . . . . . . . . . . . . . . . . . . . . . . . . .65<br />
Change Owner ID . . . . . . . . . . . . . . . . . . . . . . . . . . . . . . . . . . . . . . . . . . . . . . . . . . . . . . . . .65<br />
Troubleshooting . . . . . . . . . . . . . . . . . . . . . . . . . . . . . . . . . . . . . . . . . . . . . . . . . . . . . . . . . . . . . . 66<br />
Operation Notice. . . . . . . . . . . . . . . . . . . . . . . . . . . . . . . . . . . . . . . . . . . . . . . . . . . . . . . . . . . . . . 69<br />
Accessibility and Voice Quality . . . . . . . . . . . . . . . . . . . . . . . . . . . . . . . . . . . . . . . . . . . . . . . . .69<br />
Maintenance . . . . . . . . . . . . . . . . . . . . . . . . . . . . . . . . . . . . . . . . . . . . . . . . . . . . . . . . . . . . . . . . . 70<br />
Maintenance of Batteries . . . . . . . . . . . . . . . . . . . . . . . . . . . . . . . . . . . . . . . . . . . . . . . . . . . . . .70<br />
Battery Warnings . . . . . . . . . . . . . . . . . . . . . . . . . . . . . . . . . . . . . . . . . . . . . . . . . . . . . . . . .70<br />
Charge the Battery . . . . . . . . . . . . . . . . . . . . . . . . . . . . . . . . . . . . . . . . . . . . . . . . . . . . . . . .70<br />
Charge Spare Batteries . . . . . . . . . . . . . . . . . . . . . . . . . . . . . . . . . . . . . . . . . . . . . . . . . . . .70<br />
Replace the Battery . . . . . . . . . . . . . . . . . . . . . . . . . . . . . . . . . . . . . . . . . . . . . . . . . . . . . . .70<br />
Easy Replacement of <strong>Handset</strong> . . . . . . . . . . . . . . . . . . . . . . . . . . . . . . . . . . . . . . . . . . . . . . . . .71<br />
Before Starting the Easy Replacement Procedure . . . . . . . . . . . . . . . . . . . . . . . . . . . . . . . .71
Table of Contents<br />
Easy Replacement Procedure . . . . . . . . . . . . . . . . . . . . . . . . . . . . . . . . . . . . . . . . . . . . . . . 72<br />
Attach the Hinge-type Clip . . . . . . . . . . . . . . . . . . . . . . . . . . . . . . . . . . . . . . . . . . . . . . . . . . . . . 74<br />
Attach the Swivel-type Clip . . . . . . . . . . . . . . . . . . . . . . . . . . . . . . . . . . . . . . . . . . . . . . . . . . . . 74<br />
Attach a Cover without a Clip . . . . . . . . . . . . . . . . . . . . . . . . . . . . . . . . . . . . . . . . . . . . . . . . . . 75<br />
Related Documents . . . . . . . . . . . . . . . . . . . . . . . . . . . . . . . . . . . . . . . . . . . . . . . . . . . . . . . . . . 75<br />
Index . . . . . . . . . . . . . . . . . . . . . . . . . . . . . . . . . . . . . . . . . . . . . . . . . . . . . . . . . . . . . . . . . . . . . . . 77<br />
vii
<strong>Mitel</strong> WiFi System (EMEA) <strong>User</strong> <strong>Guide</strong><br />
viii
About Your Phone<br />
About Your Phone<br />
This document describes the features and settings of the <strong>Mitel</strong> ® <strong>5624</strong> (WiFi) handset. This<br />
feature-rich handset has a color display, telephony, and messaging. It is designed to be used<br />
in demanding environments, such as hospitals, and in office environments.<br />
The <strong>5624</strong> handset is suitable for users who need to readily be reached and/or have a need for<br />
mobile voice and messaging features. It is ideal for applications where the user needs either<br />
one way messaging or needs to interact with other users. The color display enhances and<br />
simplifies the use of the handset.<br />
The <strong>5624</strong> Standard <strong>Handset</strong> can be upgraded with Services and Personal Alarm with<br />
messaging functions.<br />
Figure 1: <strong>5624</strong> <strong>Handset</strong><br />
Caution: The handset/headset must be fully charged before starting regular use.<br />
1
<strong>5624</strong> <strong>Wireless</strong> <strong>Handset</strong> <strong>User</strong> <strong>Guide</strong><br />
Elements of the <strong>Handset</strong><br />
2<br />
1 Multi-function button<br />
This button can be used as a short cut to functions: long or double press modes. In the Protector,<br />
the button is used for sending alarms or dialing pre-defined numbers. See Define the Multifunction<br />
or Alarm Button on page 52 and Push-button Alarm on page 33.<br />
2 Earpiece speaker<br />
3 Volume button (up)<br />
To increase the speaker earpiece, headset, and loudspeaker volume<br />
4 Volume button (down)<br />
To decrease the speaker earpiece, headset, and loudspeaker volume<br />
5 Mute and PTT button<br />
To turn on/off audible signals in standby mode, or silence the ring signal at incoming call. During<br />
a call, a long press on the button changes between microphone on/off, same as Sound off key.<br />
During a PTT group call, the microphone is open as long as the button is depressed.<br />
6 Soft keys<br />
The 3 soft keys can be pre-programmed or used with GUI<br />
7 Call key<br />
To answer a call, to pre-dial a number, and a short cut to the Call list.<br />
8 Four-way navigation key<br />
Navigation key with Left, Right, Up, Down with Confirmation (in the middle). You can program<br />
these keys for short cuts, except the middle key.<br />
9 Voice mail access* (System-dependent feature)<br />
Quick access to the handset’s Voice mail by long press<br />
10 Key lock and Upper/Lower case<br />
Combined key lock and Upper/Lower Case This key locks the keypad in combination with the<br />
"Lock" soft key.<br />
11 Microphone<br />
12 Space<br />
Used to add space between text and as a multi-purpose connector<br />
13 Sound off key<br />
To turn on/off audible signals in idle mode, silencing the ring signal at incoming call, and to turn<br />
on/off the microphone during a call.<br />
14 Tactile indicators<br />
There are two tactile indicators to indicate the centre of the key pad<br />
15 On-hook and On/Off key<br />
Combined button: to end a call, to return to standby mode, and to switch the handset on/off by<br />
long press<br />
16 Color display<br />
The full graphic type display is 128 pixels wide and 160 pixels high. The display has multiple colors<br />
and backlighting.<br />
17 Headset connector<br />
The headset connector is used to connect a headset. The headset connector cover protects it<br />
from dust.<br />
18 LED<br />
Indicates incoming call, messaging, low battery, and charging.
Features and Functions<br />
About Your Phone<br />
IMPORTANT:The handset may retain small magnetic objects around the mouth cap or<br />
ear cap region.<br />
Case<br />
The plastic cover parts are made of durable PC/ABS material.<br />
The <strong>Mitel</strong> WiFi <strong>5624</strong> <strong>Handset</strong> has the enclosure protection IP44 and it also fulfils IEC<br />
60068-2-32, procedure 1, which makes it drop proof from 1 meter onto concrete. Ascom<br />
approves 12 drops from 1.5 metre.<br />
Antenna<br />
The antenna is integrated inside the handset.<br />
Loudspeaker<br />
The handset has a separate loudspeaker for the Loudspeaking function. It is placed on the<br />
back side of the handset.<br />
Microphone<br />
The microphone is placed on the front bottom side of the handset.<br />
Clip<br />
There are two different belt clip options for the handset: a hinge-type clip (standard), and a<br />
swivel-type clip. Use the clip to attach the handset to a pocket or belt. You can use the handset<br />
without a clip on. See the <strong>Mitel</strong> <strong>5624</strong> <strong>Wireless</strong> <strong>Handset</strong> Configuration <strong>Guide</strong>.<br />
Battery<br />
The battery is a rechargeable Li-pol battery, placed under a battery cover. See “Replace the<br />
Battery” on page 70.<br />
The battery is fully charged within 2.5 hours. See “Charge the Battery” on page 70.<br />
The battery can be charged separately with a special battery charger. See “Charge Spare<br />
Batteries” on page 70.<br />
3
<strong>5624</strong> <strong>Wireless</strong> <strong>Handset</strong> <strong>User</strong> <strong>Guide</strong><br />
4<br />
Chargers<br />
Desktop Charger<br />
Figure 2: Desktop Charger<br />
You use the DC3 desktop charger to charge the handset and the <strong>Mitel</strong> <strong>5624</strong> Desktop<br />
Programmer to download new software and synchronize parameters. The units look the same<br />
except that the Desktop Programmer has an USB connection.The handset is fully operational<br />
while placed in the charger.<br />
The charger is delivered with a plug-in power supply and is connected into an ordinary wall<br />
socket.<br />
Note: Use the charger only within the temperature range of +5° C – +40° C.<br />
Caution: Use only the provided power supply.<br />
Rack Charger<br />
The CR3-DAA is a new version of the CR3 Charging Rack:<br />
• The CR3-DAA Charging Rack charges six 5603/5604/<strong>5624</strong> handsets simultaneously and<br />
is used for charging and configuration.<br />
• The CR3-DBAC Charging Rack charges six 5603/5604/5607/<strong>5624</strong> handsets simultaneously<br />
and is used for charging only.<br />
For more information, see the 5603/5604/5607/<strong>5624</strong> Rack Charger Installation and Operation<br />
<strong>Guide</strong>.<br />
Battery Pack Charger<br />
The battery pack charger can charge up to six spare batteries. For more information, see the<br />
5603/5604/5607/<strong>5624</strong> Rack Charger Installation and Operation <strong>Guide</strong>.
Contacting Emergency Services<br />
About Your Phone<br />
This handset, like any wireless phone, communicates using radio signals. As with any wireless<br />
phone, you may not be able to establish a connection under all conditions; therefore, you should<br />
not rely solely on a wireless telephone for essential, emergency communication. The key lock<br />
feature disables the handset keypad and prevents the accidental dialing of numbers that may<br />
result in nuisance calls. It also prevents accidental calls to emergency services numbers like<br />
911, 999, or 112.<br />
To disable the key lock feature, press the key and then press the Yes softkey.<br />
Currently, mobile IP phones do not support Enhanced 911 (E911) operation. If emergency<br />
services are required, it is necessary to keep the system administrator and location database<br />
up-to-date.<br />
Tips for your Comfort and Safety<br />
Don't Cradle the <strong>Handset</strong>!<br />
Prolonged use of the handset can lead to neck, shoulder, or back discomfort, especially if you<br />
cradle the handset between your ear and shoulder. If you use your phone a lot, you may find<br />
it more comfortable to use a headset. See the section on headset usage elsewhere in this guide<br />
for more information.<br />
Protect your Hearing<br />
Your phone has a control for adjusting the volume of the handset receiver or headset. Because<br />
continuous exposure to loud sounds can contribute to hearing loss, keep the volume at a<br />
moderate level.<br />
Frequency Range<br />
The handset is a radio transmitter and receiver. When it is on, it receives and sends out radio<br />
frequency (RF) energy. The handset operates on different frequency ranges depending on<br />
market and employs commonly used modulation techniques:<br />
EU b/g: 2400–2483.5 MHz (Ch 1–13) and<br />
a: 5150–5350 MHz (Ch 36, 40, 44, 48, 52, 56, 60,<br />
64), 5470–5710 MHz (Ch 100, 104, 108, 112,<br />
116, 120, 124, 128, 132, 136, 140)<br />
USA/CAN b/g: 2400–2483.5 MHz (Ch 1–11) and<br />
a: 5150–5350 MHz (Ch 36, 40, 44, 48, 52, 56, 60,<br />
64), 5470–5710 MHz (Ch 100, 104, 108, 112,<br />
116, 120, 124, 128, 132, 136, 140), 5725–5875<br />
(Ch 149, 153, 157, 161, 165)<br />
Note: DFS channels should be avoided as Mobile devices are prevented from using<br />
these channels without a period of listening to ensure radar avoidance. This listening<br />
time causes delays in the ability to communicate with the WiFi infrastructure and therefore<br />
are not suitable for voice. Instead configure the PP to use UNII-1 channels.<br />
5
<strong>5624</strong> <strong>Wireless</strong> <strong>Handset</strong> <strong>User</strong> <strong>Guide</strong><br />
6<br />
Exposure to Radio Frequency Signals<br />
This equipment complies with FCC radiation exposure limits set forth for an uncontrolled<br />
environment. This device complies with FCC SAR limit of 1.6 W/kg. The maximum SAR value<br />
measured when used at the ear is 1.38 W/kg. The telephone has also been tested when worn<br />
on the body using belt clip. The maximum measured SAR value in this configuration is 1.16<br />
W/kg. This device must not be co-located or operating in conjunction with any other antenna<br />
or transmitter.<br />
Use of non-<strong>Mitel</strong> approved accessories may violate the FCC and IC guidelines for RF exposure<br />
and should be avoided.<br />
Environmental Requirements<br />
<strong>5624</strong> <strong>Handset</strong><br />
• Only use the handset in temperatures between -10° C to +55° C (14° F to 131° F).<br />
• Avoid exposing the handset for direct sunlight or close to other heat sources.<br />
• Connect AC (power supply) to the desktop battery charger only to designated power sources<br />
as indicated on the product.<br />
• Never change the AC cord or plug. If the plug does not fit into the outlet, have a proper<br />
outlet installed by a qualified electrician. Improper connection increases the risk of electric<br />
shock.<br />
• Avoid volume levels that may be harmful to your hearing. Exposure to excessive sound<br />
pressure from a handset's earpiece or headset may cause permanently hearing loss.<br />
• Do not expose the handset to open flame.<br />
• Keep the handset away from excessive heat and moisture.<br />
• Avoid sudden temperature changes to prevent condensation in the handset. It is recommended<br />
to put the handset into an air tight plastic bag until the temperature is adjusted, for<br />
example, when entering or leaving a cold/heated building on a warm/cold day.<br />
• Protect your handset from aggressive liquids and vapors.<br />
• If the handset has been exposed for water or condensation, remove the battery immediately<br />
and let it dry completely before re-inserting the battery.<br />
• The handset may retain small metal objects around the mouth cap or ear cap region.<br />
• Keep the handset away from strong electromagnetic fields.<br />
• Do not place a cold handset in a charger.
Chemical Resistance<br />
About Your Phone<br />
The alpha and numeric characters printed on the exterior of the handset have been tested and<br />
found resistant to chipping, fading or wearing off when the handset is treated with common<br />
cleaners and disinfectants or perspiration. The following chemicals have shown no harmful<br />
effect:<br />
• 3% Hydrochloric Acid<br />
• M-alcohol (70% Methylated Ethanol)<br />
• 60% Chlorhexidin 0.5mg/ml<br />
Acetone can be damaging to the plastic casing of the handset and should not be used.<br />
Icons and Text in the Display<br />
All functions and settings available to the user are shown as icons and text in the display. The<br />
display normally displays date and time, the Owner ID and handset number. The Owner ID can<br />
manually be set by the user.<br />
Figure 3: Display Configuration in Standby Mode<br />
The Status bar (1) is used for icons which give the user information about signal strength,<br />
missed calls, new messages, phone lock, key lock, sound off, time and battery status. This row<br />
is always visible in all screens.<br />
The Header bar (2) displays the current date, headset connection, and system connection.<br />
During call it also displays microphone on and loudspeaker on.<br />
The Active area (3) is used for information such as the name of the system to which the handset<br />
is connected. A user identity provided from the system and/or an Owner ID can also be displayed<br />
if configured in the Settings menu. This is also the area for dialog window text, for example<br />
"missed calls", or to confirm an action.<br />
The Scroll bar (4) is placed to the right of the "Active area". It becomes visible when a menu<br />
screen has more than six menus, or if the complete text in a message cannot be displayed on<br />
the screen simultaneously.<br />
The Soft key bar (5) is used for soft keys which can be used as short cuts for functions in the<br />
handset. See the <strong>Mitel</strong> <strong>5624</strong> <strong>Wireless</strong> <strong>Handset</strong> Configuration <strong>Guide</strong>.<br />
7
<strong>5624</strong> <strong>Wireless</strong> <strong>Handset</strong> <strong>User</strong> <strong>Guide</strong><br />
8<br />
Icons<br />
“Signal strength” icon is visible in the upper left corner. The staples shown in display<br />
depend on the signal strength.<br />
“Full battery” icon appears in upper right corner<br />
"Low battery warning” icon is shown when the battery has 10% or less remaining capacity<br />
"Empty battery warning" icon flashes when the battery has 5% or less remaining capacity<br />
“Sound off” icon appears when the Sound off key or Mute button is pressed<br />
"Microphone off" icon indicates a silenced microphone. It appears after a long press on the<br />
Sound off key, or Mute button during a call<br />
During a PTT call, the microphone is silenced when the PTT button is released<br />
“Loudspeaking” icon appears in the soft key bar during a call. Pressing this icon turns on<br />
the loudspeaker.<br />
“Loudspeaking off” icon appears after the soft key for the Loudspeaking icon is pressed.<br />
Pressing this icon turns off the loudspeaker.<br />
“Headset connected” icon indicates that a corded headset is connected to the handset.<br />
“New message” icon or “Interactive message” icon indicates that a new text message(s)<br />
has arrived. The icon remains in the status bar until all new messages in the inbox are read.<br />
"New Message with Request for answer" icon in front of a message indicates the message<br />
must be acknowledged or rejected.<br />
"New Message, High priority" icon included with New message icon indicates message is<br />
of high priority<br />
"New Message, Alarm priority" icon included with New message icon indicates the alarm<br />
priority of a message.<br />
Voice mail message” icon appears in the message box when voice mails are received. The<br />
icon remains until you listen to your the voice mail.<br />
“Read message” icon or “Read Interactive message” icon in front of a message shows that<br />
the message was already read.<br />
"Sent message" icon.<br />
"New colored message" icon indicates that a new colored text message(s) has arrived. The<br />
messages can be labeled with different colors.
Menu icons<br />
About Your Phone<br />
"Read colored message" icon indicates that a colored text message(s) has been read. The<br />
messages can be labeled with different colors.<br />
"Profile active" icon.<br />
“Missed call” icon is added to all missed calls in the call list.<br />
“Incoming call” icon is added to all answered calls in the call list.<br />
“Outgoing call” icon is added to all outgoing calls in the call list.<br />
“Missed call” icon indicates missed calls in the status bar.<br />
“Connected call” icon indicates an ongoing call.<br />
“Call on hold” icon indicates a paused call<br />
“Call diverted” icon indicates that all calls are diverted to another <strong>5624</strong> <strong>Handset</strong>.<br />
“To contacts” icon indicates a soft key function that opens the contact list.<br />
“Locked keypad ” icon indicates a locked keypad.<br />
"Locked entry" icon indicates that the contact can not be edited or deleted by the user.<br />
“Locked handset” icon indicates a locked handset.<br />
"Personal Services" icon indicates the handset has a <strong>5624</strong> Personal Services license.<br />
"Personal Alarm" icon indicates the handset has a <strong>5624</strong> Personal Alarm license.<br />
The ”Contacts” menu contains all of the names/numbers in the local phonebook. In<br />
addition, a company phonebook* with up to 1000 entries can be downloaded to the handset<br />
using the Portable Device Manager (PDM). You can is also access a central phonebook*<br />
from the "Contacts" menu.<br />
The "Services" menu contains menu short cuts used to customize your phone<br />
Only available if the Services or Alarms licenses are installed.<br />
The “Messaging” menu contains all message handling such as reading and writing<br />
messages<br />
Only available if the Services or Alarms licenses are installed.<br />
9
<strong>5624</strong> <strong>Wireless</strong> <strong>Handset</strong> <strong>User</strong> <strong>Guide</strong><br />
10<br />
* System dependent<br />
The “Calls” menu contains the Call list, Missed calls, Presence*, and Diverted calls*.<br />
The “Connections” menu contains headset selection, system selection, and In charger<br />
selection.<br />
The “Settings” menu contains personal handset settings such as changing the ringer<br />
volume and selecting a language<br />
The ”Short cuts" menu contains short cuts for the soft keys, hot keys, navigation keys, and<br />
the Multifunction button.<br />
The “Profiles” menu allows you to add four different profiles. There are no default profiles.
Keys and Buttons<br />
Off-hook Key<br />
On-hook and On/Off Keys<br />
Navigation/Confirmation Key<br />
Sound Off Key<br />
Mute and PTT Button<br />
Key Lock and Upper/Lower Case Key<br />
Soft Keys<br />
Figure 4: Soft Keys<br />
About Your Phone<br />
This key is used to answer calls, to pre-dial numbers and as a short cut to the Call<br />
list. One short press in standby mode opens the call list.<br />
This key is used to disconnect calls and return to the main screen. A long press in<br />
standby mode switches the handset on/off.<br />
This key is used to step in the menu and is used when working in text mode.<br />
, , , and are used for stepping left/right and up/down in the menu. The<br />
navigation key can be programmed. is (by default) a short cut to the inbox and<br />
is a short cut to Call contact. During a call you can increase/decrease the volume<br />
by pressing and .<br />
A long press on the Sound off Key in idle mode toggles between ring signal on/off.<br />
When you receive an incoming call, a long press on the key silences the ring signal.<br />
During a call, a long press on the key changes between microphone on/off.<br />
A long press on the Mute button in idle mode changes between ring signal on/off.<br />
When an incoming call is received a long press on the button silences the ring<br />
signal. During a call, a long press on the button changes between microphone<br />
on/off.<br />
During a PTT call, the microphone is silenced when the PTT button is released.<br />
This key locks the keypad in combination with the soft key "Lock". It is also used<br />
for switching between upper/lower case and digits.<br />
Call List<br />
Soft keys 003<br />
The three soft keys are located just beneath the display. The function of each soft key is indicated<br />
by text in the display just above the keys.<br />
In standby mode, the soft keys can be used for specific functions defined by the user of the<br />
handset.<br />
11
<strong>5624</strong> <strong>Wireless</strong> <strong>Handset</strong> <strong>User</strong> <strong>Guide</strong><br />
12<br />
Hot Keys<br />
Any key "0", "2" - "9" can be set to a hot key. A long press on any of these numbers in stand<br />
by mode provides a short cut to the Call contact list. The list is in alphabetic order. Which key<br />
you press depends on where the contact appears in the list.<br />
A hot key can be programmed to give access to frequently used functions such as dialing a<br />
specific handset number, a short cut on the menu, or sending an SMS.<br />
Multifunction Button<br />
This button can be used as a short cut to functions and has long and double press modes as<br />
defined by the user of the handset. If the button is defined, it can be used in standby mode only.<br />
Volume Button<br />
The two buttons on the upper left side of the handset are used for increasing/decreasing the<br />
earpiece, headset, and loudspeaker volume.<br />
Alphanumeric Keys<br />
Note: This feature does not apply to the <strong>5624</strong> Personal Alarm license.<br />
Figure 5: Available Characters<br />
Note: Depending on the selected menu language, other characters can be available.<br />
This means that the character order can differ from the table above.
Headsets<br />
In Standby Mode and Number Input Mode<br />
About Your Phone<br />
• A short press on a key enables you to enter the digits “0” - “9” and the characters * and #.<br />
• You enter a pause in the number input mode by a long press on the # key. A pause is<br />
indicated by a "P" in the display.<br />
In Text Input Mode<br />
• A short press on a key 0-9, displays the first available character on that specific key. The<br />
marked character is selected after a timeout, or when another key is pressed.<br />
• You change to upper/lower case, by pressing the * key before entering the character. The<br />
* key can also be used to display only the digits.<br />
• To add space in the text, make a short press on key 0.<br />
• The first character entered in a message, or when adding/editing a name in the Contacts<br />
menu, will be an upper level character followed by lower level characters (unless the * key<br />
is pressed before you enter the character). To switch between Abc, ABC, abc, and 123 you<br />
press the * key.<br />
• A long press on the #-key displays special characters.<br />
If you will use your handset frequently, we recommended you use a headset so you have both<br />
hands free. The headset comes in two versions: microphone integrated in the cable or<br />
microphone on a boom. You can use any headset with a 2.5 mm connector and configure<br />
options for the headset using the user’s headset profile.<br />
In order to achieve optimal audio quality with your headset we recommend you select the<br />
corresponding headset profile. See the <strong>Mitel</strong> <strong>5624</strong> <strong>Wireless</strong> <strong>Handset</strong> Configuration <strong>Guide</strong> for<br />
more information.<br />
13
<strong>5624</strong> <strong>Wireless</strong> <strong>Handset</strong> <strong>User</strong> <strong>Guide</strong><br />
Customizing Your Phone<br />
Switch the <strong>Handset</strong> On<br />
14<br />
When the handset is switched off:<br />
1. Press and hold the On-hook key .<br />
When pressing the On-hook key, the handset vibrates and the display lights ups.<br />
2. Press "Yes" to confirm.<br />
Switch the <strong>Handset</strong> Off<br />
Note: If the handset is a shared phone, it must first be logged out to be able to switch<br />
off the handset. See the <strong>Mitel</strong> <strong>5624</strong> <strong>Wireless</strong> <strong>Handset</strong> Configuration <strong>Guide</strong>.<br />
1. Press and hold the On-hook key .<br />
The "Switch off?" window appears.<br />
2. Press "Yes" to confirm.<br />
Log a Shared Phone On/Off<br />
Note: This feature requires that the parameter "Phone mode" is configured. See the <strong>Mitel</strong><br />
<strong>5624</strong> <strong>Wireless</strong> <strong>Handset</strong> Configuration <strong>Guide</strong>.<br />
The shared phone feature allows more than one user to use a handset. All parameters and<br />
settings that are set in the Device Manager are loaded onto the handset upon logon. Parameters<br />
that are changed in the handset by a logged-in user are stored by the Device Manager. When<br />
the handset is logged out or switched off, the message list and call list in the handset disappears<br />
and will be empty when a new user logs onto the handset.<br />
The <strong>5624</strong> handsets are configured to be shared using the Device Manager. When a handset<br />
is configured to be a shared phone, it can be used by any shared phone user in the system.<br />
The user profile must have the “personal phone” parameter disabled. If the user is configured<br />
as personal (that is, not shared), the handset will become a personal phone upon first log on.
Log On a <strong>Handset</strong><br />
Customizing Your Phone<br />
Before you log on to the handset, ensure it has been switched on. See the <strong>Mitel</strong> <strong>5624</strong> <strong>Wireless</strong><br />
<strong>Handset</strong> Configuration <strong>Guide</strong> for more information.<br />
1. When the "Login?" window appears, press "Yes".<br />
2. Enter the user name.<br />
3. If required, enter the password.<br />
4. Navigate by using Up and Down on the Navigation key.<br />
5. Press “Log in”.<br />
If the handset does not find the WLAN upon start-up a “No Network” window appears. If the<br />
handset does not receive an IP address from the system a “No Access” window appears.<br />
Log Off a <strong>Handset</strong><br />
Note: The handset must be in idle mode. While in a menu, press the End key to return to idle<br />
mode.<br />
1. Press and hold .<br />
2. When the "Log off?" window appears, press "Yes".<br />
Turn On/Off the Audible Signal<br />
The handset must be in idle mode. A long press on the or in idle mode toggles the<br />
ring signal on/off.<br />
The icon indicates a silenced handset.<br />
Lock/Unlock the Keypad<br />
Lock/Unlock the Keypad in Idle Mode<br />
You can lock keys to prevent you from accidentally pressing them.<br />
1. Press .<br />
2. Press "Lock".<br />
Unlock keypad<br />
1. Press<br />
2. Press "Yes".<br />
Note: You can answer/close an incoming call and/or press the alarm button while the<br />
keypad is locked. If configured in Portable Device Manager (PDM), you can call a<br />
pre-defined emergency number while the keypad is locked. See the <strong>Mitel</strong> <strong>5624</strong> <strong>Wireless</strong><br />
<strong>Handset</strong> Configuration <strong>Guide</strong>.<br />
15
<strong>5624</strong> <strong>Wireless</strong> <strong>Handset</strong> <strong>User</strong> <strong>Guide</strong><br />
16<br />
Lock/Unlock the Keypad during a Call<br />
To prevent accidentally pressing keys you can lock keys during a call. This is useful when<br />
wearing a a headset and a handset attached to a pocket or belt.<br />
Lock the Keypad<br />
1. Press .<br />
2. Press "Lock".<br />
Unlock Keypad<br />
1. Press<br />
2. Press "Yes".<br />
Note: You can press the volume buttons and the mute button during the call. If the <strong>5624</strong><br />
Personal Alarm license is used it is also possible to press the alarm button.<br />
Lock/Unlock the <strong>Handset</strong><br />
The handset can be protected from unauthorized use.<br />
1. Enter the “Settings” menu. See the <strong>Mitel</strong> <strong>5624</strong> <strong>Wireless</strong> <strong>Handset</strong> Configuration <strong>Guide</strong>.<br />
2. Select “Locks”<br />
3. Select “Phone lock”.<br />
4. Select "Auto phone lock"<br />
5. Select "On", "On in charger", or "Off".<br />
6. Enter your PIN code.<br />
7. Press "OK".<br />
Note: If the handset is configured in PDM you can call a pre-defined emergency number<br />
while the handset is locked. See the <strong>Mitel</strong> <strong>5624</strong> <strong>Wireless</strong> <strong>Handset</strong> Configuration <strong>Guide</strong>.
Making and Answering Calls<br />
Call List<br />
1. Press "Menu’,<br />
2. Select "Calls" .<br />
3. Select "Call list".<br />
4. Select a number.<br />
Making and Answering Calls<br />
5. Press or the "Call" soft key to dial. The number can be edited before the call is dialled.<br />
Press "More" and select "Edit number". The 25 last received, dialled, or missed calls are<br />
stored in a call list. See the <strong>Mitel</strong> <strong>5624</strong> <strong>Wireless</strong> <strong>Handset</strong> Configuration <strong>Guide</strong>.<br />
Make a Call<br />
Pre-Dial<br />
Enter the number on the handset and press to get the line. The number is shown on the<br />
display while dialling. If required, you can press the "Clear" soft key to erase the number. You<br />
can use the navigation key to step and add/delete a digit in the middle of a number.<br />
You can turn on the tone sender in a pre-dialled number with a long press on the *-key.<br />
Dial Using a Pre-programmed Hot Key, Soft Key or Multifunction Button<br />
Note: The Multifunction button does not apply to the <strong>5624</strong> Personal Alarm license.<br />
The Multifunction button, hot keys, and soft keys can be programmed with a handset number.<br />
Press the pre-programmed hot key, soft key or Multifunction button to dial the number. The call<br />
will automatically be connected.<br />
Dial a Number from the Call List<br />
1. Press .<br />
2. Select a number and press or the "Call" soft key to dial.<br />
The number can be edited before the call starts.<br />
3. Press "More".<br />
4. Select "Edit number".<br />
17
<strong>5624</strong> <strong>Wireless</strong> <strong>Handset</strong> <strong>User</strong> <strong>Guide</strong><br />
18<br />
Dial the Sender of a Message<br />
You can call the sender of a message stored in the message list, from the Messaging menu.<br />
1. Open the menu by pressing the confirmation button, or press "Menu".<br />
2. Select "Messaging".<br />
3. Select "Inbox".<br />
4. Select a message from the list.<br />
5. Select "View".<br />
6. Select "More".<br />
7. Select "Call sender".<br />
Dial a Number from the Local Phonebook<br />
1. Press "Menu".<br />
2. Select "Contacts".<br />
3. Select "Call contact".<br />
4. Select a contact from list, or search name/number by entering characters in the "Search"<br />
field.<br />
5. Press the "Call" or the Off-hook soft key to make the call.<br />
Dial a Name from the Central Phonebook<br />
1. Press “Menu”.<br />
2. Select “Contacts”.<br />
3. Select "Central phonebook".<br />
4. Select "Search by name".<br />
5. Enter the first name and/or the last name. The whole name does not have to be entered.<br />
6. Press “Search”.<br />
7. Press the "Call" or the Off-hook soft key to make the call.<br />
Dial a Number from the Company Phonebook<br />
1. Press “Menu”.<br />
2. Select "Contacts".<br />
3. Select "Call contact".<br />
4. The local and company phonebook appears in the same list but the company names are<br />
indicated by a “Locked entry” icon in front of the name. Select a contact from the list or<br />
search for the name/number by entering characters in the "Search" field.<br />
5. Press the "Call" or the Off-hook soft key to make the call.
Answer a Call<br />
Making and Answering Calls<br />
The flashing LED, accompanied by a ring signal and/or a vibrating handset, notifies you of calls.<br />
The ring signal and vibrator can be disabled. The calling party’s handset number or name is<br />
shown. The name will be shown if the calling party’s handset number is stored in the local<br />
phonebook. When a headset is connected to the handset, the answering button on the headset<br />
can be used to answer the call.<br />
Other answering methods can be specified in the Settings menu. See the <strong>Mitel</strong> <strong>5624</strong> <strong>Wireless</strong><br />
<strong>Handset</strong> Configuration <strong>Guide</strong>. The answering methods are Automatically, Loudspeaking, and<br />
Quick answer.<br />
When “Automatically” is enabled, all incoming calls are connected automatically.<br />
Answer a Call<br />
When the signal sounds press to answer the call, or press the soft key to answer the<br />
call in loudspeaking mode. The name/number of the calling party appears if calling line<br />
information is available.<br />
End a Call<br />
Press to end the call.<br />
The duration of the call is shown in the display. The total time of the call can also be retrieved<br />
from the Calls menu > Call time.<br />
During a Call<br />
Note: Some of these functions are system dependent. The parameters are set up in<br />
PDM. See the <strong>Mitel</strong> <strong>5624</strong> <strong>Wireless</strong> <strong>Handset</strong> Configuration <strong>Guide</strong>, and the <strong>Mitel</strong> Portable<br />
Device Manager Installation and Maintenance <strong>Guide</strong>.<br />
Additional In-call functions can be added by the administrator.<br />
If the handset is configured in PDM you can call a pre-defined emergency number while the<br />
handset/keypad is locked. During the ongoing emergency call, the "More" soft key is disabled.<br />
19
<strong>5624</strong> <strong>Wireless</strong> <strong>Handset</strong> <strong>User</strong> <strong>Guide</strong><br />
20<br />
Adjust the Volume during a Call<br />
Press the "Volume up" button to increase the volume, and the "Volume down" button to decrease<br />
the volume. The handset will now store and keep the new volume level. You can also use the<br />
navigation keys and to adjust the volume.<br />
Open Contacts during a Call<br />
1. Press the "More" soft key.<br />
2. Select "Contacts".<br />
3. Press "Select".<br />
4. Select "Call contact" to search a local or company phonebook contact, or select "Central<br />
phonebook" to search a central phonebook contact.<br />
5. Press "Select".<br />
6. Select a contact.<br />
Note: You can call the selected contact by pressing "Call". When calling the contact, the<br />
first call will be put on hold. See the <strong>Mitel</strong> <strong>5624</strong> <strong>Wireless</strong> <strong>Handset</strong> Configuration <strong>Guide</strong>.<br />
Turn on/off the Microphone during a Call<br />
1. Press "More".<br />
2. Select "Microphone off".<br />
3. Press "Select".<br />
The icon indicates a silenced microphone. This means that the other party in an ongoing<br />
call cannot hear you.<br />
To turn the microphone back on:<br />
1. Press "More".<br />
2. Select "Microphone on".<br />
3. Press "Select".<br />
You can turn the microphone off/on by a long press on .
Lock/Unlock the Keypad during a Call<br />
Making and Answering Calls<br />
To prevent accidentally pressing keys, you can lock the keys during a call. This can be useful<br />
when a headset is used and the handset is attached to a pocket or belt.<br />
Lock the Keypad<br />
1. Press .<br />
2. Press "Lock".<br />
Unlock the Keypad<br />
1. Press<br />
2. Press "Yes".<br />
You can press the volume buttons and the mute button during the call. If the <strong>5624</strong> Personal<br />
Alarm license is used, it is also possible to press the alarm button.<br />
Start a New Call during a Conversation<br />
1. Press "More".<br />
2. Select "New Call".<br />
3. Press "Select".<br />
4. Enter the number, or press to access the phonebook.<br />
5. Press .<br />
21
<strong>5624</strong> <strong>Wireless</strong> <strong>Handset</strong> <strong>User</strong> <strong>Guide</strong><br />
Call Handling<br />
Hold<br />
22<br />
During a call you may need to use features, such as Hold, Transfer, Conference, Callback, and<br />
Call Park.<br />
You access these features during a call by pressing the "More" soft key. It displays the In Call<br />
menu.<br />
1. Press the "More" soft key.<br />
2. Select "Hold" to put the call on hold.<br />
To Retrieve a Held Call<br />
1. Select "Retr." to retrieve the call.<br />
Transfer to a New Call (Unsupervised)<br />
To transfer a call to another party when there is one ongoing call:<br />
1. Press "More".<br />
2. Select "Transf. to new".<br />
3. Press "Select".<br />
4. Enter the number to which the party will be connected or select a contact in the local or<br />
company phonebook.<br />
5. Press "OK" to transfer the call.<br />
Supervised Transfer<br />
1. Press "More".<br />
2. Select "New Call."<br />
3. Enter the number to which the party will be connected or select a contact in the local or<br />
company phonebook.<br />
4. Press "More".<br />
5. Select "Transf. to ".<br />
6. Press "Select".
Conference<br />
Call Handling<br />
Prerequisite: A new call has been started during conversation. See Start a New Call during a<br />
Conversation on page 21. A call has to be invited to the conference call as follows:<br />
1. Step to the call on hold (indicated with ) with the five-way Navigation key.<br />
2. Press “More” during the call.<br />
3. Select “Conference”. Now two people are in an ongoing call (indicated with ).<br />
The person initiating the conference call is the conference leader, and the other are participants<br />
of the conference call.<br />
Conference Split<br />
1. If desired, either of the participants in the ongoing conference call can be put on hold by<br />
selecting the soft key “More” and selecting “Hold name”.<br />
2. Continue talking with the other party.<br />
3. To rejoin the two lines, select the held line (indicated with ).<br />
4. Press "More".<br />
5. Select "Conference."<br />
Answer Call Waiting<br />
While on a call, if you hear a two-beep tone for an incoming call, the soft keys “Accept” and<br />
“Decline” are displayed.:<br />
1. Press "Accept" to answer the incoming call.<br />
The new call is connected and the first call is placed on hold.<br />
2. You can press the "Retr." soft key to alternate between calls.<br />
The call on hold is indicated with and the ongoing call is indicated with .<br />
3. Any of the calls can be ended by pressing the "End" soft key.<br />
23
<strong>5624</strong> <strong>Wireless</strong> <strong>Handset</strong> <strong>User</strong> <strong>Guide</strong><br />
Call Park<br />
24<br />
The Call Park feature allows you to place a call in a special hold state. You, or someone else,<br />
can then retrieve the call from any extension in the system. After parking the call, the system<br />
can automatically connect you to paging equipment so that you can announce the call to the<br />
requested party.<br />
To park a in-progress call:<br />
1. Press "More".<br />
2. Select "Call Park".<br />
3. Dial the directory number on which to park the call.<br />
4. Inform the called party of the waiting call.
Messaging<br />
Message List<br />
The thirty last received messages are stored in a list. The message list is located in the<br />
Messaging menu "Inbox". Time and date information is included in the message.<br />
Receive a Message<br />
Incoming Message for the <strong>5624</strong> Services License<br />
Messaging<br />
When a text message is received, the LED starts flashing and the message alert signal sounds.<br />
The “New message“ icon, and the content of the received message are automatically displayed.<br />
The icon will remain in the display until all new messages are opened. If the message is received<br />
during a call a beep notifies the user.<br />
You can reply or forward the message, call the sender or call the number included in a text. It<br />
is also possible to read the message later by selecting "Close". A received message is stored<br />
in the Inbox.<br />
Incoming Message for all <strong>5624</strong>s except for the <strong>5624</strong> Services License<br />
When a text message is received, the LED starts flashing and the message alert signal sounds.<br />
The “New message“ icon, and a text with information of received message are displayed. The<br />
icon will remain in the display until all new messages are opened. If the message is received<br />
during a call a beep notifies the user.<br />
You can select "Yes" to read the message and reply to it, forward it, call the sender, or call the<br />
number in text. Alternately, you can select "No" and read the message later. The message is<br />
stored in the Inbox.<br />
Read a Stored Message<br />
To read a stored message:<br />
1. Press "Menu".<br />
2. Select “Messaging”.<br />
3. Select “Inbox”.<br />
4. Select a stored message from the list.<br />
5. Press "View".<br />
25
<strong>5624</strong> <strong>Wireless</strong> <strong>Handset</strong> <strong>User</strong> <strong>Guide</strong><br />
26<br />
Reply to a Message<br />
Press “Reply”.<br />
1. Press “Reply”.<br />
2. Enter message.<br />
3. Press "Send".<br />
4. if required, edit the number.<br />
5. Press "Send".<br />
Delete a Message<br />
1. Select "Inbox".<br />
2. Select a message to delete.<br />
3. Press "More".<br />
4. Select "Delete"<br />
5. Press "Yes" to confirm.<br />
Forward a Message<br />
1. Select "Inbox"<br />
2. Select a message.<br />
3. Press "View".<br />
4. Press "More".<br />
5. Select "Forward"<br />
6. If required, write additional text.<br />
7. Enter the number to which you will forward the message or press the middle soft key to<br />
open the phonebook and select a number.<br />
8. Press "Send" to forward the message.<br />
Call the Sender of the Message<br />
1. Select "Inbox".<br />
2. Select a message.<br />
3. Press "More".<br />
4. Select "Call sender".
Call a Number Included in a Message<br />
Messaging<br />
If the sender has written a number in the message you can call the number without dialling it.<br />
1. Select "View".<br />
2. Select "More".<br />
3. Select “Call no. in text” 1 .<br />
4. Select a number in the list.<br />
5. Press "Call".<br />
Save a Number<br />
1. Select "Inbox".<br />
2. Select a message.<br />
3. Select "View".<br />
4. Press "More".<br />
5. Select "Save number".<br />
6. Select "Work number", "Mobile number", or "Other number".<br />
7. Add a name and press "OK".<br />
8. Press "Save".<br />
The number will be added to the contact list.<br />
Write and Send a Message<br />
1. In the “Messaging” menu, select “Write new message”.<br />
2. Write the message. Keys 0-9, * and * or # can be used. A long press on the #-key displays<br />
special characters. See the <strong>Mitel</strong> <strong>5624</strong> <strong>Wireless</strong> <strong>Handset</strong> Configuration <strong>Guide</strong> to view all<br />
characters.<br />
3. Press "Send".<br />
You can save the message and send it later by pressing "Back” and selecting “Yes”. The<br />
message is stored under Unsent messages.<br />
4. Enter a number.<br />
5. Press "Send".<br />
The maximum message length is 160 characters.<br />
Note: Some characters require 2 bytes in the final message; therefore, the user will<br />
sometimes not be able to enter 160 characters.<br />
The first character entered will be an upper level character followed by lower level characters<br />
unless the * -key is pressed before entering the character.<br />
1. This option is visible only if the number consists of a minimum of 3 digits.<br />
27
<strong>5624</strong> <strong>Wireless</strong> <strong>Handset</strong> <strong>User</strong> <strong>Guide</strong><br />
28<br />
When pressing a particular key, the first available character on the key appears. See the <strong>Mitel</strong><br />
<strong>5624</strong> <strong>Wireless</strong> <strong>Handset</strong> Configuration <strong>Guide</strong>. To access another characters on the key, press<br />
the key until the character appears in the display.<br />
For example, to access the character E, press the 3 key twice. "E" appears in the display and<br />
is selected after a timeout or when another key is pressed.<br />
Open a Sent Message<br />
1. In the “Messaging” menu, select “Sent”.<br />
2. Select a message.<br />
3. Press "View" to read the message.<br />
Send a Message to Another Destination<br />
1. Enter “Messaging” menu. See the <strong>Mitel</strong> <strong>5624</strong> <strong>Wireless</strong> <strong>Handset</strong> Configuration <strong>Guide</strong>.<br />
2. Select “Inbox” or "Sent".<br />
3. Select a message.<br />
4. Press "More".<br />
5. Select "Forward".<br />
6. Press "Send".<br />
7. Enter the number.<br />
8. Press "Send".<br />
Receive a Message with Request for Answer<br />
In the status bar, a message with request for answer is indicated the same way as an ordinary<br />
message. See the <strong>Mitel</strong> <strong>5624</strong> <strong>Wireless</strong> <strong>Handset</strong> Configuration <strong>Guide</strong>.<br />
In the message list, the message with request for answer is indicated by the icon.<br />
Accept/Reject the Message<br />
Press the “Accept” or “Reject” soft key.<br />
When an acknowledged message has been replied to, the icon is shown in the message<br />
list. The text “Accepted” or “Rejected”, and the time and date are also added to the<br />
acknowledged message.<br />
Note: The option “Delete” is not available for a message with request for answer. An<br />
unacknowledged message can be deleted only from the message list.
Message Queuing and Message Priority<br />
Note: This feature applies to the <strong>5624</strong> Services license only.<br />
Messaging<br />
The default settings is that each message will be displayed without being interrupted by another<br />
message, except if the new message is of higher priority. Messages that are not shown yet are<br />
placed in a queue and the priority and time of reception determine the position in the queue.<br />
There are 9 levels of the priority. 1 is highest priority and 9 is lowest priority.<br />
If several of the messages have the same priority the message that was received first is shown<br />
first.<br />
If a new message with a higher priority is received while another message is read the new<br />
message will replace the old message in the display. The old message will be placed in the<br />
queue. If a new message with equal or lower priority is received while another message is read<br />
the new message will be placed in the queue.<br />
You can specify how long a message will be displayed. See the <strong>Mitel</strong> <strong>5624</strong> <strong>Wireless</strong> <strong>Handset</strong><br />
Configuration <strong>Guide</strong>.<br />
Prio 9<br />
14:01<br />
Prio 8<br />
13:59<br />
Prio 7<br />
14:04<br />
Message queue<br />
Prio 7<br />
14:04<br />
Prio 4<br />
14:03<br />
Prio 4<br />
14:03<br />
Prio 4<br />
13:58<br />
Prio 2<br />
13:59<br />
Current Mess<br />
Prio 1<br />
14:02<br />
Prio 9<br />
14:01<br />
Prio 2<br />
13:59<br />
Current Mess<br />
Prio 1<br />
14:02<br />
Figure 6: Message Queuing and Priority<br />
New messages<br />
010<br />
29
<strong>5624</strong> <strong>Wireless</strong> <strong>Handset</strong> <strong>User</strong> <strong>Guide</strong><br />
Interactive Messaging<br />
30<br />
Note: This system dependent feature applies to the <strong>5624</strong> Services license only.<br />
Interactive Messaging (IM) is a function that extends basic messaging. It enables handset users<br />
to access information from a client application in the system.<br />
For example, customized applications can be accessed from the handset. A list of actions can<br />
be included in the message sent from the application to the handset.<br />
An IM is indicated and viewed the same way as an ordinary message. See the <strong>Mitel</strong> <strong>5624</strong><br />
<strong>Wireless</strong> <strong>Handset</strong> Configuration <strong>Guide</strong>. It is saved along with other messages in the message<br />
list.<br />
When you read an IM it can display several options. Mark the appropriate IM and press “Select”.<br />
If the selected option requests input, enter the information required and press “OK”. Pressing<br />
the middle soft key changes the mode to digit or text input depending on the format of the<br />
message. A read message is indicated the same way as an ordinary message.<br />
Note: If a handset receives an IM update and the original message was deleted, the<br />
handset sends a negative acknowledge (NAK) to the system.<br />
The following figure illustrates a basic interactive message. The options depend on the<br />
configuration of the client application.<br />
Figure 7: Interactive Message<br />
Mobile data from the handset can instruct the application to send the interactive message. See<br />
the <strong>Mitel</strong> <strong>5624</strong> <strong>Wireless</strong> <strong>Handset</strong> Configuration <strong>Guide</strong>. You can then select an action from the<br />
list, such as sending a message back to the application and/or dialling a specific number.
Colored Messaging<br />
Messaging<br />
You can send colored messages to handsets. The application sending the message determines<br />
the color of the message. Colored messaging is useful for categorizing messages. In the <strong>Mitel</strong><br />
<strong>5624</strong> <strong>Wireless</strong> <strong>Handset</strong> Configuration <strong>Guide</strong>, there are two colored messages—a new<br />
message, and a read message—in the message inbox (left in the figure). The messages are<br />
indicated by a gradient color bar behind the envelopes. When reading a message, a gradient<br />
color bar is appears below the envelop (right in the figure).<br />
Figure 8: Colored Message<br />
To enable colored messaging, see the corresponding manual for the application used. In<br />
addition, colored labels can be mapped to message beep codes. See the WSM3 Installation<br />
and Operation <strong>Guide</strong>.<br />
Mobile Data<br />
Note: This is a system dependent feature for the <strong>5624</strong> Services license only.<br />
Note: This is a system dependent feature for the <strong>5624</strong> Services license only.<br />
Send Mobile Data<br />
You can send user entered data from the handset by pressing a pre-programmed hot key or<br />
soft key, or selecting a service. Mobile data can be used for actions such as opening a door,<br />
or starting or stopping a machine. The data can either be predefined, or entered after the hot<br />
key/soft key is pressed or service is selected.<br />
The data can be predefined when programming the soft/hot key or service. See the <strong>Mitel</strong> <strong>5624</strong><br />
<strong>Wireless</strong> <strong>Handset</strong> Configuration <strong>Guide</strong> for more information.<br />
31
<strong>5624</strong> <strong>Wireless</strong> <strong>Handset</strong> <strong>User</strong> <strong>Guide</strong><br />
Voice Mail<br />
32<br />
Send Mobile Data with a Prefix<br />
Mobile data with a prefix is sent from the handset by entering data and then pressing a<br />
pre-programmed hot key or soft key or selecting a service. Mobile data with a prefix can be<br />
used to send information to an application in the system.<br />
You define the prefix when you program the hot/soft key or service. See the <strong>Mitel</strong> <strong>5624</strong> <strong>Wireless</strong><br />
<strong>Handset</strong> Configuration <strong>Guide</strong>.<br />
Note: This feature is available only if configured in the system.<br />
Receive a Voice Mail<br />
When receiving a voice mail, the content of the voice mail notification appears automatically<br />
on the screen, and is also indicated by the “Voice mail message” icon in the status bar.<br />
If the content of the notification appears, press “Call” to dial the voice mail. If "Close” is selected,<br />
you can dial the voice mail by a long press on digit key “1” in standby mode or from the Inbox<br />
menu.<br />
Information is stored in the “Messaging” inbox until you listen to the voice mail messages.<br />
Check the Voice Mail Inbox<br />
The voice mail is indicated by a “Voice mail message” icon in the front of the voice mail<br />
message, and is also displayed first in the inbox list.<br />
1. In the “Messaging” menu, select “Inbox”.<br />
2. Select the voice mail message.<br />
3. Press “View”.<br />
4. Press “Call”.<br />
Voice mail will be displayed with one entry in the message list regardless of the number of voice<br />
mail received.<br />
One Key Voice Mail Access<br />
A long press on digit key “1” in standby mode will call your voice mail. If the extension number<br />
is not available the “Voice mail number not defined" window appears.<br />
Note: Some systems require the mailbox extension number to be downloaded to the<br />
handset. See the <strong>Mitel</strong> <strong>5624</strong> <strong>Wireless</strong> <strong>Handset</strong> Configuration <strong>Guide</strong>.
Alarm Operation<br />
Push-button Alarm<br />
Alarm Operation<br />
You press the red alarm button twice within two seconds to activate the alarm. By default the<br />
text “Personal Alarm” appears. The alarm is sent to the alarm centre that distributes it further.<br />
After that the handset returns to stand-by mode. Note that you can always trigger the alarm<br />
when you are speaking, editing your settings, or while the handset is locked.<br />
Acoustic Location Signal<br />
Test Alarm<br />
Note: The following system dependent features apply to the <strong>5624</strong> Personal Alarm license<br />
only. See the <strong>Mitel</strong> <strong>5624</strong> <strong>Wireless</strong> <strong>Handset</strong> Configuration <strong>Guide</strong>.<br />
An alarm can be followed by an Acoustic Location Signal (ALS). The ALS is a signal from the<br />
handset that sounds for a predefined period of time. You silence the signal by pressing the<br />
Mute button on the handset.<br />
If you press and hold the red alarm button until the (default) “Test Alarm” text appears the<br />
following occurs depending on the options specified:<br />
• A beep is heard.<br />
• The orange LED flashes twice.<br />
• The vibrator stirs.<br />
• The handset receives a notification that the alarm has been received by the system.<br />
• If configured, the Acoustic Location Signal (ALS) is activated after the alarm has been sent,<br />
or a call is established to a pre-defined number.<br />
If the parameter "Silent alarm" is set, ALS will not be triggered and you will not be notified<br />
that the alarm was sent.<br />
• information about the handset’s location is sent along with the alarm.<br />
Alarm with Location Information<br />
The <strong>5624</strong> handset is compatible with both the Cisco Mobility Services Engine (MSE) and the<br />
Ekahau Real Time Location System (RTLS), which provides a more accurate location than AP<br />
Location.<br />
33
<strong>5624</strong> <strong>Wireless</strong> <strong>Handset</strong> <strong>User</strong> <strong>Guide</strong><br />
34<br />
Cisco MSE Location<br />
APs measure the client signal strength for received data packets and forward the measurements<br />
to the Cisco Mobility Services Engine (MSE). Your system administrator must configure the<br />
<strong>5624</strong> handset for Cisco RTLS.<br />
Ekahau RTLS<br />
The <strong>5624</strong> handset collects information about the APs and their measured radio field strength<br />
and forwards the information to the Ekahau Positioning Engine: it calculates the location of the<br />
<strong>5624</strong> <strong>Handset</strong>. Your system administrator must configure the <strong>5624</strong> <strong>Handset</strong> for Ekahau RTLS.<br />
This function requires a license.<br />
Alarm with Data<br />
You must manually define and store the data. To use the function, one soft/hot key/Navigation<br />
key in the handset must be defined as a shortcut to the “Edit alarm data" menu. See the <strong>Mitel</strong><br />
<strong>5624</strong> <strong>Wireless</strong> <strong>Handset</strong> Configuration <strong>Guide</strong>. The stored data is added to all types of alarm at<br />
transmission.<br />
Automatic Call after Alarm<br />
You can configure a handset to call a pre-defined number after an alarm has been sent.<br />
Depending on the settings, the call can be established in the following modes;<br />
• Loudspeaking mode, or<br />
• Monitor mode, or<br />
• Normal mode.<br />
See the <strong>Mitel</strong> <strong>5624</strong> <strong>Wireless</strong> <strong>Handset</strong> Configuration <strong>Guide</strong> for more information.
Menu Tree<br />
Customizing the Menu Tree<br />
Menu Tree<br />
You can customize the menu tree, hiding any functions that you do not use. The functions to<br />
be hidden are defined in PDM. See the <strong>Mitel</strong> <strong>5624</strong> <strong>Wireless</strong> <strong>Handset</strong> Configuration <strong>Guide</strong>.<br />
35
<strong>5624</strong> <strong>Wireless</strong> <strong>Handset</strong> <strong>User</strong> <strong>Guide</strong><br />
Calls<br />
36<br />
Call list > 1234 12:00 > Call<br />
1235 14:00 More > Time of call<br />
etc. Edit number<br />
Save number > Work number<br />
Mobile<br />
number<br />
Other number<br />
Send message ><br />
Delete > Yes<br />
No<br />
Delete all > Yes<br />
Back No<br />
Missed calls > 2345 15:00 > Call<br />
2346 23 Sep 03 More > (same as<br />
above)<br />
etc. Back<br />
Divert callsa > All calls > Enter number: > Activ.<br />
No reply (same as<br />
(same as<br />
above)<br />
above)<br />
When busy (same as > (same as<br />
above)<br />
Back<br />
above)<br />
Presenceb > (examples below) > Deactivate > Yes<br />
Lunch break > Return time<br />
Left for the day<br />
Away from desk<br />
> Return date No<br />
Meeting<br />
Business trip<br />
Part-time<br />
> Return time<br />
Vacation > Return date<br />
Be on leave of<br />
absence<br />
> Return date<br />
Back soon<br />
Sick-leave<br />
VAB (Parental leave)<br />
Info<br />
> Return time<br />
Call<br />
servicesb ><br />
a. Depends on the VoIP protocol used.<br />
b. This function is configured by the administrator.
Contacts<br />
Call contact > Search<br />
From contact list<br />
Add contact > New > Name ><br />
Work number ><br />
Mobile number ><br />
Other number ><br />
Ring signal ><br />
From call list ><br />
Edit contact > Search<br />
From contact list > Name<br />
Work number<br />
Mobile number<br />
Other number<br />
Ring signal ><br />
Delete contact > Search<br />
From contact list ><br />
Central Phonebooka > Search by name > Call<br />
(First name:) More > View contact<br />
(Last name:) Add to cont.<br />
Send message<br />
Search by number > Call<br />
(Phone number:) More > (same as above)<br />
Last result > Call<br />
More > (same as above)<br />
a. This function is system dependent.<br />
Menu Tree<br />
37
<strong>5624</strong> <strong>Wireless</strong> <strong>Handset</strong> <strong>User</strong> <strong>Guide</strong><br />
Profile<br />
38<br />
Normal > Name<br />
Volume ><br />
Ring signals > Internal call > Play<br />
Back<br />
External call > (same as above)<br />
Callback > (same as above)<br />
Message alert > Play<br />
Back<br />
Vibrating alert > On<br />
On if silent<br />
Off<br />
Key sound > Click<br />
Tone<br />
Silent<br />
Answering > Answering key > Hook off<br />
Any key<br />
> Answer behaviour > Automatically<br />
Loudspeaking<br />
Divert callsa > All calls > Enter number<br />
Off<br />
No reply > (same as above)<br />
When busy > (same as above)<br />
Add new > (same as Normal<br />
above)<br />
a. Depends on the VoIP protocol used.
Messaging<br />
a. Visible if number consists of a minimum of 3 digits.<br />
Menu Tree<br />
Note: Applicable to <strong>Mitel</strong> <strong>5624</strong> Services and <strong>Mitel</strong> <strong>5624</strong> Personal Alarm only.<br />
Inbox > Message ><br />
list<br />
View > Reply > Enter text > Send<br />
More > Delete<br />
Forward<br />
Call sender<br />
Call no. in texta Close<br />
Save number<br />
> Call<br />
Back<br />
More > Delete > Yes<br />
No<br />
Back<br />
Delete all > Yes<br />
No<br />
Write new ><br />
message<br />
Enter text > Send > Enter number > Send<br />
Back<br />
“Contacts<br />
access”<br />
> Send<br />
Unsent > Message ><br />
list<br />
Edit > Send > Enter number<br />
> “Contacts<br />
access”<br />
More > Delete > Yes<br />
No<br />
Back<br />
Delete all > Yes<br />
No<br />
Sent > Message ><br />
list<br />
View > Forw. > Send > Enter number > Send<br />
Clear<br />
Back<br />
“Contacts<br />
access”<br />
> Send<br />
More > Delete > Yes<br />
No<br />
Call no. in<br />
texta<br />
> Call<br />
Close<br />
Save number > Work No.<br />
Mobile No.<br />
Other No.<br />
More > Delete > Yes<br />
No<br />
Back<br />
Delete all > Yes<br />
No<br />
39
<strong>5624</strong> <strong>Wireless</strong> <strong>Handset</strong> <strong>User</strong> <strong>Guide</strong><br />
Services<br />
40<br />
The Administrator can configure PPT.<br />
Note: Applicable to <strong>Mitel</strong> <strong>5624</strong> Services and <strong>Mitel</strong> <strong>5624</strong> Personal Alarm only.<br />
Add new > Enter<br />
name<br />
Service 1<br />
(example)<br />
> Phone call > Phone<br />
number<br />
a. This function is configured by the administrator.<br />
> Enter number > Save<br />
“Contacts<br />
access”<br />
Back<br />
> Save<br />
Send data > Enter prefix > Enter number > Save<br />
Clear<br />
Back<br />
Send message > Phone<br />
number<br />
> Enter number > Save<br />
“Contacts<br />
access”<br />
Back<br />
> Save<br />
PTT > PTT Groups a<br />
(example)<br />
Edit alarm data > Alarm data<br />
(example)<br />
> Select > (Sending<br />
message)<br />
More > Edit<br />
Delete > Yes<br />
No
Short cuts<br />
Soft Keys > Left > Name<br />
Function > Not used<br />
Phone call<br />
Call list<br />
Contact list<br />
Central<br />
Phonebook<br />
> Enter number<br />
a<br />
a. This function is system dependent.<br />
b. This function is configured by the administrator.<br />
c. Dynamic, appears only for certain functions.<br />
Message inbox<br />
Send message > Enter number<br />
Change profile > Profile A<br />
(example)<br />
Open a menu > Main menu<br />
Calls<br />
Connections<br />
Contacts<br />
Messaging<br />
Services<br />
Profiles<br />
Settings<br />
Presenceb ><br />
Services<br />
Logout<br />
Divert calls<br />
Show RSSI<br />
><br />
Control question<br />
Value<br />
> Off<br />
On<br />
c<br />
Middle > (same as Left key)<br />
Right > (same as Left key)<br />
Hot Keys > 0, 2–9 > Function > (same as above)<br />
Control question > Off<br />
On<br />
Navigation<br />
keys<br />
Multifunction<br />
button d<br />
> Up > Function > (same as above)<br />
Value c<br />
Control question > Off<br />
On<br />
Down > (same as Up key)<br />
Left > (same as Up key)<br />
Right > (same as Up key)<br />
> Long<br />
press<br />
> Function > (same as above)<br />
Value c ><br />
Control question > Off<br />
On<br />
Multi<br />
press<br />
> (same as Long<br />
press)<br />
Menu Tree<br />
41
<strong>5624</strong> <strong>Wireless</strong> <strong>Handset</strong> <strong>User</strong> <strong>Guide</strong><br />
Connections<br />
Settings<br />
42<br />
d. Applicable to <strong>Mitel</strong> <strong>5624</strong> and <strong>Mitel</strong> <strong>5624</strong> Services only.<br />
Headset > Mic on boom<br />
Mic on cable<br />
Hearing protection<br />
Network > Select > Network A (example)<br />
In charger > No action<br />
Switch off<br />
Sound off<br />
Change profile > Edit<br />
Back<br />
Sound &<br />
Alerts<br />
> Volume > Silent, Volume: 1–<br />
8<br />
Ring signals > Internal call > Fourteen different<br />
signals<br />
External call > (same as above)<br />
Callback > (same as above)<br />
Message alert > Message alert 1<br />
(example)<br />
> Play<br />
Back<br />
Vibrating alert > On<br />
On if silent<br />
Off<br />
Key sound > Click > Play<br />
Back<br />
Tone<br />
Silent<br />
> (same as above)<br />
Battery warning > Repeated sound<br />
Sound once<br />
Sound off<br />
Hearing aid > Off<br />
On<br />
Locks > Automatic key lock > On<br />
Off<br />
Phone lock > Auto phone lock > On<br />
On in charger<br />
Off<br />
Change PIN code ><br />
Display > Brightness > Normal<br />
Power save<br />
Screen saver > Information<br />
Black<br />
Rotate display text > Normal<br />
Inverted<br />
Font style > Normal<br />
Bold
Time & Date > Time format > 12:00am/pm<br />
12:00<br />
Date format > 01 Jul 10<br />
Jul 01 2010<br />
2010-07-01<br />
07/01/2010<br />
01/07/2010<br />
01-07-2010<br />
01.07.2010<br />
Menu Tree<br />
Answering > Answering key > Hook-off<br />
(Call-key)<br />
Any key<br />
Answering behaviour > Automatically > Change<br />
Back<br />
Loudspeaking > (same as above)<br />
Quick answer > (same as above)<br />
Messages > Text size > Normal<br />
Large<br />
Language > German (Deutsch), Dutch<br />
(Nederlands),<br />
French (Français) and so forth.<br />
Owner ID > Name:<br />
Alarma Edit alarm data<br />
Device info > Software<br />
Hardware<br />
License<br />
WLAN info<br />
Network info<br />
<strong>User</strong> ID<br />
a. Applicable to <strong>Mitel</strong> <strong>5624</strong> Personal Alarm only.<br />
43
<strong>5624</strong> <strong>Wireless</strong> <strong>Handset</strong> <strong>User</strong> <strong>Guide</strong><br />
In Call<br />
44<br />
You access the In Call menu during a call by pressing the "More" soft key.<br />
If the handset is configured via PDM/WSM, you can access a particular function in the In call<br />
menu directly by pressing the right soft key.<br />
Note: If the handset is configured via PDM/WSM, you can call a pre-defined emergency<br />
number while the handset is locked or the keypad is locked. If calling from a locked<br />
handset, you can only access the Microphone on/off function in the In Call menu.<br />
However, you can access the entire In Call menu when calling from a handset with a<br />
locked keypad.<br />
New call > Call<br />
“Phonebook<br />
access”<br />
Cancel<br />
Transf. to new > Call<br />
“Phonebook<br />
access”<br />
> Cancel<br />
Hold a<br />
> Retr.<br />
More<br />
End<br />
Conference a<br />
><br />
Contacts > Call contact > Call<br />
View<br />
Back<br />
Add contact > New > Name ><br />
Work number ><br />
Mobile number ><br />
> Other number ><br />
> Ring signal ><br />
From call list ><br />
Edit contact ><br />
Delete contact ><br />
Central<br />
Phonebookb > Search by name > Search<br />
Clear<br />
Back<br />
Search by > (same as<br />
number<br />
above)<br />
Last result > Call<br />
More<br />
Back<br />
><br />
Microphone off > More > Microphone on > (same as<br />
above)<br />
a. Conditional in-call function.<br />
b. This function is system dependent.<br />
Additional In Call Functions<br />
In addition to the default In Call functions, you can define 10 system specific codes for general<br />
purposes.
Navigate the Menu<br />
Connections Menu<br />
Figure 9: Main Menu<br />
Navigate the Menu<br />
1. Enter the menu by pressing the “Menu” soft key,, or the confirmation button on the Navigation<br />
key.<br />
2. Select in the menu, and press the confirmation button or the "Select" soft key.<br />
Headsets<br />
In order to achieve optimal audio quality we recommend you specify a headset type: Mic on<br />
boom, Mic on cable or Hearing protection.<br />
To specify a headset type:<br />
1. Select "Headset".<br />
2. Select a headset type from the list.<br />
3. Press "Select".<br />
(1) Messaging<br />
(2) Short cuts<br />
(3) Settings<br />
(4) Contacts<br />
(5) Profiles<br />
(6) Services<br />
(7) Connections<br />
(8) Calls<br />
If the pre-configured headset profile does not match the headset in use, or the audio<br />
performance is poor, you can configure a headset profile in PDM which will be available in the<br />
handset menu. See the <strong>Mitel</strong> <strong>5624</strong> <strong>Wireless</strong> <strong>Handset</strong> Configuration <strong>Guide</strong>.<br />
45
<strong>5624</strong> <strong>Wireless</strong> <strong>Handset</strong> <strong>User</strong> <strong>Guide</strong><br />
46<br />
In Charger<br />
Mute <strong>Handset</strong> While Charging<br />
When you place the handset in the charger it can be muted while it is charging. When it is<br />
removed from the charger it will switch on the sound again.<br />
Calls Menu<br />
1. Select “In charger”.<br />
2. Select "Other actions".<br />
3. Select “Sound off”.<br />
Deactivate the Charging Mode<br />
1. Select “In charger”.<br />
2. Select “No action”.<br />
3. Press "Select" to save the setting.<br />
1. Enter the menu by pressing the “Menu” soft key, or the confirmation button on the Navigation<br />
key.<br />
2. Select in the menu and press the confirmation button or the "Select" soft key.<br />
Call List<br />
The 25 last received, dialled or missed calls are stored in a call list. If a number occurs more<br />
than once, the last time stamp and the total number of occurrences are shown.<br />
Note: If supported by the system, the number’s contact name can be displayed in the<br />
call list.<br />
1. Select Call list, and step with the and to scroll in the call list.<br />
Dial a Number from the Call list<br />
1. Select a number to call.<br />
2. Press the "Call" soft key to dial.
View the Time of a Call<br />
1. Press the "More" soft key.<br />
2. Select "Time of call".<br />
The time and date are displayed.<br />
Edit a Number from the Call list<br />
1. Press the "More" soft key.<br />
2. Select "Edit number".<br />
Save a Number<br />
1. Press the "More" soft key.<br />
2. Select "Save number".<br />
Send a Message<br />
1. Press the "More" soft key.<br />
2. Select "Send message".<br />
Delete an Entry from the Call List<br />
1. Press the "More" soft key.<br />
2. Select an entry to delete.<br />
3. Select "Delete".<br />
4. Select "Yes" to delete the entry from the list.<br />
Delete all Entries from the Call List<br />
1. Press the "More" soft key.<br />
2. Select "Delete all".<br />
3. Select "Yes" to delete all of the entries from the list.<br />
Missed Calls<br />
1. Select Missed calls, and step with the and to scroll in the list.<br />
2. Press the "Call" soft key to call back.<br />
Navigate the Menu<br />
You can use the "More" soft key to view the time/date of the call, edit the received number, add<br />
contacts and delete received numbers. See the <strong>Mitel</strong> <strong>5624</strong> <strong>Wireless</strong> <strong>Handset</strong> Configuration<br />
<strong>Guide</strong> for information about this functionality.<br />
Note: The number’s contact name can be displayed in the Call list if it is supported by<br />
the system.<br />
47
<strong>5624</strong> <strong>Wireless</strong> <strong>Handset</strong> <strong>User</strong> <strong>Guide</strong><br />
48<br />
Push to Talk<br />
The Push-to-Talk (PTT) function enables a pre-defined group of mobile staff to participate in a<br />
call whereby they all listen to the group's call activity, typically in loudspeaker (Handsfree) mode.<br />
Participants press and hold a button in order to speak.<br />
For PTT to function, the PTT-capable handsets in the PTT group must be configured on the<br />
<strong>Wireless</strong> Messaging Services (WSM) Gateway. In addition, a conference bridge, such as <strong>Mitel</strong>'s<br />
Audio & Web Conferencing (AWC), must be configured to support the PTT calls.<br />
Two types of PTT calls can be made:<br />
• PTT Voice Style (initiated by the handset)<br />
• PTT Message Style (initiated by the system)<br />
PTT Voice Style Calls (<strong>Handset</strong> initiated)<br />
Each member of a PTT group is able to initiate a PTT call via a PTT request. This PTT Call<br />
request is typically programmed onto a soft key, hot key or multi-function button on the handset<br />
for quick access.<br />
After a PTT Call request is made, the system invites the other members of the PTT group into<br />
the PTT call. The invitation typically barges onto the invited members' handsets following brief<br />
alerting of the incoming PTT call; manual PTT Call acceptance can be configured optionally.<br />
After the PPT group members have received/accepted their PTT invitations, the system<br />
automatically dials them onto the configured conference bridge and they become active in the<br />
PTT call.<br />
Accept a PTT Invitation - Voice Style<br />
The PTT invitation is indicated by a icon and is received as an incoming call. In the dialog<br />
window, a message containing maximum 24 characters can also be shown.<br />
1. Press<br />
Note: Depending on the configuration, it may take 10 seconds or more for all members<br />
to be active on the PTT call from the time a user initiates a PTT request.<br />
Note: Multiple PTT groups are supported; if a handset is a member in multiple groups,<br />
the PTT Groups can be programmed onto the handset menu to enable selection of the<br />
appropriate PTT group Call request.<br />
The handset may accept the invitation automatically and start in inverted mute and loudspeaking<br />
mode, depending on the configuration of the received PTT invitation.<br />
2. Press and hold the Mute button to open the microphone for transmitting.<br />
The microphone is muted again when the Mute button is released.
Reject a PTT Invitation - Voice Style<br />
Navigate the Menu<br />
• Press to reject the PTT invitation. The handset will return to the previously shown<br />
screen. See the <strong>Mitel</strong> <strong>5624</strong> <strong>Wireless</strong> <strong>Handset</strong> Configuration <strong>Guide</strong>.<br />
PTT Message Style (System/Application initiated)<br />
This mode is typically used in conjunction with an application that triggers the PTT call based<br />
on a alarm or communication escalation.<br />
Note: This method requires an additional Alarm Management Server (AMS) module.<br />
Accept a PTT Invitation - Message Style<br />
Note: This feature applies to the <strong>5624</strong> Services license only.<br />
The PTT invitation is received as a message, can contain up to 1000 characters, and is viewed<br />
the same way as an ordinary message.<br />
1. Press the "Call" soft key.<br />
The handset may accept the invitation automatically and start in inverted mute and loudspeaking<br />
mode, depending on the configuration of the received PTT invitation.<br />
2. Press and hold the Mute button to open the microphone for transmitting.<br />
The microphone is muted again when the Mute button is released.<br />
Reject a PTT Invitation - Message Style 2<br />
Note: This feature applies to the <strong>5624</strong> Services license only.<br />
• Press "Reject" to reject the PTT invitation.<br />
The handset will return to the previously shown screen. See the <strong>Mitel</strong> <strong>5624</strong> <strong>Wireless</strong><br />
<strong>Handset</strong> Configuration <strong>Guide</strong>.<br />
Re-join a PTT Group<br />
If a PTT invitation (PTT Voice Style) is rejected or missed, the PTT group can be dialed from<br />
the Call list or from Missed calls, respectively. The PTT invitation is indicated by the icon<br />
in the list. See the <strong>Mitel</strong> <strong>5624</strong> <strong>Wireless</strong> <strong>Handset</strong> Configuration <strong>Guide</strong>.<br />
If a PTT invitation (PTT Message Style) is rejected, the PTT group can be dialed by selecting<br />
the message indicated by the icon in the Messaging inbox, and pressing the "Call" soft key.<br />
Call a PTT Group<br />
Note: PTT group(s) must be defined in PDM and Messaging Group(s) in WSM to be<br />
able to use this function. See the <strong>Mitel</strong> <strong>5624</strong> <strong>Wireless</strong> <strong>Handset</strong> Configuration <strong>Guide</strong>, and<br />
the WSM3 Installation and Operation <strong>Guide</strong>.<br />
49
<strong>5624</strong> <strong>Wireless</strong> <strong>Handset</strong> <strong>User</strong> <strong>Guide</strong><br />
50<br />
When calling a PTT group, the members in the defined PTT group will receive a PTT invitation<br />
as an incoming call (PTT Voice Style).<br />
1. Press "Menu".<br />
2. Select "Calls".<br />
3. Select "PTT groups" 1 .<br />
4. Select a PTT group.<br />
5. Press "Call", or the Off-hook key.<br />
Short Cuts Menu<br />
Predefined functions can be set as short cuts for the soft keys, hot keys, navigation keys, and<br />
the Multifunction button. For example, you can to define a soft key to make a call, as a short<br />
cut for sending a message, or as a short cut to a menu.<br />
1. Enter the menu by pressing the “Menu” soft key, or the confirmation button on the Navigation<br />
key.<br />
2. Select in the menu, and press the confirmation button or the "Select" soft key.<br />
Define Soft Keys<br />
1. Select "Soft keys".<br />
2. Select "Middle" or "Right".<br />
3. Press "Select".<br />
4. Enter a name for the soft key.<br />
5. Press "OK".<br />
6. Select "Function".<br />
7. Select a function from list.<br />
8. Press "Back".<br />
9. Select "Value" (applies to some of the functions).<br />
10. Press "Select".<br />
11. Enter a value (for example, enter a handset number).<br />
12. Press "Back".<br />
13. Select "Control question".<br />
14. Press "Select".<br />
15. Press "Back".<br />
16. Press "Save".<br />
1. Only available if a PTT group is defined in PDM/WSM.
Define Hot Keys<br />
1. Select "Hot keys".<br />
2. Select "0", "2" to "9".<br />
3. Select "Function".<br />
4. Press "Select".<br />
5. Select a function from list.<br />
6. Press "Back".<br />
7. Select "Value" (applies to some of the functions).<br />
8. Press "Select".<br />
9. Enter a value (for example, enter a handset number).<br />
10. Press "Back".<br />
11. Select "Control question".<br />
12. Press "Select".<br />
13. Press "Save".<br />
Define Navigation Keys<br />
1. Select "Navigation keys".<br />
2. Select "Up", "Down", "Left", or "Right".<br />
3. Select "Function".<br />
4. Press "Select".<br />
5. Select a function from list.<br />
6. Press "Back".<br />
7. Select "Value" (applies only to some functions).<br />
8. Press "Select".<br />
9. Enter a value for example a handset number.<br />
10. Press "Back".<br />
11. Select "Control question".<br />
12. Press "Select".<br />
13. Press "Save".<br />
Navigate the Menu<br />
51
<strong>5624</strong> <strong>Wireless</strong> <strong>Handset</strong> <strong>User</strong> <strong>Guide</strong><br />
52<br />
Define the Multifunction or Alarm 1 Button<br />
The Multi-function button can be defined with two different functions: a long press activates<br />
one function, and a double press activates another function.<br />
1. Select "Multi-function button"/"Alarm button".<br />
2. Select "Long press", or "Multi press".<br />
3. Select "Function".<br />
4. Press "Select".<br />
5. Select a function from list.<br />
6. Press "Back".<br />
7. Select "Value" (applies only to some functions).<br />
8. Press "Select".<br />
9. Enter a value (for example, enter a handset number).<br />
10. Press "Back".<br />
11. Select "Control question".<br />
12. Press "Select".<br />
13. Press "Save".<br />
Services Menu<br />
A list of predefined menu functions are available. Using the Services menu you can customize<br />
the menu with functions you use often.<br />
Note: The Services menu is only available on handsets with a Services or Alarm license.<br />
1. Enter the menu by pressing the “Menu” soft key, or the confirmation button on the Navigation<br />
key.<br />
2. Select in the menu, and press the "Select" soft key.<br />
Add a Service<br />
1. Select "Add new".<br />
2. Enter a name of the service in the field and press "OK".<br />
3. Select a function by using the and on the navigation key.<br />
4. Press "Select", or the confirmation button.<br />
5. If necessary, enter values in the fields (applies only to some functions)<br />
6. Press "Back".<br />
1. Applies to the <strong>5624</strong> Personal Alarm license only.
Messaging<br />
Edit a Service<br />
1. Select a service by using the and on the navigation key.<br />
2. Press "More"<br />
3. Select "Edit".<br />
4. Edit the service parameters.<br />
5. Press "Back".<br />
Delete a Service<br />
1. Select a service by using the and on the navigation key.<br />
2. Press "More".<br />
3. Select "Delete" by using on the navigation key.<br />
4. Press "Yes" to delete the service.<br />
5. Press "Back".<br />
Navigate the Menu<br />
1. Enter the menu by pressing the “Menu” soft key, or the confirmation button on the Navigation<br />
key.<br />
2. Select in the menu, and press the confirmation button or the "Select" soft key.<br />
Inbox<br />
Note: Messaging is only available on handsets with a Services or Alarm license.<br />
1. Select "Inbox" to view the message list.<br />
2. Select a message by using the and on the navigation key.<br />
Reply to a Sender<br />
1. Select "View".<br />
2. Select "Reply".<br />
3. Enter text.<br />
4. Select "Send".<br />
Delete a Message<br />
1. Select "More".<br />
2. Select "Delete".<br />
3. Select "Yes" to delete the message.<br />
53
<strong>5624</strong> <strong>Wireless</strong> <strong>Handset</strong> <strong>User</strong> <strong>Guide</strong><br />
54<br />
Forward a Message<br />
1. Select "View".<br />
2. Select "More".<br />
3. Select "Forward".<br />
4. Enter additional text if required.<br />
5. Select "Send".<br />
6. Enter a number.<br />
7. Select "Send" to forward the message.<br />
Call a Sender<br />
1. Select "View".<br />
2. Select "More".<br />
3. Select "Call Sender".<br />
Call a Number in Text<br />
1. Select "View".<br />
2. Select "More".<br />
3. Select "Call (No. in text)" 1 .<br />
4. Select a number from the list.<br />
5. Select "Call"<br />
Save a Number<br />
1. Select "View".<br />
2. Select "More".<br />
3. Select "Save number".<br />
4. Select "Work Number", "Mobile number, or "Other number".<br />
5. Press "Add".<br />
6. Enter a name for the contact.<br />
7. Press "OK".<br />
8. Press "Save". The number will be saved in the contact list.<br />
1. Only visible if the number consists of minimum 3 digits.
Write New Messages<br />
1. Select "Write new message".<br />
Navigate the Menu<br />
2. Enter text, and press "Send". See the <strong>Mitel</strong> <strong>5624</strong> <strong>Wireless</strong> <strong>Handset</strong> Configuration <strong>Guide</strong>.<br />
It is possible to save a message and send it later by pressing the soft key "Back" and<br />
selecting "Yes". The message will be stored under Unsent messages.<br />
3. Enter a number or press the middle soft key to open the phonebook.<br />
4. Press "Send".<br />
Unsent Messages<br />
1. Select "Unsent" to view the list.<br />
2. Select message to edit/send.<br />
3. Select "Edit", edit text and/or just select "Send".<br />
Delete/Delete All<br />
1. Select "More".<br />
2. Select "Delete" or "Delete all".<br />
3. Select "Yes" to delete the message not sent.<br />
Sent Messages<br />
1. Select "Sent" to view the list.<br />
2. Select "View".<br />
Forward a message<br />
1. Enter additional text if required.<br />
2. Enter a number or press the middle soft key to open the phonebook.<br />
3. Select "Send".<br />
Delete a Message<br />
1. Select "Delete".<br />
2. Select "Yes" to delete the message.<br />
Delete/Delete All<br />
1. Select "More".<br />
2. Select "Delete" or "Delete all".<br />
3. Select "Yes" to delete the unsent message.<br />
55
<strong>5624</strong> <strong>Wireless</strong> <strong>Handset</strong> <strong>User</strong> <strong>Guide</strong><br />
Profiles Menu<br />
56<br />
You can set up your own profiles for incoming calls, message alerts, vibrating alerts and key<br />
sounds. This can be useful when there are many users on the same handset and they want<br />
different sound profiles. It can also be used for temporarily settings, for example to silence the<br />
ring tone for incoming calls while in a meeting. You can readily switch between different profiles.<br />
1. Enter the menu by pressing the “Menu” soft key, or the confirmation button on the Navigation<br />
key.<br />
2. Select in the menu.<br />
Add a new Profile<br />
1. Press "Add new".<br />
2. Enter name of the profile.<br />
3. Select "Save".<br />
4. Press "More".<br />
5. Select "Add settings".<br />
6. Select the settings to be added to the profile.<br />
7. Repeat steps 3 to 6 to add additional settings.<br />
8. Select a setting and press "Edit" to make the changes.<br />
Delete a Profile<br />
1. Select a profile from the list.<br />
2. Press "More".<br />
3. Select "Delete" from the list.<br />
4. Press "Delete".<br />
5. Press "Yes" to confirm.<br />
Edit a Profile<br />
1. Select a profile from list.<br />
2. Press "More".<br />
3. Select "Edit" from menu.<br />
4. Select the information to be edited.<br />
5. Press "Edit".<br />
6. Perform any of the following options:<br />
• Edit a setting by marking it and then press "Edit".<br />
• Add additional settings by pressing "More" and selecting "Add setting" or "Import from".<br />
• Remove a setting by selecting it and selecting "More > Remove setting".<br />
7. Make changes and press "Save" to confirm.
Contacts Menu<br />
Navigate the Menu<br />
The handset has a local phonebook with 250 entries: you can add, delete, or edit names and<br />
numbers. The phonebook lists all names in alphabetical order. three numbers can be added<br />
for each contact: work number, mobile number, and other number.<br />
In addition, you can download a company phonebook to the handset via the PDM/WSM. You<br />
cannot edit or delete the company phonebook names and numbers. The phonebook lists all<br />
names in alphabetical order. The local and company phonebooks appear in the same list but<br />
the company names are indicated by a “Locked entry” icon in front of the name. The contact<br />
will include only the work number. See the <strong>Mitel</strong> <strong>5624</strong> <strong>Wireless</strong> <strong>Handset</strong> Configuration <strong>Guide</strong><br />
for more information.<br />
You can also access a central phonebook 1 . See the <strong>Mitel</strong> <strong>5624</strong> <strong>Wireless</strong> <strong>Handset</strong> Configuration<br />
<strong>Guide</strong>. You send a request to a messaging server with the first characters entered and the<br />
messaging server returns a list of names and numbers that matches the search.<br />
1. Enter the menu by pressing the “Menu” soft key, or the confirmation button on the Navigation<br />
key.<br />
2. Select in the menu. See the <strong>Mitel</strong> <strong>5624</strong> <strong>Wireless</strong> <strong>Handset</strong> Configuration <strong>Guide</strong>.<br />
Call a Contact<br />
1. Select "Call contact".<br />
2. Select contact from the list or enter name or number in the search field.<br />
3. Press the "Call" soft key.<br />
You can select "View" > "More" to edit the contact and send a message.<br />
Add a Contact<br />
1. Select "Add contact".<br />
Add a New Contact<br />
1. Select "New".<br />
2. Select "Add".<br />
3. Enter the name of the contact.<br />
4. Press "OK".<br />
5. Select "Work Number", or "Mobile number", or "Other number".<br />
6. Press "Add".<br />
7. Enter a number and press "OK".<br />
8. Press "Save"<br />
9. Press "Back".<br />
1. This is a system dependent function.<br />
57
<strong>5624</strong> <strong>Wireless</strong> <strong>Handset</strong> <strong>User</strong> <strong>Guide</strong><br />
58<br />
Different ring signals can be set to distinguish between contacts.<br />
Add a Contact from the Call List<br />
1. Select "From call list".<br />
2. Select a number.<br />
3. Press "Add".<br />
4. Select a number type.<br />
5. Press "Add".<br />
6. Enter a name for the contact.<br />
7. Press "OK".<br />
8. Press "Save".<br />
Edit a Contact<br />
1. Select "Edit contact".<br />
2. Select a contact.<br />
3. Press "Edit".<br />
4. Select "Work Number", or "Mobile number", or "Other number".<br />
5. Press "Edit".<br />
6. Enter a new name or number.<br />
7. Press "OK".<br />
8. Press "Save".<br />
Delete a Contact<br />
1. Select "Delete contact".<br />
2. Select a contact.<br />
3. Press "Delete".<br />
4. Press "Yes" to confirm.<br />
Central Phonebook<br />
In the Central Phonebook it is possible to search by name or number.<br />
When the search result is ready you can view contact information, add the number to a new<br />
contact, or send a message by selecting the "More" soft key. You can also call the number by<br />
selecting the "Call" soft key.<br />
• Select "Central phonebook".
Search by Name<br />
1. Select "Search by name".<br />
2. Enter a first name and/or a last name.<br />
3. Select "Search".<br />
The search result appears.<br />
Search by Number<br />
1. Select "Search by number".<br />
2. Enter a handset number.<br />
3. Select "Search".<br />
The search result appears.<br />
View the Last Search Result<br />
1. Select "Last result".<br />
Settings Menu<br />
Only the last result appears.<br />
The following settings apply to the <strong>5624</strong> handset.<br />
1. Enter the menu by pressing the “Menu” soft key.<br />
2. Select in the menu.<br />
Sound and Alert Settings<br />
Adjust the Ringer Volume<br />
1. Select "Sound & Alerts".<br />
2. Select “Volume”.<br />
3. Step with to increase the volume and with to decrease it.<br />
4. Press "Back" to save the setting.<br />
Set Ring Signals for Internal Calls, External Calls and Call Backs<br />
1. Select “Sound & Alerts”.<br />
2. Select “Ring signals”.<br />
You can set different signals for internal calls, external calls and call backs.<br />
3. Select "Internal call", "External call", or "Callback".<br />
The handset has 14 different ring signals.<br />
4. Select a sound.<br />
You can press "Play" to listen to the different sounds.<br />
Navigate the Menu<br />
59
<strong>5624</strong> <strong>Wireless</strong> <strong>Handset</strong> <strong>User</strong> <strong>Guide</strong><br />
60<br />
5. Press "Back".<br />
Set Message Alerts for Mail<br />
1. Select "Sound & Alerts.<br />
2. Select “Message alert”.<br />
You can select from 8 different message alerts.<br />
3. Select a message alert from list.<br />
You can press "Play" to listen to the different sounds.<br />
4. Press "Back".<br />
Turn the Vibrator On/Off<br />
1. Select "Sound & Alerts.<br />
2. Select “Vibrator alert”.<br />
3. Select “On”, “On if silent” (that is, the vibrator is on when the handset is muted), or “Off”.<br />
4. Press "Back".<br />
Set the Key Sound<br />
When you set the sound key, every time a key is used the handset produces a faint sound.<br />
1. Select "Sound & Alerts".<br />
2. Select “Key sound”.<br />
3. Select “Silent, “Click”, or “Tone”.<br />
4. Select a key sound.<br />
5. Press "Back".<br />
You can listen to the key sound by pressing the "Play" soft key.<br />
Set the Battery Warning Tone<br />
If desired, a low battery can be indicated by a tone, a repeated sound or be set to silent.<br />
1. Press “Menu”.<br />
2. Select “Settings” in the menu.<br />
3. Select “Sound & Alerts”.<br />
4. Select “Battery warning”.<br />
The default battery warning is “Repeated sound”.<br />
5. Select “Repeated sound, “Sound once” or “Sound off”.<br />
6. Press “Back”.
Configure <strong>Handset</strong> for Hearing Aid<br />
The handset may be configured for use with hearing aid.<br />
1. Press “Menu”.<br />
2. Select “Settings” in the menu.<br />
3. Select “Sound & Alerts”.<br />
4. Select “Hearing aid”.<br />
5. Select “On“ or “Off”.<br />
6. Press “Back” repeatedly until the idle screen appears.<br />
Phone Lock Settings<br />
Activate the Automatic Key Lock<br />
1. Select “Locks”.<br />
2. Select "Automatic key lock".<br />
Navigate the Menu<br />
3. Select "On" to activate the automatic key lock.<br />
Note: You can answer/close an incoming call and/or press the alarm button while the<br />
keypad is locked. If configured in PDM/WSM, you can call an emergency number while<br />
the keypad is locked. See the <strong>Mitel</strong> <strong>5624</strong> <strong>Wireless</strong> <strong>Handset</strong> Configuration <strong>Guide</strong>.<br />
Activate the Phone Lock<br />
You can protect a handset from unauthorized use. If the Activate phone lock function is activated<br />
you must enter a PIN code at power on, or when the handset is placed in a charger. The phone<br />
lock is activated when the handset is placed in the charger. The default phone lock code (0000)<br />
can be changed to any 4 -8 digit code.<br />
Note: If configured in the handset, you can call an emergency number while the handset<br />
is locked. See the <strong>Mitel</strong> <strong>5624</strong> <strong>Wireless</strong> <strong>Handset</strong> Configuration <strong>Guide</strong>.<br />
1. Select “Locks.<br />
2. Select "Phone Lock".<br />
3. Select “Auto phone lock”.<br />
4. Select “On”, or "On in charger".<br />
5. Enter a PIN code.<br />
6. Press "OK".<br />
If the PIN code is forgotten it can be removed by your distributor.<br />
Deactivate the Phone Lock<br />
1. Select “Locks > "Phone Lock" > “Auto phone lock”.Select "Phone Lock".<br />
2. Select “Off”.<br />
61
<strong>5624</strong> <strong>Wireless</strong> <strong>Handset</strong> <strong>User</strong> <strong>Guide</strong><br />
62<br />
3. Enter a PIN code.<br />
4. Press "OK".<br />
Change the PIN Code<br />
1. Select “Locks”.<br />
2. Select "Phone Lock".<br />
3. Select "Change PIN code".<br />
4. Enter the old PIN code.<br />
5. Press "OK".<br />
6. Enter a new PIN code twice.<br />
7. Press "Save".<br />
Display Settings<br />
Screen Saver<br />
1. Select “Display”.<br />
2. Select “Screen saver”.<br />
3. Select “Information”, or “Black”.<br />
Selecting "Information" displays time and status information. The display turns off when the<br />
handset is not used.<br />
4. Press "Back".<br />
Brightness<br />
1. Select “Display”.<br />
2. Select “Brightness”.<br />
3. Select “Normal” or “Power save”.<br />
4. Press "Back".<br />
Contrast<br />
1. Select “Display”.<br />
2. Select “Contrast”.<br />
3. Increase/decrease the contrast by pressing and on the Navigation key.<br />
4. Press "Back".
Rotate Display Text<br />
Navigate the Menu<br />
The handset may be configured to show the contents of the display (except the soft key bar)<br />
upside-down at incoming calls or messages. This setting makes it possible to check the<br />
display while the handset remains clipped to a belt or pocket. The display will revert to normal<br />
when any key is pressed (except up/down on the Navigation key).<br />
1. Press “Menu”.<br />
2. Select “Settings” in the menu.<br />
3. Select “Display”.<br />
4. Select “Rotate display text”.<br />
5. Select “Normal” or “Inverted”.<br />
6. Press “Back” repeatedly until the idle screen appears.<br />
Font style<br />
The handset may be configured to show menu texts in bold font for increased readability.<br />
1. Press “Menu”.<br />
2. Select “Settings” in the menu.<br />
3. Select “Display”.<br />
4. Select “Font style”.<br />
5. Select “Normal” or “Bold”.<br />
Time and Date Settings<br />
The time and date are received from the system. If the time and date are changed in the system,<br />
it takes up to 24 hours before the changes appear in the handset. If the handset is turned off<br />
and then turned on, the changes will be applied immediately. However, it is possible to change<br />
the format of the time and date.<br />
Set the Time Format<br />
1. Select "Time & Date".<br />
2. Press "Select".<br />
3. Select a time format.<br />
The actual time format will be displayed. The time formats include:<br />
• 12:00 (AM/PM)<br />
• 24:00<br />
4. Press "Select" to save the setting.<br />
63
<strong>5624</strong> <strong>Wireless</strong> <strong>Handset</strong> <strong>User</strong> <strong>Guide</strong><br />
64<br />
Set the Date Format<br />
1. Select “Time & Date”.<br />
2. Press "Select".<br />
3. Select “Date format”.<br />
4. Press "Select".<br />
The date formats include:<br />
• DD MMM YY, for example 30 Jan 11<br />
• MMM DD YYYY, for example Jan 30 2011<br />
• YYYY-MM-DD, for example 2011-01-30 (ISO 8601)<br />
• MM/DD/YYYY, for example. 01/30/2011 (also called US)<br />
• DD/MM/YYYY, for example 10/01/2011 (also called Europe)<br />
• DD-MM-YYYY, for example 30-01-2011<br />
• DD.MM.YYYY, for example. 30.01.2011<br />
5. Press "Select" to save the setting.<br />
Answering<br />
By default the handset uses the Off-hook key when answering calls. You can configure the<br />
handset to answer calls automatically (without pressing a key) and can set loudspeaking mode.<br />
You can associate the answering behavior with any key. If you select "Any key", any key except<br />
the "On-hook" and "Sound off" keys, can be used to answer a call.<br />
1. Select in the menu. See the <strong>Mitel</strong> <strong>5624</strong> <strong>Wireless</strong> <strong>Handset</strong> Configuration <strong>Guide</strong>.<br />
2. Select “Answering”.<br />
Answering Key<br />
By default the answering key is set to Hook-off.<br />
1. Select "Answering key"<br />
2. Select "Hook-off" or "Any key".<br />
3. Press "Back" to save the setting.
Answering Behavior<br />
1. Select "Answering behaviour".<br />
2. Select "Automatically", "Loudspeaking", or "Quick answer".<br />
At Quick answer, the call is connected by lifting the handset out of the charger.<br />
3. Press "Change" to change the setting.<br />
The check box will be selected.<br />
4. Press "Back" to save the setting.<br />
5. To optionally remove the setting, press "Change".<br />
The check box will be cleared.<br />
Change Text Size for Messages<br />
1. Select "Messages".<br />
2. Select "Text size Normal".<br />
The default text size is "Normal".<br />
3. Select "Normal" or "Large".<br />
4. Press "Back".<br />
Change the Menu Language<br />
1. Select “Language”.<br />
Navigate the Menu<br />
2. Select the laungague to be used: Brazilian Português (Brazilian Portuguese), (Czech),<br />
Dansk (Danish), Deutsch (German), English, Español (Spanish), Français (French),<br />
(Greek), (Hungarian), Italiano (Italian), Nederlands (Dutch), Norska (Norwegian), (Polish),<br />
(Russian), (Slovakian), Soumi (Finish), Svenska (Swedish), or (Turkish).<br />
3. Press "Back".<br />
Note: The languages mentioned above are the default languages. You can download<br />
an additional language to the handset. See the <strong>Mitel</strong> <strong>5624</strong> <strong>Wireless</strong> <strong>Handset</strong><br />
Configuration <strong>Guide</strong>.<br />
Change Owner ID<br />
The Owner ID is set to identify the handset.<br />
1. Select "Owner ID".<br />
2. Enter a name/identity.<br />
3. Press "Save".<br />
To view the handset’s software version, enter *#34# in idle mode.<br />
65
<strong>5624</strong> <strong>Wireless</strong> <strong>Handset</strong> <strong>User</strong> <strong>Guide</strong><br />
Troubleshooting<br />
66<br />
This section contains information on how to solve common operational problems and warnings<br />
you may receive.<br />
If you cannot resolve the issue contact your system administrator.<br />
If others are experiencing similar problems there may be a system error.<br />
Operational Problems<br />
Fault Probable cause Action or comment<br />
No display The battery level is low or the handset is<br />
defective.<br />
No ringing The sound off icon is on, or the ringer<br />
volume set to silent, or the handset is<br />
defective.<br />
No change in<br />
Time & Date<br />
setting<br />
Charge the battery or contact the system<br />
administrator.<br />
Long press the Sound off key or Mute<br />
button to increase the volume or contact<br />
system the administrator.<br />
PBX dependent Changes in the handset appear 24 hours<br />
or sooner after a system change or by<br />
turning on and off the handset.
Error or Warning Messages<br />
Display shows Probable cause Action or comment<br />
No access The network is in range but there are<br />
no access rights.<br />
No System. The handset<br />
beeps once a minute<br />
(during max 30 minutes)<br />
with a low tone followed<br />
by a high tone (if enabled,<br />
the vibrator also follows<br />
the beeps).<br />
SERVICE required<br />
Parameters corrupt<br />
Note: This display<br />
message is only shown in<br />
English.<br />
SERVICE required<br />
Invalid IPDI<br />
Note: This display<br />
message is only shown in<br />
English.<br />
The handset is out of coverage or<br />
handset is defective.<br />
Troubleshooting<br />
Switch off the handset and then<br />
switch it on again or contact your<br />
system administrator.<br />
Stop the beep with the Sound off<br />
key and go into range.<br />
Note: When re-entering the<br />
coverage area it can take a couple<br />
of minutes before the handset<br />
automatically registers with the<br />
system.<br />
or<br />
contact the system administrator.<br />
The handset is defective. Select the reset option on the<br />
middle soft key if available. If no<br />
reset option is available or fault<br />
does not resolve the issue the<br />
handset needs repair.<br />
Easy replacement procedure not<br />
followed correctly or failure during<br />
easy replacement procedure.<br />
Send the handset for service.<br />
Enter PIN code The handset’s lock is activated. Enter the required PIN code. If the<br />
PIN code is lost enter a new one<br />
via PDM or do a factory reset via<br />
the PDM.<br />
Battery low, charge now The battery level is low. Charge or replace the battery.<br />
Phonebook is not<br />
available at the moment.<br />
Voice mail number not<br />
defined<br />
Could not encrypt<br />
connection.<br />
The phonebook does not respond, not<br />
available at the moment.<br />
There is no Voice mail number<br />
defined in the handset.<br />
The parameter "Encryption Required"<br />
is enabled in the handset in<br />
combination with;<br />
1. Unencrypted base station(s);<br />
and/or,<br />
2. Unsupported base station(s).<br />
Try again later. If the fault persists<br />
do a factory reset via the Admin<br />
menu or PDM.<br />
Define a Voice mail number via the<br />
PDM.<br />
1. Disable the "Encryption<br />
Required" parameter in<br />
handset; and/or,<br />
2. Enable the encryption in the<br />
base station(s); and/or,<br />
Note: If a base station(s) is<br />
used, the software version<br />
must be 3.1.x or later.<br />
3. Use supported base station(s).<br />
Ask your supplier.<br />
67
<strong>5624</strong> <strong>Wireless</strong> <strong>Handset</strong> <strong>User</strong> <strong>Guide</strong><br />
68<br />
Display shows Probable cause Action or comment<br />
Not allowed 1) The handset that has shared phone<br />
functionality enabled cannot be<br />
logged in because another<br />
handset/user is using the extension.<br />
LED Error Indications<br />
Note: If you require a password (AC<br />
code) to log in a handset and the<br />
handset is logged in, you can log in a<br />
second handset. The first logged in<br />
handset will automatically be logged<br />
out.<br />
2) The extension (user) does not<br />
exist.<br />
3) The password is incorrect.<br />
See the <strong>Mitel</strong> <strong>5624</strong> <strong>Wireless</strong> <strong>Handset</strong> Configuration <strong>Guide</strong>.<br />
LED is flashing red, quick flash, (100 ms on, 800 ms off)<br />
1. If a third handset, that is another handset than the "old" (the replaced handset) and "new"<br />
(the replacement headset) handset, is inserted into the charger during Easy Replacement,<br />
this error indication appears. Change to the correct handset.<br />
2. The charger has found that Easy Replacement does not work. Change back to the "new"<br />
handset.<br />
LED is flashing red, long flash (800 ms on, 100 ms off)<br />
1) Log out the handset that uses<br />
the extension.<br />
2) Make sure that you entered the<br />
correct extension. if required,<br />
contact the system administrator.<br />
3) Make sure you have entered the<br />
correct password. Contact the<br />
system administrator if you have<br />
forgot the password.<br />
Error during Easy Replacement. Both telephones need to be sent for service.
Operation Notice<br />
Accessibility and Voice Quality<br />
Operation Notice<br />
The base network is not always available. If you do not get in contact with your system, contact<br />
your system administrator. For best voice quality, avoid positioning near computer, radio or<br />
similar equipment.<br />
Operating Area<br />
You can only use the handset in the area that is covered by your system. Outside this area you<br />
will loose contact with the system. The signal strength icon will be low and “Searching” will<br />
appear.<br />
Out of Range<br />
When you leave the system's coverage area a short beep sounds and the text “Searching” will<br />
appear in the display.<br />
The out of range beep will be repeated every minute for 30 minutes. You can turn off the sound<br />
by long pressing , or .<br />
When re-entering the coverage area it can take a couple of minutes before the handset<br />
automatically registered with the system.<br />
69
<strong>5624</strong> <strong>Wireless</strong> <strong>Handset</strong> <strong>User</strong> <strong>Guide</strong><br />
Maintenance<br />
Maintenance of Batteries<br />
70<br />
Battery Warnings<br />
The "Low battery" icon appears when the battery has 10% or less remaining capacity. In<br />
addition; a warning signal sounds every minute, the LED flashes orange, and the dialog<br />
window shows "Battery low". "Charge now" appears.<br />
The "Empty battery" icon flashes when the battery has 5% or less remaining capacity. In<br />
addition; a warning signal sounds every second, the LED flashes red, and the dialog<br />
window "Battery empty. Shutting down." appears.<br />
During a call, only the corresponding battery warning signal will notify the user. The warning<br />
signal cannot be silenced during a call. When not in call, the warning signal can be silenced<br />
by pressing or .<br />
Charge the Battery<br />
Place the handset in the desktop charger or in the rack charger. The battery is being charged<br />
when the LED on the handset is steady orange. When the battery is fully charged the LED will<br />
be green.<br />
The animated battery icon indicates the battery is charging. The icon indicates a fully<br />
charged battery.<br />
Note: Only use the prescribed chargers for charging.<br />
Charge Spare Batteries<br />
Spear batteries can be charged with a separate battery pack charger. It can charge six batteries<br />
at the same time.<br />
Replace the Battery<br />
If the standby time for the handset becomes too low you must replace the battery with a new<br />
one. Contact your system administrator or your supplier to obtain new batteries.<br />
Attach the battery as described in the following illustration. You attach the battery inside the<br />
battery lid. It is connected it to the handset in such a way that "no miss-contact" is possible.
Figure 10: Easy Replaceable Battery - Unlock the Lid and Remove the Battery<br />
Easy Replacement of <strong>Handset</strong><br />
Maintenance<br />
Easy replacement can be used if a handset needs to be replaced. The easy replacement<br />
procedure is done via the handset display and the <strong>5624</strong> Programmer, or the rack charger.<br />
The following settings are replaced during easy replacement:<br />
• registration<br />
• <strong>User</strong> parameters (including <strong>User</strong> ID)<br />
• Contacts<br />
• The extension number is assigned to the new handset.<br />
The following settings are not replaced during the easy replacement:<br />
• Call list<br />
• Messages<br />
• License(s) 1<br />
Before Starting the Easy Replacement Procedure<br />
1. Check that both the old handset (that is, the handset to be replaced) and the new handset<br />
(that is, the replacement handset) are of the same device type (<strong>5624</strong>).<br />
Note: It is possible to perform Easy Replacement between different licenses (that is;<br />
<strong>5624</strong> Standard, <strong>5624</strong> Services, <strong>5624</strong> Personal Alarm, and <strong>5624</strong> Location). The new<br />
handset’s license is not replaced by the old handset’s license during the procedure 1 .<br />
2. Make sure that the handset batteries are charged before starting the easy replacement<br />
procedure.<br />
3. Switch off the new handset by long pressing .<br />
1. A license (that includes the handset variant and/or license dependent features) can be moved to another handset using<br />
PDM/WSM.<br />
71
<strong>5624</strong> <strong>Wireless</strong> <strong>Handset</strong> <strong>User</strong> <strong>Guide</strong><br />
72<br />
Easy Replacement Procedure<br />
During the Easy Replacement procedure, the LEDs of the handset and the charger follow the<br />
same LED indications. This means that if the old handset has a broken display, the LED<br />
indications on the charger and on the handset can be used to follow the replacement procedure.<br />
Before and after easy replacement, the LEDs may have different LED indications. For more<br />
details, see the <strong>Mitel</strong> <strong>5624</strong> <strong>Wireless</strong> <strong>Handset</strong> Configuration <strong>Guide</strong>.<br />
IMPORTANT: Never remove a handset from the charger until the instructions in the<br />
display or the LED tells you to do so. (See the status on the LED if the display is broken).<br />
If an error is indicated you may be able to remove the handset. See the <strong>Mitel</strong> <strong>5624</strong> <strong>Wireless</strong><br />
<strong>Handset</strong> Configuration <strong>Guide</strong> for further instructions.<br />
After you place the old handset in the charger, you must place the new handset in the<br />
charger, regardless of whether the replacement was successful or not. Failing to do so<br />
may result in malfunction and the new handset will need servicing.<br />
Figure 11: Easy Replacement using the <strong>5624</strong> Programmer
1 On the new handset, press and hold<br />
Note: Do not release until you are instructed to do so.<br />
LED Indications during Easy Replacement<br />
Maintenance<br />
2 Put the new handset in the charger.<br />
3 When the text "Start phone replacement?" appears, release<br />
Press "Yes" (left soft key).<br />
.<br />
4, 5<br />
The text "Follow the instructions. Each step can take several minutes." appears.<br />
Press "OK"(left soft key).<br />
When the text "Please insert old phone in charger" appears, replace the new handset with the<br />
old handset. The handset can either be switched on or off.<br />
Note: If the rack charger is used, the same charging slot has to be used for both handsets.<br />
The handset will be restarted and after a few seconds.<br />
The text "Saving settings appears.<br />
Do not remove phone from charger" appears. The charger LED changes to slow orange<br />
flashing.<br />
IMPORTANT: Do not remove the handset while the text "Saving settings. Do not remove phone<br />
from charger" appears. It may take several minutes.<br />
6, 7 When the text "Please insert new phone in charger" appears, replace the old handset with the<br />
new handset.<br />
The text "Restoring settings" appears.<br />
IMPORTANT: Do not remove the handset while the text "Restoring settings" appears<br />
8 When the text "Phone successfully replaced. Please remove phone to restart." appears, remove<br />
the handset from the charger. The handset is automatically restarted.<br />
The following table shows the LED indications that are used for the <strong>5624</strong> and the charger during<br />
the easy replacement procedure.<br />
LED indication Description<br />
Orange, flashing (1 000 ms on, 1 000 ms off) File transfer during Easy Replacement<br />
Orange, flashing (100 ms on, 800 ms off) “Change phone” indication during Easy Replacement<br />
Red, flashing (100 ms on, 800 ms off) Error indication during Easy Replacement. Put back old<br />
handset in charger<br />
Red, flashing (900 ms on, 100 ms off) Error during Easy Replacement. Service required for<br />
both handsets<br />
See the <strong>Mitel</strong> <strong>5624</strong> <strong>Wireless</strong> <strong>Handset</strong> Configuration <strong>Guide</strong>.<br />
73
<strong>5624</strong> <strong>Wireless</strong> <strong>Handset</strong> <strong>User</strong> <strong>Guide</strong><br />
Attach the Hinge-type Clip<br />
74<br />
Attach the hinge-type belt clip as shown in the illustration below.<br />
Attach the Swivel-type Clip<br />
Figure 12: Screw the Hinge-type Clip into Position<br />
Attach the swivel-type belt clip as shown in the illustration below.
Attach a Cover without a Clip<br />
Figure 13: Screw the Swivel-type Clip into Position<br />
Maintenance<br />
Attach the enclosed cover as shown in the illustration below when no clip is to be used.<br />
Related Documents<br />
• <strong>Mitel</strong> <strong>5624</strong> WiFi <strong>Handset</strong> Datasheet<br />
Figure 14: Screw the Cover into Position<br />
• <strong>Mitel</strong> <strong>5624</strong> <strong>Wireless</strong> <strong>Handset</strong> <strong>User</strong> <strong>Guide</strong><br />
• <strong>Mitel</strong> <strong>5624</strong> <strong>Wireless</strong> <strong>Handset</strong> Quick Reference <strong>Guide</strong><br />
• <strong>Mitel</strong> <strong>5624</strong> <strong>Wireless</strong> <strong>Handset</strong> Configuration <strong>Guide</strong><br />
• Portable Device Manager, Windows Version, Installation and Operation <strong>Guide</strong><br />
• WSM3 Installation and Operation <strong>Guide</strong><br />
75
<strong>5624</strong> <strong>Wireless</strong> <strong>Handset</strong> <strong>User</strong> <strong>Guide</strong><br />
76
Index<br />
NUMERICS<br />
3rd party 10<br />
A<br />
Antenna 3<br />
B<br />
Battery 3, 70<br />
low battery 8, 70<br />
C<br />
C (Clear) button 11<br />
Call info 10<br />
Call service 10<br />
Calling<br />
answered call 9<br />
call a number from the call list 17<br />
dial a number 17<br />
missed call 9<br />
outgoing call 9<br />
quick call by a name in the phonebook 17–18<br />
Case 3<br />
Centralized phonebook 57<br />
Chemical resistance 7<br />
Clip 3<br />
D<br />
Delete a Text Message 26<br />
E<br />
Earpiece 3<br />
Easy replacement 71<br />
F<br />
Forward a Text Message 26<br />
H<br />
Handsfree key 1<br />
Headset connector 1<br />
I<br />
Icons 8<br />
L<br />
LED indications 73<br />
Loudspeaker 3<br />
Loudspeaking 8, 19<br />
M<br />
Menu tabs 9<br />
Message<br />
new message 8, 25<br />
old message 8<br />
voice message 8<br />
Microphone 3<br />
Mute button 11<br />
N<br />
Navigation Key 11<br />
Number input mode 13<br />
O<br />
On/Off button 11<br />
Ongoing call 10<br />
Operating Area 69<br />
Out of Coverage 69<br />
P<br />
PIN code 61<br />
Push to Talk 48<br />
R<br />
Reply to a Text Message 26<br />
Ring signal muted 8<br />
S<br />
Signal strength 8<br />
Standby mode<br />
date 7<br />
time 7<br />
user identity 7<br />
T<br />
Text input mode 13<br />
W<br />
Writing Text/Numbers<br />
add space in text 13<br />
pause 13<br />
upper/lower case 13<br />
Index<br />
77