Hydronic M-II (Water Heater) - Espar
Hydronic M-II (Water Heater) - Espar
Hydronic M-II (Water Heater) - Espar

Create successful ePaper yourself
Turn your PDF publications into a flip-book with our unique Google optimized e-Paper software.
Installation Procedures<br />
Push/Pull Switch<br />
• Mount switch in a location where it is easily accessible<br />
• Mount using hardware supplied<br />
• Connect the switch harness to the connector at the heater<br />
and run the harness to the switch location<br />
• Cut harness to length at the switch and install terminals<br />
• Connect wiring as described below<br />
Note: Switch light glows when pulled out and is off when<br />
pushed in.<br />
Brown- 31 Power from battery “-”<br />
Red- K(15) Power from battery “+”<br />
Yellow-15(K) Switch control to the heater<br />
Blue/White Diagnostic from heater (disregard - tape end<br />
and tie off to the side)<br />
P/N 5670007 (12v)<br />
P/N 5670008 (24v)<br />
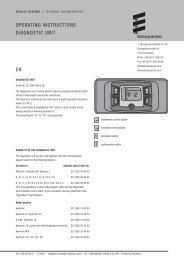
Programmable Timer<br />
P/N 5670433 (12v)<br />
P/N 5670434 (24v)<br />
18<br />
I AUTO O RUN P<br />
P M<br />
1 2 3 4 5 6 7<br />
P 1...7 h m<br />
R<br />
IMPORTANT: This electronic timer has a maximum loading<br />
printed on the rating label and under no circumstances<br />
should this be exceeded.<br />
Features:<br />
• Up to 8 ON and OFF switches a day/56 ON and OFF swit-<br />
ches per week.<br />
• Option to program individual days or 8 different weekday<br />
groups.<br />
• Minimum switching period of one minute<br />
• Summer/Winter time changeover<br />
• Easy to read LCD display<br />
• Manual Override button<br />
• Battery Back-up<br />
Note: As soon as you have connected 12 or 24 volts you<br />
will have to push down the RESET button and set<br />
time to activate the timer.<br />
Setting the time<br />
- Slide right switch to to set time.<br />
- Press 1….7 button until arrow points to current day<br />
(1=Monday, 2=Tuesday, etc.). Press the “ h ” and“ m ” buttons to set<br />
the hours and minutes. The “PM” indicator shows noon to<br />
11:59 p.m.<br />
- Slide right switch to “RUN”.<br />
Programming of Switching Times<br />
The Auto Time Switch has the capacity for 8 ON/OFF switches.<br />
By using the blocks of days available, you can save program<br />
capacity. The block days are:<br />
MO, TU, WE, TH, FR, SA, SU – Individual days of the week<br />
MO, TU, WE, TH, FR<br />
SA, SU<br />
MO, TU, WE, TH, FR, SA<br />
MO, WE, FR<br />
TU, TH, SA<br />
MO, TU, WE<br />
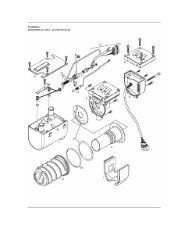
a3)<br />
a5)<br />
a4)<br />
Yellow (Signal to <strong>Heater</strong>)<br />
Brown (-)<br />
Red (+)<br />
Programmable Timer Instructions<br />
- To program ON or OFF time slide the right switch to .<br />
A “ ” appears in the bottom right hand.<br />
corner and a bulb icon is displayed indicating an ON time is<br />
ready to be programmed in memory “ ”.<br />
Press “P” button until desired ON or OFF time program is<br />
selected. (NOTE: Odd numbers indicate ON times and Even<br />
numbers indicate OFF times. When an OFF time is ready to be<br />
programmed there is no bulb icon present. Every cycle must<br />
have a programmed ON time and a programmed OFF time or<br />
the program will not execute.)<br />
- Press 1....7 button until arrows point to selected day(s) you<br />
want this ON cycle to occur.<br />
- Press “ h ” and “ m ” buttons to show switch-on time, noting<br />
the “PM” indicator.<br />
5<br />
4 5670433 - 12 Volt<br />
5670434 - 24 Volt<br />
3<br />
2<br />
Programmable<br />
Timer<br />
Note: to save time you can set up each on/off cycle;<br />
- A) to be unique for each individual day, or<br />
- B) for Monday to Friday (days 1 to 5), or<br />
- C) for weekends only (days 6 & 7), or<br />
- D) for all days except Sunday (days 1 to 6) , or …<br />
- E) the entire week at one time. This can save a lot<br />
of time when programming the “on” and “off” cycles.<br />
1