

Pro 501st Airless Paint Sprayer - Graco Inc.
Pro 501st Airless Paint Sprayer - Graco Inc.
Pro 501st Airless Paint Sprayer - Graco Inc.

Create successful ePaper yourself
Turn your PDF publications into a flip-book with our unique Google optimized e-Paper software.
Setup<br />
8. Check all fluid connections for leaks. Relieve the<br />
pressure before tightening any connections.<br />
9. Install the spray tip. Lock the gun trigger safety<br />
first. See manual 307–848 for how to install the tip.<br />
10. Adjust the spray pattern.<br />
a. <strong>Inc</strong>rease the pressure just until spray from the<br />
gun is completely atomized. To avoid excessive<br />
overspray and fogging, and to extent tip<br />
and sprayer life, always use the lowest pressure<br />
required to get the desired results.<br />
NOTE: Spray patterns will change as tips wear.<br />
Change the spray tip if adjusting the pressure will not<br />
improve the spray pattern.<br />
<br />
A<br />
b. If more coverage is needed, use a larger tip<br />
rather than increasing the pressure.<br />
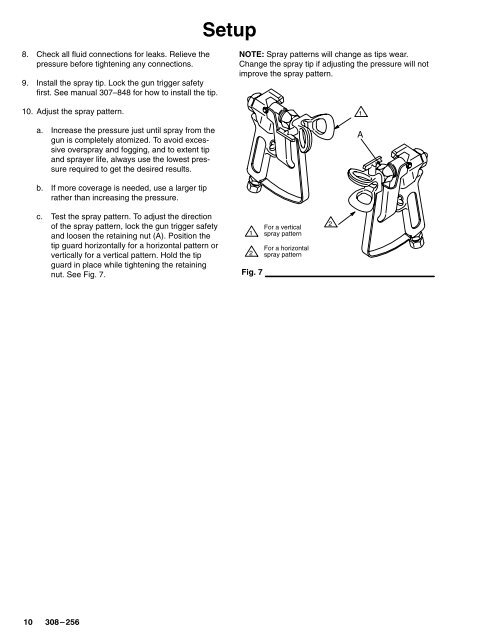
c. Test the spray pattern. To adjust the direction<br />
of the spray pattern, lock the gun trigger safety<br />
and loosen the retaining nut (A). Position the<br />
tip guard horizontally for a horizontal pattern or<br />
vertically for a vertical pattern. Hold the tip<br />
guard in place while tightening the retaining<br />
nut. See Fig. 7.<br />
<br />
<br />
Fig. 7<br />
For a vertical<br />
spray pattern<br />
For a horizontal<br />
spray pattern


