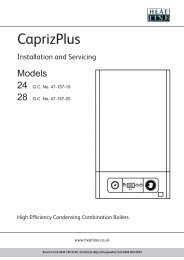
Monza 24 and 28 Instructions for use - Heatline
Monza 24 and 28 Instructions for use - Heatline
Monza 24 and 28 Instructions for use - Heatline

You also want an ePaper? Increase the reach of your titles
YUMPU automatically turns print PDFs into web optimized ePapers that Google loves.
Boiler hanging<br />
a<br />
With<br />
regards to the Manual H<strong>and</strong>ling Operations,<br />
1992 Regulations, the following lift operation<br />
exceeds the recommended weight <strong>for</strong> a one<br />
person lift, refer to chapter "Manual H<strong>and</strong>ling".<br />
2<br />
Ensure that the appliance is disconnected be<strong>for</strong>e cleansing the<br />
system.<br />
• Do not <strong>use</strong> any solvent products, due to the risk of damaging<br />
the circuit.<br />
a<br />
Do<br />
not per<strong>for</strong>m any 'hot work' directly under<br />
the appliance, this may ca<strong>use</strong> damage to the<br />
appliance base. Heat may also damage the<br />
isolation valves. Always pre-assemble pipes<br />
be<strong>for</strong>e fitting them to the boiler.<br />
• Only <strong>use</strong> original seals supplied with the appliance.<br />
• Check that there are no leaks. Repair if necessary.<br />
1<br />
Be<strong>for</strong>e turning on the cold mains supply to the boiler<br />
turn off the cold water inlet to the boiler, lock the fi lling<br />
loop in the closed position <strong>and</strong> close its fi lling taps.<br />
8.2 Safety Discharge Valve<br />
2<br />
Key<br />
1 Boiler<br />
2 Hanging bracket<br />
1<br />
3<br />
B<br />
• Two persons recommended. Lifting the boiler into position,<br />
lean the top of the boiler slightly to the wall <strong>and</strong> position just<br />
above the hanging bracket.<br />
• Lower the boiler slowly <strong>and</strong> engage onto the hanging bracket<br />
A<br />
8 Hydraulic connection<br />
8.1 Gas <strong>and</strong> water connections<br />
The whole of the gas installation, including the meter, should be<br />
inspected, tested <strong>for</strong> tightness <strong>and</strong> purged in accordance with<br />
the current issue of BS6891 <strong>and</strong> in IE the current edition of<br />
I.S.813 “Domestic Gas Installations”.<br />
The gas supply pipe should be a minimum of 22mm.<br />
The appliance may contain a small amount of<br />
water, place a water container beneath the boiler<br />
connections.<br />
• Take care to clean the pipes be<strong>for</strong>e assembly removing any<br />
debris or burrs. Grease <strong>and</strong> oils may need to be removed they<br />
are not possible to remove by cleansing <strong>and</strong> fl ushing. Foreign<br />
bodies in the system may enter the appliance <strong>and</strong> interrupt its<br />
operation.<br />
Key<br />
1 Discharge pipe 15mm o.d.<br />
2 Pressure relief valve PRV<br />
3 Draining outlet<br />
A PRV outlet - Extend, using 15mm Cu pipe, to terminate in a<br />
safe location outside the building<br />
B Appliance drain<br />
This must be extended, using not less than 15mm o.d. pipe,<br />
to discharge, in a visible position, outside the building, facing<br />
downwards, preferably over a drain. To ease future servicing<br />
it is advisable to <strong>use</strong> a compression type fi tting to extend the<br />
safety discharge valve tube.<br />
The pipe must have a continuous fall <strong>and</strong> be routed to a<br />
position so that any discharge of water, possibly boiling,<br />
or steam cannot create any danger to persons, damage to<br />
property or external electrical components <strong>and</strong> wiring.<br />
- 12 - Service Call 0844 736 9042, Technical Help (Chargeable) Call 0906 802 0253