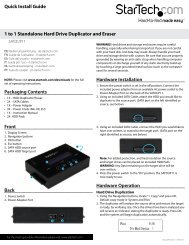
SATA RAID Drive Enclosure - StarTech.com
SATA RAID Drive Enclosure - StarTech.com
SATA RAID Drive Enclosure - StarTech.com

You also want an ePaper? Increase the reach of your titles
YUMPU automatically turns print PDFs into web optimized ePapers that Google loves.
Instruction Manual<br />
Command buttons on the Advanced Configuration Wizard - Cont’d<br />
Apply : Submits configuration changes to the <strong>Drive</strong> <strong>Enclosure</strong>, closes the Wizard, and<br />
displays the updated configuration on the Status Window.<br />
Cancel : Aborts the in-progress changes and closes the Wizard.<br />
Multiple Volume Configuration<br />
The Advanced Configuration Wizard allows many <strong>com</strong>binations of storage policies and<br />
capacities. This procedure shows how to modify a basic SAFE configuration so that it<br />
contains several volumes, each with different storage policies. This example illustrates<br />
one possible <strong>com</strong>bination that allocates all of the system’s available capacity to:<br />
One 50-gigabyte (GB) SAFE volume on drives 0 and 1, with no reserved space for a Hot<br />
Spare.<br />
One FAST volume that uses the remaining capacity on drives 0 and 1.<br />
One BIG volume that uses all of the capacity on drives 2, 3, and 4.<br />
The same sequence of steps applies to any configuration you choose to implement; only<br />
the storage policy and capacity allocation vary for different configuration options.<br />
NOTE: Before reconfiguring an existing SAT3550ESR <strong>Drive</strong> <strong>Enclosure</strong> with a<br />
new configuration, backup the data. Use the Disk Management utility provided<br />
by your OS to delete all partitions - except the unallocated, un-initialized disk<br />
that represents the SteelVine processor. Once the configuration and partitioning<br />
of the new volumes has taken place, it is safe to restore the backed up data to<br />
the new configuration. See the section entitled Partitioning Configured<br />
Volumes for details.<br />
1. Click the Configure Box toolbar button to open the Basic Configuration Wizard.<br />
2. Click To Advanced Mode to open the Advanced Configuration Wizard.<br />
3. Select Delete all volumes from the toolbar.<br />
Click Delete All<br />
Volumes<br />
4. When prompted to confirm the deletion of the volumes, click Yes.<br />
5. Select Create a new volume from the toolbar.<br />
Click Create a<br />
new volume<br />
13