Sensit 2 - AMS
Sensit 2 - AMS
Sensit 2 - AMS

You also want an ePaper? Increase the reach of your titles
YUMPU automatically turns print PDFs into web optimized ePapers that Google loves.
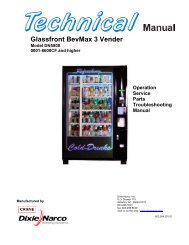
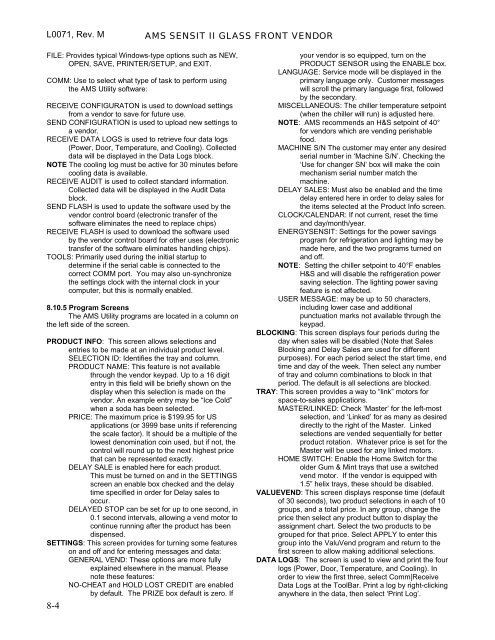
L0071, Rev. M <strong>AMS</strong> SENSIT II GLASS FRONT VENDOR<br />
FILE: Provides typical Windows-type options such as NEW,<br />
OPEN, SAVE, PRINTER/SETUP, and EXIT.<br />
COMM: Use to select what type of task to perform using<br />
the <strong>AMS</strong> Utility software:<br />
RECEIVE CONFIGURATON is used to download settings<br />
from a vendor to save for future use.<br />
SEND CONFIGURATION is used to upload new settings to<br />
a vendor.<br />
RECEIVE DATA LOGS is used to retrieve four data logs<br />
(Power, Door, Temperature, and Cooling). Collected<br />
data will be displayed in the Data Logs block.<br />
NOTE The cooling log must be active for 30 minutes before<br />
cooling data is available.<br />
RECEIVE AUDIT is used to collect standard information.<br />
Collected data will be displayed in the Audit Data<br />
block.<br />
SEND FLASH is used to update the software used by the<br />
vendor control board (electronic transfer of the<br />
software eliminates the need to replace chips)<br />
RECEIVE FLASH is used to download the software used<br />
by the vendor control board for other uses (electronic<br />
transfer of the software eliminates handling chips).<br />
TOOLS: Primarily used during the initial startup to<br />
determine if the serial cable is connected to the<br />
correct COMM port. You may also un-synchronize<br />
the settings clock with the internal clock in your<br />
computer, but this is normally enabled.<br />
8.10.5 Program Screens<br />
The <strong>AMS</strong> Utility programs are located in a column on<br />
the left side of the screen.<br />
PRODUCT INFO: This screen allows selections and<br />
entries to be made at an individual product level.<br />
SELECTION ID: Identifies the tray and column.<br />
PRODUCT NAME: This feature is not available<br />
through the vendor keypad. Up to a 16 digit<br />
entry in this field will be briefly shown on the<br />
display when this selection is made on the<br />
vendor. An example entry may be “Ice Cold”<br />
when a soda has been selected.<br />
PRICE: The maximum price is $199.95 for US<br />
applications (or 3999 base units if referencing<br />
the scale factor). It should be a multiple of the<br />
lowest denomination coin used, but if not, the<br />
control will round up to the next highest price<br />
that can be represented exactly.<br />
DELAY SALE is enabled here for each product.<br />
This must be turned on and in the SETTINGS<br />
screen an enable box checked and the delay<br />
time specified in order for Delay sales to<br />
occur.<br />
DELAYED STOP can be set for up to one second, in<br />
0.1 second intervals, allowing a vend motor to<br />
continue running after the product has been<br />
dispensed.<br />
SETTINGS: This screen provides for turning some features<br />
on and off and for entering messages and data:<br />
GENERAL VEND: These options are more fully<br />
explained elsewhere in the manual. Please<br />
note these features:<br />
NO-CHEAT and HOLD LOST CREDIT are enabled<br />
by default. The PRIZE box default is zero. If<br />
8-4<br />
your vendor is so equipped, turn on the<br />
PRODUCT SENSOR using the ENABLE box.<br />
LANGUAGE: Service mode will be displayed in the<br />
primary language only. Customer messages<br />
will scroll the primary language first, followed<br />
by the secondary.<br />
MISCELLANEOUS: The chiller temperature setpoint<br />
(when the chiller will run) is adjusted here.<br />
NOTE: <strong>AMS</strong> recommends an H&S setpoint of 40°<br />
for vendors which are vending perishable<br />
food.<br />
MACHINE S/N The customer may enter any desired<br />
serial number in ‘Machine S/N’. Checking the<br />
‘Use for changer SN’ box will make the coin<br />
mechanism serial number match the<br />
machine.<br />
DELAY SALES: Must also be enabled and the time<br />
delay entered here in order to delay sales for<br />
the items selected at the Product Info screen.<br />
CLOCK/CALENDAR: If not current, reset the time<br />
and day/month/year.<br />
ENERGYSENSIT: Settings for the power savings<br />
program for refrigeration and lighting may be<br />
made here, and the two programs turned on<br />
and off.<br />
NOTE: Setting the chiller setpoint to 40°F enables<br />
H&S and will disable the refrigeration power<br />
saving selection. The lighting power saving<br />
feature is not affected.<br />
USER MESSAGE: may be up to 50 characters,<br />
including lower case and additional<br />
punctuation marks not available through the<br />
keypad.<br />
BLOCKING: This screen displays four periods during the<br />
day when sales will be disabled (Note that Sales<br />
Blocking and Delay Sales are used for different<br />
purposes). For each period select the start time, end<br />
time and day of the week. Then select any number<br />
of tray and column combinations to block in that<br />
period. The default is all selections are blocked.<br />
TRAY: This screen provides a way to “link” motors for<br />
space-to-sales applications.<br />
MASTER/LINKED: Check ‘Master’ for the left-most<br />
selection, and ‘Linked’ for as many as desired<br />
directly to the right of the Master. Linked<br />
selections are vended sequentially for better<br />
product rotation. Whatever price is set for the<br />
Master will be used for any linked motors.<br />
HOME SWITCH: Enable the Home Switch for the<br />
older Gum & Mint trays that use a switched<br />
vend motor. If the vendor is equipped with<br />
1.5” helix trays, these should be disabled.<br />
VALUEVEND: This screen displays response time (default<br />
of 30 seconds), two product selections in each of 10<br />
groups, and a total price. In any group, change the<br />
price then select any product button to display the<br />
assignment chart. Select the two products to be<br />
grouped for that price. Select APPLY to enter this<br />
group into the ValuVend program and return to the<br />
first screen to allow making additional selections.<br />
DATA LOGS: The screen is used to view and print the four<br />
logs (Power, Door, Temperature, and Cooling). In<br />
order to view the first three, select Comm|Receive<br />
Data Logs at the ToolBar. Print a log by right-clicking<br />
anywhere in the data, then select ‘Print Log’.