Solution 4+4 Installation Manual - Securityhelpdesk.com.au
Solution 4+4 Installation Manual - Securityhelpdesk.com.au
Solution 4+4 Installation Manual - Securityhelpdesk.com.au

You also want an ePaper? Increase the reach of your titles
YUMPU automatically turns print PDFs into web optimized ePapers that Google loves.
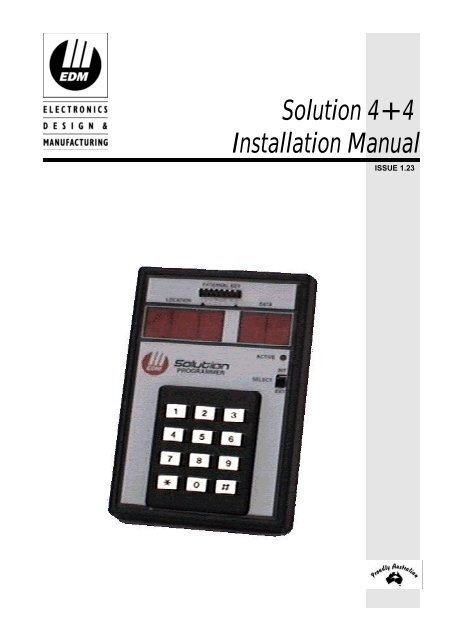
<strong>Solution</strong> <strong>4+4</strong><br />
<strong>Installation</strong> <strong>Manual</strong><br />
ISSUE 1.23
MA400I<br />
This page has been included for you to cut out and insert into the spine<br />
of the folder<br />
<strong>Solution</strong><br />
4 + 4<br />
<strong>Installation</strong><br />
<strong>Manual</strong><br />
ISSUE 1.23<br />
(61-2) 9672 1233
<strong>Solution</strong> <strong>4+4</strong><br />
<strong>Installation</strong> <strong>Manual</strong><br />
Copyright © 1997 by Electronics Design and Manufacturing Pty Limited,<br />
SYDNEY, AUSTRALIA<br />
Document Part Number MA400I<br />
Document ISSUE 1.23<br />
Printed 01 December 1997<br />
This documentation is provided to suit <strong>Solution</strong> <strong>4+4</strong> (CC400)<br />
Firmware Revision 1.20 – 1.27<br />
Hardware Revision A<br />
Alarm Link Form - Software Version 1.00 = S4_V12<br />
Copyright Notice<br />
All rights reserved. No part of this publication may be reproduced, transmitted or stored in a retrieval system in any form or<br />
by any means, electronic, mechanical, photocopying, recording, or otherwise, without the prior written permission of<br />
Electronics Design and Manufacturing Pty Limited.<br />
Trademarks<br />
Throughout this document trademark names may have been used. Rather than put a trademark symbol in every occurrence<br />
of a trademark name, we state that we are using the names only in an editorial fashion and to the benefit of the trademark<br />
owner with no intention of infringement of the trademark.<br />
Notice of Liability<br />
While every prec<strong>au</strong>tion has been taken in the preparation of this document, neither Electronics Design and Manufacturing<br />
Pty Limited nor any of its official representatives shall have any liability to any person or entity with respect to any<br />
liability, loss or damage c<strong>au</strong>sed or alleged to be c<strong>au</strong>sed directly or indirectly by the information contained in this book.<br />
Electronics Design and Manufacturing Pty Limited reserves the right to make changes to features and specifications at any<br />
time without prior notification in the interest of ongoing product development and improvement.
Table Of Contents<br />
Introduction______________________________________________________________________13<br />
Introduction __________________________________________________________________________ 14<br />
Features _____________________________________________________________________________ 15<br />
Quick Start___________________________________________________________________________ 16<br />
Zone Def<strong>au</strong>lts_________________________________________________________________________________16<br />
Programming ____________________________________________________________________17<br />
Programming _________________________________________________________________________ 18<br />
Programming With The Remote Codepad _________________________________________________ 19<br />
Programming With The Hand Held Programmer___________________________________________ 20<br />
Programming With The Programming Key________________________________________________ 21<br />
Programming Option Bits ______________________________________________________________ 21<br />
Installer’s Programming Commands _____________________________________________________ 22<br />
Command 958 - Enable/Disable Zone Status Mode ___________________________________________________22<br />
Command 959 - Test Programming Key ____________________________________________________________23<br />
Command 960 - Exit Installer's Programming Mode___________________________________________________23<br />
Command 961 - Reset Control Panel Back To Factory Def<strong>au</strong>lt Settings ___________________________________23<br />
Command 962 - Copy Control Panel Memory To Programming Key______________________________________24<br />
Command 963 - Copy From Programming Key To Control Panel ________________________________________25<br />
Command 964 - Erase Programming Key ___________________________________________________________26<br />
Command 965 - Set Up Domestic Dialling Format____________________________________________________27<br />
Command 966 - Enable/Disable Automatic Stepping Of Locations _______________________________________28<br />
Command 999 - Display Software Version Number ___________________________________________________29<br />
Disable Factory Def<strong>au</strong>lt_________________________________________________________________________29<br />
Def<strong>au</strong>lting The Control Panel ____________________________________________________________________30<br />
System Indicators and Operations ____________________________________________________31<br />
System Indicators and Operations________________________________________________________ 32<br />
CP5 Eight Zone Codepad _______________________________________________________________ 32<br />
Zone Indicators _______________________________________________________________________________32<br />
AWAY Indicator ______________________________________________________________________________32<br />
STAY Indicator _______________________________________________________________________________32<br />
MAINS Indicator ______________________________________________________________________________33<br />
FAULT Indicator ______________________________________________________________________________33<br />
Audible Indicators _____________________________________________________________________________33<br />
CP5 Eight Zone LCD Codepad __________________________________________________________ 34<br />
Zone Indicators _______________________________________________________________________________34<br />
AWAY Indicator ______________________________________________________________________________34<br />
STAY Indicator _______________________________________________________________________________34<br />
System Disarmed ______________________________________________________________________________35<br />
MAINS Indicator ______________________________________________________________________________35<br />
Zone Isolating Mode ___________________________________________________________________________35<br />
FAULT Indicator ______________________________________________________________________________35<br />
Programming Mode ____________________________________________________________________________35<br />
Off Indicator/Zone Sealed _______________________________________________________________________36<br />
On Indicator/Zone In Alarm _____________________________________________________________________36<br />
Audible Indicators _____________________________________________________________________________36
System Operations _____________________________________________________________________37<br />
Arming The System In AWAY Mode______________________________________________________________37<br />
Forced Arming _____________________________________________________________________________37<br />
Disarming The System From AWAY Mode _________________________________________________________37<br />
Arming The System In STAY Mode_______________________________________________________________38<br />
Forced Arming _____________________________________________________________________________38<br />
Disarming The System From STAY Mode __________________________________________________________39<br />
Codepad Duress Alarm _________________________________________________________________________40<br />
Codepad Panic Alarm - Versions Up To 1.26 ________________________________________________________40<br />
Codepad Panic Alarm – Version 1.27 Onwards ______________________________________________________40<br />
Codepad Fire Alarm – Version 1.27 Onwards _______________________________________________________40<br />
Codepad Medical Alarm – Version 1.27 Onwards ____________________________________________________40<br />
Isolating Zones ________________________________________________________________________41<br />
Standard Isolating _____________________________________________________________________________41<br />
Code To Isolate _______________________________________________________________________________42<br />
F<strong>au</strong>lt Analysis Mode____________________________________________________________________43<br />
F<strong>au</strong>lt Descriptions _____________________________________________________________________________44<br />
Low Battery________________________________________________________________________________44<br />
Date and Time ______________________________________________________________________________44<br />
Sensor Watch_______________________________________________________________________________44<br />
Horn Speaker Monitor________________________________________________________________________44<br />
Reserved __________________________________________________________________________________44<br />
E 2 F<strong>au</strong>lt ___________________________________________________________________________________44<br />
Reserved __________________________________________________________________________________44<br />
Communication Failure_______________________________________________________________________44<br />
AC Mains Failure ___________________________________________________________________________44<br />
System Functions_________________________________________________________________ 45<br />
System Functions ______________________________________________________________________46<br />
Installer Code Functions ________________________________________________________________46<br />
F<strong>au</strong>lt Analysis Mode _________________________________________________________________________47<br />
How To Enter F<strong>au</strong>lt Analysis Mode _____________________________________________________________47<br />
Reserved __________________________________________________________________________________47<br />
Set The Number Of Days Until The First Test Report _______________________________________________48<br />
Event Memory Recall Mode ___________________________________________________________________49<br />
Walk Test Mode ____________________________________________________________________________50<br />
Satellite Siren Service Mode ___________________________________________________________________50<br />
Initiate Modem Call__________________________________________________________________________50<br />
How To Initiate A Modem Call_________________________________________________________________50<br />
Turning Telephone Monitor Mode On/Off ________________________________________________________51<br />
Reserved __________________________________________________________________________________51<br />
Send Test Report ____________________________________________________________________________51<br />
How To Initiate A Test Report _________________________________________________________________51<br />
Master Code Functions _________________________________________________________________52<br />
Reserved __________________________________________________________________________________52<br />
Changing and Deleting User Codes______________________________________________________________53<br />
Changing Domestic Phone Numbers_____________________________________________________________55<br />
Event Memory Recall Mode ___________________________________________________________________56<br />
Walk Test Mode ____________________________________________________________________________57<br />
F<strong>au</strong>lt Analysis Mode _________________________________________________________________________58<br />
Setting The Date and Time ____________________________________________________________________59<br />
Turn Day Alarm On and Off ___________________________________________________________________59<br />
Reset Latching Outputs _______________________________________________________________________60<br />
Initiate Modem Call__________________________________________________________________________60
Hold Down Functions __________________________________________________________________ 61<br />
Arm The System In AWAY Mode ______________________________________________________________61<br />
Arm The System In STAY Mode _______________________________________________________________61<br />
Horn Speaker Test ___________________________________________________________________________61<br />
Bell Test___________________________________________________________________________________61<br />
Strobe Test _________________________________________________________________________________62<br />
Turning Day Alarm On and Off_________________________________________________________________62<br />
F<strong>au</strong>lt Analysis Mode _________________________________________________________________________62<br />
Initiate A Modem Call ________________________________________________________________________63<br />
Reset Latching Outputs _______________________________________________________________________63<br />
Codepad Beeper Tone Change__________________________________________________________________63<br />
Initiate A Test Report_________________________________________________________________________63<br />
Remote Operations ________________________________________________________________65<br />
Remote Operations ____________________________________________________________________ 66<br />
Remote Arming Via The Telephone ______________________________________________________ 66<br />
Upload/Download Via Alarm Link Software _______________________________________________ 67<br />
Remote Connect_______________________________________________________________________________67<br />
Remote Connect With Customer Control _________________________________________________________67<br />
Remote Connect Without Callback Verification ____________________________________________________67<br />
Remote Connect With Callback Verification ______________________________________________________68<br />
Dialler Reporting Formats __________________________________________________________69<br />
Dialler Reporting Formats ______________________________________________________________ 70<br />
Contact ID Format _____________________________________________________________________________70<br />
Point ID Codes________________________________________________________________________________71<br />
Event Codes __________________________________________________________________________________72<br />
General Reporting Formats ______________________________________________________________________73<br />
Securitel _____________________________________________________________________________________75<br />
Domestic Reporting Format______________________________________________________________________76<br />
Domestic Dialling Function____________________________________________________________________76<br />
Programming Domestic Reporting ______________________________________________________________77<br />
Basic Pager Reporting Format____________________________________________________________________79<br />
Base Station Information ___________________________________________________________81<br />
Base Station Information _______________________________________________________________ 82<br />
Primary Telephone Number______________________________________________________________________83<br />
Secondary Telephone Number____________________________________________________________________83<br />
Callback Telephone Number _____________________________________________________________________83<br />
Dialling Format _______________________________________________________________________________84<br />
Handshake Tone ______________________________________________________________________________84<br />
Transmission Format ___________________________________________________________________________85<br />
Transmission Speed ____________________________________________________________________________85<br />
Receivers and Their Formats ___________________________________________________________________86<br />
Subscriber ID Number__________________________________________________________________________86<br />
Ring Count___________________________________________________________________________________87<br />
Answering Machine Bypass______________________________________________________________________87<br />
User Codes_______________________________________________________________________89<br />
Access Codes _________________________________________________________________________ 90<br />
Installer Code_________________________________________________________________________________90<br />
User Codes___________________________________________________________________________________90<br />
User Code Priority _____________________________________________________________________________91<br />
Arm and Disarm_____________________________________________________________________________91<br />
Arm Only __________________________________________________________________________________91<br />
Patrolman Code _____________________________________________________________________________91<br />
Arm and Disarm + Code To Isolate______________________________________________________________91<br />
Patrolman Code + Code To Isolate ______________________________________________________________91<br />
Arm and Disarm + Master Code Functions ________________________________________________________91<br />
Arm and Disarm + Master Code Functions + Code To Isolate _________________________________________91<br />
Code Retries__________________________________________________________________________________92
Zone Information_________________________________________________________________ 93<br />
Zone Information ______________________________________________________________________94<br />
Day Alarm Mask ______________________________________________________________________________94<br />
Day Alarm Resetting _________________________________________________________________________94<br />
Day Alarm Latching _________________________________________________________________________94<br />
Day Alarm Operation __________________________________________________________________________95<br />
EOL Resistor Value____________________________________________________________________________96<br />
Connections Of Split EOL Resistors Using N/O Contacts ______________________________________________97<br />
Zone Programming_____________________________________________________________________98<br />
Zone Operating Information ___________________________________________________________________98<br />
Zone Reporting Information ___________________________________________________________________98<br />
Tamper Zones ________________________________________________________________________________99<br />
Zone Def<strong>au</strong>lts _______________________________________________________________________________100<br />
Zone Types _________________________________________________________________________________100<br />
Instant Zone_______________________________________________________________________________100<br />
Handover Zone ____________________________________________________________________________100<br />
Delay-1 Zone______________________________________________________________________________100<br />
Delay-2 Zone______________________________________________________________________________100<br />
Reserved _________________________________________________________________________________100<br />
Reserved _________________________________________________________________________________101<br />
Instant Zone + Isolated In STAY Mode _________________________________________________________101<br />
Handover Zone + Isolated In STAY Mode _______________________________________________________101<br />
Delay-1 Zone + Isolated In STAY Mode ________________________________________________________101<br />
Delay-2 + Isolated In STAY Mode _____________________________________________________________101<br />
Reserved _________________________________________________________________________________101<br />
Keyswitch Zone____________________________________________________________________________101<br />
24 Hour Burglary Zone ______________________________________________________________________101<br />
24 Hour Fire Zone __________________________________________________________________________101<br />
Chime Zone _______________________________________________________________________________101<br />
Zone Not Used_____________________________________________________________________________101<br />
Zone Options ________________________________________________________________________________102<br />
Lockout Siren & Lockout Dialler ______________________________________________________________102<br />
Silent Alarm ______________________________________________________________________________103<br />
Sensor Watch______________________________________________________________________________103<br />
Keyswitch Zone Options _______________________________________________________________________104<br />
Latching Arm and Disarm In AWAY Mode ______________________________________________________104<br />
Latching Arm In AWAY Mode________________________________________________________________104<br />
Latching Disarm From AWAY Mode Or STAY Mode _____________________________________________104<br />
Latching Arm and Disarm In STAY Mode _______________________________________________________104<br />
Latching Arm In STAY Mode_________________________________________________________________104<br />
Latching Disarm From AWAY Mode Or STAY Mode _____________________________________________104<br />
Momentary Arm and Disarm In AWAY Mode____________________________________________________105<br />
Momentary Arm In AWAY Mode _____________________________________________________________105<br />
Momentary Disarm From AWAY Mode Or STAY Mode ___________________________________________105<br />
Momentary Arm and Disarm In STAY Mode_____________________________________________________105<br />
Momentary Arm In STAY Mode ______________________________________________________________105<br />
Momentary Disarm From AWAY Mode Or STAY Mode ___________________________________________105<br />
Zone Pulse Count ____________________________________________________________________________106<br />
Zone Pulse Count Handover __________________________________________________________________106<br />
Zone Pulse Count Time ________________________________________________________________________106<br />
System Status Information ________________________________________________________ 107<br />
System Status Information______________________________________________________________108<br />
Zone Bypass Reports__________________________________________________________________________108<br />
Zone Trouble Reports _________________________________________________________________________108<br />
Codepad Duress Report________________________________________________________________________109<br />
Codepad Panic Report _________________________________________________________________________110<br />
Access Denied _______________________________________________________________________________111<br />
AC Fail Report ______________________________________________________________________________112<br />
Low Battery Report___________________________________________________________________________112<br />
Sensor Watch Report__________________________________________________________________________113<br />
Open/Close Reports___________________________________________________________________________113<br />
Test Reporting Time __________________________________________________________________________114
Programmable Outputs____________________________________________________________115<br />
Programmable Outputs _______________________________________________________________ 116<br />
Output Def<strong>au</strong>lts ______________________________________________________________________________116<br />
Redirecting Outputs To The Codepad Buzzer _______________________________________________________117<br />
Output Event Types ___________________________________________________________________________118<br />
Output Polarity_______________________________________________________________________________123<br />
Output Not Used ___________________________________________________________________________123<br />
Normally Open, Going Low __________________________________________________________________123<br />
Normally Open, Pulsing Low _________________________________________________________________123<br />
Normally Open, One Shot Low ________________________________________________________________123<br />
Normally Open, One Shot Low With Retrigger ___________________________________________________123<br />
Normally Open, One Shot Low With Reset_______________________________________________________123<br />
Normally Open, One Shot Low With Alarm ______________________________________________________124<br />
Normally Open, Latching Low ________________________________________________________________124<br />
Normally Low, Going Open __________________________________________________________________124<br />
Normally Low, Pulsing Open _________________________________________________________________124<br />
Normally Low, One Shot Open ________________________________________________________________124<br />
Normally Low, One Shot Open With Retrigger ___________________________________________________124<br />
Normally Low, One Shot Open With Reset_______________________________________________________124<br />
Normally Low, One Shot Open With Alarm ______________________________________________________124<br />
Normally Low, Latching Open ________________________________________________________________124<br />
Timing Of Outputs____________________________________________________________________________125<br />
Pulsing Polarities _____________________________________________________________________________125<br />
One Shot Polarities ___________________________________________________________________________126<br />
System Event Timers______________________________________________________________127<br />
System Event Timers__________________________________________________________________ 128<br />
How To Program Entry/Exit Timers ____________________________________________________________128<br />
Entry Time __________________________________________________________________________________128<br />
Entry Timer 1________________________________________________________________________________128<br />
Entry Timer 2________________________________________________________________________________128<br />
Exit Time ___________________________________________________________________________________129<br />
Exit Time ___________________________________________________________________________________129<br />
Entry Guard Timer For STAY Mode______________________________________________________________129<br />
Sensor Watch Time ___________________________________________________________________________129<br />
Codepad Lockout Time ________________________________________________________________________130<br />
Siren Run Time ______________________________________________________________________________130<br />
Siren Sound Rate _____________________________________________________________________________130<br />
Swinger Shutdown Count ______________________________________________________________________131<br />
System Time ________________________________________________________________________________132<br />
Setting The Date and Time ___________________________________________________________________132<br />
Options Bits _____________________________________________________________________133<br />
Dialler Options_______________________________________________________________________ 134<br />
Dialler Options 1 _____________________________________________________________________________134<br />
Enable Dialler Reporting Functions_____________________________________________________________134<br />
Disable Dialler Reporting Functions ____________________________________________________________134<br />
Enable Remote Arming Via The Telephone ______________________________________________________134<br />
Enable Upload/Download Via Alarm Link _______________________________________________________134<br />
Terminate “Alarm Link” Session On Alarm ______________________________________________________134<br />
Dialler Options 2 _____________________________________________________________________________135<br />
Send Open/Close Reports Only If A Previous Alarm Has Occurred____________________________________135<br />
Reserved__________________________________________________________________________________135<br />
Send Open/Close Reports When In STAY Mode__________________________________________________135<br />
Delay Siren Until Transmission Complete _______________________________________________________135<br />
System Options 1_____________________________________________________________________________136<br />
Enable Forced Arming_______________________________________________________________________136<br />
Enable EDM Smart Lockout __________________________________________________________________136<br />
Enable Monitoring Of Horn Speaker____________________________________________________________136<br />
Allow Horn Speaker Beeps For Remote Control Operations _________________________________________136
System Options 2_____________________________________________________________________________137<br />
Enable Radio Key/Keyswitch Interface or Night Arm Station ________________________________________137<br />
Enable Handover Delay To Be Sequential _______________________________________________________137<br />
Enable Codepad Panic To Be Silent ____________________________________________________________137<br />
Enable Access Denied To Be Silent ____________________________________________________________137<br />
System Options 3_____________________________________________________________________________138<br />
Reserved _________________________________________________________________________________138<br />
Reserved _________________________________________________________________________________138<br />
Ignore AC Mains Fail Indication_______________________________________________________________138<br />
Enable Zone Pulse Count Handover ____________________________________________________________138<br />
Consumer Options 1 __________________________________________________________________________139<br />
Send Test Reports Only If The System Is Armed __________________________________________________139<br />
Enable Operation Of Siren & Strobe In STAY Mode _______________________________________________139<br />
Enable Answering Machine Bypass Only When Armed_____________________________________________139<br />
Enable Codepad Extinguish Mode _____________________________________________________________139<br />
Consumer Options 2 __________________________________________________________________________140<br />
Reserved _________________________________________________________________________________140<br />
Enable Single Button Arming In AWAY Mode Or STAY Mode______________________________________140<br />
Enable Single Button Disarming From STAY Mode _______________________________________________140<br />
Enable Alarm Memory Reset On Disarm ________________________________________________________140<br />
Optional Equipment______________________________________________________________ 141<br />
Optional Equipment___________________________________________________________________142<br />
Terminals and Descriptions________________________________________________________ 147<br />
Terminal Definitions and Descriptions____________________________________________________148<br />
Glossary Of Terms ____________________________________________________________________149<br />
<strong>Solution</strong> <strong>4+4</strong> Wiring Diagram ___________________________________________________________________151<br />
<strong>Solution</strong> <strong>4+4</strong> Component Overlay ________________________________________________________________152<br />
Tele<strong>com</strong> Connection Diagrams __________________________________________________________________153<br />
Appendices _____________________________________________________________________ 155<br />
Appendix A __________________________________________________________________________156<br />
Telephone Anti-Jamming ______________________________________________________________________156<br />
Appendix B __________________________________________________________________________157<br />
Test Reports Only When Armed _________________________________________________________________157<br />
Specifications ___________________________________________________________________ 159<br />
Warranty Statement___________________________________________________________________160<br />
Specifications_________________________________________________________________________160<br />
Software Version Number______________________________________________________________________160<br />
Advice To Users _____________________________________________________________________________161<br />
New Zealand Telepermit Notes__________________________________________________________________161<br />
Programming Sheets _____________________________________________________________ 163<br />
Index__________________________________________________________________________ 169
Introduction<br />
This section includes the following;<br />
• Introduction<br />
• Features<br />
• Quick Start
14 <strong>Solution</strong> <strong>4+4</strong> <strong>Installation</strong> <strong>Manual</strong><br />
Introduction<br />
Congratulations on selecting the <strong>Solution</strong> <strong>4+4</strong> control panel for your installation. So that<br />
you can obtain the most from your unit, we suggest that you take the time to read through this<br />
manual and familiarise yourself with the numerous outstanding operating and installation<br />
features of this system.<br />
You will notice that in all aspects of planning, engineering, styling, operation, convenience and<br />
adaptability, we have sought to anticipate your every possible requirement. Programming<br />
simplicity and speed have been some of the major considerations and we believe that our<br />
objectives in this area have been more than satisfied.<br />
This installation manual will explain all aspects of programming the <strong>Solution</strong> <strong>4+4</strong> control<br />
panel from factory def<strong>au</strong>lt to final <strong>com</strong>missioning. All system parameters and options are<br />
detailed, however, suitability is left up to the individual. Every control panel can be tailored to<br />
meet all requirements quickly and easily. The programming simplicity will make your<br />
installation quick, accurate and rewarding each and every time.<br />
The <strong>Solution</strong> range of control panels are very popular amongst thousands of people<br />
throughout many countries of the world, all who have various levels of technical aptitude and<br />
ability. We have tried to aim this installation manual to all levels of readers.<br />
As the <strong>Solution</strong> control panels continue to be improved over the years, they have be<strong>com</strong>e<br />
very powerful. Some of its early first-time users have advanced to true "power users" and we<br />
need to address their needs too, while maintaining the simplicity of the manual and the product.<br />
ISSUE123.DOC<br />
Electronics Design and Manufacturing Pty Limited
Introduction 15<br />
Features<br />
The <strong>Solution</strong> <strong>4+4</strong> security system uses the very latest in microprocessor technology to<br />
provide you with more useful features and superior reliability and performance.<br />
Following is a list of the main features that the control panel will provide.<br />
‣ Eight Programmable User Codes<br />
‣ Codepad Duress, Panic, Fire, Medical Alarms<br />
‣ STAY Mode and AWAY Mode Operation<br />
‣ Entry and Exit Warning Beeper<br />
‣ Four Programmable Burglary Zones<br />
‣ Four 24 Hour Tamper Zones<br />
‣ Zone Lockout<br />
‣ Sensor Watch<br />
‣ Day Alarm<br />
‣ Dynamic Battery Testing<br />
‣ Remote Arming<br />
‣ Answering Machine Bypass<br />
‣ AC Fail and System F<strong>au</strong>lt Indicators<br />
‣ Event Memory Recall<br />
‣ Walk Test Mode<br />
‣ Upload/Download Programmable<br />
‣ Monitored Siren Output<br />
‣ Strobe Output<br />
‣ Relay Output<br />
‣ EDMSAT – Satellite Siren Compatible<br />
‣ Separate Fire Alarm Sound<br />
Electronics Design and Manufacturing Pty Limited<br />
ISSUE123.DOC
16 <strong>Solution</strong> <strong>4+4</strong> <strong>Installation</strong> <strong>Manual</strong><br />
Quick Start<br />
The following steps will enable you to use the <strong>Solution</strong> <strong>4+4</strong> control panel with the<br />
factory def<strong>au</strong>lt values. The def<strong>au</strong>lt values allow the control panel to <strong>com</strong>municate in the<br />
Contact ID format.<br />
1. Connect the AC plug pack to the control panel.<br />
2. Check the operation of the red overload indicator (LD1) on the PCB. In normal<br />
operation the indicator will not illuminate. The MAINS indicator will remain on as will<br />
the AWAY indicator. The system is now in the armed state.<br />
3. Enter the def<strong>au</strong>lt Master Code 2580 followed by the button. The AWAY<br />
indicator will extinguish. The system is now in the disarmed state. Installer’s<br />
Programming Mode can now be accessed.<br />
4. The back-up battery should now be connected.<br />
5. Enter the factory def<strong>au</strong>lt Installer Code 1234 followed by the button. The<br />
STAY and AWAY indicators will now flash simultaneously to indicate that you have<br />
now entered Installer’s Programming Mode.<br />
6. Enter the Primary Telephone Number followed by the Secondary Telephone Number<br />
and the Subscriber ID Number.<br />
7. Set the time for the test reports if required. Any other programming changes required<br />
may also be made, otherwise the factory def<strong>au</strong>lt settings will be used.<br />
8. Enter Installer’s Command 960 followed by the button to exit Installer’s<br />
Programming Mode. The system will now return to the disarmed state and is now ready<br />
for use. Refer to “Installer’s Programming Commands” on page 22 for more<br />
information<br />
9. Use the Master Code to set the date and time.<br />
How To Set The New Date and Time<br />
1. Enter your followed by 6 and the button.<br />
Three beeps will be heard and the STAY and AWAY indicators will begin to<br />
flash.<br />
2. Enter the day, month, year, hour and minute using the (DD, MM, YY, HH, MM)<br />
format.<br />
3. Press the button when finished.<br />
Two beeps will be heard and the STAY and AWAY indicators will extinguish.<br />
Zone Def<strong>au</strong>lts<br />
The def<strong>au</strong>lt zone settings are as listed in the table below.<br />
Zone No<br />
Zone Type<br />
1 Delay-1<br />
2 & 3 Handover<br />
4 24 Hour Zone<br />
Table 1: Zone Def<strong>au</strong>lts<br />
ISSUE123.DOC<br />
Electronics Design and Manufacturing Pty Limited
Programming<br />
This section includes the following;<br />
• Programming<br />
• Programming With The Remote Codepad<br />
• Programming With The Hand Held Programmer<br />
• Programming With The Programming Key<br />
• Programming Option Bits<br />
• Installer’s Programming Commands<br />
• Disable Factory Def<strong>au</strong>lt<br />
• Def<strong>au</strong>lting The Control Panel
18 <strong>Solution</strong> <strong>4+4</strong> <strong>Installation</strong> <strong>Manual</strong><br />
Programming<br />
The programming options of this control panel are stored in a non-volatile Eprom. This<br />
memory will hold all the relevant configuration and user specific data even during a total<br />
power loss.<br />
The data retention time is as long as ten years without power, therefore, no reprogramming will<br />
be required after powering the control panel down.<br />
The data can be altered as many times as required without the need for any additional<br />
specialised equipment. This memory is laid out in numerous locations, each of which holds the<br />
data for a specific function.<br />
15 is the maximum value that can be programmed into any location.<br />
In general, the entire programming sequence will consist of nominating the location number<br />
required and then entering or altering the data. You will repeat this procedure until all the data<br />
has been programmed to suit your requirements. The factory def<strong>au</strong>lt settings have been<br />
selected for reporting in the Contact ID Format.<br />
There are two programming modes. The Installer's Programming Mode and the Operators<br />
Programming Mode. Both programming modes have individual access codes and these two<br />
codes must always be programmed differently. The Master Code, as well as being able to arm<br />
and disarm the system gives access to the Operators Programming Mode. The Installers Code<br />
only gives access to the Installer's Programming Mode and does NOT arm and disarm the<br />
system.<br />
Programming of the <strong>Solution</strong> <strong>4+4</strong> control panel can be carried out via any of the following<br />
four methods.<br />
• System Codepad<br />
• Hand Held Programmer (CC814)<br />
• Programming Key (CC810)<br />
• Alarm Link Upload/Download Software (CC816)<br />
ISSUE123.DOC<br />
Electronics Design and Manufacturing Pty Limited
Programming 19<br />
Programming With The Remote Codepad<br />
The system must be in the disarmed state with no flashing zone alarm memories, this can be<br />
achieved by entering the followed by the button. The factory def<strong>au</strong>lt<br />
Master Code is 2580.<br />
To access the Installer’s Programming Mode, enter the four digit<br />
followed by<br />
the button. The factory def<strong>au</strong>lt Installer Code is 1234. Three beeps will be heard<br />
and both the AWAY and the STAY indicators will flash simultaneously. If a long beep is heard,<br />
check the system for alarm memory. The codepad indicators will display the current data<br />
stored in the first location (LOCATION 000).<br />
Data<br />
Value<br />
Zone 1<br />
Indicator<br />
Zone 2<br />
Indicator<br />
Zone 3<br />
Indicator<br />
Zone 4<br />
Indicator<br />
Zone 5<br />
Indicator<br />
Zone 6<br />
Indicator<br />
Zone 7<br />
Indicator<br />
Zone 8<br />
Indicator<br />
MAINS<br />
Indicator<br />
0<br />
1 ü<br />
2 ü<br />
3 ü<br />
4 ü<br />
5 ü<br />
6 ü<br />
7 ü<br />
8 ü<br />
9 ü ü<br />
10 ü<br />
11 ü ü<br />
12 ü ü<br />
13 ü ü<br />
14 ü ü<br />
15 ü ü<br />
Example<br />
Table 2: Zone Indicators When Programming<br />
To enter Installer’s Programming Mode, enter the<br />
followed by the<br />
button. Three beeps will be heard and the codepad will display the current data stored in<br />
“LOCATION 000”.<br />
To move to a particular programming location, enter the<br />
followed by the button. The data of the new location will now be displayed.<br />
required<br />
To move to the next location, press the button. This will step you to the next location<br />
and the data in that location will be displayed via the ZONE indicators.<br />
If you press the button without previously entering a location number, the system will<br />
step back one location. To change data in the current location, enter the new value (0 – 15)<br />
followed by the button. This will store the new data into the location and still leave you<br />
positioned at the same location.<br />
To proceed to the next location, press the<br />
displayed.<br />
button. The next locations data will now be<br />
To exit the Installer’s Programming Mode, enter <strong>com</strong>mand 960 followed by the<br />
button. Two beeps will be heard and the system will return to the disarmed state. Refer to<br />
“Installer’s Programming Commands” on page 22 for further information on <strong>com</strong>mands that<br />
can be performed during access of Installer’s Programming Mode.<br />
Electronics Design and Manufacturing Pty Limited<br />
ISSUE123.DOC
20 <strong>Solution</strong> <strong>4+4</strong> <strong>Installation</strong> <strong>Manual</strong><br />
Programming With The Hand Held Programmer<br />
The Hand Held Programmer (CC814) has five, seven segment displays. The three on the left<br />
display the location number, and the two on the right display the data for that particular<br />
location.<br />
To connect the hand held programmer, locate the connections marked PROGRAMMING<br />
KEY. This point can be found on the left-hand side of the printed circuit board. Observe the<br />
triangular markings on the printed circuit board and line them up with the markings on the<br />
hand held programmers connecting socket.<br />
When the hand held programmer is correctly connected onto the printed circuit board, one beep<br />
will be heard and four centre bars on the hand held programmer will illuminate with either an<br />
'A' or 'U' suffix to indicate the system is armed or unarmed. Only when the Installer's<br />
Programming Mode has been accessed will any numerals appear on the display.<br />
When connecting the hand held programmer to the control panel, make sure that the<br />
switch on the hand held programmer is in the EXT position and that no external<br />
programming key has been connected. Failing to do this may corrupt the control panel's<br />
memory. If this occurs, the control panel will need to be returned to Electronics Design<br />
and Manufacturing Pty Limited where a service fee will be charged to unlock the control<br />
panel's memory.<br />
Example<br />
To enter the Installer's Programming Mode, enter the followed by the #<br />
button. The factory def<strong>au</strong>lt Installers Code is 1234. Three beeps will be heard and the<br />
hand held programmers display will display the current data stored in "LOCATION 000".<br />
To move to a particular programming location, enter the<br />
# button. The data for the new location will now be displayed.<br />
followed by the<br />
To move to the next location press the # button. This will step you to the next location and<br />
the data in that location will now be displayed via the ZONE indicators.<br />
If you press the * button without previously entering a location number, the system will step<br />
back one location. To change data in the current location, enter the new value (0-15) followed<br />
by the * button. This will store the new data into the location and still leave you positioned<br />
at the same location.<br />
To proceed to the next location, press the # button. The next locations data will now be<br />
displayed.<br />
To exit the Installer's Programming Mode, enter <strong>com</strong>mand 960 followed by the #<br />
button. Two beeps will be heard and the system will return to the disarmed state. Refer to<br />
"Installer’s Programming Commands" on page 22 for further information on <strong>com</strong>mands that<br />
can be performed during access of the Installer's Programming Mode.<br />
When using the hand held programmer, any reference in this manual made to the<br />
button should be considered as the * button and the button considered as the #<br />
button.<br />
ISSUE123.DOC<br />
Electronics Design and Manufacturing Pty Limited
Programming 21<br />
Programming With The Programming Key<br />
The Programming Key (CC810) is a unique device that will allow you to easily program your<br />
control panel. Inserting the programming key will <strong>au</strong>tomatically initiate a data transfer from<br />
the programming key to the control panel memory.<br />
If you have a new programming key, you should first enter the Installer's Programming Mode,<br />
configure the system as required before inserting the programming key.<br />
To connect the programming key, locate the connections marked PROGRAMMING KEY.<br />
This point can be found on the right hand side of the control panel. Observe the triangular<br />
markings on the printed circuit board and line them up with the markings on the programming<br />
key.<br />
To copy the control panel's data into your new programming key, enter <strong>com</strong>mand 962<br />
followed by the # button. Refer to "Command 962 - Copy Control Panel Memory To<br />
Programming Key" on page 24 for further information.<br />
Exit the Installer's Programming Mode by entering the <strong>com</strong>mand 960 followed by the #<br />
button, wait two seconds for the activity LED to return to its normal state and then remove the<br />
programming key. This programming key will now be<strong>com</strong>e your standard data pattern for<br />
future programming of your control panels.<br />
It should be noted that when entering the Installer's Programming Mode, inserting a<br />
programming key and then altering any location would c<strong>au</strong>se a simultaneous update of not<br />
only the programming keys data, but also the control panels data. Therefore, you are not able<br />
to alter data in the programming key without the same location being altered in the control<br />
panels memory.<br />
Connecting a Programming Key (CC810) to the control panel when the programming<br />
keys memory is blank will corrupt the control panel's memory unless the Installer's<br />
Programming Mode has been entered first. If this occurs, then the control panel will<br />
need to be returned to Electronics Design and Manufacturing Pty Limited where a service<br />
fee will be charged to unlock the control panel's memory.<br />
Programming Option Bits<br />
When programming these locations you will notice that there are four alternatives per location.<br />
You may select one, two, three or all of these alternatives for each location, however, only one<br />
number is required to be programmed. This number is calculated by adding the option bit<br />
numbers together.<br />
Example<br />
If at "LOCATION 224" you want options 1, 2 and 4, add the numbers together and the total is<br />
the number to be programmed. In this example, the number to be programmed is 7 (ie. 1 + 2 +<br />
4 = 7).<br />
Option<br />
Description<br />
1 Enable Dialler Reporting Functions<br />
2 Enable Remote Arming Via The Telephone<br />
4 Enable Upload/Download Via Alarm Link<br />
8 Terminate “Alarm Link” Session On Alarm<br />
Table 3: Example - Programming Option Bits<br />
Electronics Design and Manufacturing Pty Limited<br />
ISSUE123.DOC
22 <strong>Solution</strong> <strong>4+4</strong> <strong>Installation</strong> <strong>Manual</strong><br />
Installer’s Programming Commands<br />
There are several <strong>com</strong>mands that can be invoked to perform various functions once the<br />
Installer's Programming Mode has been entered. To invoke the <strong>com</strong>mand, enter the<br />
corresponding numerical code followed by the # button<br />
Command<br />
Description<br />
958 Enable/Disable Zone Status Mode When Using Hand Held Programmer<br />
959 Test Programming Key<br />
960 Exit Installer’s Programming Mode<br />
961 Reset Control Panel Back To Factory Def<strong>au</strong>lt Settings<br />
962 Copy The Control Panel Memory To The Programming Key<br />
963 Copy The Programming Key Data To The Control Panel<br />
964 Erase Programming Key<br />
965 Set Up Domestic Dialling Format<br />
966 Enable/Disable Automatic Stepping Of Locations During Programming<br />
999 This Command Displays The Control Panel’s Software Version Number<br />
Only When Using The Hand Held Programmer<br />
Command 958 - Enable/Disable Zone Status Mode<br />
Table 4: Installer's Programming Commands<br />
This function enables and disables the zone status display mode. When using the hand held<br />
programmer, the zones will be displayed on the seven-segment display from left to right. If<br />
there is a dash illuminated on the display, the corresponding zone is unsealed and if the display<br />
is blank, the zone is sealed.<br />
The third (or centre) display shows the number 4. The number 4 constantly illuminated<br />
indicates that zones 1 - 4 are being displayed. The number 4 flashing indicates that tamper<br />
zones 1 - 4 are being displayed.<br />
Pressing the # button will toggle the display between the zones. This feature will prove to be<br />
very useful during installation as it allows you to view the status of the zones directly at the<br />
control panel, saving you time and money.<br />
How To Enable Zone Status Mode<br />
1. Enter Installers Programming Mode.<br />
(ie. 1234 followed by the # button).<br />
2. Enter <strong>com</strong>mand 958 followed by the # button.<br />
Two beeps will be heard.<br />
How To Disable Zone Status Mode<br />
Example<br />
1. Enter <strong>com</strong>mand 958 followed by the # button.<br />
Two beeps will be heard.<br />
A " - " in the display indicates the zone is triggered.<br />
A blank display indicates the zone is normal.<br />
--4-- A steady 4 indicates that zones 1, 2, 3 and 4 are triggered.<br />
-À4À- A flashing 4 indicates that tamper zones 1 and 4 are triggered.<br />
Tamper zones report back to base as zones 9, 10, 11 and 12.<br />
ISSUE123.DOC<br />
Electronics Design and Manufacturing Pty Limited
Programming 23<br />
Command 959 - Test Programming Key<br />
This <strong>com</strong>mand initiates a test to be carried out on the programming key. This test is nondestructive<br />
and any data in the programming key will remain intact after the test has been<br />
<strong>com</strong>pleted. One long beep indicates that the programming key has failed and three beeps<br />
indicate a successful test. If the programming key has been removed before the test has<br />
<strong>com</strong>pleted or the programming key has failed, the data in the programming key has be<strong>com</strong>e<br />
corrupt. Remember, do not remove the programming key while the activity LED is<br />
illuminated constantly or pulsing rapidly.<br />
How To Test The Programming Key<br />
1. Enter Installer's Programming Mode.<br />
(ie. 1234 followed by the # button).<br />
2. Plug the programming key onto the pins marked PROGRAMMING KEY on the control<br />
panel.<br />
3. Enter <strong>com</strong>mand 959 followed by the # button.<br />
Two beeps will be heard and the programming key has now been tested.<br />
4. Enter <strong>com</strong>mand 960 followed by the # button to exit the Installer's Programming<br />
Mode before removing the programming key.<br />
How To Test The Programming Key Using The Hand Held Programmer<br />
1. Before connecting the hand held programmer, make sure that the switch on the hand<br />
held programmer is in the EXT position and that no external key has been plugged onto<br />
the hand held programmer.<br />
2. Enter the Installer's Programming Mode.<br />
(ie. 1234 followed by the # button).<br />
3. Plug the programming key onto the pins marked EXTERNAL KEY on the hand held<br />
programmer.<br />
4. Enter <strong>com</strong>mand 959 followed by the # button.<br />
Two beeps will be heard and the programming key connected to the hand held<br />
programmer has now been tested.<br />
5. Enter <strong>com</strong>mand 960 followed by the # button to exit the Installer's Programming<br />
Mode.<br />
6. Leave the switch on the hand held programmer in the EXT position and disconnect the<br />
external programming key.<br />
Command 960 - Exit Installer's Programming Mode<br />
This <strong>com</strong>mand is used to exit the Installer's Programming Mode after you <strong>com</strong>plete your<br />
programming alterations. This is achieved by entering <strong>com</strong>mand 960 followed by the #<br />
button. Two beeps will be heard and the system will return to the disarmed state. This<br />
<strong>com</strong>mand can be performed at any programming stage and from any location.<br />
Command 961 - Reset Control Panel Back To Factory Def<strong>au</strong>lt Settings<br />
This <strong>com</strong>mand will reset the control panel back to the factory def<strong>au</strong>lt values. Refer to the<br />
def<strong>au</strong>lt values shown throughout this manual or the "Programming Sheets" on page 163. This<br />
is achieved by entering <strong>com</strong>mand 961 followed by the # button. Three beeps will be<br />
heard.<br />
Electronics Design and Manufacturing Pty Limited<br />
ISSUE123.DOC
24 <strong>Solution</strong> <strong>4+4</strong> <strong>Installation</strong> <strong>Manual</strong><br />
Command 962 - Copy Control Panel Memory To Programming Key<br />
This <strong>com</strong>mand is used to copy the control panel memory to the programming key.<br />
How To Copy The Control Panel Memory To The Programming Key<br />
1. Enter Installer's Programming Mode.<br />
(ie. 1234 followed by the # button).<br />
2. Plug the programming key onto the pins marked PROGRAMMING KEY on the control<br />
panel.<br />
3. Enter <strong>com</strong>mand 962 followed by the # button.<br />
Two beeps will be heard and the control panel's memory has now been copied into the<br />
programming key.<br />
4. Enter <strong>com</strong>mand 960 followed by the # button to exit Installer's Programming<br />
Mode.<br />
5. Disconnect the programming key from the control panel.<br />
How To Copy The Panel Memory To Programming Key Using The Hand Held Programmer<br />
1. Before connecting the hand held programmer to the control panel, make sure that the<br />
switch on the hand held programmer is in the EXT position and that no external<br />
programming key has been plugged onto the hand held programmer.<br />
2. Enter Installer's Programming Mode.<br />
(ie. 1234 followed by the # button).<br />
3. Plug the programming key onto the pins marked EXTERNAL KEY on the hand held<br />
programmer.<br />
4. Enter <strong>com</strong>mand 962 followed by the # button.<br />
Two beeps will be heard and the control panel's memory has now been copied into the<br />
programming key.<br />
5. Enter <strong>com</strong>mand 960 followed by the # button to exit Installer's Programming<br />
Mode.<br />
6. Leave the switch on the hand held programmer in the EXT position and disconnect the<br />
programming key.<br />
ISSUE123.DOC<br />
Electronics Design and Manufacturing Pty Limited
Programming 25<br />
Command 963 - Copy From Programming Key To Control Panel<br />
This <strong>com</strong>mand is used to copy data from the programming key to the control panel.<br />
How To Copy The Programming Key Memory To The Control Panel<br />
1. Enter Installer's Programming Mode.<br />
(ie. 1234 followed by the # button).<br />
2. Connect the programming key onto the pins marked PROGRAMMING KEY on the<br />
control panel.<br />
3. Enter <strong>com</strong>mand 963 followed by the # button.<br />
Two beeps will be heard and the programming key's data has now been copied to the<br />
control panel.<br />
4. Enter <strong>com</strong>mand 960 followed by the # button to exit Installer's Programming<br />
Mode.<br />
5. Disconnect the programming key from the control panel.<br />
How To Copy Programming Key Memory To Control Panel Using Hand Held Programmer<br />
1. Before connecting the hand held programmer to the control panel, make sure that the<br />
switch on the hand held programmer is in the EXT position and that no external<br />
programming key has been plugged onto the hand held programmer.<br />
2. Enter Installer's Programming Mode.<br />
(ie. 1234 followed by the # button).<br />
3. Plug the programming key onto the pins marked EXTERNAL KEY on the hand held<br />
programmer.<br />
4. Enter <strong>com</strong>mand 963 followed by the # button.<br />
Two beeps will be heard and the programming keys data will now be copied to the<br />
control panel.<br />
5. Enter <strong>com</strong>mand 960 followed by the # button to exit Installer's Programming<br />
Mode.<br />
6. Leave the switch on the hand held programmer in the EXT position and disconnect the<br />
programming key.<br />
Electronics Design and Manufacturing Pty Limited<br />
ISSUE123.DOC
26 <strong>Solution</strong> <strong>4+4</strong> <strong>Installation</strong> <strong>Manual</strong><br />
Command 964 - Erase Programming Key<br />
This <strong>com</strong>mand erases all data from the programming key.<br />
How To Erase The Programming Key<br />
1. Enter Installer's Programming Mode.<br />
(ie. 1234 followed by the # button).<br />
2. Connect the programming key onto the pins marked PROGRAMMING KEY on the<br />
control panel.<br />
3. Enter <strong>com</strong>mand 964 followed by the # button.<br />
Two beeps will be heard and the programming keys data has now been deleted.<br />
4. Enter <strong>com</strong>mand 960 followed by the # button to exit Installer's Programming<br />
Mode.<br />
5. Disconnect the programming key from the control panel.<br />
How To Erase The Programming Key Using The Hand Held Programmer<br />
1. Before connecting the hand held programmer to the control panel, make sure that the<br />
switch on the hand held programmer is in the EXT position and that no external<br />
programming key has been plugged onto the hand held programmer.<br />
2. Enter Installer's Programming Mode.<br />
(ie. 1234 followed by the # button).<br />
3. Plug the programming key onto the pins marked EXTERNAL KEY on the hand held<br />
programmer.<br />
4. Enter <strong>com</strong>mand 964 followed by the # button.<br />
Two beeps will be heard and the programming keys data has now been deleted.<br />
5. Enter <strong>com</strong>mand 960 followed by the # button to exit Installer's Programming<br />
Mode.<br />
6. Disconnect the programming key from the hand held programmer.<br />
ISSUE123.DOC<br />
Electronics Design and Manufacturing Pty Limited
Programming 27<br />
Command 965 - Set Up Domestic Dialling Format<br />
Command 965 has been added to make the set up of the domestic dialling format a one step<br />
operation. Refer to page 76 for more information on Domestic Reporting Format.<br />
After Installer's Programming Mode has been accessed, enter <strong>com</strong>mand 965 followed by<br />
the # button. This will <strong>au</strong>tomatically set the following locations in bold below. No other<br />
locations will be changed when <strong>com</strong>mand 965 has been issued.<br />
Location Description Setting<br />
LOCATION 49 Handshake Tone 2 (1400 Hz)<br />
LOCATION 50 Transmission Format 11 (Domestic)<br />
LOCATION 052 – 055 Subscriber ID Number 0, 0, 0, 1 (1 Beep)<br />
LOCATION 104 – 111 Zone 1 2, 0, 0, 0, 0, 3, 0, 1 (Delay-1)<br />
LOCATION 112 - 119 Zone 2 1, 0, 0, 0, 0, 3, 0, 1 (Handover)<br />
LOCATION 120 - 127 Zone 3 1, 0, 0, 0, 0, 3, 0, 1 (Handover)<br />
LOCATION 128 - 135 Zone 4 12, 0, 0, 0, 0, 3, 0, 1 (24 Hour)<br />
LOCATION 152 - 153 Bypass Reports 0, 0 (Not Used)<br />
LOCATION 154 - 155 Trouble Reports 0, 0 (Not Used)<br />
LOCATION 156 - 159 Codepad Duress 0, 0, 0, 0 (Not Used)<br />
LOCATION 160 - 163 Codepad Panic 0, 0, 0, 0 (Not Used)<br />
LOCATION 164 - 167 Access Denied 0, 0, 0, 0 (Not Used)<br />
LOCATION 168 - 171 AC Fail 0, 0, 0, 0 (Not Used)<br />
LOCATION 172 - 175 Low Battery 0, 0, 0, 0 (Not Used)<br />
LOCATION 176 - 179 Sensor Watch 0, 0, 0, 0 (Not Used)<br />
LOCATION 180 - 181 Open/Close Reports 0, 0 (Not Used)<br />
LOCATION 182 – 185 Test Report Time 0, 0, 0, 9 (Not Used)<br />
Table 5: Command 965 Def<strong>au</strong>lts<br />
As you can see from the table above, all reporting other than zone alarms have been disabled.<br />
The handshake tone has been set for 1400 Hz tone acknowledgment and the Subscriber ID<br />
Number has been set for one identification beep. The zone reporting has been set so that any<br />
zone that triggers an alarm condition will only report when the alarm occurs, the zone restore<br />
report will not report as there is no separate indications for zone alarm reports and zone alarm<br />
restore reports.<br />
Electronics Design and Manufacturing Pty Limited<br />
ISSUE123.DOC
28 <strong>Solution</strong> <strong>4+4</strong> <strong>Installation</strong> <strong>Manual</strong><br />
Command 966 - Enable/Disable Automatic Stepping Of Locations<br />
This <strong>com</strong>mand enables or disables the <strong>au</strong>tomatic stepping of locations while programming.<br />
When enabled via the hand held programmer, the decimal point of the left most display will<br />
reflect the mode of operation.<br />
If the decimal point is illuminated then <strong>au</strong>to step mode is active. An <strong>au</strong>tomatic increment of<br />
the location being programmed will occur as soon as the * button is pressed positioning you<br />
at the next location ready for programming.<br />
If the decimal point is not illuminated, the <strong>au</strong>to step mode is disabled. The next programming<br />
location will need to be manually selected by pressing the # button. As you can see from the<br />
examples below, <strong>au</strong>to step mode is a very useful feature when programming successive<br />
locations.<br />
How To Enable Automatic Stepping Of Locations<br />
1. Enter Installer’s Programming Mode.<br />
(ie. 1234 followed by the # button).<br />
2. Enter <strong>com</strong>mand 966 followed by the # button.<br />
Two beeps will be heard.<br />
How To Disable Automatic Stepping Of Locations<br />
Example<br />
1. Enter <strong>com</strong>mand 966 followed by the # button.<br />
Two beeps will be heard.<br />
(Auto Step Enabled)<br />
To enter the Primary Telephone Number "02 p<strong>au</strong>se 9672 1055" with <strong>au</strong>to step enabled (ie.<br />
Decimal point illuminated).<br />
Press 0 followed by the # button.<br />
(This will position you at "LOCATION 000" being the start of the Primary Telephone<br />
Number).<br />
Example<br />
+ * + 2 + * + + * + 9 + * + 6 + * +<br />
7 + * + 2 + * + 1 + * + + * + 5 + * + 5<br />
+ * + 0 + *<br />
(Auto Step Disabled)<br />
To enter the Primary Telephone Number "02 p<strong>au</strong>se 9672 1055" with <strong>au</strong>to step disabled (ie.<br />
Decimal point extinguished).<br />
Press 0 followed by the # button.<br />
(This will position you at "LOCATION 000" being the start of the Primary Telephone<br />
Number).<br />
+ * + # + 2 + * + # + + * + # + 9 + *<br />
+ # + 6 + * + # + 7 + * + # + 2 + * + # +<br />
1 + * + # + + * + # + 5 + * + # + 5 + *<br />
+ # + 0 + *<br />
ISSUE123.DOC<br />
Electronics Design and Manufacturing Pty Limited
Programming 29<br />
Command 999 - Display Software Version Number<br />
This <strong>com</strong>mand will display the control panel's software version number. This <strong>com</strong>mand can<br />
only be used with the hand held programmer.<br />
Once access to Installer’s Programming Mode has been gained, enter <strong>com</strong>mand 999<br />
followed by the # button to display the control panel's software version number. Two beeps<br />
will be heard. Press the # button to exit this <strong>com</strong>mand and return to the Installer’s<br />
Programming Mode.<br />
Disable Factory Def<strong>au</strong>lt<br />
LOCATION 900 0<br />
The system has a feature that prevents the control panel from being manually def<strong>au</strong>lted via the<br />
def<strong>au</strong>lt button or by using a programming key unless the Installer’s Code is known.<br />
Any number between 0-14 programmed into this location will allow def<strong>au</strong>lting of the control<br />
panel. If 15 has been programmed into this location, def<strong>au</strong>lting of the control panel will not<br />
operate and the Installer Code MUST be used for further programming of the control panel.<br />
If the Installer Code is not known, the control panel will need to be returned to your EDM<br />
Distributor for exchange. A nominal fee applies for this service.<br />
Electronics Design and Manufacturing Pty Limited does not re<strong>com</strong>mend the use of this<br />
feature.<br />
If the option to prevent def<strong>au</strong>lting of the control panel is required, a special programming<br />
procedure has been introduced to eliminate any possibility of accidentally setting this option.<br />
The def<strong>au</strong>lt button on the PCB must be held down while programming this location.<br />
How To Prevent <strong>Manual</strong> Def<strong>au</strong>lting Of The Control Panel<br />
1. Disarm the system.<br />
2. Access Installer's Programming Mode.<br />
3. Go to "LOCATION 900".<br />
4. Hold down the def<strong>au</strong>lt button.<br />
5. Program a 15 into "LOCATION 900".<br />
6. Release the def<strong>au</strong>lt button.<br />
7. Exit Installer's Programming Mode.<br />
Electronics Design and Manufacturing Pty Limited<br />
ISSUE123.DOC
30 <strong>Solution</strong> <strong>4+4</strong> <strong>Installation</strong> <strong>Manual</strong><br />
Def<strong>au</strong>lting The Control Panel<br />
If the <strong>Solution</strong> <strong>4+4</strong> control panel does not have "LOCATION 900" programmed as 15,<br />
follow the procedure outlined below to successfully def<strong>au</strong>lt the control panel back to the<br />
factory def<strong>au</strong>lt settings.<br />
How To Def<strong>au</strong>lt The Control Panel<br />
1. Disconnect the AC mains supply and the backup battery from the control panel.<br />
2. Hold down and continue to hold down the DEFAULT button located at the top of the<br />
printed circuit board.<br />
3. Reconnect the AC mains to the control panel.<br />
4. After reconnecting the AC mains, wait for 3-5 seconds before releasing the DEFAULT<br />
button.<br />
You will hear the dialler seize relay (RL1) on the control panel click once and two beeps will<br />
be heard on the remote codepad. The control panel will now need to be disarmed by using the<br />
def<strong>au</strong>lt Master Code (ie. 2580).<br />
The control panel has now been successfully def<strong>au</strong>lted back to the factory def<strong>au</strong>lt settings.<br />
If you hear the dialler seize relay (RL1) click four times while attempting to def<strong>au</strong>lt the<br />
control panel, this would indicate that the feature of def<strong>au</strong>lting the control panel has<br />
been disabled in “LOCATION 900” on page 29. The control panel will need to be returned<br />
to Electronics Design and Manufacturing Pty Limited for exchange where a service fee<br />
will be charged to unlock the control panel's memory if the Installer Code is not known.<br />
ISSUE123.DOC<br />
Electronics Design and Manufacturing Pty Limited
System Indicators and Operations<br />
This section includes the following;<br />
• System Indicators and Operations<br />
• CP5 Eight Zone Codepad<br />
• CP5 Eight Zone LCD Codepad<br />
• System Operations<br />
• Arming The System In AWAY Mode<br />
• Disarming The System From AWAY Mode<br />
• Arming The System In STAY Mode<br />
• Disarming The System From STAY Mode<br />
• Codepad Duress Alarm<br />
• Codepad Panic Alarm<br />
• Codepad Fire Alarm<br />
• Codepad Medical Alarm<br />
• Isolating Zones<br />
• F<strong>au</strong>lt Analysis Mode<br />
• F<strong>au</strong>lt Descriptions
32 <strong>Solution</strong> <strong>4+4</strong> <strong>Installation</strong> <strong>Manual</strong><br />
System Indicators and Operations<br />
CP5 Eight Zone Codepad<br />
The codepad is the <strong>com</strong>munications interface between you and your alarm<br />
system. It allows you to issue <strong>com</strong>mands and offers both visual and <strong>au</strong>dible<br />
indications that guide you through the general operation.<br />
The codepad incorporates numerous indicators. There are ZONE indicators<br />
which are used to show the condition of each zone and four others for<br />
general status. The following is a list of situations and the relevant<br />
indications that will be seen.<br />
Figure 1: CP5 Eight Zone Codepad (CP508)<br />
Zone Indicators<br />
The ZONE indicators are used to show the status of the zones. The following table lists the<br />
various circumstances that the indicators will display (ie. Zone Sealed, Zone Unsealed).<br />
Indicator<br />
On<br />
Off<br />
Flashing Fast<br />
(0.25 Sec On – 0.25 Sec Off)<br />
Flashing Very Fast<br />
(0.1 Sec On – 0.1 Sec Off)<br />
Flashing Slow<br />
(1 Sec On – 1 Sec Off)<br />
Flashing Very Slow<br />
(2 Sec On – 1 Sec Off)<br />
Definition<br />
Zone Is Unsealed<br />
Zone Is Sealed<br />
Zone Is In Alarm Condition<br />
Tamper Zone Is In Alarm Condition<br />
Zone Is <strong>Manual</strong>ly Isolated<br />
Tamper Zone In The Unsealed State<br />
Table 6: Zone Indicators<br />
AWAY Indicator<br />
The AWAY indicator is used to inform you that the system is armed in the AWAY Mode.<br />
Indicator<br />
On<br />
Off<br />
Definition<br />
System Is Armed In AWAY Mode<br />
System Is Not Armed In AWAY Mode<br />
Table 7: AWAY Indicator<br />
STAY Indicator<br />
The STAY indicator is used to indicate that the system is armed in the STAY Mode.<br />
Indicator<br />
On<br />
Off<br />
Flashing<br />
Definition<br />
System Is Armed In STAY Mode<br />
System Is Not Armed In STAY Mode<br />
System Is In Isolating Mode<br />
Table 8: STAY Indicator<br />
ISSUE123.DOC<br />
Electronics Design and Manufacturing Pty Limited
System Indicators and Operations 33<br />
MAINS Indicator<br />
The MAINS indicator is used to indicate that the systems AC mains supply is normal or has<br />
failed.<br />
Indicator<br />
On<br />
Flashing<br />
Definition<br />
AC Mains Power Normal<br />
AC Mains Failure<br />
Table 9: MAINS Indicator<br />
FAULT Indicator<br />
The FAULT indicator is used to indicate that the system has detected a system f<strong>au</strong>lt. Refer to<br />
"F<strong>au</strong>lt Analysis Mode" on page 43 for more information.<br />
Indicator<br />
On<br />
Off<br />
Flashing<br />
Definition<br />
There Is A System F<strong>au</strong>lt That Needs To Be Rectified<br />
The System Is Normal, There Are No F<strong>au</strong>lts<br />
There Is A System F<strong>au</strong>lt Waiting To Be Acknowledged<br />
Table 10: FAULT Indicator<br />
Audible Indicators<br />
In general, the <strong>au</strong>dible indications given out by the codepad are as follows:<br />
Indicator<br />
One Short Beep<br />
Two Short Beeps<br />
Three Short Beeps<br />
One Long Beep<br />
One Short Beep Every Second<br />
One Short Beep Every Two<br />
Seconds<br />
One Short Beep Every Minute<br />
Definition<br />
A Button Has Been Pressed On The Codepad<br />
Or End Of Exit Time When Armed In STAY Mode<br />
The System Has Accepted Your Code<br />
The Requested Function Has Been Executed<br />
Indicates The End Of Exit Time In AWAY Mode Or The<br />
Requested Operation Has Been Denied Or Aborted<br />
Walk Test Mode Is Currently Active<br />
Telephone Monitor Mode Is Active<br />
There Is A System F<strong>au</strong>lt Waiting To Be Acknowledged<br />
Table 11: Audible Indications<br />
Electronics Design and Manufacturing Pty Limited<br />
ISSUE123.DOC
34 <strong>Solution</strong> <strong>4+4</strong> <strong>Installation</strong> <strong>Manual</strong><br />
CP5 Eight Zone LCD Codepad<br />
The codepad is the <strong>com</strong>munications interface between you and your alarm<br />
system. It allows you to issue <strong>com</strong>mands and offers both visual and <strong>au</strong>dible<br />
indications that guide you through the general operation.<br />
The codepad incorporates numerous indicators. There are ZONE indicators<br />
which are used to show the condition of each zone and nine others for<br />
general status. The following is a list of situations and the relevant<br />
indications that will be seen.<br />
Figure 2: CP5 Eight Zone LCD Codepad<br />
(CP508L)<br />
Zone Indicators<br />
1 2 3 ....<br />
The ZONE indicators are used to show the status of the zones. The following table lists the<br />
various circumstances that the indicators will display (ie. Zone Sealed, Zone Unsealed).<br />
Indicator<br />
On<br />
Off<br />
Flashing Fast<br />
(0.25 Sec On – 0.25 Sec Off)<br />
Flashing Very Fast<br />
(0.1 Sec On – 0.1 Sec Off)<br />
Flashing Slow<br />
(1 Sec On – 1 Sec Off)<br />
Flashing Very Slow<br />
(2 Sec On – 1 Sec Off)<br />
Definition<br />
Zone Is Unsealed<br />
Zone Is Sealed<br />
Zone Is In Alarm Condition<br />
Tamper Zone Is In Alarm Condition<br />
Zone Is <strong>Manual</strong>ly Isolated<br />
Tamper Zone In The Unsealed State<br />
Table 12: Zone Indicators<br />
AWAY Indicator<br />
The AWAY indicator illuminates when the system is armed in AWAY Mode. The<br />
indicator will also illuminate when the system is armed in AWAY Mode.<br />
Indicator<br />
On<br />
Off<br />
Definition<br />
System Is Armed In AWAY Mode<br />
System Is Not Armed In AWAY Mode<br />
Table 13: AWAY Indicator<br />
STAY Indicator<br />
The STAY indicator illuminates when the system is armed in STAY Mode. The<br />
indicators will also illuminate when the system is armed in STAY Mode.<br />
and<br />
Indicator<br />
On<br />
Off<br />
Flashing<br />
Definition<br />
System Is Armed In STAY Mode<br />
System Is Not Armed In STAY Mode<br />
System Is In Isolating Mode<br />
Table 14: STAY Indicator<br />
ISSUE123.DOC<br />
Electronics Design and Manufacturing Pty Limited
System Indicators and Operations 35<br />
System Disarmed<br />
This indicator will illuminate when the system has been disarmed. The<br />
also illuminate when the system has been disarmed.<br />
indicator will<br />
MAINS Indicator<br />
The MAINS indicator is used to indicate that the systems AC mains supply is normal or has<br />
failed.<br />
Indicator<br />
On<br />
Flashing<br />
Definition<br />
AC Mains Power Normal<br />
AC Mains Failure<br />
Table 15: MAINS Indicator<br />
Zone Isolating Mode<br />
Flashing<br />
This indicator will illuminate when you attempt to isolate zones. The person will flash once<br />
every 3 seconds.<br />
FAULT Indicator<br />
The FAULT indicator is used to indicate that the system has detected a system f<strong>au</strong>lt. Refer to<br />
"F<strong>au</strong>lt Analysis Mode" on page 43 for more information.<br />
Indicator<br />
On<br />
Off<br />
Flashing<br />
Definition<br />
There Is A System F<strong>au</strong>lt That Needs To Be Rectified<br />
The System Is Normal, There Are No F<strong>au</strong>lts<br />
There Is A System F<strong>au</strong>lt Waiting To Be Acknowledged<br />
Table 16: FAULT Indicator<br />
Programming Mode<br />
This indicator will illuminate when the system has entered either Installer’s Programming<br />
Mode or Operators Programming Mode. Both persons will flash.<br />
Flashing<br />
Electronics Design and Manufacturing Pty Limited<br />
ISSUE123.DOC
36 <strong>Solution</strong> <strong>4+4</strong> <strong>Installation</strong> <strong>Manual</strong><br />
Off Indicator/Zone Sealed<br />
The indicator will illuminate when the system is in the disarmed state and will flash<br />
when a zone be<strong>com</strong>es unsealed. It will stop flashing when all zones are sealed.<br />
On Indicator/Zone In Alarm<br />
The indicator will illuminate when the system is armed in AWAY Mode and will flash<br />
when an alarm occurs. The indicator will reset once a valid user code has been entered.<br />
Both the and indicators will illuminate when the system has been armed in<br />
STAY Mode.<br />
Audible Indicators<br />
In general, the <strong>au</strong>dible indications given out by the codepad are as follows:<br />
Indicator<br />
One Short Beep<br />
Two Short Beeps<br />
Three Short Beeps<br />
One Long Beep<br />
One Short Beep Every Second<br />
One Short Beep Every Two<br />
Seconds<br />
One Short Beep Every Minute<br />
Definition<br />
A Button Has Been Pressed On The Codepad<br />
Or End Of Exit Time When Armed In STAY Mode<br />
The System Has Accepted Your Code<br />
The Requested Function Has Been Executed<br />
Indicates The End Of Exit Time In AWAY Mode Or The<br />
Requested Operation Has Been Denied Or Aborted<br />
Walk Test Mode Is Currently Active<br />
Telephone Monitor Mode Is Active<br />
There Is A System F<strong>au</strong>lt Waiting To Be Acknowledged<br />
Table 17: Audible Indications<br />
ISSUE123.DOC<br />
Electronics Design and Manufacturing Pty Limited
System Indicators and Operations 37<br />
System Operations<br />
Arming The System In AWAY Mode<br />
There are two methods for arming your system in AWAY Mode. Method one is standard and<br />
will always operate. Method two is optional and needs to be enabled in "LOCATION 230" on<br />
page 140.<br />
Single button arming in AWAY Mode will report as user code number 32.<br />
Method One<br />
How To Arm The System In AWAY Mode<br />
1. Enter your followed by the button.<br />
Two beeps will be heard and the AWAY indicator will illuminate. Exit time will now<br />
<strong>com</strong>mence.<br />
+<br />
Method Two<br />
How To Arm The System In AWAY Mode<br />
1. Hold down the button until two beeps are heard.<br />
The AWAY indicator will illuminate and exit time will now <strong>com</strong>mence. Refer to Option<br />
2 in "LOCATION 230" on page 140 to enable single button arming in AWAY Mode.<br />
If a zone is not sealed at the end of exit time the zone will be <strong>au</strong>tomatically isolated. The zone<br />
will be<strong>com</strong>e an active part of the system again as soon as it has resealed (ie. If a window is left<br />
open after exit time has expired, the window will not be an active part of the system until it has<br />
closed. Opening the window after exit time has expired will c<strong>au</strong>se an alarm condition).<br />
Forced Arming<br />
The feature of arming the system when a zone is not sealed is known as forced arming. Refer<br />
to Option 1 in “LOCATION 226” on page 136 for more information on forced arming.<br />
If the AWAY indicator does not illuminate and a long beep is heard when attempting to arm the<br />
system, forced arming is not permitted. If this is the case, you must ensure that all zones are<br />
sealed or manually isolated before you can arm the system.<br />
Disarming The System From AWAY Mode<br />
How To Disarm The System From AWAY Mode<br />
1. Enter your followed by the button.<br />
Two beeps will be heard and the AWAY indicator will extinguish. A flashing ZONE<br />
indicator represents a previous alarm on that zone.<br />
+<br />
Electronics Design and Manufacturing Pty Limited<br />
ISSUE123.DOC
38 <strong>Solution</strong> <strong>4+4</strong> <strong>Installation</strong> <strong>Manual</strong><br />
Arming The System In STAY Mode<br />
STAY Mode is when the system has been armed with particular zones <strong>au</strong>tomatically isolated.<br />
Refer to “Zone Options” on page 102 for further information.<br />
When there is a need to arm only the system perimeter, this mode is extremely handy. It<br />
<strong>au</strong>tomatically disables the interior detection zones allowing movement within the protected<br />
area while at the same time arming the perimeter zones.<br />
There are two methods for arming your system in STAY Mode. Method one is standard and<br />
will always operate. Method two is optional and needs to be enabled in "LOCATION 230” on<br />
page 140.<br />
Single button arming in STAY Mode will report as user code number 32.<br />
Method One<br />
How To Arm The System In STAY Mode<br />
1. Enter your followed by the button.<br />
Two beeps will be heard and the STAY indicator will illuminate. Exit time will now<br />
<strong>com</strong>mence.<br />
Any zones that have been programmed for STAY Mode will be <strong>au</strong>tomatically isolated<br />
and their respective indicators will begin to flash until exit time expires. At the end of<br />
exit time, the ZONE indicators will extinguish and the codepad will give one short beep.<br />
+<br />
Method Two<br />
How To Arm The System In STAY Mode<br />
1. Hold down the button until two beeps are heard.<br />
The STAY indicator will illuminate and exit time will now <strong>com</strong>mence.<br />
Any zones that have been programmed for STAY Mode will be <strong>au</strong>tomatically isolated<br />
and their respective indicators will begin to flash until exit time expires. At the end of<br />
exit time, the ZONE indicators will extinguish and the codepad will give one short beep.<br />
If a zone is not sealed at the end of exit time, the zone will be <strong>au</strong>tomatically isolated. The zone<br />
will be<strong>com</strong>e an active part of the system again as soon as it has resealed (ie. If a window is left<br />
open after exit time has expired, the window will not be an active part of the system until it has<br />
closed. Opening the window after exit time has expired will c<strong>au</strong>se an alarm condition).<br />
Forced Arming<br />
The feature of arming the system when a zone is not sealed is known as forced arming. Refer<br />
to Option 1 in “LOCATION 226” on page 136 for more information on forced arming.<br />
If the STAY indicator does not illuminate and a long beep is heard when attempting to arm the<br />
system, forced arming is not permitted. If this is the case, you must ensure that all zones are<br />
sealed or manually isolated before you can arm the system.<br />
ISSUE123.DOC<br />
Electronics Design and Manufacturing Pty Limited
System Indicators and Operations 39<br />
Disarming The System From STAY Mode<br />
There are two methods for disarming the system from STAY Mode. Method one is standard<br />
and will always operate. Method two is optional and needs to be enabled in "LOCATION<br />
230” on page 140.<br />
Method two will not operate unless "Enable Single Button Arming In AWAY Mode and<br />
STAY Mode" has been enabled in “LOCATION 230”.<br />
Method One<br />
How To Disarm The System From STAY Mode<br />
1. Enter your followed by the button.<br />
Two beeps will be heard and the STAY indicator will extinguish. A flashing ZONE<br />
indicator represents a previous alarm on that zone.<br />
+<br />
Method Two<br />
A flashing ZONE indicator represents a previous alarm on that zone. If this is the case, a valid<br />
user code will need to be used to disarm the system. To enable method two, Option 4 in<br />
"LOCATION 230” on page 140 will need to be enabled.<br />
Single button disarming from STAY Mode will report as user code number 32.<br />
How To Disarm The System From STAY Mode<br />
1. Hold down the button until two beeps are heard.<br />
The STAY indicator will extinguish and the system will disarm.<br />
Electronics Design and Manufacturing Pty Limited<br />
ISSUE123.DOC
40 <strong>Solution</strong> <strong>4+4</strong> <strong>Installation</strong> <strong>Manual</strong><br />
Codepad Duress Alarm<br />
A codepad duress alarm can be used as a hold up alarm. This will occur when the number 9<br />
is added to the end of any valid user code that is being used to disarm the system. A duress<br />
alarm is always silent and can only be made use of if your system is reporting back to a<br />
monitoring station or pocket pager. If you wish to disable the reporting of the codepad duress<br />
alarm report, refer to “LOCATION 156 - 159” on page 109 for more information.<br />
Codepad Panic Alarm - Versions Up To 1.26<br />
+ 9 +<br />
A panic alarm will occur when any two outside buttons in the same horizontal row on a<br />
codepad are pressed simultaneously. This is an <strong>au</strong>dible alarm. Refer to Option 4 in<br />
"LOCATION 227" on page 137 to enable codepad panic to be silent. If you wish to disable the<br />
reporting of the codepad panic alarm report, refer to “LOCATION 160 - 163” on page 110 for<br />
more information.<br />
Codepad Panic Alarm – Version 1.27 Onwards<br />
1 + 3 or 4 + 6 or 7 + 9 or +<br />
A codepad panic alarm will be triggered when either the 1 and 3 buttons or the and<br />
buttons are pressed simultaneously. This is an <strong>au</strong>dible alarm. Refer to Option 4 in<br />
"LOCATION 227" on page 137 to enable codepad panic to be silent. If you wish to disable the<br />
reporting of the codepad panic alarm report, refer to “LOCATION 160 - 163” on page 110 for<br />
more information.<br />
Codepad Fire Alarm – Version 1.27 Onwards<br />
1 + 3 or +<br />
A codepad fire alarm will be triggered when the 4 and 6 buttons on the remote codepad are<br />
pressed simultaneously. A distinct fire sound is emitted through the horn speaker to indicate<br />
this type of alarm condition. The fire sound is different to the burglary sound. This is an<br />
<strong>au</strong>dible alarm.<br />
Codepad Medical Alarm – Version 1.27 Onwards<br />
4 + 6<br />
A codepad medical alarm will be triggered when the 7 and 9 buttons on the codepad are<br />
pressed simultaneously. This is an <strong>au</strong>dible alarm.<br />
7 + 9<br />
To disable both the reporting and the <strong>au</strong>dible alarms for codepad panic, codepad fire and<br />
codepad medical alarms, the dialler channel for “Codepad Panic” in “LOCATION 163” on<br />
page 110 should be set as zero and enable Option 4 in “LOCATION 227” on page 137.<br />
Codepad fire and codepad medical alarms can not be disabled without disabling<br />
codepad panic alarms.<br />
ISSUE123.DOC<br />
Electronics Design and Manufacturing Pty Limited
System Indicators and Operations 41<br />
Isolating Zones<br />
Standard Isolating<br />
When a zone has been isolated, access is allowed into that zone at all times. Isolating zones is<br />
performed by one of two methods. One way requires the use of a valid user code while the<br />
other way does not. The ability to isolate zones is governed by the priority level allocated to<br />
each user code holder. Some user code holders may not be able to isolate zones. Refer to<br />
"User Code Priority" on page 91 for further information.<br />
Twenty four hour zone types and zone not used cannot be isolated. If isolation of these zones<br />
is attempted, a long beep will be heard.<br />
1. Press the button twice.<br />
Three beeps will be heard.<br />
2. * Enter the required to be isolated followed by the button.<br />
The zone you just selected to be isolated will now begin to flash.<br />
Repeat Step 2 if more than one zone is required to be isolated until all zones that are<br />
required to be isolated have been selected.<br />
3. Press the button when finished selecting the zones to be isolated.<br />
Two beeps will be heard.<br />
The isolated zones will now continue to flash until the system has next been disarmed. The<br />
system is ready to be armed in AWAY Mode.<br />
+ + +<br />
+ + +<br />
* As each zone is isolated, the corresponding ZONE indicator will begin to flash. If a<br />
mistake is made, press the zone number that was incorrectly entered followed by the<br />
button. This zone is now no longer isolated and the ZONE indicator will<br />
extinguish.<br />
Electronics Design and Manufacturing Pty Limited<br />
ISSUE123.DOC
42 <strong>Solution</strong> <strong>4+4</strong> <strong>Installation</strong> <strong>Manual</strong><br />
Code To Isolate<br />
1. Press the button.<br />
2. Enter your .<br />
3. Press the button.<br />
Three beeps will be heard.<br />
4. * Enter the required to be isolated followed by the button. The<br />
zone you have just selected to be isolated will now begin to flash.<br />
Repeat Step 4 if more than one zone is required to be isolated until all zones that are<br />
required to be isolated have been selected.<br />
5. Press the button when finished selecting the zones to be isolated.<br />
Two beeps will be heard.<br />
The isolated zones will now continue to flash until the system has next been disarmed. The<br />
system is ready to be armed in AWAY Mode.<br />
+ + + +<br />
+ + +<br />
* As each zone is isolated, the corresponding ZONE indicator will begin to flash. If a<br />
mistake is made, press the zone number that was incorrectly entered followed by the<br />
button. This zone is now no longer isolated and the ZONE indicator will<br />
extinguish.<br />
ISSUE123.DOC<br />
Electronics Design and Manufacturing Pty Limited
System Indicators and Operations 43<br />
F<strong>au</strong>lt Analysis Mode<br />
Whenever a system f<strong>au</strong>lt occurs, the FAULT or MAINS indicator will flash and the codepad will<br />
beep once every minute.<br />
If the MAINS indicator is flashing, this is bec<strong>au</strong>se the AC mains has been disconnected. There<br />
is no need to determine this type of system f<strong>au</strong>lt. Pressing the button for two seconds<br />
will acknowledge the AC mains fail and will stop the codepad beeping once every minute.<br />
How To Determine The Type Of System F<strong>au</strong>lt<br />
To determine the type of system f<strong>au</strong>lt that has occurred, enter f<strong>au</strong>lt analysis mode by following<br />
the procedures below.<br />
1. Hold down the 5 button until two beeps are heard.<br />
The FAULT indicator should remain steady and the STAY and AWAY indicators will<br />
flash in unison with each other.<br />
The ZONE indicators will indicate the type of system f<strong>au</strong>lt. Refer to "Table 18: F<strong>au</strong>lt<br />
Indicators" below for the list of different system f<strong>au</strong>lts that may occur.<br />
Zone Indicator<br />
F<strong>au</strong>lt Description<br />
1 Low Battery<br />
2 Date and Time<br />
3 Sensor Watch<br />
4 Horn Speaker Disconnected<br />
5 Reserved<br />
6 E 2 F<strong>au</strong>lt<br />
7 Reserved<br />
8 Communications Failure<br />
Table 18: F<strong>au</strong>lt Indicators<br />
2. To exit f<strong>au</strong>lt analysis mode, press the button. The STAY and AWAY indicators<br />
will extinguish and the FAULT indicator will remain illuminated.<br />
How To Acknowledge The System F<strong>au</strong>lt<br />
1. To acknowledge the system f<strong>au</strong>lt, press the button. The FAULT indicator will<br />
remain illuminated and the codepad will cease its once a minute beep.<br />
Electronics Design and Manufacturing Pty Limited<br />
ISSUE123.DOC
44 <strong>Solution</strong> <strong>4+4</strong> <strong>Installation</strong> <strong>Manual</strong><br />
F<strong>au</strong>lt Descriptions<br />
1<br />
Low Battery<br />
A low battery f<strong>au</strong>lt will register when the battery supply voltage falls below 10.5 volts or when<br />
a dynamic battery test detects a low capacity battery. This f<strong>au</strong>lt will clear after a successful<br />
dynamic battery test. A dynamic battery test is performed every four hours once power has<br />
been connected to the control panel and also every time the system is armed in AWAY Mode<br />
and STAY Mode.<br />
2<br />
3<br />
Date and Time<br />
The date and time f<strong>au</strong>lt will register every time the control panel has been powered down. This<br />
f<strong>au</strong>lt will not c<strong>au</strong>se the FAULT indicator on the codepad to illuminate. This f<strong>au</strong>lt will only be<br />
indicated when entering f<strong>au</strong>lt analysis mode. This f<strong>au</strong>lt will clear once the date and time has<br />
been programmed. Refer to "Setting The Date and Time" on page 59 for further information<br />
on setting the date and time.<br />
Sensor Watch<br />
A sensor watch f<strong>au</strong>lt will register bec<strong>au</strong>se one of the detection devices has stopped working or<br />
has failed to detect movement for the programmed time period whilst the system is disarmed.<br />
The f<strong>au</strong>lt will clear after the registered zone has been unsealed and resealed again.<br />
To find out which zone has registered the sensor watch f<strong>au</strong>lt, enter f<strong>au</strong>lt analysis mode and<br />
hold down the 5 button to display the zone that has registered the sensor watch f<strong>au</strong>lt. Refer<br />
to "LOCATION 218 - 219" on page 129 for setting sensor watch time and "Zone Options" on<br />
page 102 for setting zones to be monitored for sensor watch.<br />
4<br />
5<br />
6<br />
7<br />
8<br />
Horn Speaker Monitor<br />
A horn speaker f<strong>au</strong>lt will register when the horn speaker be<strong>com</strong>es disconnected from the<br />
control panel. This f<strong>au</strong>lt will clear when the horn speaker has been reconnected. Option 4 in<br />
"LOCATION 226" on page 136 to enable monitoring of the horn speaker.<br />
Reserved<br />
E 2 F<strong>au</strong>lt<br />
An E 2 f<strong>au</strong>lt will register when the control panel detects an internal checksum error. The<br />
control panel will need to be powered down and def<strong>au</strong>lted to clear this f<strong>au</strong>lt.<br />
Reserved<br />
Communication Failure<br />
A <strong>com</strong>munication failure f<strong>au</strong>lt will register if the control panel was unsuccessful in calling the<br />
receiving party after the control panel has exh<strong>au</strong>sted its maximum number of attempts.<br />
If the control panel is not connected to the telephone line and no Primary Telephone<br />
Number or Secondary Telephone Numbers have been programmed, the control panel will<br />
still register this f<strong>au</strong>lt if Option 1 in "LOCATION 224" on page 134 is enabled.<br />
AC Mains Failure<br />
An AC mains failure will flash the MAINS indicator, sound the codepad buzzer once every<br />
minute and an "AC Fail" report will be transmitted to the monitoring station. This f<strong>au</strong>lt will<br />
clear after the AC mains has been reconnected. An "AC Restore" report will be transmitted<br />
once the AC mains has been restored for more than two minutes.<br />
If you wish only to transmit an "AC Fail" report and ignore the mains failure on the codepad,<br />
enable Option 4 in "LOCATION 228" on page 138.<br />
ISSUE123.DOC<br />
Electronics Design and Manufacturing Pty Limited
System Functions<br />
This section includes the following;<br />
• Installer Code Functions<br />
• Master Code Functions<br />
• Hold Down Functions
46 <strong>Solution</strong> <strong>4+4</strong> <strong>Installation</strong> <strong>Manual</strong><br />
System Functions<br />
Installer Code Functions<br />
This section deals with the more advanced features that are required for testing and regular<br />
maintenance of the system. Features such as Installer Code Functions, Master Code Functions<br />
and Hold Down Functions are covered in this section.<br />
Installer Code Functions are provided to allow the installer to perform various system functions<br />
without the need to know a Master Code.<br />
To enter the required Installer Code function, enter the<br />
required digit and the button.<br />
followed by the<br />
+ +<br />
These functions can only be carried out when the system is in the disarmed state.<br />
Function<br />
Description<br />
0 F<strong>au</strong>lt Analysis Mode<br />
1 Reserved<br />
2 Set Number Of Days Until The First Test Report<br />
3 Event Memory Recall<br />
4 Walk Test Mode<br />
5 EDMSAT - Satellite Siren Service Mode<br />
6 Initiate Modem Call<br />
7 Turning Telephone Monitor Mode On/Off<br />
8 Reserved<br />
9 Send Test Report<br />
Table 19: Installer Code Functions<br />
ISSUE123.DOC<br />
Electronics Design and Manufacturing Pty Limited
System Functions 47<br />
0<br />
F<strong>au</strong>lt Analysis Mode<br />
Whenever a system f<strong>au</strong>lt occurs, the FAULT or MAINS indicator will flash and the codepad<br />
will beep once every minute.<br />
If the MAINS indicator is flashing, this is bec<strong>au</strong>se the AC mains supply has been disconnected.<br />
There is no need to determine this type of system f<strong>au</strong>lt. Pressing the button once will<br />
acknowledge the AC mains fail and will stop the codepad from beeping once every minute.<br />
How To Enter F<strong>au</strong>lt Analysis Mode<br />
1. Enter your followed by 0 and the button.<br />
Two beeps will be heard and the STAY and AWAY indicators will begin to flash in<br />
unison with the FAULT indicator.<br />
One or more zone indicators (1-8) will illuminate indicating the type of f<strong>au</strong>lt that has<br />
occurred. Refer to “F<strong>au</strong>lt Descriptions” on page 44 for further information.<br />
2. Press the button again to exit this function.<br />
Two beeps will be heard and the STAY and AWAY indicators will extinguish.<br />
+ 0 +<br />
Zone Indicator<br />
F<strong>au</strong>lt Description<br />
1 Low Battery<br />
2 Date and Time<br />
3 Sensor Watch<br />
4 Horn Speaker Disconnected<br />
5 Reserved<br />
6 E 2 F<strong>au</strong>lt<br />
7 Reserved<br />
8 Communications Failure<br />
Table 20: F<strong>au</strong>lt Indicators<br />
1<br />
Reserved<br />
Electronics Design and Manufacturing Pty Limited<br />
ISSUE123.DOC
48 <strong>Solution</strong> <strong>4+4</strong> <strong>Installation</strong> <strong>Manual</strong><br />
2<br />
Set The Number Of Days Until The First Test Report<br />
If test reports are required, "LOCATION 182 - 185" on page 114 will need to be programmed.<br />
After this has been carried out, test reports need to be initiated by setting the first test report. If<br />
the first test report is not set, the test report will be transmitted in the number of days as<br />
programmed in the repeat interval programmed in "LOCATION 182 - 185".<br />
Each time Installer's Programming Mode has been entered, you will need to reset the<br />
number of days until the first test report. Otherwise, the next test report will report as<br />
programmed in the repeat interval time.<br />
How To Set The First Test Report<br />
1. Enter your followed by 2 and the button.<br />
Three beeps will be heard and the STAY and AWAY indicators will begin to flash.<br />
2. Enter the to wait (1-99) until the first test report.<br />
3. Press the button when finished.<br />
Two beeps will be heard and the STAY and AWAY indicators will extinguish.<br />
+ +<br />
+ 2 +<br />
Test reports will not report if the Subscriber ID Number is 0000. The number of day’s<br />
decrements by one at 2400 hours as set in "LOCATION 901 – 904" on page 132.<br />
ISSUE123.DOC<br />
Electronics Design and Manufacturing Pty Limited
System Functions 49<br />
3<br />
Event Memory Recall Mode<br />
This feature allows you to playback the last forty events that have occurred to the system. The<br />
event memory recall mode reports all alarms and arming/disarming of the system in the<br />
AWAY Mode and STAY Mode. This function helps with trouble shooting system f<strong>au</strong>lts. The<br />
events are displayed via the codepad indicators.<br />
How To Enter The Event Memory Recall Mode<br />
1. Enter your followed by 3 and the button.<br />
Three beeps will be heard. The events will be played back via the codepad indicators in<br />
reverse chronological order.<br />
+ 3 +<br />
Example<br />
If the events were as follows:<br />
Event No<br />
Event Description<br />
1 System Armed In AWAY Mode<br />
2 Alarm In Zone 3<br />
3 Alarm In Zone 4<br />
4 System Disarmed<br />
Table 21: Event Memory Recall - Example Events<br />
The event memory playback will report as follows:<br />
Event No Codepad Indicator Event Description<br />
4 All Indicators Off Except MAINS System Disarmed<br />
3 Zone 4 + AWAY Indicator Illuminates Alarm In Zone 4<br />
2 Zone 3 + AWAY Indicator Illuminates Alarm In Zone 3<br />
1 AWAY Indicator Illuminates System Armed In AWAY Mode<br />
Table 22: Event Memory Recall - Example Event Playback<br />
A beep and an illuminated indicator indicate each event. Resetting a 24 hour alarm in the<br />
disarmed state is indicated by one beep only. After the last event, three beeps will be heard to<br />
indicate the end of playback. The replay can be terminated at any time by pressing the<br />
button.<br />
If the control panel has been powered down, the memory of all events will be lost.<br />
Electronics Design and Manufacturing Pty Limited<br />
ISSUE123.DOC
50 <strong>Solution</strong> <strong>4+4</strong> <strong>Installation</strong> <strong>Manual</strong><br />
4<br />
Walk Test Mode<br />
Walk test mode allows you to test detection devices to ensure that they are functioning<br />
correctly. Before activating walk test mode, isolate any zones that are not required for testing.<br />
Refer to "Isolating Zones" on page 41 for further information.<br />
How To Enter Walk Test Mode<br />
1. Enter your followed by 4 and the button.<br />
Three beeps will be heard and the STAY and AWAY indicators will begin to flash. The<br />
codepad will beep once every second while the system is in walk test mode.<br />
2. Unseal and seal the zones to be tested.<br />
The codepad will sound one long beep while the horn speaker will sound one short beep<br />
every time a zone is sealed or unsealed.<br />
3. Press the button to exit this function.<br />
Two beeps will be heard and the STAY and AWAY indicators will extinguish.<br />
+ 4 +<br />
5<br />
Satellite Siren Service Mode<br />
If an EDMSAT is connected to Output 1, this function will allow you to perform service work<br />
on the system without triggering the siren or the strobe. The unit will return to its normal<br />
working state the next time the system is armed.<br />
How To Enter Satellite Siren Service Mode<br />
1. Enter your followed by 5 and the button.<br />
Three beeps will be heard.<br />
+ 5 +<br />
6<br />
Initiate Modem Call<br />
This function will force the control panel to dial the callback telephone number programmed in<br />
an attempt to connect to your installer’s remote programming <strong>com</strong>puter.<br />
How To Initiate A Modem Call<br />
1. Enter your followed by 6 and the button.<br />
Three beeps will be heard.<br />
+ 6 +<br />
ISSUE123.DOC<br />
Electronics Design and Manufacturing Pty Limited
System Functions 51<br />
7<br />
Turning Telephone Monitor Mode On/Off<br />
Telephone monitor mode allows the remote codepad to be used for a visual representation of<br />
data transmissions between the control panel and the base station receiver. The dialling<br />
sequence is also shown in this mode.<br />
The codepad will beep once every two seconds while telephone monitor mode is turned on<br />
regardless of whether the system is in Installer's Programming Mode or normal operating<br />
mode. The first five indicators are used to display the progressive steps for a transmission to<br />
the base station receiver.<br />
Zone Indicator<br />
Dialling Event<br />
1 Telephone Line Seized<br />
2 Dialling Phone Number<br />
3 Handshake Received<br />
4 Data Is Being Transmitted<br />
5 Kiss-Off Received<br />
None Telephone Line Released<br />
Table 23: Telephone Monitor Mode Indications<br />
How To Turn Telephone Monitor Mode On<br />
1. Enter your followed by 7 and the button.<br />
Three beeps will be heard.<br />
How To Turn Telephone Monitor Mode Off<br />
+ 7 +<br />
1. Enter your followed by 7 and the button.<br />
Two beeps will be heard.<br />
+ 7 +<br />
8<br />
9<br />
Reserved<br />
Send Test Report<br />
This function will force the control panel to send a test report which is used to test the dialling<br />
and reporting capabilities of the system without c<strong>au</strong>sing the sirens to sound.<br />
How To Initiate A Test Report<br />
1. Enter your followed by 9 and the button.<br />
Three beeps will be heard.<br />
+ 9 +<br />
Electronics Design and Manufacturing Pty Limited<br />
ISSUE123.DOC
52 <strong>Solution</strong> <strong>4+4</strong> <strong>Installation</strong> <strong>Manual</strong><br />
Master Code Functions<br />
Master Code Functions are designed to allow those users that have the appropriate priority<br />
level to perform certain functions of a supervisory level.<br />
The def<strong>au</strong>lt Master Code is 2580 and is known as User Code 1. It is possible for<br />
the system to have multiple Master Codes. Refer to "User Code Priority" on page 91 for<br />
more information.<br />
To enter the required Master Code function, enter the<br />
digit and the button.<br />
followed by the required<br />
+ +<br />
These functions can only be carried out when the system is in the disarmed state.<br />
Function<br />
Description<br />
0 Reserved<br />
1 Changing and Deleting User Codes<br />
2 Changing Domestic Phone Numbers<br />
3 Event Memory Recall Mode<br />
4 Walk Test Mode<br />
5 F<strong>au</strong>lt Analysis Mode<br />
6 Setting The Date and Time<br />
7 Turn Day Alarm On and Off<br />
8 Reset Latching Outputs<br />
9 Initiate Modem Call<br />
Table 24: Master Code Functions<br />
0<br />
Reserved<br />
ISSUE123.DOC<br />
Electronics Design and Manufacturing Pty Limited
System Functions 53<br />
1<br />
Changing and Deleting User Codes<br />
This function allows a Master Code holder to add/change or delete any of the system user<br />
codes.<br />
When changing or deleting user codes, it is important that you know the number of the user<br />
you wish to change or delete.<br />
How To Add Or Change A User Code<br />
1. Enter your followed by 1 and the button.<br />
Three beeps will be heard and the STAY and AWAY indicators will begin to flash.<br />
2. Enter the (1-8) that you wish to change followed by the button.<br />
Two beeps will be heard and the corresponding ZONE indicator will illuminate. Refer<br />
to "Table 25: Zone Indicators Showing Relative User Numbers" on page 54.<br />
3. Enter the digits required for the followed by the button.<br />
Two beeps will be heard and the STAY and AWAY indicators will extinguish.<br />
If you wish to change any further user codes, repeat this procedure as many times as required.<br />
+ 1 +<br />
+ + + +<br />
When adding or changing user codes, this function will <strong>au</strong>tomatically terminate if a<br />
button is not pressed within sixty seconds. Pressing the button will also terminate<br />
the session at anytime. One long beep indicates the code entered already exists or an<br />
incorrect user number has been selected.<br />
Electronics Design and Manufacturing Pty Limited<br />
ISSUE123.DOC
54 <strong>Solution</strong> <strong>4+4</strong> <strong>Installation</strong> <strong>Manual</strong><br />
How To Delete A User Code<br />
1. Enter your followed by 1 and the button.<br />
Three beeps will be heard and the STAY and AWAY indicators will begin to flash.<br />
2. Enter the (1-8) that you wish to delete followed by the button.<br />
Two beeps will be heard and the corresponding ZONE indicator will illuminate. Refer<br />
to "Table 25: Zone Indicators Showing Relative User Numbers" on page 54.<br />
3. Press the button to delete the user code.<br />
Two beeps will be heard and the STAY and AWAY indicators will extinguish.<br />
If you wish to delete any further user codes, repeat this procedure as many times as required.<br />
+ 1 +<br />
+ + +<br />
When deleting user codes, this function will <strong>au</strong>tomatically terminate if a button is not<br />
pressed within sixty seconds. Pressing the button will also terminate the session<br />
at anytime. One long beep indicates an incorrect user number has been selected.<br />
User<br />
No<br />
Zone 1<br />
Indicator<br />
Zone 2<br />
Indicator<br />
Zone 3<br />
Indicator<br />
Zone 4<br />
Indicator<br />
Zone 5<br />
Indicator<br />
Zone 6<br />
Indicator<br />
Zone 7<br />
Indicator<br />
1 ü<br />
2 ü<br />
3 ü<br />
4 ü<br />
5 ü<br />
6 ü<br />
7 ü<br />
8 ü<br />
Table 25: Zone Indicators Showing Relative User Numbers<br />
Zone 8<br />
Indicator<br />
ISSUE123.DOC<br />
Electronics Design and Manufacturing Pty Limited
System Functions 55<br />
2<br />
Changing Domestic Phone Numbers<br />
This option allows a Master Code holder to view and program the required telephone numbers<br />
that the system will call in the event of an alarm. For a more detailed description, refer to<br />
"Domestic Reporting" on page 82 for further information.<br />
How To Change Domestic Phone Numbers<br />
1. Enter your followed by 2 and the button.<br />
Three beeps will be heard and the STAY and AWAY indicators will begin to flash.<br />
If there are telephone numbers already programmed, they will be displayed one digit at<br />
a time via the zone indicators on the codepad. Refer to "Table 26: Zone Indicators For<br />
Changing Phone Numbers" on page 56 for the indicators and their meanings.<br />
If there are no telephone numbers programmed, a further two beeps will be heard after<br />
entering this mode. These two beeps are normally heard after the last digit of the last<br />
telephone number has been displayed.<br />
2. Enter all the digits for , one digit at a time. You will notice as each digit is<br />
entered, the corresponding codepad indicators will illuminate.<br />
3. After you have entered all the digits of the first telephone number, press the<br />
button if there is more than one telephone number to be programmed. This will insert a<br />
break between the first telephone number and the second telephone number. If there is<br />
only one telephone number, press the button to exit this mode.<br />
4. Enter all the digits for , one digit at a time. You will notice as each digit is<br />
entered, the corresponding codepad indicators will illuminate.<br />
5. After the last digit of the second telephone number, press the button to exit this<br />
mode unless a third telephone number is required.<br />
+ 2 +<br />
+ + + +<br />
How To Disable Domestic Dialling<br />
If at any time you wish to cancel domestic dialling for any reason (eg. You are moving house<br />
and do not wish the system to continue calling your work place or mobile phone etc), you may<br />
enter the following sequence.<br />
1. Enter your followed by 2 and the button.<br />
Three beeps will be heard and the STAY and AWAY indicators will begin to flash.<br />
2. Press the button.<br />
3. Press the button to disable domestic dialling and exit this function.<br />
+ 2 + + +<br />
Electronics Design and Manufacturing Pty Limited<br />
ISSUE123.DOC
56 <strong>Solution</strong> <strong>4+4</strong> <strong>Installation</strong> <strong>Manual</strong><br />
Digit<br />
Zone 1<br />
Indicator<br />
Zone 2<br />
Indicator<br />
Zone 3<br />
Indicator<br />
Zone 4<br />
Indicator<br />
Zone 5<br />
Indicator<br />
Zone 6<br />
Indicator<br />
Zone 7<br />
Indicator<br />
Zone 8<br />
Indicator<br />
MAINS<br />
Indicator<br />
0 ü<br />
1 ü<br />
2 ü<br />
3 ü<br />
4 ü<br />
5 ü<br />
6 ü<br />
7 ü<br />
8 ü<br />
9 ü ü<br />
Number<br />
Separator<br />
ü<br />
ü<br />
Table 26: Zone Indicators For Changing Phone Numbers<br />
3<br />
Event Memory Recall Mode<br />
This feature allows you to playback the last forty events that have occurred to the system. The<br />
event memory recall mode reports all alarms and arming/disarming of the system in the<br />
AWAY Mode and STAY Mode. This function helps with trouble shooting system f<strong>au</strong>lts. The<br />
events are displayed via the codepad indicators.<br />
How To Enter The Event Memory Recall Mode<br />
1. Enter your followed by 3 and the button.<br />
Three beeps will be heard. The events will be played back via the codepad indicators in<br />
reverse chronological order.<br />
Example<br />
+ 3 +<br />
If the events were as follows:<br />
Event No<br />
Event Description<br />
1 System Armed In AWAY Mode<br />
2 Alarm In Zone 3<br />
3 Alarm In Zone 4<br />
4 System Disarmed<br />
Table 27: Event Memory Recall - Example Events<br />
The event memory playback will report as follows:<br />
Event No Codepad Indicator Event Description<br />
4 All Indicators Off Except MAINS System Disarmed<br />
3 Zone 4 + AWAY Indicator Illuminates Alarm In Zone 4<br />
2 Zone 3 + AWAY Indicator Illuminates Alarm In Zone 3<br />
1 AWAY Indicator Illuminates System Armed In AWAY Mode<br />
Table 28: Event Memory Recall - Example Event Playback<br />
A beep and an illuminated indicator indicate each event. Resetting a 24 hour alarm in the<br />
disarmed state is indicated by one beep only. After the last event, three beeps will be heard to<br />
indicate the end of playback. The replay can be terminated at any time by pressing the<br />
button.<br />
If the control panel has been powered down, the memory of all events will be lost.<br />
ISSUE123.DOC<br />
Electronics Design and Manufacturing Pty Limited
System Functions 57<br />
4<br />
Walk Test Mode<br />
Walk test mode allows you to test detection devices to ensure that they are functioning<br />
correctly. This should be performed on a weekly basis.<br />
Before activating walk test mode, isolate any zones that are not required for testing. Refer to<br />
"Isolating Zones" on page 41 for more information on isolating zones.<br />
How To Enter Walk Test Mode<br />
1. Enter your followed by 4 and the button.<br />
Three beeps will be heard and the STAY and AWAY indicators will begin to flash. The<br />
codepad will beep once every second while the system is in the walk test mode.<br />
2. Unseal and seal the zones to be tested. The codepad will sound one long beep and the<br />
horn speaker will sound one short beep every time a zone is sealed or unsealed.<br />
3. Press the button to exit this function.<br />
Two beeps will be heard and the STAY and AWAY indicators will extinguish.<br />
+ 4 +<br />
Electronics Design and Manufacturing Pty Limited<br />
ISSUE123.DOC
58 <strong>Solution</strong> <strong>4+4</strong> <strong>Installation</strong> <strong>Manual</strong><br />
5<br />
F<strong>au</strong>lt Analysis Mode<br />
Whenever a system f<strong>au</strong>lt occurs, the FAULT or MAINS indicator will flash and the codepad will<br />
beep once every minute.<br />
If the MAINS indicator is flashing, this is bec<strong>au</strong>se the AC mains supply has been disconnected.<br />
There is no need to determine this type of system f<strong>au</strong>lt. Pressing the button once will<br />
acknowledge the AC mains fail and stop the codepad beeping once every minute.<br />
How To Enter F<strong>au</strong>lt Analysis Mode<br />
1. Enter your followed by 5 and the button.<br />
Two beeps will be heard and the STAY and AWAY indicators will begin to flash in<br />
unison with the FAULT indicator.<br />
One or more zone indicators (1-8) will also illuminate indicating the type of f<strong>au</strong>lt that<br />
has occurred. Refer to “F<strong>au</strong>lt Descriptions” on page 44 for a more detailed description<br />
of each type of system f<strong>au</strong>lt.<br />
2. Press the button to exit this function.<br />
Two beeps will be heard and the STAY and AWAY indicators will extinguish and the<br />
FAULT indicator will remain illuminated.<br />
+ 5 +<br />
Zone Indicator<br />
F<strong>au</strong>lt Description<br />
1 Low Battery<br />
2 Date and Time<br />
3 Sensor Watch<br />
4 Horn Speaker Disconnected<br />
5 Reserved<br />
6 E 2 F<strong>au</strong>lt<br />
7 Reserved<br />
8 Communications Failure<br />
Table 29: F<strong>au</strong>lt Indicators<br />
ISSUE123.DOC<br />
Electronics Design and Manufacturing Pty Limited
System Functions 59<br />
6<br />
Setting The Date and Time<br />
This function needs to be used when the date and time requires to be changed or the system has<br />
been powered down.<br />
How To Set The New Date and Time<br />
1. Enter your followed by 6 and the button.<br />
Three beeps will be heard and the STAY and AWAY indicators will begin to flash.<br />
2. Enter the day, month, year, hour and minute using the (DD, MM, YY, HH, MM)<br />
format.<br />
3. Press the button when finished.<br />
Two beeps will be heard and the STAY and AWAY indicators will extinguish.<br />
+ 6 +<br />
Example<br />
If the date and time needs to be set for the 1st January 1997 at 10:30 PM, program the date and<br />
time as follows;<br />
+ 6 +<br />
0 + 1 + 0 + 1 + 9 + 7 + 2 + 2 + 3 + 0<br />
+<br />
7<br />
Turn Day Alarm On and Off<br />
This function will allow you to turn day alarm on and off. Day alarm can be used to monitor<br />
zones while the system is disarmed. Refer to Day Alarm Operation on page 95 for more<br />
information.<br />
How To Turn Day Alarm On<br />
1. Enter your followed by 7 and the button.<br />
Three beeps will be heard and day alarm will be turned on.<br />
How To Turn Day Alarm Off<br />
1. Enter your followed by 7 and the button.<br />
Two beeps will be heard and day alarm will be turned off.<br />
Electronics Design and Manufacturing Pty Limited<br />
ISSUE123.DOC
60 <strong>Solution</strong> <strong>4+4</strong> <strong>Installation</strong> <strong>Manual</strong><br />
8<br />
Reset Latching Outputs<br />
This function will reset any device that has been programmed to remain on once it has been<br />
activated. This could be a door bell that is required to keep ringing until someone has<br />
acknowledged it.<br />
How To Reset Latching Outputs<br />
1. Enter your followed by 8 and the button.<br />
Two beeps will be heard and all latching outputs will reset.<br />
+ 8 +<br />
9<br />
Initiate Modem Call<br />
This function will force the control panel to dial the callback telephone number programmed in<br />
an attempt to connect to the installer’s remote <strong>com</strong>puter for remote programming changes.<br />
How To Initiate A Modem Call<br />
1. Enter your followed by 9 and the button.<br />
Two beeps will be heard.<br />
+ 9 +<br />
ISSUE123.DOC<br />
Electronics Design and Manufacturing Pty Limited
System Functions 61<br />
Hold Down Functions<br />
Hold down function have been incorporated to allow easy activation of specific operations.<br />
When a button is held down for two seconds, two beeps will be heard and a particular function<br />
will operate. The functions available are listed below.<br />
#<br />
*<br />
Arm The System In AWAY Mode<br />
Holding the # button down until two beeps are heard will arm the system in AWAY Mode.<br />
Refer to Option 2 in "LOCATION 230" on page 140 for setting this feature.<br />
Arm The System In STAY Mode<br />
Holding the * button down until two beeps are heard will arm the system in STAY Mode.<br />
Option 2 in "LOCATION 230" on page 140 will need to be enabled for this function to<br />
operate.<br />
If there has not been an alarm during the armed cycle, holding the * button down a second<br />
time will disarm the system from STAY Mode. Option 4 in "LOCATION 230" on page 140<br />
will need to be enabled for this hold down function to operate.<br />
If an alarm has occurred or entry warning has been triggered, a valid user code will need to be<br />
used to disarm the system.<br />
1<br />
Horn Speaker Test<br />
Holding the 1 button down until two beeps are heard will sound the horn speaker for a two<br />
second burst. No other sounding device will sound in this mode.<br />
If an EDMSAT (SS914) has been connected to the control panel, this function will test the<br />
horn speaker for a two second burst followed by the strobe connected to the satellite siren.<br />
2<br />
Bell Test<br />
Holding the 2 button down until two beeps are heard will sound the speakers for a two<br />
second burst. No other sounding device will sound in this mode.<br />
If an EDMSAT (SS914) has been connected to the control panel, this function will test the<br />
horn speaker for a two second burst followed by the strobe connected to the satellite siren.<br />
Electronics Design and Manufacturing Pty Limited<br />
ISSUE123.DOC
62 <strong>Solution</strong> <strong>4+4</strong> <strong>Installation</strong> <strong>Manual</strong><br />
3<br />
Strobe Test<br />
Holding the 3 button down will operate the strobe. No other device will operate in this mode.<br />
If an EDMSAT (SS914) has been connected to the control panel, this function will also test the<br />
strobe on the satellite siren.<br />
How To Turn Strobe Test ON<br />
1. Hold down the 3 button until three beeps are heard.<br />
The strobe will begin to flash.<br />
How To Turn Strobe Test OFF<br />
1. Hold down the 3 button until two beeps are heard.<br />
The strobe will stop flashing.<br />
4<br />
Turning Day Alarm On and Off<br />
Holding the 4 button down will turn day alarm on or off.<br />
How To Turn Day Alarm ON<br />
1. Hold down the 4 button until three beeps are heard.<br />
Day alarm has now been turned on.<br />
How To Turn Day Alarm OFF<br />
1. Hold down the 4 button until two beeps are heard.<br />
Day alarm has now been turned off.<br />
5<br />
F<strong>au</strong>lt Analysis Mode<br />
There are various system f<strong>au</strong>lts that can be detected by the control panel. When any of these<br />
are present, the FAULT indicator will begin to flash and the codepad will beep once every<br />
minute. Refer to "F<strong>au</strong>lt Descriptions" on page 44 for a more detailed description on each f<strong>au</strong>lt<br />
type.<br />
How To Determine The Type Of F<strong>au</strong>lt<br />
1. Hold the 5 button down until two beeps are heard.<br />
The STAY and AWAY indicators will begin to flash in unison with the FAULT indicator.<br />
One or more ZONE indicators (1-8) will illuminate to indicate the type of f<strong>au</strong>lt that has<br />
occurred.<br />
How To Exit F<strong>au</strong>lt Analysis Mode<br />
1. To exit f<strong>au</strong>lt analysis mode, press the button.<br />
The STAY and AWAY indicators will extinguish.<br />
Zone Indicator<br />
F<strong>au</strong>lt Description<br />
1 Low Battery<br />
2 Date and Time<br />
3 Sensor Watch<br />
4 Horn Speaker Disconnected<br />
5 Reserved<br />
6 E 2 F<strong>au</strong>lt<br />
7 Reserved<br />
8 Communications Failure<br />
Table 30: F<strong>au</strong>lt Indicators<br />
ISSUE123.DOC<br />
Electronics Design and Manufacturing Pty Limited
System Functions 63<br />
6<br />
Initiate A Modem Call<br />
Holding the 6 button down until two beeps are heard will force the control panel to dial the<br />
callback telephone number programmed in "LOCATION 32 - 47" on page 83 in an attempt to<br />
connect to the remote <strong>com</strong>puter.<br />
The remote <strong>com</strong>puter will be required to be running the Alarm Link Software (CC816) and<br />
will need to be set to "Waiting For An In<strong>com</strong>ing Call". If no callback telephone number has<br />
been programmed, holding down the 6 button will have no effect.<br />
7<br />
8<br />
Reset Latching Outputs<br />
Holding the 7 button down until two beeps are heard will reset any programmable output that<br />
has been programmed to remain on once it has been activated.<br />
The output will need to be programmed with a latching polarity. Refer to "Output Polarity" on<br />
page 123 for further information.<br />
Codepad Beeper Tone Change<br />
Holding the 8 button down continuously will change the tone of the buzzer in the remote<br />
codepad. There are fifty different tones to choose from between 1500 Hz and 5000 Hz and<br />
they are specific to each codepad. In a multiple codepad installation, each codepad can have a<br />
different tone.<br />
How To Change The Tone Of The Buzzer<br />
1. To change the tone of the codepad buzzer, hold the 8 button down continuously.<br />
The tone of the buzzer will start to increase in pitch.<br />
2. Release the 8 button when the desired tone has been reached.<br />
3. Press the button to exit this function.<br />
9<br />
Initiate A Test Report<br />
Holding the 9 button down until two beeps are heard will transmit a test report which is used<br />
to test the dialling and reporting capabilities of the system without c<strong>au</strong>sing the sirens to sound.<br />
A test report will not be transmitted if the Subscriber ID Number is 0000. This feature is only<br />
applicable if the control panel has the dialler hybrid enabled in "LOCATION 224" on page<br />
134.<br />
Electronics Design and Manufacturing Pty Limited<br />
ISSUE123.DOC
64 <strong>Solution</strong> <strong>4+4</strong> <strong>Installation</strong> <strong>Manual</strong><br />
ISSUE123.DOC<br />
Electronics Design and Manufacturing Pty Limited
Remote Operations<br />
This section includes the following;<br />
• Remote Operations<br />
• Remote Arming Via The Telephone<br />
• Upload/Download Via Alarm Link Software
66 <strong>Solution</strong> <strong>4+4</strong> <strong>Installation</strong> <strong>Manual</strong><br />
Remote Operations<br />
Remote Arming Via The Telephone<br />
This section covers all aspects of operating and programming the <strong>Solution</strong> <strong>4+4</strong> control<br />
panel other than by a remote codepad or the hand held programmer. There are a number of<br />
methods that can be used via the telephone line to gain access to the control panel. These<br />
methods will prove to be time saving and easy to perform.<br />
This feature allows you to arm your system from any remote location via the telephone line.<br />
For obvious security reasons, the system cannot be disarmed using this method. To make use<br />
of this feature, you will require a touch tone telephone or the Phone Controller (CC911).<br />
How To Remotely Arm Your System Via The Telephone<br />
1. Call the telephone number that your control panel has been connected to.<br />
2. When the control panel answers the in<strong>com</strong>ing call, a short jingle will be heard. Hold<br />
the phone controller to the mouthpiece of the telephone and press the button on the side<br />
of the unit for 3 seconds. You can alternatively press the * button on the touch tone<br />
telephone for 3 seconds to arm the system.<br />
If you hear a number of strange sounding tones when the control panel answers the<br />
in<strong>com</strong>ing call, this means that the system has been programmed for remote<br />
programming functions. Simply wait for a p<strong>au</strong>se in the tones and follow Step 2 to<br />
remotely arm the system.<br />
3. After releasing the button on the phone controller or the * button on the touch tone<br />
telephone, two beeps will be heard to indicate that the system has armed in AWAY<br />
Mode.<br />
4. Hang up the telephone and the system will remain armed.<br />
If the control panel does not answer the call, this means that the system may already be armed,<br />
remote functions have not been enabled or the ring count has been set to zero. Refer to<br />
"LOCATION 224" on page 134 to enable remote arming via the telephone and “LOCATION<br />
060” on page 87 to set the ring count.<br />
Where both remote arming and Upload/Download via the Installer’s remote <strong>com</strong>puter<br />
have been selected, the control panel will answer the call expecting the remote<br />
<strong>com</strong>puter. This is easily noticed, as the modem negotiating tones will be heard rather<br />
than the remote arming jingle.<br />
ISSUE123.DOC<br />
Electronics Design and Manufacturing Pty Limited
Remote Operations 67<br />
Upload/Download Via Alarm Link Software<br />
The <strong>Solution</strong> <strong>4+4</strong> control panel can be remotely programmed or controlled via an IBM or<br />
<strong>com</strong>patible personal <strong>com</strong>puter via the Alarm Link Software (CC816). This facility will allow<br />
you to make alterations to your customers control panel without the need to leave your office,<br />
thus improving customer service and saving you time and money. For country locations where<br />
a control panel may be situated hundreds of kilometres from your office, the Upload/Download<br />
feature is invaluable.<br />
When selecting the control panel type during the setup of a new customer database in the<br />
Alarm Link Software, refer to the table below to select the software version number that<br />
corresponds to the control panel type required.<br />
Remote Connect<br />
Control Panels Software Version<br />
Select Panel Type<br />
1.2x S4_V12<br />
Table 31: Alarm Link Panel Forms<br />
After selecting the correct panel type when adding a new customer in the Alarm Link Software,<br />
the Subscriber ID Number and the Installer Code will need to match that of the control panel<br />
for synchronisation when making connection to the control panel. If these two locations do not<br />
match that of the control panel, the <strong>com</strong>puter and the control panel will not synchronise.<br />
The remote connect feature allows you to establish a connection through the telephone network<br />
from your IBM or <strong>com</strong>patible <strong>com</strong>puter to the <strong>Solution</strong> <strong>4+4</strong> control panel anywhere in the<br />
country where a telephone line is present. The advantages of this are very obvious and having<br />
this facility will allow you to offer faster service to your clients.<br />
Remote Connect With Customer Control<br />
If you wish to configure the control panel so that a remote connection can only be established<br />
when the client initiates it through the remote codepad, you will need to program the following<br />
information.<br />
"LOCATION 32 - 47" on page 83 will need to have the Callback Telephone Number<br />
programmed and Option 4 in "LOCATION 224" on page 134 will need to be disabled. The<br />
control panel has now been set so that the client has control of when a remote connection can<br />
be established.<br />
To initiate the control panel to dial the remote <strong>com</strong>puter to establish a link, hold the 6 button<br />
down until two beeps are heard on the remote codepad.<br />
Remote Connect Without Callback Verification<br />
Remote connect without callback verification can be handy where you have a need to perform<br />
Upload/Download functions from multiple locations. It should be noted that by using this<br />
feature you are reducing the security of the control panel.<br />
"LOCATION 32 - 47" on page 83 should be cleared and Option 4 in "LOCATION 224" on<br />
page 134 will need to be enabled. The control panel will now allow a connection of the first<br />
call without calling the remote <strong>com</strong>puter back to make contact.<br />
Electronics Design and Manufacturing Pty Limited<br />
ISSUE123.DOC
68 <strong>Solution</strong> <strong>4+4</strong> <strong>Installation</strong> <strong>Manual</strong><br />
Remote Connect With Callback Verification<br />
Remote connect with callback verification offers the highest degree of data security by<br />
incorporating a two level security check.<br />
The first is the Installer Code <strong>com</strong>bined with the Subscriber ID Number needs to match that of<br />
the control panel. Secondly, the control panel will callback the programmed callback phone<br />
number to establish the valid connection. The "Callback Telephone Number" is the phone line<br />
that the modem and <strong>com</strong>puter has been connected to.<br />
"LOCATION 32 - 47" on page 83 must be programmed with the Callback Telephone Number<br />
and Option 4 in "LOCATION 224" on page 134 will need to be enabled.<br />
ISSUE123.DOC<br />
Electronics Design and Manufacturing Pty Limited
Dialler Reporting Formats<br />
This section includes the following;<br />
• Dialler Reporting Formats<br />
• Contact ID Format<br />
• Point ID Codes<br />
• Event Codes<br />
• General Reporting Formats<br />
• Securitel<br />
• Domestic Reporting Format<br />
• Domestic Dialling Function<br />
• Programming Domestic Reporting<br />
• Basic Pager Reporting Format
70 <strong>Solution</strong> <strong>4+4</strong> <strong>Installation</strong> <strong>Manual</strong><br />
Dialler Reporting Formats<br />
When making use of the control panel's dialling and <strong>com</strong>munication features, there are a<br />
number of transmission formats available. The <strong>Solution</strong> <strong>4+4</strong> control panel <strong>com</strong>es factory<br />
def<strong>au</strong>lt to report in the Contact ID Format.<br />
Contact ID Format<br />
Contact ID Format can identify hundreds of protection zones by their unique code and provides<br />
a single digit event qualifier and a three digit event code which quickly identifies the condition<br />
being reported.<br />
Subscriber<br />
ID Number<br />
Qualifier<br />
Event<br />
Code<br />
Group<br />
Number<br />
Point ID<br />
Number<br />
SSSS Q XYZ GG CCC<br />
Four Digit<br />
Subscriber ID<br />
Number<br />
Event Qualifier, Which Gives<br />
Specific Event Information.<br />
1 = New Event Or Opening<br />
3 = New Restore Or Closing<br />
Event Code<br />
(Made Up Of 3<br />
Hex Digits)<br />
Group Number<br />
(Made Up Of 2<br />
Hex Digits)<br />
Point ID Number<br />
(Made Up Of 3<br />
Hex Digits)<br />
Table 32: Contact ID Format Breakdown<br />
In general, Contact ID reporting format is very simple as most of the Event Codes and Point ID<br />
Codes have been predefined. The event code is programmable where the Point ID Number is<br />
fixed. The base station software usually only has the ability to identify a zone going into alarm<br />
by its Point ID Code and usually pays little attention to the Event Code.<br />
Refer to "Table 33: Point ID Codes" on page 71 for further information on the <strong>Solution</strong> <strong>4+4</strong><br />
Point ID Codes.<br />
ISSUE123.DOC<br />
Electronics Design and Manufacturing Pty Limited
Dialler Reporting Formats 71<br />
Point ID Codes<br />
Point ID<br />
Number<br />
Event<br />
Description<br />
Event<br />
Code Explanation Page<br />
Zone Specific Burglary Zones 130 Burglary 100<br />
1 - 3<br />
Zone Specific 24 Hour Burglary Zones 133 24 Hour Burglary 100<br />
4<br />
Zone Specific Tamper Zones 1 – 4 137 Zone Tamper 100<br />
9 - 12<br />
Fixed<br />
User Specific Open/Close Report 401 Opening – User #<br />
90<br />
1 - 8<br />
Fixed Closing – User #<br />
030 AC Mains Fail 301 AC Power 112<br />
031 Low Battery 309 Battery Test Failure 112<br />
040 Codepad Duress 121 Duress Alarm 109<br />
041 Codepad Panic 120 Panic Alarm 110<br />
046 Codepad Fire<br />
110 Fire Alarm 110<br />
(New – Version 1.27)<br />
Fixed<br />
045 Codepad Medical<br />
100 Medical Alarm 110<br />
(New – Version 1.27)<br />
Fixed<br />
042 Code Retry Limit Exceeded 421 Access Denied 111<br />
044 Test Report 602<br />
Fixed<br />
Zone Specific Sensor Watch 307<br />
1 – 4<br />
Fixed<br />
Zone Specific Trouble 380<br />
1 - 4<br />
Fixed<br />
Zone Specific Tamper Trouble 383<br />
9 – 12<br />
Fixed<br />
Zone Specific Bypass 570<br />
1 – 4<br />
Fixed<br />
Test Report 114<br />
Sensor Self Test Failure 113<br />
Sensor Trouble 108<br />
Sensor Trouble Tamper 108<br />
Zone Bypass 108<br />
Table 33: Point ID Codes<br />
This table shows the different Point ID Codes and Event Codes that are transmitted to the base<br />
station receiver when using Contact ID Reporting Format. Some event codes are fixed, while<br />
others are user definable. The event codes that are fixed will always send the same event code<br />
as there is no programming locations made available to alter these. The other event codes may<br />
be changed when required. For example, if zone four is being used as a 24 hour medical alarm<br />
rather than a 24 hour burglary, its event code may be changed to 100 instead of 133.<br />
Before changing any event codes, please contact your base station supervisor to ensure<br />
you choose the correct event code.<br />
Electronics Design and Manufacturing Pty Limited<br />
ISSUE123.DOC
72 <strong>Solution</strong> <strong>4+4</strong> <strong>Installation</strong> <strong>Manual</strong><br />
Event Codes<br />
Event Description Event Description Event Description<br />
Medical Alarms 24 Hour Non Burglary Peripheral Troubles<br />
100 Medical 150 24 Hour Non Burg 330 System Peripheral<br />
101 Pendant Transmitter 151 Gas Detected 331 Polling Loop Open<br />
102 Fail To Report In 152 Refrigeration 332 Polling Loop Short<br />
Fire Alarms 153 Loss Of Heat 333 Exp Module Failure<br />
110 Fire Alarm 154 Water Leakage 334 Fail To Communicate<br />
111 Smoke 155 Foil Break 335 Lcl Printer Paper Out<br />
112 Combustion 156 Day Trouble 336 Local Printer Failure<br />
113 Water Flow 157 Bottled Gas Low Comms Trouble<br />
114 Heat 158 High Temperature 350 Communication<br />
115 Pull Station 159 Low Temperature 351 Tele<strong>com</strong> Line 1 Fail<br />
116 Duct 161 Loss Of Air Flow 352 Tele<strong>com</strong> Line 2 Fail<br />
117 Flame Fire Supervisory 353 Long Radio TX Fail<br />
118 Near Alarm 200 Fire Supervisory 354 Fail To Communicate<br />
Panic Alarms 201 Low Water Pressure 355 Loss Of Radio Super<br />
120 Panic Alarm 202 Low CO2 356 Loss Of Central Poll’g<br />
121 Duress Alarm 203 Gate Valve Sensor Protection Loop Trouble<br />
122 Silent Alarm 204 Low Water Level 370 Protection Loop<br />
123 Audible Alarm 205 Pump Activated 371 Protection Loop Open<br />
Burglary Alarms 206 Pump Failure 372 Protection Loop Short<br />
130 Burglary System Troubles 373 Fire Trouble<br />
131 Perimeter 300 System Trouble Sensor Troubles<br />
132 Interior 301 AC Loss 380 Sensor Trouble<br />
133 24 Hour 302 Low System Battery 381 Loss Of Super - RF<br />
134 Entry/Exit 303 RAM Checksum Bad 382 Loss Of Super - RPM<br />
135 Day/Night 304 ROM Checksum Bad 383 Sensor Tamper<br />
136 Outdoor 305 System Reset 384 RF XMTR Low Battery<br />
137 Tamper 306 Panel Program Altered Access Control<br />
138 Near Alarm 307 Self Test Failure 421 Access Denied<br />
General Alarms 308 System Shutdown Zone Bypass<br />
140 General Alarm 309 Battery Test Failure 570 Zone Bypass<br />
141 Polling Loop Open 310 Ground F<strong>au</strong>lt<br />
142 Polling Loop Short Sounder Relay Troubles<br />
143 Exp’n Module Fail 320 Sounder/Relay<br />
144 Sensor Tamper 321 Bell 1<br />
145 Exp’n Module Tamper 322 Bell 2<br />
323 Alarm Relay<br />
324 Trouble Relay<br />
325 Reversing 602 Test<br />
Table 34: Contact ID Event Codes<br />
ISSUE123.DOC<br />
Electronics Design and Manufacturing Pty Limited
Dialler Reporting Formats 73<br />
General Reporting Formats<br />
The following formats may be designated to report in either Standard of Extended Formats. In<br />
all cases, the standard format will report to the central monitoring station a Subscriber ID<br />
Number followed by an Alarm, Trouble, Restore or Open/Close codes.<br />
The Expanded 3+1 and Expanded 4+1 Formats will report a Subscriber ID Number followed<br />
by an Expansion Code, followed by a second line where the Expansion Code is repeated as the<br />
Subscriber ID Number followed by the Reporting Channel (Or User ID) relevant to that report.<br />
If 4+2 Format is selected then no second line is transmitted and the reporting channel number<br />
is transmitted directly after the expansion code.<br />
Event<br />
3+1/4+1<br />
Universal<br />
3+1/4+1<br />
Expanded 4+2<br />
Alarm SSS (S) A SSS (S) A<br />
SSSS AC H<br />
AAA (A) C H<br />
Trouble SSS (S) T SSS (S) T<br />
SSSS TC H<br />
TTT (T) C H<br />
Bypass SSS (S) B SSS (S) B<br />
SSSS BC H<br />
BBB (B) C H<br />
AC Fail SSS (S) E SSS (S) E<br />
SSSS EA C<br />
EEE (E) A C<br />
Low Battery SSS (S) L SSS (S) L<br />
SSSS LL B<br />
LLL (L) L B<br />
Open SSS (S) O SSS (S) O<br />
SSSS OU<br />
OOO (O) U<br />
Close SSS (S) C SSS (S) C<br />
SSSS CU<br />
CCC (C) U<br />
Test SSS (S) T E SSS (S) T E SSSS T E O<br />
Program Altered SSS (S) P SSS (S) P SSSS P0<br />
Duress SSS (S) D SSS (S) D SSSS DD 0<br />
Restore<br />
3+1/4+1<br />
Universal<br />
3+1/4+1<br />
Expanded 4+2<br />
Alarm SSSS (S) R SSS (S) R<br />
SSSS R CH<br />
RRR (R) C H<br />
Trouble SSS (S) T R SSS (S) T R<br />
SSSS T R C H<br />
T R T R T R (T R ) C H<br />
Bypass SSS (S) B R SSS (S) B R<br />
SSSS B R C H<br />
B R B R B R (B R ) C H<br />
AC Fail SSS (S) E R SSS (S) E R<br />
SSSS E R A CR<br />
E R E R E R (E R ) A CR<br />
Low Battery SSS (S) L BR SSS (S) L BR<br />
L BR L BR L BR (L BR ) L B<br />
SSSS L BR L B<br />
Table 35: General Reporting Formats<br />
Electronics Design and Manufacturing Pty Limited<br />
ISSUE123.DOC
74 <strong>Solution</strong> <strong>4+4</strong> <strong>Installation</strong> <strong>Manual</strong><br />
Code Description Code Description<br />
SSSS Subscriber ID Number R Alarm Restore Code<br />
A Alarm T R Trouble Restore Code<br />
C H Channel Number B R Bypass Restore Code<br />
0 Zero E R AC Fail Restore Code 1 st digit<br />
T Trouble A CR AC Fail Restore Code 2 nd Digit<br />
B Bypass L R Low Battery Restore Code 1 st Digit<br />
E AC Fail Code 1 st Digit L BR Low Battery Restore Code 2 nd Digit<br />
A C AC Fail Code 2 nd Digit D Duress Code 1 st Digit<br />
L Low Battery Code 1 st Digit D 0 Duress Code 2 nd Digit<br />
L B Low Battery Code 2 nd Digit P Panic Code 1 st Digit<br />
O P Open P CH Panic Code 2 nd Digit<br />
C P Close T P Test Code<br />
U User Number<br />
Table 36: 3+1/4+1 Transmission Code Descriptions<br />
ISSUE123.DOC<br />
Electronics Design and Manufacturing Pty Limited
Dialler Reporting Formats 75<br />
Securitel<br />
The <strong>Solution</strong> <strong>4+4</strong> control panel can <strong>com</strong>municate to base stations via the Securitel Network<br />
using an EDMSTU (CS800). Not all messages can be transmitted via securitel as they can via<br />
the <strong>com</strong>munication dialler transmitting in Contact ID Format. Refer to "Table 37: Securitel<br />
Reporting Messages" below for the list of messages that are supported by securitel.<br />
Event Location Page No<br />
Alarms and Restores LOCATION 104 - 151 98<br />
Zone Bypass Reports * LOCATION 152 – 153 108<br />
Zone Trouble Reports * LOCATION 154 – 155 108<br />
Open/Close Reports LOCATION 180 - 181 113<br />
AC Fail LOCATION 168 - 171 112<br />
Low Battery LOCATION 172 - 175 112<br />
Codepad Panic LOCATION 160 - 163 110<br />
Codepad Duress LOCATION 156 - 159 109<br />
Codepad Tamper LOCATION 164 - 167 111<br />
Table 37: Securitel Reporting Messages<br />
Zone bypass and zone trouble reports are not transmitted separately. They are<br />
transmitted as one <strong>com</strong>bined isolate report.<br />
How To Program and Setup Securitel<br />
To connect and setup the EDMSTU, follow the procedures below:<br />
1. Program the Subscriber ID Number in "LOCATION 052 – 055".<br />
2. Program Output 2 (Strobe) as all zero's in "LOCATION 192 - 197".<br />
3. Disable Option 1 in "LOCATION 224" if the control panel is not going to use the onboard<br />
dialler.<br />
4. Connect the EDMSTU to the <strong>Solution</strong> <strong>4+4</strong> control panel using the table below.<br />
5. Once the EDMSTU has been connected to the control panel, the EDMSTU will now<br />
need to be 'upped' by the monitoring station.<br />
<strong>Solution</strong> <strong>4+4</strong> EDMSTU<br />
STR<br />
D<br />
GND -<br />
+ COM +<br />
Table 38: EDMSTU Connection Terminals<br />
Refer to your EDMSTU <strong>Installation</strong> <strong>Manual</strong> (MASTU) for further information.<br />
Electronics Design and Manufacturing Pty Limited<br />
ISSUE123.DOC
76 <strong>Solution</strong> <strong>4+4</strong> <strong>Installation</strong> <strong>Manual</strong><br />
Domestic Reporting Format<br />
The locations of the primary telephone number and secondary telephone number which are<br />
normally used for base station reporting can be added together making provision to store up to<br />
32 digits for domestic dialling format. The 32 locations are now used to store any number of<br />
telephone numbers and subject to the length of each telephone number, it is possible to store 3<br />
or more different phone numbers for domestic dialling.<br />
A four second p<strong>au</strong>se may be inserted anywhere in the telephone number by programming the<br />
number ‘13’. The four second p<strong>au</strong>ses can only be programmed by the installer as the Master<br />
Code holder has no access to this function.<br />
Domestic Dialling Function<br />
When the control panel has activated into alarm condition, it will <strong>com</strong>mence dialling the first<br />
programmed telephone number. If a busy or engaged tone has been detected, the control panel<br />
will hang up and <strong>com</strong>mence dialling the second telephone number (if one is programmed).<br />
The first call however will be counted as one unsuccessful dialling attempt. If the second<br />
telephone number is also busy or an engaged tone is detected, the control panel will hang up<br />
and <strong>com</strong>mence dialling the third telephone number (if one is programmed).<br />
If a busy tone is not detected, the control panel will assume that the phone has been answered<br />
and will begin sending its transmission. The transmission consists of a siren tone followed by<br />
a unit identification beep. The identification beep will allow the customer to verify which<br />
control panel made the call if more than one control panel is reporting to the same telephone<br />
number. The identification beep is programmed in "LOCATION 055" of the Subscriber ID<br />
Number.<br />
After the identification beep, a long p<strong>au</strong>se will follow allowing you to acknowledge the call. If<br />
the call is not acknowledged during the p<strong>au</strong>se, the sequence of the siren tone, the identification<br />
beep and the p<strong>au</strong>se will continue until you acknowledge the call or until the control panel<br />
hangs up after two minutes has expired.<br />
A maximum of 6 calls per alarm event will be made when the control panel has been set<br />
up for "Domestic Dialling Format". This count includes any unsuccessful calls. The<br />
counter will be reset if the zone retriggers and a further 6 attempts will be made. The<br />
control panel will stop dialling after 6 attempts or 3 successful calls. The control panel<br />
will also stop dialling if a valid user code has been entered at the remote codepad.<br />
How To Acknowledge Domestic Dialling<br />
Once the call has been received, if it is not acknowledged by pressing the * button on a touch<br />
tone telephone or by using the Phone Controller (CC911), the control panel will continue to<br />
send its transmission for a period of 2 minutes. It will then hang up and <strong>com</strong>mence dialling the<br />
next telephone number. If the call is acknowledged, the control panel will hang up and no<br />
further calls will be made for that event.<br />
ISSUE123.DOC<br />
Electronics Design and Manufacturing Pty Limited
Dialler Reporting Formats 77<br />
Programming Domestic Reporting<br />
Programming the control panel for domestic reporting has been made extremely simple by the<br />
use of the Installer's Programming Command 965. Refer to "Command 965 - Set Up Domestic<br />
Dialling Format" on page 27 for more information.<br />
How To Set Up The Control Panel For Domestic Dialling<br />
1. Enter Installer's Programming Mode (EG: 1234 followed by the button).<br />
Two beeps will be heard and the STAY and AWAY indicators will begin to flash.<br />
2. Enter Command 965 followed by the button.<br />
Two beeps will be heard. The control panel has now been set up for Domestic Dialling<br />
Format. Refer to “Command 965 - Set Up Domestic Dialling Format” on page 27 for<br />
more information.<br />
3. Exit Installer's Programming Mode by entering Command 960 followed by the<br />
button. Two beeps will be heard and the STAY and AWAY indicators will<br />
extinguish.<br />
How To Program Domestic Phone Numbers<br />
1. Enter your followed by 2 and the button.<br />
Three beeps will be heard and the STAY and AWAY indicators will begin to flash.<br />
If there are telephone numbers programmed, they will be displayed one digit at a time<br />
via the zone indicators on the codepad. Refer to "Table 26: Zone Indicators For<br />
Changing Phone Numbers" on page 56 for the indicators and their meanings.<br />
If there are no telephone numbers programmed, a further two beeps will be heard after<br />
entering this mode. These two beeps are normally heard after the last digit of the last<br />
phone number has been displayed.<br />
2. Enter all the digits for , one digit at a time. You will notice as each digit is<br />
entered, the corresponding codepad indicators will illuminate.<br />
3. After you have entered all the digits of the first telephone number press the<br />
button if there is more than one phone number. This will insert a break between the<br />
first telephone number and the second telephone number. If there is only one phone<br />
number, press the button to exit this mode.<br />
4. Enter all the digits for , one digit at a time. You will notice as each digit is<br />
entered, the corresponding codepad indicators will illuminate.<br />
5. After the last digit of the second telephone number, press the button to exit this<br />
mode unless a third telephone number is required.<br />
Your control panel has now been set up to report in the domestic dialling format. Test<br />
the dialling functions by triggering the control panel to report to your programmed<br />
telephone numbers.<br />
Electronics Design and Manufacturing Pty Limited<br />
ISSUE123.DOC
78 <strong>Solution</strong> <strong>4+4</strong> <strong>Installation</strong> <strong>Manual</strong><br />
How To Disable Domestic Dialling Using The Master Code<br />
If at any time you wish to cancel domestic dialling for any reason (eg. You are moving house<br />
and you do not wish the system to continue calling your work place or mobile phone etc), you<br />
may enter the following sequence.<br />
1. Enter the followed by 2 and the button.<br />
Three beeps will be heard and the STAY and AWAY indicators will begin to flash.<br />
2. Press the button.<br />
3. Press the button to disable domestic dialling.<br />
+ 2 + + +<br />
ISSUE123.DOC<br />
Electronics Design and Manufacturing Pty Limited
Dialler Reporting Formats 79<br />
Basic Pager Reporting Format<br />
Basic Pager Format requires some interpretation of the numbers that appear on the display,<br />
however, it is possible to differentiate between 1000 different control panels when a number of<br />
control panels are reporting to the one pager.<br />
How To Setup Basic Pager Reporting<br />
1. "LOCATION 000 - 015" requires the Basic Pager's access telephone number<br />
programmed.<br />
2. “LOCATION 052 – 055” requires a Subscriber ID Number programmed.<br />
3. "LOCATION 049" requires "Option 5 - Pager Handshake" to be selected.<br />
4. "LOCATION 050" requires "Option 12 - Basic Pager Format" to be selected.<br />
Figure 3: Basic Pager Display<br />
The example in "Figure 3: Basic Pager Display" shows that the transmission has <strong>com</strong>e from<br />
Subscriber ID Number 678 and that Zone 2 is in alarm, Zone 3 has been manually isolated, the<br />
system is armed, the panic zone is normal, the AC is connected and there is no f<strong>au</strong>lt condition.<br />
Electronics Design and Manufacturing Pty Limited<br />
ISSUE123.DOC
80 <strong>Solution</strong> <strong>4+4</strong> <strong>Installation</strong> <strong>Manual</strong><br />
ISSUE123.DOC<br />
Electronics Design and Manufacturing Pty Limited
Base Station Information<br />
This section includes the following;<br />
• Base Station Information<br />
• Primary Telephone Number<br />
• Secondary Telephone Number<br />
• Callback Telephone Number<br />
• Dialling Format<br />
• Handshake Tone<br />
• Transmission Format<br />
• Transmission Speed<br />
• Subscriber ID Number<br />
• Ring Count<br />
• Answering Machine Bypass
82 <strong>Solution</strong> <strong>4+4</strong> <strong>Installation</strong> <strong>Manual</strong><br />
Base Station Information<br />
This section outlines the programming information required for the <strong>Solution</strong> <strong>4+4</strong> control<br />
panel when <strong>com</strong>municating with base station receivers. Typically these parameters specify the<br />
telephone numbers to call, the transmission formats, handshake tones and transmission speeds.<br />
How To Program A Phone Number<br />
When programming the telephone number, if a '0' is required, it must be programmed as a '10'.<br />
Each location in the primary, secondary and callback telephone numbers hold one digit of the<br />
telephone number.<br />
To tell the dialler when the end of the telephone number has been reached, a '0' must be<br />
inserted at the end of the telephone number. Therefore the dialling sequence will be terminated<br />
when a zero appears.<br />
Example<br />
To program the telephone number 9672 1055, you would program the following:<br />
96721 5500000000.<br />
Programming A Four Second P<strong>au</strong>se In The Phone Number<br />
To enter a four second p<strong>au</strong>se in the dialling sequence, you would need to program the value<br />
'13'. This may be necessary when the dialler is <strong>com</strong>municating through an old (slower)<br />
telephone exchange or where a PABX system is in place.<br />
Example<br />
To program the telephone number 02 p<strong>au</strong>se 9672 1055, you would program the following:<br />
2 96721 5500000.<br />
Digit Required Number To Program Digit Required Number To Program<br />
0 10 8 8<br />
1 1 9 9<br />
2 2 End Of Number 0<br />
3 3 * 11<br />
4 4 # 12<br />
5 5 4 Second P<strong>au</strong>se 13<br />
6 6 Break 14<br />
7 7<br />
Table 39: Dialling Digits<br />
ISSUE123.DOC<br />
Electronics Design and Manufacturing Pty Limited
Dialler Programming Information 83<br />
Primary Telephone Number<br />
LOCATION 000 - 015 0000000000000000<br />
When the control panel requires to transmit a report, the control panel will dial this number in<br />
an attempt to contact the monitoring station or pager etc. If the call is successful, the relevant<br />
information will be transmitted and the dialler will return back to the stand-by mode.<br />
If unsuccessful, the dialler will attempt two more times using the primary telephone number,<br />
after which the secondary telephone number will be called three times. This procedure will be<br />
repeated only once again (ie. Maximum of 12 call attempts per alarm) after ten minutes if none<br />
of the first 6 attempts were successful<br />
Contact your monitoring station or pager <strong>com</strong>pany for the relevant telephone numbers before<br />
programming this location.<br />
Secondary Telephone Number<br />
LOCATION 016 - 031 0000000000000000<br />
Refer to the Primary Telephone Number for programming information.<br />
Callback Telephone Number<br />
LOCATION 32 - 47 0000000000000000<br />
This location contains the telephone number that will be called when Upload/Download is<br />
requested or the number 6 button is held down to initiate a modem call from the control panel<br />
to establish a <strong>com</strong>munications link with the installer’s remote <strong>com</strong>puter. The <strong>com</strong>puter must<br />
be running the Alarm Link Software (CC816) and will need to be set to "Waiting For An<br />
In<strong>com</strong>ing Call". The Callback Telephone Number is also required to be programmed if<br />
"Remote Connect With Callback Verification" on page 68 is required.<br />
Electronics Design and Manufacturing Pty Limited<br />
ISSUE123.DOC
84 <strong>Solution</strong> <strong>4+4</strong> <strong>Installation</strong> <strong>Manual</strong><br />
Dialling Format<br />
LOCATION 048 1<br />
The method for dialling telephone numbers is entered here. Options 3 and 6 will alternate the<br />
dialling sequence between DTMF and Decadic if the call to the base station receiver was<br />
unsuccessful. C<strong>au</strong>tion should be exercised when selecting the dialling method.<br />
Only use the Australian method if the control panel is to be connected to the Australian<br />
Tele<strong>com</strong>munications Network. The International DTMF dialling option should only be used in<br />
those countries that allow both the caller and the receiver to terminate the phone call. Using<br />
the incorrect format will disable EDM's patent Telephone Anti-Jamming feature.<br />
Option Dialling Format Option Dialling Format<br />
1 Australian DTMF<br />
(5 Digits/Second)<br />
4 International DTMF<br />
(Touch Tone)<br />
2 Australian Decadic 5 Reversed Decadic<br />
(10 Minus 1)<br />
3 Alternating DTMF<br />
& Australian Decadic<br />
6 Alternate DTMF<br />
& Reversed Decadic<br />
Table 40: Dialling Formats<br />
The alternating sequence is as follows; DTMF - Decadic - DTMF - Decadic - DTMF -<br />
Decadic<br />
Handshake Tone<br />
LOCATION 049 1<br />
This location sets the type of handshake tone required before data transmissions to the<br />
monitoring station will begin.<br />
1. HI LO Handshake Tone is required when the control panel requires to <strong>com</strong>municate in<br />
Contact ID Format or High Speed DTMF.<br />
2. 1400 Hz Handshake Tone is required when the control panel requires to <strong>com</strong>municate<br />
in Ademco Lo Speed Format or Domestic Dialling Format.<br />
3. Reserved.<br />
4. No Handshake Tone is not re<strong>com</strong>mended.<br />
5. Pager Handshake Tone is required when the control panel needs to <strong>com</strong>municate in<br />
Basic Pager Format.<br />
Option Handshake Tone Option Handshake Tone<br />
1 HI LO Handshake<br />
4 No Handshake<br />
(Contact ID Format)<br />
2 1400 Hz Lo Speed<br />
5 Pager Handshake<br />
(Ademco Tx At 1900Hz)<br />
3 Reserved<br />
Table 41: Handshake Tones<br />
ISSUE123.DOC<br />
Electronics Design and Manufacturing Pty Limited
Dialler Programming Information 85<br />
Transmission Format<br />
LOCATION 050 1<br />
Enter the desired transmission format here. This location selects the data format that will be<br />
transmitted to the monitoring station receiver. This location also allows you to configure the<br />
control panel for domestic or basic pager formats.<br />
Option Transmission Format Option Transmission Format<br />
1 Contact ID 9 Reserved<br />
2 4+2 Express 10 Reserved<br />
3 4+2 Pulsed 11 Domestic<br />
4 4+2 Pulsed + Checksum 12 Basic Pager<br />
5 4+1 Pulsed Universal 13 Reserved<br />
6 4+1 Pulsed Expanded 14 Reserved<br />
7 3+1 Pulsed Universal 15 Reserved<br />
8 3+1 Pulsed Expanded<br />
Table 42: Transmission Formats<br />
Transmission Speed<br />
LOCATION 051 2<br />
This location selects the speed at which data is transmitted to the base station receiver when<br />
Lo-Speed Pulsed transmission formats are used. Changing this location will only effect pulsed<br />
transmission formats.<br />
Option Transmission Speed Option Transmission Speed<br />
1 1 Pulse Per Second 4 20 Pulses Per Second<br />
2 10 Pulses Per Second 5 20 Pulses Per Second Fixed Digit Length<br />
3 15 Pulses Per Second 6 40 Pulses Per Second<br />
Table 43: Transmission Speeds<br />
Electronics Design and Manufacturing Pty Limited<br />
ISSUE123.DOC
86 <strong>Solution</strong> <strong>4+4</strong> <strong>Installation</strong> <strong>Manual</strong><br />
Receivers and Their Formats<br />
The following is a list of some <strong>com</strong>patible control room receivers, their specific handshake<br />
tones and transmission formats. Use this table only as a guide when selecting the transmission<br />
format.<br />
Receiver Type<br />
Transmission Format<br />
Silent Knight<br />
10 PPS, 1400 Hz HS, 3+1, 3+2, 4+1, 4+2<br />
Ademco Slow<br />
Sescoa<br />
20 PPS, 2300 Hz, 3+1, 3+2, 4+1, 4+2<br />
Franklin<br />
DCI<br />
Vertex<br />
Silent Knight FAST 20 PPS, 2300 HS, 3+1, 3+2, 4+1, 4+2<br />
Ademco 10 PPS, 1400 Hz HS, 3+1, 3+2, 4+1, 4+2<br />
20 PPS, 2300 Hz HS, 3+1, 3+2, 4+1, 4+2<br />
40 PPS, 1400 Hz HS, 3+1, 3+2, 4+1, 4+2<br />
DTMF, Hi-Low HS, Expanded Format, 4+2 Express<br />
FBI 10 PPS, 1400 Hz HS or 2300 Hz HS, 3+1, 3+2, 4+1, 4+2<br />
20 PPS, 1400 Hz HS or 2300 Hz HS, 3+1, 3+2, 4+1, 4+2<br />
40 PPS, 1400 Hz HS or 2300 Hz HS, 3+1, 3+2, 4+1, 4+2<br />
DTMF, 1400 Hz HS or 2300 Hz or Hi-Low, 4+2 or 4+2+CS<br />
DTMF, Hi-Low HS, Expanded Format<br />
Table 44: Receivers and Their Formats<br />
If your base station receiver type is not listed above, do not despair, there are many<br />
<strong>com</strong>binations of formats, speeds and handshake tones. Try a few <strong>com</strong>binations and you will<br />
more than likely find the one that works for your receiver.<br />
It should be noted that some formats offer much more detailed information than others, so take<br />
the time to consider the many alternatives being offered.<br />
Subscriber ID Number<br />
LOCATION 052 – 055 0000<br />
This number is transmitted to identify the calling control panel. Enter the desired Subscriber<br />
ID Number in the four locations provided. For Basic Pager Format, “LOCATION 052” will be<br />
ignored and the first digit of the Subscriber ID Number required must start in “LOCATION<br />
053”. When using Domestic Dialling Format, the number of identification beeps will be the<br />
number that is programmed in “LOCATION 055”. This gives the ability to identify between<br />
15 different control panels calling the same telephone number.<br />
ISSUE123.DOC<br />
Electronics Design and Manufacturing Pty Limited
Dialler Programming Information 87<br />
Ring Count<br />
LOCATION 060 8<br />
Answering Machine Bypass<br />
This location sets the number of rings before the control panel will answer an in<strong>com</strong>ing call.<br />
This should be set at an acceptable level bearing in mind that one ring = "Ring, Ring - Ring,<br />
Ring" and that a ring count of 10 represents approximately 60 seconds. This location only has<br />
an effect if remote arming and/or remote Upload/Download via Alarm Link Software has been<br />
enabled. If this location is programmed as 'zero', then the answering of in<strong>com</strong>ing calls will be<br />
totally disabled irrespective of any programmed options.<br />
Answering machine bypass has been incorporated so that it is possible to make a connection<br />
with the control panel for remote arming or Upload/Download when there is an answering<br />
machine or facsimile machine on the same telephone line. There are two different methods of<br />
using answering machine bypass as explained below. The secondary method should only be<br />
used when there is a large amount of traffic on the line (eg. A home office). It will reduce the<br />
chance of the control panel incorrectly answering in<strong>com</strong>ing calls.<br />
1. Programming the ring count as 15 will enable "Answering Machine Bypass" in the<br />
primary mode. When calling the control panel, let the phone ring for no more than 4<br />
rings and then hang up. If you call again within 45 seconds, the control panel will<br />
answer the call on the first ring and the connection will be established. This will<br />
prevent the answering machine or facsimile from answering the call. Refer to<br />
"LOCATION 229" on page 139 if you wish to enable "Answering Machine Bypass<br />
Only When System Is Armed".<br />
2. NEW – Software Version 1.27<br />
Programming a 14 as the ring count will enable "Answering Machine Bypass" in the<br />
secondary mode. In this mode, when calling the control panel, allow the phone to ring<br />
for no more than 2 rings and then hang up. Wait a minimum of 8 seconds before calling<br />
the control panel again. The control panel will now answer on the first ring. If you do<br />
not wait the 8 seconds, the control panel will not answer the call. Refer to<br />
"LOCATION 229" on page 139 if you wish to enable "Answering Machine Bypass<br />
Only When System Is Armed".<br />
You should set the ring count on the answering machine or facsimile machine to be<br />
higher than two rings. Four or six rings would be preferred.<br />
Electronics Design and Manufacturing Pty Limited<br />
ISSUE123.DOC
88 <strong>Solution</strong> <strong>4+4</strong> <strong>Installation</strong> <strong>Manual</strong><br />
ISSUE123.DOC<br />
Electronics Design and Manufacturing Pty Limited
User Codes<br />
This section includes the following;<br />
• Installer Code<br />
• User Codes<br />
• User Code Priority
90 <strong>Solution</strong> <strong>4+4</strong> <strong>Installation</strong> <strong>Manual</strong><br />
Access Codes<br />
This section describes the access codes that are used to assign privileges and access functions<br />
for user code holders of the system. Two types of user codes exist within the system, the<br />
Installer Code and User Codes. Each of these codes allow specific access and operation of the<br />
varied functions of the control panel.<br />
Installer Code<br />
LOCATION 056 - 059 1234<br />
This code is used to access the Installer's Programming Mode and can be between one to four<br />
digits long. However, after the control panel has been powered up, the Installer Code can<br />
disarm the system if it is the first code used. The next time the Installer Code is used, access<br />
into Installer's Programming Mode will be made.<br />
LOCATION 061 - 100<br />
User Codes<br />
The purpose of user codes is to arm and disarm the system as well as perform other specific<br />
functions as described in Master Code Functions on page 52.<br />
User codes can be any length between one to four digits long. Each user code may have a<br />
different priority level. The priority level controls the behaviour of the code, allowing it to arm<br />
only, arm and disarm or be a Master Code holder etc. The priority level of each user code is<br />
programmed in the last location of each user code.<br />
15 15 15 15 0<br />
User Code<br />
Priority<br />
There are a total of 8 user codes available that can be altered or deleted at any time by a Master<br />
Code holder. Multiple Master Codes can be programmed. Refer to Master Code Functions on<br />
page 52 for more information on adding, deleting or changing user codes.<br />
The priority level for each user code can only be programmed or altered by the installer.<br />
Location 061 - 065 Location 066 - 070<br />
User Code 1 2 5 8 0 8 User Code 2 15 15 15 15 0<br />
Location 071 - 075 Location 076 - 080 Location 081 - 085<br />
User Code 3 15 15 15 15 0 User Code 4 15 15 15 15 0 User Code 5 15 15 15 15 0<br />
Location 086 - 090 Location 091 - 095 Location 096 - 100<br />
User Code 6 15 15 15 15 0 User Code 7 15 15 15 15 0 User Code 8 0 15 15 15 1<br />
User Code 32 will report when any of the following methods for arming and disarming are<br />
used.<br />
1. Arm and disarm via remote radio control equipment connected to the optional Radio<br />
Key/Keyswitch Interface (CC813) or keyswitch zone.<br />
2. Arm and disarm the system via Alarm Link Software (CC816).<br />
3. Arm the system remotely over the telephone.<br />
4. Single button arming in AWAY Mode or STAY Mode.<br />
5. Single button disarming from STAY Mode.<br />
ISSUE123.DOC<br />
Electronics Design and Manufacturing Pty Limited
User Codes 91<br />
User Code Priority<br />
There are seven different priority levels that can be allocated to the user code. Each priority<br />
level allows or restricts the functions that different user code holders may perform.<br />
If user code priority levels 4, 6 or 12 have been programmed to any of the available 8 user<br />
codes, the method of standard isolating will no longer operate. Only those user codes<br />
with the priority level of 4, 6 or 12 will be able to isolate zones using the method code to<br />
isolate.<br />
Priority<br />
Description<br />
0 Arm and Disarm<br />
1 Arm Only<br />
2 Patrolman Code<br />
4 Arm and Disarm + Code To Isolate<br />
6 Patrolman Code + Code To Isolate<br />
8 Arm and Disarm + Master Code Functions<br />
12 Arm and Disarm + Master Code Functions + Code To Isolate<br />
Table 45: User Code Priority Levels<br />
0<br />
1<br />
2<br />
4<br />
6<br />
Arm and Disarm<br />
This priority level allows the user code holder to arm and disarm the system.<br />
Arm Only<br />
This priority level allows the user code holder to arm the system but not disarm it.<br />
Patrolman Code<br />
This priority level allows the patrolman to disarm the system only after an alarm has occurred.<br />
This will prevent un<strong>au</strong>thorised use of the code. A patrolman code can always arm the system.<br />
Arm and Disarm + Code To Isolate<br />
This priority level allows the user code holder to arm and disarm the system. Isolating of<br />
zones will only be allowed by using the method “Code To Isolate” once this priority level has<br />
been set. Refer to Isolating Zones on page 41 for further information.<br />
Patrolman Code + Code To Isolate<br />
This priority level allows the patrolman to disarm the system only after an alarm has occurred.<br />
This will prevent un<strong>au</strong>thorised use of the code. A patroman can always arm the system.<br />
Isolating of zones will only be allowed by using the method “Code To Isolate” once this<br />
priority level has been set. Refer to Isolating Zones on page 41 for further information.<br />
8<br />
12<br />
Arm and Disarm + Master Code Functions<br />
This priority level allows arming and disarming of the system and the ability to carry out any<br />
of the Master Code Functions described on page 52. More than one user code can be allocated<br />
to this priority level.<br />
Arm and Disarm + Master Code Functions + Code To Isolate<br />
This priority level allows arming and disarming of the system and the ability to carry out any<br />
of the Master Code Functions described on page 52.<br />
Isolating zones will only be allowed by using the method "Code To Isolate" once this priority<br />
level has been set. Refer to Isolating Zones on page 41 for more information. More than one<br />
user code can be allocated to this priority level.<br />
Electronics Design and Manufacturing Pty Limited<br />
ISSUE123.DOC
92 <strong>Solution</strong> <strong>4+4</strong> <strong>Installation</strong> <strong>Manual</strong><br />
Code Retries<br />
LOCATION 102 6<br />
Code retries restricts the amount of times an invalid user code can be used in an attempt to<br />
operate the system. This location sets the number of incorrect code attempts that will c<strong>au</strong>se an<br />
alarm condition. When the number of incorrect code attempts equals the number programmed<br />
in this location, the system will carry out the following;<br />
1. Activate the sirens, internal screamers and strobes connected to the control panel. Refer<br />
to Option 8 in “LOCATION 227” on page 137 if you require access denied to be silent.<br />
2. Shutdown all codepads that are connected to the control panel and lock them out for the<br />
time period programmed in “LOCATION 220” on page 130.<br />
3. Transmit an “Access Denied” (Contact ID Event Code 421) report to the base station<br />
receiver.<br />
Each time the system is armed or disarmed, the counter will be reset. The number of attempts<br />
can be anywhere between 1-15. If you program a zero into “LOCATION 102”, the code<br />
attempts are unlimited and neither of the three points listed above will take place. This<br />
function works when the system is in the armed or disarmed state.<br />
ISSUE123.DOC<br />
Electronics Design and Manufacturing Pty Limited
Zone Information<br />
This section includes the following;<br />
• Day Alarm Mask<br />
• Day Alarm Operation<br />
• EOL Resistor Value<br />
• Zone Programming<br />
• Zone Def<strong>au</strong>lts<br />
• Zone Types<br />
• Zone Options<br />
• Keyswitch Zone Options<br />
• Zone Pulse Count<br />
• Zone Pulse Count Time
94 <strong>Solution</strong> <strong>4+4</strong> <strong>Installation</strong> <strong>Manual</strong><br />
Zone Information<br />
Day Alarm Mask<br />
LOCATION 101 1<br />
When programming this location, you will notice that there are four options per location. You<br />
may select one, two, three or all four of these options, however, only one number needs to be<br />
programmed. This number is calculated by adding the option bit numbers together. Program a<br />
seven (7) is you require options 1, 2 and 4 simultaneously (ie. 1 + 2 + 4 = 7).<br />
Option<br />
1 Zone 1<br />
2 Zone 2<br />
4 Zone 3<br />
8 Zone 4<br />
Day Alarm Zone<br />
Table 46: Day Alarm Zones 1 - 4<br />
Day alarm enables a <strong>com</strong>bination of zones to be monitored while the system is in the disarmed<br />
state. Indications are available via any of the programmable outputs including the codepad<br />
buzzer. This function has been expanded to ac<strong>com</strong>modate latching and non latching day alarm<br />
output event types.<br />
When the system has been armed in AWAY Mode or STAY Mode, zones that have been<br />
programmed as day alarm zones will activate the sirens and dialler just as non day alarm zones<br />
do. When day alarm has been activated, it will ignore any zone pulse count settings that have<br />
been programmed for that zone (ie. Zone pulse count is only relevant when the system has<br />
been armed).<br />
Day Alarm Resetting<br />
An output that has been programmed for day alarm resetting will operate when a zone<br />
programmed for day alarm has been triggered. The output will reset once the zone has<br />
resealed. This will only occur when the system is disarmed. Refer to Output Event Type “Day<br />
Alarm Resetting” on page 119 for more information.<br />
Day Alarm Latching<br />
An output that has been programmed for day alarm latching will operate when a zone<br />
programmed for day alarm has been triggered. The ZONE indicator and the latching output<br />
will reset when the button has been pressed. This will only occur when the system is<br />
disarmed. Refer to Output Event Type - “Day Alarm Latching” on page 119 for more<br />
information.<br />
ISSUE123.DOC<br />
Electronics Design and Manufacturing Pty Limited
Zone Information 95<br />
Day Alarm Operation<br />
How To Turn Day Alarm On<br />
1. Hold down the 4 button until three beeps are heard.<br />
How To Turn Day Alarm Off<br />
1. Hold Down the 4 button until two beeps are heard.<br />
If a zone has been programmed for day alarm, the zone can be isolated in the normal way so<br />
that it does not register as a day alarm zone. Only zones 1 – 4 can be used as day alarm zones.<br />
The STAY indicator can be programmed to indicate whether day alarm has been turned on or<br />
off. When day alarm has been turned on, the STAY indicator will flash once every three<br />
seconds.<br />
Monitoring of tamper zones 1 – 4 can be achieved by programming an output to mimic a zone.<br />
Refer to “Output Event Types” on page 118 for more information.<br />
No Of Beeps<br />
System Status<br />
2 Day Alarm Turned Off<br />
3 Day Alarm Turned On<br />
Table 47: Day Alarm Status Indication Beeps<br />
Electronics Design and Manufacturing Pty Limited<br />
ISSUE123.DOC
96 <strong>Solution</strong> <strong>4+4</strong> <strong>Installation</strong> <strong>Manual</strong><br />
EOL Resistor Value<br />
LOCATION 103 4<br />
Option Resistor Value Option Resistor Value<br />
0 No EOL Resistor 8 6K8 (Blue, Grey, Black, Brown) 1%<br />
1 1K (Brown, Black, Red) 9 10K (Brown, Black, Orange)<br />
2 1K5 (Brown, Green, Red) 10 12K (Brown, Red, Orange)<br />
3 2K2 (Red, Red, Red) 11 22K (Red, Red, Orange)<br />
4 3K3 (Orange, Orange, Black, Brown) 1% 12 Reserved<br />
5 3K9 (Orange, White, Red) 13 Reserved<br />
6 4K7 (Yellow, Violet, Red) 14 Reserved<br />
7 5K6 (Green, Blue, Red) 15 Split EOL (3K3/6K8) 1% Resistors Required<br />
4 Burglary Zones and 4 x 24 Tamper Zones.<br />
Table 48: EOL Resistor Value<br />
The control panel has the ability to be programmed for different values of EOL resistors. This<br />
is a global parameter and will effect all four zones simultaneously. It gives the ability to fit the<br />
<strong>Solution</strong> <strong>4+4</strong> control panel into an existing installation without having to change the EOL<br />
resistors. This feature also increases the security of the system as there are eleven possible<br />
EOL resistor values that can be used. This makes it extremely difficult for anyone to tamper<br />
with the system.<br />
If split EOL resistors have been selected, the control panel will look for four burglary zones (1-<br />
4) consisting of 3K3 EOL resistors and four 24 hour tamper zones (1–4) consisting of 6K8<br />
resistors connected in parallel. The zone 1 termination on the PCB be<strong>com</strong>es the termination<br />
for zone 1 and tamper zone 1.<br />
C<strong>au</strong>tion should be exercised when using split EOL resistors to create four burglary<br />
zones and four 24 hour tamper zones. This configuration is only suitable for normally<br />
closed contacts. If normally open contacts are used, as is the case with most types of<br />
smoke detectors, a short circuit on one zone will trigger both zones connected in<br />
parallel.<br />
Figure 4: Connections Of Split EOL Resistors For 4 Burglary Zones and 4 Tamper Zones<br />
ISSUE123.DOC<br />
Electronics Design and Manufacturing Pty Limited
Zone Information 97<br />
Connections Of Split EOL Resistors Using N/O Contacts<br />
Figure 5: Connections Of Split EOL Resistors Using One N/O Contact<br />
Figure 6: Connections Of Split EOL Using Two N/O Contacts<br />
Electronics Design and Manufacturing Pty Limited<br />
ISSUE123.DOC
98 <strong>Solution</strong> <strong>4+4</strong> <strong>Installation</strong> <strong>Manual</strong><br />
Zone Programming<br />
Each zone contains eight locations which are divided into two groups of four. The first four<br />
locations determine how the zone operates, while the second four locations contain the dialler<br />
reporting information.<br />
Zone Operating Information<br />
Zone Type<br />
Zone Option<br />
Zone Pulse Count<br />
Zone Pulse Count Time<br />
This location programs the “Zone Type” required (eg. Delay-1,<br />
Instant, 24 Hour etc).<br />
This location controls the zone (eg. Lockout Siren, Silent etc).<br />
This location sets how many times the zone must trigger within the<br />
time specified in the “Zone Pulse Count Time.<br />
This parameter sets the time period for the number of times the zone<br />
must trigger before activating an alarm.<br />
Zone Reporting Information<br />
Hundreds Digit<br />
Tens Digit<br />
Units Digit<br />
Dialler Channel<br />
The hundreds digit of the Contact ID Event Code is programmed into<br />
this location. This location is also the “Alarm Restore” code in all<br />
other reporting formats.<br />
The tens digit of the Contact ID Event Code is programmed into this<br />
location. This location is the “Alarm” code in all other reporting<br />
formats.<br />
The units digit of the Contact ID Event Code is programmed into this<br />
location. This location is the “Channel” code that the zone reports on<br />
in other reporting formats other than Contact ID Format.<br />
This location is factory def<strong>au</strong>lt to report on dialler channel 1. If the<br />
system has been partitioned, zones allocated to report on areas other<br />
than Area 1 should have their dialler channel correspond to the area<br />
number that the zone is allocated to.<br />
ISSUE123.DOC<br />
Electronics Design and Manufacturing Pty Limited
Zone Information 99<br />
Tamper Zones<br />
Tamper zones are 24 hour zones only. Tamper zones are not programmable like the burglary<br />
zones.<br />
Tamper zones when unselaed in either the armed or disarmed state will c<strong>au</strong>se an alarm. This<br />
alarm condition will be displayed on the codepad by the relevant zone indicator flashing very<br />
quickly (0.1 Second On / 0.1 Second Off).<br />
If you arm the system with a tamper zone unsealed, the zone indicator of that zone will flash (2<br />
Seconds On / 1 Second Off) to indicate that the tamper zone has been left unsealed. Burglary<br />
zones which are left unsealed when the system has been armed will be indicated by the zone<br />
indicator constantly illiminated.<br />
Tamper zones will be displayed on their corrsponding zone indicator on the codepad. (Eg: If<br />
the tamper on Zone 1 be<strong>com</strong>es unsealed, the codepad will then display Zone 1. If an alarm<br />
occurs on a burglary zone as well as it’s parallel tamper zone during the same arming cycle,<br />
only the burglary zone will be indicated on the codepad. Event memory recall mode will<br />
however display that two separate alarms had occurred.<br />
Tamper zones when reporting to the base station receiver report as Zones 9 – 12 to allow the<br />
monitoring station to tell the difference between burglary and tamper zones. Refer to Point ID<br />
Codes on page 71 for more information.<br />
If a burglary zone is programmed to be silent or lockout dialler/lockout siren, the tamper zone<br />
which is connected in parallel will also be<strong>com</strong>e silent or lockout dialler/lockout siren.<br />
Electronics Design and Manufacturing Pty Limited<br />
ISSUE123.DOC
100 <strong>Solution</strong> <strong>4+4</strong> <strong>Installation</strong> <strong>Manual</strong><br />
Zone Def<strong>au</strong>lts<br />
Zone 1 Location 104 - 111 Zone 2 Location 112 - 119 Zone 3 Location 120 - 127<br />
2 0 0 0 1 3 0 1 1 0 0 0 1 3 0 1 1 0 0 0 1 3 0 1<br />
Zone 4 Location 128 - 135 Location 136 - 143 Location 144 - 151<br />
12 0 0 0 1 3 3 1 R E S E R V E D R E S E R V E D<br />
Zone<br />
Type<br />
Zone<br />
Option<br />
Zone Pulse<br />
Count<br />
Zone Pulse<br />
Count Time<br />
Event Code<br />
Hundreds Digit<br />
Event Code<br />
Tens Digit<br />
Event Code<br />
Units Digit<br />
Dialler<br />
Channel<br />
Zone Types<br />
There are thirteen different zone types to choose from. Zones 1 – 4 may be programmed as<br />
any one of the zone types listed below. Tamper zones connected in parallel can only be used<br />
as a fixed 24 hour zone type and cannot be changed.<br />
Zone Type Description Zone Type Description<br />
0 Instant 8 Delay-1 + Isolated In STAY Mode<br />
1 Handover 9 Delay-2 + Isolated In STAY Mode<br />
2 Delay-1 10 Reserved<br />
3 Delay-2 11 Keyswitch<br />
4 Reserved 12 24 Hour Burglary<br />
5 Reserved 13 24 Hour Fire<br />
6 Instant + Isolated In STAY Mode 14 Chime Only<br />
7 Handover + Isolated In STAY Mode 15 Zone Not Used<br />
0<br />
1<br />
2<br />
3<br />
4<br />
Table 49: Zone Types<br />
Instant Zone<br />
An Instant zone will sound the sirens and operate the dialler as soon as it registers as unsealed<br />
after the exit timer has expired.<br />
Handover Zone<br />
A Handover zone will act as an instant zone if it has been triggered by itself. If a handover<br />
zone is triggered after a delay zone, the remaining delay time will handover from the delay<br />
zone to the handover zone. Handover may be sequential or non sequential. Refer to Option 2<br />
in "LOCATION 227" on page 137 if you require handover to be sequential or non sequential.<br />
Delay-1 Zone<br />
A Delay-1 zone will have a delay time determined by the value in "Entry Timer 1" on page<br />
128.<br />
Delay-2 Zone<br />
A Delay-2 zone will have a delay time determined by the value in "Entry Timer 2" on page<br />
128.<br />
Reserved<br />
ISSUE123.DOC<br />
Electronics Design and Manufacturing Pty Limited
Zone Information 101<br />
5<br />
6<br />
7<br />
8<br />
9<br />
10<br />
11<br />
12<br />
13<br />
14<br />
Reserved<br />
Instant Zone + Isolated In STAY Mode<br />
This zone will act as a Instant zone when the system is armed in the AWAY Mode, but will be<br />
<strong>au</strong>tomatically isolated when the system is armed in STAY Mode.<br />
Handover Zone + Isolated In STAY Mode<br />
This zone will act as a Handover zone when the system is armed in the AWAY Mode, but will<br />
be <strong>au</strong>tomatically isolated when the system is armed in STAY Mode.<br />
Delay-1 Zone + Isolated In STAY Mode<br />
This zone will act as a Delay-1 zone when the system is armed in the AWAY Mode, but will<br />
be <strong>au</strong>tomatically isolated when the system is armed in STAY Mode. A Delay-1 zone will have<br />
a delay time determined by the value in "Entry Timer 1" on page 128.<br />
Delay-2 + Isolated In STAY Mode<br />
This zone will act as a Delay-2 zone when the system is armed in the AWAY Mode, but will<br />
be <strong>au</strong>tomatically isolated when the system is armed in STAY Mode. A Delay-2 zone will have<br />
a delay time determined by the value in "Entry Timer 2" on page 128.<br />
Reserved<br />
Keyswitch Zone<br />
A Keyswitch zone is used when you need to connect a keyswitch to operate the system. Refer<br />
to “Keyswitch Zone Options” on page 104 for selecting options such as momentary, toggle etc.<br />
User code number 32 will be reported when arming and disarming using this method of<br />
operation.<br />
24 Hour Burglary Zone<br />
A 24 Hour Burglary zone is always ready to trigger the horn speaker, bell and strobe regardless<br />
of whether the system is in the armed or disarmed state.<br />
24 Hour Fire Zone<br />
A 24 Hour Fire zone is always ready to trigger the horn speaker, bell and strobe regardless of<br />
whether the system is in the armed or disarmed state. A distinct fire sound is emitted through<br />
the horn speaker to indicate this type of alarm condition. The fire sound is <strong>com</strong>pletely different<br />
to the burglary sound.<br />
Chime Zone<br />
A Chime zone is not a burglary zone. It can never sound the sirens or trigger the dialler. Its<br />
purpose is to map it to a programmable output for an indication of sealed or unsealed. Refer to<br />
Output Event Type - Global Chime on page 122.<br />
Chime zones require EOL resistors and they will register at a remote codepad. These zones do<br />
not effect the operation of forced arming.<br />
15<br />
Zone Not Used<br />
If a zone is not used, program it as a zone type of 15. This zone will never sound the sirens or<br />
trigger the dialler. An EOL resistor is not required if this zone type is used.<br />
Electronics Design and Manufacturing Pty Limited<br />
ISSUE123.DOC
102 <strong>Solution</strong> <strong>4+4</strong> <strong>Installation</strong> <strong>Manual</strong><br />
Zone Options<br />
When programming this location, you will notice that there are four options per location. You<br />
may select one, two, three or all four of these options, however, only one number needs to be<br />
programmed. This number is calculated by adding the option bit numbers together. Program a<br />
seven (7) is you require options 1, 2 and 4 simultaneously (ie. 1 + 2 + 4 = 7).<br />
Option<br />
Description<br />
1 Lockout Siren<br />
2 Lockout Dialler<br />
4 Silent Alarm<br />
8 Sensor Watch<br />
1 & 2<br />
Table 50: Zone Options<br />
Lockout Siren & Lockout Dialler<br />
Lockout means one activation per arming cycle (ie. A zone programmed for "Lockout" can<br />
only c<strong>au</strong>se the sirens or dialler to operate once).<br />
When the system is next armed, the zone can c<strong>au</strong>se the sirens and dialler to operate once more.<br />
As can be seen by "Table 50: Zone Options", the sirens can be locked out but still leave the<br />
dialler to transmit all reports to the base station receiver by programming Option 1.<br />
Programming Option 2 will lockout the dialler but leave the sirens to be reset. Programming a<br />
3 (ie. 1 + 2 = 3), will lockout both the sirens and dialler. Restore signals will be transmitted<br />
when the system has been disarmed.<br />
The <strong>Solution</strong> <strong>4+4</strong> control panel performs lockout different to most other control panels in<br />
that only the first zone to trigger an alarm condition will be locked out. All other zones that are<br />
triggered during the same siren run time will reset when the sirens reset. This prevents an<br />
intruder from triggering all zones then waiting for the sirens to stop before re-entering the<br />
premises.<br />
Example<br />
All zones are programmed for both lockout siren and dialler. Zone 1 is triggered followed by<br />
all other zones c<strong>au</strong>sing the sirens to sound and the dialler to report to the base station receiver.<br />
Zone 1 will be the only zone that stops reporting to the base station receiver bec<strong>au</strong>se of the first<br />
zone to trigger is locked out. The remaining zones will continue to report if they are triggered<br />
again.<br />
Refer to "LOCATION 223" on page 131 to set the number of times the siren and dialler will be<br />
allowed to activate before they will be locked out.<br />
ISSUE123.DOC<br />
Electronics Design and Manufacturing Pty Limited
Zone Information 103<br />
4<br />
8<br />
Silent Alarm<br />
A zone programmed to be silent will not trigger the HORN SPEAKER, RELAY, STROBE or<br />
EDMSAT outputs. The dialler and all other programmable outputs will function as per their<br />
particular programming.<br />
Sensor Watch<br />
Sensor watch gives the control panel the ability to recognise that detection devices may have<br />
stopped working. This is a feature that monitors the operation of a zone over a programmed<br />
time period. Refer to "LOCATION 218 - 219" on page 129 for programming sensor watch<br />
time.<br />
This value determines how many 24 hour periods a zone may remain continuously sealed<br />
before it registers as a sensor watch f<strong>au</strong>lt. The number of hours required to fulfil these 24 hour<br />
periods is only calculated while the system is in the disarmed state. Every time the system is<br />
armed the counter p<strong>au</strong>ses calculating. Sensor watch will continue calculating the next time the<br />
system has been disarmed.<br />
Example<br />
If the sensor watch time is programmed for two days in a situation where a premises is armed<br />
for twelve hours and disarmed for twelve hours each day, it will take four days before a zone<br />
can register as a f<strong>au</strong>lty sensor watch zone.<br />
Electronics Design and Manufacturing Pty Limited<br />
ISSUE123.DOC
104 <strong>Solution</strong> <strong>4+4</strong> <strong>Installation</strong> <strong>Manual</strong><br />
Keyswitch Zone Options<br />
When you select a zone to be a keyswitch input, then the following table relates to the options<br />
available to that keyswitch zone. These keyswitch zone options replace zone options only for<br />
the zones that have been programmed to operate as a keyswitch zone.<br />
Option<br />
Description<br />
0 Latching Arm and Disarm In AWAY Mode<br />
1 Latching Arm In AWAY Mode<br />
2 Latching Disarm From AWAY Mode Or STAY Mode<br />
4 Latching Arm and Disarm In STAY Mode<br />
5 Latching Arm In STAY Mode<br />
6 Latching Disarm From STAY Mode<br />
8 Momentary Arm and Disarm In AWAY Mode<br />
9 Momentary Arm In AWAY Mode<br />
10 Momentary Disarm From AWAY Mode Or STAY Mode<br />
12 Momentary Arm and Disarm In STAY Mode<br />
13 Momentary Arm In STAY Mode<br />
14 Momentary Disarm From STAY Mode<br />
0<br />
1<br />
2<br />
4<br />
5<br />
6<br />
Table 51: Keyswitch Zone Options<br />
Latching Arm and Disarm In AWAY Mode<br />
If this option has been selected, the system will either arm or disarm from the AWAY Mode<br />
when using the latching keyswitch input.<br />
Latching Arm In AWAY Mode<br />
If this option has been selected, the system will arm in AWAY Mode when using the latching<br />
keyswitch input. Disarming the system will not be permitted via the keyswitch zone if this<br />
option has been selected.<br />
Latching Disarm From AWAY Mode Or STAY Mode<br />
If this option has been selected, the system will disarm from AWAY Mode or STAY Mode<br />
when using the latching keyswitch input. Arming the system will not be permitted via the<br />
keyswitch zone if this option has been selected.<br />
Latching Arm and Disarm In STAY Mode<br />
If this option has been selected, the system will arm or disarm in STAY Mode when using the<br />
latching keyswitch input. Arming the system in AWAY Mode will not be permitted via the<br />
keyswitch zone if this option has been selected.<br />
Latching Arm In STAY Mode<br />
If this option has been selected, the system will arm in STAY Mode when using the latching<br />
keyswitch input. Arming the system in AWAY Mode or disarming the system will not be<br />
permitted via the keyswitch zone if this option has been selected.<br />
Latching Disarm From AWAY Mode Or STAY Mode<br />
If this option has been selected, the system will disarm from AWAY Mode or STAY Mode<br />
when using the latching keyswitch input. Arming the system will not be permitted via the<br />
keyswitch zone if this option has been selected.<br />
ISSUE123.DOC<br />
Electronics Design and Manufacturing Pty Limited
Zone Information 105<br />
8<br />
9<br />
10<br />
12<br />
13<br />
14<br />
Momentary Arm and Disarm In AWAY Mode<br />
If this option has been selected, the system will either arm or disarm from AWAY Mode when<br />
using the momentary keyswitch input.<br />
Momentary Arm In AWAY Mode<br />
If this option has been selected, the system will arm in AWAY Mode when using the<br />
momentary keyswitch input. Disarming the system will not be permitted via the keyswitch<br />
zone if this option has been selected.<br />
Momentary Disarm From AWAY Mode Or STAY Mode<br />
If this option has been selected, the system will disarm from either AWAY Mode or STAY<br />
Mode when using the momentary keyswitch input. Arming the system will not be permitted<br />
via the keyswitch zone if this option has been selected.<br />
Momentary Arm and Disarm In STAY Mode<br />
If this option has been selected, the system will arm or disarm in STAY Mode when using the<br />
momentary keyswitch input. Arming the system in AWAY Mode will not be permitted via the<br />
keyswitch zone if this option has been selected.<br />
Momentary Arm In STAY Mode<br />
If this option has been selected, the system will arm in STAY Mode when using the<br />
momentary keyswitch input. Arming the system in AWAY Mode or disarming the system will<br />
not be permitted via the keyswitch zone if this option has been selected.<br />
Momentary Disarm From AWAY Mode Or STAY Mode<br />
If this option has been selected, the system will only disarm the system from AWAY Mode or<br />
STAY Mode when using the momentary keyswitch input. Arming the system will not be<br />
permitted via the keyswitch zone if this option has been selected.<br />
Figure 7: Wiring Diagram For Keyswitch Zone<br />
Electronics Design and Manufacturing Pty Limited<br />
ISSUE123.DOC
106 <strong>Solution</strong> <strong>4+4</strong> <strong>Installation</strong> <strong>Manual</strong><br />
Zone Pulse Count<br />
Zone pulse count is the number of times a zone must be triggered before the zone registers as<br />
an alarm. The number of pulses vary between 0 – 15. The zone pulse count value is relative to<br />
the time frame (ie. The number of pulses must be present during a particular time frame. Refer<br />
to “Table 53: Zone Pulse Count Times” on page 106 for time frame settings.<br />
Option Number Of Pulses Option Number Of Pulses<br />
0 1 8 8<br />
1 1 9 9<br />
2 2 10 10<br />
3 3 11 11<br />
4 4 12 12<br />
5 5 13 13<br />
6 6 14 14<br />
7 7 15 15<br />
Table 52: Number Of Pulses<br />
Zone Pulse Count Handover<br />
Zone pulse count handover will only operate with zone pulse count time options 8 – 15. Refer<br />
to “Zone Pulse Count Time” on page 106 for more information.<br />
Any zone which registers one trigger pulse will <strong>au</strong>tomatically increment any other zone pulse<br />
count which has already registered at least one trigger pulse during its respective time. To<br />
enable this option, refer to Option 8 in “LOCATION 228” on page 138.<br />
24 Hour zones do not receive any handover pulses from other zones. 24 Hour zones may<br />
handover pulses to other zones.<br />
Zone Pulse Count Time<br />
Zone pulse count time is the time frame or period over which the programmed number of<br />
pulses must register before an alarm condition is generated.<br />
20 ms Loop Response Time 150 ms Loop Response Time<br />
Option Pulse Count Time Option Pulse Count Time<br />
0 0.5 Seconds 8 20 Seconds<br />
1 1 Second 9 30 Seconds<br />
2 2 Seconds 10 40 Seconds<br />
3 3 Seconds 11 50 Seconds<br />
4 4 Seconds 12 60 Seconds<br />
5 5 Seconds 13 90 Seconds<br />
6 10 Seconds 14 120 Seconds<br />
7 15 Seconds 15 200 Seconds<br />
Table 53: Zone Pulse Count Times<br />
For zone pulse count time, options 0 – 7 have a zone loop response time of 20 ms. For zone<br />
pulse count time, options 8 – 15 have a zone loop response time of 150 ms. Loop response<br />
time is the length of time a zone must be triggered before it can register as unsealed or a valid<br />
pulse.<br />
Inertia sensors should use options 0-7, while PIR detectors should use options 8 – 15.<br />
Zones which trigger for more than 10 seconds continuously will be considered unsealed<br />
and c<strong>au</strong>se an alarm condition irrespective of any zone pulse count or zone time settings.<br />
ISSUE123.DOC<br />
Electronics Design and Manufacturing Pty Limited
System Status Information<br />
This section includes the following;<br />
• Zone Bypass Reports<br />
• Zone Trouble Reports<br />
• Codepad Duress Report<br />
• Codepad Panic Report<br />
• Access Denied<br />
• AC Fail Report<br />
• Low Battery Report<br />
• Sensor Watch Time<br />
• Open/Close Reports<br />
• Test Reporting Time
108 <strong>Solution</strong> <strong>4+4</strong> <strong>Installation</strong> <strong>Manual</strong><br />
System Status Information<br />
This section covers features that are involved with the basic house keeping of the system. This<br />
includes monitoring of the zones - whether they are isolated from the system or more<br />
importantly that they are actually operating, the status of both the AC mains and DC power to<br />
the system and codepad generated alarms activated by the user.<br />
Zone Bypass Reports<br />
LOCATION 152 – 153 99<br />
Location<br />
Description<br />
152 Alarm Or Expansion Code In 4+2 Format<br />
153 Restore Code In 4+2 Format<br />
Table 54: Zone Status - Bypass Report Locations<br />
A zone is bypassed when it is manually isolated. Refer to “Isolating Zones” on page 41 for<br />
information on isolating zones. A "Zone Bypass" report (Contact ID Event Code 570) will be<br />
transmitted at the end of exit time for any zone that has been manually isolated. 24 hour zones<br />
cannot be manually isolated, therefore they will never transmit bypass reports.<br />
A "Zone Bypass Restore" report will be transmitted when the system has been disarmed. If<br />
bypass restore is not programmed, it can be assumed that it will transmit a bypass restore report<br />
when an opening report is transmitted. All bypassed zones are <strong>au</strong>tomatically cleared when the<br />
system has been disarmed.<br />
The bypass code parameter is used as the expansion digit in 4+2 Formats. It has no effect on<br />
Contact ID Format as a zone bypass will always be reported on event code 570.<br />
If "Zone Bypass" reports are not required, program "LOCATION 152 – 153" with a zero.<br />
Zone Trouble Reports<br />
LOCATION 154 – 155 99<br />
Location<br />
Description<br />
154 Alarm Or Expansion Code In 4+2 Format<br />
155 Restore Code In 4+2 Format<br />
Table 55: Zone Status - Trouble Report Locations<br />
A zone is in trouble when it is unsealed at the end of exit time. A "Sensor Trouble" report<br />
(Contact ID Event Code 380) will be transmitted to indicate that one or more zones have been<br />
<strong>au</strong>tomatically isolated by the system. 24 hour zones that are unsealed at the end of exit time<br />
will not transmit a "Sensor Trouble" report as the restore for that zone is still outstanding.<br />
A "Sensor Trouble" restore report will be transmitted for burglary zones when the zone reseals<br />
or when the system is next disarmed (which ever happens first). A 24 hour zone will only<br />
transmit a restore signal when it has resealed.<br />
The trouble code parameter is used as the expansion digit in 4+2 Format. It has no effect on<br />
Contact ID Format as a "Sensor Trouble" report will always be reported on event code 380.<br />
If "Sensor Trouble" reports are not required, program "LOCATION 154 – 155" with a zero.<br />
If a tamper zone is unsealed at the end of exit time, a Contact ID Event Code 383 will be<br />
transmitted.<br />
ISSUE123.DOC<br />
Electronics Design and Manufacturing Pty Limited
System Reporting Information 109<br />
Codepad Duress Report<br />
LOCATION 156 - 159 1211<br />
Location<br />
Description<br />
156 Contact ID Event Code – Hundreds Digit<br />
157 Contact ID Event Code – Tens Digit<br />
Or Alarm Or Expansion Digit In 4+2 Format<br />
158 Contact ID Event Code – Units Digit<br />
Or Channel Location For All Other Formats<br />
159 Dialler Channel<br />
Table 56: Codepad Duress Report Location<br />
A "Duress" report (Contact ID Event Code 121) will be transmitted to the base station receiver<br />
when the 9 button is added to the end of any valid user code being used to disarm the system.<br />
This alarm will always be silent. A duress alarm can be triggered during exit time (ie. If the<br />
system has been armed and then disarmed by adding the 9 button to the end of the user code<br />
before exit time has expired, a "Duress" report will be transmitted. Adding 9 to the end of a<br />
user code when arming the system will not c<strong>au</strong>se a duress alarm.<br />
Restore reports are not transmitted for this event. If a "Duress" report is not required,<br />
program "LOCATION 159" with a zero.<br />
Electronics Design and Manufacturing Pty Limited<br />
ISSUE123.DOC
110 <strong>Solution</strong> <strong>4+4</strong> <strong>Installation</strong> <strong>Manual</strong><br />
Codepad Panic Report<br />
LOCATION 160 - 163 1201<br />
Location<br />
Description<br />
160 Contact ID Event Code – Hundreds Digit<br />
161 Contact ID Event Code – Tens Digit<br />
Or Alarm Or Expansion Digit In 4+2 Format<br />
162 Contact ID Event Code – Units Digit<br />
Or Channel Location For All Other Formats<br />
163 Dialler Channel<br />
Software Version 1.20 – 1.26<br />
Table 57: Codepad Panic Report Locations<br />
A "Panic Alarm" report (Contact ID Event Code 120) will be transmitted to the base station<br />
receiver when any two outside buttons in the same horizontal row on the codepad are pressed<br />
simultaneously. This is an <strong>au</strong>dible alarm. Refer to Option 1 in "LOCATION 227" on page<br />
137 if you require codepad panic to be silent.<br />
Software Version 1.27 Onwards<br />
A "Panic Alarm" report (Contact ID Event Code 120) will be transmitted to the base station<br />
receiver when either the two outside buttons 1 and 3 or and are pressed<br />
simultaneously. This is an <strong>au</strong>dible alarm. Refer to "LOCATION 227" on page 137 if you<br />
require codepad panic to be silent.<br />
A "Fire Alarm" report (Contact ID Event Code 110) will be transmitted to the base station<br />
receiver when the 4 and 6 buttons are pressed simultaneously. This is an <strong>au</strong>dible alarm.<br />
A "Medical" report (Contact ID Event Code 100) will be transmitted to the base station<br />
receiver when the 7 and 9 buttons are pressed simultaneously. This is an <strong>au</strong>dible alarm.<br />
To disable both the reporting and the <strong>au</strong>dible alarms for ALL codepad alarm events, the<br />
dialler channel for "Codepad Panic" in "LOCATION 163" will need to be programmed as<br />
zero and enable Option 4 in "LOCATION 227" on page 137.<br />
ISSUE123.DOC<br />
Electronics Design and Manufacturing Pty Limited
System Reporting Information 111<br />
Access Denied<br />
LOCATION 164 - 167 4211<br />
Location<br />
Description<br />
164 Contact ID Event Code – Hundreds Digit<br />
165 Contact ID Event Code – Tens Digit<br />
Or Alarm Or Expansion Digit In 4+2 Format<br />
166 Contact ID Event Code – Units Digit<br />
Or Channel Location For All Other Formats<br />
167 Dialler Channel<br />
Table 58: System Status – Access Denied Locations<br />
An "Access Denied" report (Contact ID Event Code 421) will be transmitted to the base station<br />
receiver when the number of incorrect code attempts equals the number programmed in<br />
"LOCATION 102” on page 92". This is an <strong>au</strong>dible alarm. Refer to Option 8 in "LOCATION<br />
227" on page 137 if you require this alarm to be silent.<br />
Restore signals for this event are not transmitted. If an "Access Denied" report is not<br />
required, program "LOCATION 167" with a zero.<br />
Electronics Design and Manufacturing Pty Limited<br />
ISSUE123.DOC
112 <strong>Solution</strong> <strong>4+4</strong> <strong>Installation</strong> <strong>Manual</strong><br />
AC Fail Report<br />
LOCATION 168 - 171 3011<br />
Location<br />
Description<br />
168 Contact ID Event Code – Hundreds Digit<br />
169 Contact ID Event Code – Tens Digit<br />
Or Alarm Or Expansion Digit In 4+2 Format<br />
170 Contact ID Event Code – Units Digit<br />
Or Channel Location For All Other Formats<br />
171 Dialler Channel<br />
Table 59: System Status – AC Fail Report Locations<br />
An "AC Loss" report (Contact ID Event Code 301) will be transmitted to the base station<br />
receiver when the AC mains supply has been disconnected for two minutes. A restore signal<br />
will be transmitted when the AC mains has been reconnected for two minutes.<br />
If an "AC Loss" report is not required, program "LOCATION 168 - 171" with a zero.<br />
Low Battery Report<br />
LOCATION 172 - 175 3091<br />
Location<br />
Description<br />
172 Contact ID Event Code – Hundreds Digit<br />
173 Contact ID Event Code – Tens Digit<br />
Or Alarm Or Expansion Digit In 4+2 Format<br />
174 Contact ID Event Code – Units Digit<br />
Or Channel Location For All Other Formats<br />
175 Dialler Channel<br />
Table 60: System Status – Low Battery Report Locations<br />
A "Battery Test Failure" report (Contact ID Event Code 309) will be transmitted to the base<br />
station receiver when the systems battery voltage falls below 10.5 volts or when a dynamic<br />
battery test detects a low capacity battery.<br />
The control panel continually monitors the battery voltage. Refer to "F<strong>au</strong>lt Descriptions" on<br />
page 44 for more information. A dynamic battery test is performed every time the system has<br />
been armed as well as every four hours from when the power has been supplied to the control<br />
panel.<br />
A "Low Battery” restore report will be transmitted if the back up battery has been restored the<br />
next time the system has been armed, or when the next dynamic battery test reports the battery<br />
test is OK<br />
If a "Low Battery" report is not required, program "LOCATION 172 - 175" with a zero.<br />
ISSUE123.DOC<br />
Electronics Design and Manufacturing Pty Limited
System Reporting Information 113<br />
Sensor Watch Report<br />
LOCATION 176 - 179 3071<br />
Location<br />
Description<br />
176 Contact ID Event Code – Hundreds Digit<br />
177 Contact ID Event Code – Tens Digit<br />
Or Alarm Or Expansion Digit In 4+2 Format<br />
178 Contact ID Event Code – Units Digit<br />
Or Channel Location For All Other Formats<br />
179 Dialler Channel<br />
Table 61: System Status – Low Battery Report Locations<br />
A Self Test Failure report (Contact ID Event Code 307) will be reported to the base station<br />
receiver when a zone has not been triggered during the sensor watch time. This report will<br />
continue to be transmitted (according to the frequency of the sensor watch time) until the f<strong>au</strong>lt<br />
has been rectified. To clear the f<strong>au</strong>lt and stop any further reporting, the zone that has registered<br />
the f<strong>au</strong>lt must be unsealed and resealed again. Refer to “LOCATION 218 - 219” on page 129<br />
for setting the number of days a zone may remain sealed before registering as a f<strong>au</strong>lt.<br />
If a "Sensor Watch" report is not required, program "LOCATION 176 - 179" with a zero.<br />
Open/Close Reports<br />
LOCATION 180 - 181 89<br />
Location<br />
180 Opening Report Code<br />
181 Closing Report Code<br />
Description<br />
Table 62: Open/Close Reporting Locations<br />
An "Opening" report (Contact ID Event Code 401) will be transmitted to the base station<br />
receiver when the system has been disarmed from AWAY Mode. A "Closing" report (Contact<br />
ID Event Code 401) is transmitted at the end of exit time when the system has been armed in<br />
AWAY Mode.<br />
If an expanded format has been selected, this code will be used as the expansion code and the<br />
user number that armed or disarmed the system will follow in the same transmission.<br />
Refer to Option 4 in "LOCATION 225" on page 135 for programming "Open/Close" reports in<br />
STAY Mode. To program "Open/Close" reports only after a previous alarm, refer to Option 1<br />
in "LOCATION 225" on page 135.<br />
If you do not require "Open/Close" reports, program "LOCATION 180 - 181" with zero.<br />
Electronics Design and Manufacturing Pty Limited<br />
ISSUE123.DOC
114 <strong>Solution</strong> <strong>4+4</strong> <strong>Installation</strong> <strong>Manual</strong><br />
Test Reporting Time<br />
LOCATION 182 - 185 00 0 9<br />
(Hour) (Repeat) (Exp)<br />
Location<br />
Description<br />
182 Actual Hour Of The Day (Tens Digit)<br />
183 Actual Hour Of The Day (Units Digit)<br />
184 Repeat Interval In Days (0 – 15)<br />
185 Expansion Code For 4+2 Format<br />
Table 63: Test Reporting Time Locations<br />
A "Test" report (Contact ID Event Code 602) is a specific signal that is transmitted to the base<br />
station receiver and is normally used to test the dialling and reporting functions of the control<br />
panel. Test reports will not report if the Subscriber ID Number is 0000.<br />
When programming test reports, the control panel needs to know the hour as well as how often<br />
to transmit the report. Test reports are reported on a daily basis ranging from every day to<br />
every fifteen days. Refer to "Installer Code Functions" on page 46 to set the first test report.<br />
If you do not require "Test" reports, program the repeat interval in "LOCATION 182 - 185"<br />
as zero.<br />
ISSUE123.DOC<br />
Electronics Design and Manufacturing Pty Limited
Programmable Outputs<br />
This section includes the following;<br />
• Programmable Outputs<br />
• Output Def<strong>au</strong>lts<br />
• Redirecting Outputs To The Codepad Buzzer<br />
• Output Event Types<br />
• Output Polarity<br />
• Timing Of Outputs<br />
• Pulsing Polarities<br />
• One Shot Polarities
116 <strong>Solution</strong> <strong>4+4</strong> <strong>Installation</strong> <strong>Manual</strong><br />
Programmable Outputs<br />
The <strong>Solution</strong> <strong>4+4</strong> control panel has three fully programmable outputs on the main PCB<br />
and one other programmable output that operates the codepad buzzer. These three outputs are<br />
factory def<strong>au</strong>lt to operate a horn speaker, strobe and an internal screamer.<br />
Programmable outputs require four parameters to be programmed in order to operate correctly.<br />
Event Type:<br />
Polarity:<br />
Time Base:<br />
Time Multiplier:<br />
When To Operate<br />
How To Operate<br />
How Long To Operate For<br />
How Often To Operate<br />
Event<br />
Polarity<br />
Time<br />
Time<br />
Type<br />
Base<br />
Multiplier<br />
When To Operate Is selected from the output event types listed on page 118.<br />
Each digit should be entered into the two corresponding<br />
locations for the output event type required.<br />
How To Operate<br />
How Long To Operate For<br />
How Often To Operate For<br />
Is selected from "Table 65: Event Type Polarities” on page<br />
123. This determines whether the output remains operating for<br />
the duration of the event, pulses for the duration, operates once<br />
only (one shot) or latches on.<br />
Is determined by a time base and a multiplier. Refer to<br />
"Timing Of Outputs" on page 125 for further information.<br />
Is determined by a time base and a multiplier. Refer to<br />
"Timing Of Outputs" on page 125 for further information.<br />
Output Def<strong>au</strong>lts<br />
Output 1 Location 186 - 191 Output 2 Location 192 - 197<br />
1 14 0 0 0 0 2 0 1 0 0 0<br />
Event<br />
Type<br />
Polarity<br />
Time<br />
Base<br />
Def<strong>au</strong>lt For Horn Speaker<br />
Time<br />
Multiplier<br />
Event<br />
Type<br />
Polarity<br />
Time<br />
Base<br />
Def<strong>au</strong>lt For Strobe Operation<br />
Time<br />
Multiplier<br />
Output 3 Location 198 - 203 Codepad Buzzer Location 204 - 209<br />
1 15 1 0 0 0 0 12 2 1 0 1<br />
Event<br />
Type<br />
Polarity<br />
Time<br />
Base<br />
Def<strong>au</strong>lt For Screamers – RELAY<br />
Time<br />
Multiplier<br />
Event<br />
Type<br />
Polarity<br />
Time<br />
Base<br />
Time<br />
Multiplier<br />
Def<strong>au</strong>lt For Entry Warning + Day Alarm<br />
ISSUE123.DOC<br />
Electronics Design and Manufacturing Pty Limited
Programmable Outputs 117<br />
Redirecting Outputs To The Codepad Buzzer<br />
Example<br />
Multiple output event types can be directed to the codepad buzzer so that it may be used to<br />
indicate any number of events.<br />
This is achieved by selecting an output and programming it for the required output event type.<br />
When you are satisfied that the output is functioning correctly, change the first digit of the<br />
output event type (ie. The tens digit) by adding the value 8.<br />
30 Communications Failure<br />
This event will operate when the dialler has made all possible attempts to reach the<br />
base station receiver. The output will reset when the first "Kiss-Off" is received.<br />
This output event type is not applicable for domestic reporting.<br />
To redirect the above output event type to operate the codepad buzzer, program the output<br />
event type as below:<br />
0 Communications Failure<br />
This event will operate when the dialler has made all possible attempts to reach the<br />
base station receiver. The output will reset when the first "Kiss-Off" is received.<br />
This output event type is not applicable for domestic reporting.<br />
The codepad buzzer will now operate instead of the output that has been programmed. The<br />
output is no longer functional and cannot be used for any other output event type.<br />
Electronics Design and Manufacturing Pty Limited<br />
ISSUE123.DOC
118 <strong>Solution</strong> <strong>4+4</strong> <strong>Installation</strong> <strong>Manual</strong><br />
Output Event Types<br />
There are approximately fifty different output event types to choose from. Two numbers<br />
designate each output event type. These two numbers need to be programmed into the<br />
appropriate locations of the output being used to indicate when the output should operate.<br />
All reset times are in reference to polarity 1 and 8. Reset times will vary depending on<br />
the polarity used.<br />
00 EDMSAT - Satellite Siren (Output 1 Only)<br />
This output controls all functions of an EDMSAT satellite siren (SS914). The<br />
option of speaker indication beeps will not operate via the EDMSAT for remote<br />
operations. No polarity is required to be programmed for this output event type.<br />
00 EDMSTU – Securitel PCB (Output 2 - Only )<br />
This output controls all functions of an EDMSTU Securitel unit (CS800). The Data<br />
terminal on the securitel unit connects to the STR terminal on the control panel. No<br />
polarity is required to be programmed for this output event type.<br />
01 System Armed<br />
This output will operate when the system is armed in AWAY Mode or STAY Mode.<br />
The output will reset when the system has been disarmed.<br />
02 System Disarmed<br />
This output will operate when the system is in the disarmed state. The output will<br />
reset as soon as the system be<strong>com</strong>es armed.<br />
03 Armed In STAY Mode<br />
This output will operate when the system has been armed in STAY Mode. The<br />
output will reset when the system is disarmed.<br />
04 Armed In AWAY Mode<br />
This output will operate when the system has been armed in AWAY Mode. The<br />
output will reset when the system is disarmed.<br />
06 Exit Warning With All Zones Sealed Or Entry Warning<br />
This output will operate during exit time when the control panel has been armed in<br />
AWAY Mode or STAY Mode if all zones are sealed. This output event type will<br />
reset once exit time has expired.<br />
The next time this output event type will operate will be during entry time and will<br />
reset once entry time has expired or the system has been disarmed. This output<br />
event type will also operate if a zone has triggered when the system has been armed<br />
in STAY Mode only if the “Entry Guard Timer For STAY Mode” has been<br />
programmed in "LOCATION 216 - 217" on page 129.<br />
07 Exit Warning<br />
This output operates during exit time when the system has been armed in AWAY<br />
Mode or STAY Mode. The output will reset once exit time has expired.<br />
08 Exit Warning Finished<br />
This output operates when the exit time has expired when the system has been<br />
armed in AWAY Mode or STAY Mode. The output will reset when the system has<br />
been disarmed.<br />
09 Kiss-Off After End Of Exit Time<br />
This output will operate after the first successful transmission to the base station<br />
receiver when exit time has expired. The output will reset when the system has been<br />
disarmed.<br />
0 Entry Warning<br />
This output will operate when either Entry Timer 1, Entry Timer 2 or Entry Guard<br />
Timer For STAY Mode are operating. The output will reset when the entry time<br />
expires or the system has been disarmed.<br />
ISSUE123.DOC<br />
Electronics Design and Manufacturing Pty Limited
Programmable Outputs 119<br />
0 Entry Warning + Day Alarm Resetting<br />
This output <strong>com</strong>bines both Entry Warning and Day Alarm Resetting so that either of<br />
these two events will activate the output.<br />
If the output has been triggered by either Entry Timer 1, Entry Timer 2, or Entry<br />
Guard Timer For STAY Mode, the output will reset once the entry timer has expired<br />
or the system has been disarmed.<br />
If a zone programmed for day alarm has triggered the output, the output will reset<br />
when the zone has resealed. Refer to “LOCATION 101” on page 94 for<br />
programming zones for day alarm.<br />
Day alarm can be turned on and off by holding down the 4 button. Three beeps<br />
indicates that day alarm has been turned on, two beeps indicates that day alarm has<br />
been turned off. Refer to "Hold Down Functions" on page 61 for further<br />
information on day alarm.<br />
0 Day Alarm Resetting<br />
This output will operate when a zone programmed for day alarm has been triggered.<br />
The output will reset when the day alarm zone has resealed. Refer to “LOCATION<br />
101” on page 94 for programming zones for day alarm.<br />
Day alarm can be turned on and off by holding down the 4 button. Three beeps<br />
indicates that day alarm has been turned on, two beeps indicates that day alarm has<br />
been turned off. Refer to "Hold Down Functions" on page 61 for further<br />
information on day alarm.<br />
0 Day Alarm Latching<br />
This output will operate when a zone programmed for day alarm has been triggered.<br />
The output will reset when the button has been pressed. Refer to<br />
“LOCATION 101” on page 94 for programming zones for day alarm.<br />
Day alarm can be turned on and off by holding down the 4 button. Three beeps<br />
indicates that day alarm has been turned on, two beeps indicates that day alarm has<br />
been turned off. Refer to "Hold Down Functions" on page 61 for further<br />
information on day alarm.<br />
10 Day Alarm Enabled<br />
This output will operate as soon as day alarm has been enabled. The output will<br />
reset when day alarm has been turned off.<br />
Day alarm can be turned on and off by holding down the 4 button. Three beeps<br />
indicates that day alarm has been turned on, two beeps indicates that day alarm has<br />
been turned off. Refer to "Hold Down Functions" on page 61 for further<br />
information on day alarm.<br />
14 AC Fail<br />
This output will operate as soon as the AC mains has failed. The output will reset as<br />
soon as the AC mains has restored. This output will operate regardless of Option 4<br />
in "LOCATION 228" on page 138 being set.<br />
15 Low Battery<br />
This output will operate when a dynamic battery test detects that the battery has<br />
failed or the battery voltage has fallen below 10.5 volts. The dynamic battery test is<br />
performed every four hours from when the system has been powered up or every<br />
time the system has been armed in AWAY Mode or STAY Mode.<br />
This output will reset only after a dynamic battery test reports the backup battery has<br />
restored.<br />
Electronics Design and Manufacturing Pty Limited<br />
ISSUE123.DOC
120 <strong>Solution</strong> <strong>4+4</strong> <strong>Installation</strong> <strong>Manual</strong><br />
16 Horn Speaker Monitor Fail<br />
If Option 4 – Enable Monitoring Of Horn Speaker in "LOCATION 226" on page<br />
136 has been selected, this output will operate when the horn speaker has been<br />
disconnected. The output will reset when the horn speaker has been reconnected.<br />
17 Sensor Watch Alarm<br />
This output will operate when the sensor watch count has been reached. Refer to<br />
"Zone Options" on page 102 for more information on programming zones for sensor<br />
watch. Refer to "LOCATION 218 - 219" on page 129 for setting how many days<br />
before a zone can register as a f<strong>au</strong>lty sensor watch zone.<br />
18 Codepad Medical Alarm (New – Software Version 1.27)<br />
This output will operate when a codepad medical alarm has been activated by<br />
pressing the 7 and 9 buttons on the remote codepad simultaneously. This output<br />
will reset once a valid user code has been entered at the remote codepad.<br />
19 Codepad Fire Alarm (New – Software Version 1.27)<br />
This output will operate when a codepad fire alarm has been activated by pressing<br />
the 4 and 6 buttons on the remote codepad simultaneously. This output will reset<br />
once a valid user code has been entered at the remote codepad.<br />
1 Codepad Panic Alarm<br />
This output will operate when a codepad panic alarm (<strong>au</strong>dible or silent) has been<br />
activated by pressing the 1 and 3 buttons or the and buttons on the<br />
remote codepad simultaneously. This output will reset once a valid user code has<br />
been entered at the remote codepad.<br />
1 Codepad Duress Alarm<br />
This output will operate when a duress alarm has been activated by adding a 9 to<br />
the end of the user code being used to disarm the system. This output will reset the<br />
next time the system has been armed.<br />
1 Codepad Tamper<br />
This output will operate when the wrong code has been entered more times than<br />
allowed. Refer to "LOCATION 102" on page 92 for setting the number of incorrect<br />
attempts that may be allowed. This output will reset once a valid user code has been<br />
entered.<br />
1 Speaker Beeps<br />
This output will function during all remote radio/keyswitch operations allowing you<br />
to fit a 12V DC buzzer or light to provide status indication for the system operator.<br />
Option 8 – Enable Horn Speaker Beeps For Remote Control Operation in<br />
"LOCATION 226" on page 136 is not required to be selected for this event type to<br />
operate.<br />
No Of Beeps<br />
System Status<br />
1 System Disarmed<br />
2 System Armed In AWAY Mode<br />
3 System Armed In STAY Mode<br />
Table 64: Horn Speaker Beeps<br />
1 Sirens Running<br />
This output will operate for the duration of the siren run time programmed in<br />
"LOCATION 221" on page 130. When the sirens have been activated, this output<br />
will reset once the siren run time has expired.<br />
20 Strobe Operating<br />
This output will operate when an alarm condition occurs and will reset once a valid<br />
user code has been entered.<br />
ISSUE123.DOC<br />
Electronics Design and Manufacturing Pty Limited
Programmable Outputs 121<br />
21 Silent Alarm<br />
This output will operate whenever a zone programmed as silent alarm has triggered.<br />
The output will reset when the siren run time expires, an <strong>au</strong>dible alarm has triggered,<br />
or a valid user code has been entered. Refer to “Zone Options” on page 102 for<br />
more information on programming zones to be silent.<br />
22 Alarm When In STAY Mode<br />
This output will operate whenever an <strong>au</strong>dible or silent zone alarm has triggered<br />
when the system has been armed in STAY Mode. The output will reset when the<br />
system has been disarmed.<br />
23 Alarm When In AWAY Mode<br />
This output will operate whenever an <strong>au</strong>dible or silent zone alarm has triggered<br />
when the system has been armed in AWAY Mode. The output will reset when the<br />
system has been disarmed.<br />
25 Fire Alarm Resetting<br />
This output will operate when a 24 hour fire zone is triggered. The output will reset<br />
once a valid user code has been entered or when siren run time expires.<br />
26 Fire Alarm Latching<br />
This output will operate when a 24 hour fire zone has triggered and will reset when<br />
the system has been armed or disarmed.<br />
27 Fire Alarm Verification<br />
This feature is used on some <strong>com</strong>mercial fire control panels to reduce false alarms<br />
on smoke detectors. It is conceptually very similar to zone pulse count as used in<br />
some motion detectors. Basically, a fire zone is allotted a pulse count of 3 pulses<br />
over a period of 3 minutes.<br />
If the smoke detector trips, the voltage to the smoke detector is disconnected for 15<br />
seconds and then reapplied. No alarm has registered.<br />
If within 3 minutes of the first trigger the unit triggers again, no alarm will be<br />
registered and the voltage to the smoke detector will again be disconnected for 15<br />
seconds and then reapplied.<br />
If a third trigger is detected within 3 minutes of the first trigger, (ie. 3 pulses in 3<br />
minutes) a fire alarm will be registered. Power to the smoke detector will be<br />
maintained to facilitate unit identification via the detector memory.<br />
This output should be connected to the negative side of any fire/smoke detector. To<br />
configure an output for this feature, use the following settings.<br />
EVENT TYPE = 2,7 POLARITY = 10<br />
TIMEBASE = 2 MULTIPLIER = 15<br />
The zone that the fire/smoke detector is connected to should be programmed as<br />
follows:<br />
ZONE TYPE = 13 OPTION = 0 ZONE PULSE COUNT = 3<br />
ZONE TIME = 15<br />
28 Remote Control 1 29 Remote Control 2<br />
2 Remote Control 3<br />
These outputs can be remotely activated (Turned "On" or "Off") via the Alarm Link<br />
Software - Refer to your Alarm Link Instruction <strong>Manual</strong> for further information.<br />
Electronics Design and Manufacturing Pty Limited<br />
ISSUE123.DOC
122 <strong>Solution</strong> <strong>4+4</strong> <strong>Installation</strong> <strong>Manual</strong><br />
2 Communications Failure After 3 Unsuccessful Calls<br />
This output will operate when the <strong>com</strong>munication dialler has made 3 unsuccessful<br />
calls to the base station receiver. The output will reset when all messages have been<br />
transmitted (ie. When the buffer is empty or when all possible attempts have been<br />
made).<br />
30 Communications Failure<br />
This output will operate when the <strong>com</strong>munication dialler has made all possible<br />
attempts to reach the base station receiver. The output will reset when the first<br />
"Kiss-Off" has been received. This output will not operate for domestic formats.<br />
31 Dialler Disabled<br />
This output will operate as long as Option 1 – Enable Dialler Reporting Functions in<br />
"LOCATION 224" on page 134 has been disabled. The output will reset once<br />
Option 1 – Enable Dialler Reporting Functions in "LOCATION 224" on page 134<br />
has been enabled.<br />
32 Dialler Active<br />
This output will operate when the <strong>com</strong>munication dialler is on-line. The output will<br />
reset when the <strong>com</strong>munication dialler has released the telephone line.<br />
33 Ring Detect<br />
This output will operate when an in<strong>com</strong>ing call has been detected by the control<br />
panel. The output will reset when the ringing has stopped or when the call has been<br />
answered.<br />
35 Mimic Zone 1 3 Mimic Tamper Zone 1<br />
36 Mimic Zone 2 3 Mimic Tamper Zone 2<br />
37 Mimic Zone 3 3 Mimic Tamper Zone 3<br />
38 Mimic Zone 4 40 Mimic Tamper Zone 4<br />
These output types will mimic the zone inputs. The output will operate when the<br />
zone is unsealed and will reset when the zone has resealed. They will operate<br />
regardless of the zone type chosen (ie. A zone "Not Used" can still operate a mimic<br />
output). This feature operates when the system is armed or disarmed.<br />
45 Global Chime<br />
This output will operate when any zones programmed as "Chime" have triggered.<br />
The output will reset when the zone has resealed.<br />
46 Zone Not Sealed<br />
This output will operate whenever a burglary zone is unsealed. Chime zones will<br />
not operate this output event type.<br />
47 Zone Not Sealed After Exit Time<br />
This output will operate at the end of exit time if a burglary zone is unsealed. The<br />
output will reset when all zones are sealed or the system has been disarmed. Chime<br />
zones will not operate this output event type.<br />
ISSUE123.DOC<br />
Electronics Design and Manufacturing Pty Limited
Programmable Outputs 123<br />
Output Polarity<br />
There are fifteen different polarities to choose from. Each polarity is designated by a number.<br />
This number needs to be programmed into the appropriate location of the output being used to<br />
indicate how the output should operate.<br />
Option Polarity Option Polarity<br />
0 Output Not Used<br />
1 Normally Open, Going Low 8 Normally Low, Going Open<br />
2 Normally Open, Pulsing Low 9 Normally Low, Pulsing Open<br />
3 Normally Open, One Shot Low 10 Normally Low, One Shot Open<br />
4 Normally Open, One Shot Low (Retrigger) 11 Normally Low, One Shot Open (Retrigger)<br />
5 Normally Open, One Shot Low (Can Reset) 12 Normally Low, One Shot Open (Can Reset)<br />
6 Normally Open, One Show Low (Alarm) 13 Normally Low, One Shot Open (Alarm)<br />
7 Normally Open, Latching Low 14 Normally Low, Latching Open<br />
0<br />
1<br />
2<br />
3<br />
4<br />
Table 65: Event Type Polarities<br />
Output Not Used<br />
If an output is not required for use, the polarity should be programmed as zero.<br />
Normally Open, Going Low<br />
This polarity is normally open circuit and will switch to zero volts when the event occurs. The<br />
output will switch back to open circuit when the event has restored. Time parameters are not<br />
applicable to this polarity.<br />
Normally Open, Pulsing Low<br />
This polarity is normally open circuit and will switch to pulsing zero volts when the event<br />
occurs. The output will switch back to open circuit when the event has restored. Time<br />
parameters vary the "On" time of the pulse.<br />
Normally Open, One Shot Low<br />
This one shot polarity is normally open circuit and will switch to zero volts when the event<br />
occurs. The output will switch back to open circuit when the time parameter setting has<br />
expired. This one shot time setting will always run its full duration and cannot be manually<br />
reset.<br />
Normally Open, One Shot Low With Retrigger<br />
This one shot polarity is normally open circuit and will switch to zero volts when the event<br />
occurs. Every time the event occurs, it will restart the one shot timer. The output will switch<br />
back to open circuit once the one shot time has expired.<br />
This polarity is ideally suited for lighting control. A PIR can be used to trigger an output for<br />
turning on lights. While ever there is movement, the PIR will keep re-triggering the output and<br />
lengthen the time the lights will remain switched on.<br />
5<br />
Normally Open, One Shot Low With Reset<br />
This one shot polarity is normally open circuit and will switch to zero volts when the event<br />
occurs. The output will switch back to open circuit when the one shot time has expired or<br />
when the event has returned to normal. This means the operation of the output can be<br />
shortened regardless of the time parameter programmed.<br />
Electronics Design and Manufacturing Pty Limited<br />
ISSUE123.DOC
124 <strong>Solution</strong> <strong>4+4</strong> <strong>Installation</strong> <strong>Manual</strong><br />
6<br />
Normally Open, One Shot Low With Alarm<br />
This one shot polarity is normally open circuit and will switch to zero volts when the event<br />
occurs. The output will switch back to open circuit once the one shot time has expired, when<br />
the event has returned to normal or when the system has been disarmed.<br />
This polarity is ideally suited for the operation of strobe lights as they can be programmed (Up<br />
to 99 hours) to reset and prevent them from burning out or be<strong>com</strong>ing annoying to others from<br />
prolonged operation.<br />
7<br />
8<br />
9<br />
10<br />
11<br />
12<br />
13<br />
14<br />
Normally Open, Latching Low<br />
This polarity is normally open circuit and will switch to zero volts when the event occurs. The<br />
output will switch back to open circuit once the 7 button on the remote codepad is held down<br />
until two beeps are heard. Time parameters are not applicable to this polarity.<br />
Normally Low, Going Open<br />
This polarity is normally zero volts and will switch to open circuit when the event occurs. The<br />
output will switch back to zero volts when the event has restored. Time parameters are not<br />
applicable to this polarity.<br />
Normally Low, Pulsing Open<br />
This polarity is normally zero volts and will switch to pulsing open circuit when the event<br />
occurs. The output will switch back to zero volts when the event has restored. Time<br />
parameters vary the "Off" time of the pulse.<br />
Normally Low, One Shot Open<br />
This one shot polarity is normally zero volts and will switch to open circuit when the event<br />
occurs. The output will switch back to zero volts when the time parameter has expired. This<br />
one shot time setting will always run its full duration and cannot be manually reset.<br />
Normally Low, One Shot Open With Retrigger<br />
This one shot polarity is normally zero volts and will switch to open circuit when the event<br />
occurs. Every time the event occurs, it will restart the one shot timer. The output will switch<br />
back to zero volts once the one shot time has expired.<br />
Normally Low, One Shot Open With Reset<br />
This one shot polarity is normally zero volts and will switch to open circuit when the event<br />
occurs. The output will switch back to zero volts when the one shot time has expired or when<br />
the event has returned to normal. This means the one shot timer can be shortened regardless of<br />
the time setting.<br />
Normally Low, One Shot Open With Alarm<br />
This one shot polarity is normally zero volts and will switch to open circuit when the event<br />
occurs. The output will switch back to zero volts when the one shot time has expired, when the<br />
event has returned to normal or when the system has been disarmed. This means that the one<br />
shot timer can be shortened regardless of the time setting.<br />
Normally Low, Latching Open<br />
This polarity is normally zero volts and will switch to open circuit when the event occurs. The<br />
output will switch back to zero volts once the 7 button on the remote codepad has been held<br />
down until two beeps are heard. Time parameters are not applicable to this polarity.<br />
ISSUE123.DOC<br />
Electronics Design and Manufacturing Pty Limited
Programmable Outputs 125<br />
Timing Of Outputs<br />
The timing of outputs is calculated by the time base and a multiplier. These two values play<br />
different roles depending on the polarity selected. When programming outputs to pulse, both<br />
the "On" and "Off" times can be set. One shot polarities can be programmed to operate<br />
between 200 ms up to 99 hours in duration.<br />
Time<br />
Base<br />
Multiplier<br />
Tens / Units<br />
The maximum value that can be programmed in the two multiplier locations is 99.<br />
Option<br />
Time Base<br />
1 200 ms<br />
2 1 Second<br />
3 1 Minute (60 Seconds)<br />
4 1 Hour (60 Minutes)<br />
Table 66: Time Base Settings<br />
The time base settings can be set to only one of the values listed in "Table 66: Time Base<br />
Settings". The multiplier value is a two digit decimal number from 00-99. For greater<br />
accuracy, use 60 seconds for 1 minute intervals and use 60 minutes for one hour intervals.<br />
Pulsing Polarities<br />
When calculating pulsing polarities both the "On" and "Off" times need to be programmed.<br />
The duration or "On" time of an output is determined by selecting only one of the time base<br />
options from "Table 66: Time Base Settings". This means there are only four "On" times to<br />
choose from.<br />
The "Off" time is calculated as a multiple of the "On" time by choosing a decimal number<br />
between 00 and 99. If an output is required to operate for 200 ms every five seconds, program<br />
the time settings as follows;<br />
1 2 5<br />
On Time<br />
Off Time<br />
ON Time OFF Time Increments Tolerance<br />
200 ms 200 ms - 19.8 ms 200 ms +/- 200 ms<br />
1 Sec 1 Sec - 99 Sec’s 1 Sec +/- 1 Sec<br />
1 Min 1 Min - 99 Min’s 1 Min +/- 1 Min<br />
1 Hour 1 Hour - 99 Hours 1 Hour +/- 1 Hour<br />
Table 67: Pulsing Time Settings<br />
Electronics Design and Manufacturing Pty Limited<br />
ISSUE123.DOC
126 <strong>Solution</strong> <strong>4+4</strong> <strong>Installation</strong> <strong>Manual</strong><br />
One Shot Polarities<br />
The duration or "On" time of an output is determined by the product of the time base and the<br />
multiplier.<br />
If an output is required to operate for five seconds, program the time settings as follows;<br />
2 0 5<br />
Time Base<br />
Multiplier<br />
The "On" time is calculated by multiplying the time base setting (1 second) by the multiplier<br />
value (05).<br />
(ie. 1 x 05 = 5 seconds)<br />
On Time Increments Tolerance<br />
200 ms - 19.8 Sec’s 200 ms +/- 200 ms<br />
1 Sec - 99 Sec’s 1 Sec +/- 1 Sec<br />
1 Min - 99 Min’s 1 Min +/- 1 Min<br />
1 Hour - 99 Hours 1 Hour +/- 1 Hour<br />
Table 68: One Shot Time Settings<br />
ISSUE123.DOC<br />
Electronics Design and Manufacturing Pty Limited
System Event Timers<br />
This section includes the following;<br />
• Entry Timer 1<br />
• Entry Timer 2<br />
• Exit Time<br />
• Entry Guard Timer For STAY Mode<br />
• Sensor Watch Time<br />
• Codepad Lockout Time<br />
• Siren Run Time<br />
• Siren Sound Rate<br />
• Swinger Shutdown Count<br />
• System Time
128 <strong>Solution</strong> <strong>4+4</strong> <strong>Installation</strong> <strong>Manual</strong><br />
System Event Timers<br />
This section covers the features that involve timing. Features such as entry and exit times,<br />
sensor watch time, siren run time and system date and time along with a host of other timers<br />
are discussed extensively in this section.<br />
How To Program Entry/Exit Timers<br />
There are two locations to be programmed for Entry Timer 1, Entry Timer 2, Exit Time For<br />
AWAY Mode and Entry Guard Time For STAY Mode.<br />
The first location of the timer is for programming increments of 1 second. The second location<br />
of the timer is for programming increments of 16 seconds. By adding these two locations<br />
together will give the total time required.<br />
Example<br />
Entry Time<br />
If you require the entry time to expire after 18 seconds, you would need to program<br />
“LOCATION 210” as 2 (ie. 2 x 1 second = 2 seconds) and “LOCATION 211” as 1 (ie. 1 x 16<br />
seconds = 16 seconds). This would give you the total time of 18 seconds (ie. 2 + 16 seconds =<br />
18 seconds).<br />
The <strong>Solution</strong> <strong>4+4</strong> control panel has two separate entry timers. Entry time can be<br />
programmed between 0 and 255 seconds in increments of one second. These will prove to be<br />
helpful in any installation that requires more than one entry timer.<br />
Entry Timer 1<br />
LOCATION 210 - 211 (Def<strong>au</strong>lted To 10 Seconds) 0<br />
Location<br />
Description<br />
210 Increments Of 1 Second (0 – 15 Sec’s)<br />
211 Increments Of 16 Seconds (0 – 240 Sec’s)<br />
Table 69: Entry Timer 1 Locations<br />
Entry Timer 1 is the delay time used by the Delay-1 zone type. Refer to “Zone Types” on page<br />
100 for more information.<br />
Entry Timer 2<br />
LOCATION 212 - 213 (Def<strong>au</strong>lted To 20 Seconds) 41<br />
Location<br />
Description<br />
212 Increments Of 1 Second (0 - 15 Sec’s)<br />
213 Increments Of 16 Seconds (0 –240 Sec’s)<br />
Table 70: Entry Timer 2 Locations<br />
Entry Timer 2 is the delay time used by the Delay-2 zone type. Refer to “Zone Types” on page<br />
100 for more information.<br />
ISSUE123.DOC<br />
Electronics Design and Manufacturing Pty Limited
System Event Timers 129<br />
Exit Time<br />
Exit time can be programmed to be between 0 and 255 seconds in increments of one second.<br />
The remote codepad will always give one long beep at the end of exit time when arming in<br />
AWAY Mode or one short beep at the end of exit time when arming in STAY Mode.<br />
Exit Time<br />
LOCATION 214 – 215 (Def<strong>au</strong>lted To 60 Seconds) 3<br />
Location<br />
Description<br />
214 Increments Of 1 Second (0 - 15 Sec’s)<br />
215 Increments Of 16 Seconds (0 –240 Sec’s)<br />
Table 71: Exit Time Locations<br />
Entry Guard Timer For STAY Mode<br />
LOCATION 216 - 217 (Def<strong>au</strong>lted To 60 Seconds) 3<br />
Location<br />
Description<br />
216 Increments Of 1 Second (0 - 15 Sec’s)<br />
217 Increments Of 16 Seconds (0 –240 Sec’s)<br />
Table 72: Entry Guard Timer 1 Locations<br />
"Entry Guard Timer For STAY Mode" is the delay time used for ALL zones except 24 hour<br />
burglary and 24 hour fire zones when the system is armed in STAY Mode. Each zone<br />
including delay zones will have the entry delay as programmed in "LOCATION 216 - 217" (ie.<br />
The delay time programmed for a delay zone will be overridden by the entry guard timer). If<br />
the entry guard timer has been programmed as "0" each zone will act as per its programmed<br />
zone type.<br />
Sensor Watch Time<br />
LOCATION 218 - 219 00<br />
Location<br />
Description<br />
218 Increments Of Days (Tens Digit)<br />
219 Increments Of Days (Units Digit)<br />
Table 73: Entry Timer 1 Locations<br />
The time set in these two locations determines how many days (0-99) a zone may remain<br />
sealed before registering as a f<strong>au</strong>lt. This feature is only active when the system is in the<br />
disarmed state. If a zone programmed for sensor watch has not triggered and reset during this<br />
time, the FAULT indicator will illuminate. Refer to "F<strong>au</strong>lt Descriptions" on page 44 for further<br />
information on sensor watch f<strong>au</strong>lts. Refer to “LOCATION 176 - 179” on page 113 for sensor<br />
watch reports and Zone Types on page 100 to program zones for sensor watch.<br />
Electronics Design and Manufacturing Pty Limited<br />
ISSUE123.DOC
130 <strong>Solution</strong> <strong>4+4</strong> <strong>Installation</strong> <strong>Manual</strong><br />
Codepad Lockout Time<br />
LOCATION 220 0<br />
Location<br />
Description<br />
220 Increments Of 10 Seconds<br />
Table 74: Codepad Lockout Time Locations<br />
All codepads will be locked out for the specified time programmed if an invalid code has been<br />
entered more times than allowed by the code retry attempts programmed in "LOCATION 102"<br />
on page 92. If the "Codepad Lockout Time" is programmed as zero, no codepad lockout will<br />
occur.<br />
LOCATION 221 (Def<strong>au</strong>lted To 10 Minutes)<br />
Location<br />
Description<br />
221 Increments Of 1 Minute (0 – 15)<br />
Table 75: Siren Run Time Locations<br />
Siren Run Time<br />
The siren run time determines how long the horn speaker will activate during an alarm<br />
condition. The siren run time can be programmed between 0-15 minutes (+/- 1 minute).<br />
Siren Sound Rate<br />
LOCATION 222 7<br />
Location<br />
Description<br />
222 Siren Sound Rate (0 = SLOWEST 15 = FASTEST)<br />
Table 76: Siren Sound Rate Locations<br />
The siren sound rate varies the frequency of the siren tone. Zero rate is the slowest and fifteen<br />
is the fastest rate. The siren sound rate does not change the frequency rate for the fire alarm<br />
tone.<br />
ISSUE123.DOC<br />
Electronics Design and Manufacturing Pty Limited
System Event Timers 131<br />
Swinger Shutdown Count<br />
LOCATION 223 0<br />
Location<br />
Description<br />
223 Swinger Shutdown Count (0-15)<br />
Table 77: Swinger Shutdown Count<br />
This location determines the number of times the sirens and dialler can be triggered before any<br />
lockout options will take effect. A minimum of one zone must be programmed for lockout<br />
siren or dialler for this location to be effective. Refer to “Zone Options” on page 102 for more<br />
information on programming zones for lockout siren or lockout dialler.<br />
Only alarms triggered from zone inputs will increment the swinger shutdown counter. This<br />
means alarms such as codepad panic, access denied and any other system alarms will not effect<br />
the swinger shutdown count.<br />
While the sirens are operating, the counter for the sirens is only incremented by the first zone<br />
that c<strong>au</strong>ses the alarm. Any other zones that are triggered during siren run time will not effect<br />
the counter. While the dialler is on line, its counter is only incremented by the first zone that<br />
c<strong>au</strong>ses the alarm. Any other zones that are triggered while the dialler is on line will not effect<br />
the counter.<br />
When the swinger shutdown count (As programmed in “LOCATION 223” has been reached,<br />
all zones that have been triggered will be locked out according to their individual lockout<br />
settings.<br />
Electronics Design and Manufacturing Pty Limited<br />
ISSUE123.DOC
132 <strong>Solution</strong> <strong>4+4</strong> <strong>Installation</strong> <strong>Manual</strong><br />
System Time<br />
LOCATION 901 – 904 0000<br />
Location<br />
Description<br />
901 Current Hour In 24 Hour Time (Tens Digit)<br />
902 Current Hour In 24 Hour Time (Units Digit)<br />
903 Current Minute (Tens Digit)<br />
904 Current Minute (Units Digit)<br />
Table 78: System Time Locations<br />
The <strong>Solution</strong> <strong>4+4</strong> control panel has a real time 24 hour clock that needs to be set during<br />
installation. This time must be set in 24 hour format (ie. 10:30 PM would be programmed as<br />
2230). Every time the system has been powered down, the system time will need to be reset.<br />
Setting The Date and Time<br />
The Master Code holder is allowed to set the date and time as follows:<br />
How To Set The New Date and Time<br />
1. Enter your followed by 6 and the button.<br />
Three beeps will be heard and the STAY and AWAY indicators will begin to flash.<br />
2. Enter the day, month, year, hour and minute using the (DD, MM, YY, HH, MM)<br />
format.<br />
3. Press the button when finished.<br />
Two beeps will be heard and the STAY and AWAY indicators will extinguish.<br />
+ 6 +<br />
Example<br />
If the date and time needs to be set for the 1st January 1997 at 10:30 PM, program the date and<br />
time as follows;<br />
+ 6 +<br />
0 + 1 + 0 + 1 + 9 + 7 + 2 + 2 + 3 + 0<br />
+<br />
ISSUE123.DOC<br />
Electronics Design and Manufacturing Pty Limited
Options Bits<br />
This section includes the following;<br />
• Dialler Options 1<br />
• Dialler Options 2<br />
• System Options 1<br />
• System Options 2<br />
• System Options 3<br />
• Consumer Options 1<br />
• Consumer Options 2
134 <strong>Solution</strong> <strong>4+4</strong> <strong>Installation</strong> <strong>Manual</strong><br />
Dialler Options<br />
When programming these locations, you will notice that there are four options per location.<br />
You may select one, two, three or all four of these options, however, only one number needs to<br />
be programmed. This number is calculated by adding the option bit numbers together.<br />
Program a seven (7) if you require options 1, 2 and 4 simultaneously (ie. 1 + 2 + 4 = 7).<br />
Dialler Options 1<br />
LOCATION 224 5<br />
Option<br />
Description<br />
1 Enable Dialler Reporting Functions<br />
2 Enable Remote Arming Via The Telephone<br />
4 Enable Upload/Download Via Alarm Link<br />
8 Terminate “Alarm Link” Session On Alarm<br />
Table 79: Dialler Options 1<br />
1<br />
Enable Dialler Reporting Functions<br />
If this option has been selected, the dialler will function for all operations. Upload/Download<br />
via Alarm Link Software (CC816) and telephone remote arming will remain operational<br />
regardless of this setting.<br />
Disable Dialler Reporting Functions<br />
If this option is not selected, the <strong>com</strong>munication dialler will not operate. Upload/Download via<br />
Alarm Link Software (CC816) and telephone remote arming will remain operational regardless<br />
of this setting.<br />
2 2<br />
Enable Remote Arming Via The Telephone<br />
If this option has been selected, you can remotely arm the system via a standard telephone<br />
using the Phone Controller (CC911) or by using a touch tone telephone by pressing the *<br />
button on the phone. Refer to “Remote Arming Via The Telephone” on page 66 for more<br />
information. Forced arming is <strong>au</strong>tomatically assumed when this feature is being used.<br />
Whether remote functions have been enabled or disabled, this will have no effect on remote<br />
arming via the telephone. Refer to “Ring Count” on page 87 for programming the number of<br />
rings before the control panel will answer an in<strong>com</strong>ing call.<br />
4<br />
8<br />
Enable Upload/Download Via Alarm Link<br />
This option will need to be selected if you require to use the Alarm Link Software (CC816) to<br />
remotely program the control panel. The control panel will not respond to the Alarm Link<br />
Software if this option is not selected. Refer to “Upload/Download Via Alarm Link Software”<br />
on page 67 for more information.<br />
Terminate “Alarm Link” Session On Alarm<br />
If the control panel is <strong>com</strong>municating with a remote <strong>com</strong>puter via Alarm Link Software<br />
(CC816) and an alarm has registered, the “Alarm Link” session will <strong>au</strong>tomatically terminate<br />
and the relevant alarm message will be reported to the base station receiver.<br />
If an alarm occurs that does not need to report to the base station receiver, the session will not<br />
terminate. If this option has not been selected and an alarm has registered, the Alarm Link<br />
software will prompt the operator with a “Terminate” or “Continue” message.<br />
ISSUE123.DOC<br />
Electronics Design and Manufacturing Pty Limited
System and Consumer Options 135<br />
Dialler Options 2<br />
LOCATION 225 0<br />
Option<br />
Description<br />
1 Send Open/Close Reports Only If A Previous Alarm Has Occurred<br />
2 Reserved<br />
4 Send Open/Close Reports When In STAY Mode<br />
8 Delay Siren Until Transmission Complete<br />
1<br />
Table 80: Dialler Options 2<br />
Send Open/Close Reports Only If A Previous Alarm Has Occurred<br />
This option requires Open/Close reports in “LOCATION 180 - 181” to be enabled on page 113<br />
for it to be effective.<br />
An opening report will be transmitted to the base station receiver when the system has been<br />
disarmed after an alarm has occurred. When the system has been armed, a closing report will<br />
be transmitted. An opening or closing report will not report again until the system has<br />
registered another alarm condition.<br />
If the system is disarmed when an alarm occurs, only a closing report will be transmitted<br />
when the system is next armed.<br />
2<br />
4<br />
Reserved<br />
Send Open/Close Reports When In STAY Mode<br />
If open and close reports (Contact ID Event Code 401) are required when the system is armed<br />
in STAY Mode, this option will need to be selected.<br />
This option requires Open/Close reports in “LOCATION 180 - 181” to be enabled on page 113<br />
for it to be effective.<br />
8<br />
Delay Siren Until Transmission Complete<br />
If this option has been selected, the horn speaker, bell and strobe outputs will not activate until<br />
the base station receiver has sent a kiss-off back to the control panel after the message has been<br />
transmitted. If multiple messages are transmitted, the sirens will activate after the last kiss-off<br />
has been sent.<br />
Electronics Design and Manufacturing Pty Limited<br />
ISSUE123.DOC
136 <strong>Solution</strong> <strong>4+4</strong> <strong>Installation</strong> <strong>Manual</strong><br />
System Options 1<br />
LOCATION 226 1<br />
1<br />
Option<br />
Description<br />
1 Enable Forced Arming<br />
2 Enable EDM Smart Lockout<br />
4 Enable Monitoring Of Horn Speaker<br />
8 Allow Horn Speaker Beeps For Remote Control Operation<br />
Table 81: System Options 1<br />
Enable Forced Arming<br />
If this option has been selected, the system can be armed with zones unsealed.<br />
If this option is not selected, all zones must be sealed before the system can be armed. An<br />
attempt to arm the system with forced arming not enabled will clear any alarm memories<br />
present but arming will not be permitted.<br />
This feature will be ignored if the system has been remotely armed via the telephone using a<br />
Phone Controller (CC911) or by pressing the * button on a touch tone telephone.<br />
2<br />
4<br />
Enable EDM Smart Lockout<br />
This feature allows the control panel to remove any zones that are programmed for lockout<br />
dialler from the lockout list while the sirens are running. This feature allows a monitoring<br />
station to receive codes from previously locked out zones during siren time. Refer to “Zone<br />
Options” on page 102 for information on programming zones for lockout dialler and lockout<br />
siren.<br />
Enable Monitoring Of Horn Speaker<br />
If this option has been selected, the control panel will detect when the horn speaker has been<br />
disconnected from the speaker terminals. The FAULT indicator will illuminate when the horn<br />
speaker has been disconnected and will extinguish when the horn speaker has been<br />
reconnected.<br />
If an output is required to operate when the horn speaker has been disconnected, refer to<br />
"Output Event Type – Horn Speaker Monitor Fail" on page 120 for more information.<br />
8<br />
Allow Horn Speaker Beeps For Remote Control Operations<br />
This feature will enable horn speaker beeps to be heard when the system is armed and disarmed<br />
via a hand held radio remote control unit. Devices connected to the bell output (RELAY<br />
OUTPUT) will not activate.<br />
These speaker beeps are applicable when using the Radio Key/Keyswitch Interface (CC813) or<br />
when remotely operating the system via a zone programmed for keyswitch operation. Refer to<br />
“Radio Key/Keyswitch Interface” on page 144 for more information. Refer to “Keyswitch<br />
Zone” on page 101 for more information.<br />
No Of Beeps<br />
System Status<br />
1 System Disarmed<br />
2 System Armed In AWAY Mode<br />
3 System Armed In STAY Mode<br />
Table 82: Horn Speaker Beeps<br />
When using the Night Arm Station (CP105) to arm in STAY Mode, if this option has been<br />
selected, three beeps will be heard from the horn speaker to indicate that the system has<br />
been armed in STAY Mode.<br />
ISSUE123.DOC<br />
Electronics Design and Manufacturing Pty Limited
System and Consumer Options 137<br />
System Options 2<br />
LOCATION 227 2<br />
Option<br />
Description<br />
1 Enable Radio Key/Keyswitch Interface Or Night Arm Station<br />
2 Enable Handover Delay To Be Sequential<br />
4 Enable Codepad Panic To Be Silent<br />
8 Enable Access Denied To Be Silent<br />
1<br />
2<br />
4<br />
Table 83: System Options 2<br />
Enable Radio Key/Keyswitch Interface or Night Arm Station<br />
This option must be selected when using the Radio Key/Keyswitch Interface (CC813) or the<br />
Night Arm Station (CP105). This option allows the control panel to be operated using either of<br />
these two accessories.<br />
Enable Handover Delay To Be Sequential<br />
If this option has been selected, handover delay will be sequential (ie. In numerical order from<br />
lowest to highest). If the sequence is broken before the entry time expires, an alarm will occur.<br />
If this option has not been selected, handover delay will follow the entry path provided that a<br />
delay zone has been triggered first.<br />
Enable Codepad Panic To Be Silent<br />
If this option has been selected, a codepad panic alarm will not operate the horn speaker, the<br />
bell or the strobe outputs. If this option is not selected, all three outputs will operate after a<br />
codepad panic alarm has been activated from the codepad. Selecting this option does not effect<br />
the operation of the <strong>com</strong>munication dialler.<br />
If you wish to disable the reporting of the codepad panic alarm, program “LOCATION 160 -<br />
163” on page 110 as zero.<br />
8<br />
Enable Access Denied To Be Silent<br />
If this option has been selected, a codepad tamper alarm will not operate the horn speaker, bell<br />
or the strobe outputs. If this option is not selected, all three outputs will operate after a<br />
codepad tamper alarm has occurred.<br />
Refer to "LOCATION 102" on page 92 to set the number of invalid code retries before an<br />
alarm condition occurs. Selecting this option does not effect the operation of the<br />
<strong>com</strong>munication dialler. If you wish to disable the reporting of access denied reports program<br />
“LOCATION 164 - 167” on page 111 as zero.<br />
Electronics Design and Manufacturing Pty Limited<br />
ISSUE123.DOC
138 <strong>Solution</strong> <strong>4+4</strong> <strong>Installation</strong> <strong>Manual</strong><br />
System Options 3<br />
LOCATION 228 0<br />
1<br />
2<br />
4<br />
8<br />
Reserved<br />
Reserved<br />
Option<br />
Description<br />
1 Reserved<br />
2 Reserved<br />
4 Ignore AC Mains Fail<br />
8 Enable Pulse Count Handover<br />
Table 84: System Options 3<br />
Ignore AC Mains Fail Indication<br />
If this option has been selected, the MAINS indicator will not flash, nor will the codepad beep<br />
once every minute when the AC mains has been disconnected from the control panel. If you<br />
require a programmable output to operate when the AC mains has failed, refer to “Output<br />
Event Type – AC Fail" on page 119.<br />
Enable Zone Pulse Count Handover<br />
If this option has been selected, any zone pulse count readings will handover and accumulate to<br />
any zone that is triggered during the same arming cycle. Zone pulse count handover will only<br />
operate with zone pulse count options 8-15.<br />
Refer to "Zone Pulse Count" on page 106 and "Zone Pulse Count Time" on page 106 for more<br />
information.<br />
24 hour zones do not receive any handover pulses from other zones. 24 hour zones can<br />
handover pulses to other zones.<br />
ISSUE123.DOC<br />
Electronics Design and Manufacturing Pty Limited
System and Consumer Options 139<br />
Consumer Options 1<br />
LOCATION 229 2<br />
Option<br />
Description<br />
1 Send Test Reports Only If The System Is Armed<br />
2 Enable Operation Of Siren and Strobe In STAY Mode<br />
4 Enable Answering Machine Bypass Only When Armed<br />
8 Enable Codepad Extinguish Mode<br />
1<br />
Table 85: System Options 4<br />
Send Test Reports Only If The System Is Armed<br />
If this option has been selected, test reports (Contact ID Event Code 602) will only be sent<br />
when the system has been armed in AWAY Mode or STAY Mode. It is no longer necessary to<br />
send a test report as well as an opening and closing report every day.<br />
During the working week, most <strong>com</strong>mercial premises would be open and therefore a test report<br />
is not necessary, as open and close reports would be sent at the time programmed.<br />
Refer to “Test Reporting Time” on page 114 to set the test report time required.<br />
2<br />
4<br />
8<br />
Enable Operation Of Siren & Strobe In STAY Mode<br />
This option will need to be selected if <strong>au</strong>dible alarms are required when the system has been<br />
armed in STAY Mode.<br />
Enable Answering Machine Bypass Only When Armed<br />
This option needs to be selected if the answering machine bypass feature is required to operate<br />
only when the system has been armed. When the system is disarmed, the control panel will not<br />
answer any in<strong>com</strong>ing calls. This option is beneficial in high telephone traffic installations<br />
where the control panel could answer an in<strong>com</strong>ing call. Refer to “LOCATION 060” on page<br />
87 to enable answering machine bypass.<br />
Enable Codepad Extinguish Mode<br />
If this option has been selected, all indicators on the remote codepads will extinguish if a<br />
button is not pressed for 60 seconds. The indicators will illuminate when there is an alarm<br />
(except a silent alarm), when a button is pressed on the codepad, when the AC mains fail<br />
beeps, or if the entry timer has been activated.<br />
Electronics Design and Manufacturing Pty Limited<br />
ISSUE123.DOC
140 <strong>Solution</strong> <strong>4+4</strong> <strong>Installation</strong> <strong>Manual</strong><br />
Consumer Options 2<br />
LOCATION 230 0<br />
1<br />
Reserved<br />
Option<br />
Description<br />
1 Reserved<br />
2 Enable Single Button Arming In AWAY Mode and STAY Mode<br />
4 Enable Single Button Disarming In STAY Mode<br />
8 Enable Alarm Memory Reset On Disarm<br />
Table 86: Consumer Options 2<br />
2<br />
4<br />
8<br />
Enable Single Button Arming In AWAY Mode Or STAY Mode<br />
If this option has been selected, the hold down functions for arming in AWAY Mode or STAY<br />
Mode will be functional. Refer to "Hold Down Functions" on page 61 for more information.<br />
Enable Single Button Disarming From STAY Mode<br />
This option will only operate when Option 2 in this location has also been selected. This<br />
option will allow hold down functions for disarming from STAY Mode. Refer to "Hold Down<br />
Functions" on page 61 for more information.<br />
Enable Alarm Memory Reset On Disarm<br />
This option allows the memory of alarm events to be cleared from the remote codepad when<br />
the system has been disarmed. If this option has not been selected, the system will need to be<br />
armed and disarmed again to clear alarm memory from the remote codepad.<br />
ISSUE123.DOC<br />
Electronics Design and Manufacturing Pty Limited
Optional Equipment<br />
This section includes the following;<br />
• EDMSAT - Satellite Siren (SS914)<br />
• Programming Key (CC810)<br />
• Alarm Link Software (CC816)<br />
• CP5 Eight Zone Codepad (CP508)<br />
• CP5 Eight Zone LCD Codepad (CP508L)<br />
• Night Arm Station (CP105)<br />
• Phone Controller (CC911)<br />
• Hand Held Dialler Tester (DD901)<br />
• Cellular Diallers<br />
• PS100 Power Supply Module (PS100)<br />
• TF008 Plug Pack (TF008)<br />
• <strong>Solution</strong> Codepad Mimic Board (CC820)<br />
• <strong>Solution</strong> Relay Output Interface (CC892)<br />
• 2 Wire Smoke Detector Interface (FA101)<br />
• Radio Key/Keyswitch Interface (CC813)
142 <strong>Solution</strong> <strong>4+4</strong> <strong>Installation</strong> <strong>Manual</strong><br />
Optional Equipment<br />
EDM manufactures numerous accessories that can be used in conjunction with the <strong>Solution</strong><br />
<strong>4+4</strong> control panel. These optional pieces of equipment will enhance certain features thus<br />
making the system extremely flexible.<br />
EDMSAT - Satellite Siren (SS914)<br />
The EDMSAT Satellite Siren is a totally self contained unit incorporating a high powered siren<br />
and a weatherproof strobe. A 1.2 AH sealed lead acid battery needs to be fitted. The<br />
EDMSAT requires only two wires for operation on which the charging of the battery and<br />
triggering of the siren and strobe are carried out. This is done by pulse code modulating<br />
(PCM) the charging voltage. Any attempt to tamper with the wiring or to substitute an<br />
alternative power source across the wiring will disrupt the data transmission and the EDMSAT<br />
will activate immediately. When the EDMSAT carries out a battery test, the unit will sound<br />
for two seconds if the battery test fails. Refer to the “Output Event Type – EDMSAT -<br />
Satellite Siren” on page 118 when programming a programmable output for the satellite siren.<br />
Hand Held Programmer (CC814)<br />
The hand held programmer is used to program the locations in the <strong>Solution</strong> <strong>4+4</strong> control<br />
panel. The unit displays the actual location number and the data value currently programmed.<br />
It <strong>com</strong>es <strong>com</strong>plete with a one metre connecting cable and a socket for an external programming<br />
key. Refer to “Programming With The Hand Held Programmer” on page 20 for more<br />
information.<br />
Programming Key (CC810)<br />
The programming key is a unique device that will store all programming information<br />
programmed in your control panel once copied to the programming key. The programming<br />
key can hold all your <strong>com</strong>mon configuration data such as monitoring station telephone<br />
numbers and zone reporting channels etc.<br />
Alarm Link Software (CC816)<br />
This software package is designed to be used for programming the <strong>Solution</strong> <strong>4+4</strong> control<br />
panel by remote connect via the telephone line. All options and features can be accessed via<br />
this software as well as maintaining history and service reports. Refer to "LOCATION 224"<br />
on page 134 to enable this feature. Refer to “Upload/Download Via Alarm Link Software” on<br />
page 67 for more information on the remote connect methods.<br />
CP5 Eight Zone Codepad (CP508)<br />
This codepad is designed to operate with the <strong>Solution</strong> range of control panels. This codepad<br />
provides indications for up to 8 zones.<br />
CP5 Eight Zone LCD Codepad (CP508L)<br />
This codepad is designed to operate with the <strong>Solution</strong> range of control panels with a fixed<br />
icon display. This codepad provides indications for up to 8 zones.<br />
Night Arm Station (CP105)<br />
The night arm station incorporates a panic button and is designed to allow system operation<br />
from a bedroom or sitting room to arm and disarm the system in STAY Mode.<br />
Phone Controller (CC911)<br />
The phone controller operates at a frequency of 1400 Hz and allows the user to remotely arm<br />
the system in AWAY Mode via the telephone. This phone controller can also be used to<br />
acknowledge a phone call from the control panel when the system is set up for domestic<br />
dialling.<br />
ISSUE123.DOC<br />
Electronics Design and Manufacturing Pty Limited
Optional Equipment 143<br />
Hand Held Dialler Tester (DD901)<br />
The hand held dialler tester simulates a base station for testing of the control panel's dialling<br />
functions. It <strong>com</strong>municates in most formats.<br />
Cellular Diallers<br />
The cellular dialler when connected to the control panel will transmit alarm information via the<br />
cellular phone network to the base station receiver when a land telephone line is not present or<br />
has been tampered with.<br />
PS100 Power Supply Module (PS100)<br />
The PS100 Power Supply Module has been designed for applications requiring 13.8 volts DC<br />
at currents of up to 1 Amp and must be used in conjunction with the TF008 - 18 volt AC plug<br />
pack.<br />
The unit <strong>com</strong>es <strong>com</strong>plete with our standard, fully short circuit proof, power out and battery<br />
charging terminals as well as a DC LED indicator and AC mains fail output. For situations<br />
requiring an uninterrupted power source, a rechargeable sealed lead-acid battery can be<br />
connected. In the event of a mains failure, the power supply will switch to battery power<br />
without interrupting the load being supplied.<br />
TF008 Plug Pack (TF008)<br />
The TF008 plug packs have been designed to be used with the EDM control panels and the<br />
PS100 Power Supply Module. The plug pack includes built in thermal fuses which under<br />
overload or f<strong>au</strong>lt conditions will blow and eliminate any possible fire threat due to excessive<br />
heat build up inside the casing.<br />
The TF008 plug pack incorporates a three wire flying lead that enables a mains earth<br />
connection to be made between the equipment and the plug pack. This connection may be<br />
required for lightning protection on equipment that is connected to phone lines or for safety<br />
reasons such as earthing of metal enclosures.<br />
<strong>Solution</strong> Codepad Mimic Board (CC820)<br />
The <strong>Solution</strong> Codepad Mimic Board (CC820) has been designed to allow you to have a<br />
separate output indicator for each indicator found on the remote codepad. This will be useful<br />
to remotely display system status information.<br />
<strong>Solution</strong> Relay Output Interface (CC892)<br />
The <strong>Solution</strong> Relay Output Interface (CC892) has been designed to allow up to an additional 8<br />
relay outputs to be connected to a <strong>Solution</strong> control panel. This will be useful to remotely<br />
display system status information.<br />
The 3 way DIP switch on the board is used to select the data that is to be displayed on the<br />
relays. Multiple interfaces may be connected in parallel for different data displays.<br />
2 Wire Smoke Detector Interface (FA101)<br />
The 2 Wire Smoke Detector Interface (FA101) has been designed to allow high quality 2 wire,<br />
24 volt DC smoke detectors to be easily connected to the <strong>Solution</strong> range of control panels. The<br />
interface provides the 24 volts required to power the smoke detector and also provides a relay<br />
output that is used to trigger the control panel. Multiple detectors may be connected to the<br />
same interface.<br />
Electronics Design and Manufacturing Pty Limited<br />
ISSUE123.DOC
144 <strong>Solution</strong> <strong>4+4</strong> <strong>Installation</strong> <strong>Manual</strong><br />
Radio Key/Keyswitch Interface (CC813)<br />
This interface was designed to allow simple interfacing of a momentary keyswitch or radio<br />
equipment for remote control operations to operate the control panel.<br />
If the R/K terminal is used, a number of momentary keyswitches may be connected in parallel<br />
for multiple arm/disarm locations. The ON and OFF terminals can be used to directly interface<br />
to any access control system.<br />
The HOME terminal will force the system to arm and disarm in STAY Mode.<br />
There is also a PANIC terminal that allows the customer to issue a panic alarm from a remote<br />
keyswitch or hand held radio transmitter.<br />
This is handy if you require your system to be radio controlled and you would like to give your<br />
customer total control via a hand held radio remote.<br />
Indication beeps can be provided via the horn speakers when arming and disarming using this<br />
interface board. Refer to Option 8 in "LOCATION 226" on page 136 for more information.<br />
As you can see, the radio key/keyswitch interface allows you the flexibility to perform quite a<br />
number of functions cheaply and easily.<br />
No Of Beeps<br />
System Status<br />
1 System Disarmed<br />
2 System Armed In AWAY Mode<br />
3 System Armed In STAY Mode<br />
Table 87: Horn Speaker Beeps<br />
Refer to “Figure 8: Radio Key/Keyswitch Interface (CC813) Connection Diagram” on page<br />
145 and “Figure 9: Radio Key/Keyswitch Interface (CC813) Connection Diagram” on page<br />
146 for wiring information.<br />
EDMSTU – Securitel Interface (SC800)<br />
The EDMSTU – Securitel Interface has been designed to operate in conjunction with the<br />
control panel using a serial connection. This means that all alarm information can be reported<br />
from the control panel to the EDMSTU using only 3 wires. The EDMSTU provides full serial<br />
reporting of alarms, opening and closing reports, isolations and user ID information. The<br />
monitoring control room also monitors line integrity.<br />
ISSUE123.DOC<br />
Electronics Design and Manufacturing Pty Limited
Optional Equipment 145<br />
Figure 8: Radio Key/Keyswitch Interface (CC813) Connection Diagram<br />
Electronics Design and Manufacturing Pty Limited<br />
ISSUE123.DOC
146 <strong>Solution</strong> <strong>4+4</strong> <strong>Installation</strong> <strong>Manual</strong><br />
Figure 9: Radio Key/Keyswitch Interface (CC813) Connection Diagram<br />
ISSUE123.DOC<br />
Electronics Design and Manufacturing Pty Limited
Terminals and Descriptions<br />
This section includes the following;<br />
• Terminal Definitions and Descriptions<br />
• Glossary Of Terms<br />
• <strong>Solution</strong> <strong>4+4</strong> Wiring Diagram<br />
• <strong>Solution</strong> <strong>4+4</strong> Component Overlay<br />
• Tele<strong>com</strong> Connection Diagrams
148 <strong>Solution</strong> <strong>4+4</strong> <strong>Installation</strong> <strong>Manual</strong><br />
Terminal Definitions and Descriptions<br />
Terminal<br />
EARTH<br />
18V AC<br />
+BATTERY<br />
-BATTERY<br />
Description<br />
This terminal should be connected to the green wire on the TF008 Plug Pack that is internally connected<br />
to the mains earth. Extensive lightning protection has been built into the control panel and this terminal<br />
will have to be connected correctly if you are to take the best advantage of the protection provided.<br />
These two terminals are plug on type, and are the termination point for the TF008 Plug Pack. The<br />
voltage of the plug pack being used must be 18 - 22 volts AC and rated at 1.3 Amps minimum for correct<br />
operation.<br />
The + BATTERY connects to the red positive terminal of the battery and the - BATTERY connects to<br />
the black negative terminal of the battery. The battery should be a 12 volt sealed lead acid rechargeable<br />
type with a capacity of between 1.2 AH - 6.5 AH. The battery is protected by a 3 Amp fuse.<br />
The charging globe which is situated above the 3 Amp fuse will always be illuminated until the battery is<br />
100% charged.<br />
GND<br />
+12V<br />
CLK<br />
DATA<br />
STR<br />
OUT1<br />
+COM<br />
This group of terminals are the connection points for your system codepads. All system codepads should<br />
connect in a parallel configuration back to these terminals. The only factor restricting the number of<br />
codepads that can be connected is the available power and its distribution. Each codepad has a<br />
maximum power requirement of 60 mA with all indicators illuminated, therefore this should be taken<br />
into consideration when calculating your available continuous power. The total continuous external load<br />
on the system should not exceed 1 Amp maximum.<br />
This group of terminals are the output interface terminals. They can be configured to any <strong>com</strong>bination of<br />
the functions available via the system programming options. They can be used for a variety of functions<br />
with incredible flexibility. All outputs have a <strong>com</strong>mon terminal that is positive 12 volts and each output<br />
is capable of sinking a maximum of 400 mA. Output 1 is def<strong>au</strong>lted to operate a horn speaker.<br />
The outputs are protected by EDM's unique Integrated Protection System, [IPS]. This makes them<br />
extremely tolerant to abuse or incorrect wiring. It should be noted that each output is open collector and<br />
will not source any current but can sink a maximum of 400 mA per output.<br />
COMM<br />
N/O<br />
(12v 1A Max)<br />
+12V<br />
Z4<br />
Z3<br />
+12V<br />
GND<br />
Z2<br />
Z1<br />
+12V<br />
These relay contacts are fully programmable as with the strobe and output 1. The relay is factory<br />
def<strong>au</strong>lted as an alarm output (Sirens Running - Event Type 1,15).<br />
The N/O contact is the connection point for the positive side of a DC siren such as a piezo screamer. The<br />
negative side of the DC siren needs to be connected to the GND terminal. A link (JP2) is provided on<br />
the PCB for connecting the COM terminal to either GND or 12V. This link should be connected to +12V<br />
as shown in "Figure 10: <strong>Solution</strong> <strong>4+4</strong> Wiring Diagram" on page 151. The relay is rated at 1 Amp/30<br />
VDC.<br />
These terminals are zones three and four. Their <strong>com</strong>mon terminal is +12V. All normally closed contacts<br />
are to be wired in series with the EOL resistor, where normally open contacts are to be wired in parallel<br />
with the EOL resistor. The function of the zones and their response times are programmable via the<br />
system programming options. If split EOL has been programmed, this will enable 24 hour tamper zones<br />
to be connected in parallel to zones three and four to act as zones eleven and twelve.<br />
These two terminals are for power to detectors and other equipment. They are fuse protected by a 1 amp<br />
fuse.<br />
These terminals are zones one and two. Their <strong>com</strong>mon terminal is +12V. All normally closed contacts<br />
are to be wired in series with the EOL resistor, where normally open contacts are to be wired in parallel<br />
with the EOL resistor. The function of the zones and their response times are programmable via the<br />
system programming options. If split EOL has been programmed, this will enable 24 hour tamper zones<br />
to be connected in parallel to zones one and two to act as zones nine and ten<br />
ISSUE123.DOC<br />
Electronics Design and Manufacturing Pty Limited
Terminals and Descriptions 149<br />
Glossary Of Terms<br />
Term<br />
Alarm Condition<br />
Answering Machine<br />
Bypass<br />
Armed<br />
(System ON)<br />
AWAY or #<br />
AWAY Mode<br />
Codepad<br />
Day Alarm<br />
Detectors<br />
Dialler<br />
Disarmed<br />
Dynamic Battery<br />
Testing<br />
EDMSAT<br />
(Satellite Siren)<br />
Entry Time or<br />
Entry Delay<br />
Entry Warning<br />
Exit Time or<br />
Exit Delay<br />
External Equipment<br />
Forced Arming<br />
Description<br />
Is when your alarm system is armed and one of the detection devices are violated. A 24 hour zone<br />
(eg. Smoke detector) may trigger when your system is armed or disarmed.<br />
Answering machine bypass has been incorporated so that it is possible to make a connection with<br />
the control panel for remote arming or remote programming operations when there is an answering<br />
machine or facsimile machine on the same telephone line.<br />
When the system is in a state ready to accept alarms.<br />
This is the button on your codepad used to execute any given <strong>com</strong>mand.<br />
Is the mode used to arm your system when you leave your premises.<br />
The codepad allows you to perform all functions such as arming, disarming and programming of<br />
your alarm system.<br />
Day alarm allows a <strong>com</strong>bination of zones to be monitored while the system is in the disarmed<br />
state.<br />
Are devices connected to your alarm system used to c<strong>au</strong>se an alarm condition. Some <strong>com</strong>mon<br />
forms of detection devices are; passive infrared, smoke, photo electric beams, reed switches and<br />
vibration sensors.<br />
Is a device that is used for <strong>com</strong>municating to a monitoring station, mobile phone or pocket pager<br />
etc.<br />
Is when your system is in a state that will not accept alarms except for 24 hour zones.<br />
Is a feature used to monitor and test the condition of your backup battery.<br />
Is a self contained siren unit <strong>com</strong>plete with flashing blue strobe light and a backup battery. It<br />
offers a higher level of security for your alarm system.<br />
Is the time allowed after entering your premises, to disarm your system before an alarm occurs.<br />
Is the beeping from your codepad during entry time to remind you to disarm your system.<br />
Is the amount of time you have to leave your premises after you have armed your system.<br />
Is any device connected to your system such as detectors, codepads and sirens.<br />
Is a situation where your alarm system is permitted to be armed when one or more zones are<br />
unsealed.<br />
Electronics Design and Manufacturing Pty Limited<br />
ISSUE123.DOC
150 <strong>Solution</strong> <strong>4+4</strong> <strong>Installation</strong> <strong>Manual</strong><br />
Term<br />
Handover Delay<br />
Hand Held Radio<br />
Remote Control<br />
Lockout Dialler<br />
Lockout Siren<br />
Master Code<br />
Monitoring Station<br />
Panic<br />
Phone Controller<br />
Sealed<br />
Sensor Watch<br />
Silent Alarm<br />
STAY Mode<br />
Unsealed<br />
User Code<br />
Zones<br />
Description<br />
When your system is armed and zone one is violated, the entry delay starts timing. If zone two is<br />
then violated the entry delay time is handed over to zone two and so on through zones three and<br />
four. This is known as sequential hand over delay.<br />
Can be used to arm and disarm your system or c<strong>au</strong>se a panic alarm.<br />
Lockout dialler means that the dialler will only activate once per zone per arming cycle.<br />
Lockout siren means that the sirens will only activate once per zone per arming cycle.<br />
Is a numerical code used for arming and disarming the system as well as allowing access to all<br />
functions that are programmable through the codepad.<br />
Is a secure location where a digital receiver monitors numerous alarm systems and deciphers their<br />
alarm transmission reports so that the operator can advise the appropriate <strong>au</strong>thorities to take<br />
immediate action.<br />
This is a type of alarm raised by you to indicate to the monitoring station that there is an<br />
emergency situation at your premises.<br />
Is a device used for arming your system via the telephone line. It is also used to acknowledge<br />
domestic alarm reports.<br />
Refers to a zones status. If a zone is sealed, the detection devices are not violated and the zone<br />
indicator will be extinguished (ie. a reed switch is closed or a detector is on stand by waiting for an<br />
intrusion).<br />
Sensor watch gives the control panel the ability to recognise that detection devices may have<br />
stopped working. This is a feature that monitors the operation of a zone over a programmed time<br />
period.<br />
When programming your system, it is possible to have an individual zone for silent alarm. This<br />
means that when the zone is violated your alarm system will <strong>com</strong>municate with the monitoring<br />
station without sounding the sirens. This can only be programmed by your installer.<br />
Is a condition that <strong>au</strong>tomatically isolates certain zones when your system is armed in STAY Mode.<br />
These zones can only be programmed by your installer.<br />
Refers to zone status. If a zone is unsealed, the detection devices are violated and the zone<br />
indicator will be illuminated (ie. a reed switch is open or a detector has noted an intrusion).<br />
A numerical code used to arm and disarm the system.<br />
A monitored input used to trigger an alarm condition.<br />
24 Hour Zone A monitored input where tamper switches and emergency switches may be connected. If at any<br />
time, (whether your system is armed or disarmed) one of these switches is violated, an alarm<br />
condition will be generated.<br />
ISSUE123.DOC<br />
Electronics Design and Manufacturing Pty Limited
Terminals and Descriptions 151<br />
<strong>Solution</strong> <strong>4+4</strong> Wiring Diagram<br />
Figure 10: <strong>Solution</strong> <strong>4+4</strong> Wiring Diagram<br />
Electronics Design and Manufacturing Pty Limited<br />
ISSUE123.DOC
152 <strong>Solution</strong> <strong>4+4</strong> <strong>Installation</strong> <strong>Manual</strong><br />
<strong>Solution</strong> <strong>4+4</strong> Component Overlay<br />
Figure 11: <strong>Solution</strong> <strong>4+4</strong> Component Overlay<br />
ISSUE123.DOC<br />
Electronics Design and Manufacturing Pty Limited
Terminals and Descriptions 153<br />
Tele<strong>com</strong> Connection Diagrams<br />
Figure 12: Tele<strong>com</strong> Connection Diagrams For <strong>Solution</strong> <strong>4+4</strong><br />
Electronics Design and Manufacturing Pty Limited<br />
ISSUE123.DOC
154 <strong>Solution</strong> <strong>4+4</strong> <strong>Installation</strong> <strong>Manual</strong><br />
ISSUE123.DOC<br />
Electronics Design and Manufacturing Pty Limited
Appendices<br />
This section includes the following;<br />
• Telephone Anti-Jamming<br />
• Test Reports Only When Armed
156 <strong>Solution</strong> <strong>4+4</strong> <strong>Installation</strong> <strong>Manual</strong><br />
Appendix A<br />
Telephone Anti-Jamming<br />
There are many <strong>com</strong>panies today importing American designed products that claim to have<br />
Anti-Jamming and believe it or not, they push this feature as if it were a major break through in<br />
control panel technology. Well this in fact is not the case at all as most control panels have<br />
some sort of Anti-Jamming feature. We can go as far back as the early 1980's where even the<br />
678 diallers incorporated a form of Anti-Jamming as a standard programmable option.<br />
The important thing to note is that as most American designed products are primarily aimed at<br />
their local market and telephone networks, when they are imported to Australia their antijamming<br />
function does not perform as it should.<br />
To clear up just what anti-jamming is and how it works needs some understanding of<br />
Telephone Networks. In America either of the two parties (ie. the one who initiated the call or<br />
the one receiving the call) can clear the line by placing the hand piece back on the hook. If you<br />
pick up the hand piece again, dial tone will be received and you will be able to make a new call<br />
immediately. This is not so here in Australia.<br />
In Australia, only the calling party can immediately terminate the call. If you receive a call<br />
from someone and hang up on them, picking the hand piece back up again to make a new call<br />
only reconnects you to the original caller. It will not be possible to make another call until the<br />
original caller hangs up or you hang up phone the phone for ninety seconds or longer. So you<br />
see Australia is very different and needs a special form of anti-jamming to suit our telephone<br />
network.<br />
There are control panels on the market that after making a few call attempts which fail simply<br />
hang up and wait for ninety seconds or so, in an attempt to clear the jamming in<strong>com</strong>ing call.<br />
This may work in some instances where the caller is not a genuine burglar and is not<br />
deliberately trying to jam the control panel. With this simple method of hanging up for ninety<br />
seconds we have not only delayed the alarm signal for this time but also the time taken for the<br />
original failed call attempts which could easily total 4 minutes. This is bad enough in its own<br />
right but even more disturbing is the fact that the initial failed call attempts allow for the<br />
establishment of an <strong>au</strong>dio connection between the would be burglar and the control panel.<br />
Anyone with a little knowledge of alarm systems will be able to actually trick the dialler into<br />
thinking it is talking to a base station thus actually clearing the alarm signal. Pretty frightening<br />
when you thought the control panel you were using and re<strong>com</strong>mending to your customers is<br />
supposed to have anti-jamming.<br />
At Electronics Design and Manufacturing Pty Limited we take anti-jamming very seriously<br />
and have in fact devoted a great deal of time and money researching this problem. Our<br />
engineers have <strong>com</strong>e up with the best possible anti-jamming procedure known and patented<br />
accordingly {Patent Number 571994}.<br />
Our procedure is very simple and effective bec<strong>au</strong>se we never answer the burglars phone call<br />
and the Tele<strong>com</strong> Network will <strong>au</strong>tomatically clear an unanswered call in approximately ninety<br />
seconds. This time will be even shorter if the call is originated through the Mobile-Net<br />
Network where it will most likely be in the case of a true burglary.<br />
Once the control panel detects that the phone line has stopped ringing it immediately loops the<br />
line and makes its call therefore transmitting its alarm message successfully. The line is also<br />
<strong>au</strong>tomatically disconnected from the telephones within the protected premises immediately on<br />
an alarm condition by the control panel to further confuse the burglar and eliminate the<br />
possibility of the burglar answering the call. As you can see, our method of anti-jamming will<br />
in the worst possible case delay the alarm signal by ninety seconds but even more importantly<br />
will never allow for an <strong>au</strong>dio connection between the burglar and the control panel.<br />
ISSUE123.DOC<br />
Electronics Design and Manufacturing Pty Limited
Appendices 157<br />
Appendix B<br />
Test Reports Only When Armed<br />
All dialling products produced by Electronics Design and Manufacturing Pty Limited have<br />
incorporated this true anti-jamming feature as standard since 1985 and we do not consider it as<br />
an option but a must in any professional security system.<br />
True anti-jamming can only be found in products produced by Electronics Design and<br />
Manufacturing Pty Limited and any other manufacturer can only offer second best due to our<br />
patent on this very unique and effective procedure.<br />
The <strong>Solution</strong> <strong>4+4</strong> control panel allows for test reports to be transmitted to the base station<br />
receiver to verify that the dialler functional. So what you might say, as most alarm diallers<br />
allow you to do this.<br />
The one problem with this is that installations that report opening and closing reports will<br />
generally also transmit a test report each day. This call is unnecessary, as a successful opening<br />
and closing report means that the dialler is functioning correctly.<br />
The <strong>Solution</strong> <strong>4+4</strong> control panel allows you to save time and money by providing test<br />
reports only while the system is in the armed state.<br />
Program "LOCATION 182 - 185" on page 114 with Option 1 (Send test reports only if the<br />
system is armed), and then set the test report time to be in the middle of the day. During<br />
Monday to Friday when the premises are generally open and the system disarmed a test report<br />
will not be transmitted. However, on the weekend, the premises will be closed and the system<br />
armed, so a test report will be transmitted at the programmed time thus verifying the operation<br />
of the dialler.<br />
At first glance this may not seem to be a big deal but lets do a few sums and you will see just<br />
where savings can be made.<br />
Let us assume that the customer wants, needs or has test reports programmed for once a day as<br />
well as opening and closing reports. This means that at least three phone calls will be made<br />
each week day and one call on Saturday and one call on Sunday.<br />
By using the <strong>Solution</strong> <strong>4+4</strong> control panel you will be able to eliminate five calls per week.<br />
This means that over one week you will save your customer $1.20 and over one year you will<br />
save them $62.40.<br />
Not a bad saving, and remember these figures are for local calls only.<br />
Turning the table slightly, a control room with lets say 1000 customers sending the above<br />
mentioned reports, can expect to receive some 884,000 phone calls ($212,160 assuming local<br />
calls) just for reporting opening, closing and test reports over a 12 month period.<br />
If you use the <strong>Solution</strong> <strong>4+4</strong> control panel, you can effectively cut the calls to 624,000 per<br />
year (at a value of $149,760 assuming local calls), a saving of $62,400. If we now assume that<br />
for each call one line is printed on the logging printer, and that one page is filled per 60 calls.<br />
You will be able to save 4333 sheets of paper per year and at approximately $45 per box this<br />
be<strong>com</strong>es a considerable saving.<br />
As you can see using the <strong>Solution</strong> <strong>4+4</strong> control panel will save you money, your customer<br />
money and will help conserve our natural resources, in fact, the only people who don't like this<br />
feature is Tele<strong>com</strong>.<br />
Electronics Design and Manufacturing Pty Limited<br />
ISSUE123.DOC
158 <strong>Solution</strong> <strong>4+4</strong> <strong>Installation</strong> <strong>Manual</strong><br />
ISSUE123.DOC<br />
Electronics Design and Manufacturing Pty Limited
Specifications<br />
This section includes the following;<br />
• Warranty Statement<br />
• Specifications<br />
• Software Version Number<br />
• Advice To Users<br />
• New Zealand Telepermit Notes
160 <strong>Solution</strong> <strong>4+4</strong> <strong>Installation</strong> <strong>Manual</strong><br />
Warranty Statement<br />
Specifications<br />
Electronics Design and Manufacturing Pty Limited warrants this product to be free from<br />
defects in material and workmanship for a period of three years from the date of manufacture<br />
as indicated by the date stamp and /or the serial number on the product.<br />
Defective units returned by the purchaser at their own expense during this period would be<br />
repaired or replaced at the option of the manufacturer. The repair or replacement will be free of<br />
charge provided that the defects were not incurred during shipping or handling, or the damage<br />
was not due to c<strong>au</strong>ses beyond the control of Electronics Design and Manufacturing Pty<br />
Limited, such as lightning, excessive voltage, mechanical shock or damage arising out of<br />
abuse, alteration or improper application of the equipment.<br />
Temperature Range:<br />
0 – 45 Degrees Celsius<br />
Humidity: 10% - 95%<br />
Power Source: TF008 Plug Pack – 240 Volt / 18 Volt AC @ 1.3<br />
Amp<br />
Stand-By Current:<br />
Current Draw In Alarm Condition:<br />
Current Draw With No Alarm and Codepad Fitted:<br />
Back-Up Battery:<br />
65 mA<br />
115 mA<br />
105 mA<br />
Ah / 12 Volt DC Rechargeable Sealed Lead Acid<br />
Battery<br />
Dimensions:<br />
Weight:<br />
Austel Approval Number:<br />
306 mm x 262 mm x 76 mm<br />
2.5 Kg<br />
A96/02B/0032 – Only With TF008 Plug Pack<br />
New Zealand Telepermit: PTC 211/95/263<br />
Malaysia Approval Number:<br />
MAIA/76A/0796/S<br />
Software Version Number<br />
LOCATION 999 1.27<br />
When using the Hand Held Programmer (CC814), you have the ability to display the software<br />
version number of the control panel. Refer to “Command 999 - Display Software Version<br />
Number" on page 29 for more information.<br />
ISSUE123.DOC<br />
Electronics Design and Manufacturing Pty Limited
Specifications 161<br />
Advice To Users<br />
The Austel permit that has been issued for this product is subject to the following conditions.<br />
New Zealand Telepermit Notes<br />
• The <strong>Solution</strong> <strong>4+4</strong> Control Panel may only be powered by an EDM TF008 Plug Pack<br />
(Approval Number Q92128).<br />
• The grant of a telepermit for a device in no way indicates Tele<strong>com</strong> acceptance of<br />
responsibility for the correct operation of that device under all operating conditions.<br />
• This equipment shall not be used in any manner that could constitute a nuisance to other<br />
Tele<strong>com</strong> customers.<br />
• Immediately disconnect this equipment should it be<strong>com</strong>e physically damaged and<br />
arrange for its disposal or repair.<br />
• The transmit level from this device is set at a fixed level and bec<strong>au</strong>se of this there may<br />
be circumstances where the performance is less than optimal. Before reporting such<br />
occurrences as f<strong>au</strong>lts, please check the line with a standard telepermitted telephone and<br />
do not report a f<strong>au</strong>lt if the telephone performance is satisfactory.<br />
Electronics Design and Manufacturing Pty Limited<br />
ISSUE123.DOC
162 <strong>Solution</strong> <strong>4+4</strong> <strong>Installation</strong> <strong>Manual</strong><br />
ISSUE123.DOC<br />
Electronics Design and Manufacturing Pty Limited
Programming Sheets
164 <strong>Solution</strong> <strong>4+4</strong> <strong>Installation</strong> <strong>Manual</strong><br />
Location 000 – 015 Page 83<br />
Primary Telephone Number<br />
Location 016 – 031 Page 83<br />
Secondary Telephone Number<br />
Location 032 – 047 Page 83<br />
Callback Telephone Number<br />
Location 048 Page 84<br />
Dialling Format<br />
1 = Australian DTMF 4 = International DTMF<br />
2 = Australian Decadic 5 = Reversed Decadic<br />
3 = Alternate DTMF & Decadic (AUST) 6 = Alternate DTMF & Reversed Decadic<br />
1<br />
Location 049 Page 84<br />
Handshake Tone<br />
1 = HI-LO Handshake (Contact ID) 4 = No Handshake Required<br />
2 = 1400 Hz (Ademco TX @ 1900 Hz) 5 = Pager<br />
3 = 2300 Hz (Sescoa TX @ 1800 Hz)<br />
1<br />
Location 050 Page 85<br />
Transmission Format<br />
1 = Contact ID 6 = 4 + 1 Pulsed Expanded 11 = Domestic<br />
2 = 4 + 2 Expressed 7 = 3 + 1 Pulsed Universal 12 = Basic Pager<br />
3 = 4 + 2 Pulsed 8 = 3 + 1 Pulsed Expanded 13 = Reserved<br />
4 = 4 + 2 Pulsed + Checksum 9 = Reserved 14 = Reserved<br />
1<br />
5 = 4 + 1 Pulsed + Universal 10 = Reserved 15 = Reserved<br />
Location 051 Page 85<br />
Transmission Speed<br />
1 = 1 Pulse / Second 4 = 20 Pulses / Second<br />
2 = 10 Pulses / Second 5 = 20 Pulses / Second FDL<br />
3 = 15 Pulses / Second 6 = 40 Pulses / Second<br />
2<br />
Location 052 – 055 Page 86<br />
Subscriber ID Number<br />
Location 056 – 059 Page 90<br />
Installer Code<br />
0 0 0 0 0 0 0 0 0 0 0 0 0 0 0 0<br />
0 0 0 0 0 0 0 0 0 0 0 0 0 0 0 0<br />
0 0 0 0 0 0 0 0 0 0 0 0 0 0 0 0<br />
Location 060 Page 87<br />
15 = Answering Machine Bypass 1<br />
Ring Count<br />
14 = Answering Machine Bypass 2 (New - Software Version 1.27 Onwards)<br />
8<br />
Location 061 - 100 Page 90<br />
User Codes<br />
Location 61 - 65 Location 66 - 70<br />
User Code 1 2 5 8 0 8 User Code 2 15 15 15 15 0<br />
0 0 0 0<br />
1 2 3 4<br />
Location 71 - 75 Location 76 - 80 Location 81 - 85<br />
User Code 3 15 15 15 15 0 User Code 4 15 15 15 15 0 User Code 5 15 15 15 15 0<br />
Location 86 - 90 Location 91 - 95 Location 96 - 100<br />
User Code 6 15 15 15 15 0 User Code 7 15 15 15 15 0 User Code 8 0 15 15 15 1<br />
Location 101 Page 94<br />
Day Alarm Mask<br />
1 = Zone 1<br />
2 = Zone 2<br />
4 = Zone 3<br />
1<br />
8 = Zone 4<br />
Location 102 Page 92<br />
Code Retries<br />
Location 103 Page 96<br />
EOL Resistor Value<br />
1 = 1K 5 = 3K9 9 = 10K 13 = Reserved<br />
2 = 1K5 6 = 4K7 10 = 12K 14 = Reserved<br />
3 = 2K2 7 = 5K6 11 = 22K 15 = Split EOL (3K3/6K8) For<br />
4<br />
4 = 3K3 8 = 6K8 12 = Reserved 4 Zones + 4 Tamper Zones<br />
6<br />
ISSUE123.DOC<br />
Electronics Design and Manufacturing Pty Limited
Programming Sheets 165<br />
Location 104 – 151 Page 100<br />
Zones<br />
Zone 1 Location 104 - 111 Zone 2 Location 112 - 119 Zone 3 Location 120 - 127<br />
2 0 0 0 1 3 0 1 1 0 0 0 1 3 0 1 1 0 0 0 1 3 0 1<br />
Zone 4 Location 128 - 135 Location 136 - 143 Location 144 - 151<br />
12 0 0 0 1 3 3 1 R E S E R V E D R E S E R V E D<br />
Zone<br />
Type<br />
Zone<br />
Option<br />
Zone Pulse<br />
Count<br />
Zone Pulse<br />
Count Time<br />
Event Code<br />
Hundreds Digit<br />
Event Code<br />
Tens Digit<br />
Event Code<br />
Units Digit<br />
Dialler<br />
Channel<br />
Each zone contains eight locations which are divided into two groups of four. The first four locations determine how the zone operates,<br />
while the second four locations contain the dialler reporting information.<br />
Zone Types<br />
There are thirteen different zone types to choose from. Each zone can be programmed as any of the zone types listed in the table below.<br />
Zone Options<br />
Zone Type Description Zone Type Description<br />
0 Instant 8 Delay-1 + Isolated In STAY Mode<br />
1 Handover 9 Delay-2 + Isolated In STAY Mode<br />
2 Delay-1 10 Reserved<br />
3 Delay-2 11 Keyswitch<br />
4 Reserved 12 24 Hour Burglary<br />
5 Reserved 13 24 Hour Fire<br />
6 Instant + Isolated In STAY Mode 14 Chime Only<br />
7 Handover + Isolated In STAY Mode 15 Zone Not Used<br />
Zone Option<br />
Description<br />
1 Lockout Siren<br />
2 Lockout Dialler<br />
4 Silent Alarm<br />
8 Sensor Watch<br />
Zone Pulse Count Settings<br />
The pulse count settings for each zone can be programmed between 0 - 15.<br />
Zone Pulse Count Time<br />
Zone pulse count time is the time frame or period over which the number of pulses must register.<br />
20 ms Loop Response Time<br />
Zone Pulse Count Time<br />
150 ms Loop Response Time<br />
Zone Pulse Count Time<br />
0 0.5 Second 8 20 Seconds<br />
1 1 Second 9 30 Seconds<br />
2 2 Seconds 10 40 Seconds<br />
3 3 Seconds 11 50 Seconds<br />
4 4 Seconds 12 60 Seconds<br />
5 5 Seconds 13 90 Seconds<br />
6 10 Seconds 14 120 Seconds<br />
7 15 Seconds 15 200 Seconds<br />
Zone Descriptions<br />
Use this table as a reference to indicate what each zone is connected to.<br />
Zone Description Tamper Zone Description<br />
1 1<br />
2 2<br />
3 3<br />
4 4<br />
Electronics Design and Manufacturing Pty Limited<br />
ISSUE123.DOC
166 <strong>Solution</strong> <strong>4+4</strong> <strong>Installation</strong> <strong>Manual</strong><br />
Location 152 – 153 Page 108<br />
Bypass Codes (Zones 1 To 4)<br />
Location 154 – 155 Page 108<br />
Trouble Codes (Zones 1 To 4)<br />
Location 156 – 159 Page 109<br />
Codepad Duress<br />
Location 160 – 163 Page 110<br />
Codepad Panic<br />
Location 164 – 167 Page 111<br />
Access Denied (Code Retries)<br />
Location 168 – 161 Page 112<br />
AC Fail<br />
Location 172 – 175 Page 112<br />
Low Battery<br />
Location 176 – 179 Page 113<br />
Sensor Watch<br />
Location 180 – 181 Page 113<br />
Open/Close<br />
Location 182 – 185 Page 114<br />
Test Reporting Time<br />
Location 182 Actual Hour Of The Day (Tens Digit)<br />
Location 183 Actual Hour Of The Day (Units Digit)<br />
Location 184 Repeat Interval In Days<br />
Location 185 Expansion Code For 4+2 Format<br />
0 0 0 9<br />
Location 186 – 209 Page 116<br />
Output<br />
Configurations<br />
9 9<br />
9 9<br />
1 2 1 1<br />
1 2 0 1<br />
4 2 1 1<br />
3 0 1 1<br />
3 0 9 1<br />
3 0 7 1<br />
8 9<br />
Location 186 - 191 Location 192 - 197 Location 198 - 203<br />
Output 1 1 14 0 0 0 0 Strobe 2 0 1 0 0 0 Relay 1 15 1 0 0 0<br />
Location 204 - 209<br />
Codepad 0 12 2 1 0 1<br />
Event Type Polarity Time Base Time Multiplier<br />
Location 210 – 211 Page 128<br />
Entry Timer 1<br />
Location 212 – 213 Page 128<br />
Entry Timer 2<br />
Location 214 – 215 Page 129<br />
Exit Time<br />
Location 210 Increments Of 1 Second (0 - 15 Sec’s)<br />
Location 211 Increments Of 16 Seconds (0 - 240 Sec’s)<br />
10 0<br />
Location 212 Increments Of 1 Second (0 - 15 Sec’s)<br />
Location 213 Increments Of 16 Seconds (0 - 240 Sec’s)<br />
4 1<br />
Location 214 Increments Of 1 Second (0 - 15 Sec’s)<br />
Location 215 Increments Of 16 Seconds (0 - 240 Sec’s)<br />
12 3<br />
Location 216 – 217 Page 129<br />
Entry Guard Time For STAY Mode<br />
Location 216 Increments Of 1 Second (0 - 15 Sec’s)<br />
Location 217 Increments Of 16 Seconds (0 - 240 Sec’s)<br />
12 3<br />
Location 218 – 219 Page 129<br />
Sensor Watch Time<br />
Location 218 Increments Of Days (Tens Digit)<br />
Location 219 Increments Of Days (Units Digit)<br />
0 0<br />
ISSUE123.DOC<br />
Electronics Design and Manufacturing Pty Limited
Programming Sheets 167<br />
Location 220 Page 130<br />
Location 220 Increments Of 10 Seconds<br />
Codepad Lockout Time<br />
Location 221 Page 130<br />
Location 221 Increments Of Minutes (0-15)<br />
Siren Run Time<br />
Location 222 Page 130<br />
Siren Sound Rate (Slow Fast)<br />
Location 223 Page 131<br />
Swinger Shutdown Count<br />
Location 224 Page 134<br />
Dialler Options 1<br />
1 = Enable Dialler Reporting Functions<br />
2 = Enable Remote Arming Via The Telephone<br />
4 = Enable Upload/Download Via Alarm Link<br />
8 = Terminate “Alarm Link” Session On Alarm 5<br />
Location 225 Page 135<br />
Dialler Options 2<br />
1 = Send Open/Close Reports Only If A Previous Alarm Has Occurred<br />
2 = Reserved<br />
4 = Send Open/Close Reports When In STAY Mode<br />
8 = Delay Siren Until Transmission Complete<br />
0<br />
Location 226 Page 136<br />
System Options 1<br />
1 = Enable Forced Arming<br />
2 = Enable EDM Smart Lockout<br />
4 = Enable Monitoring Of Horn Speaker<br />
1<br />
8 = Enable Horn Speaker Beeps For Remote Control Operation<br />
Location 227 Page 137<br />
System Options 2<br />
1 = Enable Radio Key/Keyswitch Interface or Night Arm Station<br />
2 = Enable Handover Delay To Be Sequential<br />
4 = Enable Codepad Panic To Be Silent<br />
8 = Enable Codepad Tamper To Be Silent 2<br />
Location 228 Page 138<br />
System Options 3<br />
1 = Reserved<br />
2 = Reserved<br />
4 = Ignore AC Fail<br />
8 = Enable Pulse Count Handover<br />
0<br />
Location 229 Page 139<br />
Consumer Options 1<br />
1 = Send Test Reports Only If The System Is Armed<br />
2 = Enable Operation Of Siren & Strobe In STAY Mode<br />
4 = Enable Answering Machine Bypass Only When Armed<br />
8 = Enable Codepad Extinguish Mode<br />
2<br />
Location 230 Page 140<br />
Consumer Options 2<br />
1 = Reserved<br />
2 = Enable Single Button Arming In AWAY and STAY Mode<br />
4 = Enable Single Button Disarming From STAY Mode<br />
0<br />
8 = Enable Alarm Memory Reset On Disarm<br />
Location 900 Page 29<br />
Disable Factory Def<strong>au</strong>lt<br />
0 = Def<strong>au</strong>lting Enabled<br />
15 = Def<strong>au</strong>lting Disabled 0<br />
Location 901 – 904 Page 132<br />
System Time<br />
Location 901<br />
Location 902<br />
Location 903<br />
Hour Of The Day (Tens Digit)<br />
Hour Of The Day (Units Digit)<br />
Minute Of The Day (Tens Digit)<br />
Location 904 Minute Of The Day (Units Digit) 0 0 0 0<br />
0<br />
10<br />
7<br />
0<br />
Electronics Design and Manufacturing Pty Limited<br />
ISSUE123.DOC
168 <strong>Solution</strong> <strong>4+4</strong> <strong>Installation</strong> <strong>Manual</strong><br />
ISSUE123.DOC<br />
Electronics Design and Manufacturing Pty Limited
Index
170 <strong>Solution</strong> <strong>4+4</strong> <strong>Installation</strong> <strong>Manual</strong><br />
2<br />
2 Wire Smoke Detector Interface........................................143<br />
24 Hour Burglary Zone ......................................................101<br />
24 Hour Fire Zone .............................................................101<br />
24 Hour Zone ....................................................................150<br />
A<br />
AC Fail Report ..................................................................112<br />
AC Mains Failure ................................................................44<br />
Access Codes ......................................................................90<br />
Access Denied........................................................... 111, 137<br />
Access Denied Reports ......................................................111<br />
Access Denied To Be Silent...............................................137<br />
Acknowledge Domestic Dialling..........................................76<br />
Adding User Codes..............................................................53<br />
Alarm Condition................................................................149<br />
Alarm Link - Enable Upload/Download..............................134<br />
Alarm Link - Terminate On Alarm .....................................134<br />
Alarm Link Software .........................................................142<br />
Alarm Memory Reset On Disarm .......................................140<br />
Answering Machine Bypass ......................................... 87, 149<br />
Answering Machine Bypass Only When Armed .................139<br />
Arm In AWAY Mode ..........................................................61<br />
Arm In STAY Mode............................................................61<br />
Armed...............................................................................149<br />
Armed In AWAY Mode.......................................................34<br />
Armed In STAY Mode ........................................................34<br />
Arming In AWAY Mode .....................................................37<br />
Arming In STAY Mode .......................................................38<br />
Arming Via Telephone ........................................................66<br />
Audible Indicators .........................................................33, 36<br />
Automatic Stepping Of Locations.........................................28<br />
AWAY Indicator ...........................................................32, 34<br />
AWAY Mode....................................................................149<br />
AWAY or #.......................................................................149<br />
B<br />
Base Station Information......................................................82<br />
Basic Pager .........................................................................79<br />
Basic Pager Reporting Format..............................................79<br />
Battery Testing ..................................................................149<br />
Bell Test..............................................................................61<br />
Bypass Reports..................................................................108<br />
C<br />
Callback Telephone Number................................................83<br />
Cellular Diallers ................................................................143<br />
Changing Domestic Phone Numbers ....................................55<br />
Changing User Codes ..........................................................53<br />
Chime Zone.......................................................................101<br />
Code Retries........................................................................92<br />
Code To Isolate ...................................................................42<br />
Codepad............................................................................149<br />
Codepad Beeper Tone Change .............................................63<br />
Codepad Buzzer ................................................................116<br />
Codepad Duress........................................................... 40, 109<br />
Codepad Duress Report .....................................................109<br />
Codepad Extinguish Mode .................................................139<br />
Codepad Fire............................................................... 40, 110<br />
Codepad Lockout Time......................................................130<br />
Codepad Medical......................................................... 40, 110<br />
Codepad Panic......................................................40, 110, 137<br />
Codepad Panic Report........................................................110<br />
Codepad Panic To Be Silent...............................................137<br />
Command 958 - Enable/Disable Zone Status ........................22<br />
Command 959 - Test Programming Key...............................23<br />
Command 960 - Exit Installer's Programming Mode .............23<br />
ISSUE123.DOC<br />
Electronics Design and Manufacturing Pty Limited<br />
Command 961 - Reset Control Panel Back To Factory Def<strong>au</strong>lt<br />
Settings .......................................................................... 23<br />
Command 962 - Copy Control Panel Memory To Programming<br />
Key ................................................................................ 24<br />
Command 963 - Copy From Programming Key To Control<br />
Panel.............................................................................. 25<br />
Command 964 - Erase Programming Key ............................ 26<br />
Command 965 - Set Up Domestic Dialling .......................... 27<br />
Command 966 - Enable/Disable Automatic Stepping ........... 28<br />
Command 999 - Display Software Version Number............. 29<br />
Communication Failure....................................................... 44<br />
Component Overlay ...........................................................152<br />
Connections Of Split EOL Using N/O Contacts ................... 97<br />
Consumer Options 1 ..........................................................139<br />
Consumer Options 2 ..........................................................140<br />
Contact ID Event Codes...................................................... 72<br />
Contact ID Format .............................................................. 70<br />
Copy Control Panel Memory To Programming Key ............. 24<br />
Copy From Programming Key To Control Panel.................. 25<br />
CP5 Eight Zone Codepad.............................................32, 142<br />
CP5 Eight Zone LCD Codepad ....................................34, 142<br />
D<br />
Date and Time ....................................................... 44, 59, 132<br />
Day Alarm............................................................. 62, 94, 149<br />
Day Alarm Latching ........................................................... 94<br />
Day Alarm Operation.......................................................... 95<br />
Day Alarm Resetting........................................................... 94<br />
Def<strong>au</strong>lt Control Panel ......................................................... 23<br />
Def<strong>au</strong>lting The Control Panel.............................................. 30<br />
Delay Siren Until Transmission Complete ..........................135<br />
Delay-1 + Isolated In STAY...............................................101<br />
Delay-1 Zone.....................................................................100<br />
Delay-2 + Isolated In STAY...............................................101<br />
Delay-2 Zone.....................................................................100<br />
Deleting User Codes ........................................................... 54<br />
Detectors...........................................................................149<br />
Dialler...............................................................................149<br />
Dialler - Disable Reporting Functions.................................134<br />
Dialler Channel................................................................... 98<br />
Dialler Options 1 ...............................................................134<br />
Dialler Options 2 ...............................................................135<br />
Dialler Programming Information........................................ 82<br />
Dialler Reporting Formats................................................... 70<br />
Dialler Reporting Functions ...............................................134<br />
Dialling Format .................................................................. 84<br />
Disable Dialler Reporting Functions...................................134<br />
Disable Domestic Dialling .............................................55, 78<br />
Disable Factory Def<strong>au</strong>lt ...................................................... 29<br />
Disarmed...........................................................................149<br />
Disarming From AWAY Mode ........................................... 37<br />
Disarming From STAY Mode ............................................. 39<br />
Display Software Version Number ...................................... 29<br />
Domestic Dialling............................................................... 27<br />
Domestic Dialling - Acknowledge....................................... 76<br />
Domestic Dialling Function................................................. 76<br />
Domestic Phone Numbers................................................... 55<br />
Domestic Reporting Format ................................................ 76<br />
Duress Alarm ..................................................................... 40<br />
E<br />
E2 F<strong>au</strong>lt.............................................................................. 44<br />
EDM Smart Lockout..........................................................136<br />
EDMSAT .....................................................50, 118, 142, 149<br />
EDMSTU.................................................................. 118, 144<br />
Enable Dialler Reporting Functions....................................134<br />
Enable Remote Arming Via Telephone...............................134<br />
Enable Upload/Download ..................................................134<br />
Enable/Disable Automatic Stepping .................................... 28<br />
Enable/Disable Zone Status Mode ....................................... 22
Index 171<br />
Entry Guard Timer For STAY Mode ..................................129 Installer Code Function – Send Test Report ......................... 51<br />
Entry Time ................................................................ 128, 149 Installer Code Function - Set Number Of Days Until First Test<br />
Entry Timer 1 ....................................................................128<br />
Report ............................................................................ 48<br />
Entry Timer 2 ....................................................................128 Installer Code Function - Telephone Monitor Mode ............. 51<br />
Entry Warning ...................................................................149 Installer Code Function - Walk Test Mode........................... 50<br />
EOL Resistor Value............................................................ 96 Installer Code Functions...................................................... 46<br />
Erase Programming Key ..................................................... 26 Installer’s Programming Commands.................................... 22<br />
Event Code - Hundreds Digit .............................................. 98 Instant + Isolated In STAY................................................ 101<br />
Event Code - Tens Digit...................................................... 98 Instant Zone...................................................................... 100<br />
Event Code - Units Digit..................................................... 98 Internal Screamers ............................................................ 116<br />
Event Codes ....................................................................... 72 Introduction ........................................................................ 14<br />
Event Memory Recall ......................................................... 56 Invalid Code.................................................92, 120, 130, 137<br />
Event Memory Recall Mode................................................ 49 Isolating Zones ................................................................... 41<br />
Exit Installer's Programming Mode...................................... 23<br />
Exit Time .................................................................. 129, 149 K<br />
External Equipment ...........................................................149 Keyswitch Zone................................................................ 101<br />
F<br />
Keyswitch Zone Options................................................... 104<br />
FAULT - AC Mains Failure ................................................ 44<br />
FAULT - Communication Failure ....................................... 44<br />
FAULT - Date and Time..................................................... 44<br />
FAULT - E2 F<strong>au</strong>lt .............................................................. 44<br />
FAULT - Horn Speaker ...................................................... 44<br />
FAULT - Low Battery ........................................................ 44<br />
FAULT - Sensor Watch ...................................................... 44<br />
F<strong>au</strong>lt Analysis Mode................................................ 43, 47, 62<br />
FAULT Indicator...........................................................33, 35<br />
Features.............................................................................. 15<br />
Fire Alarm.......................................................................... 40<br />
Forced Arming ...............................................37, 38, 136, 149<br />
G<br />
General Reporting Formats ................................................. 73<br />
Glossary Of Terms.............................................................149<br />
H<br />
Hand Held Dialler Tester ...................................................143<br />
Hand Held Programmer ...............................................20, 142<br />
Hand Held Radio Remote Control ......................................150<br />
Handover + Isolated In STAY ............................................101<br />
Handover Delay.................................................................150<br />
Handover Delay To Be Sequential......................................137<br />
Handover Zone..................................................................100<br />
Handshake Tone ................................................................. 84<br />
Hold Down Function - Arm In AWAY Mode ...................... 61<br />
Hold Down Function - Arm In STAY Mode ........................ 61<br />
Hold Down Function - Bell Test.......................................... 61<br />
Hold Down Function - Codepad Beeper Tone Change ......... 63<br />
Hold Down Function - F<strong>au</strong>lt Analysis Mode........................ 62<br />
Hold Down Function - Horn Speaker Test ........................... 61<br />
Hold Down Function - Initiate Modem Call......................... 63<br />
Hold Down Function - Initiate Test Report .......................... 63<br />
Hold Down Function - Reset Latching Outputs.................... 63<br />
Hold Down Function - Strobe Test ...................................... 62<br />
Hold Down Functions ......................................................... 61<br />
Horn Speaker...............................................................44, 116<br />
Horn Speaker Beeps...........................................................136<br />
Horn Speaker Monitor .......................................................136<br />
Horn Speaker Test .............................................................. 61<br />
How To Program Entry/Exit Timers...................................128<br />
I<br />
Ignore AC Mains Fail Indication ........................................138<br />
Initiate Modem Call................................................. 50, 60, 63<br />
Initiate Test Report ............................................................. 63<br />
Installer Code ..................................................................... 90<br />
Installer Code Function - Event Memory Recall Mode ......... 49<br />
Installer Code Function – F<strong>au</strong>lt Analysis Mode.................... 47<br />
Installer Code Function - Initiate Modem Call ..................... 50<br />
Installer Code Function - Satellite Siren Service Mode......... 50<br />
Electronics Design and Manufacturing Pty Limited<br />
L<br />
Latching Outputs ................................................................ 63<br />
Lockout Dialler..........................................................102, 150<br />
Lockout Siren ............................................................102, 150<br />
Low Battery........................................................................ 44<br />
Low Battery Report .......................................................... 112<br />
M<br />
MAINS Indicator...........................................................33, 35<br />
Master Code ..................................................................... 150<br />
Master Code Function - Changing & Deleting Codes ........... 53<br />
Master Code Function - Changing Domestic Phone Numbers55<br />
Master Code Function - Event Memory Recall..................... 56<br />
Master Code Function – Initiate Modem Call....................... 60<br />
Master Code Function – Reset Latching Outputs.................. 60<br />
Master Code Function - Set Date and Time.......................... 59<br />
Master Code Function – Turn Day Alarm On and Off .......... 59<br />
Master Code Function - Turning Outputs On/Off ................. 58<br />
Master Code Function - Walk Test Mode............................. 57<br />
Master Code Functions ....................................................... 52<br />
Medical Alarm.................................................................... 40<br />
Modem Call........................................................................ 63<br />
Monitor Horn Speaker....................................................... 136<br />
Monitoring Station............................................................ 150<br />
Multiplier ......................................................................... 126<br />
N<br />
New Zealand Telepermit Notes ......................................... 161<br />
Night Arm Station......................................................137, 142<br />
Normally Open, One Shot Low ......................................... 123<br />
O<br />
OFF Indicator/Zone Sealed ................................................. 36<br />
Off Time .......................................................................... 125<br />
ON Indicator/Zone In Alarm ............................................... 36<br />
On Time ........................................................................... 125<br />
One Shot Polarities ........................................................... 126<br />
Open/Close Reports .......................................................... 113<br />
Open/Close Reports Only After Alarm Occurs................... 135<br />
Open/Close Reports When Armed In STAY Mode ............ 135<br />
Option Bits ......................................................................... 21<br />
Optional Equipment.......................................................... 142<br />
Output 1 ........................................................................... 116<br />
Output 2 ........................................................................... 116<br />
Output 3 ........................................................................... 116<br />
Output Def<strong>au</strong>lts ................................................................ 116<br />
Output Event Type - AC Fail............................................. 119<br />
Output Event Type - Alarm In AWAY Mode..................... 121<br />
Output Event Type - Alarm In STAY Mode....................... 121<br />
Output Event Type - Armed In AWAY Mode.................... 118<br />
Output Event Type – Armed In STAY Mode ..................... 118<br />
Output Event Type - Codepad Duress Alarm ..................... 120<br />
ISSUE123.DOC
172 <strong>Solution</strong> <strong>4+4</strong> <strong>Installation</strong> <strong>Manual</strong><br />
Output Event Type - Codepad Fire Alarm...........................120<br />
Output Event Type - Codepad Medical Alarm ....................120<br />
Output Event Type - Codepad Panic Alarm ........................120<br />
Output Event Type - Codepad Tamper ...............................120<br />
Output Event Type - Comms Fail After 3 Calls...................122<br />
Output Event Type - Comms Failure ..................................122<br />
Output Event Type - Day Alarm Enabled ...........................119<br />
Output Event Type - Day Alarm Latching ..........................119<br />
Output Event Type - Day Alarm Resetting..........................119<br />
Output Event Type - Dialler Active ....................................122<br />
Output Event Type - Dialler Disabled.................................122<br />
Output Event Type - EDMSAT ..........................................118<br />
Output Event Type - EDMSTU..........................................118<br />
Output Event Type - Entry Warning ...................................118<br />
Output Event Type - Entry Warning + Day Alarm Reset.....119<br />
Output Event Type - Exit Warning .....................................118<br />
Output Event Type - Exit Warning Finished .......................118<br />
Output Event Type - Exit Warning With Zones Sealed + Entry<br />
Warning ........................................................................118<br />
Output Event Type - Fire Alarm Latching...........................121<br />
Output Event Type - Fire Alarm Resetting..........................121<br />
Output Event Type - Fire Alarm Verification......................121<br />
Output Event Type - Global Chime ....................................122<br />
Output Event Type - Horn Speaker Monitor Fail.................120<br />
Output Event Type - Kiss-Off After Exit Time ...................118<br />
Output Event Type - Low Battery.......................................119<br />
Output Event Type - Mimic Tamper Zone 1 .......................122<br />
Output Event Type - Mimic Tamper Zone 2 .......................122<br />
Output Event Type - Mimic Tamper Zone 3 .......................122<br />
Output Event Type - Mimic Tamper Zone 4 .......................122<br />
Output Event Type - Mimic Zone 1....................................122<br />
Output Event Type - Mimic Zone 2....................................122<br />
Output Event Type - Mimic Zone 3....................................122<br />
Output Event Type - Mimic Zone 4....................................122<br />
Output Event Type - Remote Control 1...............................121<br />
Output Event Type - Remote Control 2...............................121<br />
Output Event Type - Remote Control 3...............................121<br />
Output Event Type - Ring Detect .......................................122<br />
Output Event Type - Sensor Watch Alarm..........................120<br />
Output Event Type - Silent Alarm ......................................121<br />
Output Event Type - Sirens Running ..................................120<br />
Output Event Type - Speaker Beeps ...................................120<br />
Output Event Type - Strobe Operating................................120<br />
Output Event Type - System Armed ...................................118<br />
Output Event Type - System Disarmed...............................118<br />
Output Event Type - Zone Not Sealed ................................122<br />
Output Event Type - Zone Not Sealed After Exit Time .......122<br />
Output Event Types ...........................................................118<br />
Output Polarity ..................................................................123<br />
Output Polarity - Normally Low, Going Open ....................124<br />
Output Polarity - Normally Low, Latching Open ................124<br />
Output Polarity - Normally Low, One Shot Open................124<br />
Output Polarity - Normally Low, One Shot Open With Alarm<br />
.....................................................................................124<br />
Output Polarity - Normally Low, One Shot Open With Reset<br />
.....................................................................................124<br />
Output Polarity - Normally Low, One Shot Open With<br />
Retrigger .......................................................................124<br />
Output Polarity - Normally Low, Pulsing Open...................124<br />
Output Polarity - Normally Open, Going Low.....................123<br />
Output Polarity - Normally Open, Latching Low.................124<br />
Output Polarity - Normally Open, One Shot Low With Alarm<br />
.....................................................................................124<br />
Output Polarity - Normally Open, One Shot Low With Reset<br />
.....................................................................................123<br />
Output Polarity - Normally Open, One Shot Low With<br />
Retrigger .......................................................................123<br />
Output Polarity - Normally Open, Pulsing Low...................123<br />
Outputs - Multiplier ...........................................................126<br />
Outputs - Off Time ............................................................125<br />
Outputs - On Time.............................................................125<br />
Outputs - On/Off................................................................. 58<br />
Outputs - One Shot Polarities .............................................126<br />
Outputs - Pulsing Polarities ................................................125<br />
Outputs - Time Base ..........................................................126<br />
Outputs - Timing ...............................................................125<br />
P<br />
Panic .................................................................................150<br />
Panic Alarm........................................................................ 40<br />
Phone Controller........................................................ 142, 150<br />
Phone Number Programming .............................................. 82<br />
Point ID Codes ................................................................... 71<br />
Polarity..............................................................................123<br />
Primary Telephone Number ................................................ 83<br />
Program and Setup Securitel ............................................... 75<br />
Programmable Ouputs........................................................116<br />
Programming...................................................................... 18<br />
Programming Domestic Reporting....................................... 77<br />
Programming Key........................................................21, 142<br />
Programming Mode ............................................................ 35<br />
Programming Option Bits ................................................... 21<br />
Programming Phone Numbers............................................. 82<br />
Programming Sheets ..........................................................163<br />
Programming With Hand Held Programmer ........................ 20<br />
Programming With Programming Key................................. 21<br />
Programming With Remote Codepad .................................. 19<br />
PS100 Power Supply Module.............................................143<br />
Pulsing Polarities...............................................................125<br />
Q<br />
Quick Start ......................................................................... 16<br />
R<br />
Radio Key/Keyswitch Interface.................................. 137, 144<br />
Receivers and Their Formats............................................... 86<br />
Redirecting Outputs To The Codepad Buzzer .....................117<br />
Relay Output .....................................................................116<br />
Remote Arming Via Telephone....................................66, 134<br />
Remote Connect ................................................................. 67<br />
Remote Connect With Callback Verification........................ 68<br />
Remote Connect With Customer Control............................. 67<br />
Remote Connect Without Callback Verification................... 67<br />
Remote Operations ............................................................. 66<br />
Reporting Format - Basic Pager........................................... 79<br />
Reporting Format - Contact ID Format ................................ 70<br />
Reporting Format - Securitel ............................................... 75<br />
Reset Control Panel Back To Factory Def<strong>au</strong>lt Settings ......... 23<br />
Reset Latching Ouputs........................................................ 60<br />
Reset Latching Outputs....................................................... 63<br />
Ring Count......................................................................... 87<br />
S<br />
Satellite Siren ............................................................ 142, 149<br />
Satellite Siren Service Mode ............................................... 50<br />
Sealed ...............................................................................150<br />
Secondary Telephone Number............................................. 83<br />
Securitel ......................................................................75, 144<br />
Send Test Report ................................................................ 51<br />
Sensor Watch ...................................................... 44, 103, 150<br />
Sensor Watch Report .........................................................113<br />
Sensor Watch Time............................................................129<br />
Set Number Of Days Until First Test Report........................ 48<br />
Set Up Domestic Dialling.................................................... 27<br />
Setting The Date and Time.................................................132<br />
Silent Alarm .............................................................. 103, 150<br />
Single Button Arming ........................................................140<br />
Single Button Disarming....................................................140<br />
Siren & Strobe In STAY Mode ..........................................139<br />
Siren Delay Until Transmission Complete ..........................135<br />
Siren Run Time .................................................................130<br />
ISSUE123.DOC<br />
Electronics Design and Manufacturing Pty Limited
Index 173<br />
Siren Sound Rate ...............................................................130 U<br />
Software Version Number............................................29, 160<br />
<strong>Solution</strong> Codepad Mimic Board .........................................143 Unsealed .......................................................................... 150<br />
<strong>Solution</strong> Relay Output Interface .........................................143 Upload/Download Via Alarm Link...................................... 67<br />
Speaker Beeps ...................................................................136 User Code......................................................................... 150<br />
Specifications ....................................................................160 User Code Priority .............................................................. 91<br />
Standard Isolating ............................................................... 41 User Codes ......................................................................... 90<br />
STAY Indicator .............................................................32, 34 W<br />
STAY Mode......................................................................150<br />
Strobe................................................................................116 Walk Test Mode ............................................................50, 57<br />
Strobe Test ......................................................................... 62 Warranty Statement .......................................................... 160<br />
Subscriber ID Number ........................................................ 86 Wiring Diagram................................................................ 151<br />
Swinger Shutdown Count...................................................131<br />
System Disarmed................................................................ 35 Z<br />
System Disarmed Indicator ................................................. 35<br />
System Event Timers .........................................................128<br />
System Functions................................................................ 46<br />
System Indicators & Operations .......................................... 32<br />
System Operations.............................................................. 37<br />
System Options 1...............................................................136<br />
System Options 2...............................................................137<br />
System Options 3...............................................................138<br />
System Reporting Information............................................108<br />
System Time .....................................................................132<br />
T<br />
Tele<strong>com</strong> Connection Diagrams ..........................................153<br />
Telephone Anti-Jamming ...................................................156<br />
Telephone Monitor Mode.................................................... 51<br />
Terminal Definitions and Descriptions................................148<br />
Terminate Alarm Link Session On Alarm...........................134<br />
Test Programming Key ....................................................... 23<br />
Test Report......................................................................... 63<br />
Test Report Only When Armed ..........................................139<br />
Test Reporting Time ..........................................................114<br />
Test Reports Only When Armed.........................................157<br />
TF008 Plug Pack ...............................................................143<br />
Time Base .........................................................................126<br />
Timing Of Outputs.............................................................125<br />
Transmission Format .......................................................... 85<br />
Transmission Speed ............................................................ 85<br />
Trouble Reports.................................................................108<br />
Turn Day Alarm On and Off ............................................... 59<br />
Turn Day Alarm On/Off.................................................62, 95<br />
Turning Outputs On/Off...................................................... 58<br />
Zone Bypass Reports ........................................................ 108<br />
Zone Def<strong>au</strong>lts ..................................................................... 16<br />
Zone Indicators..............................................................32, 34<br />
Zone Information................................................................ 94<br />
Zone Isolating Indicator ...................................................... 35<br />
Zone Isolating Mode ........................................................... 35<br />
Zone Operating Information ................................................ 98<br />
Zone Options...............................................................98, 102<br />
Zone Programming ............................................................. 98<br />
Zone Pulse Count.........................................................98, 106<br />
Zone Pulse Count Handover.......................................106, 138<br />
Zone Pulse Count Time................................................98, 106<br />
Zone Reporting Information ................................................ 98<br />
Zone Reporting Information - Dialler Channel ..................... 98<br />
Zone Trouble Reports ....................................................... 108<br />
Zone Type .......................................................................... 98<br />
Zone Type - 24 Hour Burglary .......................................... 101<br />
Zone Type - 24 Hour Fire.................................................. 101<br />
Zone Type - Chime........................................................... 101<br />
Zone Type - Delay-1 ......................................................... 100<br />
Zone Type – Delay-1 + Isolated In STAY Mode................ 101<br />
Zone Type - Delay-2 ......................................................... 100<br />
Zone Type – Delay-2 + Isolated In STAY Mode................ 101<br />
Zone Type - Handover ...................................................... 100<br />
Zone Type – Handover + Isolated In STAY Mode ............. 101<br />
Zone Type - Instant........................................................... 100<br />
Zone Type – Instant + Isolated In STAY Mode.................. 101<br />
Zone Type - Keyswitch ..................................................... 101<br />
Zone Type - Not Used....................................................... 101<br />
Zone Types....................................................................... 100<br />
Zones ............................................................................... 150<br />
Electronics Design and Manufacturing Pty Limited<br />
ISSUE123.DOC