Create successful ePaper yourself
Turn your PDF publications into a flip-book with our unique Google optimized e-Paper software.
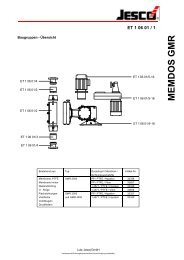
<strong>Solenoid</strong>-<strong>Diaphragm</strong> <strong>Dosing</strong> <strong>Pump</strong> MAGDOS LP<br />
Operating Instructions<br />
8.7 Hydraulic accessories<br />
The following chapter is intended to give you an overview of installation<br />
options.<br />
Please note that these operating instructions are no substitute for the<br />
instructions supplied with the accessories in each case. The corresponding<br />
documentation supplied with the product applies to safety<br />
information and provides exact instructions on assembly.<br />
8.7.1 Injection nozzle<br />
If the pressure line enters a main line, it is advisable to install an injection<br />
nozzle.<br />
Injection nozzles have three main functions:<br />
• <strong>Dosing</strong> the medium into a main line,<br />
• Preventing flowback into the pressure line through a non-return<br />
valve.<br />
Notes on assembly:<br />
• Double-ball injection nozzles must be installed into the main line<br />
vertically from the bottom. You can install hose and spring-loaded<br />
injection nozzles any way you like.<br />
• With dosing media that tend to crystallize, it is advisable to carry out<br />
installation into the main line from the bottom. This prevents air<br />
bubbles from being trapped.<br />
• Many dosing media tend to contaminate the injection nozzles, which<br />
can lead to blockages. In cases like this, it is advisable to install an<br />
injection nozzle that is easy to dismantle and block off.<br />
<br />
<br />
No.<br />
<br />
<br />
<br />
<br />
<br />
<br />
<br />
<br />
<br />
Table 8-1:<br />
Main line<br />
Description<br />
Injection nozzle with shut-off valve<br />
Pressure relief valve<br />
Chemical tank<br />
Pressure line<br />
MAGDOS LP dosing pump<br />
Wall bracket<br />
Shutoff valve<br />
Suction line<br />
Designation of components<br />
8.7.2 <strong>Diaphragm</strong> rupture sensor leak sensor<br />
If a diaphragm ruptures, the dosing medium starts to leak. The leakage<br />
is drained via the leakage opening.<br />
As an option, the MAGDOS LP dosing pump is supplied with a leak<br />
sensor in the diaphragm flange; in the case of a diaphragm rupture, the<br />
sensor passes on a signal to the dosing pump and stops it. The system<br />
shows a "<strong>Diaphragm</strong> rupture" message on the display and reports a<br />
disturbance. The dosing pump cannot restart until you press Start.<br />
You must first replace the diaphragm and clean dosing medium residue<br />
from the diaphragm flange. There must be no conducting connection<br />
between the two rings of the leak sensor.<br />
The connecting cable of the leak sensor has an M12x1 male connector<br />
that you connect to connection socket 5 (see „Connection socket 5“ on<br />
page 28).<br />
<br />
<br />
For an explanation of the icons, see “Set "<strong>Diaphragm</strong> rupture" menu<br />
item” on page 33.<br />
<br />
<br />
<br />
<br />
<br />
Fig. 8-8: Installation with an injection nozzle<br />
Fig. 8-9: MAGDOS LP with leak sensor in the diaphragm flange<br />
© Lutz-Jesco GmbH 2012<br />
Subject to technical changes.<br />
BA-10231-02-V01<br />
Hydraulic installation<br />
Hydraulic accessories<br />
19