TOPAX DE Operation & Maintenance Instructions
TOPAX DE Operation & Maintenance Instructions
TOPAX DE Operation & Maintenance Instructions

Create successful ePaper yourself
Turn your PDF publications into a flip-book with our unique Google optimized e-Paper software.
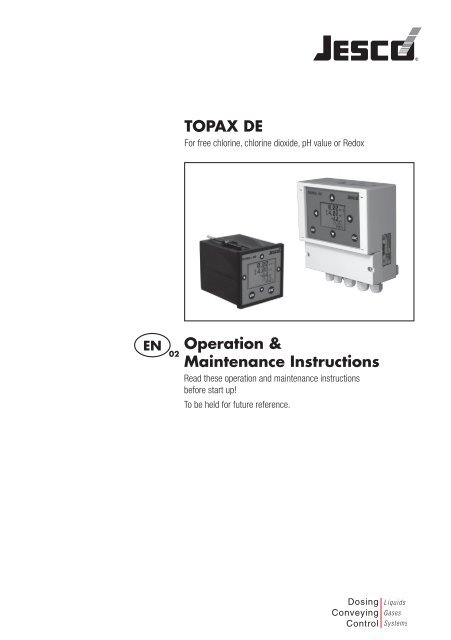
<strong>TOPAX</strong> <strong>DE</strong><br />
For free chlorine, chlorine dioxide, pH value or Redox<br />
EN<br />
02<br />
<strong>Operation</strong> &<br />
<strong>Maintenance</strong> <strong>Instructions</strong><br />
Read these operation and maintenance instructions<br />
before start up!<br />
To be held for future reference.<br />
Dosing<br />
Conveying<br />
Control<br />
Liquids<br />
Gases<br />
Systems
Inhaltsverzeichnis<br />
1. General and Safety <strong>Instructions</strong>.......................................................................... 4<br />
1.1 General.......................................................................................................... 4<br />
1.2 Warning symbols used in this <strong>Operation</strong> & <strong>Maintenance</strong> Manual........................ 4<br />
1.3 Qualification and training of personnel.............................................................. 4<br />
1.4 Important safety instructions............................................................................ 4<br />
1.5 Hazards due to non-compliance with safety instructions.................................... 5<br />
1.6 Safe operation................................................................................................ 5<br />
1.7 Safety instructions for the owner/operator........................................................ 5<br />
1.8 Safety instructions for inspection-, maintenance-, and installation work.............. 5<br />
1.9 Unauthorized modifications and production of spare parts................................. 6<br />
1.10 General notes of instruction!.......................................................................... 6<br />
1.11 Scope of delivery.......................................................................................... 6<br />
1.12 Disposal....................................................................................................... 6<br />
1.13 Overview of Device <strong>Operation</strong> Functions......................................................... 7<br />
1.14 Different types of <strong>TOPAX</strong> <strong>DE</strong> and its function................................................... 8<br />
1.15 Technical Specifications................................................................................. 9<br />
2. Device Installation and Connection................................................................... 11<br />
2.1 Dimensions.................................................................................................. 12<br />
2.2 Installation of built-in casing.......................................................................... 13<br />
2.3 Assembly of wall mounted devices................................................................. 14<br />
2.4 Terminal connection diagram of built in casing................................................ 15<br />
2.5 Terminal connection diagram of wall mounted assembly.................................. 17<br />
3. Directions on Device <strong>Operation</strong>s....................................................................... 19<br />
3.1 Parameter settings........................................................................................ 20<br />
3.2 Menu overview............................................................................................. 22<br />
4. General Settings................................................................................................. 24<br />
4.1 Date and time settings.................................................................................. 24<br />
4.2 Select Language........................................................................................... 24<br />
4.3 Password function........................................................................................ 24<br />
5. Metering Unit Settings....................................................................................... 25<br />
5.1 pH measurement calibration.......................................................................... 26<br />
5.2 Chlorine measurement calibration.................................................................. 27<br />
5.3 Temperature compensation............................................................................ 28<br />
5.4 pH compensation (Cl 2<br />
measuring only)............................................................ 28<br />
| Operating Manual <strong>TOPAX</strong> <strong>DE</strong> | Contents
6. Controller Unit Settings...................................................................................... 29<br />
6.1 Configuration on Delivery............................................................................... 30<br />
6.2 Configuration changes................................................................................... 30<br />
6.3 Set Point, proportional, integral and derivative gain settings............................. 32<br />
6.4 Switching the controller unit ON and OFF........................................................ 33<br />
6.5 Switch–on delay........................................................................................... 33<br />
6.6 External Controller stop................................................................................. 33<br />
6.7 Manual relay operations................................................................................ 34<br />
6.8 Threshold values........................................................................................... 34<br />
6.9 Metering Control........................................................................................... 35<br />
6.10 Disturbance variable (<strong>DE</strong> 3 and <strong>DE</strong> 6 only).................................................... 36<br />
7. Alarm.................................................................................................................. 37<br />
7.1 Alarm messages........................................................................................... 39<br />
8. Data readout....................................................................................................... 40<br />
8.1 Outputs........................................................................................................ 40<br />
8.2 Data readout via the RS485 Interface............................................................. 40<br />
8.3 Assembly of a Data Network (TopView)........................................................... 41<br />
9. <strong>Operation</strong> and <strong>Maintenance</strong>............................................................................... 44<br />
10. Test functions................................................................................................... 45<br />
12. Declaration of conformity................................................................................ 49<br />
13. Revision............................................................................................................ 50<br />
14. Warranty........................................................................................................... 51<br />
Contents | Operating Manual <strong>TOPAX</strong> <strong>DE</strong> |
1. General and Safety <strong>Instructions</strong><br />
1.1 General<br />
This <strong>Operation</strong> & <strong>Maintenance</strong> Manual contains basic information to be noted during installation,<br />
operation and maintenance. It is therefore essential that the contractor read the<br />
manual before installing and commissioning the pump/system as well as by the relevant<br />
operating personnel/owner of the pump/system. It must remain accessible at the dosing<br />
pump/system for reference at all times.<br />
In addition to the general safety instructions under this main heading of Safety, the special<br />
safety precautions outlined another section must also be observed.<br />
1.2 Warning symbols used in this <strong>Operation</strong> & <strong>Maintenance</strong> Manual<br />
This <strong>Operation</strong> & <strong>Maintenance</strong> Manual contains vital information, which may endanger<br />
people, the environment and the dosing pump/system if disregarded. These statements<br />
are identified by the following symbols:<br />
DANGER! Refers to an imminent danger. Non-compliance can lead to death or serious<br />
injury.<br />
WARNING! Refers to a potentially hazardous situation. Non-compliance can lead to death<br />
or serious injury.<br />
CAUTION! Refers to a potentially hazardous situation. Non-compliance can lead to minor<br />
injury or property damage.<br />
NOTICE! or INFORMATION! Appear in conjunction with safety instructions, which may<br />
endanger the pump/system and its operation if disregarded.<br />
IMPORTANT! Draws attention to supplementary information to make the work easier and<br />
ensure trouble free operation.<br />
1.3 Qualification and training of personnel<br />
The personnel employed for installation, operation, inspection and maintenance work<br />
must be qualified to do so. The areas of responsibility, competence and supervision of the<br />
personnel must be precisely defined by the owner. Personnel who do not have the required<br />
knowledge must be duly rained and instructed. If necessary, this training can also be<br />
provided by the manufacturer/supplier on behalf of the dosing pump’s owner. In addition,<br />
the owner of the system must ensure that the relevant personnel are fully familiar with and<br />
have understood the contents of this <strong>Operation</strong> & <strong>Maintenance</strong> Manual.<br />
1.4 Important safety instructions<br />
When installing and using this electrical equipment, basic safety precautions should<br />
always be followed, including the following:<br />
1.) Read and follow all instructions!<br />
2.) WARNING! To reduce risk of injury, do not permit children to use this product<br />
unless they are closely supervised at all times.<br />
WARNING!<br />
| Operating Manual <strong>TOPAX</strong> <strong>DE</strong> | General and Safety <strong>Instructions</strong>
3.) WARNING! Risk of electric shock. Connect only to a grounding type receptacle<br />
protected by a ground-fault circuit-interrupter (GFCI). Contact a qualified electrician<br />
if you cannot verify that the receptacle is protected by a GFCI.<br />
4.) Do not bury the cord. Locate the cord to minimize abuse from lawn mowers, hedge<br />
trimmers, and other equipment.<br />
WARNING!<br />
5.) WARNING! To reduce the risk of electric shock, replace damaged cord immediately.<br />
6.) WARNING! To reduce the risk of electric shock, do not use an extension cord<br />
to connect the unit to the electricity supply; provide a properly located outlet.<br />
7.) Save these instructions!<br />
1.5 Hazards due to non-compliance with safety instructions<br />
Failure to comply with safety instructions may endanger not only people, but also the environment<br />
and the dosing pump/system. Non-compliance with the safety instructions can<br />
lead to the loss of all entitlement to damages. The following hazard in particular may arise:<br />
- Danger to people due to electrical, mechanical and chemical effects. - Failure of system<br />
functions. - Danger to the environment due to leakage of hazardous substances. -<br />
WARNING!<br />
WARNING!<br />
1.6 Safe operation<br />
The safety instructions in this <strong>Operation</strong> & <strong>Maintenance</strong> Manual must be observed.<br />
The owner is responsible for ensuring the compliance with local safety regulations.<br />
1.7 Safety instructions for the owner/operator<br />
Leakages (e.g. due to ruptures in the lining) of hazardous substances (e.g. toxic or<br />
abrasive) must be discharged in such a way as to exclude all danger to people and the<br />
environment. Statutory regulations must be observed.<br />
Danger due to electric current must be excluded (for further details, refer to the German<br />
V<strong>DE</strong> standards as well as local regulations or chapter 1.4).<br />
1.8 Safety instructions for inspection-, maintenance-, and installation work<br />
The owner must ensure that all inspection, maintenance and installation work is undertaken<br />
by authorized and duly qualified personnel who have also studied this <strong>Operation</strong> &<br />
<strong>Maintenance</strong> Manual.<br />
The dosing pump must always come to a complete stop before starting any work on the<br />
pump. The procedure specified in this <strong>Operation</strong> & <strong>Maintenance</strong> Manual for shutting down<br />
the Dosing/pump/system must be observed without fail.<br />
Dosing pumps or systems in contact with potentially harmful media must be decontaminated.<br />
All safety mechanisms and guards must be refitted and reactivated as the work is<br />
completed.<br />
General and Safety <strong>Instructions</strong> | Operating Manual <strong>TOPAX</strong> <strong>DE</strong> |
1.9 Unauthorized modifications and production of spare parts<br />
The device may only be modified or converted in consultation with the manufacturer. Genuine<br />
spare parts and accessories authorized by the manufacturer ensure greater safety.<br />
The use of other parts can void the liability for the subsequent consequences.<br />
1.10 General notes of instruction!<br />
Measuring cables must not be laid parallel or close to power supply or high-voltage current<br />
lines. Interferences would mutilate the measurement. At close distances, power supply and<br />
measuring lines may only cross at a 90° angle.<br />
The admissible length of the measuring cables must be adhered to with regard to the sensor<br />
used. It is of decisive importance whether high-impedance (e.g. pH value) or low-impedance<br />
(e.g. free chlorine sensor) measurements are carried out. In the case high-impedance<br />
measurements, make sure that the (plug) connections are clean and dry (plug) and<br />
the lines do not become brittle due to sharp buckling. The screened cables normally used<br />
for such measuring lines must be handled according to the prescribed quality. Screening<br />
may only be connected to ground at one end of the cable (preferably at the controller).<br />
Interface lines must be twisted and screened (see recommended cables).<br />
IMPORTANT!<br />
IMPORTANT!<br />
If possible, a continuous cable from sensor to measuring input should be used.<br />
An extension of the cable by plugs or terminal socket increases the risk of disturbances<br />
due to contamination, humidity or excessive transition resistances.<br />
1.11 Scope of delivery<br />
IMPORTANT!<br />
Please unpack the dosing pump and ordered accessories with great care in order<br />
not to miss any small parts. Immediately compare the scope of delivery with<br />
the delivery note. The cause of any discrepancies must be determined.<br />
IMPORTANT!<br />
1.12 Disposal<br />
Should the device need to be permanently taken out of operation, please bear in mind that<br />
it contains electrolytic capacitors and must therefore be disposed of accordingly.<br />
| Operating Manual <strong>TOPAX</strong> <strong>DE</strong> | General and Safety <strong>Instructions</strong>
1.13 Overview of Device <strong>Operation</strong> Functions<br />
Metering Unit<br />
Metering range<br />
[mg/l]<br />
<strong>DE</strong> 1 ... <strong>DE</strong> 4 <strong>DE</strong> 5, <strong>DE</strong> 6 <strong>DE</strong> 1-10 ... <strong>DE</strong> 4-10 <strong>DE</strong> 5-20, <strong>DE</strong><br />
6-20<br />
Free chlorine<br />
Cl 2<br />
chlorine dioxide<br />
ClO 2<br />
Free chlorine<br />
Cl 2<br />
Amperometric electrode 0.0 – 4.0 - 0.0 – 10.0 -<br />
chlorine dioxide<br />
ClO 2<br />
Potentialstatic electrode 0.0 – 4.0 0.0 – 4.0 0.0 – 10.0 0.0 – 20.0<br />
More metering ranges<br />
pH measurement<br />
Redox measurement (<strong>DE</strong> 4)<br />
0.0 – 14.0 pH<br />
-1500 – +1500 mV<br />
Temperature measurement -30.0 – +140.0 °C<br />
Display<br />
Temperature compensation<br />
Controller Unit<br />
Switch points<br />
Controller options<br />
Hysteresis<br />
Proportional gain KP<br />
Integral gain KI<br />
Derivative gain KD<br />
Minimum impulse<br />
Pulse + pause time<br />
Impulse frequency<br />
Switch-on delay<br />
Alarm function<br />
Metering control<br />
Measurement values with relative units. Status messages, sensors,<br />
calibration, controller and alarm.<br />
Either manual or automatic, Pt 100 measuring principle.<br />
2 dual switch points, with adjustable operation mode<br />
ON/OFF Controller with hysteresis option, Proportional (P), Proportional<br />
Integral (PI) or Proportional Integral, Derivative (PID) Controller, either<br />
pulse-pause or pulse-frequency or continuous output controller.<br />
0.00 – 4.00 mg/l (<strong>DE</strong> 4: 0.00 – 14.00 pH)<br />
0.00 – 4.00 mg/l (<strong>DE</strong> 4: 0.00 – 14.00 pH)<br />
0 – 2000 sec<br />
0 – 500 sec<br />
0.0 – 10.0 sec<br />
02 – 99 sec<br />
100 – 7200 impulses/h<br />
0 – 2000 sec<br />
2 minimum and maximum threshold values and delay times<br />
0 – 9999 sec<br />
Overview of Device <strong>Operation</strong> Functions | Operating Manual <strong>TOPAX</strong> <strong>DE</strong> |
Connection<br />
Relay outputs<br />
Analogue outputs<br />
Analogue inputs<br />
Digital input<br />
Digital interfaces (optional)<br />
3 potential free dry contacts, freely configurable, 6A, 250 V, max. 550 A<br />
2x (built in casing) or 3x (wall-mounted casing) 0/4 – 20 mA, electrically<br />
isolated, maximum 500 Ohm load<br />
4 measurement inputs, for chlorine, pH, ORP and temperature<br />
external controller stop or water deficiency sensor<br />
RS485, baud rate 9600, data format 8Bit, 1 start and 1 stop bit, no even<br />
parity. It is possible to activate the <strong>TOPAX</strong> <strong>DE</strong> with the software TopView<br />
(Windows, A/N 78349).<br />
1.14 Different types of <strong>TOPAX</strong> <strong>DE</strong> and its function<br />
Function <strong>DE</strong> 1 <strong>DE</strong> 2 <strong>DE</strong> 3 <strong>DE</strong> 4 <strong>DE</strong> 5 <strong>DE</strong> 6<br />
Free chlorine<br />
chlorine dioxide<br />
pH-value Metering Metering &<br />
Controlling<br />
Temperature<br />
Redox<br />
Flow input/<br />
Disturbance<br />
variable<br />
RS 485<br />
(optional)<br />
Metering & Controlling<br />
X<br />
Metering<br />
Metering<br />
Metering<br />
Metering & Controlling<br />
X X X X X X<br />
X<br />
NOTE!<br />
NOTE!<br />
The disturbance variable (<strong>DE</strong> 3/<strong>DE</strong> 6) only works in connection with 0/4-20 mA<br />
stepping motor.<br />
| Operating Manual <strong>TOPAX</strong> <strong>DE</strong> | Overview of Device <strong>Operation</strong> Functions
1.15 Technical Specifications<br />
Feature Built-in casing Wall-mounted casing<br />
Assembly option Panel mounted device Table or wall mounted device<br />
Device sizes 96 x 96 x 127 mm (WxHxD) 165 x 160 x 80 mm (WxHxD)<br />
Weight 0.8 kg 1.0 kg<br />
Connectors Push-screw terminal Spring-load terminal<br />
Protection Classes<br />
Supply voltage<br />
for up to maximum 1.5 mm² section wiring<br />
IP54 (front end),<br />
IP55 (at front end door)<br />
IP65<br />
230 V +6/-10%, 50/60 Hz. Alternatively:110 V or 24 V<br />
Internal safety fuses: none 230 V: 63 mA delayed action fuse<br />
110 V: 125 mA delayed action fuse<br />
24 V: 800 mA semi-delayed action fuse<br />
Power input<br />
Display<br />
10 VA<br />
LCD graphic display 128x64, backlit, displays measurement values and<br />
relative units, displays operating conditions.<br />
Outputs 2 x 0/4 – 20 mA 3 x 0/4 – 20 mA<br />
Interfaces<br />
Controller<br />
electrically isolated, maximum 500 Ohm load<br />
RS485, baud rate 9600, data format 8Bit,<br />
1 start and 1 stop bit<br />
2 independent controllers for chlorine values and pH values<br />
Controller options ON/OFF Controller (see table 1.14)<br />
Switch points<br />
Alarm function<br />
Contact load<br />
Operating temperature<br />
Storage temperature<br />
Atmospheric moisture<br />
2 dual switch points, free set point within the metering range<br />
2, with maximum and minimum limit values and time delay<br />
6 A/ 250 V, maximum 550 VA ohmic resistive load<br />
(with RC protective circuit)<br />
0 – +50°C<br />
-20 – +65°C<br />
0 – 90 % non condensing<br />
Overview of Device <strong>Operation</strong> Functions | Operating Manual <strong>TOPAX</strong> <strong>DE</strong> |
10 | Operating Manual <strong>TOPAX</strong> <strong>DE</strong> | Overview of Device <strong>Operation</strong> Functions
2. Device Installation and Connection<br />
Installation<br />
Schematic diagrams and dimensions are provided over the next few pages herein.<br />
A 92x92mm cut-out is required for the device casing. The device must then be pushed in<br />
from the fore end and fixed in with the appropriate lock-on clips provided on issue.<br />
The wall-mount casing can either be hung up to or foisted into the assembly slot, according<br />
to preference. It must then be fixed on with two screws.<br />
CAUTION<br />
The device assembly site must be selected so that the device is not subject to<br />
any mechanical load or chemical exposure in any way!<br />
Please note that the relative protection classes are:<br />
built in casing: IP54 for the front end, with IP55 at the front end door<br />
wall-mounted casing: IP65 (with closed clamp covers)<br />
CAUTION!<br />
Connections:<br />
Connection diagrams are provided over the next few pages herein.<br />
Please beware of the supply voltage specified on the rating plate at all times.<br />
CAUTION<br />
Input, output and control lead wires and cables must always be kept unattached<br />
from one another. In particular, they must be totally detached from power lines!<br />
All input and output wires and cables need to be shielded. The shielding can bear on one<br />
end only.<br />
For safe measurement data protection from any external disrupting influences, exclusive<br />
use of the specially shielded cable provided on issue to ensure effective measurements, is<br />
required.<br />
For Pt100 temperature sensor connection, use of a low-ohm cable with a large section is<br />
required.<br />
Upon relay connection, please beware that inductive loads need to be interference-suppressed.<br />
If this is not possible, the device terminal strip relay contacts need to be provided<br />
with an RC-protective circuit. With direct-current voltage, the relays or contactor coil need<br />
to be interference-suppressed via a free wheeling diode.<br />
CAUTION!<br />
Power up to: Capacitor C Resistor R<br />
R<br />
C<br />
60 mA 10 nF 260V 390 Ohm 2 Watt<br />
70 mA 47 nF 260V 22 Ohm 2 Watt<br />
150 mA 100 nF 260V 47 Ohm 2 Watt<br />
1,0 mA 220 nF 260V 47 Ohm 2 Watt<br />
Device Installation and Connection | Operating Manual <strong>TOPAX</strong> <strong>DE</strong> | 11
2.1 Dimensions<br />
Built in casing<br />
Optional: Front door<br />
Wall mount casing<br />
12 | Operating Manual <strong>TOPAX</strong> <strong>DE</strong> | Device Installation and Connection
2.2 Installation of built-in casing<br />
Prepare a 92 x 92 mm<br />
cutout.<br />
Insert the device in from<br />
the fore end firmly, and<br />
fixed it on using the<br />
appropriate lock-on clips<br />
provided on issue.<br />
Use a screwdriver to adjust<br />
the lock-on clip screws<br />
until the device is firmly in<br />
place.<br />
Device Installation and Connection | Operating Manual <strong>TOPAX</strong> <strong>DE</strong> | 13
2.3 Assembly of wall mounted devices<br />
First, remove the terminal<br />
covering.<br />
Prepare three drill holes<br />
(to be max. M5). Check<br />
the top hole, to ensure<br />
that the wall-mount casing<br />
can either be safely hung<br />
or foisted on. If it is hung<br />
on, the top hole must be<br />
120 mm above the bottom<br />
two. If it is foisted on, said<br />
distance must amount to<br />
135 mm.<br />
In both cases the screws<br />
must protrude for at least<br />
3mm.<br />
Hang the device onto the<br />
top screw or foist it on from<br />
the underside, then fix it on<br />
via the two bottom screws.<br />
Either fit the terminal covering<br />
back on, or proceed<br />
directly with the various<br />
connections.<br />
14 | Operating Manual <strong>TOPAX</strong> <strong>DE</strong> | Device Installation and Connection
2.4 Terminal connection diagram of built in casing<br />
Connection Clamps Directions<br />
pH electrode<br />
(<strong>DE</strong> 1 … <strong>DE</strong> 6)<br />
Cl 2<br />
or ClO 2<br />
electrode<br />
(<strong>DE</strong> 1 … <strong>DE</strong> 6)<br />
Cl 2<br />
electrode<br />
(<strong>DE</strong> 1 … <strong>DE</strong> 4)<br />
1<br />
3<br />
1 = RD /shielding/Reference electrode<br />
3 = BU / internal lead/Measuring electrode<br />
5 - 7 Potentiostatic electrode, Typ PM-J (4 mg/l):<br />
5 = Reference electrode, with cable (Pin 2)<br />
6 = Counter / stainless steel electrode (Pin 3)<br />
7 = Measuring / gold electrode (Pin 1)<br />
5 - 7 Amperometric electrode<br />
5 = copper (blue) or silver (violet) electrode<br />
6 = bridge to clip 5<br />
7 = Measuring / platin electrode (red)<br />
Redox Sensor (<strong>DE</strong> 4) 10 10 = BU / internal lead Measuring electrode<br />
disturbance variable<br />
(<strong>DE</strong> 3, <strong>DE</strong> 6)<br />
Temperature electrode<br />
(<strong>DE</strong> 1 ... <strong>DE</strong> 6)<br />
9<br />
10<br />
9 = -, 10 = +<br />
0/4-20 mA<br />
11 - 12 Temperature measurement (Pt100)<br />
Polarity optional.<br />
Analog output 1 15 - 16 15 = +, 16 = -maximum 500 Ohm load<br />
Analog output 2 17 - 18 17 = +, 18 = -maximum 500 Ohm load<br />
Relay 1 24 - 26 24 + 26: normally open contact;<br />
25 + 26: normally closed contact<br />
Relay 2 27 - 29 27 + 29: normally open contact;<br />
28 + 29: normally closed contact<br />
Relay 3 30 -32 30 + 32: normally open contact;<br />
31 + 32: normally closed contact<br />
Power supply<br />
L/+<br />
N/-<br />
PE<br />
Check details on rating plate!<br />
RS485 Sub-D 3 = +, 8 = - ; bridge circuit 4/7 for load resistor activation<br />
Digital input 1 22 - 23 Potential free dry contacts (normally closed or normally<br />
open); external controller stop.<br />
WARNING!<br />
The Redox reference electrode (shield) has not to be connected to the<br />
<strong>TOPAX</strong> <strong>DE</strong> 4.<br />
WARNING!<br />
Device Installation and Connection | Operating Manual <strong>TOPAX</strong> <strong>DE</strong> | 15
Terminal connection diagram of built in casing<br />
Potentiostatic electrode, Type PM-J (see terminal connection diagram at the top)<br />
Amperometric electrode (see terminal connection diagram at the bottom)<br />
Reference electrode, with cable (black)<br />
Counter / stainless steel electrode (red)<br />
Measuring / gold electrode (violet)<br />
1<br />
2<br />
3<br />
4<br />
5<br />
6<br />
7<br />
8<br />
9<br />
10<br />
11<br />
12<br />
13<br />
14<br />
+ 15<br />
- 16<br />
+ 17<br />
- 18<br />
19<br />
20<br />
21<br />
22<br />
23<br />
internal lead<br />
shielding<br />
9<br />
8<br />
7<br />
6<br />
1<br />
2<br />
3<br />
4<br />
5<br />
6<br />
RS 485<br />
(Optional)<br />
5<br />
4<br />
3<br />
2<br />
1<br />
24<br />
25<br />
26<br />
27<br />
28<br />
29<br />
30<br />
31<br />
32<br />
L<br />
N<br />
PE<br />
Relay 1<br />
Relay 2<br />
Relay 3<br />
Potentiostatic<br />
electrode<br />
pH<br />
<strong>TOPAX</strong> <strong>DE</strong> 4: REDOX, 10 = internal lead<br />
<strong>TOPAX</strong> <strong>DE</strong> 3/6: disturbance variable 0/4 - 20mA, 9 = -, 10 = +<br />
Measuring / platin electrode (red)<br />
copper (blue) or silver (volet) electrode<br />
1<br />
2<br />
3<br />
4<br />
5<br />
6<br />
7<br />
8<br />
9<br />
10<br />
11<br />
12<br />
13<br />
14<br />
+ 15<br />
- 16<br />
+ 17<br />
- 18<br />
19<br />
20<br />
21<br />
22<br />
23<br />
internal lead<br />
internal lead<br />
shielding<br />
9<br />
8<br />
7<br />
6<br />
1<br />
2<br />
3<br />
4<br />
5<br />
6<br />
RS 485<br />
(Optional)<br />
5<br />
4<br />
3<br />
2<br />
1<br />
24<br />
25<br />
26<br />
27<br />
28<br />
29<br />
30<br />
31<br />
32<br />
L<br />
N<br />
PE<br />
Relay 1<br />
Relay 2<br />
Relay 3<br />
Amperometric<br />
electrode<br />
pH<br />
<strong>TOPAX</strong> <strong>DE</strong> 4: REDOX, 10 = internal lead<br />
<strong>TOPAX</strong> <strong>DE</strong> 3/6: disturbance variable 0/4 - 20mA, 9 = -, 10 = +<br />
16 | Operating Manual <strong>TOPAX</strong> <strong>DE</strong> | Device Installation and Connection
2.5 Terminal connection diagram of wall mounted assembly<br />
Connection Clamps Directions<br />
Cl2 or ClO2 electrode<br />
(<strong>DE</strong> 1 … <strong>DE</strong> 6)<br />
Cl2<br />
(<strong>DE</strong> 1 … <strong>DE</strong> 4)<br />
PH electrode<br />
(<strong>DE</strong> 1 … <strong>DE</strong> 6)<br />
Redox electrode<br />
(<strong>DE</strong> 4)<br />
disturbance variable<br />
(<strong>DE</strong> 1 … <strong>DE</strong> 6)<br />
27 - 29 Potentiostatic electrode, Typ PM-J (4 mg/l):<br />
27 = Measurement/gold electrode (Pin 1)<br />
28 = Reference electrode with cable (Pin 2)<br />
29 = Counter electrode /stainless steel electrode (Pin 3)<br />
27 - 29 Amperometric electrode:<br />
27 = Measuring electrode (red)<br />
28 = Copper (blue) or silver (violet) electrode<br />
29 = Bridge to clip 28<br />
30<br />
31<br />
30 = RD / shielding / Reference electrode<br />
31 = BU / internal lead / Measuring electrode<br />
35 35 = BU / internal lead Measuring electrode<br />
34<br />
35<br />
34 = -, 35 = +<br />
0/4-20 mA<br />
Temperature sensor 36 - 37 Temperature measurement (Pt 100)<br />
Polarity optional.<br />
Analog output 1 10 - 11 10 = -, 11 = + maximum 500 Ohm load<br />
Analog output 2 12 - 13 12 = -, 13 = + maximum 500 Ohm load<br />
Analog output 3 14 - 15 14 = -, 15 = + maximum 500 Ohm load<br />
Relay 1 38 - 40 39 + 40: normally open contact;<br />
38 + 39: normally closed contact;<br />
Relay 2 41 - 43 42 + 43: normally open contact;<br />
41 + 42: normally closed contact;<br />
Relay 3 44 - 46 45 + 46: normally open contact;<br />
44 + 45: normally closed contact; ;<br />
Power supply<br />
L/+<br />
N/-<br />
PE<br />
Check details on rating plate!<br />
RS485 17 + 18 17 = -, 18 = +<br />
Digital input 1 23 - 24 Potential free dry contacts (normally closed or normally<br />
open); external controller stop.<br />
WARNING!<br />
The Redox reference electrode (shield) has not to be connected to the<br />
<strong>TOPAX</strong> <strong>DE</strong> 4.<br />
WARNING!<br />
Device Installation and Connection | Operating Manual <strong>TOPAX</strong> <strong>DE</strong> | 17
Terminal connection diagram of wall mounted assembly<br />
Potentiostatic electrode, Type PM-J (see terminal connection diagram at the top)<br />
Amperometric electrode (see terminal connection diagram at the bottom)<br />
Temperature<br />
Pt 100<br />
Relay 1 Relay 2 Relay 3<br />
Power<br />
Temperature<br />
Pt 100<br />
Relay 1 Relay 2 Relay 3<br />
Power<br />
26<br />
27<br />
28<br />
29<br />
30<br />
31<br />
32<br />
33<br />
35<br />
36<br />
37<br />
38<br />
39<br />
40<br />
41<br />
42<br />
43<br />
44<br />
45<br />
46<br />
44<br />
45<br />
46<br />
26<br />
27<br />
28<br />
29<br />
30<br />
31<br />
32<br />
33<br />
35<br />
36<br />
37<br />
Measurement / gold electrode (violet)<br />
Reference electrode with cable (black)<br />
Counter electrode / stainless steel electrode (red)<br />
38<br />
39<br />
40<br />
41<br />
42<br />
43<br />
44<br />
45<br />
46<br />
44<br />
45<br />
46<br />
Potentiostatic<br />
electrode<br />
shielding reference electrode<br />
pH<br />
internal lead electrode<br />
GND<br />
GND<br />
GND<br />
GND<br />
GND<br />
1<br />
2<br />
3<br />
4<br />
5<br />
6<br />
7<br />
8<br />
9<br />
10<br />
11<br />
12<br />
13<br />
14<br />
15<br />
16<br />
17<br />
18<br />
19<br />
20<br />
21<br />
22<br />
-<br />
+<br />
Analog output 1<br />
0/4 - 20 mA<br />
-<br />
+<br />
Analog output 2<br />
0/4 - 20 mA<br />
-<br />
+<br />
Analog output 3<br />
0/4 - 20 mA<br />
GND<br />
RS 485<br />
(Optional)<br />
GND<br />
GND<br />
34<br />
- +<br />
<strong>TOPAX</strong> <strong>DE</strong> 4: REDOX, 35 = internal lead<br />
<strong>TOPAX</strong> <strong>DE</strong> 3/6: disturbance variable 0/4 - 20mA, 34 = -, 35 = +<br />
-<br />
+<br />
Water deficiency<br />
L<br />
N<br />
PE<br />
23<br />
24<br />
25<br />
- +<br />
GND<br />
GND<br />
34<br />
-<br />
+<br />
L<br />
N<br />
PE<br />
Measuring electrode (red)<br />
Copper (blue) or silver (violet) electrode<br />
shielding reference electrode<br />
internal lead electrode<br />
pH<br />
Amperometrische<br />
Messzelle<br />
GND<br />
GND<br />
GND<br />
GND<br />
1<br />
2<br />
3<br />
4<br />
5<br />
6<br />
7<br />
8<br />
9<br />
10<br />
11<br />
12<br />
13<br />
14<br />
15<br />
16<br />
17<br />
18<br />
19<br />
20<br />
21<br />
22<br />
-<br />
+<br />
Analog output 1<br />
0/4 - 20 mA<br />
-<br />
+<br />
Analog output 2<br />
0/4 - 20 mA<br />
-<br />
+<br />
GND<br />
RS 485<br />
(Optional)<br />
GND<br />
GND<br />
Water deficiency<br />
23<br />
24<br />
25<br />
Analog output 3<br />
0/4 - 20 mA<br />
- +<br />
GND<br />
<strong>TOPAX</strong> <strong>DE</strong> 4: REDOX, 35 = internal lead<br />
<strong>TOPAX</strong> <strong>DE</strong> 3/6: disturbance variable 0/4 - 20mA, 34 = -, 35 = +<br />
- +<br />
18 | Operating Manual <strong>TOPAX</strong> <strong>DE</strong> | Device Installation and Connection
3. Directions on Device <strong>Operation</strong>s<br />
1 2 3 4 5<br />
11<br />
10<br />
0.34mg/l<br />
7.25pH<br />
736mV<br />
27°C<br />
Hand><br />
6<br />
7<br />
8<br />
9<br />
1 Cl 2<br />
, ClO 2<br />
measurement value<br />
2 pH measurement value<br />
3 Temperature<br />
(<strong>DE</strong> 4: Redox measurement<br />
value)<br />
4 <strong>DE</strong> 4: Temperature<br />
<strong>DE</strong> 3/6: disturbance variable<br />
(“% Z”)<br />
5 Controller operation mode<br />
AUTO – Controller ON<br />
MANUAL – Controller OFF<br />
6 UP arrow key ()<br />
7 RIGHT arrow key ()<br />
8 DOWN arrow key ()<br />
9 “ESC” key<br />
10 “OK” key<br />
11 LEFT arrow key ()<br />
Once switched on, the device will initially display the measuring value data. Controller<br />
unit displays will also display the operating mode (Auto/Manual) and th activation mode of<br />
relays S1 and S2.<br />
It is possible to scroll through the menu via the operating keys:<br />
Use key “” to go from the measuring value indication to the main menu. Use key “”<br />
and “” to scroll upwards and downwards.<br />
A black cursor bar will highlight the display row you are currently on.<br />
Use key “” to select a menu or a parameter.<br />
Use key “” to exit a menu and to save/enter data.<br />
The “ESC” key will exit a menu without saving any data.<br />
The “OK” key represents an additional safety function. Any device function or command<br />
that will then be extremely tedious to reverse, can only be activated by the simultaneous<br />
pressing of two keys. For example, for calibration entries, it is necessary to press both the<br />
“OK“ key and the “” key simultaneously.<br />
NOTE!<br />
The panel mounted device and the wall mounted device only differ from one<br />
another in that they have different external casings and a different number of<br />
outputs. Programming and operation functions are identical.<br />
NOTE!<br />
Directions on Device <strong>Operation</strong>s | Operating Manual <strong>TOPAX</strong> <strong>DE</strong> | 19
3.1 Parameter settings<br />
Selection of the various options<br />
In most cases, all that is required is selection of the various options provided. For example,<br />
when you need to select either manual or automatic temperature compensation, simply<br />
use the “” key to scroll across from one option to the next, until you come back to the<br />
start point or until you reach the option required.<br />
For these parameters, any changes are effective immediately upon selection. There is no<br />
need to enter an extra saving command for setting activation.<br />
Compensation<br />
Manual Comp.<br />
25.0°C<br />
pH Compensation<br />
Chlorine value<br />
OFF<br />
Compensation<br />
Manual Comp.<br />
23.8°C<br />
Pt100 correction<br />
0.0°C<br />
pH Compensation<br />
Chlorine value<br />
OFF<br />
Compensation<br />
Manual Comp.<br />
25.0°C<br />
pH Compensation<br />
Chlorine value<br />
OFF<br />
Numeric parameter settings<br />
Numeric parameters can be modified basically only if they are highlighted by a short cursor<br />
bar. To do so, use the “” key to access the parameter in question.<br />
Use keys “” and “” to enter the required number. Briefly pressing down on the key<br />
once will also increase or decrease the last position by 1. If the key is pressed and held<br />
down for longer, the number starts running in fast forward or backward mode until the key<br />
is released.<br />
Press the “” key to enter and save the setting. The cursor bar will extend itself over the<br />
entire line setting field.<br />
Compensation<br />
Manual Comp.<br />
25.0°C<br />
pH Compensation<br />
Chlorine value<br />
OFF<br />
Compensation<br />
Manual Comp.<br />
25.0°C<br />
pH Compensation<br />
Chlorine value<br />
OFF<br />
Compensation<br />
Manual Comp.<br />
20.0°C<br />
pH Compensation<br />
Chlorine value<br />
OFF<br />
Compensation<br />
Manual Comp.<br />
20.0°C<br />
pH Compensation<br />
Chlorine value<br />
OFF<br />
20 | Operating Manual <strong>TOPAX</strong> <strong>DE</strong> | Directions on Device <strong>Operation</strong>s
NOTE!<br />
If you do not wish to save the parameter, press key “M” instead of key “”.<br />
Two-key operations<br />
The “Calibration” and “Delete Memory” functions that are extremely tedious to reverse, can<br />
only be activated by the simultaneous pressing of two keys.<br />
It is thus necessary to press the “OK“ key and, whilst keeping it pressed in, to also press<br />
the “” key simultaneously. Subsequent to calibration you will see that the metering value<br />
is the same as that of the compared value, and subsequent to delete memory the device<br />
will go back to the measured value display.<br />
NOTE!<br />
Calibration M1<br />
Current<br />
0.00mg/l<br />
Comparison data<br />
0.32mg/l<br />
Probe Slope<br />
25mV<br />
Calibration M1<br />
Current<br />
0.32mg/l<br />
Comparison data<br />
0.32mg/l<br />
Probe Slope<br />
23mV<br />
Directions on Device <strong>Operation</strong>s | Operating Manual <strong>TOPAX</strong> <strong>DE</strong> | 21
3.2 Menu overview<br />
0.44mg/l<br />
7.24pH<br />
736mV<br />
27.2°C<br />
MAN ><br />
Calibration<br />
Compensation<br />
Controller<br />
Manual mode<br />
Date an time<br />
Archive<br />
Default setting<br />
Selection<br />
Cl2 Calibration<br />
pH Calibration<br />
Selection<br />
Cl2 set value<br />
Cl2 alarm values<br />
pH** set Point<br />
pH** alarm values<br />
**<br />
<strong>TOPAX</strong><br />
<strong>DE</strong> 2<br />
Controller<br />
Analogue output<br />
flow input*<br />
pH calib. data<br />
Language<br />
Bus address<br />
Test functions<br />
Cl2 Calibration<br />
Current<br />
0.00mg/l<br />
Comparison data<br />
DPD 0.00mg/l<br />
Cl2 set value<br />
P-Control<br />
SP1 0.30mg/l<br />
P-Range 0.20mg/l<br />
Default setting<br />
Contr. release<br />
Start-up Delay<br />
Cl2 Controller<br />
Meter test<br />
Probe Slope<br />
25mV/0,1mg/l<br />
pH** Controller<br />
Meter test<br />
pH Calibration<br />
Current 4.00pH<br />
Buffer<br />
4.00pH<br />
Probe Slope<br />
58mV/pH<br />
Probe zero point<br />
0mV<br />
Cl2 alarm values<br />
hi<br />
lo<br />
Delay<br />
1.00mg/l<br />
0.00mg/l<br />
0s<br />
mA outputs<br />
mA outputs 1<br />
mA outputs 2<br />
mA outputs 3<br />
Compensation<br />
Manual Comp.<br />
20.0°C<br />
pH Compensation<br />
Chlorine value<br />
OFF<br />
Compensation<br />
Auto Comp.<br />
23.4°C<br />
Pt100 correction<br />
0.0°C<br />
pH Compensation<br />
Chlorine value<br />
OFF<br />
Archive<br />
Cl2 trend data<br />
pH trend data p<br />
mV trend data.<br />
Temp. trend data<br />
Logbook<br />
mg/l tend<br />
máx<br />
mín<br />
-3h<br />
Cl2<br />
h<br />
***<br />
<strong>TOPAX</strong><br />
<strong>DE</strong> 4<br />
pH Calib. data<br />
Buffer solution 1<br />
7.00pH<br />
Buffer solution 2<br />
4.00pH<br />
Int. electrode<br />
float buffer<br />
7.00pH<br />
Select language<br />
german<br />
english<br />
french<br />
spanish<br />
Manual mode<br />
Cl2 SP1 H-OFF<br />
Cl2 SP2 H-OFF<br />
pH SP1 ——**<br />
pH SP2 ——**<br />
Manual max. ON<br />
time 0 min<br />
mg/l tend Cl2<br />
Start 0.00mg/l<br />
End 1.00mg/l<br />
Bus address<br />
the RS485<br />
Interface<br />
(Option)<br />
0<br />
Time Date<br />
07:15 03.11.06<br />
Hours 7<br />
Minutes 15<br />
Days 3<br />
Months 11<br />
Years 6<br />
***Logbook***<br />
Time Date<br />
11:16 10.08.06<br />
TestSolutFailure<br />
*****END****<br />
Test functions<br />
Unit data<br />
Analogue inputs<br />
Digital inputs<br />
Analogue outputs<br />
Interface<br />
Delete memory<br />
22 | Operating Manual <strong>TOPAX</strong> <strong>DE</strong> | Directions on Device <strong>Operation</strong>s
Contr. release<br />
Input active<br />
with logic<br />
Meter test Cl2<br />
Preset 0s<br />
Preset = 0s<br />
Delay OFF<br />
P-Control<br />
Meter test Cl2<br />
Pulse length<br />
Reduce SP1 —— Preset 0s<br />
SP2 boost ——<br />
Hi Alarm —— Preset = 0s<br />
Lo Alarm —— Control Off<br />
P-Pausa 10s Alarm relay<br />
P-min 0.5s Select ——<br />
**<strong>TOPAX</strong> <strong>DE</strong> 2<br />
Output 1<br />
Output of Cl2<br />
output<br />
Start<br />
End<br />
0-20mA<br />
0.00mg<br />
1.00mg<br />
PI-Control<br />
Pulse-Frequency<br />
Reduce SP1 ——<br />
SP2 cut ——<br />
Hi Alarm ——<br />
Lo Alarm ——<br />
Impulses/h 0<br />
setting *100<br />
PID-Control<br />
Boost servomotor<br />
Motor clsd Rel.1<br />
Motor open Rel.2<br />
Hi Alarm Rel.3<br />
Lo Alarm Rel.3<br />
Run time 0s<br />
P-min 0.5s<br />
flow input<br />
flow input<br />
Start<br />
Start<br />
End<br />
100%<br />
OFF<br />
0-20 mA<br />
0.0%<br />
100%<br />
*<strong>TOPAX</strong> <strong>DE</strong> 3 / <strong>DE</strong> 6<br />
on/off - Control<br />
Reduce SP1 Rel.1<br />
SP2 boost Rel.2<br />
Hi Alarm Rel.3<br />
Lo Alarm Rel.3<br />
Hyst. 0.00mg<br />
Unit data<br />
Unit number<br />
115<br />
Software Status<br />
6.06<br />
Production date<br />
8.06<br />
Measurement<br />
input test<br />
Input 1 52mV<br />
Input 2 -12mV<br />
Input 3 736mV<br />
Input 4 27°C<br />
Measurement<br />
digital<br />
Input 1<br />
Off<br />
Measurement<br />
analogue<br />
Test functions On<br />
Output 1<br />
Output 2<br />
Output 3<br />
4.00mA<br />
6.20mA<br />
7.05mA<br />
Measurement<br />
digital<br />
Interface<br />
>>>>>>
e<br />
lues<br />
int<br />
values<br />
value<br />
ol<br />
0.30mg/l<br />
e 0.20mg/l<br />
m values<br />
.00mg/l<br />
.00mg/l<br />
0s<br />
ta<br />
ta p<br />
ta.<br />
data<br />
nd<br />
Cl2<br />
h<br />
/l tend Cl2<br />
**<br />
<strong>TOPAX</strong><br />
<strong>DE</strong> 2<br />
***<br />
<strong>TOPAX</strong><br />
<strong>DE</strong> 4<br />
art 0.00mg/l<br />
d 1.00mg/l<br />
ook***<br />
Date<br />
10.08.06<br />
lutFailure<br />
D****<br />
flow input* pH Compensation<br />
pH calib. data Chlorine value<br />
Language OFF<br />
Bus address<br />
Test functions<br />
Manual mode<br />
Cl2 SP1 H-OFF<br />
Default Cl2 SP2 settingH-OFF<br />
Contr. pH SP1 release ——**<br />
Cl2 Controller<br />
Meter Manual test max. ON<br />
time 0 min<br />
pH** Controller<br />
Meter test<br />
4.<br />
Start-up pH SP2 ——**<br />
General<br />
Delay<br />
Settings<br />
4.1 Date and time settings<br />
mA Time outputs Date<br />
07:15 03.11.06<br />
mA Hours outputs 17<br />
Minutes 15<br />
mA Days outputs 23<br />
Months 11<br />
mA Years outputs 36<br />
Input mínactive<br />
with logic -3h<br />
mg/l tend<br />
h<br />
Cl2<br />
Start 0.00mg/l<br />
End 1.00mg/l<br />
**<strong>TOPAX</strong> ***Logbook*** <strong>DE</strong> 2<br />
Time Date<br />
Output 11:16 10.08.06 1<br />
Output of Cl2<br />
TestSolutFailure<br />
output *****END**** 0-20mA<br />
Start 0.00mg<br />
End 1.00mg<br />
spanish 0s<br />
= 0s<br />
OFF<br />
The system is provided with a real-time clock, that only needs to be set once, i.e. when<br />
putting pH Calib. the device data into operation for the first flow time. input The clock is supported by a battery so<br />
Buffer solution 1<br />
100%<br />
that it will 7.00pH not stop running in the event of power cut offs. The settings are maintained even<br />
Buffer solution 2<br />
flow input OFF<br />
in case of memory delete processes.<br />
4.00pH<br />
Int. electrode<br />
float buffer<br />
7.00pH<br />
4.2 Select Language<br />
Select language<br />
german<br />
english<br />
french<br />
spanish<br />
Bus address<br />
the RS485<br />
Interface<br />
0<br />
(Option)<br />
Start<br />
Start<br />
End<br />
0-20 mA<br />
0.0%<br />
100%<br />
Preset<br />
Preset<br />
Delay<br />
Unit data<br />
Unit number<br />
115<br />
Software Status<br />
6.06<br />
Production date<br />
8.06<br />
Measurement<br />
analogue<br />
Test functions On<br />
Output 1 4.00mA<br />
Output 2 6.20mA<br />
Output 3 7.05mA<br />
*<strong>TOPAX</strong> <strong>DE</strong> 3 / <strong>DE</strong> 6<br />
There is a selection of languages available for device communication.<br />
Considering that the language settings belong to the fundamental device settings, password<br />
code 86 is necessary. If a different password code has been set, you will immediately<br />
be requested to enter the required code no.<br />
4.3 Test Password functions function<br />
Prior Unit to data being allowed to proceed with any settings at all, you are firstly required to enter<br />
Analogue inputs<br />
the Digital necessary inputs password codes accordingly:<br />
Analogue outputs<br />
InterfaceCode 11 enables access to all main menu functions<br />
Delete memory<br />
Code 86 enables access to all parameters and functions<br />
All the other codes will not enable access to any parameter and function.<br />
When finished entering all the required settings has been accomplished, it is necessary<br />
to “close” the device back down. It is thus possible to enter 11 again or any other number<br />
you may prefer, that is not 86.<br />
It is then necessary to press “ESC” for as many times as required to exit the various menu<br />
levels and to return to the measuring value page. Once done, press “ESC” once more, to<br />
call up the hidden “Password Entry” menu.<br />
Thereafter, press “ESC” once more to exit the menu again.<br />
Reduce<br />
SP2 bo<br />
Hi Alarm<br />
Lo Alar<br />
P-Paus<br />
P-min<br />
Bus address<br />
the RS485<br />
Interface<br />
PI-Con<br />
0Pulse-F<br />
Reduce<br />
SP2 cu<br />
(Option) Hi Alarm<br />
Lo Alar<br />
Impulse<br />
Test functions<br />
setting<br />
Unit data<br />
Analogue inputs PID-Co<br />
Digital inputs Boost s<br />
Analogue outputs Motor c<br />
Interface Motor o<br />
Delete memoryHi Alarm<br />
Lo Alarm<br />
Run tim<br />
P-min<br />
on/off -<br />
Reduce<br />
SP2 bo<br />
Hi Alarm<br />
Lo Alar<br />
Hyst.<br />
Measurement<br />
input test<br />
Input 1 52m<br />
Input 2 -12m<br />
Input 3 736m<br />
Input 4 27°C<br />
Measurement<br />
digital<br />
Interface<br />
>>>>>>
5. Metering Unit Settings<br />
Free chlorine and chlorine dioxide measuring<br />
The measurements of free chlorine and chlorine dioxide are defined by the example of the<br />
measurement of free chlorine.<br />
Chlorine measuring is dependant on the pH value and the flow rate. The flow rate is kept<br />
constant via the valve whereas the pH value can be compensated. Once a compensation<br />
process has been activated, it is necessary to re-calibrate. We therefore recommend to<br />
first calibrate the pH metering and to set the test water at the target pH value, before<br />
calibrating the chlorine metering and operating the chlorine controller.<br />
Chlorine measuring requires a calibration through which the current electrode features and<br />
data need to be detected and acknowledged.<br />
This occurs through identification of the current chlorine concentration by means of a<br />
compared measurement, e.g. with a photometric DPD method, for subsequent comparison<br />
with the current measured value. During calibration the electrode is left in the valve thus<br />
the flow rate must not be altered during the calibration process.<br />
One attaches - only during the chlorine measurement – an amperometric measuring cell<br />
instead of a potentiostatic one, and carry out a two-point-calibration when it is started up<br />
and equilibrate the zero-point.<br />
The measuring cell has to operate with chlorine free water for the zero-point calibration<br />
or the flow rate of the measuring water has to be suppressed. If the value on the display<br />
does not alter anymore, then “0.00 mg/l” has to be entered into the menu and saved. A<br />
zero point calibration is not necessary for chlorine metering although it is possible to run if<br />
effectively required.<br />
After calibrating the zero-point the amperometric measuring cell has to be driven with<br />
chlorine water. If the value on the display does not alter anymore, the chlorine content in<br />
the measuring water is determined using the DPD-method. After determining the value<br />
it has to be entered into the control system and saved. The measuring water has to be<br />
taken from the measuring cell.<br />
pH measuring<br />
pH metering too requires calibration, which is conducted by measuring two calibration<br />
solutions having pH values that are known. The pH values of both calibration solutions are<br />
entered into the calibration data.<br />
If calibration with special buffer solutions is required, the device calibration data must<br />
first be changed. In this case it is also necessary to consider the internal electrode buffer,<br />
should it differ from pH7.<br />
Compensation of the temperature influence can either be conducted manually or automatically.<br />
Manual compensation requires for manual temperature setting whereas automatic<br />
compensation requires connection of a PT100 temperature sensor.<br />
Redox measuring<br />
ORP metering is not subject to calibration and neither is temperature compensating<br />
required.<br />
Metering Unit Settings | Operating Manual <strong>TOPAX</strong> <strong>DE</strong> | 25
0.44mg/l<br />
7.24pH<br />
736mV<br />
27.2°C<br />
MAN ><br />
Compensation<br />
Controller<br />
Manual mode<br />
Date an time<br />
Archive<br />
Default setting<br />
Temperature measuring<br />
Selection<br />
Temperature can either be set manually, or it can be metered via a Pt100 Analogue temperature output<br />
sensor. In both cases, the temperature data is automatically used for temperature<br />
flow input*<br />
compensation.<br />
Cl2 alarm<br />
Cl2 set value<br />
values<br />
Cl2 Calibration<br />
pH Calibration<br />
Archive and Logbook<br />
The Cl2 device Calibration stores metering data for a 3 Cl2 hour set time value range and provides feedback in the form<br />
Current<br />
of 0.00mg/l a trend-graph. The logbook instead shows P-Control a record of the operative process last-performed<br />
by the device, e.g. switch-on of the controller, or<br />
Comparison data<br />
SP1 0.30mg/l<br />
calibration.<br />
DPD<br />
0.00mg/l<br />
Probe Slope<br />
25mV/0,1mg/l<br />
5.1 pH measurement calibration<br />
Selection<br />
pH** set Point<br />
pH** alarm values<br />
P-Range 0.20mg/l<br />
**<br />
<strong>TOPAX</strong><br />
<strong>DE</strong> 2<br />
Controller<br />
pH calib. data<br />
Language<br />
Bus address<br />
Test functions<br />
Default setting<br />
Contr. release<br />
Start-up Delay<br />
Cl2 Controller<br />
Meter test<br />
pH** Controller<br />
Meter test<br />
alibration<br />
ompensation<br />
ontroller<br />
anual mode<br />
ate an time<br />
rchive<br />
efault setting<br />
e<br />
alues<br />
int<br />
values<br />
value<br />
ol<br />
0.30mg/l<br />
e 0.20mg/l<br />
rm values<br />
.00mg/l<br />
.00mg/l<br />
ta<br />
ta p<br />
ta.<br />
data<br />
nd<br />
0s<br />
Cl2<br />
h<br />
**<br />
<strong>TOPAX</strong><br />
<strong>DE</strong> 2<br />
NOTE!<br />
***<br />
<strong>TOPAX</strong><br />
<strong>DE</strong> 4<br />
pH Calibration<br />
Current 4.00pH<br />
Buffer<br />
4.00pH<br />
Probe Slope<br />
58mV/pH<br />
Probe zero point<br />
0mV<br />
Cl2 alarm values<br />
Compensation<br />
Archive<br />
Manual Calibration Comp. process<br />
pH Calib. data<br />
Buffer solution 1<br />
1) Switch<br />
20.0°Cthe controller to manual Cl2 operations trend data and the temperature compensation 7.00pH<br />
pH trend data p<br />
Buffer solution 2<br />
function to manual compensation. mV trend Set the data. calibration solution temperature. Access 4.00pH the<br />
pH Compensation<br />
Temp. trend data ***<br />
Int. electrode<br />
Chlorine calibration value menu and select “pH calibration“.<br />
OFF<br />
<strong>TOPAX</strong> float buffer<br />
Controller<br />
Logbook Contr. release Meter test Cl2<br />
P-Cont<br />
<strong>DE</strong> 4<br />
7.00pH<br />
Analogue 2) Dip output the electrode into one of the calibration solutions. The detected buffer is displayed. Pulse l<br />
flow input*<br />
Preset 0s Reduce<br />
pH calib. Compensation Wait data until the measuring value has stabilised. mg/l Input tend active Press Cl2 the “OK“ key and, whilst keeping SP2 bo<br />
Auto Comp.<br />
máx<br />
Select language<br />
Language<br />
with logic<br />
Preset = 0s<br />
Hi Alarm<br />
it pressed 23.4°C in, also press the “ƒ” key simultaneously. The measuring value german on display<br />
Bus address<br />
Delay OFF Lo Alar<br />
Pt100 correction<br />
english<br />
Test functions<br />
P-Paus<br />
will now be the pH value of the calibration solution.<br />
0.0°C<br />
french<br />
P-min<br />
pH Compensation<br />
spanish<br />
3) Clean the electrode then repeat the process with the second calibration solution.<br />
Chlorine value<br />
mín<br />
4) Default Test the OFF setting probe slope rate and zero point, -3h then replace h the electrode back into the PI-Con<br />
Contr. release<br />
Pulse-F<br />
Start-up valve. Switch Delaythe temperature compensation function back to automatic compensation Reduce<br />
Cl2 Controller<br />
mg/l tend Cl2<br />
Bus address SP2 cu<br />
Manual Meter<br />
and mode the<br />
testcontroller back to automatic operation mode.<br />
the RS485 Hi Alar<br />
Cl2 SP1 H-OFF<br />
Interface Lo Alar<br />
Cl2 pH** SP2 Controller H-OFF<br />
Start 0.00mg/l<br />
Impulse<br />
pH SP1 ——**<br />
0<br />
pH<br />
NOTE! Meter test<br />
setting<br />
SP2 ——**<br />
**<strong>TOPAX</strong> End <strong>DE</strong> 21.00mg/l<br />
The ideal slope rate should amount to 58 or 59 mV, whereas the probe<br />
Manual max. ON<br />
(Option) zero point<br />
mA outputs<br />
Output 1<br />
time should 0 min<br />
PID-Co<br />
possibly be about 0mV. Over time, Output the slope of rate Cl2 should decrease whilst<br />
Boost s<br />
mA outputs 1<br />
the zero point error should increase. When the electrode is no longer serviceable,<br />
an error message will come up<br />
Motor c<br />
output 0-20mA<br />
Test functions Motor o<br />
mA outputs 2<br />
***Logbook***<br />
Time<br />
on display.<br />
Hi Alarm<br />
Start Date 0.00mg<br />
Time Date<br />
Unit data Lo Alar<br />
mA outputs 3<br />
11:16 10.08.06<br />
07:15 03.11.06<br />
Analogue inputs Run tim<br />
End 1.00mg<br />
Hours Calibration data 7<br />
Digital inputs P-min<br />
TestSolutFailure<br />
Minutes 15<br />
Analogue outputs<br />
*****END****<br />
Days 3<br />
Interface<br />
Months 11<br />
Delete memory<br />
pH Calib. data<br />
flow input<br />
on/off -<br />
Years Buffer solution 6 1<br />
100%<br />
7.00pH<br />
Reduce<br />
Buffer solution 2<br />
flow input OFF<br />
SP2 bo<br />
4.00pH<br />
Hi Alar<br />
Int. electrode<br />
Start 0-20 mA<br />
Lo Alar<br />
float buffer<br />
Start 0.0%<br />
Hyst.<br />
7.00pH<br />
End 100%<br />
*<strong>TOPAX</strong> <strong>DE</strong> 3 / <strong>DE</strong> 6<br />
Select language<br />
german<br />
english<br />
french<br />
spanish<br />
26 | Operating Manual <strong>TOPAX</strong> <strong>DE</strong> | Metering Unit Settings<br />
hi<br />
lo<br />
Delay<br />
1.00mg/l<br />
0.00mg/l<br />
The pH calibration menu displays the buffer solution data that has been saved.<br />
0s<br />
Unit data<br />
Unit number<br />
115<br />
Software Status<br />
6.06<br />
Production date<br />
mA outputs<br />
mA outputs 1<br />
mA outputs 2<br />
mA outputs 3<br />
Measurement<br />
input test<br />
Input 1 52m<br />
Input 2 -12m<br />
Input 3 736<br />
Input 4 27°C
0.44mg/l<br />
7.24pH<br />
736mV<br />
27.2°C<br />
MAN ><br />
Should you wish to calibrate using other buffer solutions, set and enter the relative pH<br />
values in under the Ph calibration data menu. The entry sequence here is not important.<br />
When implementing electrodes featuring Selection special internal buffers it is necessary<br />
Controller<br />
to enter<br />
the pH value of the internal buffer too as it is this value that will serve as zero point. You<br />
flow input*<br />
will find that the internal electrode Cl2 buffer set pH value<br />
is marked directly on pH the calib. electrode. data<br />
Selection<br />
Cl2 Calibration<br />
pH Calibration<br />
5.2 Chlorine measurement calibration<br />
Cl2 Calibration<br />
Current<br />
0.00mg/l<br />
Comparison data<br />
DPD 0.00mg/l<br />
Probe Slope<br />
25mV/0,1mg/l<br />
pH Calibration<br />
Current 4.00pH<br />
Buffer<br />
4.00pH<br />
Probe Slope<br />
58mV/pH<br />
Probe zero point<br />
0mV<br />
Compensation<br />
Manual Comp.<br />
20.0°C<br />
pH Compensation<br />
Chlorine value<br />
OFF<br />
Compensation<br />
Auto mode. Comp.<br />
23.4°C<br />
Pt100 correction<br />
0.0°C<br />
pH Compensation<br />
Chlorine value<br />
OFF<br />
Manual mode<br />
Cl2 SP1 H-OFF<br />
Cl2 SP2 H-OFF<br />
pH SP1 ——**<br />
pH SP2 ——**<br />
Manual max. ON<br />
time 0 min<br />
Time Date<br />
07:15 03.11.06<br />
Hours 7<br />
Minutes 15<br />
Days 3<br />
Months 11<br />
Years 6<br />
Calibration<br />
Compensation<br />
Controller<br />
Manual mode<br />
Date an time<br />
Archive<br />
Default setting<br />
Cl2 alarm values<br />
**<br />
pH** set Point <strong>TOPAX</strong><br />
pH** alarm values<br />
<strong>DE</strong> 2<br />
Cl2 set value<br />
P-Control<br />
SP1 0.30mg/l<br />
P-Range 0.20mg/l<br />
Cl2 alarm values<br />
hi 1.00mg/l<br />
lo 0.00mg/l<br />
Delay 0s<br />
mg/l tend<br />
máx<br />
mín<br />
-3h<br />
Cl2<br />
h<br />
***Logbook***<br />
Time Date<br />
11:16 10.08.06<br />
TestSolutFailure<br />
*****END****<br />
Analogue output<br />
Language<br />
Bus address<br />
Test functions<br />
Default setting<br />
Contr. release<br />
Start-up Delay<br />
Cl2 Controller<br />
Meter test<br />
pH** Controller<br />
Meter test<br />
mA outputs<br />
mA outputs 1<br />
mA outputs 2<br />
mA outputs 3<br />
NOTE!<br />
Ensure that the pH value has stabilised and lies within the pH 6.5 – 7.5 range.<br />
Calibration process<br />
1) Switch the controller to manual operations. Access the calibration menu and select<br />
“Chlorine calibration“. Archive<br />
2) Determine the current chlorine concentration e.g. using a photometric DPD method.<br />
Cl2 trend data<br />
Enter the concentration as detected pH trend under data “Compared p DPD measurement”. Press the<br />
mV trend data.<br />
“OK“ key and, whilst keeping it Temp. pressed trend in, also datapress the ***“” key simultaneously.<br />
The measuring value on display<br />
<strong>TOPAX</strong><br />
Logbook will now indicate the set concentration value.<br />
<strong>DE</strong> 4<br />
3) Test the probe slope rate, then switch the controller back to automatic operation<br />
pH Calib. data<br />
Buffer solution 1<br />
7.00pH<br />
Buffer solution 2<br />
4.00pH<br />
Int. electrode<br />
float buffer<br />
7.00pH<br />
Select language<br />
german<br />
english<br />
french<br />
spanish<br />
NOTE!<br />
Should the slope rate fall below 3mV, an error message will come up on display.<br />
Zero point calibration<br />
mg/l tend Cl2<br />
The zero point calibration process is the same as the above – if you enter 0.00 mg/l as<br />
comparison measurement the device will automatically Start acknowledge 0.00mg/l that the entry involves<br />
a zero point calibration and will assess calibration End accordingly. 1.00mg/l<br />
Bus address<br />
the RS485<br />
Interface<br />
0<br />
(Option)<br />
NOTE!<br />
During zero point calibration, check to ensure that there actually is no chlorine<br />
content in the water!<br />
Test functions<br />
Unit data<br />
Analogue inputs<br />
Digital inputs<br />
Analogue outputs<br />
Interface<br />
Delete memory<br />
NOTE!<br />
NOTE!<br />
NOTE!<br />
Co<br />
In<br />
wi<br />
**T<br />
O<br />
O<br />
o<br />
S<br />
E<br />
flo<br />
flo<br />
S<br />
S<br />
E<br />
Metering Unit Settings | Operating Manual <strong>TOPAX</strong> <strong>DE</strong> | 27
0mV<br />
Delay<br />
0s<br />
Compensation<br />
Manual Comp.<br />
20.0°C<br />
pH Compensation<br />
Chlorine value<br />
OFF<br />
5.3 Temperature compensation<br />
Compensation<br />
Auto Comp.<br />
23.4°C<br />
Pt100 correction<br />
0.0°C<br />
pH Compensation<br />
Chlorine value<br />
OFF<br />
Archive<br />
Cl2 trend data<br />
pH trend data p<br />
mV trend data.<br />
Temp. trend data<br />
Logbook<br />
mg/l tend<br />
máx<br />
mín<br />
-3h<br />
Cl2<br />
h<br />
***<br />
<strong>TOPAX</strong><br />
<strong>DE</strong> 4<br />
pH Calib. data<br />
Buffer solution 1<br />
7.00pH<br />
Buffer solution 2<br />
4.00pH<br />
Int. electrode<br />
float buffer<br />
7.00pH<br />
Select language<br />
german<br />
english<br />
french<br />
spanish<br />
Two options are provided for temperature compensation: mg/l tend Cl2<br />
Bus address<br />
Manual mode<br />
the RS485<br />
Cl2 SP1 H-OFF<br />
Cl21) SP2 Automatic H-OFF compensation, with temperature sensor connection Interface<br />
Start 0.00mg/l<br />
pH SP1 ——**<br />
pH Ensure SP2 that the ——** temperature sensor consistently<br />
End<br />
records the<br />
1.00mg/l<br />
temperature that the<br />
0<br />
Manual electrode max. is exposed ON to. When Pt100 and electrodes do not find themselves in (Option) the same<br />
time 0 min<br />
solution, for example during pH measurement calibration, we recommend that you opt for<br />
manual compensation.<br />
Test functions<br />
***Logbook***<br />
Time Date<br />
Time 2) Manual Datecompensation<br />
Unit data<br />
11:16 10.08.06<br />
07:15 03.11.06<br />
Analogue inputs<br />
Hours If the temperature 7 remains adequately constant, Digital inputs<br />
TestSolutFailure it is also possible to set the temperature<br />
Minutes 15<br />
Analogue outputs<br />
*****END****<br />
Days manually. The 3device then provides for measuring value compensation constantly Interface based on<br />
Months 11<br />
Delete memory<br />
Years the temperature 6 influence of the temperature as set.<br />
Temperature measurement calibration<br />
Because the temperature sensor is hooked up implementing dual-lead technology it may<br />
be possible to have slight variations in temperature measurements. The temperature<br />
measurement can thus be calibrated.<br />
Measure the temperature once manually whilst putting the device into operation and<br />
set the correction value under “Correction to Pt100” in such a way that the temperature<br />
display corresponds with the manual temperature measurement read offs.<br />
5.4 pH compensation (Cl 2<br />
measuring only)<br />
Under the “Compensation” menu it is additionally possible to turn the pH compensation on<br />
and off. Bear in mind that subsequent to switch-on, you will need to calibrate the chlorine<br />
measurement compensation all over again.<br />
28 | Operating Manual <strong>TOPAX</strong> <strong>DE</strong> | Metering Unit Settings
6. Controller Unit Settings<br />
The controller settings of free chlorine, chlorine dioxide and pH are defined by the example<br />
of the controller of free chlorine.<br />
The <strong>TOPAX</strong> <strong>DE</strong> comes equipped with one chlorine value and one pH value controller (<strong>DE</strong><br />
2 only). Both controllers can be configured maximally as PID controllers and are provided<br />
with a maximum of 2 dual switch points, thereby also allowing for adjustable operation<br />
mode.<br />
The actuating variables can be output through three relays and through each one of the<br />
three outputs.<br />
The device will assist you during configuration. Firstly, on the one side the device is already<br />
delivered from our works with typical pre-configured settings so that as little adjustments<br />
as possible are required. If any adjustments are needed, each selection that you come<br />
across will only display the settings required for the selection in question: meaning that<br />
the initial abundance of setting options is quickly cut down to a quick-overview selection<br />
and it is possible to determine straight away when a chosen selection will not provide the<br />
required results.<br />
NOTE!<br />
Only switch points that are assigned to a relay or to an output are displayed<br />
under the “Set Point” menu. If no relays or outputs are assigned to a controller,<br />
when the “Set Point” menu is selected, the device will display the “Function currently<br />
not active” message!<br />
NOTE!<br />
When a relay is configured as an alarm relay, a good number of threshold values<br />
may be assigned to it. However, relays that are assigned to one switch point<br />
cannot avail of any other application or switch point.<br />
For controller implementation, a set of four controller options are provided:<br />
NOTE!<br />
NOTE!<br />
ON/OFF Controller<br />
The ON/OFF controller switches ON when a switch-point threshold is exceeded and goes<br />
OFF when a threshold is under-run, or vice verse, based on effective operation direction.<br />
Metering is therefore always carried out at 100% (ON) or 0% (OFF). A hysteresis can be<br />
preset for standard system parameters.<br />
P Controller<br />
The P Controller or Proportional Controller provides for metering reduction upon approaching<br />
of the set point, proportionally to control deviation. This occurs constantly on application<br />
of the output as standard output, on application of the relay either via reduction of<br />
the switching frequency (Impulse Frequency Controller) or via reduction of the time slice of<br />
a preset switch frame, with the relay OPEN (Pulse Pause Controller). Setting of the P gain<br />
range is required and so is setting of the impulse frequency, of the pulse + pause time as<br />
well as minimum impulse data, subsequent to every parameter application.<br />
Controller Unit Settings | Operating Manual <strong>TOPAX</strong> <strong>DE</strong> | 29
PI Controller<br />
The PI Controller or Proportional Integral Controller is the P Controller with an additional<br />
Integral function. The settings are carried out as per the P Controller, whereby additional<br />
setting of a so called reset time, corresponding to the “I” integral gain, is also required.<br />
The “I” gain locks on later compared to the P Controller and principally eliminates residual<br />
control deviation, constant to the P Controller.<br />
PID Controller<br />
The PID Controller or Proportional Integral Derivative Controller is the PI Controller with an<br />
additional Derivative function. Further to the specified settings, derivative time, corresponding<br />
to the “D” gain, is further provided here. The “D” gain locks on earlier to balance out<br />
inertia by the “I” controller. The adjustment control is therefore provided with a quicker<br />
reaction to any control deviation.<br />
PI and PID controllers provide the additional possibility of servo motor control. Only one effective<br />
direction is however possible, as both switch points are implemented for one motor.<br />
6.1 Configuration on Delivery<br />
When delivered from our works, device configuration is as follows:<br />
Controller Controlled process variable Effective direction Relay<br />
Cl 2<br />
controller Cl 2<br />
Free chlorine measurement value boosting 1<br />
pH controller pH measurement value dropping 2<br />
NOTE!<br />
NOTE!<br />
The pH value can be controlled only with <strong>TOPAX</strong> <strong>DE</strong> 2.<br />
Both P controllers are preset as pulse-pause controllers with a 10 sec pulse-pause time,<br />
and a 0.5 sec minimum impulse.<br />
The third relay is configured prior to delivery as an alarm relay for threshold value monitoring<br />
of both the chlorine measurements as well as the pH measurements.<br />
During factory settings, the outputs are not implemented for control.<br />
Should you need to change any of the preset settings, it is necessary to access the<br />
“Controller” menus under the device default settings. A description of the process steps is<br />
given over the next few pages.<br />
Set points and proportional ranges are also pre-configured in our works, although readjustment<br />
thereof is possible at all times without altering configuration by accessing the “Set<br />
point” menu under the main menu.<br />
6.2 Configuration changes<br />
Access the “Controller” menu in the default settings.<br />
Select the controller that needs to be set. This will also access the configuration window.<br />
First line – Controller type<br />
The very top line displays current controller type. Using the “rightwards” arrow key you can<br />
switch from one type to another. Choose between ON/OFF, P, PI and PID Controller types.<br />
30 | Operating Manual <strong>TOPAX</strong> <strong>DE</strong> | Controller Unit Settings
Meter test<br />
**<strong>TOPAX</strong> <strong>DE</strong> 2<br />
P-min 0.5s Select setting —— *100<br />
ing tr. release<br />
se<br />
lay<br />
ler t active<br />
logic<br />
ller<br />
mA outputs Meter test Cl2<br />
mA outputs Preset 1 0s<br />
mA outputs Preset = 20s<br />
Delay<br />
mA outputs<br />
OFF<br />
3<br />
**<strong>TOPAX</strong> <strong>DE</strong> 2<br />
P-Control Output 1 Meter PI-Control test Cl2<br />
Pulse length Output of Cl2 Pulse-Frequency<br />
Reduce SP1 —— Preset Reduce SP1 0s ——<br />
SP2 boost output —— 0-20mA SP2 cut ——<br />
Hi Alarm —— Preset Hi Alarm = 0s ——<br />
Lo AlarmStart<br />
—— 0.00mg Control Lo Alarm Off ——<br />
P-Pausa 10s Alarm Impulses/h relay 0<br />
P-min End 0.5s 1.00mg Select setting —— *100<br />
PID-Control<br />
Boost servomotor<br />
Motor clsd Rel.1<br />
Motor open Rel.2<br />
Hi Alarm Rel.3<br />
Lo Alarm Rel.3<br />
Run time 0s<br />
P-min 0.5s<br />
st Cl2 pH P-Control Output 1<br />
Calib. data<br />
Meter PI-Control test Cl2 flow input<br />
PID-Control<br />
on/off - Control<br />
Buffer Pulse length Output of Cl2<br />
solution 1<br />
Pulse-Frequency<br />
100%<br />
Boost servomotor<br />
1<br />
0s Reduce 7.00pH SP1 —— Preset Reduce SP1 0s —— Motor clsd Rel.1 Reduce SP1 Rel.1<br />
Buffer SP2 boost<br />
output<br />
solution —— 0-20mA<br />
2<br />
SP2 cut<br />
flow input<br />
——<br />
OFF<br />
Motor open Rel.2 SP2 boost Rel.2<br />
2<br />
= 0s Hi Alarm4.00pH<br />
—— Preset Hi Alarm = 0s —— Hi Alarm Rel.3 Hi Alarm Rel.3<br />
*** OFF Int. Lo Alarm<br />
Start<br />
electrode ——<br />
0.00mg<br />
Control Lo Alarm Start Off —— 0-20 mA Lo Alarm Rel.3 Lo Alarm Rel.3<br />
3<br />
<strong>TOPAX</strong> float P-Pausa buffer 10s Alarm Impulses/h relayStart<br />
0 0.0% Run time 0s<br />
Hyst. 0.00mg<br />
P-min End<br />
<strong>DE</strong> 4<br />
7.00pH 0.5s 1.00mg<br />
Select setting<br />
End —— *100<br />
P-min 0.5s<br />
PAX <strong>DE</strong> 2<br />
100%<br />
*<strong>TOPAX</strong> <strong>DE</strong> 3 / <strong>DE</strong> 6<br />
tput 1<br />
ata<br />
Select PI-Control language<br />
PID-Control<br />
tput of Cl2<br />
flow input<br />
on/off - Control<br />
tion 1<br />
german Pulse-Frequency 100% Boost servomotor<br />
english Reduce SP1 —— Motor clsd Rel.1<br />
tput pH Second line – Output type (not for ON/OFF Controllers)<br />
Reduce SP1 Rel.1<br />
0-20mA<br />
Unit data<br />
Measurement<br />
Measurement<br />
french SP2 cut —— Motor open Rel.2<br />
pH tion 2<br />
flow input OFF<br />
SP2 boost Rel.2<br />
input test<br />
digital<br />
spanish Hi Alarm —— Hi Alarm Rel.3 Hi Alarm Rel.3<br />
rt 0.00mg The Lo Alarm second ——<br />
Unit number<br />
e<br />
Startline displays 0-20 mA Lo current Alarm output Rel.3type. Using Lo the Alarm“rightwards” Rel.3 arrow key you can<br />
Impulses/h 0<br />
Run time 0s<br />
115<br />
Input 1 52mV Input 1 Off<br />
d 1.00mg Start 0.0%<br />
Hyst. 0.00mg<br />
setting *100<br />
Software Status Input 2 -12mV<br />
pH switch from End one type 100% to another.<br />
P-min<br />
Choose<br />
0.5s<br />
between 6.06pulse-pause, impulse-frequency Input 3 736mV and (for<br />
*<strong>TOPAX</strong> <strong>DE</strong> 3 / <strong>DE</strong> 6<br />
Production date<br />
l2<br />
Bus address<br />
8.06<br />
Input 4 27°C<br />
the PI and PID types) servo<br />
PID-Control<br />
on/off motor - Control boost or servo motor drop.<br />
uage input the RS485<br />
100% Boost<br />
Interface<br />
servomotor<br />
0.00mg/l Motor clsd Rel.1 Reduce SP1 Rel.1<br />
Unit data<br />
Motor open Rel.2 SP2 boost Rel.2Measurement<br />
Measurement<br />
input OFFLines 0<br />
1.00mg/l Hi Alarm 3 to 4 Rel.3 – Effective Hi direction Alarm Rel.3 and input relay/output test allocation<br />
digitalfor display of the<br />
Unit number<br />
rt 0-20 mA Lo Alarm Rel.3 Lo Alarm Rel.3<br />
rt 0.0% Run (Option)<br />
115<br />
time 0s<br />
Hyst. 0.00mg Input 1 52mV Input 1 Off<br />
activating variable Software Status Input 2 -12mV<br />
100% P-min 0.5s<br />
*<strong>TOPAX</strong> <strong>DE</strong> 3 / <strong>DE</strong> 6<br />
6.06<br />
Input 3 736mV<br />
Production date<br />
Input<br />
Measurement<br />
4 27°C<br />
Measurement<br />
Delete memory<br />
analogue<br />
digital<br />
s Each Test functions controller is provided 8.06with two switch points. When use of a switch point is required,<br />
on/off - Control<br />
Test functions On<br />
!!! Warning !!!<br />
Interface<br />
Unit data<br />
Stored data is<br />
it is necessary that an effective direction (boost Output 1or drop), 4.00mA a relay >>>>>>>>>>>>
tion<br />
ion<br />
0.44mg/l<br />
7.24pH<br />
736mV<br />
27.2°C<br />
MAN ><br />
Variant<br />
Hysteresis<br />
P-Pause<br />
P-min<br />
Impulse/h<br />
Selection<br />
Running<br />
time<br />
Description<br />
the hysteresis prevents that the relay keeps switching to and fro in the vicinity of the<br />
set point range. When the hysteresis function is set, the relay switches only if the<br />
hysteresis’ half-way line exceeded, or either fallen short of.<br />
Calibration<br />
Compensation<br />
Controller<br />
Manual mode<br />
Date an time<br />
Archive<br />
Default setting<br />
Cl2 set value<br />
Cl2 alarm values<br />
(pulse-pause time) defines a time frame, in which the relay, proportionally to control<br />
deviation, is either OPEN (pulse) or CLOSED (pause).<br />
(minimum impulse) sets the minimum time for which the relay must be OPEN, so that<br />
the actuating element that is connected, provides for actual metering.<br />
specifies maximal pulse frequency, corresponding to a 100% metering function.<br />
Settings are entered in one hundreds per hour. When, for example, 16 is set, the<br />
relay switches 1600 times per second.<br />
Specifies how long the Analogue servo motor output takes to run from the “totally closed” to the<br />
flow input*<br />
“totally open” position. pH calib. data<br />
**<br />
6.3 Set Point, proportional, <strong>TOPAX</strong> integral Test and functions derivative gain settings.<br />
pH** set Point<br />
pH** alarm values<br />
<strong>DE</strong> 2<br />
Controller<br />
Language<br />
Bus address<br />
Contr. release<br />
Input active<br />
with logic<br />
libration<br />
/l<br />
rison data<br />
0.00mg/l<br />
lope<br />
25mV/0,1mg/l<br />
ibration<br />
t 4.00pH<br />
4.00pH<br />
Slope<br />
58mV/pH<br />
ero point<br />
0mV<br />
Cl2 set value<br />
P-Control<br />
SP1 0.30mg/l<br />
P-Range 0.20mg/l<br />
Default setting<br />
Contr. release<br />
Start-up Delay<br />
Cl2 Controller<br />
Meter test<br />
pH** Controller<br />
Meter test<br />
**<strong>TOPAX</strong> <strong>DE</strong> 2<br />
Cl2 alarm values<br />
These control parameters need to be adjusted mA outputs more frequently and are therefore Output part of 1<br />
Output of Cl2<br />
the main menu. To access them, select mA the “Controller” outputs 1menu and then select either “Cl2<br />
hi 1.00mg/l<br />
output 0-20mA<br />
set points” or “pH set points”. mA outputs 2<br />
lo 0.00mg/l<br />
Start 0.00mg<br />
Move to the “SP1“ field and enter the required mA outputs set point. 3Repeat setting as required for<br />
Delay 0s<br />
End 1.00mg<br />
switch point 2.<br />
ion<br />
p.<br />
°C<br />
sation<br />
lue<br />
nsation<br />
omp.<br />
23.4°C<br />
correction<br />
0.0°C<br />
pensation<br />
e value<br />
OFF<br />
de<br />
H-OFF<br />
H-OFF<br />
——**<br />
——**<br />
x. ON<br />
te<br />
1.06<br />
7<br />
15<br />
3<br />
11<br />
NOTE!<br />
Archive<br />
Cl2 trend data<br />
pH trend data p<br />
mV trend data.<br />
Temp. trend data<br />
Logbook<br />
mg/l tend<br />
máx<br />
Cl2<br />
***<br />
<strong>TOPAX</strong><br />
<strong>DE</strong> 4<br />
mín<br />
If you have -3h selected h a PI or a PID controller, entry of the I gain and of the D gain data is<br />
mg/l tend Cl2<br />
Bus address<br />
You can ascertain the correct values for the example RS485 via a Ziegler-Nichols oscillation test:<br />
Interface<br />
reduce the Start P gain range, 0.00mg/l until the system oscillates constantly. Ascertain the oscillating<br />
0<br />
period duration, End e.g. 1.00mg/l by checking it on the trend display. The period duration is the time<br />
(Option)<br />
***Logbook***<br />
Time Date<br />
11:16 10.08.06<br />
32 TestSolutFailure<br />
| Operating Manual <strong>TOPAX</strong> <strong>DE</strong> | Controller Unit Settings<br />
*****END****<br />
pH Calib. data<br />
Buffer solution 1<br />
7.00pH<br />
Buffer solution 2<br />
4.00pH<br />
Int. electrode<br />
float buffer<br />
7.00pH<br />
Select language<br />
german<br />
english<br />
french<br />
spanish<br />
Test functions<br />
Unit data<br />
Analogue inputs<br />
Digital inputs<br />
Analogue outputs<br />
Interface<br />
Delete memory<br />
flow input<br />
NOTE!<br />
Only the switch points that have a relay allocation in the default settings, are<br />
displayed here.<br />
flow input<br />
Start<br />
Start<br />
End<br />
If you have selected an On/Off controller, this is the only setting that is required by your<br />
controller.<br />
If you have selected a P, PI or PID controller, the next step is to enter a P gain range. Start<br />
with a large value, then gradually reduce until the controller starts oscillating. The optimal<br />
setting is the lowest value, with which the system will not oscillate.<br />
now required.<br />
between one peak and the next.<br />
100%<br />
OFF<br />
0-20 mA<br />
0.0%<br />
100%<br />
Unit data<br />
Unit numb<br />
115<br />
Software S<br />
6.06<br />
Production<br />
8.06<br />
Measurem<br />
analogue<br />
Test functi<br />
Output 1<br />
Output 2<br />
Output 3
NOTE!<br />
Measuring value trend display is a big help for optimized controller operations.<br />
P Controller settings:<br />
Select the P gain range by multiplying the value entered for the oscillation test by 2,2.<br />
NOTE!<br />
PI Controller settings:<br />
Select the P gain range by multiplying the value entered for the oscillation test by 2,2.<br />
Work out the I gain range at 0.85 times the period duration.<br />
PID Controller settings:<br />
Select the P gain range by multiplying the value entered for the oscillation test by 1,66.<br />
Work out the I gain range at 0.5 times the period duration.<br />
Work out the D gain range at 0.12 times the period duration.<br />
NOTE!<br />
Sometimes a more stable control is ensured when slightly bigger P gain range<br />
and reset times are selected.<br />
6.4 Switching the controller unit ON and OFF<br />
To switch the controller unit ON and OFF, access the main measuring value display page<br />
and press key “” directly. By so doing, you will switch from manual operations (controller<br />
OFF) to automatic operations (controller ON) and vice verse. The current operating mode is<br />
shown on display.<br />
NOTE!<br />
WARNING!<br />
Check to ensure that the controller has been switched off prior to connecting up<br />
metering pumps or any similar devices to the unit!<br />
6.5 Switch–on delay<br />
By means of the switch-on delay function, it is possible to enter a time setting that must<br />
go by every time the device starts up, re-starts or the power is cut off, before the control<br />
functions all become active. This delay time gives the measuring processes time to settle<br />
and stabilise, thereby preventing false metering incidents in the device start-up phases.<br />
WARNING!<br />
6.6 External Controller stop<br />
It is also possible to switch the device ON and OFF externally. No settings are required<br />
to do so. All that is required is an external potential free dry contact connected up to the<br />
digital input. When the input is open, the controller stops and the “External Controller Stop”<br />
message will come up on display.<br />
Controller Unit Settings | Operating Manual <strong>TOPAX</strong> <strong>DE</strong> | 33
NOTE!<br />
pH Calibration<br />
Current 4.00pH<br />
Buffer<br />
4.00pH<br />
Probe Slope<br />
58mV/pH<br />
Probe zero point<br />
0mV<br />
NOTE!<br />
This function can also be implemented as a water deficiency protection by connecting<br />
up a float<br />
Compensation<br />
Archive<br />
gauge.<br />
Manual Comp.<br />
20.0°C<br />
Upon delivery of the device, the digital input pH trend is configured data p as a normally closed contact<br />
mV trend data.<br />
(opener): pH Compensation opening the input will release Temp. the controller trend data stop. If your water deficiency sensor<br />
***<br />
Chlorine value<br />
works as a normally open contact (shutter), it is possible to invert <strong>TOPAX</strong> the digital input.<br />
OFF<br />
If, despite sufficient water supply you nevertheless still have the “External Controller Stop”<br />
Compensation<br />
mg/l tend Cl2<br />
message Auto on Comp. display, select “Controller” under máx the default settings menu. Once accessed,<br />
23.4°C<br />
german<br />
select “Controller Pt100 correction Release”, then press key “„” to switch the external controller stop english from<br />
0.0°C<br />
logic 1 to logic 0, or vice verse.<br />
pH Compensation<br />
Chlorine value<br />
OFF<br />
6.7 Manual relay operations<br />
hi<br />
lo<br />
Delay<br />
Cl2 trend data<br />
Logbook<br />
Cl2 alarm values<br />
mín<br />
-3h<br />
1.00mg/l<br />
0.00mg/l<br />
0s<br />
h<br />
<strong>DE</strong> 4<br />
mA outputs<br />
mA outputs 1<br />
mA outputs 2<br />
mA outputs 3<br />
pH Calib. data<br />
Buffer solution 1<br />
7.00pH<br />
Buffer solution 2<br />
4.00pH<br />
Int. electrode<br />
float buffer<br />
7.00pH<br />
Select language<br />
french<br />
spanish<br />
Manual mode<br />
Cl2 SP1 H-OFF<br />
Cl2 SP2 H-OFF<br />
pH SP1 ——**<br />
pH SP2 ——**<br />
Manual max. ON<br />
time 0 min<br />
mg/l tend Cl2<br />
Start 0.00mg/l<br />
End 1.00mg/l<br />
Bus address<br />
the RS485<br />
Interface<br />
(Option)<br />
0<br />
tion<br />
ion<br />
libration<br />
t<br />
/l<br />
rison data<br />
0.00mg/l<br />
lope<br />
25mV/0,1mg/l<br />
ibration<br />
t 4.00pH<br />
4.00pH<br />
Slope<br />
58mV/pH<br />
zero point<br />
0mV<br />
0.44mg/l<br />
7.24pH<br />
736mV<br />
27.2°C<br />
MAN ><br />
WARNING!<br />
All relays that are allocated to a switch point can also be switched on by hand, for example<br />
in order to fill up or to empty hoses.<br />
Time Date<br />
07:15 03.11.06<br />
Hours 7<br />
Minutes 15<br />
Days Calibration 3<br />
Months Compensation 11<br />
Years Controller6<br />
Manual mode<br />
Date an time<br />
Archive<br />
Default setting<br />
***Logbook***<br />
Time Date<br />
11:16 10.08.06<br />
Manual relay operations are only possible, when the controller is switched off.<br />
TestSolutFailure<br />
*****END****<br />
Test functions<br />
Press key “” on the controller’s main measuring value display page and go from automatic<br />
operations to manual operations.<br />
On the main menu, select the “Manual operations” menu which will access a list showing<br />
all four switch points and the relays/outputs as allocated to them. A line “——“ is displayed<br />
if no relay/output is allocated for a switch point.<br />
Select a connection point and press key “” to turn on the relay. The “Manual Off” message<br />
will change to “Manual On”. Controller<br />
Selection<br />
Cl2 set value<br />
Cl2 alarm values<br />
Unit data<br />
Analogue inputs<br />
Digital inputs<br />
Analogue outputs<br />
Interface<br />
Delete memory<br />
WARNING!<br />
Relays that are switched ** Bus address<br />
ON manually will stay on, unless they are not switched<br />
<strong>TOPAX</strong> Test functions<br />
OFF manually again!<br />
pH** set Point<br />
pH** alarm values<br />
For Cl2 safety, set value the device is provided with an Default automatic setting switch off function. Simply enter a<br />
Contr. release<br />
time P-Control setting, within which the device will<br />
Start-up<br />
automatically<br />
Delayswitch off any relays that have been<br />
SP1 0.30mg/l<br />
switched on manually.<br />
P-Range 0.20mg/l<br />
6.8 Threshold values<br />
Cl2 alarm values<br />
hi<br />
lo<br />
Delay<br />
1.00mg/l<br />
0.00mg/l<br />
0s<br />
<strong>DE</strong> 2<br />
Analogue output<br />
flow input*<br />
pH calib. data<br />
Language<br />
Cl2 Controller<br />
Meter test<br />
pH** Controller<br />
Meter test<br />
mA outputs<br />
mA outputs 1<br />
mA outputs 2<br />
mA outputs 3<br />
Contr. release<br />
Input active<br />
with logic<br />
**<strong>TOPAX</strong> <strong>DE</strong> 2<br />
Output 1<br />
Output of Cl2<br />
output<br />
Start<br />
End<br />
0-20mA<br />
0.00mg<br />
1.00mg<br />
ion<br />
p.<br />
°C<br />
sation<br />
lue<br />
You will find the threshold values in the main menu under “Controller”.<br />
Archive<br />
Cl2 trend data<br />
pH trend data p<br />
mV trend data.<br />
34 | Operating Manual <strong>TOPAX</strong> <strong>DE</strong> | Controller Unit Settings 4.00pH<br />
Temp. trend data<br />
***<br />
<strong>TOPAX</strong><br />
pH Calib. data<br />
Buffer solution 1<br />
7.00pH<br />
Buffer solution 2<br />
Int. electrode<br />
float buffer<br />
flow input<br />
flow input<br />
Start<br />
Start<br />
100%<br />
OFF<br />
0-20 mA<br />
0.0%
h<br />
——<br />
——<br />
——<br />
——<br />
10s<br />
0.5s<br />
It is possible to set alarm values for all the threshold values that have a relay allocated to<br />
them.<br />
If one of the values is exceeded the display will show the “Threshold values exceeded”<br />
message and will cut off the relativ relay, which in turn can act on an external sound<br />
warning such as a horn, or on a warning lamp.<br />
Alarm delay<br />
Depending on the type of control processes being run, threshold values can also be exceeded<br />
during standard operations. To prevent that during any such brief value overshoots an<br />
Alarm is given off, it is possible to set a threshold value excess delay time that must first<br />
go by before the alarm is set off.<br />
In other words, the alarm will go off only if the threshold value is either exceeded or falls<br />
short for a time that is longer than the delay time setting.<br />
NOTE!<br />
Threshold value monitoring is only active if the Controller is switched on, with<br />
the display showing it is in AUTO mode. If the controller is switched to MANUAL,<br />
the alarm alert is cancelled and the relay will switch OFF.<br />
Meter test Cl2<br />
Preset<br />
0s<br />
Preset = 0s<br />
Control Off<br />
Alarm relay<br />
Select ——<br />
NOTE!<br />
ency<br />
1 ——<br />
——<br />
——<br />
——<br />
0<br />
*100<br />
motor<br />
Rel.1<br />
Rel.2<br />
Rel.3<br />
Rel.3<br />
0s<br />
0.5s<br />
trol<br />
1 Rel.1<br />
Rel.2<br />
Rel.3<br />
Rel.3<br />
0.00mg<br />
6.9 Metering Control<br />
During controller settings it is possible – separately for each controller – to enter a time<br />
setting determining the maximum length of time allowed for metering operations at full<br />
capacity.<br />
If, after the above set time the set point or the set P gain values have not yet been reached<br />
and the activating variable is still only about 100%, the alarm goes off and the relay is<br />
switched off..<br />
This is to avoid, for example, that uncontrolled, dangerous substances are set free in the<br />
event that a metering hose is damaged.<br />
NOTE!<br />
If the metering control is up to standard, only the controller in question is deactivated.<br />
NOTE!<br />
Measurement<br />
digital<br />
Input 1<br />
Off<br />
Controller Unit Settings | Operating Manual <strong>TOPAX</strong> <strong>DE</strong> | 35
ase<br />
elay<br />
ller<br />
oller<br />
**<strong>TOPAX</strong> <strong>DE</strong> 2<br />
Pulse-Frequency<br />
Reduce SP1 ——<br />
SP2 cut ——<br />
Hi Alarm ——<br />
Lo Alarm ——<br />
Impulses/h 0<br />
setting *100<br />
s<br />
s 1<br />
s 2<br />
s 3<br />
ata<br />
tion 1<br />
pH<br />
tion 2<br />
pH<br />
de<br />
r<br />
pH<br />
uage<br />
ss<br />
NOTE!<br />
Output 1<br />
NOTE! Output of Cl2<br />
Boost servomotor<br />
If 0 seconds are set for the metering time, metering<br />
Motor<br />
control<br />
clsdon the<br />
Rel.1<br />
output 0-20mA<br />
Motor open Rel.2<br />
selected<br />
controller is deactivated.<br />
Hi Alarm Rel.3<br />
Start<br />
End<br />
0.00mg<br />
1.00mg<br />
6.10 Disturbance variable (<strong>DE</strong> 3 and <strong>DE</strong> 6 only)<br />
flow input<br />
flow input<br />
Start<br />
Start<br />
End<br />
100%<br />
OFF<br />
0-20 mA<br />
0.0%<br />
100%<br />
Unit number<br />
115<br />
Software Status<br />
6.06<br />
Production date<br />
8.06<br />
*<strong>TOPAX</strong> <strong>DE</strong> 3 / <strong>DE</strong> 6<br />
PID-Control<br />
Lo Alarm Rel.3<br />
Run time 0s<br />
P-min 0.5s<br />
on/off - Control<br />
Reduce SP1 Rel.1<br />
SP2 boost Rel.2<br />
Hi Alarm Rel.3<br />
Lo Alarm Rel.3<br />
Hyst. 0.00mg<br />
It is possible to integrate a disturbance variable through a sensor (0/4 – 20mA). The sensor’s<br />
limit values are adjustable via the “start” and “end”. The disturbance<br />
Unit data<br />
Measurement<br />
Measurement<br />
variable affects<br />
the control circuit of Cl input test<br />
digital<br />
2<br />
(<strong>TOPAX</strong> <strong>DE</strong> 3) and/or ClO 2<br />
(<strong>TOPAX</strong> <strong>DE</strong> 6).<br />
Input 1 52mV<br />
Input 2 -12mV<br />
Input 3 736mV<br />
Input 4 27°C<br />
Input 1<br />
Off<br />
0<br />
ons<br />
nputs<br />
ts<br />
utputs<br />
mory<br />
Measurement<br />
analogue<br />
Test functions On<br />
Output 1<br />
Output 2<br />
Output 3<br />
4.00mA<br />
6.20mA<br />
7.05mA<br />
Measurement<br />
digital<br />
Interface<br />
>>>>>>
7. Alarm<br />
Alongside the metering control function, the device is also provided with a set of further<br />
alarm functions.<br />
In the event that an Alarm does go off, the relay that is configured accordingly is cut off<br />
instantaneously and a text message is displayed, specifying the reason for the alarm.<br />
If an alarm event will not allow for control processes, as soon as the alarm is tripped off<br />
the controller is deactivated. It is only enabled when the device turns off the alarm, which<br />
occurs automatically provided that the reason causing the alarm is removed.<br />
Sensor-Check Calibration<br />
If a sensor does not produce satisfactory data upon calibration, an error message is<br />
displayed, until a new calibration process produces satisfactory data. In this case the<br />
controller is not blocked – in order not to stop the system, the controller can continue<br />
operations either with a replacement sensor, or a cleaned or regenerated sensor, until<br />
replacement is available.<br />
Sensor monitoring during measurement<br />
Also during the regular continuous measuring mode, all connected sensors are monitored.<br />
If a measuring process receives a meaningless signal, e.g. upon cable failure, the alarm is<br />
tripped off and the relative controller unit is deactivated. Both the alarm and the controller<br />
stop mode remain active until meaningful signals for the measuring process in question<br />
are not resumed.<br />
Water deficiency<br />
If a water deficiency sensor is hooked up to the digital input, an alarm is tripped off as<br />
soon as the gauge switches. The alarm is reset as soon as water is available again. The<br />
controller is stopped for the overall duration of this alarm condition.<br />
Metering monitoring<br />
If a controller goes on metering at 100% for longer than the appropriate time set accordingly<br />
in the controller settings, an alarm is tripped off and the controller in question is<br />
deactivated for the overall duration of the alarm condition.<br />
WARNING!<br />
The metering monitoring permanence only responds to 100% metering. If for<br />
example you have a chlorine control set point amounting to 0.3 mg/l and a set<br />
P gain amounting to 0.5 mg/l, the required 100% is not reached, even if for<br />
example it may occur that there is no longer any chlorine content in the water<br />
due to metering hose failure or damage! Therefore, kindly check prior to starting<br />
up the controller whether your settings will allow/are suitable to a metering<br />
monitoring process!<br />
WARNING!<br />
Alarm | Operating Manual <strong>TOPAX</strong> <strong>DE</strong> | 37
ALARM event Only active in AUTO mode Automatic controller STOP<br />
Cl 2<br />
rise slope error no no<br />
pH rise slope error no no<br />
pH zero point error no no<br />
Input 1 (Cl 2<br />
) error no yes<br />
Input 2 (pH) error no yes<br />
Input 3 (ORP) error no no<br />
Input 4 (T) error no yes<br />
Threshold value yes no<br />
Metering monitoring yes yes<br />
Water deficiency no yes<br />
38 | Operating Manual <strong>TOPAX</strong> <strong>DE</strong> | Alarm
7.1 Alarm messages<br />
Error message Event Measures<br />
Cl 2<br />
/ pH rise slope<br />
error<br />
pH zero point error<br />
Input 1 (Cl 2<br />
) error<br />
Input 2 (pH) error<br />
Input 3 (ORP) error<br />
Input 4 (T) error<br />
The rise slope recorded on<br />
calibration was less than<br />
3mV or more than 100mV<br />
for chlorine and less than<br />
50mV/pH or more than<br />
65mV/pH for pH (at 25°C)<br />
The zero point error recorded<br />
on calibration was<br />
larger than +/- 59mV.<br />
The input on display is not<br />
receiving any signals.<br />
Check the temperature, the flow rate, the<br />
pH value and the connection and calibrate<br />
them all over again. If the rise slope error<br />
still persists, the electrodes either need to<br />
be regenerated, cleaned or replaced.<br />
Check to see whether the internal buffer<br />
setting coincides with that indicated on the<br />
electrode, then calibrate again.<br />
If the zero point error still persists, try<br />
regenerating the electrodes (replacement of<br />
the KCl solution in the liquid filled reference<br />
electrodes and/or storage of the electrodes<br />
in a 3-molar KCI solution)<br />
This error message indicates that there is<br />
a component failure. Apart from the sensor,<br />
it could also involve a cable or a defected<br />
connection.<br />
Input 4 (T) error could also come on display,<br />
when automatic temperature compensation<br />
is selected although no dedicated temperature<br />
sensor is connected.<br />
Cl 2<br />
/ pH alarm values Cl2 / pH alarm values Test the metering and if required, set the<br />
control parameters again.<br />
Cl 2<br />
/ pH metering<br />
monitoring<br />
External controller<br />
stop<br />
The Cl 2<br />
and/or the pH<br />
controller is metering at<br />
100% i.e. for longer than<br />
the metering monitoring<br />
setting.<br />
The digital input has been<br />
cut off.<br />
Test the metering, particularly the metering<br />
lead and the injecting position.<br />
CAUTION! Damaged metering<br />
leads may disperse dangerous<br />
chemicals!<br />
Open the input as soon as you want to<br />
proceed with the control process.<br />
If a water deficiency sensor is installed<br />
in your system, it will display an error<br />
message, informing that no test water is<br />
available.<br />
CAUTION!<br />
Alarm | Operating Manual <strong>TOPAX</strong> <strong>DE</strong> | 39
alibration<br />
ompensation<br />
ontroller<br />
anual mode<br />
ting ate an time<br />
rchive se<br />
efault lay setting<br />
ller<br />
oller<br />
e<br />
alues 1<br />
**<br />
int<br />
2<br />
<strong>TOPAX</strong><br />
values<br />
3 <strong>DE</strong> 2<br />
value<br />
ol<br />
ata 0.30mg/l<br />
etion 0.20mg/l 1<br />
pH<br />
tion 2<br />
pH<br />
de<br />
rm pHvalues<br />
uage .00mg/l<br />
.00mg/l<br />
0s<br />
ta s<br />
ta p<br />
ta.<br />
data<br />
0<br />
nd<br />
ns<br />
Cl2<br />
puts<br />
ts<br />
utputs<br />
h<br />
ory<br />
/l tend Cl2<br />
***<br />
<strong>TOPAX</strong><br />
<strong>DE</strong> 4<br />
art 0.00mg/l<br />
d 1.00mg/l<br />
ook***<br />
Date<br />
10.08.06<br />
lutFailure<br />
D****<br />
NOTE!<br />
NOTE!<br />
with logic Preset = 0s<br />
Delay OFF<br />
PI-Control<br />
Pulse-Frequency<br />
Reduce SP1 ——<br />
8. Data readout<br />
SP2 cut<br />
Hi Alarm<br />
Lo Alarm<br />
——<br />
——<br />
——<br />
Impulses/h 0<br />
8.1 Outputs<br />
setting *100<br />
**<strong>TOPAX</strong> <strong>DE</strong> 2<br />
Controller<br />
Contr. release Meter test Cl2<br />
Analogue output<br />
flow input* Output 1<br />
PID-Control Preset 0s<br />
pH calib. Output data of Cl2<br />
Input active Boost servomotor<br />
Language<br />
with logic Motor clsd Preset Rel.1 = 0s<br />
Bus address output 0-20mA<br />
Motor open Delay Rel.2 OFF<br />
Test functions<br />
Hi Alarm Rel.3<br />
Start 0.00mg<br />
Lo Alarm Rel.3<br />
Run time 0s<br />
End 1.00mg<br />
P-min 0.5s<br />
Default setting<br />
Contr. release<br />
Panel Start-up mounted Delay devices are provided with two outputs whereas on/off - wall Control mounted devices are<br />
flow Cl2 Controller input<br />
provided Meter test with three 100% outputs, that can be freely allocated.<br />
Reduce SP1 Rel.1<br />
flow input OFF<br />
SP2 boost Rel.2<br />
Select pH** the Controller “Analogue Outputs” menu in the default settings Hi Alarm then select the Rel.3 output that<br />
Meter test<br />
needs Start to be configured. 0-20 mA<br />
**<strong>TOPAX</strong> <strong>DE</strong><br />
Lo<br />
2<br />
Alarm Rel.3<br />
Start 0.0%<br />
Hyst. 0.00mg<br />
In End mA the outputs second row, 100% it is possible *<strong>TOPAX</strong> to allocate <strong>DE</strong> 3 a /<br />
Output<br />
<strong>DE</strong> measurement 6<br />
1to the output. Use the “right<br />
Output of Cl2<br />
arrow” mA outputs key to toggle 1 from one measurement to the next.<br />
output 0-20mA<br />
mA outputs 2<br />
NOTE! Unit data<br />
Start Measurement 0.00mg Measurement<br />
mA outputs 3<br />
input test<br />
digital<br />
If the output has Unit already number been configured<br />
Endduring the<br />
1.00mg<br />
controller setting process<br />
115<br />
Input 1 52mV Input 1 Off<br />
as the controller Software output, Status you will find that Input “R12<br />
(R2) Output” -12mVis displayed here.<br />
6.06<br />
Input 3 736mV<br />
This pH allocation Calib. data Production can only date be changed via flow Input the input controller 4 27°C setting menus.<br />
Buffer solution 1 8.06<br />
100%<br />
The “Beginning”<br />
7.00pH<br />
and “End” parameters allow you to determine, which portion of the<br />
Buffer solution 2<br />
flow input OFF<br />
measuring 4.00pH range is to be recorded via the output.<br />
Int. electrode<br />
Start 0-20 mA<br />
float buffer<br />
Start 0.0%<br />
7.00pH<br />
End 100%<br />
*<strong>TOPAX</strong> <strong>DE</strong> 3 / <strong>DE</strong> 6<br />
Select language Measurement<br />
german<br />
english<br />
analogue<br />
Test functions On<br />
french<br />
spanish Output 1 4.00mA<br />
Output 2 6.20mA<br />
Output 3 7.05mA<br />
Hi Alarm —— Preset = 0s<br />
Lo Alarm —— Control Off<br />
P-Pausa 10s Alarm relay<br />
P-min 0.5s Select ——<br />
NOTE!<br />
If one of the outputs has already been configured as controller output, the<br />
distribution will be 0-100%. The entry of “beginning” and “end” parameters is<br />
no longer required.<br />
8.2 Data readout via the RS485 Interface<br />
Bus address<br />
the RS485<br />
Interface<br />
(Option)<br />
0<br />
Test functions<br />
Unit data<br />
Analogue inputs<br />
Digital inputs<br />
Analogue outputs<br />
Interface<br />
Delete memory<br />
PI-Con<br />
Pulse-F<br />
Reduce<br />
SP2 cu<br />
Hi Alar<br />
Lo Alar<br />
Impulse<br />
setting<br />
PID-Co<br />
Boost s<br />
Motor c<br />
Motor o<br />
Hi Alarm<br />
Lo Alar<br />
Run tim<br />
P-min<br />
on/off -<br />
Reduce<br />
SP2 bo<br />
Hi Alar<br />
Lo Alar<br />
Hyst.<br />
Measurement<br />
Delete memory<br />
digital<br />
Interface<br />
Unit data !!! Warning Measurement<br />
!!!<br />
Stored data input is test<br />
>>>>>>>>
8.3 Assembly of a Data Network (TopView)<br />
With the (optional) RS 485 computer interface it is possible to transfer data to a PC. Furthermore<br />
multiple <strong>TOPAX</strong> <strong>DE</strong>s can be connected to a network. Each <strong>TOPAX</strong> <strong>DE</strong> (with RS<br />
485) has to be allocated an address for this purpose.<br />
CAUTION!<br />
The network address 10 is not permitted.<br />
The maximum length of data transfer amounts to 1000 m. Up to 14 <strong>TOPAX</strong> <strong>DE</strong>s can be<br />
connected with a PC to a network. The data line has to be attached directly to the <strong>TOPAX</strong><br />
<strong>DE</strong>’s RS 485 terminal:<br />
CAUTION!<br />
Casing Connection Allocation<br />
wall assembly terminal 18 + A<br />
17 - B<br />
mounting sub-D 3 + A<br />
8 - B<br />
CAUTION!<br />
Separate connection sockets or junction boxes within the data line have to be<br />
avoided. One must use a cable type “KAT.5, 2X2XAWG24/1 (Lapp cable) or better.<br />
The manufacturer is not liable for this.<br />
Due to electromagnetic compatibility the cable’s screen has to be connected on both sides<br />
before the device connections large surface area and conduct well with the protective<br />
earth. For this it has to be confirmed that no potential current loss can escape over the<br />
screen.<br />
Today’s computers are equipped with a serial computer interface RS 232 (9-pin Sub-D<br />
connector) and/or with a USB-connector. In this case an additional connector converter<br />
has to be inserted in the PC (RS 485 to RS 232 or RS 485 to USB).<br />
CAUTION!<br />
120 ohm cut-off resistances<br />
At both ends of the network the data line has to be cut off with a resistance of 120ohm.<br />
It is possible to put the switch for the resistance on the last <strong>TOPAX</strong> <strong>DE</strong> in the network<br />
through the composition of jumpers (see following illustration).<br />
If the connector converters with order no. 44300101 (RS 232 to RS 485) or no. 44300102<br />
(USB to RS 485) are attached to the PC, the cut-off resistance of the PC’s sides is already<br />
activated.<br />
Pull-up/pull-down resistance<br />
The data line has to be set at a fixed potential. For this purpose plug-in jumpers have to<br />
be inserted into the last <strong>TOPAX</strong> <strong>DE</strong> (Pull-up/pull-down resistance). A cut-off of the cable<br />
with Pull-up/Pull-down resistances is fundamentally necessary for the RS485-connections,<br />
in the times, in which the data sender is active, in order to exact the quiescent level on the<br />
bus system. Without this measure it is not possible to transfer data.<br />
Data readout | Operating Manual <strong>TOPAX</strong> <strong>DE</strong> | 41
To activate all resistances jumpers have to be attached to the <strong>TOPAX</strong> <strong>DE</strong> (see following<br />
illustration). For this purpose the device front has to be unscrewed and flipped up.<br />
CAUTION!<br />
WARNING!<br />
CAUTION!<br />
You must only insert the 120 ohm Pull-up/Pull-down resistances into one <strong>TOPAX</strong><br />
<strong>DE</strong>, the last one in the network. (No resistances are inserted in its delivered<br />
state).<br />
WARNING!<br />
Before opening switch the device without fail to zero-potential!!<br />
120 ohm Pull-up Pull-down resistance note jumper on the bridges<br />
not installed (delivered state) 2, 4 and 6 (right and left)<br />
installed (on the last device) 2, 3 and 5 (right and left)<br />
View of the display board for the jumper field for the Pull-up/Pull-down resistances (shown<br />
in the delivered state):<br />
Connector<br />
6<br />
5<br />
4<br />
3<br />
2<br />
1<br />
left<br />
right<br />
6<br />
5<br />
4<br />
3<br />
2<br />
1<br />
42 | Operating Manual <strong>TOPAX</strong> <strong>DE</strong> | Data readout
CAUTION!<br />
With a defect in the <strong>TOPAX</strong> <strong>DE</strong>, in which the Pull-up/Pull-down resistances are<br />
installed, the total network does not function and the transfer of data is no<br />
longer guaranteed. In this case the resistances have to be installed in another<br />
<strong>TOPAX</strong> <strong>DE</strong>.<br />
CAUTION!<br />
TopView<br />
To visualize the data read out in the network we offer the application TopView 2.0 in two<br />
versions: Standard and Mini. The programme “TopView 2.0 Standard” has the order no.<br />
78349. The Software “TopView 2.0 Mini” is free to download from the manufacturer’s<br />
website.<br />
Data readout | Operating Manual <strong>TOPAX</strong> <strong>DE</strong> | 43
9. <strong>Operation</strong> and <strong>Maintenance</strong><br />
Device <strong>Maintenance</strong>:<br />
Device operation is maintenance free. No check settings are required during operation.<br />
Should you however require a verification of your device at any time, you can forward it<br />
to us. It shall be returned to you within two weeks together with a protocol test report.<br />
Alternatively, one of our Service Technicians can carry out the examination directly at your<br />
works.<br />
Safety protection replacement<br />
Wall mounted devices are equipped with an internal safety protection that in case of<br />
necessity, may have to be replaced. A spare safety protection is accordingly provided on<br />
issue with the device. You will find it is stored in the terminal covering. Data concerning the<br />
safety protection is provided under the “Technical Specification” section herein.<br />
For safety protection replacement, it is necessary to unscrew and remove the front end of<br />
the device by flipping it upwards. The safety protection is located about half way up on the<br />
right edge of the board. It is locked on with a bayonet catch. Rotate the catch leftwards,<br />
until the safety protection slips out. Exchange it with the spare safety protection and fasten<br />
it in place by turning the catch rightwards. Replace the front end of the device back on<br />
again and screw it on accurately and firmly.<br />
WARNING!<br />
Prior to opening it, make sure that the device is totally powered down.<br />
WARNING!<br />
CAUTION!<br />
CAUTION!<br />
During these service and maintenance operations, beware with the connection<br />
cable located along the front end of the device!<br />
Cleaning<br />
Please ensure that during cleaning operations, the face end of the device does not come<br />
into contact with solvents such as methanol, alcohol or methylated spirits. Take care that<br />
no water permeates into the device. We recommend cleaning the device by simply wiping<br />
it with a clean, damp cloth.<br />
Measurement maintenance<br />
It is necessary to clean off the sediment deposits and fatty substances from the electrode<br />
metal surfaces at regular intervals. The pH electrodes and the reference electrodes are<br />
subject to deterioration over time, so that the relative features also change over time. Said<br />
variations must therefore be ascertained and checked regularly.<br />
NOTE!<br />
NOTE!<br />
At every calibration process, the device tests the applicability of the sensors and<br />
specifies when a sensor needs to be changed. In this connection, please refer to<br />
the “Alarm Message” section herein.<br />
44 | Operating Manual <strong>TOPAX</strong> <strong>DE</strong> | <strong>Operation</strong> and <strong>Maintenance</strong>
mA A outputs3<br />
3 3<br />
english<br />
french<br />
spanish<br />
End End End<br />
10. (Option) Test functions<br />
1.00mg<br />
Unit data<br />
Run Run Run time time time Measurement 0s 0s 0s<br />
P-min input 0.5s test 0.5s 0.5s<br />
Unit number<br />
115<br />
Input 1 52mV<br />
h<br />
Software Status Input 2 -12mV<br />
H pH Calib. data data data<br />
flow flow input<br />
- - flow input input<br />
on/off - Control<br />
6.06<br />
Input 3 736mV<br />
Buffer solution 1 1 1<br />
100% Production date<br />
Input 4 27°C<br />
Cl2<br />
7.00pH<br />
Reduce SP1 SP1 SP1 Rel.1<br />
Rel.1<br />
Bus address<br />
8.06<br />
Buffer solution 2 2 2<br />
SP2 Rel.2<br />
the RS485 flow flow input OFF<br />
SP2 flow input input OFF OFF<br />
SP2 boost Rel.2<br />
4.00pH<br />
Hi Hi Hi Alarm Rel.3<br />
Rel.3<br />
Interface<br />
. nt. 0.00mg/l<br />
Int. electrode<br />
Start Start Start 0-20 0-20 0-20 mA mA mA<br />
Lo Lo Lo Alarm Rel.3<br />
Rel.3<br />
float buffer<br />
Hyst.<br />
0<br />
Start Start Start 0.0%<br />
0.0%<br />
Hyst.<br />
0.00mg<br />
1.00mg/l<br />
7.00pH<br />
End End End<br />
100%<br />
*<strong>TOPAX</strong> <strong>DE</strong> <strong>DE</strong> 3 <strong>DE</strong> / 3 <strong>DE</strong> 3 / <strong>DE</strong> / 6<strong>DE</strong> 6 6<br />
Measurement<br />
digital<br />
Select language<br />
german<br />
Measurement<br />
Measurement<br />
Delete memory<br />
english<br />
analogue<br />
digital<br />
Test functions<br />
Unit Unit data<br />
Test functions On<br />
Unit data data<br />
Measurement<br />
Measurement<br />
french<br />
Contr. release<br />
Meter test test Cl2 Cl2 Cl2<br />
P-Control<br />
input input test<br />
!!! Warning !!!<br />
Interface<br />
input test<br />
test Meter test test Cl2 Cl2 Cl2<br />
digital<br />
spanish Unit data<br />
Unit Unit Stored data is<br />
Unit number<br />
Pulse length<br />
Output 1 4.00mA >>>>>>>>>>
11. Index<br />
A<br />
Abmessungen..........................................................................................................10<br />
Alarmverzögerung....................................................................................................33<br />
Alarmwerte..............................................................................................................32<br />
Amperometrische Messzelle......................................................................................13<br />
Analogausgänge.......................................................................................................36<br />
Analogeingänge........................................................................................................41<br />
Anschluss..................................................................................................................9<br />
Anschlusspläne<br />
Einbaugehäuse..................................................................................................13<br />
Wandaufbaugehäuse..........................................................................................15<br />
Archiv......................................................................................................................24<br />
C<br />
Chlordioxidmessung.................................................................................................23<br />
Chlormessung..........................................................................................................23<br />
Code........................................................................................................................22<br />
D<br />
D-Anteil...................................................................................................................30<br />
Datum und Uhrzeit....................................................................................................22<br />
E<br />
Einbau-Ort.................................................................................................................8<br />
Einschaltverzögerung................................................................................................31<br />
Einstellen des Messgerätes.......................................................................................23<br />
Einstellen des Reglers...............................................................................................27<br />
Einstellen von Parametern.........................................................................................18<br />
Externer Reglerstop..................................................................................................31<br />
G<br />
Gerätedaten.............................................................................................................41<br />
Grenzwerte..............................................................................................................32<br />
46 | Operating Manual <strong>TOPAX</strong> <strong>DE</strong> | Index
H<br />
Hysterese.................................................................................................................30<br />
I<br />
I-Anteil.....................................................................................................................30<br />
Impulsfrequenz.........................................................................................................30<br />
K<br />
Kalibrieren...............................................................................................................24<br />
Kalibrierdaten....................................................................................................24<br />
Klemmenabdeckung.................................................................................................12<br />
L<br />
Laufzeit....................................................................................................................30<br />
Logbuch..................................................................................................................24<br />
M<br />
Messbereiche.............................................................................................................7<br />
Messwertanzeige......................................................................................................17<br />
Mindestimpuls..........................................................................................................30<br />
Montage Einbaugehäuse...........................................................................................11<br />
Montage Wandaufbaugehäuse..................................................................................12<br />
Motorlaufzeit............................................................................................................30<br />
P<br />
P-Bereich.................................................................................................................30<br />
pH-Messung............................................................................................................23<br />
Potenziostatische Messzelle......................................................................................13<br />
Puls-Pause-Zeit........................................................................................................30<br />
Pulsfrequenz............................................................................................................30<br />
R<br />
Redoxmessung.........................................................................................................23<br />
Regler<br />
EIN/AUS-Regler..................................................................................................27<br />
Index | Operating Manual <strong>TOPAX</strong> <strong>DE</strong> | 47
Impuls-Frequenz-Regler.....................................................................................29<br />
Konfiguration ändern..........................................................................................28<br />
Konfiguration bei Auslieferung.............................................................................28<br />
P-Regler............................................................................................................27<br />
PI-Regler...........................................................................................................28<br />
PID-Regler.........................................................................................................28<br />
Puls-Pause-Regler.............................................................................................29<br />
Regler-Variante.........................................................................................................28<br />
Relais........................................................................................................................7<br />
Handbetrieb der Relais.......................................................................................32<br />
Kontaktbelastung.................................................................................................8<br />
RC-Schutzschaltung.............................................................................................9<br />
RS485.....................................................................................................................36<br />
S<br />
Schnittstelle..........................................................................................................7,36<br />
Schutzklasse..............................................................................................................8<br />
Sensorüberwachung<br />
Kalibrierung.......................................................................................................34<br />
Messung...........................................................................................................34<br />
Sollwerte..................................................................................................................30<br />
Sprache...................................................................................................................22<br />
Steilheit...................................................................................................................24<br />
Stellmotor................................................................................................................29<br />
Störgröße.................................................................................................................33<br />
Stromausgänge........................................................................................................36<br />
T<br />
Tasten......................................................................................................................17<br />
Temperaturkompensation..........................................................................................26<br />
Automatische Kompensation...............................................................................26<br />
Manuelle Kompensation.....................................................................................26<br />
Temperatursensor..............................................................................................26<br />
TopView...................................................................................................................39<br />
U<br />
Uhr..........................................................................................................................22<br />
48 | Operating Manual <strong>TOPAX</strong> <strong>DE</strong> | Index
12. Declaration of conformity<br />
This declaration is no assurance of characteristics in the sense of the product liability law.<br />
The safety notes in the operation & maintenance instructions must be observed.<br />
page 1 of 2<br />
EC - Conformity Declaration<br />
We,<br />
Lutz-Jesco GmbH<br />
Am Bostelberge 19<br />
30900 Wedemark<br />
Germany<br />
hereby certify,<br />
that the product described in the following complies with the relevant<br />
fundamental safety and sanitary requirements and the EC regulations<br />
mentioned below due to the concept and design of the version sold by us.<br />
If the product is modified without our consent, this declaration loses its<br />
validity.<br />
Product description:<br />
Model designation:<br />
Relevant EC regulations:<br />
Measuring and control unit<br />
<strong>TOPAX</strong> <strong>DE</strong><br />
EC Low-Voltage Directive (73/23/EEC)<br />
EC Electromagnetic Compatibility Directive<br />
(89/336/EEC) amended by 93/31/EEC<br />
Applied harmonized EN 50081 Parts 1 and 2,<br />
standards, especially: EN 50082 Parts 1 and 2,<br />
Electromagnetic Compatibility,<br />
Emission of Noise and Noise Immunity<br />
Date,<br />
Signature of Manufacturer:<br />
Information on the signer:<br />
Feb. 01, 2007 _______________________<br />
Mr. Dipl.-Ing. Klaus Albert<br />
Head of Technical Department<br />
The appendices are part of this declaration.<br />
This declaration certifies the conformity with the a.m. regulations. However, it is no assurance of<br />
characteristics.<br />
The safety notes in the operating instructions must be observed.<br />
Declaration of conformity | Operating Manual <strong>TOPAX</strong> <strong>DE</strong> | 49
page 2 of 2<br />
Appendix to EC - Declaration of Conformity<br />
EMC Directive 89/336/EEC<br />
Product : <strong>TOPAX</strong> <strong>DE</strong><br />
For the evaluation of the product concerning electromagnetic compatibility,<br />
the following standards were used:<br />
For Noise Emission: EN 50 081, Part 1 and Part 2, 1993<br />
(in the home, in offices and factories, in small businesses as well as<br />
industries)<br />
Connection Basic standard<br />
Housing: EN 55022 Class B Interference characteristics, limit<br />
values and measuring methods<br />
AC mains supply: EN 6055-2 Reactions in supply networks<br />
EN 6055-3EN 55022EN 55014<br />
For Noise Immunity: EN 50082 Part 1 and Part 2, 1995<br />
Ambient phenomenon Connection Basic standard Evaluation criteria<br />
Electromagnetic HF-field Housing ENV 50140 of 1993 A<br />
Discharge of static electricity Housing EN 61000-4-2 B<br />
Input and output AC EN 60555-3 B<br />
Quick transients<br />
unsymmetrical<br />
Signal and control lines EN 610004-4-4<br />
capacitive measuring<br />
Für die Störaussendung:<br />
(Wohnbereich, Geschäfts- und Gewerbebereich , Kleinbetriebe sowie<br />
Industriebereich)<br />
Basisnorm: EN 55011 (08.03.) EN 55022, (09.03)<br />
Störspannung auf Netzleitungen DIN EN 61000-6-3<br />
(06.05)<br />
Störstrahlung DIN EN 61000-6-3<br />
(06.05)<br />
Für die Störfestigkeit:<br />
(Wohnbereich, Geschäfts- und Gewerbebereich, Kleinbetriebe sowie<br />
Industriebereich)<br />
13. Revision<br />
This Operating Manual is valid for the following devices:<br />
Gerät und Typ Revisions-Stand Software-Version<br />
<strong>TOPAX</strong> <strong>DE</strong> 02/2007 1.0<br />
It contains all the technical information required for installation, start-up and maintenance.<br />
Should you have any questions or require further informations regarding these operating<br />
instructions, please contact the manufacturer or its official national representative.<br />
50 | Operating Manual <strong>TOPAX</strong> <strong>DE</strong> | Revision
14. Warranty<br />
Please copy and send with the device.<br />
If the device breaks down within the period of warranty, please return it in a cleaned condition with the complete<br />
warranty application, filled out.<br />
Sender<br />
Company:............................................................... Phone:...................................Date:.................................<br />
Address:........................................................................................................................................................<br />
Contact person:..............................................................................................................................................<br />
Lutz-Jesco order-no.:............................................... Delivery date:..................................................................<br />
Device type:............................................................ Serial no.:........................................................................<br />
Nominal capacitynominal pressure:..................................................................................................................<br />
Description of fault:.........................................................................................................................................<br />
....................................................................................................................................................................<br />
....................................................................................................................................................................<br />
....................................................................................................................................................................<br />
....................................................................................................................................................................<br />
Type of fault:<br />
1. Mechanical fault.................................................. 2. Electrical fault..............................................................<br />
- premature wear.................................................... - loose connections such as plug connector or cable.........<br />
- wear parts............................................................ - operating elements (e.g.. switches/buttons)....................<br />
- breakage/other damage........................................ - electronics - corrosion...................................................<br />
- damage in transit<br />
Service conditions of the dosing pump<br />
Point of use / system designation:...................................................................................................................<br />
Accessories used (Suction line, PDS, etc.):.......................................................................................................<br />
....................................................................................................................................................................<br />
....................................................................................................................................................................<br />
Commissioning (date):...........................................................................................<br />
Duty peroid (approx. operating hours):.....................................................................<br />
Please describe the specifics of the installation and provide a simple diagram with details of the material, diameter,<br />
length and levels.<br />
Warranty | Operating Manual <strong>TOPAX</strong> <strong>DE</strong> | 51
Lutz-Jesco GmbH<br />
Am Bostelberge 19<br />
30900 Wedemark<br />
Germany<br />
Phone: +49 5130 5802-0<br />
Fax: +49 5130 5802-68<br />
E-Mail: info@lutz-jesco.de<br />
Internet: www.lutz-jesco.de<br />
24h-Hotline: +49 5130 580 280<br />
Austria<br />
Great Britain<br />
Netherlands<br />
Hungary<br />
Lutz-Jesco GmbH<br />
Lutz-Jesco (GB) Ltd.<br />
Lutz-Jesco Nederland B.V.<br />
Lutz-Jesco Üzletág<br />
Aredstraße 29/212<br />
2544 Leobersdorf<br />
Austria<br />
Gateway Estate<br />
West Midlands Freeport<br />
Birmingham B26 3QD<br />
Great Britain<br />
Nijverheidstraat 14 C<br />
2984 AH Ridderkerk<br />
Netherlands<br />
Vasvári P. u. 9.<br />
9024 Györ<br />
Hungary<br />
Phone: +43 2256 62180<br />
Fax: +43 2256 6218062<br />
E-Mail: info@lutz-jesco.at<br />
Internet: www.lutz-jesco.at<br />
Phone: +44 121 782 2662<br />
Fax: +44 121 782 2680<br />
E-Mail: info-gb@jesco.de<br />
Internet: www.lutz-jesco.de<br />
Phone: +31 180 499460<br />
Fax: +31 180 497516<br />
E-Mail: info@lutz-jesco.nl<br />
Internet: www.lutz-jesco.nl<br />
Phone: +36 96 523046<br />
Fax: +36 96 523047<br />
E-Mail: info-hu@jesco.de<br />
Internet: www.lutz-jesco.hu<br />
USA<br />
East Asia<br />
Middle East<br />
Lutz-JESCO America Corp.<br />
55 Bermar Park<br />
Rochester, NY 14624<br />
USA<br />
Lutz-Jesco<br />
East Asia Sdn Bhd<br />
Taman Perindustrian Jaya<br />
47200 Petaling Jaya<br />
Malaysia<br />
Lutz-Jesco Middle East FZE<br />
P.O. Box 9614<br />
SAIF-Free Zone Center<br />
Sharjah<br />
UAE<br />
Phone: +1 585 426-0990<br />
Fax: +1 585 426-4025<br />
E-Mail: mail@jescoamerica.com<br />
Internet: www.jescoamerica.com<br />
Phone: +603 78454812<br />
Fax: +603 78458413<br />
E-Mail: info@lutz-jescoasia.com<br />
Internet: www.lutz-jescoasia.com<br />
Phone: +971 6 5572205<br />
Fax: +971 6 5572230<br />
E-Mail: info-me@jesco.de<br />
Internet: www.jescome.com<br />
Best.-Nr. BA-40500<strong>DE</strong>-02-V02<br />
Subject to technical changes<br />
© Lutz-Jesco GmbH 05.2007<br />
Printed in Germany