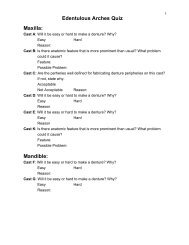
Manuals_files/CD Manual 12.pdf - Removable Prosthodontics
Manuals_files/CD Manual 12.pdf - Removable Prosthodontics
Manuals_files/CD Manual 12.pdf - Removable Prosthodontics

You also want an ePaper? Increase the reach of your titles
YUMPU automatically turns print PDFs into web optimized ePapers that Google loves.
Custom Trays - 17<br />
Custom Trays<br />
Custom trays are individualized impression trays made from a diagnostic cast that are<br />
used for making final impressions. They are most commonly made of a rigid acrylic resin<br />
(e.g. SR-Ivolin, Hygon, Formatray, Triad). Trays are made short of the periphery of the<br />
diagnostic casts, since they are usually overextended, due to the viscosity of the irreversible<br />
hydrocolloid used to make the preliminary impression.<br />
Purpose of a custom tray<br />
1. Minimize impression material distortion (uniform thickness, rigid tray)<br />
2. Prevent tissue distortion (less viscous material, more accurately adapted tray)<br />
3. Reduce costs - less impression material (expensive) is used<br />
4. Allow for accuracy by molding the border, resulting in improved retention<br />
Procedure:<br />
1.Use a pencil to outline the depth of the vestibule (where the vertical portion of the ridge<br />
begins to turn toward the horizontal portion of the vestibule) and across the vibrating line.<br />
2.Draw a second line 3-4 mm short of the first around the vestibule, (at the posterior border).<br />
3.Provide adequate room for frenal attachments (narrow labial, and wide buccal).<br />
4.Block out all undercuts with baseplate wax to prevent the tray from locking onto the cast<br />
5.Lightly lubricate the cast (petroleum jelly, Alcote or material specific release agent).<br />
6.Adapt one thickness of base plate wax to the cast. Trim the wax 3 mm short of the second<br />
line in the vestibule and in a “butterfly” configuration at the vibrating line from hamular<br />
notch to hamular notch (do not place relief wax over the blockout wax). Wax provides<br />
room for the impression material, but more importantly minimizes the production of<br />
hydraulic pressures that could distort the mucosa. Where blockout is placed, these<br />
pressures cannot build up because the acrylic is already away from the tissue.<br />
7.Place a piece of unpolymerized light-curing acrylic resin (e.g. Triad, Tru-Tray) on the cast.<br />
Wear gloves to minimize exposure to material to prevent sensitivity reactions.<br />
8.Adapt the resin to the cast (palatal area first), trim excess using a scalpel blade. Push down<br />
through the resin, rather than pulling the blade along the periphery (This will minimize<br />
sticking and tearing of the resin, and result in a better periphery.