FinePix S1 Pro Manual - Sensor Cleaning
FinePix S1 Pro Manual - Sensor Cleaning
FinePix S1 Pro Manual - Sensor Cleaning

Create successful ePaper yourself
Turn your PDF publications into a flip-book with our unique Google optimized e-Paper software.
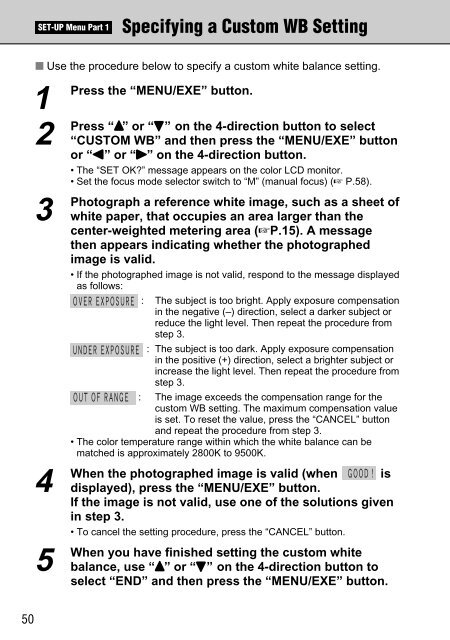
SET-UP Menu Part 1<br />
Specifying a Custom WB Setting<br />
■ Use the procedure below to specify a custom white balance setting.<br />
1<br />
Press the “MENU/EXE” button.<br />
2<br />
Press “a” or “b” on the 4-direction button to select<br />
“CUSTOM WB” and then press the “MENU/EXE” button<br />
or “d” or “c” on the 4-direction button.<br />
• The “SET OK?” message appears on the color LCD monitor.<br />
• Set the focus mode selector switch to “M” (manual focus) (☞ P.58).<br />
3<br />
Photograph a reference white image, such as a sheet of<br />
white paper, that occupies an area larger than the<br />
center-weighted metering area (☞P.15). A message<br />
then appears indicating whether the photographed<br />
image is valid.<br />
• If the photographed image is not valid, respond to the message displayed<br />
as follows:<br />
: The subject is too bright. Apply exposure compensation<br />
in the negative (–) direction, select a darker subject or<br />
reduce the light level. Then repeat the procedure from<br />
step 3.<br />
: The subject is too dark. Apply exposure compensation<br />
in the positive (+) direction, select a brighter subject or<br />
increase the light level. Then repeat the procedure from<br />
step 3.<br />
: The image exceeds the compensation range for the<br />
custom WB setting. The maximum compensation value<br />
is set. To reset the value, press the “CANCEL” button<br />
and repeat the procedure from step 3.<br />
• The color temperature range within which the white balance can be<br />
matched is approximately 2800K to 9500K.<br />
4<br />
When the photographed image is valid (when is<br />
displayed), press the “MENU/EXE” button.<br />
If the image is not valid, use one of the solutions given<br />
in step 3.<br />
• To cancel the setting procedure, press the “CANCEL” button.<br />
5<br />
When you have finished setting the custom white<br />
balance, use “a” or “b” on the 4-direction button to<br />
select “END” and then press the “MENU/EXE” button.<br />
50