user's guide â High Frequency Structure Simulator
user's guide â High Frequency Structure Simulator
user's guide â High Frequency Structure Simulator

You also want an ePaper? Increase the reach of your titles
YUMPU automatically turns print PDFs into web optimized ePapers that Google loves.
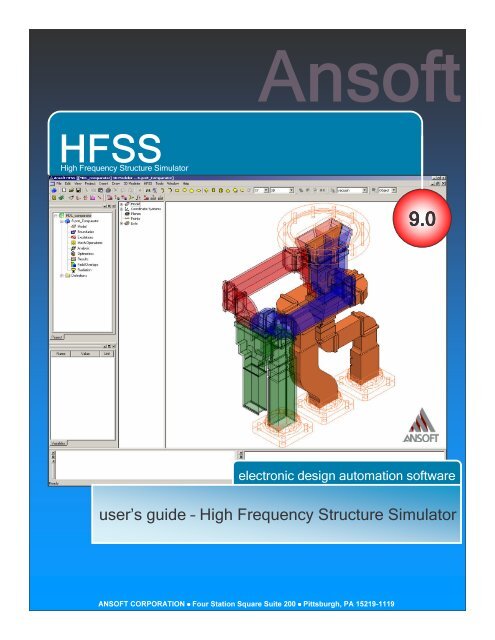
<strong>High</strong> <strong>Frequency</strong> <strong>Structure</strong> <strong>Simulator</strong><br />
9.0<br />
electronic design automation software<br />
user’s <strong>guide</strong> – <strong>High</strong> <strong>Frequency</strong> <strong>Structure</strong> <strong>Simulator</strong><br />
ANSOFT CORPORATION • Four Station Square Suite 200 • Pittsburgh, PA 15219-1119
This page is intentionally left blank.
The information contained in this document is subject to change without notice.<br />
Ansoft makes no warranty of any kind with regard to this material, including,<br />
but not limited to, the implied warranties of merchantability and fitness for a<br />
particular purpose. Ansoft shall not be liable for errors contained herein or for<br />
incidental or consequential damages in connection with the furnishing, performance,<br />
or use of this material.<br />
© 2003 Ansoft Corporation. All rights reserved.<br />
Ansoft Corporation<br />
Four Station Square<br />
Suite 200<br />
Pittsburgh, PA 15219<br />
USA<br />
Phone: 412-261-3200<br />
Fax: 412-471-9427<br />
HFSS and Optimetrics are registered trademarks or trademarks of Ansoft Corporation.<br />
All other trademarks are the property of their respective owners.<br />
New editions of this manual will incorporate all material updated since the previous<br />
edition. The manual printing date, which indicates the manual’s current<br />
edition, changes when a new edition is printed. Minor corrections and updates<br />
which are incorporated at reprint do not cause the date to change.<br />
Update packages may be issued between editions and contain additional and/or<br />
replacement pages to be merged into the manual by the user. Note that pages<br />
which are rearranged due to changes on a previous page are not considered to<br />
be revised.<br />
Edition: REV1.0<br />
Date: 08 August 2003<br />
Software Version: 9.0<br />
Ansoft <strong>High</strong> <strong>Frequency</strong> <strong>Structure</strong> <strong>Simulator</strong> v 9.0 User’s Guide 1
Ansoft HFSS Fundamentals<br />
What is HFSS v 9.0?<br />
HFSS is a high-performance full-wave electromagnetic(EM) field simulator for<br />
arbitrary 3D volumetric passive device modeling that takes advantage of the<br />
familiar Microsoft Windows graphical user interface. It integrates simulation,<br />
visualization, solid modeling, and automation in an easy-to-learn environment<br />
where solutions to your 3D EM problems are quickly and accurately obtained.<br />
Ansoft HFSS employs the Finite Element Method(FEM), adaptive meshing, and<br />
brilliant graphics to give you unparalleled performance and insight to all of your<br />
3D EM problems. Ansoft HFSS can be used to calculate parameters such as S-<br />
Parameters, Resonant <strong>Frequency</strong>, and Fields. Typical uses include:<br />
Package Modeling – BGA, QFP, Flip-Chip<br />
PCB Board Modeling – Power/Ground planes, Mesh Grid Grounds,<br />
Backplanes<br />
Silicon/GaAs - Spiral Inductors, Transformers<br />
EMC/EMI – Shield Enclosures, Coupling, Near- or Far-Field Radiation<br />
Antennas/Mobile Communications – Patches, Dipoles, Horns, Conformal<br />
Cell Phone Antennas, Quadrafilar Helix, Specific Absorption Rate(SAR),<br />
Infinite Arrays, Radar Cross Section(RCS), <strong>Frequency</strong> Selective<br />
Surfaces(FSS)<br />
Connectors – Coax, SFP/XFP, Backplane, Transitions<br />
Wave<strong>guide</strong> – Filters, Resonators, Transitions, Couplers<br />
Filters – Cavity Filters, Microstrip, Dielectric<br />
HFSS is an interactive simulation system whose basic mesh element is a<br />
tetrahedron. This allows you to solve any arbitrary 3D geometry, especially those<br />
with complex curves and shapes, in a fraction of the time it would take using<br />
other techniques.<br />
The name HFSS stands for <strong>High</strong> <strong>Frequency</strong> <strong>Structure</strong> <strong>Simulator</strong>. Ansoft<br />
pioneered the use of the Finite Element Method(FEM) for EM simulation by<br />
developing/implementing technologies such as tangential vector finite elements,<br />
adaptive meshing, and Adaptive Lanczos-Pade Sweep(ALPS). Today, HFSS<br />
continues to lead the industry with innovations such as Modes-to-Nodes and Full-<br />
Wave Spice.<br />
Ansoft HFSS has evolved over a period of years with input from many users and<br />
industries. In industry, Ansoft HFSS is the tool of choice for high-productivity<br />
research, development, and virtual prototyping.<br />
Ansoft <strong>High</strong> <strong>Frequency</strong> <strong>Structure</strong> <strong>Simulator</strong> v 9.0 User’s Guide 2
Contents<br />
Contents<br />
This document discusses some basic concepts and terminology used throughout<br />
the Ansoft HFSS application. It provides an overview of the following topics:<br />
0. Fundamentals<br />
Ansoft HFSS Desktop<br />
Opening a Design<br />
Setting Model Type<br />
1. Parametric Model Creation<br />
1.1 Boundary Conditions<br />
1.2 Excitations<br />
2. Analysis Setup<br />
3. Data Reporting<br />
4. Solve Loop<br />
4.1 Mesh Operations<br />
5. Examples – Antenna<br />
6. Examples – Microwave<br />
7. Examples – Signal Integrity<br />
8. Examples – EMC/EMI<br />
Ansoft <strong>High</strong> <strong>Frequency</strong> <strong>Structure</strong> <strong>Simulator</strong> v 9.0 User’s Guide 3
Installing the Ansoft HFSS v 9.0 Software<br />
System Requirements<br />
Microsoft Windows XP, Windows 2000, or Windows NT4.0. For up-to-date<br />
information, refer to the HFSS v.9.0 Release Notes.<br />
Pentium –based computer<br />
128MB RAM minimum<br />
8MB Video Card minimum<br />
Mouse or other pointing device<br />
CD-ROM drive<br />
NOTE: You should make backup copies of all HFSS projects created with a<br />
previous version of the software before opening them in HFSS v.9.0<br />
Installing the Ansoft HFSS v.9.0 Software<br />
For up-to-date information, refer to the HFSS v.9.0 Installation Guide<br />
Starting Ansoft HFSS<br />
1. Click the Microsoft Start button, select Programs, and select the Ansoft, HFSS 9<br />
program group. Click HFSS 9.<br />
9<br />
2. Or Double click on the HFSS 9 icon on the Windows Desktop<br />
Ansoft <strong>High</strong> <strong>Frequency</strong> <strong>Structure</strong> <strong>Simulator</strong> v 9.0 User’s Guide 4
Converting Older Files<br />
Converting Older HFSS file to HFSS v.9.0<br />
Because of changes to the HFSS files with the development of HFSS v.9.0,<br />
opening a HFSS document from an earlier release may take more time than you<br />
are used to experiencing. However, once the file has been opened and saved,<br />
subsequent opening time will return to normal<br />
Ansoft HFSS v.9.0 provides a way for you to automatically convert your HFSS<br />
projects from an earlier version to the HFSS v.9.0 format.<br />
To access HFSS projects in an earlier version.<br />
From HFSS v9.0,<br />
1. Select the menu item File > Open<br />
2. Open dialog<br />
1. Files of Type: Ansoft Legacy EM Projects (.cls<br />
cls)<br />
2. Browse to the existing project and select the .cls file<br />
3. Click the Open button<br />
Ansoft <strong>High</strong> <strong>Frequency</strong> <strong>Structure</strong> <strong>Simulator</strong> v 9.0 User’s Guide 5
Getting Help<br />
Getting Help<br />
If you have any questions while you are using Ansoft HFSS v.9.0 you can find<br />
answers in several ways:<br />
Ansoft HFSS Online Help provides assistance while you are working.<br />
To get help about a specific, active dialog box, click the Help button<br />
in the dialog box or press the F1 key.<br />
Select the menu item Help > Contents to access the online help<br />
system.<br />
Tooltips are available to provide information about tools on the<br />
toolbars or dialog boxes. When you hold the pointer over a tool for a<br />
brief time, a tooltip appears to display the name of the tool.<br />
As you move the pointer over a tool or click a menu item, the Status<br />
Bar at the bottom of the Ansoft HFSS window provides a brief<br />
description of the function of the tool or menu item.<br />
The Ansoft HFSS v.9.0 Getting Started <strong>guide</strong> provides detailed<br />
information about using HFSS to create and solve 3D EM projects.<br />
Ansoft Technical Support<br />
To contact Ansoft technical support staff in your geographical area,<br />
please log on to the Ansoft corporate website, www.ansoft.com and<br />
select Contact.<br />
Your Ansoft sales engineer may also be contacted in order to<br />
obtain this information.<br />
Visiting the Ansoft Web Site<br />
If your computer is connected to the Internet, you can visit the Ansoft Web site to<br />
learn more about the Ansoft company and products.<br />
From the Ansoft Desktop<br />
Select the menu item Help > Ansoft Corporate Website to access<br />
the Online Technical Support (OTS) system.<br />
From your Internet browser<br />
Visit www.ansoft.com<br />
Ansoft <strong>High</strong> <strong>Frequency</strong> <strong>Structure</strong> <strong>Simulator</strong> v 9.0 User’s Guide 6
Getting Help<br />
For Technical Support<br />
The following link will direct you to the Ansoft Support Page. The Ansoft Support<br />
Pages provide additional documentation, training, and application notes.<br />
Web Site: http://www.ansoft.com/support.cfm<br />
Technical Support:<br />
9-4 EST: (412) 261-3200 x0 – Ask for Technical Support<br />
Application Engineers for North America<br />
The names and numbers in this list may change without notice<br />
Ansoft Office: Pittsburgh, PA, 412-261<br />
261-3200<br />
Yianni Antoniadis, x175, yantoniadis@ansoft.com<br />
Shu Li, x172, sli@ansoft.com<br />
Ansoft Office: Boston, MA, 781-229<br />
229-8900<br />
Jim Delap, x133, jdelap@ansoft.com<br />
Ansoft Office: Boulder, CO, 303-541<br />
541-9525<br />
Bryan Boots, x31, bboots@ansoft.com<br />
Brian Gray, x32, bgray@ansoft.com<br />
Ansoft Office: El Segundo, CA, 310-426<br />
426-2287<br />
2287<br />
Aaron Edwards, aedwards@ansoft.com<br />
Liza Ma, lma@ansoft.com<br />
Peter Shin, pshin@ansoft.com<br />
Ansoft Office: Santa Clara, CA, 408-261<br />
261-9095<br />
Harpreet Randhawa, x210, hrandhawa@ansoft.com<br />
Denis Soldo, x214, dsoldo@ansoft.com<br />
Others<br />
Matt Commens, IL, 847-925-9066, mcommens@ansoft.com<br />
Lisa Murphy, AZ, 408-288-1114, lmurphy@ansoft.com<br />
Jim Sherman, FL, 727-394-1023, jsherman@ansoft.com<br />
Canada<br />
Markus Kopp, Ottawa, 613-241-0500, mkopp@ansoft.com<br />
Ansoft <strong>High</strong> <strong>Frequency</strong> <strong>Structure</strong> <strong>Simulator</strong> v 9.0 User’s Guide 7
Ansoft Terms<br />
Ansoft Terms<br />
The Ansoft HFSS window has several optional panels:<br />
A Project Manager which contains a design tree which lists the structure of<br />
the project.<br />
A Message Manager that allows you to view any errors or warnings that<br />
occur before you begin a simulation.<br />
A Property Window that displays and allows you to change model<br />
parameters or attributes.<br />
A Progress Window that displays solution progress.<br />
A 3D Modeler Window which contains the model and model tree for the<br />
active design. For more information about the3D Modeler Window, see<br />
chapter 1.<br />
Menu<br />
bar<br />
Toolbars<br />
3D Modeler<br />
Window<br />
Project<br />
Manager<br />
with project<br />
tree<br />
Message<br />
Manager<br />
Progress<br />
Window<br />
Status<br />
bar<br />
Coordinate Entry Fields<br />
Property Window<br />
Ansoft <strong>High</strong> <strong>Frequency</strong> <strong>Structure</strong> <strong>Simulator</strong> v 9.0 User’s Guide 8
Ansoft Terms<br />
Project Manager<br />
Project Manager Window<br />
Project<br />
Design<br />
Design Setup<br />
Design Automation<br />
•Parametric<br />
•Optimization<br />
•Sensitivity<br />
•Statistical<br />
Design Results<br />
Ansoft <strong>High</strong> <strong>Frequency</strong> <strong>Structure</strong> <strong>Simulator</strong> v 9.0 User’s Guide 9
Ansoft Terms<br />
Property Window<br />
Property Window<br />
Property<br />
table<br />
Property<br />
buttons<br />
Property tabs<br />
Ansoft <strong>High</strong> <strong>Frequency</strong> <strong>Structure</strong> <strong>Simulator</strong> v 9.0 User’s Guide 10
Ansoft Terms<br />
Ansoft 3D Modeler<br />
3D Modeler Window<br />
Graphics<br />
area<br />
Model<br />
3D Modeler<br />
design tree<br />
Context menu<br />
Vertex<br />
Edge<br />
Plane<br />
Coordinate System (CS)<br />
Origin<br />
Model<br />
Face<br />
Ansoft <strong>High</strong> <strong>Frequency</strong> <strong>Structure</strong> <strong>Simulator</strong> v 9.0 User’s Guide 11
Ansoft Terms<br />
3D Modeler Design Tree<br />
Material<br />
Object<br />
Object Command History<br />
Grouped by Material<br />
Object View<br />
Ansoft <strong>High</strong> <strong>Frequency</strong> <strong>Structure</strong> <strong>Simulator</strong> v 9.0 User’s Guide 12
Design Windows<br />
Design Windows<br />
In the Ansoft HFSS Desktop, each project can have multiple designs and each<br />
design is displayed in a separate window.<br />
You can have multiple projects and design windows open at the same time.<br />
Also, you can have multiple views of the same design visible at the same time.<br />
To arrange the windows, you can drag them by the title bar, and resize them by<br />
dragging a corner or border. Also, you can select one of the following menu<br />
options: Window >Cascade, Window >Tile Vertically, or Window > Tile<br />
Horizontally.<br />
To organize your Ansoft HFSS window, you can iconize open designs. Click the<br />
Iconize ** symbol in the upper right corner of the document border. An icon<br />
appears in the lower part of the Ansoft HFSS window. If the icon is not visible, it<br />
may be behind another open document. Resize any open documents as<br />
necessary. Select the menu item Window > Arrange Icons to arrange them at<br />
the bottom of the Ansoft HFSS window.<br />
Select the menu item Window > Close All to close all open design. You are<br />
prompted to Save unsaved designs.<br />
Iconize<br />
Symbol<br />
Design icons<br />
Ansoft <strong>High</strong> <strong>Frequency</strong> <strong>Structure</strong> <strong>Simulator</strong> v 9.0 User’s Guide 13
Toolbars<br />
Toolbars<br />
The toolbar buttons are shortcuts for frequently used commands. Most of the<br />
available toolbars are displayed in this illustration of the Ansoft HFSS initial<br />
screen, but your Ansoft HFSS window probably will not be arranged this way.<br />
You can customize your toolbar display in a way that is convenient for you.<br />
Some toolbars are always displayed; other toolbars display automatically when<br />
you select a document of the related type. For example, when you select a 2D<br />
report from the project tree, the 2D report toolbar displays.<br />
To display or hide individual toolbars:<br />
Right-click the Ansoft HFSS window frame.<br />
A list of all the toolbars is displayed. The toolbars with a check mark<br />
beside them are visible; the toolbars without a check mark are hidden.<br />
Click the toolbar name to turn its display on or off<br />
To make changes to the toolbars, select the menu item Tools > Customize. See<br />
Customize and Arrange Toolbars on the<br />
next page.<br />
Ansoft HFSS<br />
panels<br />
Toolbars<br />
Ansoft <strong>High</strong> <strong>Frequency</strong> <strong>Structure</strong> <strong>Simulator</strong> v 9.0 User’s Guide 14
Toolbars<br />
Customize and Arrange Toolbars<br />
To customize toolbars:<br />
Select the menu item Tools > Customize, or right-click the Ansoft HFSS<br />
window frame and click Customize at the bottom of the toolbar list.<br />
In the Customize dialog, you can do the following:<br />
View a Description of the toolbar commands<br />
1. Select an item from the Component pull-down list<br />
2. Select an item from the Category list<br />
3. Using the mouse click on the Buttons to display the<br />
Description<br />
4. Click the Close button when you are finished<br />
Toggle the visibility of toolbars<br />
1. From the Toolbar list, toggle the check boxes to control the<br />
visibility of the toolbars<br />
2. Click the Close button when you are finished<br />
Ansoft <strong>High</strong> <strong>Frequency</strong> <strong>Structure</strong> <strong>Simulator</strong> v 9.0 User’s Guide 15
Overview<br />
Ansoft HFSS Desktop<br />
The Ansoft HFSS Desktop provides an intuitive, easy-to-use interface for<br />
developing passive RF device models. Creating designs, involves the following:<br />
1. Parametric Model Generation – creating the geometry, boundaries and<br />
excitations<br />
2. Analysis Setup – defining solution setup and frequency sweeps<br />
3. Results – creating 2D reports and field plots<br />
4. Solve Loop - the solution process is fully automated<br />
To understand how these processes co-exist, examine the illustration shown<br />
below.<br />
Design<br />
Solution Type<br />
1.1. Boundaries<br />
1. Parametric Model<br />
Geometry/Materials<br />
2. Analysis<br />
Solution Setup<br />
<strong>Frequency</strong> Sweep<br />
1.2. Excitations<br />
4.1 Mesh<br />
Operations<br />
Analyze<br />
Mesh<br />
Refinement<br />
Solve<br />
3. Results<br />
2D Reports<br />
Fields<br />
4. Solve Loop<br />
NO<br />
Converged<br />
Update<br />
YES<br />
Finished<br />
Ansoft <strong>High</strong> <strong>Frequency</strong> <strong>Structure</strong> <strong>Simulator</strong> v 9.0 User’s Guide 16
Opening a Design<br />
Opening a HFSS project<br />
This section describes how to open a new or existing project.<br />
Opening a New project<br />
To open a new project:<br />
1. In an Ansoft HFSS window, select the menu item File > New.<br />
2. Select the menu Project > Insert HFSS Design.<br />
Opening an Existing HFSS project<br />
To open an existing project:<br />
1. In an Ansoft HFSS window,<br />
select the menu File > Open.<br />
Use the Open dialog to select<br />
the project.<br />
2. Click Open to open the project<br />
Opening an Existing Project from Explorer<br />
You can open a project directly from the Microsoft Windows Explorer.<br />
To open a project from Windows Explorer, do one of the following:<br />
Double-click on the name of the project in Windows Explorer.<br />
Right-click the name of the project in Windows Explorer and select<br />
Open from the shortcut menu.<br />
Ansoft <strong>High</strong> <strong>Frequency</strong> <strong>Structure</strong> <strong>Simulator</strong> v 9.0 User’s Guide 17
Set Solution Type<br />
Set Solution Type<br />
This section describes how to set the Solution Type. The Solution Type defines<br />
the type of results, how the excitations are defined, and the convergence. The<br />
following Solution Types are available:<br />
1. Driven Modal - calculates the modal-based S-parameters. The S-matrix<br />
solutions will be expressed in terms of the incident and reflected powers of<br />
wave<strong>guide</strong> modes.<br />
2. Driven Terminal - calculates the terminal-based S-parameters of multiconductor<br />
transmission line ports. The S-matrix solutions will be expressed<br />
in terms of terminal voltages and currents.<br />
3. Eignemode – calculate the eigenmodes, or resonances, of a structure. The<br />
Eigenmode solver finds the resonant frequencies of the structure and the<br />
fields at those resonant frequencies.<br />
Convergence<br />
Driven Modal – Delta S for modal S-Parameters. This was the only<br />
convergence method available for Driven Solutions in previous versions.<br />
Driven Terminal New – Delta S for the single-ended or differential nodal S-<br />
Parameters.<br />
Eigenmode - Delta F<br />
To set the solution type:<br />
1. Select the menu item HFSS > Solution Type<br />
2. Solution Type Window:<br />
1. Choose one of the following:<br />
1. Driven Modal<br />
2. Driven Terminal<br />
3. Eigenmode<br />
2. Click the OK button<br />
Ansoft <strong>High</strong> <strong>Frequency</strong> <strong>Structure</strong> <strong>Simulator</strong> v 9.0 User’s Guide 18
Parametric Model Creation<br />
1<br />
Parametric Model Creation<br />
The Ansoft HFSS 3D Modeler is designed for ease of use and flexibility. The<br />
power of the 3D Modeler is in its unique ability to create fully parametric designs<br />
without editing complex macros/model history.<br />
The purpose of this chapter is to provide an overview of the 3D Modeling<br />
capabilities. By understanding the basic concepts outlined here you will be able<br />
to quickly take advantage of the full feature set offered by the 3D Parametric<br />
Modeler.<br />
Overview of the 3D Modeler User Interface<br />
The following picture shows the 3D Modeler window.<br />
3D Modeler Design Tree – The 3D Modeler Design Tree is an essential part<br />
of the user interface. From here you may access the structural elements in<br />
addition to any object dependencies and attributes.<br />
Context Menus – Context menus are a flexible way of accessing frequently<br />
used menu commands for the current context. The contents of these<br />
menus change dynamically and are available throughout the interface by<br />
clicking the right mouse button.<br />
Graphics Area – The graphics area is used to interact with the structural<br />
elements.<br />
Graphics<br />
area<br />
Model<br />
3D Modeler<br />
design tree<br />
Context menu<br />
Ansoft <strong>High</strong> <strong>Frequency</strong> <strong>Structure</strong> <strong>Simulator</strong> v 9.0 User’s Guide<br />
1-1
Parametric Model Creation<br />
1<br />
Overview of the 3D Modeler User Interface (Continued)<br />
When using the 3D Modeler interface you will also interact with two additional<br />
interfaces:<br />
Property Window – The Property Window is used to view or modify the<br />
attributes and dimensions of structural objects<br />
Property<br />
table<br />
Property<br />
buttons<br />
Property tabs<br />
Status Bar/Coordinate Entry – The Status Bar on the Ansoft HFSS Desktop<br />
Window displays the Coordinate Entry fields that can be used to define<br />
points or offsets during the creation of structural objects<br />
Ansoft <strong>High</strong> <strong>Frequency</strong> <strong>Structure</strong> <strong>Simulator</strong> v 9.0 User’s Guide<br />
1-2
Parametric Model Creation<br />
1<br />
Grid Plane<br />
To simplify the creation of structural primitives, a grid or drawing plane is used.<br />
The drawing plane does not in any way limit the user to two dimensional<br />
coordinates but instead is used as a <strong>guide</strong> to simplify the creation of structural<br />
primitives. The drawing plane is represented by the active grid plane (The grid<br />
does not have to be visible). To demonstrate how drawing planes are used,<br />
review the following section: Creating and Viewing Simple <strong>Structure</strong>s.<br />
Active Cursor<br />
The active cursor refers to the cursor that is available during object creation. The<br />
cursor allows you to graphically change the current position. The position is<br />
displayed on the status bar of the Ansoft HFSS Desktop Window.<br />
When objects are not being constructed, the cursor remains passive and is set<br />
for dynamic selection. See the Overview of Selecting Objects for more details.<br />
Ansoft <strong>High</strong> <strong>Frequency</strong> <strong>Structure</strong> <strong>Simulator</strong> v 9.0 User’s Guide<br />
1-3
Parametric Model Creation<br />
1<br />
Creating and Viewing a Simple <strong>Structure</strong><br />
Creating 3D structural objects is accomplished by performing the following steps:<br />
1. Set the grid plane<br />
2. Create the base shape of the object<br />
3. Set the Height<br />
Create a Box<br />
We will investigate creating a box to demonstrate these steps. These steps<br />
assume that project and a HFSS design have already been created. Three<br />
points are required to create the box. The first two form the base rectangle<br />
and the third sets the height.<br />
Point 1: Defines the start point of the base rectangle<br />
Point 2: Defines the size of the base rectangle<br />
Point 3: Defines the height of the Box<br />
Point 1<br />
Grid Plane<br />
Point 3<br />
Base Rectangle<br />
Point 2<br />
Ansoft <strong>High</strong> <strong>Frequency</strong> <strong>Structure</strong> <strong>Simulator</strong> v 9.0 User’s Guide<br />
1-4
Parametric Model Creation<br />
1<br />
Create a Box (Continued)<br />
1. Select the menu item 3D Modeler > Grid Plane > XY<br />
2. Use the mouse to create the base shape<br />
1. Set the start point by positioning the active cursor and click the left<br />
mouse button.<br />
2. Position the active cursor and click the left mouse button to set the<br />
second point that forms the base rectangle<br />
3. Set the Height by positioning the active cursor and clicking left mouse<br />
button.<br />
Ansoft <strong>High</strong> <strong>Frequency</strong> <strong>Structure</strong> <strong>Simulator</strong> v 9.0 User’s Guide<br />
1-5
Parametric Model Creation<br />
1<br />
Specifying Points<br />
Grid<br />
From the example, we saw that the simplest way to set a point is by<br />
clicking its position on the grid plane. To set the precision of the grid plane,<br />
select the menu item View > Grid Settings. From here you may specify the<br />
Grid Type, Style, Visibility, and Precision. By pressing the Save As Default<br />
button, you can set the default behavior for future HFSS Designs.<br />
Coordinate Entry<br />
Another way to specify a coordinate is to use the Coordinate Entry fields<br />
which are located on the status bar of the Ansoft HFSS Desktop. The<br />
position may be specified in Cartesian, Cylindrical, or Spherical<br />
coordinates. Once the first point is set, the Coordinate Entry will default to<br />
Relative coordinates. In Relative mode the coordinates are no longer<br />
absolute (measured from the origin of the working coordinate system), but<br />
relative to the last point entered.<br />
Equations<br />
The Coordinate Entry fields allow equations to be entered for<br />
position values. Examples: 2*5, 2+6+8, 2*cos(10*(pi/180)).<br />
Variables are not allowed in the Coordinate Entry Field<br />
Note: Trig functions are in radians<br />
Relative mode<br />
Ansoft <strong>High</strong> <strong>Frequency</strong> <strong>Structure</strong> <strong>Simulator</strong> v 9.0 User’s Guide<br />
1-6
Parametric Model Creation<br />
1<br />
Commands<br />
Specifying Points (Continued)<br />
Object Properties<br />
By default the Properties dialog will appear after you have finished<br />
sketching an object. The position and size of objects can be modified from<br />
the dialog. This method allows you to create objects by clicking the<br />
estimated values using the mouse and then correcting the values in the<br />
final dialog.<br />
The Property dialog accepts equations, variables, and units. See the<br />
Overview of Entering Parameters for more detail.<br />
Every object has two types of properties<br />
1. Command – Defines the structural primitive<br />
2. Attributes – Defines the material, display, and solve properties<br />
Attributes<br />
Ansoft <strong>High</strong> <strong>Frequency</strong> <strong>Structure</strong> <strong>Simulator</strong> v 9.0 User’s Guide<br />
1-7
Parametric Model Creation<br />
1<br />
Overview of Draw<br />
Primitives<br />
In solid modeling, the basic element or object is often called a primitive.<br />
Examples of primitives are boxes, cylinders, rectangles, circles, etc. There<br />
are two types of primitives: 3D primitives or solids, and 2D primitives or<br />
surfaces. By placing a collection of primitives in the correct location and of<br />
the correct size we can create a represent complex structural objects.<br />
To create complex objects, primitives can be used as “tools” to cut holes,<br />
carve away, or join. The operations that are performed with these “tools”<br />
are often referred to as Boolean operations.<br />
2D primitives can be swept to create arbitrarily shaped solid primitives<br />
2D Draw Objects<br />
The following 2D Draw objects are available:<br />
Rectangle, Circle, Line, Point, Spline, Ellipse, Regular Polygon (v8.5<br />
circle)<br />
3D Draw Objects<br />
The following 3D Draw objects are available:<br />
Box, Cylinder, Sphere, Torus, Helix, Bond Wire, Cone, Regular<br />
Polyhedron (v8.5 cylinder)<br />
True Surfaces<br />
Circles, Cylinders, Spheres, etc are represented as true surfaces. In<br />
versions prior to release 9, these primitives would be represented as<br />
faceted objects. If you wish to use the faceted primitives (Cylinders or<br />
Circles), select the Regular Polyhedron or Regular Polygon.<br />
To control the mesh generation of true surfaces objects, see the section on<br />
Mesh Control.<br />
Ansoft <strong>High</strong> <strong>Frequency</strong> <strong>Structure</strong> <strong>Simulator</strong> v 9.0 User’s Guide<br />
1-8
Parametric Model Creation<br />
1<br />
Overview of Draw (Continued)<br />
Snap Mode<br />
As an aid for graphical selection, the<br />
modeler provides Snap options. The<br />
default is to snaps are shown here. The<br />
shape of the active cursor will dynamically<br />
change as the cursor is moved over the<br />
snap positions.<br />
Moving<br />
By default all active cursor movement is in three dimensions. The modeler<br />
can also be set to allow the active cursor to only move in a plane or out of<br />
plane. These are set from the menu item 3D Modeler > Movement Mode.<br />
In addition, the movement can be limited to a specific direction (x, y, or z)<br />
by holding down the x, y, or z key. This prevents movement in the other<br />
directions.<br />
Pressing the CTRL+Enter key sets a local reference point. This can be<br />
useful for creating geometry graphically that is based on an existing<br />
objects. This is outlined on the next page:<br />
Ansoft <strong>High</strong> <strong>Frequency</strong> <strong>Structure</strong> <strong>Simulator</strong> v 9.0 User’s Guide<br />
1-9
Parametric Model Creation<br />
1<br />
Moving (Continued)<br />
Step 1: Start Point<br />
Step 2: Hold X key and select vertex point<br />
Step 3: CTRL+Enter Keys set a local reference<br />
Step 4: Hold Z key and set height<br />
Ansoft <strong>High</strong> <strong>Frequency</strong> <strong>Structure</strong> <strong>Simulator</strong> v 9.0 User’s Guide<br />
1-10
Parametric Model Creation<br />
1<br />
Selecting Previously Defined Shapes<br />
You may select an object by moving the mouse over the object in the graphics<br />
area and clicking on it. The default mode is Dynamic selection which will display<br />
the object to be selected with a unique outline color. Please note that after<br />
selecting (Clicking on the object) the object it will be displayed solid pink while all<br />
other objects are drawn transparent.<br />
Types of Selection<br />
The default is to select objects. Sometimes is necessary to select faces,<br />
edges, or vertices. To change the selection mode, select the menu item<br />
Edit > Select and choose the appropriate selection mode. The shortcut<br />
keys o (Object selection) and f (face selection) are useful for quickly<br />
switching between the most common selection modes<br />
Multiple Select or Toggle Selection<br />
Multiple objects can be selected graphically by holding down the CTRL key<br />
while selecting. In addition, with the CTRL key pressed, the selection of an<br />
object can be toggled between selected or unselected.<br />
Blocked Objects<br />
If the object you wish to select is located behind another object, select the<br />
object that is blocking the desired object and press the b key or right-click<br />
and select Next Behind from the context menu. You may repeat this as<br />
many times as needed to select the correct object.<br />
Select All Visible<br />
You can select all visible objects by pressing the CTRL+a key or by<br />
selecting the menu item Edit > Select All Visible.<br />
Select by Name<br />
To select objects by Name you can use anyone of the following:<br />
Select the menu item Edit > Select > By Name<br />
Select the menu item HFSS > List<br />
Select the Model tab<br />
Select objects from the list<br />
Use the Model Tree. See the next page<br />
Ansoft <strong>High</strong> <strong>Frequency</strong> <strong>Structure</strong> <strong>Simulator</strong> v 9.0 User’s Guide<br />
1-11
Parametric Model Creation<br />
1<br />
Selecting Previously Defined Shapes (Continued)<br />
Model Tree<br />
After an object has been created, it is automatically added to the Model<br />
Tree. All objects can be found in the Model Tree. If you open the Model<br />
folder you will find the objects sorted by Object or by Material. You can<br />
toggle between the views by toggling the menu item 3D Modeler > Group<br />
Object by Material.<br />
Sorted by Object<br />
Sorted by Material<br />
As stated previously, every object has two types of properties:<br />
Attributes<br />
You may select an object by clicking on the corresponding<br />
item in the Model Tree.<br />
When the object is selected the attributes will be displayed in<br />
the Property Window. Double-clicking on the object will open<br />
a properties dialog. Use the Property Window or properties<br />
dialog to modify the attributes.<br />
Commands<br />
From the Model Tree, the Command Properties can be<br />
selected by expanding the object folder to display the<br />
command list. Using the mouse, select the corresponding<br />
Attributes<br />
command from the tree. The properties will be displayed in<br />
Commands the Property Window. Double-clicking on the command will<br />
open a properties dialog. Use the Property Window or<br />
properties dialog to modify the command.<br />
When the command is selected, the object will be outlined<br />
with bold lines in the 3D Model Window. Since an object can<br />
be a combination of several primitives, the command list may<br />
contain several objects. Anyone of these commands can be<br />
selected to visualize or modify the object.<br />
Ansoft <strong>High</strong> <strong>Frequency</strong> <strong>Structure</strong> <strong>Simulator</strong> v 9.0 User’s Guide<br />
1-12
Parametric Model Creation<br />
1<br />
Object Attributes<br />
An objects attributes set the following user defined properties:<br />
Name – User defined name. Default names start with the primitive type<br />
followed by an increasing number: Box1, Box2, etc.<br />
Material – User defined material property. The default property is vacuum.<br />
This can be changed by using the material toolbar<br />
Solve Inside – By default HFSS only solves for fields inside<br />
dielectrics. To force HFSS to solve inside conductors, check<br />
solve inside.<br />
Orientation<br />
Model Object – Controls if the object is included in the solve<br />
Display Wireframe – Forces the object to always be displayed as wireframe<br />
Color – Set object color<br />
Transparency – Set the transparency of an object. 0–Solid, 1- Wireframe<br />
Note: Visibility is not an object property.<br />
Ansoft <strong>High</strong> <strong>Frequency</strong> <strong>Structure</strong> <strong>Simulator</strong> v 9.0 User’s Guide<br />
1-13
Parametric Model Creation<br />
1<br />
Materials<br />
By clicking on the property button for the material name, the material definition<br />
window will appear. You can select from the existing database or define a<br />
custom project material.<br />
Ansoft <strong>High</strong> <strong>Frequency</strong> <strong>Structure</strong> <strong>Simulator</strong> v 9.0 User’s Guide<br />
1-14
Parametric Model Creation<br />
1<br />
Materials (Continued)<br />
User Defined Project Material<br />
To define a custom material click the Add Material button from the material<br />
definition window. The following dialog will appear. Enter the material<br />
definitions and click the OK button.<br />
Ansoft <strong>High</strong> <strong>Frequency</strong> <strong>Structure</strong> <strong>Simulator</strong> v 9.0 User’s Guide<br />
1-15
Parametric Model Creation<br />
1<br />
Changing the View<br />
You can change the view at any time (even during shape generation) by using<br />
the following commands:<br />
Toolbar<br />
Rotate – The structure will be rotated around the coordinate system<br />
Pan – The structure will be translated in the graphical area<br />
Dynamic Zoom – Moving the mouse upwards will increase the zoom factor<br />
while moving the mouse downwards will decrease the zoom factor<br />
Zoom In/Out – In this mode a rubber band rectangle will be defined by<br />
dragging the mouse. After releasing the mouse button the zoom factor will<br />
be applied.<br />
Pan<br />
Zoom In/Out<br />
Rotate Dynamic Zoom<br />
Context Menu<br />
Right click in the graphics area and select the menu item View and choose<br />
from the options outlined in the Toolbar section. The context menu also<br />
offers the following:<br />
Fit All – This will zoom the defined structure to a point where it fits in<br />
the drawing area<br />
Fit Selection – This fits only the selected objects into the drawing<br />
area.<br />
Spin – Drag the mouse and release the mouse button to start the<br />
object spinning. The speed of the dragging prior to releasing the<br />
mouse controls the speed of the spin.<br />
Animate – Create or display the animation of parametric geometry<br />
Shortcuts<br />
Since changing the view is a frequently used operation, some useful<br />
shortcut keys exist. Press the appropriate keys and drag the mouse with<br />
the left button pressed:<br />
ALT + Drag – Rotate<br />
In addition, there are 9 pre-defined view angles that can be<br />
selected by holding the ALT key and double clicking on the<br />
locations shown on the next page.<br />
Shift + Drag - Pan<br />
ALT + Shift + Drag – Dynamic Zoom<br />
Ansoft <strong>High</strong> <strong>Frequency</strong> <strong>Structure</strong> <strong>Simulator</strong> v 9.0 User’s Guide<br />
1-16
Parametric Model Creation<br />
1<br />
Shortcuts - Predefined Views<br />
Top<br />
Predefined View Angles<br />
Left<br />
Right<br />
Bottom<br />
Ansoft <strong>High</strong> <strong>Frequency</strong> <strong>Structure</strong> <strong>Simulator</strong> v 9.0 User’s Guide<br />
1-17
Parametric Model Creation<br />
1<br />
Changing the View (Continued)<br />
Visibility<br />
The visibility of objects, Boundaries, Excitations, and Field Reports can be<br />
controlled from the menu item View > Visibility<br />
Hide Selection<br />
The visibility of selected objects can be set hidden by selecting the<br />
object(s) and choosing the menu View > Hide Selection > All Views.<br />
Rendering<br />
To change the rendering select the menu item View > Render > Wireframe<br />
or View > Render > Smooth Shaded<br />
Coordinate System<br />
To control the view of the coordinate system, select the menu item:<br />
Visibility:<br />
Toggle the menu item View > Coordinate System > Hide<br />
(Show)<br />
Size:<br />
Toggle the menu item View > Coordinate System > Small<br />
(Large)<br />
Background Color<br />
To set the background color, select the menu item View > Modify Attributes<br />
> Background Color<br />
Addition View Seetings<br />
Additional attributes of the view such as the projection, orientation, and<br />
lighting can be set from the menu item View > Modify Attributes<br />
Ansoft <strong>High</strong> <strong>Frequency</strong> <strong>Structure</strong> <strong>Simulator</strong> v 9.0 User’s Guide<br />
1-18
Parametric Model Creation<br />
1<br />
Applying Structural Transformations<br />
So far we have investigated hot to model simple shapes and how to change the<br />
view of the model. To create more complicated models or reduce the number of<br />
objects that need to be created manually we can apply various transformations.<br />
The following examples assume that you have already selected the object(s) that<br />
you wish to apply a transformation.<br />
You can select the transformation options from the menu item Edit ><br />
Arrange ><br />
Move – Translates the structure along a vector<br />
Rotate – Rotates the shape around a coordinate axis by an angle<br />
Mirror – Mirrors the shape around a specified plane<br />
Offset – Performs a uniform scale in x, y, and z.<br />
Duplicate ><br />
Along Lines – Create multiple copies of an object along a vector<br />
Around Axis – Create multiple copies of an object rotated by a fixed<br />
angle around the x, y, or z axis<br />
Mirror - Mirrors the shape around a specified plane and creates a<br />
duplicate<br />
Scale – Allows non-uniform scaling in the x, y, or z direction<br />
The faces of an object can also be moved to alter the shape of an existing object.<br />
To move the faces of an object select the menu item 3D Modeler > Surfaces ><br />
Move Faces and select Along Normal or Along Vector.<br />
Ansoft <strong>High</strong> <strong>Frequency</strong> <strong>Structure</strong> <strong>Simulator</strong> v 9.0 User’s Guide<br />
1-19
Parametric Model Creation<br />
1<br />
Combine Objects by Using Boolean Operations<br />
Most complex structures can be reduced to combinations of simple primitives.<br />
Even the solid primitives can be reduced to simple 2D primitives that are swept<br />
along a vector or around an axis(Box is a square that is swept along a vector to<br />
give it thickness). The solid modeler supports the following Boolean operations:<br />
Unite – combine multiple primitives<br />
Unite disjoint objects<br />
Separate Bodies to separate<br />
Subtract – remove part of a primitive from another<br />
Split – break primitives into multiple parts<br />
Intersect– keep only the parts of primitives that overlap<br />
Sweep – turn a 2D primitive into a solid by sweeping: Along a Vector,<br />
Around an Axis, Along a Path<br />
Connect – connect 2D primitives. Use Cover Surfaces to turn the<br />
connected object into a solid<br />
Section – generate 2D cross-sections of a 3D object<br />
Most Boolean operations require a base primitive in which the Boolean operation<br />
is performed. Only the base object will be preserved.<br />
The Boolean functions provide the option to Clone objects.<br />
Ansoft <strong>High</strong> <strong>Frequency</strong> <strong>Structure</strong> <strong>Simulator</strong> v 9.0 User’s Guide<br />
1-20
Parametric Model Creation<br />
1<br />
Local Coordinate Systems<br />
The ability to create local coordinate systems adds a great deal of flexibility to the<br />
creations of structural objects. In previous sections we have only discussed<br />
objects that are aligned to the global coordinate system. The local coordinate<br />
system simplifies the definition of objects that do not align with the global<br />
coordinate system. In addition, the object history is defined relative to a<br />
coordinate system. If the coordinate system is moved, the geometry will<br />
automatically move with it. The definition of coordinate systems are maintained<br />
in the Model Tree.<br />
Working Coordinate System<br />
The working coordinate system is the currently selected CS. This can be a<br />
local or global CS<br />
Global CS<br />
The default fixed coordinate system<br />
Relative CS<br />
User defined local coordinate system.<br />
Offset<br />
Rotated<br />
Both<br />
Face CS<br />
User defined local coordinate system. It is tied to the location of the object<br />
face it was created on. If the size of the base object changes, all objects<br />
created relative to the face CS will be updated automatically.<br />
Continued on Next Page<br />
Ansoft <strong>High</strong> <strong>Frequency</strong> <strong>Structure</strong> <strong>Simulator</strong> v 9.0 User’s Guide<br />
1-21
Parametric Model Creation<br />
1<br />
Local Coordinate Systems (Continued)<br />
Face CS (Continued)<br />
To create a face CS, select the menu item 3D Modeler > Coordinate<br />
System > Face<br />
1. Graphically select Face (<strong>High</strong>lighted in model)<br />
2. Select Origin for Face CS<br />
3. Set X-Axis<br />
Step 1: Select Face<br />
Step 2: Select Origin<br />
Step 3: Set X-Axis<br />
New Working CS<br />
Ansoft <strong>High</strong> <strong>Frequency</strong> <strong>Structure</strong> <strong>Simulator</strong> v 9.0 User’s Guide<br />
1-22
Parametric Model Creation<br />
1<br />
Local Coordinate Systems (Continued)<br />
Example of Face CS<br />
Cone is created with Face CS<br />
Change the size of the box and<br />
the Cone is automatically<br />
moved with the Face CS<br />
Ansoft <strong>High</strong> <strong>Frequency</strong> <strong>Structure</strong> <strong>Simulator</strong> v 9.0 User’s Guide<br />
1-23
Parametric Model Creation<br />
1<br />
Parametric Geometry<br />
The parametric modeler capability allows us to define variables in replace of a<br />
fixed position or size. Once this has been defined the variable can be changed<br />
by the user or by Optimetrics. Optimetrics can then be used to perform<br />
automatic Optimization, Parametric Sweeps, Statistical, or Sensitivity Analysis.<br />
Defining Parameters<br />
Select the command to parameterized<br />
Choose the value to change<br />
Enter a variable in replace of the fixed value<br />
Define the variable using any combination of math functions or design<br />
variables.<br />
The model will automatically be updated<br />
Ansoft <strong>High</strong> <strong>Frequency</strong> <strong>Structure</strong> <strong>Simulator</strong> v 9.0 User’s Guide<br />
1-24
Parametric Model Creation<br />
1<br />
Parametric Geometry (Continued)<br />
Variables<br />
There are two types of variables that can be defined in the HFSS Desktop<br />
Design Properties – Local to model. To access the local variables<br />
select the menu item HFSS > Design Properties<br />
Project Variables – Global to all models in project. Start with $. To<br />
access the global or project variables, select the menu item Project<br />
> Project Variables<br />
Units<br />
When defining variables they must contain units. The default units<br />
for variables is meters.<br />
Equations<br />
The variables can contain complex equations. See the Online Help<br />
for a complete list of math functions<br />
Animation<br />
Right-Click in the 3D Model Window & Choose Animate to preview<br />
the parameterization<br />
Ansoft <strong>High</strong> <strong>Frequency</strong> <strong>Structure</strong> <strong>Simulator</strong> v 9.0 User’s Guide<br />
1-25
This page is intentionally left blank.
Boundary Conditions<br />
1.1<br />
Boundary Conditions<br />
This chapter describes the basics for applying boundary conditions. Boundary<br />
conditions enable you to control the characteristics of planes, faces, or interfaces<br />
between objects. Boundary conditions are important to understand and are<br />
fundamental to solution of Maxwell’s equations.<br />
Why they are Important<br />
The wave equation that is solved by Ansoft HFSS is derived from the differential<br />
form of Maxwell’s Equations. For these expressions to be valid, it is assumed<br />
that the field vectors are single-valued, bounded, and have continuous<br />
distribution along with their derivatives. Along boundaries or sources, the fields<br />
are discontinuous and the derivatives have no meaning. Therefore boundary<br />
conditions define the field behavior across discontinuous boundaries.<br />
As a user of Ansoft HFSS you should be aware of the field assumptions made by<br />
boundary conditions. Since boundary conditions force a field behavior we want<br />
to be aware of the assumptions so we can determine if they are appropriate for<br />
the simulation. Improper use of boundary conditions may lead to inconsistent<br />
results.<br />
When used properly, boundary conditions can be successfully utilized to reduce<br />
the model complexity. In fact, Ansoft HFSS automatically uses boundary<br />
conditions to reduce the complexity of the model. Ansoft HFSS can be thought of<br />
as a virtual prototyping world for passive RF devices. Unlike the real world<br />
which is bounded by infinite space, the virtual prototyping world needs to be<br />
made finite. In order to achieve this finite space, Ansoft HFSS applies a<br />
background or outer boundary condition which is applied to the region<br />
surrounding the geometric model.<br />
The model complexity usually is directly tied to the solution time and computer<br />
resources so it is a competitive advantage to utilize them whenever possible.<br />
Ansoft <strong>High</strong> <strong>Frequency</strong> <strong>Structure</strong> <strong>Simulator</strong> v 9.0 User’s Guide<br />
1.1-1
Boundary Conditions<br />
1.1<br />
Common Boundary Conditions<br />
There are three types of boundary conditions. The first two are largely the users<br />
responsibility to define them or ensure that they are defined correctly. The<br />
material boundary conditions are transparent to the user.<br />
1. Excitations<br />
Wave Ports (External)<br />
Lumped Ports (Internal)<br />
2. Surface Approximations<br />
Symmetry Planes<br />
Perfect Electric or Magnetic Surfaces<br />
Radiation Surfaces<br />
Background or Outer Surface<br />
3. Material Properties<br />
Boundary between two dielectrics<br />
Finite Conductivity of a conductor<br />
Ansoft <strong>High</strong> <strong>Frequency</strong> <strong>Structure</strong> <strong>Simulator</strong> v 9.0 User’s Guide<br />
1.1-2
Boundary Conditions<br />
1.1<br />
How the Background Affects a <strong>Structure</strong><br />
The background is the region that surrounds the geometric model and fills any<br />
space that is not occupied by an object. Any object surface that touches the<br />
background is automatically defined to be a Perfect E boundary and given the<br />
boundary name outer. You can think of your structure as being encased with a<br />
thin, perfect conductor.<br />
If it is necessary, you can change a surface that is exposed to the background to<br />
have properties that are different from outer:<br />
To model losses in a surface, you can redefine the surface to be either a<br />
Finite Conductivity or Impedance boundary. A Finite Conductivity<br />
boundary can be a lossy metal, with loss as a function of frequency and<br />
defined using conductivity and relative permeability parameters. An<br />
Impedance boundary has real or complex values that by default remain<br />
constant over frequency.<br />
To model a surface to allow waves to radiate infinitely far into space,<br />
redefine the surface to be radiation boundary.<br />
The background can affect how you make material assignments. For example, if<br />
you are modeling a simple air-filled rectangular wave<strong>guide</strong>, you can create a<br />
single object in the shape of the wave<strong>guide</strong> and define it to have the<br />
characteristics of air. The surface of the wave<strong>guide</strong> is automatically assumed to<br />
be a perfect conductor and given the boundary condition outer, or you can<br />
change it to a lossy conductor.<br />
Ansoft <strong>High</strong> <strong>Frequency</strong> <strong>Structure</strong> <strong>Simulator</strong> v 9.0 User’s Guide<br />
1.1-3
Boundary Conditions<br />
1.1<br />
Technical Definition of Boundary Conditions<br />
Excitation – An excitation port is a type of boundary condition that permits energy<br />
to flow into and out of a structure. See the section on Excitations.<br />
Perfect E – Perfect E is a perfect electrical conductor, also referred to as a perfect<br />
conductor. This type of boundary forces the electric field (E-Field) perpendicular<br />
to the surface. There are also two automatic Perfect E assignments:<br />
Any object surface that touches the background is automatically defined to<br />
be a Perfect E boundary and given the boundary condition name outer.<br />
Any object that is assigned the material pec (Perfect Electric Conductor) is<br />
automatically assigned the boundary condition Perfect E to its surface and<br />
given the boundary condition name smetal.<br />
Perfect H – Perfect H is a perfect magnetic conductor. Forces E-Field tangential<br />
to the surface.<br />
Natural – for a Perfect H boundary that overlaps with a perfect E boundary,<br />
this reverts the selected area to its original material, erasing the Perfect E<br />
boundary condition. It does not affect any material assignments. It can be<br />
used, for example, to model a cut-out in a ground plane for a coax feed.<br />
Finite Conductivity –A Finite Conductivity boundary enables you to define the<br />
surface of an object as a lossy (imperfect) conductor. It is an imperfect E<br />
boundary condition, and is analogous to the lossy metal material definition. To<br />
model a lossy surface, you provide loss in Siemens/meter and permeability<br />
parameters. Loss is calculated as a function of frequency. It is only valid for<br />
good conductors. Forces the tangential E-Field equal to Z s (n x H tan ). The<br />
surface impedance (Z s ) is equal to, (1+j)/(δσ), where:<br />
δ is the skin depth, (2/(ωσµ)) 0.5 of the conductor being modeled<br />
ω is the frequency of the excitation wave.<br />
σ is the conductivity of the conductor<br />
µ is the permeability of the conductor<br />
Ansoft <strong>High</strong> <strong>Frequency</strong> <strong>Structure</strong> <strong>Simulator</strong> v 9.0 User’s Guide<br />
1.1-4
Boundary Conditions<br />
1.1<br />
Technical Definition of Boundary Conditions (Continued)<br />
Impedance – a resistive surface that calculates the field behavior and losses<br />
using analytical formulas. Forces the tangential E-Field equal to Z s (n x H tan ).<br />
The surface impedance is equal to R s + jX s , where:<br />
Rs is the resistance in ohms/square<br />
Xs is the reactance in ohms/square<br />
Layered Impedance – Multiple thin layers in a structure can be modeled as an<br />
impedance surface. See the Online Help for additional information on how to use<br />
the Layered Impedance boundary.<br />
Lumped RLC – a parallel combination of lumped resistor, inductor, and/or<br />
capacitor surface. The simulation is similar to the Impedance boundary, but the<br />
software calculate the ohms/square using the user supplied R, L, C values.<br />
Infinite Ground Plane – Generally, the ground plane is treated as an infinite,<br />
Perfect E, Finite Conductivity, or Impedance boundary condition. If radiation<br />
boundaries are used in a structure, the ground plane acts as a shield for far-field<br />
energy, preventing waves from propagating past the ground plane. to simulate<br />
the effect of an infinite ground plane, check the Infinite ground plane box when<br />
defining a Perfect E, Finite Conductivity, or Impedance boundary condition.<br />
Radiation – Radiation boundaries, also referred to as absorbing boundaries,<br />
enable you to model a surface as electrically open: waves can then radiate out of<br />
the structure and toward the radiation boundary. The system absorbs the wave at<br />
the radiation boundary, essentially ballooning the boundary infinitely far away<br />
from the structure and into space. Radiation boundaries may also be placed<br />
relatively close to a structure and can be arbitrarily shaped. This condition<br />
eliminates the need for a spherical boundary. For structures that include radiation<br />
boundaries, calculated S-parameters include the effects of radiation loss. When<br />
a radiation boundary is included in a structure, far-field calculations are<br />
performed as part of the simulation.<br />
Ansoft <strong>High</strong> <strong>Frequency</strong> <strong>Structure</strong> <strong>Simulator</strong> v 9.0 User’s Guide<br />
1.1-5
This page is intentionally left blank.
Excitations<br />
1.2<br />
Technical Overview<br />
Ports are a unique type of boundary condition that allow energy to flow into and<br />
out of a structure. You can assign a port to any 2D object or 3D object face.<br />
Before the full three-dimensional electromagnetic field inside a structure can be<br />
calculated, it is necessary to determine the excitation field pattern at each port.<br />
Ansoft HFSS uses an arbitrary port solver to calculate the natural field patterns or<br />
modes that can exist inside a transmission structure with the same cross section<br />
as the port. The resulting 2D field patterns serve as boundary conditions for the<br />
full three-dimensional problem.<br />
By default Ansoft HFSS assumes that all structures are completely<br />
encased in a conductive shield with no energy propagating through it. You<br />
apply Wave Ports to the structure to indicate the area were the energy<br />
enters and exits the conductive shield.<br />
As an alternative to using Wave Ports, you can apply Lumped Ports to a<br />
structure instead. Lumped Ports are useful for modeling internal ports<br />
within a structure.<br />
Ansoft <strong>High</strong> <strong>Frequency</strong> <strong>Structure</strong> <strong>Simulator</strong> v 9.0 User’s Guide<br />
1.2-1
Excitations<br />
1.2<br />
Wave Port<br />
The port solver assumes that the Wave Port you define is connected to a semiinfinitely<br />
long wave<strong>guide</strong> that has the same cross-section and material properties<br />
as the port. Each Wave Port is excited individually and each mode incident on a<br />
port contains one watt of time-averaged power. Wave Ports calculate<br />
characteristic impedance, complex propagation constant, and generalized S-<br />
Parameters.<br />
Wave Equation<br />
The field pattern of a traveling wave inside a wave<strong>guide</strong> can be determined<br />
by solving Maxwell’s equations. The following equation that is solved by<br />
the 2D solver is derived directly from Maxwell’s equation.<br />
∇ ×<br />
⎛<br />
⎜<br />
⎝ µ<br />
1 2<br />
∇ × E ⎟ − 0 r<br />
=<br />
r<br />
( x,<br />
y) ⎟ k ε E(<br />
x,<br />
y)<br />
0<br />
where:<br />
E(x,y) is a phasor representing an oscillating electric field.<br />
k 0 is the free space wave number,<br />
µ r is the complex relative permeability.<br />
ε r is the complex relative permittivity.<br />
⎞<br />
⎠<br />
To solve this equation, the 2D solver obtains an excitation field pattern in<br />
the form of a phasor solution, E(x,y). These phasor solutions are<br />
independent of z and t; only after being multiplied by e -γz do they become<br />
traveling waves.<br />
Also note that the excitation field pattern computed is valid only at a single<br />
frequency. A different excitation field pattern is computed for each<br />
frequency point of interest.<br />
Ansoft <strong>High</strong> <strong>Frequency</strong> <strong>Structure</strong> <strong>Simulator</strong> v 9.0 User’s Guide<br />
1.2-2
Excitations<br />
1.2<br />
Modes<br />
For a wave<strong>guide</strong> or transmission line with a given cross section, there is a series<br />
of basic field patterns (modes) that satisfy Maxwell’s Equations at a specific<br />
frequency. Any linear combination of these modes can exist in the wave<strong>guide</strong>.<br />
Mode Conversion<br />
In some cases it is necessary to include the effects of higher-order modes<br />
because the structure acts as a mode converter. For example, if the mode<br />
1 (dominant) field at one port is converted (as it passes through a structure)<br />
to a mode 2 field pattern at another, then it is necessary to obtain the S-<br />
parameters for the mode 2 field.<br />
Modes, Reflections, and Propagation<br />
It is also possible for a 3D field solution generated by an excitation signal of<br />
one specific mode to contain reflections of higher-order modes which arise<br />
due to discontinuities in a high frequency structure. If these higher-order<br />
modes are reflected back to the excitation port or transmitted onto another<br />
port, the S-parameters associated with these modes should be calculated.<br />
If the higher-order mode decays before reaching any port—either because<br />
of attenuation due to losses or because it is a non-propagating evanescent<br />
mode—there is no need to obtain the S-parameters for that mode.<br />
Modes and <strong>Frequency</strong><br />
The field patterns associated with each mode generally vary with<br />
frequency. However, the propagation constants and impedances always<br />
vary with frequency. Therefore, when a frequency sweep has been<br />
requested, a solution is calculated for each frequency point of interest.<br />
When performing frequency sweeps, be aware that as the frequency<br />
increases, the likelihood of higher-order modes propagating also increases.<br />
Ansoft <strong>High</strong> <strong>Frequency</strong> <strong>Structure</strong> <strong>Simulator</strong> v 9.0 User’s Guide<br />
1.2-3
Excitations<br />
1.2<br />
Modes and S-Parameters<br />
When the Wave Ports are defined correctly, for the modes that are included<br />
in the simulation, there is a perfect matched condition at the Wave Port.<br />
Because of this, the S-Parameters for each mode and Wave Port are<br />
normalized to a frequency dependent impedance. This type of S-<br />
Parameter is referred to as Generalized S-Parameter.<br />
Laboratory measurements, such as those from a vector network analyzer,<br />
or circuit simulators use a constant reference impedance (i.e. the ports are<br />
not perfectly matched at every frequency).<br />
To obtain results consistent with measurements or for use with<br />
circuit simulators, the generalized s-parameters calculated by Ansoft<br />
HFSS must be renormalized to a constant characteristic impedance.<br />
See the section on Calibrating Wave Ports for details on how to<br />
perform the renormalization.<br />
Note: Failure to renormalize the generalized S-Parameters may<br />
result in inconsistent results. For example, since the Wave Ports<br />
are perfectly matched at every frequency, the S-Parameters do not<br />
exhibit the interaction that actually exists between ports with a<br />
constant characteristic impedance.<br />
Ansoft <strong>High</strong> <strong>Frequency</strong> <strong>Structure</strong> <strong>Simulator</strong> v 9.0 User’s Guide<br />
1.2-4
Excitations<br />
1.2<br />
Wave Port Boundary Condition<br />
The edge of a Wave Port can have the following boundary conditions:<br />
Perfect E or Finite Conductivity – by default the outer edge of a Wave Port<br />
is defined to have a Perfect E boundary. With this assumption, the port is<br />
defined within a wave<strong>guide</strong>. For transmission line structures that are<br />
enclosed by metal, this is not a problem. For unbalanced or non-enclosed<br />
lines, the fields in the surrounding dielectric must be included. Improper<br />
sizing of the port definition will result in erroneous results.<br />
Symmetry – the port solver understands Perfect E and Perfect H symmetry<br />
planes. The proper Wave Port impedance multiplier needs to be applied<br />
when using symmetry planes.<br />
Impedance – the port solver will recognize an impedance boundary at the<br />
edges of the ports.<br />
Radiation – the default setting for the interface between a Wave Port and a<br />
Radiation boundary is to apply a Perfect E boundary to the edge of the<br />
ports.<br />
Ansoft <strong>High</strong> <strong>Frequency</strong> <strong>Structure</strong> <strong>Simulator</strong> v 9.0 User’s Guide<br />
1.2-5
Excitations<br />
1.2<br />
Calibrating Wave Ports<br />
Wave Ports that are added to a structure must be calibrated to ensure consistent<br />
results. This calibration is required in order to determine direction and polarity of<br />
fields and to make voltage calculations.<br />
Solution Type: Driven Modal<br />
For Driven Modal simulations, the Wave Ports are calibrated using<br />
Integration Lines. Each Integration Line is used to calculate the following<br />
characteristics:<br />
Impedance – As an impedance line, the line serves as the path over<br />
which Ansoft HFSS integrates the E-field to obtain the voltage at a<br />
Wave Port. Ansoft HFSS uses the voltage to compute the<br />
characteristic impedance of the Wave Ports, which is needed to<br />
renormalize generalized S-matrices to specific impedances such as<br />
50 ohms.<br />
Note: If you want to be able to renormalize S-parameters or<br />
view the values of Zpv or Zvi, you must apply Integration<br />
Lines to the Wave Ports of a structure.<br />
Calibration – As a calibration line, the line explicitly defines the up or<br />
positive direction at each Wave Port. At any Wave Port, the<br />
direction of the field at ωt = 0 can be in at least one of two directions.<br />
At some ports, such as circular ports, there can be more than two<br />
possible directions, and you will want to use Polarize E-Field. If you<br />
do not define an Integration Line, the resulting S-parameters can be<br />
out of phase with what you expect.<br />
Tip You may need to run a ports-only solution first to help determine how<br />
the Integration Lines need to be applied to a Wave Port and their direction.<br />
Ansoft <strong>High</strong> <strong>Frequency</strong> <strong>Structure</strong> <strong>Simulator</strong> v 9.0 User’s Guide<br />
1.2-6
Excitations<br />
1.2<br />
To calibrate a Wave Port, that has already been defined, with an<br />
Integration Line:<br />
1. From the Project Tree, expand Excitations and double click on the<br />
Wave Port to be calibrated<br />
2. Select the Modes tab.<br />
3. From the table, select the Integration Line column for the first mode<br />
and choose New Line.<br />
4. Enter the position and length of the line using one of the following<br />
methods<br />
Type the start and stop points of the line directly into the x, y,<br />
or z axis fields, referenced to the working coordinates. For<br />
more information on coordinates, refer to “Getting Oriented in<br />
the Drawing Space” in Chapter **, Drawing Basics and Tips.<br />
Graphically pick the points in the Design Window’s graphics<br />
area. The line is displayed as a vector; the vector indicates<br />
direction. From the Integration Line column, select Swap<br />
Endpoints to reverse the direction of the line, if necessary.<br />
5. Repeat steps 3 and 4 to define and apply lines to other modes of the<br />
current Wave Port.<br />
6. Click the OK button when you are finished defining Integration Lines<br />
7. Repeat steps 1-6 to apply lines to other Wave Ports.<br />
Step 3: Create New Line<br />
Ansoft <strong>High</strong> <strong>Frequency</strong> <strong>Structure</strong> <strong>Simulator</strong> v 9.0 User’s Guide<br />
1.2-7
Excitations<br />
1.2<br />
About Impedance Lines<br />
The S-matrices initially calculated by Ansoft HFSS are generalized S-<br />
matrices normalized to the impedances of each port. However, it is often<br />
desirable to compute S-matrices that are normalized to specific<br />
impedances such as 50 ohms. To convert a generalized S-matrix to a<br />
renormalized S-matrix, Ansoft HFSS first computes the characteristic<br />
impedance at each port. There are several ways to compute the<br />
characteristic impedance (Z pi , Z pv , Z vi ).<br />
Ansoft HFSS will always calculate Z pi. The impedance calculation using<br />
power and current is well defined for a Wave Port. The other two methods<br />
– Z pv and Z vi – require a line of integration to determine voltage. By defining<br />
an Integration Line for each mode, the voltage can be computed.<br />
In general, the impedance line should be defined between two points at<br />
which the voltage differential is expected to be a maximum. If you are<br />
analyzing multiple modes, define a separate Integration Lines for each<br />
mode since the orientation of the electric field will vary.<br />
About Calibration Lines<br />
When the excitation field pattern at a Wave Port is computed, the direction<br />
of the field at ωt=0 is arbitrary and can point in one of at least two ways.<br />
The Integration Lines calibrate the port by defining the preferred direction<br />
or the reference orientation. Be sure to define Integration Lines for each<br />
Wave Port so that the preferred direction is the same relative to other ports<br />
having identical or similar cross-sections. In this way, the results of<br />
laboratory measurements (in which the setup is calibrated by removing the<br />
structure and connecting two ports together) can be duplicated.<br />
Because the calibration lines only determine the phase of the excitation<br />
signal and the traveling wave, the system ignores them during the Ports-<br />
Only solution<br />
Ansoft <strong>High</strong> <strong>Frequency</strong> <strong>Structure</strong> <strong>Simulator</strong> v 9.0 User’s Guide<br />
1.2-8
Excitations<br />
1.2<br />
Solution Type: Driven Terminal<br />
The Modal S-matrix solution computed by Ansoft HFSS is expressed in<br />
terms of the incident and reflected powers of the wave<strong>guide</strong> modes. This<br />
description does not lend itself to problems where several different quasitransverse<br />
electromagnetic (TEM) modes can propagate simultaneously.<br />
For structures like coupled transmission lines or connectors, which support<br />
multiple, quasi-TEM modes of propagation, it is often desirable to compute<br />
the Terminal S-Parameters.<br />
To calibrate a Wave Port, that has already been defined, with Terminal<br />
Lines:<br />
1. From the Project Tree, expand Excitations and double click on the<br />
Wave Port to be calibrated<br />
2. Select the Terminals tab.<br />
3. From the table, select the Terminal Line column for the first terminal<br />
and choose New Line.<br />
4. Enter the position and length of the line using one of the following<br />
methods<br />
Type the start and stop points of the line directly into the x, y,<br />
or z axis fields, referenced to the working coordinates. For<br />
more information on coordinates, refer to “Getting Oriented in<br />
the Drawing Space” in Chapter **, Drawing Basics and Tips.<br />
Graphically pick the points in the Design Window’s graphics<br />
area. The line is displayed as a vector; the vector indicates<br />
direction. From the Terminal Line column, select Swap<br />
Endpoints to reverse the direction of the line, if necessary.<br />
5. Repeat steps 3 and 4 to define and apply lines to other terminals of<br />
the current Wave Port.<br />
6. Click the OK button when you are finished defining Terminal Lines<br />
7. Repeat steps 1-6 to apply lines to other Wave Ports.<br />
Ansoft <strong>High</strong> <strong>Frequency</strong> <strong>Structure</strong> <strong>Simulator</strong> v 9.0 User’s Guide<br />
1.2-9
Excitations<br />
1.2<br />
About Terminal Lines<br />
The Terminal S-Parameters represent the linear combination of nodal<br />
voltages and currents for the Wave Port. From the nodal voltages and<br />
currents, the admittance, impedance, and pseudo-S-matrices can be<br />
determined.<br />
By defining a Terminal Line for each conductor across a port, Ansoft HFSS<br />
will automatically convert the Modal Solution to its equivalent Terminal<br />
Solution.<br />
In general a single terminal line is created from the reference or<br />
“ground” conductor to each port-plane conductor.<br />
The polarity reference for the voltage is established by the arrow<br />
head(+) and the base(-) of the terminal line. If you decide to create<br />
terminal lines, they must be defined for every port and every terminal<br />
on the port<br />
Ansoft <strong>High</strong> <strong>Frequency</strong> <strong>Structure</strong> <strong>Simulator</strong> v 9.0 User’s Guide<br />
1.2-10
Excitations<br />
1.2<br />
Considerations for Defining Wave Ports<br />
Wave Port Locations<br />
It is recommended that only surfaces that are exposed to the background<br />
be defined as Wave Ports. The background is given the boundary name<br />
outer. Therefore a surface is exposed to the background if it touches the<br />
boundary outer. You can locate all regions of outer by selecting the menu<br />
item HFSS, Boundary Display (Solver View). From the Solver View of<br />
Boundaries, check the Visibility for outer.<br />
Interior Wave Ports<br />
Ports are Planar<br />
If you want to apply Wave Ports to the interior of a structure, you<br />
must create an inner void or select the surface of an interior object<br />
that is assign a perfect conductor material property. Inner voids are<br />
automatically assigned the boundary outer. You can create an inner<br />
void by surrounding one object entirely with another object, then<br />
subtracting the interior object.<br />
A port must lie in a single plane. Ports that bend are not allowed. For<br />
example, if a geometric model has a curved surface exposed to the<br />
background, that curved surface cannot be defined as a port.<br />
Ansoft <strong>High</strong> <strong>Frequency</strong> <strong>Structure</strong> <strong>Simulator</strong> v 9.0 User’s Guide<br />
1.2-11
Excitations<br />
1.2<br />
Wave Ports Require a Length of Uniform Cross Section<br />
Ansoft HFSS assumes that each port you define is connected to a semiinfinitely<br />
long wave<strong>guide</strong> that has the same cross section as the Wave Port.<br />
When solving for S-parameters, the simulator assumes that the structure is<br />
excited by the natural field patterns (modes) associated with these cross<br />
sections. The following figures illustrate cross sections. The first figure<br />
shows regions that have been defined as Wave Ports on the outer<br />
conductive surface of a structure.<br />
Port 1<br />
Port 4<br />
Port 3<br />
Port 2<br />
In the next figure, cross sections must be added to the structure. The<br />
wave<strong>guide</strong> on the left is not modeled correctly because it does not contain<br />
a length of uniform cross section at either Wave Port. To model it correctly,<br />
add a length of uniform cross section at each Wave Port, as shown on the<br />
wave<strong>guide</strong> to the right.<br />
no uniform cross section<br />
at Wave Ports<br />
uniform cross section<br />
added for each Wave Port<br />
Ansoft <strong>High</strong> <strong>Frequency</strong> <strong>Structure</strong> <strong>Simulator</strong> v 9.0 User’s Guide<br />
1.2-12
Excitations<br />
1.2<br />
The length of the uniform cross section must be long enough to allow nonpropagating<br />
modes to die out. This ensures accurate simulation results. For<br />
example, if a non-propagating mode takes approximately one-eighth of a<br />
wavelength to die out, either because of losses or because it is an<br />
evanescent mode, then you should make the uniform cross section oneeighth<br />
of a wavelength. Otherwise, you must include the effects of that<br />
higher-order mode in the simulation.<br />
Discontinuities placed close to the port may also cause non-propagating<br />
modes to reach the port. Placing the port too close to discontinuities will<br />
cause erroneous results since the boundary condition at the port will<br />
prevent the simulated solution from matching the actual solution (i.e. The<br />
system forces the field at each port to be a linear combination of the modes<br />
you request). The energy from the non-propagating modes that reach the<br />
port will affect the apparent energy in the dominate mode and produce<br />
erroneous results.<br />
The modes attenuate as a function of e -αz , assuming the wave propagates<br />
in the z-direction. Therefore, the required distance (uniform port length)<br />
depends on the value of the modes propagation constant.<br />
When the Wave Ports lengths are correct, for modes that are included in<br />
the simulation there is a perfect matched condition at a Wave Port, as if the<br />
wave<strong>guide</strong> extended to infinity. For modes that are not included in a<br />
simulation, a Wave Port appears as a perfect conductor.<br />
Wave Ports and Multiple Propagating Modes<br />
Each higher-order mode represents a different field pattern that can<br />
propagate down a wave<strong>guide</strong>. In general, all propagating modes should be<br />
included in a simulation. In most cases, you can accept the default of 1<br />
mode, but where propagating higher-order modes are present you need to<br />
change this to include higher-order modes. If there are more propagating<br />
modes than the number specified, erroneous results will be generated. The<br />
number of modes can vary among ports.<br />
Ansoft <strong>High</strong> <strong>Frequency</strong> <strong>Structure</strong> <strong>Simulator</strong> v 9.0 User’s Guide<br />
1.2-13
Excitations<br />
1.2<br />
Propagating Modes<br />
Propagating modes are those that have a propagation constant, β (rad/m),<br />
that is greater than their attenuation constant, α (Np/meter). One way to<br />
determine which modes need to be modeled is to set up the problem with<br />
multiple modes and generate a solution with no adaptive passes. Then,<br />
inspect the complex propagation constant, γ = α + β, associated with each<br />
mode. To inspect the complex propagation constant (Gamma) after an<br />
analysis has been performed:<br />
1. From the HFSS, Analysis Setup menu, select Matrix Data.<br />
2. A dialog similar to the one shown below will appear, check Gamma<br />
and change the display type to Real/Imaginary.<br />
Each additional mode at a port results in an additional set of S-parameters.<br />
For example, if you are analyzing two modes at each port in a three-port<br />
structure, the final result is a 6x6 S-matrix. In general, an n-port solution is<br />
the total number of excitations of all ports, the number of modes, plus the<br />
number of sources.<br />
If you choose not to include some higher-order modes in a simulation,<br />
make sure the cross sections on the Wave Ports are long enough so that<br />
the modes die out and are not reflected back.<br />
Ansoft <strong>High</strong> <strong>Frequency</strong> <strong>Structure</strong> <strong>Simulator</strong> v 9.0 User’s Guide<br />
1.2-14
Excitations<br />
1.2<br />
Wave Ports and Symmetry Planes – The Impedance Multiplier<br />
When a ports size is reduced because of a symmetry plane, the impedance<br />
needs to be adjusted to account for the loss of voltage and power-flow.<br />
A Perfect E Symmetry plane must be adjusted by a factor of 2.<br />
Such models have half the voltage differential and half the<br />
power flow of the full structure, resulting in impedances that<br />
are half of those for the full structure.<br />
A Perfect H Symmetry plane must be adjusted by a factor of 0.5.<br />
Such models have the same voltage differential but half the<br />
power flow of the full structure, resulting in impedances that<br />
are twice those for the full structure.<br />
If the structure has a combination of Perfect E and Perfect H<br />
Symmetry planes, adjust accordingly.<br />
For instance, you do not have to enter an impedance<br />
multiplier for a structure with both a Perfect E and Perfect H<br />
boundary since you would be multiplying by 0.5 and 2.<br />
Ansoft <strong>High</strong> <strong>Frequency</strong> <strong>Structure</strong> <strong>Simulator</strong> v 9.0 User’s Guide<br />
1.2-15
This page is intentionally left blank.
Analysis Setup<br />
2<br />
Analysis Setup<br />
This chapter provides details on Analysis in the Ansoft HFSS v.9.0 software such<br />
as:<br />
Add Solution Setup<br />
Adapt <strong>Frequency</strong><br />
Convergence Criteria<br />
Initial Mesh Options<br />
Adaptive Options<br />
Low-Order Basis Functions<br />
Setup<br />
Properties<br />
Add Sweep<br />
Sweep – Properties and Types of Sweeps<br />
Ansoft <strong>High</strong> <strong>Frequency</strong> <strong>Structure</strong> <strong>Simulator</strong> v 9.0 User’s Guide<br />
2-1
Analysis Setup<br />
2<br />
Adaptive Meshing<br />
The adaptive meshing constructs a mesh that conforms to the electrical<br />
performance of the device. By employing adaptive meshing, the mesh is<br />
automatically tuned to give the most accurate and efficient mesh possible.<br />
Without adaptive meshing, the responsibility of generating the correct mesh<br />
would be left to the user. This is both error prone and tedious. With Adaptive<br />
Meshing you will know the answer is right the first time.<br />
How it Works<br />
The adaptive meshing algorithm searches for the largest gradients in the E-<br />
field or error and sub-divides the mesh in those regions. It also targets<br />
singularities, such as the edge of a conductor, as locations to add extra<br />
elements.<br />
The mesh growth for each adaptive pass is controlled by the Tetrahedron<br />
Refinement in Setup Solution (Advanced Tab). You should notice, that the<br />
Tet. . Refinement is a percentage. This ensures that between each pass the<br />
mesh is sufficiently perturbed and guarantees that you will not receive false<br />
convergences.<br />
After the mesh has been refined, a full solution is performed and the<br />
process is repeated until convergence<br />
Convergence<br />
After each adaptive pass, HFSS compares the S-Parameters from the<br />
current mesh to the results of the previous mesh. If the answers have not<br />
changed by the user defined value or Delta S, then the solution has<br />
converged and the current or previous mesh can be used to perform a<br />
frequency sweep. If the solution has converged, then technically, the<br />
previous mesh is as good as the current mesh. In this case, Ansoft HFSS<br />
will use the previous mesh to perform frequency sweeps if they have been<br />
requested.<br />
Delta S<br />
The Delta S is the default criteria used to determine mesh/solution<br />
convergence. The Delta S is defined as the maximum change in the<br />
magnitude of the S-parameters between two consecutive passes:<br />
Max ij [mag(S N ij – S (N-1) ij)], where i and j cover all matrix entries and N<br />
represents the pass number<br />
Since this is the magnitude of a vector quantity, it can vary between<br />
0 and 2<br />
Ansoft <strong>High</strong> <strong>Frequency</strong> <strong>Structure</strong> <strong>Simulator</strong> v 9.0 User’s Guide<br />
2-2
Analysis Setup<br />
2<br />
Adaptive Meshing (Continued)<br />
Since the adaptive meshing is based on the E-field, choosing the proper adapt<br />
frequency can be critical. Like anything in engineering, there are exceptions to<br />
every rule, but in general, the following tips will help you select the correct<br />
adaptive frequency.<br />
Broadband <strong>Structure</strong>s<br />
For broadband structures, the end frequency should be used since the finer<br />
mesh should be valid at all lower frequency points.<br />
Filters<br />
For filters or narrow-band devices, a frequency within the pass-band or<br />
operating region should be used since in the stop-band the E-field is only<br />
present at the ports.<br />
Fast <strong>Frequency</strong> Sweeps<br />
For Fast <strong>Frequency</strong> Sweeps, typically use the center of the frequency<br />
band. The Fast <strong>Frequency</strong> Sweep uses the mesh/solution at the adaptive<br />
frequency point. Since the error in the Fast <strong>Frequency</strong> Sweep typically<br />
increases as you move away from this point, the center of the frequency<br />
band is usually the preferred solution frequency to extrapolate the entire<br />
band from. It is also important to center the frequency sweep around a<br />
center point that will produce an adequate mesh. This is especially true for<br />
very high Q devices such as narrow-band filters. If the center frequency is<br />
not in the filters pass-band, the bandwidth and resonant frequency will not<br />
be accurate.<br />
Full-Wave Spice Export<br />
For Full-Wave Spice problems, use the Knee <strong>Frequency</strong><br />
(F knee ≈0.5/rise_time) to adapt to convergence. Then perform 2-5 more<br />
frequency points to adapt at. The additional points should be selected<br />
between the Knee <strong>Frequency</strong> and the maximum frequency (Only needs 2-3<br />
passes per frequency point).<br />
Frequencies below the Knee <strong>Frequency</strong> should have the largest<br />
impact on the time-domain, therefore the Knee <strong>Frequency</strong> is used<br />
for the primary adaptive meshing. Unfortunately, the mesh needed<br />
at the higher frequencies may not be resolved enough without<br />
performing the additional adaptive mesh passes.<br />
Due to the large bandwidths, typically you will use an Interpolating<br />
Sweep. Using multiple frequency sweeps and combining the results<br />
may also be useful.<br />
Ansoft <strong>High</strong> <strong>Frequency</strong> <strong>Structure</strong> <strong>Simulator</strong> v 9.0 User’s Guide<br />
2-3
Analysis Setup<br />
2<br />
Adaptive Meshing (Continued)<br />
<strong>High</strong>-Speed Digital/Signal Integrity<br />
For high-speed digital simulations you are interested in the performance<br />
over a broad frequency range. To determine the frequency bandwidth that<br />
you need to simulate over, the following <strong>guide</strong> is recommended:<br />
BW ≥ 5*F knee , where F knee ≈ 0.5/rise_time<br />
In general, all of the frequencies below the F knee frequency have the largest<br />
impact on the digital signal. Therefore a good high-speed digital design will<br />
have a clean, well matched response up to at least F knee .<br />
<strong>High</strong>-Speed Digital (SPICE Export)<br />
To export to SPICE, for transient simulations, a large bandwidth is required<br />
(≥5*F knee ). The reason for this is that the F knee is an approximation, plus you<br />
want more then 1 sample point over the rise-time.<br />
When exporting to SPICE, the low frequency is also important. You want<br />
to get as close to DC as possible. Every port setup and every problem is a<br />
little different with regards to how low you can solve in Ansoft HFSS. 99%<br />
of the time you can simulate to at least 100MHz. Below that is trial an<br />
error. When you export to Full-Wave SPICE, the DC component will be<br />
extrapolated from the lowest frequency in the solve. Therefore, going from<br />
1GHz to DC is not going to give a very accurate extrapolation.<br />
<strong>Frequency</strong> spacing. The setup for Full-Wave Spice recommends that the<br />
minimum frequency be used as the spacing. This usually results in 1000-<br />
3000 points depending on the bandwidth of the sweep.<br />
<strong>High</strong>-Speed Digital (Adaptive Meshing)<br />
Since the simulation bandwidths can be so large, determining the proper<br />
adaptive mesh frequency can be very difficult. The following technique is<br />
recommended:<br />
1. Adapt at the F knee until convergence (Delta S 0.02 to 0.01)<br />
2. Pick 2-3 frequency points above F knee to adapt at<br />
Don’t run these to convergence, just do 3-5 passes<br />
3. Solve the <strong>Frequency</strong> Sweep<br />
For large bandwidths, either break up the frequency sweep<br />
and/or use Interpolating Sweeps<br />
Ansoft <strong>High</strong> <strong>Frequency</strong> <strong>Structure</strong> <strong>Simulator</strong> v 9.0 User’s Guide<br />
2-4
Analysis Setup<br />
2<br />
Adaptive Meshing (Continued)<br />
<strong>High</strong>-Speed Digital (Why this technique?)<br />
If the frequency points below Fknee have the biggest impact on the digital<br />
response, then meshing at that frequency should produce an accurate<br />
mesh for all frequency points below it.<br />
If you simulate most passive devices over a large enough bandwidth, they<br />
start to exhibit a low pass filter response. So the higher frequency content<br />
contributes less to the time-domain simulation in addition to being filtered<br />
out by the devices frequency response. This is why we don't worry as<br />
much about the higher frequency adaptive passes converging. To<br />
appreciate the significance of this you also have to take into account how<br />
HFSS does its adaptive meshing. It is done by finding the highest gradient<br />
of the electric field. So if the device behaves as a filter and we are<br />
adapting outside the pass band of the filter, we are focusing most of the<br />
mesh only at the ports.<br />
Now if your device performs well beyond Fknee, there is no harm in<br />
adapting at a higher frequency until convergence. Unfortunately, for real<br />
problems(10-40Gb/s) the design challenge is to get the device to work at<br />
least up to the knee frequency.<br />
For these large Bandwidth sweeps, use the Interpolating Sweep. This<br />
sweep is based on the discrete sweep, but it adaptively picks discrete<br />
points and curve fits. So it takes less discrete points to represent a large<br />
bandwidth. The interpolating sweep can use either a polynomial fit or a<br />
rational function. So it can help to break up the sweep. Up to the knee<br />
frequency works good for a polynomial fit and above that the rational<br />
function will work better. The interpolation sweep will always pass through<br />
the start/end frequency points so if you don't change the mesh and make<br />
sure the start and end frequency points match up for your sweeps, they<br />
combine together without a problem.<br />
Ansoft <strong>High</strong> <strong>Frequency</strong> <strong>Structure</strong> <strong>Simulator</strong> v 9.0 User’s Guide<br />
2-5
Analysis Setup<br />
2<br />
Adaptive Meshing (Continued)<br />
<strong>High</strong>-Speed Digital (Design Flow)<br />
Up until this point, the entire discussion of <strong>High</strong> Speed Digital was based<br />
on the assumption that you are exporting every simulation to SPICE.<br />
There are many stages in the design cycle and going to SPICE is not<br />
required for every part of the design. If you have resonance's, mismatch,<br />
coupling, etc below the Fknee, these should be addressed in the field<br />
solver prior to running SPICE simulations. Therefore, the sweep only<br />
needs to be done to 1.5-2x Fknee to investigate the performance. In<br />
addition, for engineering design purposes, you may not need to go below<br />
1GHz.<br />
During these early stages of design, you may also want to use the Fast<br />
<strong>Frequency</strong> Sweep since you can get S-Parameters and fields for every<br />
frequency in the Sweep. This allows you to visualize any resonance or<br />
coupling you may be seeing in the S-Parameters.<br />
Another useful tool for package/board analysis is the EigenMode solver. In<br />
many instances, resonances caused by the power and ground plane nets<br />
are the largest contributor to designs problems. By removing everything<br />
except the power/ground nets, the Eigenmode solver can be used to<br />
quickly identify resonances.<br />
Ansoft <strong>High</strong> <strong>Frequency</strong> <strong>Structure</strong> <strong>Simulator</strong> v 9.0 User’s Guide<br />
2-6
Analysis Setup<br />
2<br />
Setting Convergence<br />
It is very common to request too much accuracy when defining the Delta S.<br />
Remember! The manufacturing process, the laboratory equipment, and the<br />
measurement process all have inherent errors associated with them. Asking<br />
HFSS to provide a level of accuracy that is orders of magnitudes greater then<br />
what you can obtain in the real-world does not buy you anything other then extra<br />
simulation time. Instead, use the Convergence Monitoring and good engineering<br />
judgment to determine when to terminate the adaptive meshing process and how<br />
to set the Delta S. In general a Delta S of 0.02(2%), which is the default, or as<br />
low as 0.01(1%), is sufficient.<br />
Solution Convergence – S-Matrix vs. Fields<br />
The convergence criteria is based on the S-Matrix. Typically, the S-Matrix<br />
converges prior to field quantities. That is to say if you are looking for the<br />
absolute field value within the problem region, chances are you will need to solve<br />
several more adaptive passes in order to see the same convergence that was<br />
obtained for the S-Matrix. This will also depend on the field quantity you are<br />
solving for. Ansoft HFSS solves for the E-field directly. From the E-field it<br />
calculates the H-field and from the H-field it calculates current. Therefore, the<br />
field quantities will also converge with varying mesh densities.<br />
Ansoft <strong>High</strong> <strong>Frequency</strong> <strong>Structure</strong> <strong>Simulator</strong> v 9.0 User’s Guide<br />
2-7
Analysis Setup<br />
2<br />
Adding a Solution Setup<br />
In order to perform an Analysis in Ansoft HFSS a Solution Setup must be<br />
added. To do this, right click on Analysis in the Ansoft HFSS model tree.<br />
By default, the General Tab will be displayed. The Solution <strong>Frequency</strong> and<br />
the Convergence Criteria are set here.<br />
Ansoft <strong>High</strong> <strong>Frequency</strong> <strong>Structure</strong> <strong>Simulator</strong> v 9.0 User’s Guide<br />
2-8
Analysis Setup<br />
2<br />
Adding a Solution Setup (Continued)<br />
General Tab<br />
Solution <strong>Frequency</strong> – This frequency point is used by the adaptive mesher<br />
to automatically refine the mesh to electrical performance of the device.<br />
Solve Ports Only - The Port Solution uses an arbitrary, adaptive 2D<br />
eigenmode solver to determine the natural frequencies or modes<br />
that will be used to excite the structure. The ports only solution can<br />
be used to calculate only the modal field patterns for the 2D cross<br />
sections defined to be ports. This is useful for determining the<br />
number of modes, modal fields, the port length, and/or proper port<br />
setup prior to running a full solution.<br />
Adaptive Solutions<br />
Maximum Number of Passes - This number controls the maximum<br />
number of passes the adaptive mesh routine will perform as it<br />
attempts to satisfy the convergence criteria.<br />
Maximum Delta S Per Pass – This number defines the convergence<br />
criteria for the adaptive meshing process.<br />
Ansoft <strong>High</strong> <strong>Frequency</strong> <strong>Structure</strong> <strong>Simulator</strong> v 9.0 User’s Guide<br />
2-9
Analysis Setup<br />
2<br />
Adding a Solution Setup (Continued)<br />
Advanced Tab<br />
Initial Mesh Options<br />
Lambda Refinement - The Initial Mesh is based only on the 3D solid<br />
model, it has no bearing on the electrical performance of the device<br />
to be simulated. The Lambda Refinement process refines the Initial<br />
Mesh until most mesh element lengths are approximately onequarter<br />
wavelength for air and one-third wavelength for dielectrics.<br />
A wavelength is based on the Single <strong>Frequency</strong> value entered in the<br />
Solution <strong>Frequency</strong>. In almost all cases Lambda Refinement should<br />
be used.<br />
Use Free Space Lambda – This will force the lambda refinement to<br />
target a mesh size approximately one-quarter of a wavelength for<br />
air. The material properties of objects will be ignored. This may be<br />
useful in applications that have dielectrics with very high<br />
conductivities. Brain tissue or salt water are examples of materials<br />
that will produce very high mesh counts even though the RF<br />
penetration into the material will be limited to a region very close to<br />
the surface.<br />
Ansoft <strong>High</strong> <strong>Frequency</strong> <strong>Structure</strong> <strong>Simulator</strong> v 9.0 User’s Guide<br />
2-10
Analysis Setup<br />
2<br />
Adding a Solution Setup (Continued)<br />
Advanced Tab (Continued)<br />
Adaptive Options<br />
Refinement Per Pass -The mesh growth for each adaptive pass is<br />
controlled by the Refinement Per Pass. The Refinement Per Pass is<br />
a percentage. This ensures that between each pass the mesh is<br />
sufficiently perturbed and guarantees that you will not receive false<br />
convergences.<br />
Minimum Number of Passes - An adaptive analysis will not stop<br />
unless the minimum number of passes you specify has been<br />
completed, even if convergence criteria have been met<br />
Minimum Converged Passes - An adaptive analysis will not stop<br />
unless the minimum number of converged passes you specify has<br />
been completed. The convergence criteria must be met for at least<br />
this number of passes before the adaptive analysis will stop<br />
Use Matrix Convergence - You can specify different stopping criteria<br />
for specific entries in the S-matrix. This is done by checking the Use<br />
Matrix Convergence box. The adaptive analysis will continue until<br />
the magnitude and phase of the entries change by an amount less<br />
than the specified criteria from one pass to the next, or until the<br />
number of requested passes is completed.<br />
Ansoft <strong>High</strong> <strong>Frequency</strong> <strong>Structure</strong> <strong>Simulator</strong> v 9.0 User’s Guide<br />
2-11
Analysis Setup<br />
2<br />
Adding a Solution Setup (Continued)<br />
Advanced Tab (Continued)<br />
Use Low-Order Solution Basis – The Low Order Basis Functions reduce the<br />
default second-order basis function to a linear basis function. It is intended<br />
for simulations in which the edge to edge spacing between tetrahedron is<br />
electrically small. In this situation, the basis function, and hence the<br />
number of unknowns, can be reduced. For this assumption to be valid, the<br />
edge lengths for all tetrahedron in the model should be on the order of<br />
1/20th of a wavelength. In versions prior to v9.0, this was set with a system<br />
environment variable called ZERO_ORDER.<br />
Common Applications :<br />
On-Chip Spiral Inductors, Capacitors, Transformers, etc.<br />
Package Analysis – Flip-Chip, BGA, etc.<br />
Ansoft <strong>High</strong> <strong>Frequency</strong> <strong>Structure</strong> <strong>Simulator</strong> v 9.0 User’s Guide<br />
2-12
Analysis Setup<br />
2<br />
Adding a Solution Setup (Continued)<br />
Ports Tab<br />
Port Adapt Options<br />
Port Field Accuracy - Usually, the default Port Field Accuracy value<br />
is adequate. You may want improved port accuracy under the<br />
following conditions:<br />
You are interested primarily in the port impedances. Port<br />
impedances are computed as part of the port solution.<br />
You need to lower the noise floor to catch S-parameters that<br />
are expected to be in the -70 dB range.<br />
Refining the mesh at the ports causes HFSS to refine the mesh for<br />
the entire structure as well. This occurs because it uses the port field<br />
solutions as boundary conditions when computing the full 3D<br />
solution. Therefore, specifying too small a port field accuracy can<br />
result in an unnecessarily complex finite element mesh<br />
Ansoft <strong>High</strong> <strong>Frequency</strong> <strong>Structure</strong> <strong>Simulator</strong> v 9.0 User’s Guide<br />
2-13
Analysis Setup<br />
2<br />
Adding a Solution Setup (Continued)<br />
Ports Tab (Continued)<br />
Set Min/Max Triangles<br />
The mesh for each model port will be adaptively refined until it<br />
includes the minimum number of triangles. Refinement will then<br />
continue until the port field accuracy or the maximum number of<br />
triangles is reached.<br />
To specify the minimum and maximum number of triangles in<br />
the port mesh, uncheck the Automatically Set Min/Max<br />
Triangles option.<br />
Enter a value for the Minimum Number of Triangles. The<br />
default value is 25 for models with lumped gap ports and 90<br />
for models with wave ports.<br />
Enter a value for the Maximum Number of Triangles. The<br />
default value is 400.<br />
If you leave Automatically Set Min/Max Triangles selected, HFSS<br />
will determine the reasonable values for the minimum and maximum<br />
number of triangles based on the port’s setup.<br />
Defaults Tab<br />
The Defaults tab allows you to save the current settings as the defaults for<br />
future solution setups or revert the current settings to the standard setting.<br />
Ansoft <strong>High</strong> <strong>Frequency</strong> <strong>Structure</strong> <strong>Simulator</strong> v 9.0 User’s Guide<br />
2-14
Analysis Setup<br />
2<br />
<strong>Frequency</strong> Sweeps<br />
Using the converged mesh or initial mesh if no adaptive passes were requested,<br />
the swept frequency response of the device can be obtained. Ansoft HFSS<br />
provides several methods for calculating the frequency response:<br />
Discrete – performs a full solution at every frequency using the current<br />
mesh. The time required is the single frequency solve times the number of<br />
frequency points. Fields can be displayed at any frequency within the<br />
sweep range if the Save Fields Box is checked.<br />
Fast – uses an Adaptive Lanczos-Pade Sweep(ALPS) based solver to<br />
extrapolate an entire bandwidth of solution information from the center<br />
frequency. Very good for high-Q devices but it can not be used to solve for<br />
devices that pass through cut-off. Once the band has been extrapolated, a<br />
high number of frequency points can be calculated without a penalty. In<br />
addition, the Fields can be displayed at any frequency within the sweep<br />
range. The time and memory required to solve a fast frequency sweep<br />
may be much larger then the single frequency solve.<br />
Interpolating – performs solves at discrete frequency points that are fit by<br />
interpolating. Ansoft HFSS determines the frequency points to solve at<br />
based on the error in the interpolation between consecutive passes. The<br />
interpolation error and maximum number of points is defined by the user in<br />
the Edit Sweep. As with the fast frequency sweep, the Interpolating Sweep<br />
can generate a larger number of frequency points. But you only have the<br />
field solution for the last solved frequency. The maximum solution time is<br />
the single frequency solve times the maximum number of points.<br />
Ansoft <strong>High</strong> <strong>Frequency</strong> <strong>Structure</strong> <strong>Simulator</strong> v 9.0 User’s Guide<br />
2-15
Analysis Setup<br />
2<br />
<strong>Frequency</strong> Sweeps (Continued)<br />
Adding Points to a Fast or Interpolating Sweep<br />
After the Fast or Interpolating sweeps have completed, additional<br />
frequency points can be added by changing the number of points in Edit<br />
Sweep Clicking on Analyze will not resolve the entire frequency sweep, it<br />
will just calculate the additional frequency points.<br />
Adding Solutions to Interpolating Sweeps<br />
If the interpolating sweep does not converge with the requested passes or<br />
you wish to change the target convergence, the values can be changed<br />
and resolved. The interpolating sweep will recalculate the two end<br />
frequencies but after that it will use the previously calculated points and<br />
continue trying to reach the target convergence.<br />
Ports Only and <strong>Frequency</strong> Sweeps<br />
A discrete or interpolating frequency sweep can be used with the Ports<br />
Only solution.<br />
Fast <strong>Frequency</strong> Sweep Ports Solve<br />
The Fast <strong>Frequency</strong> sweep can not be used on ports that pass through cutoff.<br />
You may also experience problems if the sweep frequency approaches<br />
cut-off.<br />
Combining Multiple <strong>Frequency</strong> Sweeps<br />
For very large bandwidths, breaking the band into smaller frequency<br />
sweeps can improve the results. Since the Fast <strong>Frequency</strong> Sweep is<br />
extrapolated from the center frequency different error curves at the end<br />
frequencies will prevent the sweeps from aligning. The interpolating sweep<br />
will not have this problem since the solution always passes through the end<br />
frequencies (Assuming the same mesh is used).<br />
Ansoft <strong>High</strong> <strong>Frequency</strong> <strong>Structure</strong> <strong>Simulator</strong> v 9.0 User’s Guide<br />
2-16
Analysis Setup<br />
2<br />
Add Sweep<br />
After a Solution Setup has been added you can also add a <strong>Frequency</strong> Sweep.<br />
To do this, right-click on Setup in the HFSS Model Tree. The Edit Sweep window<br />
will appear<br />
Sweep Type<br />
Ansoft <strong>High</strong> <strong>Frequency</strong> <strong>Structure</strong> <strong>Simulator</strong> v 9.0 User’s Guide<br />
2-17
Analysis Setup<br />
2<br />
Add Sweep (Continued)<br />
<strong>Frequency</strong> Setup<br />
After the sweep type has been chosen, the frequencies of interest must be<br />
specified.<br />
There are three <strong>Frequency</strong> Setup Options:<br />
Linear Step -- specify a linear range of values with a constant step size<br />
Linear Count -- specify a linear range of values and the number, or count,<br />
of points within the variable range<br />
Single Points -- specify a single values for the sweep definition<br />
Saving Fields<br />
It is possible to save the Field data for every point in the Fast Sweep and<br />
the Discrete Sweep. To save the Field information make sure that the<br />
Save Fields (All Frequencies) box is checked.<br />
For the Interpolation Sweep, only the Field data for the last solved<br />
frequency will be available for post-processing.<br />
Ansoft <strong>High</strong> <strong>Frequency</strong> <strong>Structure</strong> <strong>Simulator</strong> v 9.0 User’s Guide<br />
2-18
Analysis Setup<br />
2<br />
Add Sweep (Continued)<br />
DC Extrapolation Options<br />
When exporting Spice subcircuits it is necessary to include the DC point.<br />
Since Ansoft HFSS does not solve down to DC we can use DC<br />
Extrapolation. The DC Extrapolation option is available in the Discrete and<br />
Interpolating Sweeps.<br />
Time Domain Calculation<br />
Ansoft HFSS can calculate the maximum frequency required to obtain an<br />
accurate time domain result. HFSS uses the following equation:<br />
Max. Freq. = (0.5/Signal Rise Time) x Time Steps Per Rise Time<br />
Ansoft <strong>High</strong> <strong>Frequency</strong> <strong>Structure</strong> <strong>Simulator</strong> v 9.0 User’s Guide<br />
2-19
This page is intentionally left blank.
Ansoft HFSS Data Reporting<br />
3<br />
Overview<br />
Ansoft HFSS has very powerful and flexible data management and plotting<br />
capabilities. Once understood, it will make the whole solution process much<br />
easier, and will help craft the entire problem setup.<br />
Topics of Discussion<br />
Data management<br />
2D Plotting<br />
3D Plotting<br />
Antenna characteristics<br />
Field Plotting<br />
Ansoft <strong>High</strong> <strong>Frequency</strong> <strong>Structure</strong> <strong>Simulator</strong> v 9.0 User’s Guide<br />
3-1
Ansoft HFSS Data Reporting<br />
3<br />
Data Management<br />
With every model variation that is solved, a new data entry is stored within the<br />
project results directory. This capability has implications in that the user can<br />
perform a parametric sweep of a model without needing an Optimetrics license.<br />
NOTE: Automatic parametric sweeps along with the other Optimetrics<br />
functions, Optimization, Sensitivity, and Statistical analyses, DO require an<br />
Optimetrics license.<br />
The dataset validity can be checked by selecting HFSS > Results > Browse<br />
Solutions<br />
By examining this dialog, the user can determine which parametric instances<br />
have been solved, and how many adaptive passes were necessary.<br />
Ansoft <strong>High</strong> <strong>Frequency</strong> <strong>Structure</strong> <strong>Simulator</strong> v 9.0 User’s Guide<br />
3-2
Ansoft HFSS Data Reporting<br />
3<br />
Data Management<br />
Post-processing steps can also be performed in the new interface for HFSS. The<br />
common operations that were previously performed in the Matrix Data module of<br />
previous releases are:<br />
Port Impedance Renormalization<br />
Port De-embedding<br />
embedding<br />
Differential pair analyses<br />
Other post-processing operations that used to require the Matrix Data module<br />
that are now computed by default in HFSS version 9.0 are the Y- and Z-matricesZ<br />
matrices.<br />
Also, given that the Solution Type defined early on in the process, negate the<br />
necessity of computing Terminal S-parameters from Modal S-parameters.<br />
Port Impedance Renormalization<br />
Within the new interface, many calculations are made automatically without<br />
user intervention. The wave port renormalization impedances are specified<br />
with the port wizard. By simply editing the properties of a port once a<br />
solution is completed, the port can be re-normalized.<br />
Port De-embedding<br />
embedding<br />
This same dialog can be used to change the distance that a port will be deembedded.<br />
The user can go back and edit this value as many times as<br />
necessary. Each time the OK button is pressed, the data, and also the plots<br />
if they exist, will be updated with the newly de-embedded data.<br />
Positive values of de-embedding will move the reference plane into the<br />
model<br />
Ansoft <strong>High</strong> <strong>Frequency</strong> <strong>Structure</strong> <strong>Simulator</strong> v 9.0 User’s Guide<br />
3-3
Ansoft HFSS Data Reporting<br />
3<br />
Data Management<br />
Differential pair analyses<br />
For multiple terminals per port, differential pairs can be created to look at<br />
differential S-parameters instead of single-ended S-parameters. This can<br />
be useful for investigating the possible conversion between differential and<br />
common mode within a given structure.<br />
Within the wave port dialog, the Differential Pairs tab controls the creation<br />
of the pairs from the individual Terminals<br />
1. To create a differential pair, select New Pair, and select the terminal<br />
lines that represent the positive and negative sides<br />
2. From here, you can also change the Differential and Common mode<br />
impedance setting for each pair.<br />
Ansoft <strong>High</strong> <strong>Frequency</strong> <strong>Structure</strong> <strong>Simulator</strong> v 9.0 User’s Guide<br />
3-4
Ansoft HFSS Data Reporting<br />
3<br />
Data Management<br />
Importing Data from other solutions<br />
Often it is desirable to compare the results of one simulation to the results<br />
of another simulation, HFSS, circuit, or planar, or even measurements.<br />
This can be accomplished readily within the HFSS version 9.0 desktop<br />
environment.<br />
To import solutions into HFSS Desktop:<br />
NOTE: The minimum requirements for importing a solution are an<br />
existing model with at least one port.<br />
1. Select HFSS > Results > Import Solutions, and the following dialog<br />
will appear:<br />
The import options are Import Solutions and Import Table.<br />
Solutions represent S-parameter matrices in standard forms<br />
such as Touchstone and Ansoft legacy data in .szg file<br />
format. Tables are simply files containing rows and columns<br />
of data.<br />
2. Selecting Import Solution will bring up the following dialog:<br />
Ansoft <strong>High</strong> <strong>Frequency</strong> <strong>Structure</strong> <strong>Simulator</strong> v 9.0 User’s Guide<br />
3-5
Ansoft HFSS Data Reporting<br />
3<br />
Data Management<br />
3. From this window, select Browse to find the file to be imported. The<br />
acceptable file formats are: .sNp, .szg, .flp, .yNp, .zNp, and .tou.<br />
4. Click Open to load the file.<br />
5. Click Import to bring the data into the HFSS desktop<br />
6. Click OK when you are done importing solutions<br />
All solutions will appear in the report editor under the Sweep category<br />
(more on this later)<br />
For Import Table, the following dialog will appear:<br />
Ansoft <strong>High</strong> <strong>Frequency</strong> <strong>Structure</strong> <strong>Simulator</strong> v 9.0 User’s Guide<br />
3-6
Ansoft HFSS Data Reporting<br />
3<br />
Plotting Data<br />
Data plotting can take a variety of forms. The most often used format is 2D<br />
Cartesian plotting, but we also have the capability to plot in 3D as well. Below is a<br />
list of all the quantities that can be plotted on various graphs. For definitions of<br />
each of these quantities, see the online help.<br />
Eigenmode solution<br />
Eigenmode Parameters (modes)<br />
Driven Modal Solution<br />
S-parameters<br />
Y-parameters<br />
Z-parameters<br />
VSWR<br />
Gamma (complex propagation constant)<br />
Port Zo<br />
Driven Terminal Solution<br />
S-parameters<br />
Y-parameters<br />
Z-parameters<br />
VSWR<br />
Power (at port)<br />
Voltage Transform matrix (T)<br />
Terminal Port Zo<br />
Fields<br />
Mag_E<br />
Mag_H<br />
Mag_Jvol<br />
Mag_Jsurf<br />
ComplexMag_E<br />
ComplexMag_H<br />
ComplexMag_Jvol<br />
ComplexMag_Jsurf<br />
Local_SAR (Specific Absorption Rate)<br />
Average_SAR<br />
NOTE: For all Field plots, a polyline or surface must be selected before<br />
creating the Field plot.<br />
Ansoft <strong>High</strong> <strong>Frequency</strong> <strong>Structure</strong> <strong>Simulator</strong> v 9.0 User’s Guide<br />
3-7
Ansoft HFSS Data Reporting<br />
3<br />
Plotting Data<br />
Types of Plots:<br />
Rectangular Plot<br />
Polar Plot<br />
3D Rectangular Plot<br />
3D Polar Plot<br />
Smith Chart<br />
Data Table<br />
Radiation Pattern<br />
To Create a Plot:<br />
1. Select HFSS > Results > Create Report<br />
2. Select Report Type and Display Type from the selections above<br />
3. Click OK and the Report Editor will be displayed – we will go over the<br />
options in this dialog on the next page.<br />
Ansoft <strong>High</strong> <strong>Frequency</strong> <strong>Structure</strong> <strong>Simulator</strong> v 9.0 User’s Guide<br />
3-8
Ansoft HFSS Data Reporting<br />
3<br />
Plotting Data<br />
Creating a Plot (cont’d)<br />
4. Context<br />
Design – choose from available designs within a project<br />
Sweep – choose from available sweeps including adaptive passes<br />
and imported data<br />
Domain – defaults to Sweep, but can be switched to Time domain for<br />
plotting S-parameters with an impulse or step response.<br />
5. Sweep / X / Y Tabs<br />
Sweep – controls the source of the independent variable in the plot.<br />
NOTE: By default, the Report editor selects Use Current<br />
Design and Project variable values. This will select the<br />
primary sweep of frequency usually, and the current<br />
simulated values of the project variables<br />
To display a plot with multiple traces for different variable<br />
values, change this setting to Sweep Design and Project<br />
variable values You can then change the primary sweep from<br />
frequency to a variable if desired. This is useful for looking at<br />
S21 versus stub length, for example. Simply select the value<br />
in the Name column next to primary sweep, and change the<br />
value to whatever you desire.<br />
You can also uncheck the All Points block to select which<br />
values of a variable are to be plotted.<br />
X – controls any functional operator on the independent variable<br />
Y – select the value to be plotted and any operator<br />
6. Select Add Trace for as many values as you would like to plot<br />
7. Select Done when finished<br />
An example of a multi-trace plot of the sweep tab shown on the previous page is<br />
shown next<br />
Ansoft <strong>High</strong> <strong>Frequency</strong> <strong>Structure</strong> <strong>Simulator</strong> v 9.0 User’s Guide<br />
3-9
Ansoft HFSS Data Reporting<br />
3<br />
Plotting Data<br />
Ansoft <strong>High</strong> <strong>Frequency</strong> <strong>Structure</strong> <strong>Simulator</strong> v 9.0 User’s Guide<br />
3-10
Ansoft HFSS Data Reporting<br />
3<br />
Plotting Data<br />
3D Plots – simply add a third dimension such that instead of plotting a family of<br />
curves, you can plot a 3D surface that represents your data changing with two<br />
independent variables. Below is a 3D plot of the previous family of curves.<br />
Ansoft <strong>High</strong> <strong>Frequency</strong> <strong>Structure</strong> <strong>Simulator</strong> v 9.0 User’s Guide<br />
3-11
Ansoft HFSS Data Plotting<br />
3<br />
Plotting Data<br />
Output Variables<br />
In addition to being able to plot the built-in solved quantities, you can also<br />
create your own by using output variables.<br />
Clicking on the Output Variables button in the Traces dialog shown before,<br />
brings up the following dialog:<br />
To create an output variable:<br />
Type a name into the Name box<br />
Create an equation in the Expression box<br />
Click Add<br />
In the example show above, we have created an output variable that makes<br />
an approximation for Inductance of a spiral inductor. We could also have<br />
created an equation to calculate Q as well.<br />
NOTE: These output variables can also be used for optimization.<br />
Ansoft <strong>High</strong> <strong>Frequency</strong> <strong>Structure</strong> <strong>Simulator</strong> v 9.0 User’s Guide<br />
3-12
Ansoft HFSS – Data Reporting<br />
3<br />
Data Plotting – Special Case – Antenna Parameters<br />
Since antenna parameters require a special computation setup to determine the<br />
region over which the fields are to be computed, displaying antenna parameters<br />
is a two step process.<br />
Create an Infinite Sphere setup:<br />
1. Select HFSS > Radiation > Insert Far Field Setup > Infinite Sphere<br />
2. Enter the values and steps for Theta and Phi<br />
3. You can also change the coordinate system to calculate based upon a<br />
shifted or rotated coordinate system. Select the Coordinate System tab,<br />
and switch to the new CS.<br />
4. You can also change the Radiation Surface over which the far fields are<br />
computed by simply switching to the Radiation Surface tab, and select a<br />
new surface from any that were previously defined.<br />
5. Click OK<br />
Ansoft <strong>High</strong> <strong>Frequency</strong> <strong>Structure</strong> <strong>Simulator</strong> v 9.0 User’s Guide<br />
3-13
Ansoft HFSS – Data Reporting<br />
3<br />
Data Plotting – Antenna Parameters<br />
Creating a 2D plot:<br />
1. Select HFSS > Results > Create Report<br />
2. Select Far Field form the Report Type pulldown<br />
3. Select Radiation Pattern from the Display Type pulldown<br />
4. Select the quantity to be plotted from the Traces dialog<br />
Note: If multiple Infinite Sphere setups exist, make sure you select<br />
the appropriate one<br />
5. Select Add Trace and Done<br />
For a definition of the available antenna parameters, see the online help<br />
Below is an example of the 2D slices of a patch antenna for LHCP and RHCP<br />
directivity.<br />
Ansoft <strong>High</strong> <strong>Frequency</strong> <strong>Structure</strong> <strong>Simulator</strong> v 9.0 User’s Guide<br />
3-14
Ansoft HFSS – Data Reporting<br />
3<br />
Data Plotting – Antenna Parameters<br />
Creating a 3D Plot:<br />
Follow the procedures above for the 3D plot, except change the Phi and<br />
Theta quantities to match the far field calculation. Also choose an antenna<br />
quantity to plot.<br />
Below is an example of a 3D plot for a patch antenna:<br />
Ansoft <strong>High</strong> <strong>Frequency</strong> <strong>Structure</strong> <strong>Simulator</strong> v 9.0 User’s Guide<br />
3-15
Ansoft HFSS Data Reporting<br />
3<br />
Data Plotting – Antenna Parameters<br />
Special Case – Antenna Arrays<br />
When using master and slave boundary condition pairs to emulate an<br />
antenna array, you might want to apply an array factor to the computation<br />
of the antenna patterns. This can easily be done in Ansoft HFSS<br />
To create an Antenna Array Factor calculation:<br />
1. Select HFSS > Radiation > Antenna Array Setup<br />
2. Select No, Regular, or Custom Array<br />
3. Switch to the next tab, and enter the characteristics of the array, or<br />
enter the filename that contains the element locations<br />
4. Once you click OK, any plots or calculations that are displayed will<br />
be updated with the array factor calculation. To go back to the single<br />
element calculations, select No Array Setup<br />
Ansoft <strong>High</strong> <strong>Frequency</strong> <strong>Structure</strong> <strong>Simulator</strong> v 9.0 User’s Guide<br />
3-16
Ansoft HFSS Data Reporting<br />
3<br />
Data Plotting – Antenna Parameters<br />
Antenna array – Shown below are field patterns of a single element and an array<br />
setup scanned to 30 degree angle.<br />
Ansoft <strong>High</strong> <strong>Frequency</strong> <strong>Structure</strong> <strong>Simulator</strong> v 9.0 User’s Guide<br />
3-17
Ansoft HFSS Data Reporting<br />
3<br />
Data Manipulation<br />
Sometimes, the built-in calculated quantities are not adequate even given the<br />
output variable capability. Because of this, Ansoft HFSS has the flexibility built in<br />
with an arbitrary fields calculator.<br />
You can use the Fields Calculator to manipulate field quantities to obtain any<br />
number of values. One common use is to evaluate power flow within a structure.<br />
This can be accomplished by integrating the Poynting vector over a geometric<br />
surface. This can easily be accomplished within the field calculator.<br />
To access the fields calculator:<br />
Select HFSS > Fields > Calculator<br />
For a more detailed explanation of the functions within the field calculator, visit<br />
our online technical support at http://www.ansoft.com.ots<br />
Ansoft <strong>High</strong> <strong>Frequency</strong> <strong>Structure</strong> <strong>Simulator</strong> v 9.0 User’s Guide<br />
3-18
Ansoft HFSS Data Reporting<br />
3<br />
Field Overlay Plotting<br />
Previously mentioned was the capability to plot field quantities over a geometry<br />
within a 2D plot, but this doesn’t give us a lot of insight. One of the main benefits<br />
of HFSS is that we can visualize what is going on with the electromagnetic fields<br />
within a structure, something that cannot be measured directly.<br />
Field plots can be applied to geometry selection within the 3D modeler, and can<br />
be modified given different stimulus amplitude, frequency, and phase. We can<br />
also visualize how a field propagates throughout the volume by animating this<br />
plot versus phase, which essentially adds a time base.<br />
To create a 2D / 3D Field Overlay Plot:<br />
1. Select a face of an object, an entire object, or even multiple object<br />
2. Select HFSS > Fields > Plot Fields ><br />
3. You can then change the frequency of the stimulus or phase with the<br />
resultant dialog box:<br />
Ansoft <strong>High</strong> <strong>Frequency</strong> <strong>Structure</strong> <strong>Simulator</strong> v 9.0 User’s Guide<br />
3-19
Ansoft HFSS Data Reporting<br />
3<br />
Field Overlay Plots<br />
Resultant modeler window for Magic “T” model with Mag_E plotted on Global:XY<br />
plane<br />
Selecting the object “arm”, and plotting within the volume yields:<br />
Ansoft <strong>High</strong> <strong>Frequency</strong> <strong>Structure</strong> <strong>Simulator</strong> v 9.0 User’s Guide<br />
3-20
Ansoft HFSS Data Reporting<br />
3<br />
Field Overlay Plots<br />
The 3D plot shown on the previous page is called an Isoval surface plot. This is<br />
not the default<br />
To change the field plot type:<br />
1. Selecting: HFSS > Fields > Modify Plot Attributes<br />
2. Switch to the Plot tab<br />
3. Select the applicable Plot from the pulldown<br />
4. Select the IsoValSurface radio button<br />
You can also leave the default of cloud plot and adjust the cloud<br />
density and point size until the plot looks acceptable<br />
Ansoft <strong>High</strong> <strong>Frequency</strong> <strong>Structure</strong> <strong>Simulator</strong> v 9.0 User’s Guide<br />
3-21
Ansoft HFSS Data Reporting<br />
3<br />
Field Overlay plots – Source Stimulus<br />
Sometimes it might be desirable to have multiple ports excited at the same time,<br />
perhaps out of phase. This is useful for evaluating power combiners. You might<br />
even want need to calculate the incident or reflected power for a plane wave<br />
source.<br />
To change the Field Plot stimulus:<br />
Select HFSS > Fields > Edit Sources<br />
The following field d overlay plots shows what happens to the Magic “T”<br />
when we have a 90 degree phase shift at the 2 E-plane end inputs. The<br />
component doesn’t isolate one port.<br />
Ansoft <strong>High</strong> <strong>Frequency</strong> <strong>Structure</strong> <strong>Simulator</strong> v 9.0 User’s Guide<br />
3-22
Ansoft HFSS Data Reporting<br />
3<br />
Field Overlay Plot – Phase animation<br />
The final step in field overlay plots is creating animation. This essentially shows<br />
you how a wave propagates through the structure as you vary phase (time).<br />
To create an animated 3D field plot:<br />
1. Select HFSS > Field > Animate<br />
2. Typically, you can accept the defaults, but you may want to change the<br />
number of steps to limit computation time.<br />
Ansoft <strong>High</strong> <strong>Frequency</strong> <strong>Structure</strong> <strong>Simulator</strong> v 9.0 User’s Guide<br />
3-23
Ansoft HFSS Data Reporting<br />
3<br />
Mesh Overlay Plot<br />
Another plot that can be valuable in evaluating a simulation is the mesh overlay<br />
plot. Once created, you can tell which areas of the structure may need more<br />
tetrahedra for an improved quality of mesh.<br />
To create a Mesh overlay plot:<br />
1. Select the face, plane, or object to plot the mesh<br />
2. Select HFSS > Fields > Plot Mesh<br />
Ansoft <strong>High</strong> <strong>Frequency</strong> <strong>Structure</strong> <strong>Simulator</strong> v 9.0 User’s Guide<br />
3-24
Ansoft HFSS Data Reporting<br />
3<br />
Viewing in the 3D modeler<br />
With the ability to plot field quantities and mesh within the 3D modeler, it can<br />
sometimes get crowded, and model details can be obscured by the plots. You<br />
can reduce the clutter by turning off the visibility of objects and even field plots.<br />
To turn off the visibility of field overlay plots:<br />
1. Select View > Visibility<br />
2. Select the Fields Reporter tab, and check, , or uncheck, , the fields plot<br />
you want displayed.<br />
Ansoft <strong>High</strong> <strong>Frequency</strong> <strong>Structure</strong> <strong>Simulator</strong> v 9.0 User’s Guide<br />
3-25
This page is intentionally left blank.
Solve Loop<br />
4<br />
Solve Loop<br />
Unlike pre-processing, the solution process is very automated. Once the<br />
problem has been defined properly, HFSS will take over and step through several<br />
stages of the solution process. To start the solution process, right click on<br />
Analysis in the HFSS Model Tree and select Analyze.<br />
It is important to review this section since the solution setup has a direct impact<br />
on the automated solution process. A closer look at the solution process reveals<br />
it consists of three components:<br />
Initial Solution – includes the mesh generation, ports solution, and a full<br />
solution at a single frequency<br />
Adaptive Refinement Loop – refines the mesh and performs a full solution at<br />
the Initial solution frequency until convergence<br />
<strong>Frequency</strong> Sweep – calculates the swept frequency response using a mesh<br />
generated by the Adaptive Refinement Loop<br />
The illustration on the following page outlines the steps performed by the solution<br />
process.<br />
Ansoft <strong>High</strong> <strong>Frequency</strong> <strong>Structure</strong> <strong>Simulator</strong> v 9.0 User’s Guide<br />
4-1
Solve Loop<br />
4<br />
Initial Solution<br />
Initial Mesh<br />
Seeding and<br />
Lambda Refinement<br />
(Single <strong>Frequency</strong>)<br />
Port Solution<br />
Ports Only &<br />
<strong>Frequency</strong> Sweep<br />
Full Volumetric Solution<br />
(S-Parameters/E<br />
Parameters/E-Fields)<br />
No Adaptive Meshing<br />
Adaptive Mesh Loop<br />
Refine Mesh<br />
(Gradient of E-Field<br />
at Single <strong>Frequency</strong>)<br />
No<br />
Check Convergence<br />
(Delta S)<br />
YES<br />
<strong>Frequency</strong> Sweep<br />
Full Volumetric Solution<br />
(S-Parameters/E<br />
Parameters/E-Fields)<br />
Ansoft <strong>High</strong> <strong>Frequency</strong> <strong>Structure</strong> <strong>Simulator</strong> v 9.0 User’s Guide<br />
4-2
Solve Loop<br />
4<br />
Monitoring Convergence<br />
You can view the Convergence of the entire solution process. Right click on<br />
Analysis/Setup in the HFSS model tree. The Convergence Tab can be used to<br />
display a table or a plot.<br />
Ansoft <strong>High</strong> <strong>Frequency</strong> <strong>Structure</strong> <strong>Simulator</strong> v 9.0 User’s Guide<br />
4-3
Solve Loop<br />
4<br />
Profile<br />
At any time during or after the solution process, you can examine the computing<br />
resources - or profile data - that were used by HFSS during the analysis. The<br />
profile data is essentially a log of the tasks performed by HFSS during the<br />
solution. The log indicates the length of time each task took and how much<br />
RAM/disk memory was required<br />
Task -- lists the software module that performed a task during the solution<br />
process, and the type of task that was performed. For example, for the task<br />
mesh3d_adapt, Mesh3d is the software module that adaptively refined the mesh.<br />
Real Time -- the amount of real time required to perform the task.<br />
CPU Time -- the amount of CPU time required to perform the task.<br />
Memory -- the peak amount of memory used by your machine while performing<br />
the task. This value includes all of the applications running at the time; it is not<br />
limited to HFSS..<br />
Information -- general information about the solution, including the number of<br />
tetrahedra used in the mesh.<br />
Ansoft <strong>High</strong> <strong>Frequency</strong> <strong>Structure</strong> <strong>Simulator</strong> v 9.0 User’s Guide<br />
4-4
Solve Loop<br />
4<br />
Matrix Data<br />
After the Solution is complete the Matrix Data can be viewed by clicking on<br />
Analysis/Setup. Right click on Setup and select Matrix Data. The Solution Data<br />
window will appear.<br />
In the Simulation pull-down list, click the solution setup and solved pass -<br />
adaptive, single frequency solution, or frequency sweep - for which you want to<br />
view matrices.<br />
Select the type of matrix to view.<br />
S-matrix<br />
Y-matrix<br />
Z-matrix<br />
Gamma<br />
Zo (characteristic impedance.)<br />
The available types depend on the solution type<br />
Ansoft <strong>High</strong> <strong>Frequency</strong> <strong>Structure</strong> <strong>Simulator</strong> v 9.0 User’s Guide<br />
4-5
Solve Loop<br />
4<br />
Matrix Data (cont.)<br />
Data can be displayed in the following formats:<br />
Magnitude/ Phase<br />
Real/ Imaginary<br />
dB/ Phase<br />
Magnitude<br />
Phase<br />
Real<br />
Imaginary<br />
dB<br />
The available formats depend on the matrix type being displayed.<br />
You can also select solved frequencies that you would like to display<br />
To display the matrix entries for all solved frequencies, choose All Freqs.<br />
To show the matrix entries for one solved frequency, clear All Frequencies<br />
and then select the solved frequency that you want to view.<br />
For adaptive passes, only the solution frequency specified in the Solution<br />
Setup dialog box is available. For frequency sweeps, the entire frequency<br />
range is available.<br />
To insert of delete one or more displayed frequencies, click Edit Freqs.<br />
This command is only available if the sweep type is Fast or Interpolating. If you<br />
choose to export the matrix data for the Fast or Interpolating sweep after<br />
modifying the frequencies in the Edit Frequencies dialog box, only those<br />
frequencies displayed under the Matrix Data tab will be exported.<br />
Exporting Matrix Data<br />
A number of export formats are available:<br />
Touchstone (*.sNp)<br />
Data Table (*.tab)<br />
Planar EM/HFSS v6+ (*.szg)<br />
Neutral Model Format (*.nmf)<br />
MATLAB (*.m)<br />
Citifile (*.cit)<br />
Ansoft <strong>High</strong> <strong>Frequency</strong> <strong>Structure</strong> <strong>Simulator</strong> v 9.0 User’s Guide<br />
4-6
Solve Loop<br />
4<br />
Equivalent Circuit Export<br />
It is possible to export Full-Wave Spice, Lumped Element and Partial Fraction<br />
Expansion models from Ansoft HFSS. To do this, click on Analysis/Setup/Matrix<br />
Data/Equivalent Circuit Export.<br />
The Equivalent Circuit Export Options window will appear<br />
Ansoft <strong>High</strong> <strong>Frequency</strong> <strong>Structure</strong> <strong>Simulator</strong> v 9.0 User’s Guide<br />
4-7
Solve Loop<br />
4<br />
If you have a Driven Terminal solution you can export to PSpice, , HSPICE,<br />
Spectre, , or Maxwell Spice. You must have a frequency sweep solution and five<br />
or more frequency points to successfully export an equivalent circuit data file.<br />
Select Lumped Element Export (Low Bandwidth) if you want to save the data as<br />
a low-frequency circuit model using simple lumped elements (resistors,<br />
capacitors, inductors, and dependent current sources).<br />
Select Partial Fraction Expansion for Matlab to create a *.m file<br />
Click Combine Sweeps if you want to combine the data from two or more<br />
frequency sweeps into one file. The end points of the sweep ranges can touch,<br />
but may not overlap.<br />
The S-matrices are written to the data file that you specified in the equivalent<br />
circuit data format.<br />
Ansoft <strong>High</strong> <strong>Frequency</strong> <strong>Structure</strong> <strong>Simulator</strong> v 9.0 User’s Guide<br />
4-8
Solve Loop<br />
4<br />
List<br />
To view Model Parameters, Boundaries, Excitations, Mesh Operations and<br />
Analysis Setup right click on Analysis in the Ansoft HFSS model tree and select<br />
List<br />
Ansoft <strong>High</strong> <strong>Frequency</strong> <strong>Structure</strong> <strong>Simulator</strong> v 9.0 User’s Guide<br />
4-9
This page is intentionally left blank.
Mesh Operations<br />
4.1<br />
Mesh Operations<br />
This chapter provides details on meshing in the Ansoft HFSS v.9.0 software. It<br />
discusses the default meshing of curvature, user control thereof, and the new<br />
volume correction capabilities used in matrix solution. The following topics are<br />
discussed:<br />
Curved Geometry Mesh Adaptation<br />
Faceting Default Settings<br />
Volume Perturbation in FEM Solutions<br />
User-Defining Surface Approximations<br />
Application Recommendations<br />
Applying Mesh Operations<br />
Examples/Benchmarks<br />
The following examples are provided to demonstrate the topics discussed<br />
in the chapter:<br />
Standard Pillbox Resonator<br />
Hemispherical Dielectric Resonator Antenna with Cavity<br />
Accelerator Spoke-Cavity Application<br />
Circular WG Quadrature Ortho-mode Junction (OMJ)<br />
Ansoft <strong>High</strong> <strong>Frequency</strong> <strong>Structure</strong> <strong>Simulator</strong> v.9.0 User’s Guide<br />
4.1-1
Mesh Operations<br />
4.1<br />
Curve Mesh Adaptation in HFSS v9.0<br />
HFSS v9.0 meshes handles curved surfaces differently than prior versions of<br />
HFSS. Proper understanding of the differences in curved mesh handling and the<br />
advantages of new capabilities in the HFSS v9.0 solver are essential to obtaining<br />
accurate results.<br />
The new graphical drawing interface encourages the use of true-curved<br />
drawing, by removing the option to assign a facet count to the construction<br />
of primitives such as circles, cylinders, spheres, and ellipses.<br />
Faceted primitives are available however as polyhedrons and<br />
polyhedral solids, if still desired.<br />
Initial meshing is constrained by faceting decisions made by the first pass<br />
of the meshing algorithms. In prior versions of HFSS however, adaptive<br />
mesh points could be placed ‘anywhere’ on the true-surface of the affected<br />
object(s), as shown in the before and after images below. (Initial mesh left,<br />
adapted at right. Note that regular faceting was not maintained after<br />
adaptive mesh alteration.)<br />
For HFSS v9.0, however, in order to provide more robust meshing with<br />
respect to more complex geometries, the initial faceting selections made<br />
for curved objects are respected throughout the adaptation process, so that<br />
the adapted mesh is a subdivided variation of the same meshed volume as<br />
the initial mesh. An adapted mesh from HFSS v9.0 is shown below.<br />
Ansoft <strong>High</strong> <strong>Frequency</strong> <strong>Structure</strong> <strong>Simulator</strong> v.9.0 User’s Guide<br />
4.1-2
Mesh Operations<br />
4.1<br />
Faceter Default Settings<br />
In order to keep initial meshes at reasonable sizes, the initial faceting default<br />
setting is to constrain the mesh surface normals to fall within 30degrees of the<br />
true-curved surface normals.<br />
This means that a cylindrical surface would be ‘faceted’ into 16 segments<br />
about its circumference, as illustrated below.<br />
The normal for each flat segment cannot be off by more than 30 degrees<br />
from the normal for the curved true surface which that segment’s face is<br />
approximating.<br />
Although aided by the Volume Perturbation technique now used in HFSS<br />
v9.0, it is not anticipated that this default faceting will be ‘enough’ for<br />
extremely high-accuracy analysis of resonant cavity volumes, spheroids,<br />
etc.<br />
The faceting default does not include a stringent aspect ratio default (note<br />
long triangles on top and bottom cylindrical faces).<br />
The default however is sufficient for most applications in which the curved<br />
geometry is not itself highly critical to the simulation result, yet where more<br />
faceting would result in an extremely large initial mesh<br />
E.g. Applicable for:<br />
…meshing of transmission line models with both signal and nonsignal<br />
vias present to prevent parallel-plate modes in stripline or<br />
CPW configurations<br />
…Coaxial applications, where both the inner and outer radius faceting<br />
maintains an effectively congruent distance for characteristic<br />
impedance results.<br />
…cylinders or spheres used as radiation boundaries.<br />
Less Applicable for:<br />
….cylindrical cavity resonances to 0.001% frequency accuracy<br />
…elliptical wave<strong>guide</strong> coupling irises<br />
…circular wave<strong>guide</strong>s<br />
Ansoft <strong>High</strong> <strong>Frequency</strong> <strong>Structure</strong> <strong>Simulator</strong> v.9.0 User’s Guide<br />
4.1-3
Mesh Operations<br />
4.1<br />
Introduction of Volume Perturbation to HFSS Solutions<br />
Despite lower faceting ‘compliance’ to the true-curved geometry as the<br />
adaptation process adds mesh points, HFSS v9.0 introduces a new solution<br />
technology that should result in a more accurate solution from far smaller mesh<br />
counts than in prior versions. This technology is referred to as Volume<br />
Perturbation or Volume Correction.<br />
In a faceted mesh of a cylindrical solid, small arc-section volumes are ‘lost’<br />
to the cylinder volume and become part of the volume of the cylinder’s<br />
surroundings.<br />
Since the true geometry definition is known before faceting, the deltavolumes<br />
represented by each of these sliver regions is computable<br />
The meshing algorithm in HFSS v9.0 can provide ‘adjustment factors’ to<br />
both the tetrahedral center-edge node locations and to the appropriate<br />
volumes of the tetrahedra on either side of the curved boundary, so that the<br />
FEM solution proceeds with the right terms even for a loosely-discretized<br />
mesh<br />
The end result is higher accuracy from the same mesh, even before the<br />
benefits of adaptive mesh refinement are taken into account.<br />
Volume Perturbation solutions are always on. No user setting is required to<br />
active them.<br />
Sliver Region (only top surface<br />
mesh outline shown)<br />
Ansoft <strong>High</strong> <strong>Frequency</strong> <strong>Structure</strong> <strong>Simulator</strong> v.9.0 User’s Guide<br />
4.1-4
Mesh Operations<br />
4.1<br />
User Control of Curved Mesh Faceting<br />
Since Volume Perturbation alone is not always enough, users can control the<br />
fidelity to which the initial mesh faceting conforms to geometric curvature by<br />
assigning Mesh Operation Surface Approximations to appropriate objects and/or<br />
object faces<br />
Mesh Operations can be assigned from the HFSS menu, from the Design<br />
Tree, or from the geometry interface’s context-sensitive menu.<br />
The Surface Approximation options are shown below right. Definitions<br />
follow:<br />
Surface Deviation is the maximum spacing,<br />
in drawing units, that the tetrahedral surfaces<br />
may be from the true-curved geometry’s<br />
surface.<br />
Normal Deviation is the maximum angular<br />
difference, in degrees, that a tetrahedral<br />
face’s normal can have from the surface<br />
normal for the true geometry which it is<br />
meant to represent.<br />
Aspect Ratio refers to the maximum allowed<br />
aspect ratio of all faces of all tetrahedra of<br />
the selected object or face. This setting<br />
influences mesh quality rather than actual<br />
meshed volume or surface locations.<br />
Ansoft <strong>High</strong> <strong>Frequency</strong> <strong>Structure</strong> <strong>Simulator</strong> v.9.0 User’s Guide<br />
4.1-5
Mesh Operations<br />
4.1<br />
Each Setting can be forced, left at the default, or turned off entirely<br />
Ignore means no evaluation of this<br />
constraint will be done in generation of<br />
the initial meshing, not even to the<br />
“built-in” settings HFSS follows without<br />
surface approximation instructions<br />
Use Defaults leaves that constraint at the<br />
built-in settings, and is selected if you do<br />
not wish to tighten this constraint but also<br />
do not wish to deactivate it.<br />
Set… is of course used to apply a user<br />
constraint value which may be tighter or<br />
looser than the built-in constraint used<br />
in the absence of specific instructions.<br />
Setting looser constraints than the<br />
default may require also setting<br />
adjoining objects to the same<br />
looser constraint so that the<br />
default does not take precedence<br />
at interfaces.<br />
Usage Suggestions<br />
Do not overspecify.<br />
It is always easier to ‘add’ than subtract mesh, by running more adaptive<br />
passes or by adding supplemental mesh instructions<br />
Too stringent a setting (e.g. Normal Deviation of 1 degree) can result in<br />
poor mesh qualities due to aspect ratios, poor mesh gradients to<br />
surrounding objects, etc.<br />
Use Aspect Ratio settings along with Normal or Surface Deviation settings<br />
For cylindrical type objects where curved and planar faces meet, the<br />
normal and surface deviation settings apply to the curved faces only.<br />
Setting an aspect ratio limit as well (e.g. 4:1) will force a few additional<br />
triangles on the planar faces and help preserve a cleaner overall mesh<br />
Consider using Polyhedrons or Polygons instead if using to ‘reduce’ mesh<br />
If your design has many curved objects which you want only very coarsely<br />
meshed (e.g. a whole fence of ground vias, for which 30 degree default<br />
normal deviation is unnecessary), and the geometry is not imported,<br />
consider drawing the vias as hexagonal or even square solids instead,<br />
rather than having to ‘remember’ to reduce the meshing fidelity on them all.<br />
Ansoft <strong>High</strong> <strong>Frequency</strong> <strong>Structure</strong> <strong>Simulator</strong> v.9.0 User’s Guide<br />
4.1-6
Mesh Operations<br />
4.1<br />
Applying Mesh Operations<br />
If you want to refine the mesh on a face or volume but don’t want to generate a<br />
solution, do the following after defining mesh operations:<br />
If a current mesh has been generated, HFSS will refine it using the defined<br />
mesh operations.<br />
If a current mesh has not been generated, HFSS will apply the mesh<br />
operations to the initial mesh.<br />
If an initial mesh has not been generated, HFSS will generate it and apply<br />
the mesh operations to the initial mesh.<br />
If the defined mesh operations have been applied to the selected face or<br />
object, the current mesh will not be altered.<br />
Define a new mesh operation rather than modify an existing mesh<br />
operation. HFSS will not re-apply a modified mesh operation. Applying<br />
mesh operations without solving enables you to experiment with mesh<br />
refinement in specific problem regions without losing design solutions. You<br />
cannot undo the applied mesh operations, but you can discard them by<br />
closing the project without saving them.<br />
Ansoft <strong>High</strong> <strong>Frequency</strong> <strong>Structure</strong> <strong>Simulator</strong> v.9.0 User’s Guide<br />
4.1-7
Mesh Operations<br />
4.1<br />
Source: (Canonical)<br />
Description<br />
A pillbox resonator is a simple cylindrical cavity, the exact resonance of which is<br />
solved analytically as:<br />
f<br />
TE<br />
r<br />
f<br />
TM<br />
r<br />
mnp<br />
mnp<br />
2<br />
c ⎡<br />
ε<br />
qnm<br />
p<br />
⎢ +<br />
2<br />
2 ⎣( πb)<br />
l<br />
=<br />
2<br />
2<br />
c ⎡<br />
ε<br />
pnm<br />
p<br />
⎢ +<br />
2<br />
2 ⎣( πb)<br />
l<br />
=<br />
2<br />
2<br />
2<br />
⎤<br />
⎥<br />
⎦<br />
⎤<br />
⎥<br />
⎦<br />
Benchmark<br />
Equations for TE and TM modes of order (n, m, p) where p is the<br />
number of half-wave variations in the cavity axis direction<br />
p nm and q nm represent the zeros of the Bessel functions or their<br />
derivatives<br />
b is cavity radius, and l is cavity height<br />
c ε is the speed of light in the enclosed volume media<br />
A pillbox project with b = 10 cm and l = 10 cm was constructed.<br />
Volume of cavity was vacuum; wall boundaries were perfect conductors<br />
Solution was requested for 3 eigenmodes, with Surface Approximations set to<br />
vary the Normal Deviation<br />
norm was varied from 5 to 45 degrees by 5 degree steps<br />
Aspect ratio was set at 5:1; Surface Deviation setting was “Ignore”<br />
Solution setup was 0.25 GHz starting frequency (to assure a starting<br />
frequency did not add mesh beyond those set by the surface approximation<br />
settings<br />
Solutions were continued to 0.01% delta-f (real part) or 10 passes,<br />
whichever came first<br />
Tabulated results vs. theoretical computations are shown on the page following<br />
Bessel zeros were computed to about 5 digits (e.g. p 11 = 1.84118)<br />
Speed of light used was 299792458 m/s<br />
Ansoft <strong>High</strong> <strong>Frequency</strong> <strong>Structure</strong> <strong>Simulator</strong> v.9.0 User’s Guide<br />
4.1-8
Mesh Operations<br />
4.1<br />
Results:<br />
Normal<br />
Deviation<br />
(deg)<br />
HFSS<br />
TM010<br />
Result<br />
(GHz)<br />
Observations:<br />
With higher-order modes, absolute error is higher in order of ascending frequency<br />
regardless of normal deviation faceting applied<br />
This is expected due to some solution dependence on ‘starting frequency.<br />
Added adaptive elements are ‘shared’ among modes. Yet higher order<br />
modes have more ‘focused’ field peaks as compared to more fundamental<br />
modes. Therefore more rapid improvement for lower order modes are an<br />
artifact of the adaptation technique and not one volume correction can<br />
strongly influence.<br />
Note that for higher-accuracy analysis of the higher frequency modes, the<br />
solution can be executed with solution settings that will find that as the<br />
lowest frequency mode.<br />
Even 22.5 degree setting will result in better than 0.05% error for the<br />
fundamental mode solution.<br />
40 and 45 degree cases had identical meshes and results<br />
When used to ‘reduce’ mesh, other quality checks may still constrain the<br />
result to more than just the surface approximation settings requested.<br />
Conclusions:<br />
Delta vs.<br />
Theory<br />
(%)<br />
HFSS<br />
TE111<br />
Result 1<br />
(GHz)<br />
HFSS<br />
TE111<br />
Result 2<br />
(GHz)<br />
Avg.<br />
Delta vs.<br />
Theory<br />
(%)<br />
Final<br />
Tetrahedra<br />
Count<br />
Final Delta-f<br />
Convergence<br />
(%)<br />
5 1.147406 0.001482 1.7361 1.736118 0.0756005 3347 0.0067755<br />
10 1.147345 0.006798 1.73307 1.733154 0.2480399 2670 0.0077428<br />
15 1.147124 0.026058 1.72758 1.727638 0.5647448 1882 0.022301<br />
20 1.146748 0.058827 1.7192 1.719607 1.0370537 1060 0.042848<br />
25 1.146623 0.069721 1.71165 1.712348 1.4632887 1087 0.040982<br />
30 1.146196 0.106935 1.69707 1.697355 2.3142622 1008 0.052023<br />
35 1.145602 0.158703 1.68868 1.688798 2.8019963 890 0.12154<br />
40 1.144962 0.214481 1.67654 1.677916 3.4645009 887 0.033112<br />
45 1.144962 0.214481 1.67654 1.677916 3.4645009 887 0.033112<br />
For simple canonical shapes and fundamental modes, increased faceting is<br />
unnecessary unless extremely tight accuracy deviations are required<br />
Ansoft <strong>High</strong> <strong>Frequency</strong> <strong>Structure</strong> <strong>Simulator</strong> v.9.0 User’s Guide<br />
4.1-9
Mesh Operations<br />
4.1<br />
Source:<br />
K. K. So and K. W. Leung, “Annular Slot Excited Dielectric Resonator Antenna<br />
with a Backing Cavity,” Proceedings of the 2002 IEEE Antennas and Propagation<br />
Society International Symposium, San Antonio, TX, June 2002, Volume 4<br />
Description:<br />
A hemispherical dielectric resonator antenna (DRA) is fed by a coaxial cable<br />
across an annular ring slot, which couples the DRA to a hemispherical cavity<br />
beneath it. This project has a combination of spherical and planar-circle curves<br />
which should give good evidence of the utility of the volume correction approach.<br />
The source provides both author-derived analytical results and measurement<br />
results.<br />
Benchmark:<br />
An image of the modeled geometry is shown (below, right).<br />
Symmetry was used (1 plane).<br />
Cavity (vacuum filled) is 25mm radius; DRA is 12.5 mm radius.<br />
DRA material has ε r = 9.5<br />
Annular ring outer radius is 5.8 mm, 1 mm width<br />
Feed is generated using a lumped gap source port spanning the annular<br />
ring (see detail image)<br />
A 30mm radius by 35mm height polyhedron (16 sides) is used for the<br />
radiation boundary.<br />
Bottom ground plane is treated as<br />
‘infinite ground’ boundary condition<br />
Feed Detail<br />
Solution requested using only default surface approximations<br />
10 adaptive passes or to delta-S of 0.01 at adaptive frequency of<br />
3.75 GHz<br />
2.5 – 5 GHz fast sweep requested<br />
Ansoft <strong>High</strong> <strong>Frequency</strong> <strong>Structure</strong> <strong>Simulator</strong> v.9.0 User’s Guide<br />
4.1-10
Mesh Operations<br />
4.1<br />
Results:<br />
Plots of S11 vs. frequency and real and imaginary Z11 vs. frequency are shown<br />
Results conformed almost exactly to source’s reported measured results, and<br />
were closer to measurements than source analysis<br />
HFSS v8.5 solved to effectively the same result, but required about 4 times the<br />
mesh<br />
3324 at pass 8 (v9) vs. 13,300 tetrahedra at pass 11 (v8.5)<br />
Conclusions:<br />
This provides an example of a project for which the volume perturbation is<br />
extremely well-suited, by providing the proper dielectric resonance volume<br />
Past experiments with as many as 24 facets per circumference without<br />
volume perturbation demonstrated a noticable frequency error, therefore<br />
the role of the new solution capability in this success is clear.<br />
Solution accuracy was excellent in absolute terms even with default settings, and<br />
greatly exceeded HFSS v8.5’s capabilities<br />
A second simulation with Normal Deviation set to 15 degrees solved to the<br />
same results and excellent convergence, still beating the HFSS v8.5 mesh<br />
required<br />
Ansoft <strong>High</strong> <strong>Frequency</strong> <strong>Structure</strong> <strong>Simulator</strong> v.9.0 User’s Guide<br />
4.1-11
Mesh Operations<br />
4.1<br />
Source:<br />
http://www.jlab.org/~piller/spoke/spoke.htm<br />
Description:<br />
A Spoke cavity is used in accelerators for ion beams. This variant is a ‘low Beta’<br />
type. The cavity consists of a cylindrical volume with spherical sections<br />
subtracted from the flat ends. The ‘spoke’ is a smaller cylinder with its axis<br />
orthogonal to the main cavity’s axis that cuts through the cavity centerline on a<br />
diameter. There is an input/output beam pipe that runs coaxial with the main<br />
cavity and exits the two concave spheroid ends. Due to symmetry these cavities<br />
are usually analyzed in 1/8 sections with PHC boundary conditions<br />
Benchmark:<br />
An image of the modeled cavity geometry from the HFSS graphical interface is<br />
shown (below, right).<br />
Main cavity 21.908 cm radius by 25.4cm height<br />
Spherical subtractions have radius 64.572 cm<br />
Spoke is 3.81 cm radius; beam pipe 1.359 cm radius<br />
Solved for Normal Deviations from 5 to 30 degrees (as parametric sweep)<br />
Solution settings 10 passes or to delta-f of 0.01%(real)<br />
The beam ports were left as PHC bondaries, so port loading is not<br />
included in these simulation results<br />
Results:<br />
A plot of solved resonant frequency vs. the Normal Deviation surface<br />
approximation setting used is shown above left. Tabulated results are on the<br />
page following, with mesh and error statistics<br />
The reference website indicates that a different solution method for the cavity<br />
obtained a resonance frequency of 338.048 MHz, yet the measurement obtained<br />
348.578 MHz. Deltas to both are shown in the table.<br />
Ansoft <strong>High</strong> <strong>Frequency</strong> <strong>Structure</strong> <strong>Simulator</strong> v.9.0 User’s Guide<br />
4.1-12
Mesh Operations<br />
4.1<br />
Results, cont.<br />
Normal<br />
Deviation<br />
(deg)<br />
f_r (MHz)<br />
Delta vs.<br />
Ref.<br />
Analysis (%)<br />
Delta vs. Ref.<br />
Measurement<br />
(%)<br />
Final<br />
Tetrahedra<br />
Count<br />
Final Delta-f<br />
Convergence<br />
(%)<br />
5 339.332 0.379827717 2.652490978 21160 0.0021053<br />
10 341.486 1.017015335 2.034551808 9425 0.011095<br />
15 344.907 2.029001799 1.053135884 4246 0.10175<br />
20 347.903 2.915266471 0.19364389 3356 0.1472<br />
25 347.353 2.752567683 0.351427801 3757 0.016916<br />
30 352.195 4.184908652 1.037644372 2601 0.3341<br />
Observations:<br />
Since the reference analysis and measurement do not match, neither can be<br />
taken as an absolute accuracy validator for comparison to the HFSS results.<br />
The measurement was of a cavity with port loading at the beam pipe(s) and<br />
a probe loop which will themselves perturb results slightly<br />
The trend of resonant frequency shift with tighter normal deviation restriction is<br />
quite nearly linear<br />
Tighter initial faceting results in better reported convergence for the same pass<br />
count<br />
V8.5 convergence was still not at low levels after the last solved pass. Therefore<br />
it was only coincidentally near the most-refined HFSS v9 solution. Carrying the<br />
HFSS v8.5 solution to good convergence rather than a limited number of<br />
tetrahedra took more mesh than reported for HFSS v9.<br />
Conclusions:<br />
None of the meshes resulted in inadequate volume filling or clearly incorrect<br />
solutions. This is a geometry type for which increased faceting merely fine-tunes<br />
the resulting convergence and final solution outputs.<br />
Ansoft <strong>High</strong> <strong>Frequency</strong> <strong>Structure</strong> <strong>Simulator</strong> v.9.0 User’s Guide<br />
4.1-13
Mesh Operations<br />
4.1<br />
Source:<br />
Henry Z. Zhang, “A Wideband Orthogonal-Mode Junction using Ridged Sectoral<br />
Wave<strong>guide</strong>s,” Proceedings of the 2002 IEEE Antennas and Propagation Society<br />
International Symposium, San Antonio, TX, June 2002, Volume 4<br />
Description:<br />
This quadrature orthomode junction (OMJ) uses a tapered septum to convert a<br />
circular, coaxial, quad-ridge wave<strong>guide</strong> into four contoured ridge wave<strong>guide</strong>s which<br />
have modes analagous to rectangular single-ridge wave<strong>guide</strong>. The use of tapered<br />
septums intersecting with circular cross-sections necessitates drawing in true<br />
curvature.<br />
Benchmark:<br />
The geometry is shown above. Dimensions are as follows:<br />
Outer radius 160 mm, Ridge diameter 150mm, center diameter 60mm<br />
Ridges subtend 45 degrees, evenly spaced at 90 degree intervals<br />
Septums subtend 2 degrees and extend half the length of the modeled section<br />
(400mm)<br />
Two small ‘perturbers’ of ε r = 1.001 (in red) are inserted at the singlewave<strong>guide</strong><br />
end to provide stabilization of the degenerate mode order<br />
The HFSS v9 project was generated by direct translation of the v8.5 project, and<br />
solved mesh surface approximation settings.<br />
900 MHz adapt, swept from 400 – 950 MHz<br />
10 passes or to a Delta-S of 0.009<br />
10 and 15 degree normal deviation allowance<br />
Ansoft <strong>High</strong> <strong>Frequency</strong> <strong>Structure</strong> <strong>Simulator</strong> v.9.0 User’s Guide<br />
4.1-14
Mesh Operations<br />
4.1<br />
Results<br />
Solution results are shown below, focusing on return loss.<br />
Results for 15 degree normal deviation are still unstable<br />
Delta-S of 0.0342; final mesh of 16,177 tetrahedra<br />
Results for 10 degree normal deviation are excellent<br />
Delta-S of 0.00752; final mesh of 15,897 tetrahedra (shown)<br />
Conclusions:<br />
Due to very narrow annular gaps at the ridge peaks, this geometry type is poorly<br />
meshed without user-guidance in the form of tighter surface approximation<br />
settings, providing an example for which such guidance is required<br />
However, with 10 degree faceting the solution convergence was better and to a<br />
smaller final mesh than with 15 degree faceting. Therefore in geometric cases<br />
where surface approximations are required for a good answer, they do not<br />
necessarily imply a longer solution time.<br />
Ansoft <strong>High</strong> <strong>Frequency</strong> <strong>Structure</strong> <strong>Simulator</strong> v.9.0 User’s Guide<br />
4.1-15
Mesh Operations<br />
4.1<br />
HFSS v9, 15 degree normal deviation: 10 passes converged to 0.0342<br />
delta-S with a final mesh of 16,177 tetrahedra<br />
Solution results similar to prior version, but not there yet; fast sweep<br />
indicates further convergence might result in more stable output<br />
HFSS v9, 10 degree normal deviation: 9 passes converged to 0.00752 with<br />
a final mesh of 15,897 tetrahedra<br />
Solution results identical to prior version and very clean<br />
Shows that surface approximation advice may often parallel that for<br />
seeding: a more stringent starting condition and mesh may result in a<br />
well-converged solution with a smaller ending mesh<br />
Ansoft <strong>High</strong> <strong>Frequency</strong> <strong>Structure</strong> <strong>Simulator</strong> v.9.0 User’s Guide<br />
4.1-16