NOVAR 1106 / 1114 / 1206 / 1214 NOVAR 1xxx / S400 NOVAR ...
NOVAR 1106 / 1114 / 1206 / 1214 NOVAR 1xxx / S400 NOVAR ...
NOVAR 1106 / 1114 / 1206 / 1214 NOVAR 1xxx / S400 NOVAR ...

Create successful ePaper yourself
Turn your PDF publications into a flip-book with our unique Google optimized e-Paper software.
<strong>NOVAR</strong> <strong>1xxx</strong> EPM Elektropřístroj s. r. o.<br />
2.2.4 Error Indication<br />
2.2.4.1 <strong>NOVAR</strong> 11xx / 12xx / 13xx Controllers<br />
The instrument has an auxiliary Alarm relay to indicate nonstandard conditions. This relay’s contact<br />
goes to terminals 17 and 18.<br />
2.2.4.2 <strong>NOVAR</strong> 10xx Controllers<br />
Non-standard events can be signalled by one of last two output relays (if they are not used for control).<br />
It is necessary to set such relay function properly, see parameter 26.<br />
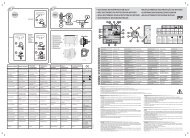
2.2.5 Output Relays<br />
The instrument has 6, 8 or 14 output relays (depending on controller model). The relays’ contacts go<br />
to terminals 19 through 32 ( or 5 through 12 at <strong>NOVAR</strong>-10xx models).<br />
The relays’ output contacts are internally wired with varistors.<br />
2.2.5.1 Standard Version Controllers<br />
The relays’ common contacts are internally connected to power supply terminal L ( No. 3; or No. 4 at<br />
at <strong>NOVAR</strong>-10xx models). When an output relay contact closes, power supply voltage appears at the<br />
corresponding output terminal.<br />
2.2.5.2 “/<strong>S400</strong>” Version Controllers<br />
Despite of standard version, the relays’ common contacts are connected to additional terminals 33,<br />
34.<br />
In case of DC voltage for supplying of contactors, installation of suppression 2A/600V diodes directly<br />
at contactors´s coils is strongly recommended. Furthermore, note lower maximum current load of the<br />
controller outputs at such case ( see technical parameters table).<br />
In installation there may be a need to test function of each compensation section by manual<br />
connection and disconnection — this can be done in the Manual mode or using manual intervention in<br />
control process (see further below).<br />
2.2.6 Second Metering Rate, External Alarm<br />
In some situations it may be suitable to operate the controller with two different settings, for example<br />
depending on load characteristics in different daily or weekly zones. To select the setting desired,<br />
there is the second metering rate input.<br />
WARNING !!! This input is not galvanically insulated from the controller’s internal circuitry and<br />
its terminals constitute exposure to hazardous voltage against the ground potential! It is<br />
therefore necessary for the relay, switch or optocoupler, driving the input, to be insulated (no external<br />
voltage) and to be located as close to the controller as possible (optimally in the same cabinet) to<br />
minimize the lead length (maximum about 2 to 3 metres). The input is connected to terminals 11 and<br />
12. The input’s internal power supply voltage is about 30 V DC, switching current about 5 mA.<br />
If the second metering rate active device is a transistor (NPN) or optocoupler, it is necessary to<br />
observe the connection polarity – transistor or optocoupler collector to go to terminal + (11) and<br />
emitter to terminal – (12).<br />
When the input is open, the controller operates with the basic metering rate setting, when it is closed<br />
(if the second metering rate function is enabled – see further below), it operates with the second<br />
metering rate setting.<br />
If second metering rate function is switched off, the second metering rate input can be used for<br />
external alarm signal – see description of parameters 30, 40.<br />
Only 12xx and 13xx line controllers feature the second metering rate selection input.<br />
18