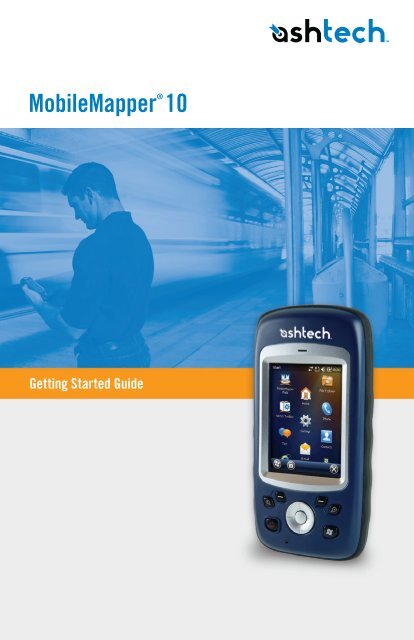
MobileMapper 10 Getting Started Guide, rev A - ARVAtec
MobileMapper 10 Getting Started Guide, rev A - ARVAtec
MobileMapper 10 Getting Started Guide, rev A - ARVAtec

You also want an ePaper? Increase the reach of your titles
YUMPU automatically turns print PDFs into web optimized ePapers that Google loves.
<strong>MobileMapper</strong> ® <strong>10</strong><br />
<strong>Getting</strong> <strong>Started</strong> <strong>Guide</strong>
Copyright Notice<br />
Copyright 2011 Ashtech. All rights reserved.<br />
Trademarks<br />
All product and brand names mentioned in this publication<br />
are trademarks of their respective holders.<br />
Ashtech Products - Limited Warranty (North, Central<br />
and South America)<br />
Ashtech warrants their GPS receivers and hardware<br />
accessories to be free of defects in material and<br />
workmanship and will conform to our published<br />
specifications for the product for a period of one year<br />
from the date of original purchase. THIS WARRANTY<br />
APPLIES ONLY TO THE ORIGINAL PURCHASER OF<br />
THIS PRODUCT.<br />
In the event of a defect, Ashtech will, at its option,<br />
repair or replace the hardware product with no charge<br />
to the purchaser for parts or labor. The repaired or replaced<br />
product will be warranted for 90 days from<br />
the date of return shipment, or for the balance of the<br />
original warranty, whichever is longer. Ashtech warrants<br />
that software products or software included in<br />
hardware products will be free from defects in the<br />
media for a period of 30 days from the date of shipment<br />
and will substantially conform to the then-current<br />
user documentation provided with the software<br />
(including updates thereto). Ashtech's sole obligation<br />
shall be the correction or replacement of the media<br />
or the software so that it will substantially<br />
conform to the then- current user documentation.<br />
Ashtech does not warrant the software will meet purchaser's<br />
requirements or that its operation will be uninterrupted,<br />
error-free or virus-free. Purchaser<br />
assumes the entire risk of using the software.<br />
PURCHASER'S EXCLUSIVE REMEDY UNDER THIS<br />
WRITTEN WARRANTY OR ANY IMPLIED WARRAN-<br />
TY SHALL BE LIMITED TO THE REPAIR OR RE-<br />
PLACEMENT, AT ASHTECH'S OPTION, OF ANY<br />
DEFECTIVE PART OF THE RECEIVER OR ACCESSO-<br />
RIES WHICH ARE COVERED BY THIS WARRANTY.<br />
REPAIRS UNDER THIS WARRANTY SHALL ONLY<br />
BE MADE AT AN AUTHORIZED ASHTECH SERVICE<br />
CENTER. ANY REPAIRS BY A SERVICE CENTER<br />
NOT AUTHORIZED BY ASHTECH WILL VOID THIS<br />
WARRANTY.<br />
To obtain warranty service the purchaser must obtain<br />
a Return Materials Authorization (RMA) number prior<br />
to shipping by calling 1-800-229-2400 (North<br />
America) or 1-408-572-1134 (International) and<br />
leaving a voice mail at option 3, or by submitting a<br />
repair request on-line at: http://ashtech.com (fill out<br />
the RMA request from under the Support tab). The<br />
purchaser must return the product postpaid with a<br />
copy of the original sales receipt to the address provided<br />
by Ashtech with the RMA number. Purchaser’s<br />
return address and the RMA number must be clearly<br />
printed on the outside of the package.<br />
Ashtech reserves the right to refuse to provide service<br />
free-of-charge if the sales receipt is not provided or if<br />
the information contained in it is incomplete or illegible<br />
or if the serial number is altered or removed.<br />
Ashtech will not be responsible for any losses or damage<br />
to the product incurred while the product is in<br />
transit or is being shipped for repair. Insurance is<br />
recommended. Ashtech suggests using a trackable<br />
shipping method such as UPS or FedEx when returning<br />
a product for service.<br />
EXCEPT AS SET FORTH IN THIS LIMITED WAR-<br />
RANTY, ALL OTHER EXPRESSED OR IMPLIED<br />
WARRANTIES, INCLUDING THOSE OF FITNESS<br />
FOR ANY PARTICULAR PURPOSE, MERCHANT-<br />
ABILITY OR NON-INFRINGEMENT, ARE HEREBY<br />
DISCLAIMED AND IF APPLICABLE, IMPLIED WAR-<br />
RANTIES UNDER ARTICLE 35 OF THE UNITED NA-<br />
TIONS CONVENTION ON CONTRACTS FOR THE<br />
INTERNATIONAL SALE OF GOODS. Some national,<br />
state, or local laws do not allow limitations on implied<br />
warranty or how long an implied warranty lasts,<br />
so the above limitation may not apply to you.<br />
The following are excluded from the warranty coverage:<br />
(1) periodic maintenance and repair or replacement<br />
of parts due to normal wear and tear; (2)<br />
batteries and finishes; (3) installations or defects resulting<br />
from installation; (4) any damage caused by<br />
(i) shipping, misuse, abuse, negligence, tampering,<br />
or improper use; (ii) disasters such as fire, flood,<br />
wind, and lightning; (iii) unauthorized attachments<br />
or modification; (5) service performed or attempted<br />
by anyone other than an authorized Ashtechs Service<br />
Center; (6) any product, components or parts not<br />
manufactured by Ashtech; (7) that the receiver will<br />
be free from any claim for infringement of any patent,<br />
trademark, copyright or other proprietary right,<br />
including trade secrets; and (8) any damage due to<br />
accident, resulting from inaccurate satellite transmissions.<br />
Inaccurate transmissions can occur due to<br />
changes in the position, health or geometry of a satellite<br />
or modifications to the receiver that may be required<br />
due to any change in the GPS. (Note: Ashtech<br />
GPS receivers use GPS or GPS+GLONASS to obtain<br />
position, velocity and time information. GPS is operated<br />
by the U.S. Government and GLONASS is the<br />
Global Navigation Satellite System of the Russian<br />
Federation, which are solely responsible for the accuracy<br />
and maintenance of their systems. Certain conditions<br />
can cause inaccuracies which could require<br />
modifications to the receiver. Examples of such conditions<br />
include but are not limited to changes in the<br />
GPS or GLONASS transmission.) Opening, dismantling<br />
or repairing of this product by anyone other than<br />
an authorized Ashtech Service Center will void this<br />
warranty.<br />
ASHTECH SHALL NOT BE LIABLE TO PURCHASER<br />
OR ANY OTHER PERSON FOR ANY INCIDENTAL OR<br />
CONSEQUENTIAL DAMAGES WHATSOEVER, IN-<br />
CLUDING BUT NOT LIMITED TO LOST PROFITS,<br />
DAMAGES RESULTING FROM DELAY OR LOSS OF<br />
USE, LOSS OF OR DAMAGES ARISING OUT OF<br />
BREACH OF THIS WARRANTY OR ANY IMPLIED<br />
WARRANTY EVEN THOUGH CAUSED BY NEGLI-<br />
GENCE OR OTHER FAULT OFASHTECH OR NEGLI-<br />
GENT USAGE OF THE PRODUCT. IN NO EVENT<br />
WILL ASHTECH BE RESPONSIBLE FOR SUCH<br />
DAMAGES, EVEN IF ASHTECH HAS BEEN ADVISED<br />
OF THE POSSIBILITY OF SUCH DAMAGES.<br />
This written warranty is the complete, final and exclusive<br />
agreement between Ashtech and the purchaser<br />
with respect to the quality of performance of<br />
the goods and any and all warranties and representations.<br />
This warranty sets forth all of Ashtech's responsibilities<br />
regarding this product. This limited<br />
warranty is governed by the laws of the State of California,<br />
without reference to its conflict of law provisions<br />
or the U.N. Convention on Contracts for the<br />
International Sale of Goods, and shall benefit<br />
Ashtech, its successors and assigns.<br />
This warranty gives the purchaser specific rights. The<br />
purchaser may have other rights which vary from locality<br />
to locality (including Directive 1999/44/EC in<br />
the EC Member States) and certain limitations contained<br />
in this warranty, including the exclusion or
limitation of incidental or consequential damages<br />
may not apply.<br />
For further information concerning this limited warranty,<br />
please call or write:<br />
Ashtech LLC, El Camino Real 451, Suite 2<strong>10</strong>, CA<br />
95050, Santa Clara, USA, Phone: +1 408 572<br />
1<strong>10</strong>3, Fax: +1 408 572 1199 or<br />
Ashtech - ZAC La Fleuriaye - BP 433 - 44474 Carquefou<br />
Cedex - France Phone: +33 (0)2 28 09 38<br />
00, Fax: +33 (0)2 28 09 39 39.<br />
Ashtech Products Limited Warranty (Europe, Middle<br />
East, Africa)<br />
All Ashtech global positioning system (GPS) receivers<br />
are navigation aids, and are not intended to replace<br />
other methods of navigation. Purchaser is<br />
advised to perform careful position charting and use<br />
good judgment. READ THE USER GUIDE CAREFUL-<br />
LY BEFORE USING THE PRODUCT.<br />
1. ASHTECH WARRANTY<br />
Ashtech warrants their GPS receivers and hardware<br />
accessories to be free of defects in material and<br />
workmanship and will conform to our published<br />
specifications for the product for a period of one year<br />
from the date of original purchase or such longer period<br />
as required by law. THIS WARRANTY APPLIES<br />
ONLY TO THE ORIGINAL PURCHASER OF THIS<br />
PRODUCT.<br />
In the event of a defect, Ashtech will, at its option,<br />
repair or replace the hardware product with no charge<br />
to the purchaser for parts or labor. The repaired or replaced<br />
product will be warranted for 90 days from<br />
the date of return shipment, or for the balance of the<br />
original warranty, whichever is longer. Ashtech warrants<br />
that software products or software included in<br />
hardware products will be free from defects in the<br />
media for a period of 30 days from the date of shipment<br />
and will substantially conform to the then-current<br />
user documentation provided with the software<br />
(including updates thereto). Ashtech's sole obligation<br />
shall be the correction or replacement of the media<br />
or the software so that it will substantially<br />
conform to the then- current user documentation.<br />
Ashtech does not warrant the software will meet purchaser's<br />
requirements or that its operation will be uninterrupted,<br />
error-free or virus-free. Purchaser<br />
assumes the entire risk of using the software.<br />
2. PURCHASER'S REMEDY<br />
PURCHASER'S EXCLUSIVE REMEDY UNDER THIS<br />
WRITTEN WARRANTY OR ANY IMPLIED WARRAN-<br />
TY SHALL BE LIMITED TO THE REPAIR OR RE-<br />
PLACEMENT, AT ASHTECH'S OPTION, OF ANY<br />
DEFECTIVE PART OF THE RECEIVER OR ACCESSO-<br />
RIES WHICH ARE COVERED BY THIS WARRANTY.<br />
REPAIRS UNDER THIS WARRANTY SHALL ONLY<br />
BE MADE AT AN AUTHORIZED ASHTECH SERVICE<br />
CENTER. ANY REPAIRS BY A SERVICE CENTER<br />
NOT AUTHORIZED BY ASHTECH WILL VOID THIS<br />
WARRANTY.<br />
3. PURCHASER'S DUTIES<br />
To obtain service, contact and return the product<br />
with a copy of the original sales receipt to the dealer<br />
from whom you purchased the product.<br />
Ashtech reserves the right to refuse to provide service<br />
free-of-charge if the sales receipt is not provided or if<br />
the information contained in it is incomplete or illegible<br />
or if the serial number is altered or removed.<br />
Ashtech will not be responsible for any losses or damage<br />
to the product incurred while the product is in<br />
transit or is being shipped for repair. Insurance is<br />
recommended. Ashtech suggests using a trackable<br />
shipping method such as UPS or FedEx when returning<br />
a product for service.<br />
4. LIMITATION OF IMPLIED WARRANTIES<br />
EXCEPT AS SET FORTH IN ITEM 1 ABOVE, ALL<br />
OTHER EXPRESSED OR IMPLIED WARRANTIES,<br />
INCLUDING THOSE OF FITNESS FOR ANY PARTIC-<br />
ULAR PURPOSE OR MERCHANTABILITY, ARE<br />
HEREBY DISCLAIMED AND IF APPLICABLE, IM-<br />
PLIED WARRANTIES UNDER ARTICLE 35 OF THE<br />
UNITED NATIONS CONVENTION ON CONTRACTS<br />
FOR THE INTERNATIONAL SALE OF GOODS.<br />
Some national, state, or local laws do not allow limitations<br />
on implied warranty or how long an implied<br />
warranty lasts, so the above limitation may not apply<br />
to you.<br />
5. EXCLUSIONS<br />
The following are excluded from the warranty coverage:<br />
(1) periodic maintenance and repair or replacement<br />
of parts due to normal wear and tear;<br />
(2) batteries;<br />
(3) finishes;<br />
(4) installations or defects resulting from installation;<br />
(5) any damage caused by (i) shipping, misuse,<br />
abuse, negligence, tampering, or improper use; (ii)<br />
disasters such as fire, flood, wind, and lightning; (iii)<br />
unauthorized attachments or modification;<br />
(6) service performed or attempted by anyone other<br />
than an authorized Ashtechs Service Center;<br />
(7) any product, components or parts not manufactured<br />
by Ashtech,<br />
(8) that the receiver will be free from any claim for<br />
infringement of any patent, trademark, copyright or<br />
other proprietary right, including trade secrets<br />
(9) any damage due to accident, resulting from inaccurate<br />
satellite transmissions. Inaccurate transmissions<br />
can occur due to changes in the position,<br />
health or geometry of a satellite or modifications to<br />
the receiver that may be required due to any change<br />
in the GPS. (Note: Ashtech GPS receivers use GPS or<br />
GPS+GLONASS to obtain position, velocity and time<br />
information. GPS is operated by the U.S. Government<br />
and GLONASS is the Global Navigation Satellite<br />
System of the Russian Federation, which are<br />
solely responsible for the accuracy and maintenance<br />
of their systems. Certain conditions can cause inaccuracies<br />
which could require modifications to the receiver.<br />
Examples of such conditions include but are<br />
not limited to changes in the GPS or GLONASS transmission.).<br />
Opening, dismantling or repairing of this product by<br />
anyone other than an authorized Ashtech Service<br />
Center will void this warranty.<br />
6. EXCLUSION OF INCIDENTAL OR CONSEQUEN-<br />
TIAL DAMAGES<br />
ASHTECH SHALL NOT BE LIABLE TO PURCHASER<br />
OR ANY OTHER PERSON FOR ANY INDIRECT, IN-<br />
CIDENTAL OR CONSEQUENTIAL DAMAGES WHAT-<br />
SOEVER, INCLUDING BUT NOT LIMITED TO LOST<br />
PROFITS, DAMAGES RESULTING FROM DELAY OR<br />
LOSS OF USE, LOSS OF OR DAMAGES ARISING<br />
OUT OF BREACH OF THIS WARRANTY OR ANY IM-
PLIED WARRANTY EVEN THOUGH CAUSED BY<br />
NEGLIGENCE OR OTHER FAULT OFASHTECH OR<br />
NEGLIGENT USAGE OF THE PRODUCT. IN NO<br />
EVENT WILL ASHTECH BE RESPONSIBLE FOR<br />
SUCH DAMAGES, EVEN IF ASHTECH HAS BEEN<br />
ADVISED OF THE POSSIBILITY OF SUCH DAMAG-<br />
ES.<br />
Some national, state, or local laws do not allow the<br />
exclusion or limitation of incidental or consequential<br />
damages, so the above limitation or exclusion may<br />
not apply to you.<br />
7. COMPLETE AGREEMENT<br />
This written warranty is the complete, final and exclusive<br />
agreement between Ashtech and the purchaser<br />
with respect to the quality of performance of<br />
the goods and any and all warranties and representations.<br />
THIS WARRANTY SETS FORTH ALL OF<br />
Ashtech'S RESPONSIBILITIES REGARDING THIS<br />
PRODUCT.<br />
THIS WARRANTY GIVES YOU SPECIFIC RIGHTS.<br />
YOU MAY HAVE OTHER RIGHTS WHICH VARY<br />
FROM LOCALITY TO LOCALITY (including Directive<br />
1999/44/EC in the EC Member States) AND CER-<br />
TAIN LIMITATIONS CONTAINED IN THIS WARRAN-<br />
TY MAY NOT APPLY TO YOU.<br />
8. CHOICE OF LAW.<br />
This limited warranty is governed by the laws of<br />
France, without reference to its conflict of law provisions<br />
or the U.N. Convention on Contracts for the International<br />
Sale of Goods, and shall benefit Ashtech,<br />
its successors and assigns.<br />
THIS WARRANTY DOES NOT AFFECT THE CUS-<br />
TOMER'S STATUTORY RIGHTS UNDER APPLICA-<br />
BLE LAWS IN FORCE IN THEIR LOCALITY, NOR<br />
THE CUSTOMER'S RIGHTS AGAINST THE DEALER<br />
ARISING FROM THEIR SALES/PURCHASE CON-<br />
TRACT (such as the guarantees in France for latent<br />
defects in accordance with Article 1641 et seq of the<br />
French Civil Code).<br />
For further information concerning this limited warranty,<br />
please call or write:<br />
Ashtech SAS - ZAC La Fleuriaye - BP 433 - 44474<br />
Carquefou Cedex - France.<br />
Phone: +33 (0)2 28 09 38 00, Fax: +33 (0)2 28 09<br />
39 39<br />
Wi-Fi Safety<br />
Turn Wi-Fi off in areas where Wi-Fi use is prohibited<br />
or when it may cause interference or danger, such as<br />
in airplanes while flying.<br />
Care & Maintenance<br />
Excessive sound pressure from earphones and headphones<br />
can cause hearing loss.<br />
USB data cables<br />
CAUTION: Use of USB data cables is restricted to<br />
standard USB version 2.0 or higher. Powered USB is<br />
prohibited.<br />
PRODUCT SAFETY WARNINGS<br />
Safety and compliance information<br />
Use responsibly. Read all instructions and safety information<br />
before use to avoid injury.<br />
The maximum operating ambient temperature of the<br />
equipment declared by the manufacturer is 50°C.<br />
Battery safety<br />
Charge battery only at ambient temperatures ranging<br />
from 0°C to 50°C.<br />
(1)CAUTION: Danger of explosion if battery is incorrectly<br />
replaced. Replace only with the same or equivalent<br />
type of battery recommended by the<br />
manufacturer. Dispose of used batteries according to<br />
battery manufacturer’s instructions.<br />
(2)CAUTION: RISK OF EXPLOSION IF BATTERY IS<br />
REPLACED BY AN INCORRECT TYPE. DISPOSE OF<br />
USED BATTERIES ACCORDING TO THE INSTRUC-<br />
TIONS.
Table of Contents<br />
First-Time Use .................................................................................... 1<br />
Unpacking ..................................................................................... 1<br />
Inserting the Battery Into the Receiver.............................................. 1<br />
Turning the Receiver On.................................................................. 2<br />
Using the AC Adapter to Charge the Battery ...................................... 3<br />
Using the Quick Toolbar .................................................................. 4<br />
Switching the Receiver Manually to Suspend Mode............................ 4<br />
Adjusting Backlight Level and Idle Time ........................................... 4<br />
Power Management......................................................................... 5<br />
Setting Time & Date ....................................................................... 5<br />
Regional Settings ........................................................................... 6<br />
Locking the Screen and the Keypad.................................................. 6<br />
How to Hold the Receiver ................................................................ 7<br />
Turning the Receiver Off ................................................................. 7<br />
Receiver Description............................................................................ 8<br />
Front View ..................................................................................... 8<br />
Rear View ...................................................................................... 9<br />
Bottom View................................................................................. <strong>10</strong><br />
GNSS Toolbox................................................................................... 11<br />
GNSS Settings ............................................................................. 11<br />
GNSS Status................................................................................ 11<br />
Reset .......................................................................................... 12<br />
About .......................................................................................... 12<br />
Advanced Features ............................................................................ 13<br />
Power Modes................................................................................ 13<br />
Internal Battery ............................................................................ 13<br />
USB Connection ........................................................................... 15<br />
Wireless Communication ............................................................... 16<br />
Motion Sensor .............................................................................. 17<br />
Using the Camera ......................................................................... 18<br />
Making a Video............................................................................. 20<br />
E-Compass Calibration....................................................................... 23<br />
Platform Specifications...................................................................... 24<br />
GNSS Characteristics.................................................................... 24<br />
Accuracy Specifications ................................................................ 24<br />
Processor..................................................................................... 24<br />
Operating System ......................................................................... 24<br />
Communication ............................................................................ 24<br />
Physical Characteristics................................................................. 25<br />
User Interface .............................................................................. 25<br />
Memory ...................................................................................... 25<br />
Environmental Characteristics........................................................ 25<br />
Power Requirements ..................................................................... 25<br />
Multimedia & Sensors ................................................................... 25<br />
Software Options .......................................................................... 25<br />
Standard Accessories .................................................................... 26
First-Time Use<br />
Unpacking<br />
Open the receiver box and unpack the following items:<br />
• Receiver<br />
• Battery<br />
• Universal AC adapter<br />
• USB cable<br />
• Hand strap<br />
• Lanyard<br />
• Stylus<br />
English<br />
Inserting the<br />
Battery Into the<br />
Receiver<br />
Follow the instructions below:<br />
• Turn over the receiver.<br />
• Using the top end of the stylus (or a coin), rotate the two<br />
screws to open the trap door: turn the left-hand one<br />
clockwise by a quarter turn, and the right-hand one<br />
anticlockwise, also by a quarter turn.<br />
• Pull the trap door open.<br />
• Insert the battery as shown. Orientate the battery so that<br />
its electric contacts can come into contact with those at<br />
the bottom of the battery compartment. Insert the upper<br />
part of the battery first, as shown, then push the battery<br />
in.<br />
1
English<br />
• Put the trap door back into place by first inserting the two<br />
lugs located at the bottom of the trap door.<br />
• Then push the door against the receiver case and rotate<br />
the two screws back in their initial positions to seal the<br />
battery compartment.<br />
Turning the<br />
Receiver On<br />
• Press the Power key [1] for a couple of seconds until you<br />
feel a vibration in your hand, then release the key.<br />
[1]<br />
Let the receiver run its boot sequence. Wait until the<br />
screen displays the Windows Mobile Home screen.<br />
The operating system used in the receiver is Microsoft<br />
Windows Mobile Professional version 6.5. For more<br />
information on how to use the different applications, you<br />
can visit the Microsoft web site at:<br />
http://www.microsoft.com/windowsmobile/en-us/help/v6-5/<br />
Basics.aspx<br />
Depending on how long your product was stored in its<br />
package before being shipped to you, the remaining power in<br />
the battery may be too low to allow the receiver to operate for<br />
your entire working session. For this reason, the first thing to<br />
do is to check the battery charge status:<br />
• Tap on the title bar at the top of the screen. The Quick<br />
Toolbar appears just underneath.<br />
• Tap on the Battery icon. This opens the Power window and<br />
simultaneously closes the Quick Toolbar.<br />
The Power window shows the status of the battery (see also<br />
Internal Battery on page 13). If the remaining power is<br />
greater than 50%, then you can use the receiver without<br />
having to charge the battery first (with 50% of remaining<br />
charge, you can use the receiver for several hours). Skip<br />
the next section and go directly to Adjusting Backlight<br />
Level and Idle Time on page 4.<br />
• If it less, Ashtech recommends you first charge the battery<br />
as explained in Using the AC Adapter to Charge the<br />
Battery on page 3.<br />
2
Using the AC<br />
Adapter to Charge<br />
the Battery<br />
Follow the instructions below.<br />
• Prepare the AC adapter:<br />
– Remove the protective cover [1] by pushing the button<br />
then sliding the cover forward.<br />
English<br />
[1] [2] [3]<br />
– Choose the plug that fits your country’s AC outlet<br />
standard (see [2]) and slide it into the AC adapter [3].<br />
(A “click” must be heard when fully inserted.)<br />
• Take the USB cable provided [4]. Connect the end fitted<br />
with a standard USB connector to the AC adapter.<br />
Connect the other end (fitted with a mini-USB connector)<br />
to the bottom side of the receiver (open the flap [5] first).<br />
[4]<br />
[3]<br />
[4]<br />
[5]<br />
[4]<br />
• Connect the AC adapter to an electric outlet. After about<br />
4 seconds, the receiver screen lights up. An icon shows up<br />
indicating that the battery is being charged. The screen is<br />
then turned back off after about <strong>10</strong> seconds. After this<br />
time, battery charging will continue at the same rate until<br />
the battery is fully charged (charging time: 4 hours max.).<br />
3
English<br />
Using the Quick<br />
Toolbar<br />
• To read the battery charging status using the Quick<br />
Toolbar, refer to the instructions in Turning the Receiver<br />
On on page 2 (see also Using the Quick Toolbar on<br />
page 4).<br />
Windows Mobile offers a quick toolbar allowing you to quickly<br />
access frequently used functions (zoom, Bluetooth, WiFi,<br />
phone, sound volume, battery power and clock).<br />
• Tap on the title bar at the top of the screen. The quick<br />
toolbar appears just underneath.<br />
• Run the desired function by just tapping on the<br />
corresponding icon. This runs the requested function and<br />
simultaneously closes the quick toolbar.<br />
The zoom function enlarges the screen content, which<br />
means only part of the screen is shown at a time, and so<br />
you should drag the stylus over the screen to scroll through<br />
the whole display.<br />
To return to 1:1 zoom, tap on the title bar again to re-open<br />
the quick toolbar, then tap on the zoom function again.<br />
Switching the<br />
Receiver Manually<br />
to Suspend Mode<br />
Adjusting<br />
Backlight Level<br />
and Idle Time<br />
Switching the receiver to Suspend mode is the right thing to<br />
do when you need to make a short pause in your work and you<br />
want to save the operating time of your battery. You should<br />
not however switch the receiver to Suspend mode when it is<br />
collecting raw data.<br />
In Suspend mode, the receiver is idle, using the minimum of<br />
energy required to save the use context.<br />
To switch to Suspend mode, just press briefly on the Power<br />
button [1]. The receiver screen is turned off instantly.<br />
To wake up the receiver, just press briefly the same button<br />
again. This will instantly switch the screen back on and<br />
restore the use context in which the receiver was before<br />
entering the Suspend mode.<br />
Backlight Level: The screen backlight may be adjusted to<br />
match the ambient light for optimized visibility. You don’t<br />
need the same level of screen backlight in dark areas than in<br />
hot sun.<br />
Backlight Idle Time: One way of saving the battery is to avoid<br />
those periods of time during which the screen backlight is<br />
unnecessarily on. As the receiver automatically counts the<br />
time during which neither the keypad nor the touch screen is<br />
active, you can set the receiver to turn off the backlight<br />
automatically after a certain idle time.<br />
4
Follow the instructions below to set these two parameters:<br />
• Press the Windows key and tap successively on Settings,<br />
System and Backlight.<br />
• Tap on the Battery Power tab.<br />
• Drag the cursor to the right or left to set the screen<br />
backlight to the desired level (between Dark and Bright).<br />
The resulting brightness is obtained when you release the<br />
cursor.<br />
• Tick the Turn off backlight if device... check box and then<br />
choose the idle time before the backlight is turned off<br />
(<strong>10</strong> seconds, 30 seconds or 1 to 5 minutes)<br />
Note that the backlight level and idle time can be set to<br />
different values for when the receiver is operated from an<br />
external power source instead of its internal battery. You<br />
can make these settings after tapping on the External<br />
Power tab.<br />
• Tap OK to save all your changes and return to the p<strong>rev</strong>ious<br />
screen.<br />
English<br />
Power<br />
Management<br />
Setting Time & Date<br />
Another way of saving the battery is to allow the receiver to<br />
switch automatically to Suspend mode after a certain period<br />
of inactivity.<br />
• Press the Windows key and tap successively on Settings,<br />
System and Power.<br />
• Tap on the Advanced tab. This tab allows you to ask for the<br />
receiver to switch automatically to Suspend mode if it<br />
stays idle for the period of time you choose. You may<br />
choose a different setting depending on whether the<br />
receiver is powered from the internal battery or from an<br />
external power source.<br />
• Tap OK to save the settings and return to the p<strong>rev</strong>ious<br />
screen.<br />
Remember that the receiver should NOT be allowed to switch<br />
automatically to Suspend mode if it is expected to collect<br />
data for a long period of time and you know the keyboard will<br />
be left idle during this time.<br />
• Press the Windows key and tap successively on<br />
Settings,and Clock & Alarms.<br />
• On the Time tab, select your time zone and then enter the<br />
local date and time.<br />
• Tap OK to save your settings.<br />
5
English<br />
Regional Settings<br />
It’s a good idea to customize your receiver so that it complies<br />
with a number of local preferences, such as country’s<br />
currency, decimal point representation, time and date<br />
formats, etc.<br />
• Press the Windows key and tap successively on Settings,<br />
System and Regional Settings.<br />
• On the Region tab, select your country.<br />
• Use the other tabs to set your local settings:<br />
– Number format<br />
– Currency choice<br />
– Time and date formats<br />
• Tap OK to save the settings and return to the Today screen.<br />
Locking the<br />
Screen and the<br />
Keypad<br />
At some stage in your work, you may need to lock the receiver<br />
to make sure no user intervention from the screen or keypad<br />
can affect the work in progress.<br />
• Press the Windows key.<br />
• In the task bar at the bottom of the screen, tap on the<br />
padlock icon (see screen below). As a result, the touch<br />
screen and keypad are made inactive.<br />
• To unlock the touch screen and keypad, just drag the onscreen<br />
slide button either to the left or right. This will take<br />
you back to the Home screen.<br />
6
How to Hold the<br />
Receiver<br />
Tracking satellites with your receiver requires that you use the<br />
receiver outdoor and hold it in an appropriate manner.<br />
The receiver will have the best view of the sky when you hold<br />
it at an angle of around 45 degrees from horizontal and not<br />
too close to your body.<br />
You can check that your receiver is tracking enough satellites<br />
by running the GNSS Toolbox, and more particularly the<br />
GNSS Status function (see GNSS Status on page 11). When<br />
enough satellites are tracked, you can start using your<br />
receiver and run your application software.<br />
English<br />
Turning the<br />
Receiver Off<br />
After you have finished your work, turn off your receiver by<br />
holding the Power button [1] pressed until a Warning<br />
message is displayed on the screen asking you to confirm the<br />
power-off request. Tap Yes. The receiver will shut down in the<br />
next couple of seconds after a duo-tone sound has been<br />
heard.<br />
7
English<br />
Receiver Description<br />
Front View<br />
Power Key<br />
Use the Power key [1] to turn on or off the receiver.<br />
To turn on the receiver, press the Power key [1] until you can<br />
feel a vibration in your hand, meaning the receiver has started<br />
a power-on procedure. You can then release the key.<br />
To turn off the receiver press the Power key [1] until a sound<br />
is heard and a warning message pops up on the screen asking<br />
you to confirm the power shutdown request. Tap Yes on the<br />
screen. A two-tone sound can then be heard just before the<br />
receiver shuts down.<br />
[8]<br />
[9]<br />
Windows key<br />
The Windows key [2] is used to give immediate and<br />
unconditional access to the Windows Start menu.<br />
Display Screen<br />
The display screen [3] is a 3.5-inch, QVGA, 256-color (18-bit<br />
RGB) touch screen (240 x 320 pixels).<br />
[3]<br />
[1] [7] [4] [5] [2] [6]<br />
Scroll / Enter keys<br />
The Enter button [4] is used to accept highlighted input and<br />
initiate various functions.<br />
The Scroll button [5] is the ring around the Enter button. It<br />
is used to move the cursor on the screen, from one data field<br />
to the next on a parameter screen, from one option to another<br />
in a menu, from one geographical location to another on a<br />
map screen.<br />
Function keys<br />
The receiver is fitted with four function keys [6]. The specific<br />
function of each of them is given in the table below.<br />
Button<br />
Function<br />
The keypad includes two of these buttons, one on the right, the other<br />
on the left.<br />
Each of them is a convenient alternative to tapping on the functions<br />
appearing just above in the task bar at the bottom of the screen (e.g.<br />
Notifications, Contacts, Menu, Log, etc.).<br />
In Ashtech applications with a map screen displayed, use this button to<br />
zoom in. In Windows Mobile, displays the Start menu.<br />
In Ashtech applications with a map screen displayed, use this button to<br />
zoom out. In Windows Mobile, displays the Phone screen.<br />
8
Microphone<br />
A microphone is used by the voice recorder. Keep the small<br />
aperture [7] clear when recording a vocal comment.<br />
Built-in GPS Antenna<br />
The receiver incorporates a built-in GPS antenna [8]. The<br />
receiver should be held properly to optimize satellite<br />
reception.<br />
English<br />
Earpiece<br />
As a multi-media device, the receiver includes an earpiece<br />
[9], which can be used by any voice-based software<br />
application.<br />
[<strong>10</strong>]<br />
Rear View<br />
[11] [12]<br />
[13] [14]<br />
[15] [16]<br />
External GPS Antenna Input<br />
Use this input [<strong>10</strong>] to connect an external GPS antenna to the<br />
receiver. When an external antenna is connected, the built-in<br />
GPS antenna is automatically disconnected from the receiver<br />
input.<br />
The antenna input connector is protected by a rubber flap.<br />
Ashtech recommends you keep the flap close when no<br />
external antenna is used.<br />
Loudspeaker<br />
The back of the receiver incorporates a high-quality<br />
loudspeaker [11].<br />
[17]<br />
Camera Lens<br />
Keep the camera lens [12] clear when taking pictures or<br />
recording videos.<br />
Hand strap<br />
The hand strap provided may be attached to the back of the<br />
receiver through two threaded holes [13] and [14] and the<br />
two recesses located at the bottom of the receiver (see<br />
Bottom View below).<br />
The hand strap may also accommodate the stylus, which can<br />
also be attached to the leather strip of the hand strap using<br />
the lanyard provided.<br />
Using the hand strap allows you to hold the receiver and the<br />
stylus around your forearm while keeping your hand free for<br />
some other tasks.<br />
9
English<br />
[18]<br />
[19]<br />
Battery Compartment<br />
The receiver makes use of a rechargeable Li-Ion battery pack.<br />
Loosen the quarter-turn screws [15] [16] using the stylus (or<br />
a coin) to access the battery compartment [17]. The two<br />
screws use opposite directions of rotation for opening and<br />
closing the trap door.<br />
The battery compartment can also accommodate a SIM card<br />
[18] and a micro SD card [19].<br />
When putting back the trap door, insert the bottom first, push<br />
the trap door against the back of the receiver and seal the<br />
battery compartment by fully rotating the two screws in the<br />
opposite direction.<br />
Information on battery charging: see Internal Battery on<br />
page 13.<br />
Bottom View<br />
[22] [20] [21]<br />
[23]<br />
[23]<br />
[24]<br />
The bottom view provides access to a standard mini-USB<br />
connector [20]. You first need to open the protective rubber<br />
flap [21], using a finger nail or a sharp and rigid tip to pull<br />
the flap from its left-hand side.<br />
The mini-USB port is used to connect the receiver to the AC<br />
adapter, for a fast battery charging cycle, or to a computer for<br />
file transfer through Microsoft ActiveSync. In both cases, you<br />
need to use the USB cable provided.<br />
Information on battery charging: see Internal Battery on<br />
page 13.<br />
The bottom part of the receiver also accommodates a Reset<br />
button [22], which is accessible after you have opened the<br />
rubber flap [21]. Should the receiver get stuck, you can press<br />
that button using a sharp tool to restart the receiver.<br />
Warning! Never use the Reset button while the receiver is<br />
operating normally or you would definitively lose all the data<br />
you are collecting.<br />
The bottom view also shows the two recesses [23] in which<br />
the hand strap [24] can be anchored.<br />
<strong>10</strong>
GNSS Toolbox<br />
GNSS Toolbox is used to control and monitor important<br />
functions in your receiver. These are listed and detailed<br />
below.<br />
• GNSS Settings: Constellations and frequencies used in the<br />
receiver.<br />
• GNSS Status: Views GNSS reception monitoring screens.<br />
• Reset: Resets the receiver.<br />
• About: Provides the software version of GNSS Toolbox.<br />
English<br />
GNSS Settings<br />
• Open the GNSS Toolbox and tap on GNSS Settings. This<br />
opens a new window where you can make the following<br />
settings:<br />
– Tracking mode: Only the “GPS L1” option is available,<br />
which means the receiver can only operate from the L1<br />
signal of the GPS constellation.<br />
– Use SBAS check box: Check this box to enable SBAS<br />
reception, clear it otherwise.<br />
• Tap OK to confirm your choices and return to the GNSS<br />
Toolbox window.<br />
GNSS Status • Open the GNSS Toolbox and tap on GNSS Status.<br />
The default Position tab shows the latitude, longitude and<br />
altitude of the current position, as computed by the<br />
receiver, as well the number of satellites used and the<br />
current PDOP value.<br />
11
English<br />
If SBAS is used, the screen also shows the position status<br />
(SDGPS).<br />
The unit used to express the current altitude (meters or<br />
feet) depends on the region (language and country) you<br />
selected in Start, Settings, System, Regional Settings.<br />
• The Satellites tab displays a polar diagram showing the<br />
locations in the sky of the tracked satellites. Different<br />
colors are used to display the numbers of the visible<br />
satellites:<br />
– Yellow characters: GPS satellites used<br />
– Grey characters: Visible SBAS satellites. Also rejected<br />
GPS satellites, because unhealthy or under the<br />
elevation mask.<br />
• The Signal tab shows the signal level for each of the<br />
tracked satellites:<br />
– Dark blue bars for all GPS satellites used<br />
– Red bars for all SBAS satellites used<br />
– Grey bars for all tracked, but not used, GPS satellites<br />
GPS satellites are numbered from 1 to 32 and SBAS<br />
satellites from 120 to 138.<br />
Reset • Open the GNSS Toolbox and tap on Reset. A message then<br />
asks you if you want to reset the receiver now. Use this<br />
option only if you think the receiver is not working<br />
properly.<br />
Using this function results in a cold reset of the receiver.<br />
Through a cold reset, all the GNSS settings, including<br />
almanac data, are cleared making it necessary for you to<br />
restore each of them manually. A few minutes are needed<br />
after a cold reset before the receiver is back to work.<br />
Using the Reset function is recommended when only the<br />
GNSS Toolbox (and not other field software) is running on<br />
the platform.<br />
About<br />
This function provides the software version of GNSS Toolbox,<br />
followed by the Ashtech legal line.<br />
12
Advanced Features<br />
Power Modes<br />
The receiver has three power modes:<br />
• Shutdown: The receiver is off.<br />
• On: The receiver is fully powered<br />
• Suspend: In this mode, the screen content and backlight<br />
are turned off to save power and the use context is saved.<br />
When quitting the Suspend mode, the use context is<br />
restored instantly. Typically this mode is used in the field<br />
to allow a quick restart after a pause.<br />
The receiver can also enter the Suspend mode<br />
automatically in case of a very low battery after dismissing<br />
successively the two “low battery” alerts, or after an idle<br />
time that you can set through a press on the Windows key,<br />
and selecting Settings, Power (Advanced tab) (See also<br />
Power Management on page 5).<br />
English<br />
Internal Battery<br />
Suspend Mode<br />
The receiver can be switched to Suspend mode. This is a<br />
power saving mode typically used in the field to allow a quick<br />
restart after a pause. In this mode, only some parts of the<br />
receiver are powered for the sole purpose of restoring the<br />
context of use in which the receiver was when it was switched<br />
to Suspend mode. The receiver should NOT however be used<br />
in that mode while collecting raw data.<br />
The receiver can also enter the Suspend mode automatically<br />
in case of a very low battery after dismissing successively the<br />
two “low battery” alerts, or after an idle time that you can set<br />
through a press on the Windows key, then Settings, System and<br />
Power (Advanced tab) (See also Power Management on<br />
page 5). When collecting raw data, please clear this option so<br />
that the receiver can never enter this mode.<br />
Monitoring the Battery Discharging Status<br />
The receiver will continuously inform you of the current status<br />
of the battery through an icon located in the Windows Mobile<br />
title bar (on the right). The different shapes of this icon<br />
indicate the current discharging status, as listed below:<br />
13
English<br />
Icon<br />
Meaning<br />
Battery high: Remaining power ranges between approximately 75<br />
and <strong>10</strong>0% of full charge.<br />
Approx. 50-75% remaining<br />
Approx 25-50% remaining<br />
Approx. <strong>10</strong>-25% remaining<br />
Battery low: Remaining power is less than 5%.<br />
Receiver powered from external source (AC adapter, computer via<br />
USB line)<br />
At any time you can read more in detail the battery status by<br />
pressing the Windows key and then selecting Settings, System,<br />
Power (see screen example).<br />
When the remaining power drops below <strong>10</strong>% of full charge<br />
(orange area), you will see the message “Main Battery Low”<br />
prompting you to replace or recharge the battery. Tap Dismiss<br />
in the task bar. You should consider replacing the battery for<br />
a fresh one but you may still continue to use the receiver for<br />
a while.<br />
With only about 5% of remaining power (red area), a new<br />
message will pop up: “Main Battery Very Low”. Tap Dismiss in<br />
the task bar to continue using the receiver. Ashtech however<br />
recommends that you turn off the receiver and replace the<br />
battery.<br />
With only about 1% of remaining power, the receiver will<br />
switch off, meaning the battery is no longer charged enough<br />
to ensure proper operation of the receiver. Ashtech<br />
recommends you do not go that far in the use of the internal<br />
battery as there is a risk of losing part of your field data.<br />
In case of long-time storage, remember Li-Ion batteries must<br />
always be recharged regularly, about every six months. This is<br />
to p<strong>rev</strong>ent ir<strong>rev</strong>ersible damage of the batteries.<br />
Battery Charging Scenarios<br />
The battery can be charged in two different ways:<br />
• From the power line, through the AC adapter and USB<br />
cable provided. This configuration offers fast battery<br />
charging, with around 700 mA of DC charging current.<br />
• From an office computer connected to the receiver<br />
through a USB line, using the same USB cable provided.<br />
According to the USB 2.0 specification, the DC current<br />
delivered will be limited to 500 mA, which means it will<br />
14
take longer to charge the battery from a computer’s USB<br />
port than from the AC adapter.<br />
You can ask the receiver not to allow the charging of the<br />
battery through the USB port when this port is connected<br />
to a computer. To do this:<br />
– Press the Windows key<br />
– Select Settings, System, Power<br />
– Clear the option: When equipment opens and links to PC,<br />
do not carry out battery charging<br />
– Tap OK.<br />
English<br />
Extracting the Battery from the Compartment<br />
Lever the battery out of its compartment using the stylus or a<br />
flat screwdriver. (The flat end of the stylus is inserted in the<br />
groove located on the bottom side of the battery, as shown<br />
below.)<br />
Likewise, extracting the SIM card or micro SD card from the<br />
battery compartment requires the use of a spiky-tipped tool<br />
to pull the card out of its slot.<br />
USB Connection<br />
By default, the mini-USB connector is set to allow a<br />
connection to a computer using Active Sync. You just need to<br />
connect the USB cable provided between the receiver’s mini-<br />
USB connector and any computer fitted with a standard USB<br />
connector. Provided Microsoft ActiveSync has been installed<br />
on the computer, a serial connection will be initiated<br />
automatically when you plug the cable. You can then use this<br />
connection to exchange files, explore the receiver’s file<br />
15
English<br />
system, install new applications directly from the computer,<br />
etc.<br />
If you want to make a different use of the receiver’s USB<br />
output, press the Windows key, go to Settings>Connections><br />
USB to PC and change the settings accordingly.<br />
Wireless<br />
Communication<br />
The receiver incorporates three wireless communication<br />
devices:<br />
• Bluetooth<br />
• WiFi<br />
• GSM/GPRS Modem<br />
The three devices can be controlled from the Wireless<br />
Manager icon (press the Windows button and go to<br />
Settings>Connections>Wireless Manager).<br />
Bluetooth<br />
Follow the procedure below to turn on Bluetooth and make a<br />
connection with another system, which is supposed to have<br />
its Bluetooth been turned on and made visible to others.<br />
• Press the Windows key and tap successively on Settings<br />
and Bluetooth.<br />
• Tap on the Mode tab.<br />
• Activate Turn on Bluetooth.<br />
• Tap on the Devices tab.<br />
• Tap on Add new device. Wait until the external system is<br />
found<br />
• Tap on the name of this system, tap Next, enter a passcode<br />
(optional) and then choose the Bluetooth service available<br />
on this system that you would like to use now.<br />
• Complete the connection setup as instructed.<br />
Being only a Bluetooth client, the receiver will not offer any<br />
Bluetooth services to external systems.<br />
WiFi<br />
The integrated Wi-Fi device allows you to access the Internet<br />
through a wireless connection.<br />
• Press the Windows key and tap successively on Settings,<br />
Connections and Wi-Fi.<br />
• Tap on the Wireless tab.<br />
16
• Tap on Search for Networks to turn on Wi-Fi and start<br />
searching for the networks that are available from your<br />
location.<br />
• Choose one, then follow the instructions until you are<br />
given access to the Internet.<br />
English<br />
GSM/GPRS Module<br />
Provided the appropriate SIM card has p<strong>rev</strong>ioulsy been<br />
inserted in the battery compartment, the GSM/GPRS modem<br />
allows you to:<br />
• Make a phone call (modem used in GSM mode)<br />
• Establish an Internet connection (modem used in GPRS<br />
mode).<br />
Motion Sensor<br />
Enabling Automatic Screen Rotation<br />
By default, the receiver screen is used in portrait format.<br />
Rotating the receiver by 90° will not cause the screen format<br />
to switch to landscape format.<br />
Operating the receiver this way is usually what you expect<br />
from your receiver because you need to keep it always in<br />
portrait position, with an angle of 45° for best satellite<br />
reception.<br />
You can however ask the receiver to rotate the display<br />
automatically, depending on the position you give to the<br />
receiver.<br />
• Press the Windows key and tap successively on Settings,<br />
System and Motion Sensor.<br />
• Tap on the switch tab<br />
• Enable the Screen rotation function. Using the Sensitivity<br />
cursor, you can also adjust the sensitivity with which the<br />
receiver will react to motion.<br />
• Tap OK to validate all your settings.<br />
Disabling Automatic Screen Rotation<br />
Just before disabling the Screen rotation function (see above),<br />
make sure the current screen format (portrait or landscape) is<br />
the one you wish to use. If it’s not, first rotate the receiver<br />
accordingly so you get this screen format, and then you can<br />
disable the Screen rotation function.<br />
17
English<br />
Scrolling through Your Picture Gallery<br />
By setting the motion sensor as a switch, you can easily go<br />
through all your pictures or audio files, just using the hand<br />
that holds the receiver, leaving your other hand free.<br />
After you have opened the MyPictures folder for example and<br />
tapped on the first picture to view it, you just need to shake<br />
the receiver briefly to view the next one, and so forth until all<br />
the pictures in the folder have been viewed.<br />
To set the motion sensor as a switch:<br />
• Press the Windows key and tap successively on Settings,<br />
System and Motion Sensor.<br />
• Tap on the switch tab<br />
• Enable the Switch songs or pictures function and tap OK.<br />
Fall Alarm<br />
You may set the receiver to produce a sound alarm when it<br />
falls down:<br />
• Press the Windows key and tap successively on Settings,<br />
System and Motion Sensor.<br />
• Tap on the Fall Alarm tab<br />
• Enable the Fall Alarm function and tap OK.<br />
Using the Camera<br />
Taking a Picture<br />
• Press the Windows key and tap Pictures & Videos. This<br />
opens the “My Pictures” folder in which you can see the<br />
list of existing images and videos. The first item in the list<br />
is the Camera, the tool you will now be using to take<br />
pictures. The light-blue background means the camera is<br />
currently selected.<br />
• Tap Camera, or press the Enter button, to turn on the<br />
camera. Wait a couple of seconds until the center of the<br />
window displays the viewfinder of the camera.<br />
• Now use the receiver as a camera. Look at the viewfinder<br />
to frame the picture you want to take.<br />
• When you are ready, stay as still as possible and press the<br />
Enter button to take the picture. When you hear the click<br />
of the camera, stay still for another two seconds until the<br />
screen displays the picture you have just taken.<br />
• Tap OK to come back to the viewfinder, then tap anywhere<br />
on the screen to re-activate the task bar a the bottom of<br />
the screen.<br />
18
• Tap OK to turn off the camera and close the window. The<br />
picture you have taken is now visible in the “My Pictures”<br />
folder.<br />
Renaming a Picture<br />
• With the “My Pictures” folder open, tap on the desired<br />
picture. This opens a new window showing the picture.<br />
• Tap Menu and Properties.<br />
• Rename the file and tap OK.<br />
English<br />
Rotating a Picture<br />
• With the “My Pictures” folder open, tap on the desired<br />
picture (or tap on View in the task bar). This opens a new<br />
window showing the picture.<br />
• Tap Menu and Edit.<br />
• Tap Rotate in the task bar. This rotates the image 90°<br />
clockwise. Repeat the operation until the image has the<br />
right orientation.<br />
• Tap OK to save the image.<br />
Cropping a Picture<br />
• With the “My Pictures” folder open, tap on the desired<br />
picture (or tap on View in the task bar). This opens a new<br />
window showing the picture.<br />
• Tap Menu and Edit.<br />
• Tap Menu again and select Crop.<br />
• As instructed, drag a rectangle on the picture representing<br />
what the final image should be like, then tap inside the<br />
rectangle to complete the crop operation. If you’re not<br />
happy with the result, you can always come back to the<br />
initial image by selecting Menu and Revert to Saved.<br />
• Tap OK to save the picture.<br />
Auto-correcting a Picture<br />
• With the “My Pictures” folder open, tap on the desired<br />
picture (or tap on View in the task bar). This opens a new<br />
window showing the picture.<br />
• Tap Menu and Edit.<br />
• Tap Menu again and select Auto Correct. This refines the<br />
picture’s brightness, contrast and colors.<br />
• Tap OK to save the picture.<br />
19
English<br />
Deleting a Picture<br />
• With the “My Pictures” folder open, tap and hold the<br />
desired picture.<br />
• Select Delete in the context-sensitive menu.<br />
• Tap Yes to confirm file deletion.<br />
Changing Picture Settings<br />
• Press the Windows key and tap Pictures & Videos. This<br />
opens the “My Pictures” folder.<br />
• Tap Camera to turn on the camera. Wait a couple of<br />
seconds until the center of the window displays the<br />
viewfinder of the camera.<br />
• Tap on the screen to re-activate the task bar, tap Menu,<br />
then Resolution. Choose one of the dimensions available<br />
(expressed in pixels). The resolution setting impacts the<br />
quality and size of the picture you take.<br />
• Tap Menu, then Mode. Choose between Normal (one picture<br />
taken), Burst (five pictures taken at a one-second interval<br />
once you have pressed Enter) and Timer (picture taken 5<br />
seconds after pressing Enter).<br />
Making a Video<br />
Setting the Duration of a Video Film<br />
• Press the Windows key and tap Pictures & Videos. This<br />
opens the “My Pictures” folder in which you can see the<br />
list of existing images and videos.<br />
• Tap Menu, Tools and then Options.<br />
• Tap on the Video tab.<br />
• The audio track may, or may not be included in your video<br />
files. Clear or check the Include Audio.. option as needed.<br />
• Tap within the Time limit for videos. field and select one of<br />
the options below:<br />
– No limit: Choose this option to be able to film a video<br />
over an unlimited period of time.<br />
– 15 seconds: Choose this option to limit the duration of<br />
every video you’ll film to 15 seconds.<br />
– 30 seconds: Choose this option to limit the duration of<br />
every video you’ll film to 30 seconds.<br />
• Tap OK to accept the changes and close the Options<br />
window.<br />
20
Starting a Video<br />
• Tap Camera to turn on the camera. Wait a couple of<br />
seconds until the center of the window displays the<br />
viewfinder of the camera.<br />
• Tap anywhere on the screen to make the task bar visible<br />
at the bottom of the screen<br />
• When you are ready to film, tap Menu and then Video.<br />
• Press the Enter button to start filming.<br />
English<br />
Ending a Video<br />
• Depending on the video settings, the video camera will<br />
stop filming as explained below:<br />
– With a preset time limit (15 or 30 seconds), the video<br />
camera will stop filming automatically and close the<br />
video file after this time has elapsed. A down counter<br />
under the viewfinder will keep you informed of the<br />
remaining time as you film.<br />
– With no time limit, the video camera will film<br />
indefinitely. A counter under the viewfinder will tell<br />
you the current duration of the video. To stop filming<br />
and close the video file, press the Enter button again.<br />
• At the end of the video shooting, the viewfinder freezes<br />
while the end of the video is being processed.<br />
• Again, tap anywhere on the screen to make the task bar<br />
visible at the bottom of the screen and then tap OK to turn<br />
off the camera and close the window. The video file you<br />
have created is now listed in the “My Pictures” folder.<br />
Playing Back a Video<br />
• With the “My Pictures” folder open, tap on the desired<br />
video file. This will automatically launch the Windows<br />
Media player.<br />
• Tap to close Windows Media player and return to the<br />
“My Pictures” folder.<br />
Renaming a Video<br />
• With the “My Pictures” folder open, select the desired<br />
video file using the Scroll button.<br />
• Tap Menu, Tools and then Properties.<br />
• Rename the file and tap OK.<br />
21
English<br />
Deleting a Video<br />
• With the “My Pictures” folder open, tap and hold the<br />
desired video file.<br />
• Select Delete in the context-sensitive menu.<br />
• Tap Yes to confirm file deletion.<br />
22
E-Compass Calibration<br />
• Press on the Windows key.<br />
• Scroll down until you see the Compass icon.<br />
• Tap on the Compass icon to open the Compass utility.<br />
• Tap on the Calibration tab.<br />
• Put the receiver down on a table to give it a horizontal<br />
position (see picture [1] below).<br />
• Tap on the Start button located in the task bar to start the<br />
calibration process.<br />
First horizontal calibration is ready to go.<br />
• Slowly rotate the receiver by a couple of turns while<br />
keeping it horizontal (see picture [1] below).<br />
Wait until the receiver indicates that horizontal calibration<br />
is complete and prompts you to start vertical calibration<br />
(“Ready” displayed underneath the Vertical calibration<br />
button).<br />
• Take the receiver in your hands (see picture [2] below),<br />
put it in vertical position then slowly rotate it by a couple<br />
of turns, in the vertical plane. Then gently put it back<br />
down on the table.<br />
• Wait until calibration is complete before proceeding.<br />
English<br />
[1] [2]<br />
23
English<br />
Platform Specifications<br />
GNSS<br />
Characteristics<br />
20 channels<br />
• GPS L1 C/A<br />
• SBAS: WAAS/EGNOS/MSAS<br />
• External antenna connector<br />
• NMEA Output<br />
Accuracy<br />
Specifications<br />
All specified values are horizontal RMS, handheld accuracy<br />
performance achieved in good conditions (open sky) with<br />
PDOP < 3 and more than seven satellites in view.<br />
• Real-time SBAS: < 2 m typical<br />
• Post-processed: < 50 cm typical<br />
Processor • ARM9<br />
• Clock frequency: 600 MHz<br />
Operating System • Microsoft Windows Mobile Professional version 6.5<br />
• Installed language at delivery: English, French, Spanish,<br />
German, Portuguese, Italian, Simplified & Traditional<br />
Chinese, Greek, Japanese or Korean. Installed OS<br />
language cannot be changed once the product has been<br />
shipped in a given language.<br />
• Software package includes:<br />
– Internet Explorer ®<br />
– Microsoft Office Mobile<br />
– ActiveSync ®<br />
– Transcriber (handwriting recognition)<br />
Communication<br />
Cellular:<br />
• Built-in GSM/GPRS<br />
• Quad-band, 850/900 MHz, 1800/1900 MHz<br />
Bluetooth:<br />
• Bluetooth 2.1 with EDR<br />
WiFi:<br />
• Integrated<br />
Interface:<br />
• USB<br />
24
Physical<br />
Characteristics<br />
User Interface<br />
• Receiver size: 169 x 88 x 25 mm<br />
• Receiver weight, alone: 3<strong>10</strong> g<br />
• Receiver weight (batteries included): 380 g<br />
Keyboard:<br />
• Alphanumeric virtual keyboard<br />
• Four-direction Scroll and Enter button, Zoom In/Out keys<br />
+ context-sensitive keys<br />
• Illuminated keyboard with touch screen<br />
• Virtual keyboard<br />
Display:<br />
• Color TFT, high-resolution display, sunlight readable, with<br />
touch screen, LED backlight<br />
• Size: 3.5”<br />
• Colors: 262 k<br />
English<br />
Memory • 128-MB SDRAM<br />
• 256-MB NAND Flash (non-volatile)<br />
• Micro SDHC memory card (up to 8 GB, Sandisk ® ,<br />
Kingston ® recommended<br />
Environmental<br />
Characteristics<br />
Power<br />
Requirements<br />
Multimedia &<br />
Sensors<br />
• Operating temperature: -<strong>10</strong>° to +50°C (14 to 122°F)<br />
• Storage temperature: -30° to +70°C (-13 to 158°F)<br />
• Humidity: 95% non condensing<br />
• Waterproofness: IP54<br />
• Free drop: 1.2 m to concrete<br />
• Battery life: > 20 hours @ 20 ºC, with GPS on, Bluetooth<br />
and WiFi disabled, screen backlight used at minimum<br />
level 20% of the time.<br />
• Charging time: 4 hours<br />
• Removable battery<br />
• 3-Megapixel camera<br />
• E-Compass<br />
• G-Sensor<br />
• Speaker<br />
• Microphone<br />
Software Options • Ashtech <strong>MobileMapper</strong> Field and Office software<br />
25
English<br />
Standard<br />
Accessories<br />
• Post-processing<br />
• ESRI ArcPad software bundle (USA only)<br />
• Stylus<br />
• Hand strap<br />
• Universal AC adapter<br />
• USB cable.<br />
26
Index<br />
A<br />
Accessories 26<br />
Adjusting backlight 5, 6, 16, 17, 18<br />
Alignment 2<br />
B<br />
Battery compartment <strong>10</strong><br />
Battery life 25<br />
Battery status icon 13<br />
Bluetooth 24<br />
Burst 20<br />
C<br />
Calibration (screen) 2<br />
Camera 18<br />
Camera lens 9<br />
Camera settings 20<br />
D<br />
Delete picture 20<br />
Delete video file 22<br />
Display screen 25<br />
E<br />
Earpiece 9<br />
Environmental characteristics 25<br />
External antenna 9<br />
External antenna input 9<br />
G<br />
GNSS reception characteristics 24<br />
GNSS settings 11<br />
GNSS status 11<br />
GNSS Toolbox 11<br />
GPS antenna (built-in) 9<br />
H<br />
Holding the receiver properly 7<br />
I<br />
Inserting battery 1<br />
K<br />
Keyboard 25<br />
L<br />
Lock keypad 6<br />
Long time battery storage 14<br />
M<br />
Main Battery Low 14<br />
Main Battery Very Low 14<br />
Memory 25<br />
Microphone 9<br />
Mini-USB <strong>10</strong><br />
Modem (internal) 24<br />
O<br />
Opening battery door 1<br />
Operating system 2, 24<br />
OPP (Object Push Profile) 24<br />
P<br />
PDOP 11<br />
Play back video 21<br />
POGO cable 14<br />
Power modes 14<br />
Processor 24<br />
Q<br />
QVGA 8<br />
R<br />
Rename picture 19<br />
Rename video file 21<br />
Reset 12<br />
Resolution 20<br />
S<br />
SBAS 11<br />
Screen alignment 2<br />
Sensors 25<br />
Standby 21<br />
Start shooting video 21<br />
Stop shooting video 21<br />
Suspend mode 4, 13<br />
T<br />
Time limit (video) 20<br />
Timer 20<br />
Tracking mode 11<br />
U<br />
Universal AC adapter 1<br />
USB <strong>10</strong><br />
V<br />
Video (duration setting) 20<br />
English
<strong>MobileMapper</strong> ® <strong>10</strong><br />
<strong>Getting</strong> <strong>Started</strong> <strong>Guide</strong><br />
Mobile Mapping Contact Information:<br />
In USA +1 408 572 1<strong>10</strong>3 n Fax +1 408 572 1199<br />
In South America +1 305 726 7813<br />
Email mobilemapping@ashtech.com<br />
In France +33 2 28 09 38 00 n Fax +33 2 28 09 39 39<br />
In Russia +7 495 980 5400 n Fax +7 495 981 4840<br />
Email mobilemappingemea@ashtech.com<br />
In Singapore +65 9838 4229 n Fax +65 6777 9881<br />
In China +86 <strong>10</strong> 5802 5174 n Fax +86 <strong>10</strong> 5802 5135<br />
Email mobilemappingapac@ashtech.com<br />
www.ashtech.com<br />
Ashtech follows a policy of continuous product improvement; specifications and descriptions are thus subject to change without notice. Please contact Ashtech<br />
for the latest product information. ©2011 Ashtech. All rights reserved. The Ashtech logo and <strong>MobileMapper</strong> are registered trademarks of of Ashtech LLC. All other<br />
product and brand names are trademarks of their respective holders. P/N 631664-01A