


Create successful ePaper yourself
Turn your PDF publications into a flip-book with our unique Google optimized e-Paper software.
High Definition 3D Multimedia Player<br />
<strong>User</strong> <strong>Manual</strong><br />
Based on Firmware V1.0.3<br />
6 December 2012<br />
High Definition Multimedia Player<br />
TM
page 1<br />
page 2<br />
page 3<br />
page 4<br />
page 5<br />
page 6<br />
page 7<br />
page 8<br />
page 9<br />
page10<br />
page11<br />
page12<br />
page13<br />
page14<br />
page15<br />
page16<br />
page17<br />
page18<br />
page19<br />
page20<br />
page21<br />
page22<br />
page23<br />
page24<br />
page25<br />
page26<br />
page27<br />
page28<br />
page29<br />
page30<br />
page31<br />
page32<br />
page33<br />
page34<br />
page35<br />
page36<br />
page37<br />
page38<br />
page39<br />
page40<br />
page41<br />
page42<br />
page43<br />
page44<br />
page45<br />
Index<br />
Introduction<br />
Unpacking / Contents<br />
General Overview<br />
Installing a Hard Drive<br />
Connections<br />
Connections continued<br />
Power Up & Standby<br />
TV Output / Audio Settings<br />
INDEX<br />
Formatting the Hard Drive / USB Connection to PC<br />
Remote Functionality<br />
Placement / External IR Sensor<br />
USB Keyboard / Wired Network<br />
My Shortcuts (Password protected shares)<br />
USB WiFi Dongle / PCIE WiFi<br />
Wireless Setup<br />
Firmware Update Procedure / Web Remote / NDNLA DMR<br />
Home Network Samba Server<br />
Home Page<br />
Media Library<br />
Media Library Continued<br />
Media Library Metadata<br />
Adding Custom Backdrops<br />
Movie JukeBox - XML Search<br />
Using Movie JukeBox - XML Search<br />
Music Jukebox<br />
Music Jukebox Continued<br />
Music Jukebox Continued<br />
Music Jukebox Continued<br />
Music Jukebox Continued<br />
Cover Art Preview in Media Library<br />
Play Folder / Play Video From Cover Art / Watched Indicator<br />
Lock Facility / Pin Code / Folder Protection / Safely Remove USB<br />
Favourites Manager<br />
Adding Genre Art to Favourites / Locking - Unlocking Favourites - Scan XML<br />
Video Info - GOTO Search / Alpha Jump<br />
3D Menus / Toggle BD Manu / Video Zoom<br />
Subtitles<br />
Music Playlists / File Manager<br />
File Manager Multiple Files<br />
Pictures<br />
Plasma Mode / Autoplay / Internet Media<br />
NFS<br />
Transmission BT<br />
Setup Menu<br />
Page1
Thank you for purchasing the <strong>Mede8er</strong> Multimedia Player.<br />
<strong>Mede8er</strong> has achieved the ultimate balance in design and functionality with the new MED1000X3D High<br />
Definition 3D Multimedia Player. It may look like an alien spaceship but we can assure you that it was<br />
designed and developed by very passionate people right here on Earth.<br />
The <strong>Mede8er</strong> has some very unique features so we suggest you read this guide and visit the <strong>Mede8er</strong> forum<br />
for additional help and information. The firmware is always “work in progress” so we suggest you regularly<br />
check the <strong>Mede8er</strong> forum for updated firmware releases and updated <strong>User</strong> <strong>Manual</strong>s.<br />
Please check the <strong>Mede8er</strong> forum for the latest user guide. www.mede8erforum.com<br />
Warranty International<br />
<strong>Mede8er</strong> products carry a 12 month from date of purchase warranty. In the event of warranty service please<br />
provide proof of purchase. Return your product to the store that it was purchased from or return it directly to<br />
Sanji Electronics (Pty) Ltd 12, Saddle Drive Woodmead Office Park, Woodmead, Gauteng, South Africa.<br />
Warranty & Support Europe<br />
<strong>Mede8er</strong> products carry a 60* month from date of purchase limited warranty. In the event of warranty service<br />
or support, please contact one of the <strong>Mede8er</strong> Service Centers; www.mede8er.eu/support,<br />
support@mede8er.eu or call +31(0)10-7142861 during business hours (CET). In order to obtain the<br />
extended warranty service of in total 60* months after purchase, you need to register your product on<br />
www.mede8er.eu/register within 1 month after purchase. * On accessories 24 months applies.<br />
Warranty does not cover damage by<br />
a) Lightning or over voltage b) Water damage or liquid spill c) Misuse or abuse d) <strong>User</strong> tampering<br />
e) Using non <strong>Mede8er</strong> approved Firmware<br />
Sanji Electronics (Pty) Ltd is not responsible for any loss of data irrespective of the cause.<br />
Important Safety Instructions<br />
Read these instructions for all components before using this product.<br />
During electrostatic discharge and the strong electromagnetic field, the product may malfunction. In such a<br />
case, unplug the power cable to power off your player and the player will return to normal performance next<br />
time it is powered on.<br />
· Do not use this apparatus near water or moisture. Do not use this product near a bathtub, washbowl,<br />
kitchen sink, laundry tub, in a wet basement, near a swimming pool, or anywhere else that water or<br />
moisture are present.<br />
· Clean only with a soft dry cloth and as directed by the manufacturer. Unplug this product from the wall<br />
outlet before cleaning.<br />
· Do not block any ventilation openings. Install in accordance with the manufacturer instructions. To<br />
ensure reliable operation of the product and to protect it from overheating, put the product in a position<br />
and location that will not interfere with its proper ventilation. For example, do not place the product on<br />
a bed, sofa, or similar surface that may block the ventilation openings. Do not put it in a built-in system,<br />
such as a bookcase or a cabinet that may keep air from flowing through its ventilation openings.<br />
· Do not install near any heat sources, such as radiators, heat registers, stoves or other apparatus that<br />
produce heat.<br />
· Protect the power cord from being walked on or pinched, particularly at plugs, convenience<br />
receptacles, and the point where they exit from the apparatus.<br />
· Only use attachments or accessories specified by the manufacturer.<br />
· Unplug this apparatus during lightning storms or when unused for long periods of time to prevent<br />
damage to this product.<br />
Refer all servicing to qualified service personnel<br />
Page2
UNPACKING / CONTENTS<br />
Contents: - X3 Remote, European Region only - AC/ DC Adapter 2 Pin Euro with slot in UK Plug,<br />
International Region - 2 Pin Euro AC/DC Adapter, USB3.0 Cable, HDMI 1.4 Cable, AV Cable, Zip Bag with<br />
Hard Drive Securing Screws, Spare X3 remote side buttons.<br />
USB 3.0 Cable<br />
AV Cable<br />
X3 Remote<br />
Hard Drive Securing Screws<br />
HDMI 1.4 Cable<br />
Spare X3 Remote Side Buttons<br />
AC/DC Adapter Europe / UK<br />
AC/DC Adapter International<br />
Remove 5.5mm<br />
Foam Pad<br />
Should your X3 be pre bundled with a thinner<br />
casing Hard Drive then you must remove the<br />
protective foam pad that is placed on top of<br />
the hard drive.<br />
Page3
GENERAL OVERVIEW<br />
Top Navigation Buttons<br />
TV System<br />
Return<br />
Front View<br />
Setup<br />
Menu<br />
Navigation Buttons<br />
Cover<br />
Cover Release Button<br />
IR Receiver<br />
On/Off Switch<br />
Air Ventilation Slots<br />
Rear View<br />
Y<br />
Pb<br />
Pr<br />
YUV - Component Video<br />
Out<br />
2 x USB Host Ports<br />
*<br />
PCIe WiFi Antenna<br />
DC - 12Volt 2 Amp input<br />
Optical Audio Out<br />
Coax Digital Audio Out<br />
RJ45 - Lan connector<br />
HDMI connector<br />
Analogue Audio Out - Right<br />
Analogue Audio Out - Left<br />
Composite Video - Out<br />
USB 3.0 Slave Port<br />
External IR Jack<br />
Card Slot<br />
Page4
INSTALLING A HARD DRIVE<br />
A<br />
B<br />
3.5" HDD<br />
2.5" HDD<br />
C<br />
Most 3.5" or 2.5" SATA Hard Drive can be installed into the X3. If the unit is going to be moved around or<br />
transported we strongly suggest you use the supplied Hard Drive securing screws. Use the Silver screw for<br />
3.5" Hard Drives and the Black screw for 2.5" Hard Drives. Screw them in as shown in ‘A’ then turn the<br />
Hard Drive around as shown in ‘B’. Press the lid opening release button as shown in ‘C’ and carefully lift the<br />
lid up to its maximum position.<br />
D<br />
E<br />
Carefully slide the Hard Drive into position as shown in ‘D’. To secure the Hard Drive and engage the<br />
connector you need to push the Hard Drive casing with the left hard to to right side as shown in ‘E’.<br />
F<br />
2.5" HDD<br />
G<br />
2.5" HDD Securing Screw (BLACK)<br />
If you are using a 2.5" Hard Drive then you must use the Black 2.5" Hard Drive securing screws and<br />
additionally add a black screw as indicated in ‘F’. Once you have completed the Hard Drive fitment then<br />
close the lid as shown in ‘G’<br />
To remove the Hard Drive you must firstly release it on the<br />
Devices screen with F2 Button functionality or switch the<br />
X3 ‘off’ and then push the Hard Drive casing with your right<br />
hand finger to the left side as indicated in ‘H’. The Hard<br />
Drive will be released from the Sata connector and then it<br />
can be lifted out.<br />
H<br />
Page5
CONNECTIONS<br />
HDMI 1.4 Cable<br />
HDMI offers the best picture quality and should be used in preference of any other connection. Use the<br />
supplied HDMI 1.4 Cable for use with the X3. The HDMI can be connected to a AV Amplifier or directly to a TV.<br />
Component YUV<br />
Component Video offers the next best picture quality to HDMI so if your system does not have a HDMI input<br />
we suggest you use the Component Video Connection.<br />
Composite Video / Analogue Audio<br />
Composite Video offers the most basic picture quality connection and should only be used if your TV does not<br />
have a HDMI or Component Video input. Use RCA analogue audio outputs in the absence of HDMI or Digital<br />
Audio inputs on your TV or Home Theatre system. RCA analogue outputs will downmix all content from mutlichannel<br />
to stereo.<br />
Co- Axial Digital / SPDIF Optical Audio<br />
For digital audio connection to your Home Theatre System you can either use the TOSLINK Optical or the Co-<br />
Ax Digital output. The X3 supports both Passthrough and Downmix for both Dolby Digital and DTS signals. If<br />
you want your Home Theatre Amplifier to decode the surround sound Bit Stream you can use either either<br />
output and set the Audio Output to SPDIF Passthrough in the Setup menu.<br />
Rj45 Ethernet Network<br />
The X3 is equipped with Rj45 connector for connection to a wired network.<br />
Page6
CONNECTIONS CONTINUED<br />
SD Card Slot<br />
SD / SDHC / Sony Pro Due Memory Cards supported.<br />
DC Power Jack<br />
DC input is specified at 12 Volt 2 Amp DC. Important-- Only use the supplied AC DC Adapter.<br />
2 X USB Host Ports<br />
Host up to two external ‘Type A’ connector USB Devices. Note - Many USB External drives require an<br />
independent power source and must be supplied power from there own power supplies.<br />
USB 3.0<br />
You can transfer files to and from the X3’s internal hard drive via USB2.0 or USB3.0 transfer.<br />
External IR Jack (Not Supplied)<br />
The X3 is equipped with an external IR Jack for those who want to add a third party external IR Receiver to<br />
the unit.<br />
Page7
POWER UP AND STANDBY<br />
Plug the AC/DC adapter into the mains outlet and plug the DC Jack into the DC IN at the rear of the X3.<br />
DO NOT USE ANY AC/DC ADAPTER AND ONLY USE THE ONE SUPPLIED otherwise you may cause<br />
damage to the unit. The Navigation Pad LED will light up ‘RED’. Press the On/Off button on the X3 front panel<br />
and Navigation Pad will LED will turn to Blue. You can switch the X3 ‘Off’ by pressing the ‘On/Off’ button on the<br />
remote or by pressing the ‘On/Off’ button on the unit. When in standby the Top Navigation LED will turn Red.<br />
Multi Voltage AC/DC Power Adapter<br />
On/Off Button<br />
SCREEN CALIBRATION<br />
For better accuracy in Video Play and Image Zoom we suggest you calibrate your TV screen. Go to System<br />
Setup then Video and select Screen Size.<br />
Press Enter to save<br />
Using the left, right, up and down navigation buttons you can adjust the red rectangle to fit the outer frame<br />
of your TV screen. Note - Do not oversize the screen size as this could result in image artifacts when<br />
viewing still images on certain brands of TV’s.<br />
Page8
TV OUTPUT SETTINGS<br />
If you do not get to see the X3 GUI on your TV you will need to toggle the X3 TV output until you get a picture.<br />
TV SYS Toggle Procedure<br />
The X3 has three video output options ie Composite Video (yellow RCA connector, Component Video (Red -<br />
Green- Blue connectors) and HDMI. Each output option offers different screen resolution settings and these<br />
will need to be adjusted to match the type of TV used.<br />
It is suggested to use the Setup Menu to change the TV Out resolution. If you do not get a picture in the first<br />
place then you can try to change the TV Out Resolution via the TV Sys button. To change the Video Output<br />
on the X3 press the TV SYS button on the remote and it will change the Video Output to the next available<br />
output option. If after pressing the TV SYS button you still do not get a picture then press the TV SYS again<br />
until you see the X3 GUI on your TV. Keep repeating this procedure until you see a picture on your TV.<br />
OR<br />
θ<br />
Once you see the X3 GUI on your TV then you must enter the Video Setup<br />
mode and adjust the Video settings to match the screen size resolution of<br />
your TV.<br />
AUDIO SETTINGS<br />
Surround Sound<br />
Select “Don’t Care” if you are using 2 CH stereo. If you are using SPDIF or Co-Axial Digital then<br />
select “AC3". If you are using HDMI Audio to amplifier then select “True HD”<br />
HDMI Auto<br />
HDMI Auto is the suggested setting for HDMI Audio. All audio will automatically passed through to the<br />
amplifier - Dolby / DTS Bitstream - Dolby True HD / DTSMA - PCM / Multi-Channel LPCM.<br />
It is suggested to always use HDMI Auto in preference to HDMI Passthrough or LPCM Multi CH<br />
SPDIF Passthrough<br />
Use this setting to connect to an amplifier via Toslink optical cable or Co-Axial Digital RCA cable. The sound<br />
will be passed through as Bitstream or PCM and the amplifier. Dolby True HD and DTSMA HD Audio and<br />
Multi-Channel LPCM will not work on either SPDIF option.<br />
SPDIF Downmix (2 channel)<br />
Use this setting to connect to a Amplifier via Toslink optical cable or Co-Axial Digital RCA cable. The sound<br />
will be downmixed to 2 channel stereo.<br />
FORCE DECODE AAC/MP3<br />
Use this setting if you do not get AAC/MP3 Audio in HDMI ‘Auto’ or Passthrough.<br />
Page9
FORMATTING THE HARD DRIVE<br />
The X3 has a built in Hard Drive format feature that formats the<br />
internal hard drive. Once the Hard Drive is formatted in the X3 it<br />
will have a main NTFS partition and two small internal Linux<br />
partitions for propriety use.<br />
The Hard Drive should be formatted in the X3 to ensure full<br />
functionality. A pre formatted Hard Drive can be used but you may<br />
not be able to use all the internal features of the X3.<br />
To Format the internal Hard Drive select Setup menu and then<br />
HDD Format. The Hard Drive format function can be protected by<br />
the built in “Pin Code Lock” function. To enable Hard Drive<br />
Format protection you must enable “Pin Protection” option in the<br />
Setup menu.<br />
WARNING: FORMATTING THE HARD DRIVE WILL ERASE ALL DATA<br />
Formatting ...<br />
VIRGIN HARD DRIVES SHOULD BE FORMATTED TWICE BEFORE USE<br />
USB CONNECTION TO PC<br />
You can transfer files to and from the X3 via USB2.0 or fast USB3.0 transfer. Use the included Blue USB3.0<br />
cable to connect the X3 to your PC. After you have connected the USB cable press the on/off button on the<br />
X3 and the LED’s on the navigation buttons will turn “off’. The Computer will automatically install the correct<br />
drivers and then you will be able to navigate the X3 like any normal external USB drive. Note: Some<br />
Computers may take up to a few minutes to install the correct USB drivers. If you cannot connect to the X3<br />
than try another USB Port on your computer. The PC will detect the X3 and it will display a connection<br />
Dialogue Screen.<br />
If you are using Windows 7 it may prompt you to do format on the Linux Partitions and you must not<br />
accept this and select ‘Cancel’<br />
Windows 7 PC’s displays the propriety Linux partitions on 3TB hard drives so you must follow these<br />
instruction to hide these.<br />
1) Right-Click on ‘Computer’ Icon on desktop<br />
2) Select ‘Manage’<br />
3) Select ‘Disk Management’<br />
4) All your Hard Disk drives and its partitions will be show in the right hand side<br />
5) Locate the X3 drive<br />
a) It will show a main NTFS Partition 2789.85GB (This is the one you will use)<br />
b) 118MB RAW Partition (Linux)<br />
c) 509MB RAW Partition (Linux)<br />
6) Right-Click on ‘b’ Linux Partitions and select option ‘Change Drive Letter and Path’ --- A new dialogue<br />
screen will open with the Partition showing and now select ‘Remove’<br />
7) Repeat Step 6 for ‘c’<br />
The Linux Partitions will now be hidden when you connect the X3 to your PC<br />
Windows Checkdisk<br />
When you connect any USB Drive to a Windows PC it will prompt you to do a file system check ‘checkdisk’<br />
and you should accept this as this as it will attempt to fix any file systems errors on the Hard Drive.<br />
EXTERNAL USB DEVICE DRIVER NOT REQUIRED<br />
IMPORTANT:<br />
FOR USB3.0 - USE THE SUPPLIED BLUE USB3.0 CABLE.<br />
FOR USB2.0 - USE THE SUPPLIED BLUE CABLE OR ANY USB2.0 BLACK CABLE.<br />
Page10
REMOTE FUNCTIONALITY<br />
DVD Angle<br />
LED<br />
On / Off<br />
TV System<br />
θ<br />
Audio Mute<br />
Favourites Shortcut button<br />
A-B<br />
Setup<br />
Media Library ‘Devices Page’ Shortcut<br />
Numbers<br />
Repeat Shuffle<br />
Fast Forward / Rewind<br />
Volume Up/Down<br />
Learn Function Button<br />
Play / Pause<br />
Home Page<br />
Navigation Left<br />
Search Bar - Video File<br />
Menu<br />
Edit<br />
Audio Selection /<br />
Audio Currently Playing<br />
Skip Forward/Back<br />
Web Browser<br />
Toggle Scroll Bars<br />
& Hyperlink select<br />
Safely Remove USB<br />
Video Slow<br />
Next / Previous<br />
Active Backlight<br />
Stop<br />
Return<br />
Navigation Up<br />
Navigation Right - Search Bar - Video File<br />
Navigation Enter<br />
Navigation Down<br />
Info Screen / Movie Sheet (about.jpg) Zoom<br />
View - Change the layout view in Media Library<br />
Video Goto<br />
Zoom<br />
Subtitle<br />
Setup Functions / Browser Functions / Edit Functions<br />
Favourites Shortcut button<br />
Edit Text - Internet Browser - Toggle BD Menu ‘on’ ‘off’<br />
Remote Back Light<br />
The X3 remote uses active Back Light technology. The activation button<br />
is conveniently located on the right side of the remote for easy access in<br />
the dark. Press the Back Light button and the remote buttons will light<br />
up. The backlighting will auto switch ‘off’ after 15 seconds of no activity.<br />
Press the Back Light button to manually switch ‘off’ the Back Lighting.<br />
Remote Function Button<br />
You can assign any button on the remote to the ‘Function’ button. This is designed to be used as a shortcut<br />
button for a function that is used a lot.<br />
To assign a button -- press the ‘Function Button’ for 3 seconds and the Remote will enter<br />
‘Learn Mode’ and the LED will turn on solid. Now press the button you want to assign and it<br />
will be learned and the LED will flash and then turn off. You can change the function button<br />
assignment at any time by repeating this procedure.<br />
REMOTE SIDE BUTTON REPLACEMENT<br />
Should the remote TPE side buttons get worn or damaged you<br />
can install the spare set of button that are supplied standard with<br />
the X3. Remove the side TPE side buttons. Place the correct<br />
side solid button into position and push it firmly and the button<br />
will self lock into position.<br />
Page11
PLACEMENT<br />
A<br />
B<br />
The X3 is designed to be placed on the top of a TV cabinet so that the IR Receiver can receive reflected IR<br />
signals from the ceiling and walls - ‘A’ diagram above. The X3 should not be placed to close to the front<br />
edge as it uses the front surface to receive the reflected signals. If the top shelf of the cabinet is glass or<br />
perspex then we suggest you place a solid material matt underneath the X3 protruding approximately<br />
40mm to the front.<br />
Should you require to place your X3 on a shelf inside the cabinet - ‘B’ diagram above - then we suggest you<br />
place it very close to the front edge. Now place a reflector made of any solid material under the X3 and<br />
protruding by approx 40mm to the front. You can use any solid material as a Infra Red reflector and even a<br />
plain piece of folded photo copy paper will work.<br />
EXTERNAL IR SENSOR<br />
External IR Sensor (Not Supplied)<br />
The X3 is equipped with an external IR Jack for those users who require to place the unit in a particular<br />
location that is not in line-of-site of the remote. A third party external IR Receiver can be used as long as the<br />
wiring termination is the same as the diagram below. For those who want to make the external IR cable<br />
themselves we can recommend the Vishay part TSOP31138 (or equivalent) as it has been tested and works<br />
well with the X3 .<br />
VCC<br />
V OUT<br />
GND<br />
External IR Receiver Wiring<br />
Page12
TM<br />
USB Keyboard Function Keys (based on MEDX2KEY) Optional Extra<br />
Back<br />
Light<br />
Play/<br />
Pause<br />
Return<br />
Info/<br />
About<br />
Enter<br />
’Ctrl’ - ZOOM<br />
YouTube,<br />
Internet Browser<br />
ESC: RETURN SPACE: PLAY<br />
ENTER: SELECT(ENTER)<br />
'0': 0 '1': 1 '2': 2 '3': 3 '4': 4 '5': 5 '6': 6 '7': 7 '8': 8 '9': 9<br />
'-': VOL_DOWN '+': VOL_UP<br />
'P' + 'SHIFT' : POWER OFF<br />
'R(r)': REPEAT 'T(t)': SUBTITLE<br />
'I(i)': INFO 'A(a)': AUDIO<br />
'G(g)': GOTO 'H(h)': HOME<br />
'Z(z)': ZOOM '/(?)': Info / About<br />
‘’Ctrl’ : ZOOM YouTube, Internet Browser<br />
',()': FFWD<br />
'F(f)': Favourite 'E(e)': EDIT<br />
'M(m)': MENU 'S(s)': Setup<br />
'V(v)': View 'L(l)': AB<br />
'\(|)': SLOW '’ (”)': STOP<br />
'/(?)': Info / About '[({)': Back Skip<br />
'](})': Forward Skip 'W(w)': Launch Web Browser<br />
'B(b)': Browser - Devices<br />
'Alt': Mute 'FI': Red button<br />
'F2': Green button 'F3': Yellow button<br />
'F4': Blue button 'F5': TV Sys<br />
'F6': Previous Chapter 'F7': Next Chapter<br />
'F8': Menu - Internet Browser<br />
WIRED NETWORK CONNECTION AND SETUP<br />
The X3 can be connected to your local network by means of a RJ45 CAT5 cable. The X3 is supplied<br />
standard with a UPnP facility, Samba Client and NFS that allows connection to your local area network via a<br />
router or switch. You can share media files from your PC or NAS and stream media content to the X3 and<br />
you can use the X3 as a Media Server to stream media content to other devises on your network.<br />
Press the “Setup” button on the X3 Remote or “Setup” on the Home Page then select “Network” option in<br />
the Setup window then select ‘Wired Lan Setup’.<br />
Network configuration allows for either automatic or manual IP setup.<br />
DHCP IP (AUTO)<br />
Choose this option if you want your router to assign a dynamic IP address to the X3. This option is easy to<br />
use and recommended for normal users.<br />
FIX IP (MANUAL)<br />
This option allows you to assign a static IP address to the X3. This option requires modifying network<br />
settings of the X3 and is recommended for advanced users. To set a Static IP for your X3, enter the<br />
IP Address, Subnet Mast, Gateway and DNS Server Address as relevant to your router.<br />
DHCP IP Auto<br />
Fixed IP <strong>Manual</strong><br />
Page13
SAMBA (Network Setup)<br />
If your PC or NAS has Share’s setup to specific users then you will need to setup a<br />
shortcut on the X3 to each <strong>User</strong> Share and specify the IP, <strong>User</strong>name and Password<br />
Setting up Samba shortcuts on the X3<br />
Select ‘Network’ and then select the ‘My_Shortcuts’ icon. Now press the ‘Menu’ button<br />
and select ‘Add New Shortcut’. Fill in the fields <strong>User</strong> Name, Password, IP Address<br />
(Host Machine), and select ‘OK’<br />
NOTE: In order to browse your secure shares you will have to enter ‘My_Shortcuts’<br />
and then select the Shortcut’s that you have setup.<br />
Tip - Navigate to the Share Via ‘My Shortcuts’ and press the ‘Menu’ button and select ‘ Add to Favourites’ -<br />
Now you will be able to launch the share from the Favourite Desktop.<br />
PUBLIC SHARES<br />
Public Shares (shares that do not have a <strong>User</strong>name and Password) can be browsed via the<br />
Media Library ---> Network and no user name or password is required.<br />
Page14
WIRELESS USB DONGLE INSTALLATION (After Market)<br />
The X3 is only compatible with the optional (unless otherwise stated on the packaging) <strong>Mede8er</strong> Wireless<br />
Dongle MED10WFB. (Other brands will not work)<br />
Refer to <strong>User</strong> Instructions supplied with the <strong>Mede8er</strong> dongle for detailed wireless connection setup.<br />
WIRELESS NETWORK CONNECTION<br />
Plug the WiFi Dongle into the USB extension base that was supplied with the MED10WFB. Plug the USB<br />
cable into one of the USB host ports on the side of the X3. Extend the cable and place the base in a<br />
position that is away from any metal object that could effect the Radio Frequency signal strength. The best<br />
placement for the WiFi Dongle will depend on your particular environment. In order to get the best<br />
placement you may need to extend the length with an additional USB extension cable.<br />
MED10WFB<br />
USB Host Port<br />
WIRELESS PCIE ANTENNA INSTALLATION (Factory Fit)<br />
Certain models of the X3 (depending on the region) may be available with a factory fitted PCIE WiFi kit.<br />
Check the packaging information to confirm if your model has the pre installed WiFi Kit.<br />
Screw the antenna into the SMA antenna<br />
connector on the X3. Twist the antenna<br />
gently into the vertical position as shown.<br />
SMA Antenna Connector<br />
PCIE Antenna<br />
The operating distance or range of your wireless connection can vary significantly based on the physical<br />
placement of the Router and the WiFi Dongle or PCIE antenna.<br />
For best results, place your Router:<br />
* Near the center of the area in which your X3 will operate.<br />
* In an elevated location such as a high shelf.<br />
* Away from potential sources of interference, such as PCs, microwaves, and cordless phones.<br />
* The Antenna should be screwed in tight and in the upright position.<br />
* Away from large metal surfaces.<br />
Page15
WIRELESS SETUP<br />
Open Setup Menu then ‘Wireless Setup’ and<br />
you should see a list of available SSID’s<br />
with signal strength info. Press the ‘Zoom<br />
button to refresh the list. Select the SSID<br />
you want to connect to and press ‘Enter’<br />
1<br />
If the WiFi Router has password protection<br />
enabled then you will be required to enter<br />
the security key of your WiFi router. Enter<br />
the key int the virtual keyboard.<br />
2<br />
Select DHCP IP (AUTO) if you<br />
want your router to assign a<br />
dynamic IP address to the X3.<br />
3 4<br />
Select FIX IP (MANUAL) if you<br />
want to assign a static IP address<br />
to the X3.<br />
If you selected Fix IP then you must enter the<br />
IP Address<br />
Subnet Mask<br />
Default Gateway<br />
DNS Server IP<br />
After inputting these settings press ‘Enter’<br />
5<br />
The X3 will now test the connection.<br />
6<br />
If the connection was successful then the<br />
X3 will display the Net Info screen. This<br />
screen shows details of the connection.<br />
7<br />
Press ‘Enter’ and then you can you can<br />
press ‘Return’ to exit the WiFi Setup Page.<br />
8<br />
Page16
FIRMWARE UPDATE<br />
Download the latest X3 Firmware from www.mede8erforum.com. UnZIP or UnRAR or join with HJ Split and<br />
will find a file named install.img. Copy this file to the root directory of a Flash Drive. Plug the USB Flash drive<br />
into one of the USB Host Ports on the X3.<br />
DO NOT REMOVE POWER DURING THE EMERGENCY RECOVERY PROCEDURE.<br />
Setup Menu Update with Auto Configuration Restore<br />
Open the Setup Menu and select the “Misc” tab. Now select USB upgrade option. After +- 5 sec the screen<br />
will display the current Firmware Version and the New Firmware Version. You will have the option to select<br />
“OK” or “Cancel”. Select “OK” and the X3 will reboot and after +- 10 seconds the update process will begin.<br />
During the update process the top Navigation Buttons LED will flash and you should see an install progress<br />
bar on your TV screen. After the update is complete the X3 will reboot with the new firmware installed.<br />
If the X3 does not reboot within 5 seconds (after pressing the "Enter" button) then<br />
press the "Home" button to initiate<br />
Emergency Method (Resets Configuration to Default)<br />
Disconnect the power jack at the rear of the X3 then plug it back in - Now press the on/off button and hold it<br />
pressed for 20 seconds and then release.<br />
After approximately 15 seconds the LED on the X3 will flash blue and you will get a progress bar on your TV<br />
display (some TV's will not display this) wait until the X3 re boots itself +- 60 sec. Your X3 firmware is now<br />
updated.<br />
USB Host Port<br />
Press on/off button for 20 Sec<br />
REMOTE CONTROL OVER NETWORK<br />
Enable the Web Remote in the Setup Menu. Remote Control the X3 from a mobile device such as a iPhone,<br />
iPad or any device that has WiFi and a built in Web Browser. Enter the X3 IP into your Web Browser with the<br />
correct Port number eg http://xxx.xxx.xxx.xxx:1024 “x” is your actual IP<br />
DLNA DMR<br />
The X3 comes with a DLNA DMR function. That stands for Digital Living Network Alliance Digital Media<br />
Renderer. That means another DLNA device can use the X3 to process media without you having to do<br />
anything else with the X3 other than turning it on. Music can be played without having to turn on the TV, or<br />
you can display photo's on your TV directly from your phone.<br />
A Device which controls this process is called a DLNA DMC - Digital Media Controller. You can get DMC apps<br />
for many devices - Android phones / tabs - Iphone / Ipad. Android Honeycomb dosn't come with a DMC<br />
installed. Android Market has a lot of them, but not all are able to detect both the X3's DMR, and the X3's<br />
Upnp server successfully. Bubbleupnp has been tested with X3 and we suggest that this is a good app to start<br />
playing and testing DLNA DMR functionality. Remember to turn the DMR ‘on’ in the X3 Setup Menu.<br />
Page17
HOME NETWORK SAMBA SERVER<br />
The X3 has NAS (Network Attached Storage) functionality built in. And although it is limited in transfer<br />
speed compared to standalone NAS servers it performs well if speed is not your major requirement. You<br />
can also use the X3 as a Media Server and stream content to other <strong>Mede8er</strong>’s on your home network. The<br />
Samba function is enabled or disabled in the ‘Network’ menu under ‘Samba Process’.<br />
You can browse your X3 in Windows - Computer ---> My Network Places ---> View Workgroup Computers.<br />
If the Hostname is not picked up by your PC then you can enter either the Host Name or the<br />
IP Address into the Explorer address bar<br />
\\192.168.0.3 - You type in the actual ip address of the X3<br />
\\MED1000X3D - If you have changed the Host Name then type in the new Host Name<br />
If you are using more than one <strong>Mede8er</strong> on your Network then you should change the Hostname in the<br />
Setup Menu. Each X3 should have its own unique Hostname. You must reboot the X3 after changing the<br />
Hostname.<br />
SAMBA NAS SECURITY<br />
By default the Samba NAS is a open Public<br />
share and it does not require any Login.<br />
You can enable Samba NAS Security and set<br />
your own Password to limit access to the<br />
content on the X3 Hard Drive.<br />
<strong>User</strong>name: admin<br />
Password: ‘your login password’<br />
Cat5<br />
Cat5<br />
Cat5<br />
MED1000X3D with internal Hard Drive<br />
acting as Media Server<br />
Router<br />
<strong>Mede8er</strong> without Hard Drive<br />
Room1<br />
<strong>Mede8er</strong> without Hard Drive<br />
Room 2<br />
Page18
HOME PAGE<br />
The X3 Home Page is the central point where you can launch all the user applications. Press the<br />
Right/Left/Up/Down Navigation buttons on the remote to navigate the Home Page and press “Enter” to<br />
launch the selected page.<br />
FAVOURITES<br />
Create, manage, apply Genre cover art to local<br />
and network folder shortcuts.<br />
MEDIA LIBRARY<br />
The Media Library allows you to browse all your<br />
media content on your Hard Drive, SD Card, USB<br />
Devices and Network and launch the built in File<br />
Manager to manage and transfer your content to<br />
and from your X3.<br />
YouTube XL<br />
Search and Stream online YouTube videos to<br />
your TV.<br />
INTERNET MEDIA<br />
The Internet Media page contains the Internet<br />
Media functionality such as Web Browser, Social<br />
Media, Internet Radio, Flicker etc<br />
SETUP<br />
The Setup page is the area where you personalize<br />
the setup options to suit your individual needs.<br />
Page19
MEDIA LIBRARY<br />
The X3 Media Library has five built in standard views ie Movie, Music, Picture, List, and Preview. The<br />
Media Library has been designed so that the view can be easily changed on the fly. In the Media Library<br />
you have the option of changing the Views <strong>Manual</strong>ly or you can enable the ‘Auto View’ option in the Setup<br />
Menu. If the ‘Auto View’ option is enabled the X3 will automatically save the last used ‘View’ of the folder.<br />
The next time you enter the same folder it will automatically change to the saved View. Auto View mode<br />
requires that the X3 has ‘write’ permissions as it needs to save a xml file to each folder. Auto View is<br />
disabled in Jukebox mode.<br />
Movie View Music View Picture View List View Preview View<br />
12<br />
1<br />
3<br />
4<br />
2<br />
9<br />
5 6 7<br />
8<br />
10<br />
13<br />
11<br />
1. Media Icons 2. File Name 3. Focus Bar 4. Scroll Bar 5. Folder Path 6. Metadata Rating 7. Metadata Genre<br />
8. Metadata Movie Length 9. Watched Indicator 10. Index 11. View Icons 12. JukeBox Icon 13. XML Info<br />
Movie View Music View Picture View<br />
List View<br />
Preview View<br />
Page20
MEDIA LIBRARY CONTINUED<br />
To change the View of the Media Library press the “View” button on the remote and the View Icons will<br />
show. Press the ‘View’ button again and the focus will change to the next View Icon. Repeat pressing the<br />
‘View’ button until the icon you require is selected and then after a short pause the on-screen View will be<br />
updated.<br />
Page21
MEDIA LIBRARY METADATA DISPLAY<br />
The Media Library will display basic Movie Metadata in all ‘Views’. This unique X3 functionality will greatly<br />
enhance your Media Library browsing experience. In order to take advantage of this advanced functionality<br />
you will need to scan your movie collection to make the required xml files. To create the xml files with<br />
Windows use Y2M (YAMJ to <strong>Mede8er</strong>) or Thumbgen and for Apple Mac we suggest you use<br />
DunX2<strong>Mede8er</strong>. Pls check the <strong>Mede8er</strong> Forum for more details on these PC Programs.<br />
Meta Data Information<br />
Plot - Genre - Star Rating - Actors - Runtime<br />
Visit the <strong>Mede8er</strong> Forum for downloads and instructions on using Y2M. www.mede8erforum.com<br />
You can view the Movie Sheet that contains the full movie details by focusing on the thumbnail cover and<br />
pressing the “Info” button on the remote control.<br />
Page22
ADDING CUSTOM BACKDROPS AND SKINS<br />
You can customise your X3 by adding your own backdrop image. Prepare the jpg image to size<br />
1280 x 720 pixels with max size 500KB. In the X3 Media Library navigate to the image and press the<br />
‘Menu’ button. Select the option ‘Set to Background’ and the X3 will load your new backdrop into flash<br />
memory and use it as its default background. You can at any time revert to the X3 original default by<br />
selecting the option ‘Restore Default Background’<br />
The skin option is community driven and you can find some unique designs available for download from the<br />
<strong>Mede8er</strong> Forum. To load a skin -- just download it and unzip /unrar it to a folder. In X3 navigate to this folder<br />
and press the ‘Menu’ button and select ‘Add to Skin Option’ The new Skin will be loaded into flash memory<br />
and used as the new default skin. You can revert back to the original skin at any time by selecting the<br />
option ‘Restore Default Skin’<br />
Once you have decided on the Background or Skin we recommend that the X3 be be<br />
Re-booted for reliable system operation.<br />
Page23
MOVIE JUKEBOX - XML SEARCH FUNCTION<br />
The X3 has a built in XML Search facility that will allow you to sort and arrange your Movie Collection by pre<br />
defined xml filters. The XML Search can be used with content on the internal Hard Drive, external USB Hard<br />
Drives, Samba and NFS Network shares.<br />
Library Preparation for XML Search operation<br />
The Media Library must conform to the <strong>Mede8er</strong> standard with all the relevant movie file information in it’s<br />
own folder. A typical folder will contain - Video File - Folder.jpg - About.jpg - XML File - Subtitle file. Once you<br />
have arranged your Video Collection into individual folders you can use Windows - Y2M (YAMJ To <strong>Mede8er</strong>)<br />
or Thumbgen / Mac - DunX2<strong>Mede8er</strong> to scan the folders to make the requires images and xml files.<br />
Scanning your Library<br />
In order to provide XML Search functionality the X3 must scan your library and build a Database file. To scan<br />
your library you must focus on the Root Folder of your library and press the ‘Menu’ button and then select<br />
‘Add to Favourite’ option. Open the Favourite screen and focus on the shortcut and press the ‘menu’ button<br />
and select the ‘Scan’ option. The X3 will start the scan process and Scan all folders and sub folders in order<br />
to build the dBase file. The scan criteria is to only include folders that have a valid Y2M/ Thumbgen /<br />
DunX2<strong>Mede8er</strong> XML inside. The folder depth level is not limited in the X3 firmware but the path of the string<br />
cannot be longer than 512 characters and the max number of sub folders cannot exceed 4096. The<br />
Database file ‘<strong>Mede8er</strong>.db’ will be save to the root of the folder that has been scanned. Network shares must<br />
be ‘Write Enabled’ for the scan process to complete. If new content is added to the root folder then the scan<br />
operation must be repeated. Scanning time is quick and it should take about 30 seconds to scan +- 1000<br />
movie folders.<br />
Note: The Maximum amount of Movies in one Database is currently +- 2000. If you scan a library with more<br />
movies than 2000 then the operation of the xml Search can become erratic and you may experience that the<br />
X3 often crashes.<br />
Page24
JukeBox View<br />
In the Setup menu under ‘Misc Options’ you can select JukeBox View -- on/off<br />
JukeBox View ‘off’ - Favourite Links to a Jukebox will be presented in a normal structure and you can<br />
navigate the scanned Folders and Sub Folders folder as you normally would in the Media Library.<br />
JukeBox View ‘on’ - Favourite Links to Jukebox will be presented in JukeBox View ie 16 Covers in a flat<br />
display. The internal folder structure of the folders will be ignored.<br />
You can add a scanned XML Folder to Favourites in the normal way.<br />
Using XML Search - Media Library<br />
To use the XML Search you must navigate to the root folder that was scanned and open it.<br />
You will see a XML Search icon on the top right of the screen.<br />
Using XML Search - Favourite Link<br />
If the Jukebox was launched from a Favourite link then the contents will be displayed in<br />
Jukebox Style (provided the Jukebox View in enables in the Setup Menu).<br />
If the Search Icon on the top right of the screen is visible then Jukebox functionality is available. Press the<br />
Menu Button and you will have a choice of XML Search options.<br />
Sort Search Results by Latest / Alphabetically<br />
This option will allow you to have the Search results filtered by ‘Latest’ (date you added the movie to your<br />
collection) or in Alphabetic order. This is a global setting and will be stored in memory. After selecting this<br />
option you must then do a XML Search.<br />
Watched Indicator<br />
If the Watched Indicator option is enabled in the Setup Menu then it will show on the XML Search Menu. You<br />
have the option to mark the Video as Watched / Unmark as Watched. The Video file will be automatically<br />
marked as Watched if more than 10% of the Video has been played.<br />
Folder Lock<br />
If enabled in the Setup Menu (Folder Protection) You will be able to<br />
lock any Movie in the Jukebox. Focus on the Movie cover and press<br />
the Menu Button and select the ‘Lock’ option and the Movie will be<br />
locked. To unlock the Movie just focus on the cover and press the<br />
Menu Button and select ‘Unlock’ then enter your 4 digit pin code and<br />
the Movie will be unlocked. Default code is 0000<br />
Hide Movie Info<br />
If this option is selected the XML Movie Info will be hidden<br />
Title Search<br />
Select the ‘Title’ option to perform a Movie Name Search. Enter the<br />
‘movie name’ or ‘key word’ into the Virtual Keyboard and the X3 will<br />
search the folder names for a match and display the results.<br />
All - All content will be displayed by ‘Latest’ or in ‘Alphabetic’ order.<br />
Genre - list of all the available Genres in the dBase will be<br />
displayed.<br />
Year - This is the release date of the movie. A list of all the ‘Years’<br />
ie release dates in the dBase will be displayed.<br />
Star Rating - The star rating is the IMDB users rating for the<br />
movie.<br />
Alpha Search - Use the Alpha buttons on the remote. An Alpha<br />
search can be conducted within a dBase XML Search.<br />
Page25
MEDIA LIBRARY - MUSIC PLAYER<br />
Select any supported music file and the Music Player Screen will launch. If the music file has embedded<br />
information tags and images then these will be displayed on the right hand side in the preview window area. If<br />
you do not want to use embedded mp3 art or you are using .m4a, ape or flac files you can save the Album<br />
Cover as a jpg file named ‘folder.jpg’ to the Music Album Folder. The X3 will use the ‘folder.jpg’ it if it does not<br />
find any embedded art in the music files. Suggested size of the embedded art is 230 x 230pixels.<br />
The X3 also supports Music Fan Art. Make a image called ‘fanart.jpg’ size 1280 x 720 and save it to the Album<br />
folder.The X3 will automatically display the Fan Art background when you select any track in the Album.<br />
Currently Playing - Music Shortcut<br />
Press the ‘Audio’ button to take you<br />
back to the Currently Playing music.<br />
Album Art Screensaver<br />
The X3 supports Album Art Screensaver.<br />
Copy a image named ‘folder.jpg’ to each Album folder<br />
with max size 230 x230 pixels and the currently<br />
playing Album Art will be shown on the screensaver.<br />
Music Jukebox<br />
Pls visit the <strong>Mede8er</strong> website for the Online Guide<br />
www.mede8er.com/mede8er_music_jukebox_user_guide.html<br />
Current Track Time<br />
Total Track Time<br />
OFF - Repeat and Shuffle off<br />
Repeat Track - Repeat the current track<br />
or<br />
Repeat All - Repeat all tracks in the folder. Shuffle off<br />
Shuffle - Shuffle all tracks in the current folder<br />
Page26
MUSIC JUKEBOX<br />
The X3 Jukebox relies on the embedded Music files 'Tag' information and correct image sizing for its<br />
functionality, so it is critical that you spend the time to correctly Tag your music collection.<br />
Music Jukebox Features<br />
Direct MP3 Scan * Supports Mp3, OGG, Monkey's Audio, Flac, AAC, wma, m4a -- when scanned with Tagscanner *<br />
Works on local drives and Network shares * Displays Tag information in the Music Player Screensaver with Album Artwork *<br />
Supports .cue files play function (Album based) * QPL (Quick Play List) Function * Make and Save <strong>Mede8er</strong> m3u Playlists on<br />
the GUI * Supports Playlist Creator 3 - 'Non extended information' m3u Playlists * Search Album Year, Artist by drop list or Text<br />
input, Genre, Track Keyword * Large collections supported +- 40 000 tracks * Supports the Auto View function * Easy Drop List<br />
selection with Right / Left Nav Alpha Jump * Results filtered by Album or Title option * Easy Setup for Multiple Music Jukeboxes<br />
* iTunes DRM m4a / WMA DRM and advanced profile -- not supported<br />
Note: The Music collection cannot be mixed with Video content.<br />
Basic MP3 direct Scanner Operation<br />
Navigate to the root folder of your Music Collection and press the 'Menu' button and select the option 'Add to<br />
Favourites'. Press the 'F4' button on the remote to go to the Favourite page. On the Favourite page select the<br />
Icon Shortcut of the Music Collection you just made and press the 'Menu' button and select the 'Scan Folder'<br />
Option - the firmware will automatically detect the music files and then scan all the MP3 tags and build a<br />
music.db (music database) file and save it to the root folder of your collection. All non MP3 tags will be ignored.<br />
Your Music Collection can be in a nested folder arrangement. Approx scanning time = 48 sec /1000 tracks<br />
Multi Codec Scanner Operation<br />
A free Windows PC program called Tagscanner together with a special <strong>Mede8er</strong> Script is used to scan the<br />
music collection and to export the Tag information to a file named TrackList.xml. Once you have installed<br />
Tagscanner then download the <strong>Mede8er</strong> Script and copy it to the 'Script' folder in Tagscanner ie C:\Program<br />
Files\tagscan5.1.610\scripts. Remember you still need to install the <strong>Mede8er</strong> Script. The script download<br />
link can be found on the <strong>Mede8er</strong> Music Online Jukebox Online <strong>User</strong> Guide.<br />
Once you have completed using Tagscanner to tag and arrange your music collection you must export the tag<br />
information to a file called Tracklist.xml. Go to 'List Maker' page in Tagscanner and select 'ALL' the files in your<br />
scanned collection and then select the <strong>Mede8er</strong> script on the right hand side and then select 'export' . The<br />
Tracklist.xml will be saved to the root of your Music Collection.<br />
In X3 GUI Navigate to the root folder of your Music Collection and press the 'Menu' Button and select the option<br />
'Add to Favourites'. Press the ‘F4' button on the remote to go to the Favourite page. On the Favourite page<br />
select the Icon Shortcut of the Music Collection you just made and press the 'Menu' button and select the 'Scan<br />
Folder' Option - the firmware will automatically detect the Tracklist.xml file and then scan it and build a music.db<br />
(music database) file and save it to the root folder of your collection. Your Music Collection can be in a nested<br />
folder arrangement. Approx scanning time = 20 sec /1000 tracks<br />
Page27
MUSIC JUKEBOX - Continued<br />
Root of Collection<br />
The 'Root' of the music collection is the folder that will be scanned and<br />
linked to the Favourites Page The music collection 'Root' will contain the<br />
Tracklist.xml (if used), Music.db and m3u files eg<br />
Music Collection
MUSIC JUKEBOX - Continued<br />
Arranging your collection<br />
Your collection can be located on your local Hard Drive, USB Drive or<br />
Network Share. The advantage of using a Network share is that you can<br />
access one central collection with multiple <strong>Mede8er</strong>'s thus making it ideal<br />
for a Multi-Room setup.<br />
If you have a big music collection it makes sense to split it up into main<br />
categories. This gives you the advantage of being able to better manage<br />
your collection in smaller bits as you can still scan the total collection with<br />
the added advantage of separate shortcut links on the Favourite Page<br />
So in this example you would have a main folder with sub folders<br />
Music Backup_all<br />
Music Backup_all/Flac<br />
Music Backup_all/Hits_etc<br />
Music Backup_all/Music<br />
You can make a Favourite shortcut link to each of these folders.<br />
Favourite Links and Scanning<br />
Before you can 'Scan' a folder you must add it to the Favourite Page. Navigate to the Folder in the Media<br />
Library and focus on the folder you want to add and then press the 'Menu' button on the remote and select the<br />
option 'Add to Favourites'. The Favourite link will be created and if successful a confirmation 'tick' will be<br />
displayed top left of the screen. If you get a 'x' then it means the link already exists or the link cannot be made.<br />
Press the 'Blue' button on the remote to go to the Favourite Page. Focus on the Favourite Shortcut and press<br />
the 'menu' button and you see options<br />
Scan Folder - Scan the folder to make a <strong>Mede8er</strong> database (Music.db).<br />
Remove - Remove the Favourite Link. This option just removes the link and does not delete the source files.<br />
Genre - Change the default folder image into a Genre artwork image for the Favourite Link.<br />
Lock - Lock the Favourite Link so that it is Pin Code Protected.<br />
Unlock - Unlock a 'Locked' Favourite Link.<br />
If you get a warning message "Set NAS to 'off' for Scan" then you must first switch 'off' the NAS function in the<br />
Setup Menu and then scan the collection.<br />
Using the Music Jukebox<br />
1) Setup ------> Misc ------> Set 'JukeBox View' to 'on’ -- AutoView - We suggest you set this to 'on'<br />
2) Select a Favourite Shortcut Icon and press 'Enter' ------> the Music Database will be imported and opened.<br />
3) Press the 'Menu' button and you will see the list of Search options on the Menu screen<br />
Alpha Jump<br />
To jump to a Alpha character in the Drop List ie - Genre - Album - Artist<br />
a) Use the 'ABC' buttons on the Remote<br />
b) Use the Left Right Navigation buttons on the Remote<br />
Music Player Page Jump<br />
Use the Left Right Navigation buttons to jump to the next or previous page in the Music Player<br />
QPL - Quick Play List<br />
The 'Quick Play List' is a easy way to group and play selected Albums or Tracks. The QPL is a one time play<br />
facility and will be automatically cancelled one you exit the Music Player. Focus on a Album or Track and press<br />
the 'F2' button on the Remote Control and the QPL icon will be added to the Album or Track. To remove a QPL<br />
just focus on the Album or Track and press the 'Green' button and the QPL icon will be removed.<br />
Once you are happy with your QPL selection press the 'Play' button and the QPL list will be loaded and you can<br />
now select the first track you want to play and the press 'Enter'.<br />
Page29
MUSIC JUKEBOX - Continued<br />
Saved Playlists<br />
'Saved Play List' is a easy way to make a Playlist via the GUI and save it<br />
so that it can be played at any time.<br />
Focus on a Album or Track in the order you want them saved and press<br />
the 'Green' button on the Remote Control and the QPL icon will be added<br />
to the Album or Track. To remove a QPL just focus on the Album or Track<br />
and press the 'Green' button and the QPL icon will be removed.<br />
Once you are happy with your Playlist selection press the 'Menu' button<br />
and the screen will open and you will see a option 'Save Playlist'. Select<br />
this option and a text dialogue screen will open allowing you to rename the<br />
Playlist. The Playlist will be saved to the 'Root' folder of your collection.<br />
To play a saved playlist press the 'Menu' button and select the Playlist<br />
option and all available Playlists will be listed.<br />
Making X3 compatible m3u Playlist with Playlist Creator 3<br />
Download and install Playlist Creator 3 -- Correct Playlist Creator 3 Setup Options<br />
1) Extended Information -- Uncheck the option ' Write extended information’<br />
2) Playlist Details -- Select 'Relative and 'Use Forward Slash instead of back slashes’<br />
3) Make your Playlist and save it to the 'Root' folder of your Music Collection in m3u format.<br />
Album Art on Music Jukebox Screensaver<br />
If you use a folder.jpg image in each folder with max size of 250 x 250 pixel (recommended size is 230 x 230<br />
pixel) it will be used in the Screensaver together with Album Tag information. For normal image manipulation,<br />
correct aspect ratio cropping and resizing of the folder.jpg we suggest a free program called Photoscape.<br />
Add to Jukebox<br />
Mp3 scan only - The Jukebox has a facility that enables you to add Albums to a pre scanned collection. If<br />
you are adding multiple Albums the easiest way would be to make a new folder with a date eg 'new_4July2012'<br />
and copy your new Albums into this folder. Now focus on the new folder 'new_4July2012' and press the 'Menu'<br />
button and select the option 'Add to Jukebox' . The new Albums will be added to the data base.<br />
Tracklist.xml- For Tracklist.xml it is probably a lot easier to just do a re-scan. For those who want the facility<br />
you can follow these instructions. Make a new folder eg 'new' and copy your new Albums into this folder. Open<br />
Tagscanner and browse to this folder 'new' and scan it and then export a Tracklist.xml. Now in the X3 Media<br />
Library navigate to the 'new' folder and focus on it then press the 'Menu' button and select the option 'Add to<br />
Jukebox' . The new Albums will be added to the data base. Now copy the contents of the folder 'new' to the root<br />
folder.<br />
Music Fan Art<br />
Make a Fan Art image 1280 x 720 pixels in jpg format called 'fanart.jpg' and copy it to a Album folder. The image<br />
will then be automatically used as the backdrop when playing the Album.<br />
Shuffle / Random Play<br />
Next/Previous Track function is supported in Shuffle/Random Play mode in the Music Jukebox but you cannot<br />
use Shuffle/Random Play and then try to select some other track to play as it is Data Base driven and the Tag<br />
Info will go out of sequence. If you want to play some other track when in Shuffle/Random Play mode then you<br />
must firstly select the 'All' mode on the Repeat button and then select the Track. Also if you want to change<br />
back to Shuffle/Random Play mode you need to start at Track1 and then select it.<br />
We suggest you visit the <strong>Mede8er</strong> Website for a more detailed <strong>User</strong> Guide<br />
Online Version - http://www.mede8er.com/mede8er_music_jukebox_user_guide.html<br />
Page30
COVER ART PREVIEW IN MEDIA LIBRARY<br />
The X3 has a built in facility to preview cover art and display it in the Thumbnail or Preview View. To use this<br />
functionality you need to arrange your collection with each video in its own folder and copy a jpeg image<br />
named ‘folder.jpg’ size 160 x 237 pixels to each folder. You can download Movie / DVD cover art directly from<br />
the Internet or can use a free program like YAMJ to <strong>Mede8er</strong>. Y2M will additionally make the movie sheet<br />
image named ‘about.jpg’ that contains the content information such as Synopsis, Cover, Rating, Year, Actors<br />
etc etc Y2M is available for download from the <strong>Mede8er</strong> Forum - www.mede8erforum.com.<br />
IMPORTANT: We recommend that you set your screen size in the Setup<br />
Menu before viewing the Movie Sheet’s in full screen.<br />
Movie Thumbnail View<br />
Preview View<br />
BROWSE BY MOVIE SHEET<br />
Press the ‘Info’ button to show the Movie Sheet in<br />
full screen. Press the Up/Down Navigation button to<br />
browse by Movie Sheet. You can launch the movie<br />
from the movie sheet by pressing the ‘Enter’ button.<br />
To view the Movie Sheet in full screen press the Info button.<br />
Press the Nav Up/Down to browse by cover art<br />
Page31
PLAY FOLDER<br />
X3 allows you to play a video file within a folder without the need to open the folder. Just focus on the folder<br />
and press the ‘Play’ button. The first video file found in the folder will be played. The folder play will only work<br />
with video files.<br />
PLAY VIDEO FROM COVER ART<br />
With the X3 you can play the video directly from the cover art. Zoom the about.jpg by pressing the ‘Info’ button<br />
and then press ‘Play’ or ‘Enter’ to play the video.<br />
Play or Enter<br />
WATCHED INDICATOR<br />
X3 is equipped with a watched video indicator feature. To enable this function go to Setup -- Misc -- Watched<br />
Indicator and switch it ‘on’. The X3 will mark the Video file with a eye icon once more than 10% of a video has<br />
been watched. You can also mark a video as watched or clear the watched icon manually.<br />
Media Library - Focus on the file or folder and press the ‘EDIT’ button on the remote control and you will be<br />
able to add or remove the watched indicator.<br />
Movie JukeBox - Focus on the file or folder and press the ‘Menu’ button on the remote control and you will be<br />
able to add or remove the watched indicator.<br />
Watched Indicator<br />
Page32
LOCK FACILITY<br />
X3 has a built in Lock facility designed to restrict access.<br />
Pin Protection - Hard Drive Format / File Manager.<br />
Folder Protection - <strong>User</strong> Folders<br />
You can enable or disable these options in the Setup menu<br />
CHANGE PIN CODE - The default 4 digit Pin Code is 0000<br />
To change the Pin Code go to Setup -- Misc -- Password -- You will be prompted to enter the existing pin<br />
code. For first time use you must enter the default factory pin ‘0000' and then the Pin Code change screen will<br />
open. Enter the default pin again and enter your new personal 4 digit code twice by pressing the numbers on<br />
your remote. Once you have entered the code press the “ENTER” button on the remote and the new code will<br />
be saved.<br />
PIN PROTECTION<br />
Enable Pin Protection to protect access to the Hard Drive Format area and the File<br />
Manager functionality. Once the Pin Protection is enabled you will be prompted to<br />
enter your personal 4 digit pin code when trying to gain access to these screens.<br />
θ<br />
FOLDER PROTECTION<br />
Folder protection will allow you to protect folders on the internal Hard Drive, USB Drives, Lock Folder Unlock Folder<br />
SD Card or Network Shares (write enabled shares). To protect a folder focus on the folder<br />
and press the ‘EDIT’ button on the remote. Select the ‘Lock’ icon and the folder will be<br />
locked. To unlock a folder, focus on the folder and press the ‘EDIT’ button on the remote. Select the ‘Unlock’<br />
icon and you will be prompted to enter your Pin Code. After the correct code is entered the folder will be<br />
Unlocked.<br />
RESET PIN CODE<br />
To reset the Pin Code re-install the latest firmware and the Pin Code will default back to ‘0000'<br />
SAFELY REMOVE USB DRIVES- Beta Functionality<br />
The Safely Remove Hard Drive is designed to dismount the Internal Hard Drive or<br />
USB Drives. To dismount a drive - navigate to the ‘Devices’ page and press the ‘F2'<br />
Button on the remote. A new page will open with a drop list of available drives that<br />
can be dismounted. Select the drive you want to<br />
dismount and press ‘Enter’ and X3 will then<br />
dismount the drive. You should remove the Drive<br />
without delay.<br />
Note: Drives that are being read from or written to in<br />
Samba NAS will be dismounted. This can cause data<br />
corruption so we suggest that you do not dismount drives<br />
that are being written to via the Samba NAS.<br />
Page33
FAVOURITES MANAGER<br />
The MED1000X3D is equipped with a desktop function called<br />
Favourites. The Favourite screen is a list of ‘Shortcuts’ created by the<br />
user. The Favourite Link will work as a shortcut link to shared folders<br />
on the internal Hard Drive, USB Drives, Samba and NFS Network<br />
Shares. The X3 will show all the shortcut links on the Favourite<br />
screen. You can add or remove a Favourite Link at any time.<br />
Using the Favourites<br />
Navigate to the file or folder that you want to add to the Favourite<br />
Screen and press the “Menu” button on the remote control. The<br />
Menu dialogue will open and you will see the option “Add to<br />
Favourites”. Select this option and the folder path will be added to<br />
the Favourites screen (as a confirmation a tick icon will be shown on<br />
the top left of the screen). If the Favourite cannot be added (in the<br />
case that it already exists) you will get a failed “X” indicator on the<br />
top left of the screen.<br />
Bootup to Favourites<br />
You can set the X3 to Bootup to the Favourites screen. Setup -<br />
--> ‘System’ and select ‘Favourites’ option under Default<br />
Appplication tab.<br />
Favourite Shortcut<br />
You can launch the Favourite screen at any time by pressing<br />
the ‘Favourite’ or “F4” button on the remote control.<br />
Tip: The Favourite button can also be learned into the<br />
Function Button on the remote control.<br />
Page34
ADDING GENRE ARTWORK TO<br />
FAVOURITES<br />
Genre thumbnail artwork can be applied to a Favourite link. To add<br />
the cover artwork, focus on the Favourite thumbnail and press the<br />
“Menu” button on the remote control. The menu dialogue screen will<br />
open and select the “Genre” option. A new screen will open with a<br />
thumbnail view of Genre cover options. Navigate to the cover you<br />
require and press the “Enter” button to make your selection. You can<br />
also use the Alpha Jump facility to jump to covers. Use the same<br />
procedure to change covers.<br />
Adding Custom Genre Art To Favourites<br />
To add custom Genre Covers to flash memory.<br />
Make a folder 'Genre' and copy up to max 50 png genre covers into<br />
this folder. 1:1 size is 117 x 172 pixels but 156 x 233 pixels work ok<br />
as well. Copy the 'Genre' folder to the Skin Folder. Focus on the Skin<br />
folder and press 'Menu' button and select 'Set to Skin' option.<br />
Locking and Unlocking<br />
Favourites<br />
To password protect a Favourite link press<br />
the “Menu” button on the remote control and<br />
the Menu dialogue screen will open. Select the Lock option and the<br />
link will now be Pin Code protected. To Unlock the Favourite link<br />
select the unlock option and you will be prompted to enter your 4<br />
digit pin code and then the Link will be unlocked.<br />
Scan XML Data<br />
You can scan a Favourite link to build or re-build a XML Data dBase for the Movie or Music Jukebox.<br />
Page35
VIDEO INFO SEARCH<br />
The Info Search allows you to easily jump to any part of the video. While viewing a Video File press the<br />
Left/Right Navigation button and the Info Screen will appear on the top of the screen. Now press the<br />
Left/Right Nav and a red bar will move left or right and with the corresponding Time position displayed in<br />
number text on the left side. Once you have reached the time search you require juts press the “Enter”<br />
button and the X3 will jump to the time you selected in the Video.<br />
File name<br />
Title info<br />
Audio codec Video codec Chapter info<br />
Current time Search time Time bar Total time Search time indicator Repeat status<br />
GOTO SEARCH<br />
The GOTO Search allows you to easily jump to a specific time point or Title or<br />
Chapter in a Video file. While viewing a Video File press “Goto” button and the Goto<br />
Screen will appear on the top of the screen. Now press the Left/Right Navigation<br />
button to select the function you require such as Time, Title or Chapter. Once the<br />
function is selected press the Up/Down Navigation button to select the numeric value<br />
you require and then press the “Enter” button and the X3 will jump to the time you<br />
selected in the Video.<br />
Time Title Chapter<br />
Current time Search time Time bar Total time Search time indicator<br />
BD PLAYLIST<br />
During BD play press the ‘Menu’ button and select the Playlist option. Navigate to the Playlist required and<br />
press ‘Enter’ button on the remote.<br />
ALPHA JUMP<br />
The X3 has a easy to use Alpha Jump facility built into the Media<br />
Library. The Alpha Jump enables you to quickly jump to files and<br />
folders in your Media Library. Navigate to the Media Library and press<br />
one of the Alpha buttons on the remote control ie ABC, DEF, GHI, JKL,<br />
MNO, PQRS, TUV, WXYZ and the Alpha letter will be displayed on the<br />
top left of the screen. Press the button again and the next Alpha<br />
character will be displayed. After a short pause of making the final<br />
selection the focus will jump to the first file or folder with the Alpha<br />
character that was selected.<br />
Page36
3D MENUS<br />
The X3 supports 3D BSISO, Side by Side, Top & Bottom, Frame Sequential, Frame Packing (3D BDISO<br />
Menus are not supported). Enable 3D playback on your TV. Select a 3D Video and Play it and then press the<br />
Menu button on the X3 remote for more 3D setting options. You can force the X3 to play a 3D file automatically<br />
in 3D by adding some extra characters to the file name. eg file_name.TB.mkv or file_name.SBS.mkv<br />
In this case the X3 will open the file and select ‘TB’ or ‘SBS’ automatically.<br />
Toggle BD Menu on /off<br />
If the BD Menu is set to ‘Off’ then the X3 will automatically switch to 3D mode<br />
when using BDISO source material. All other 3D formats must be manually<br />
selected. You can use the ‘F3' button the switch the BD Menu ‘on’ or ‘off’<br />
ZOOM<br />
The X3 is equipped with advanced zoom functionality and once your screen is calibrated<br />
you can zoom intuitively to either WIDTH or HEIGHT or XY of the video.<br />
Zoom To Height<br />
Zoom To Width<br />
Zoom To Height - This zoom function is<br />
designed for full screen viewing of ultra wide<br />
screen aspect videos on a 16:9 TV.<br />
Zoom in/out<br />
Zoom To Width - This zoom function is designed for full<br />
screen viewing of older 4:3 aspect videos on a 16:9 TV.<br />
X:100% Y:100%<br />
ENTER<br />
Zoom XY - The Zoom XY allows you to stretch the picture<br />
horizontally and vertically independent of each other. This<br />
zoom function is designed to correct videos encoded with the<br />
wrong aspect ratio. You can also use the Zoom XY to zoom to<br />
any zoom preference you may have. Once you have selected<br />
your X and Y percentage press the ENTER button on the<br />
remote to store the settings. To re-adjust the Zoom XY you<br />
need to exit and then select Zoom XY again.<br />
OFF<br />
W H X:100% Y:100%<br />
Page37
SUBTITLES<br />
X3 supports various types of subtitle files. If the subtitle is embedded into the video file it will automatically be<br />
available on the Subtitle Dialogue Screen. External Subtitles must be placed into the same folder as the video<br />
file and must be named to be exactly the same name as the video file eg<br />
Cloudy.With.A.Chance.Of.Meatballs.2009.720p.BluRay.HebDub.x264-WiKi.mkv<br />
Cloudy.With.A.Chance.Of.Meatballs.2009.720p.BluRay.HebDub.x264-WiKi.srt<br />
To access the Subtitle screen press the Subtitle button on the remote during video play.<br />
You can set the Subtitle to default on/off in the Setup Menu<br />
Subtitle Select<br />
Subtitle Position<br />
Subtitle Size<br />
Subtitle Time Sync<br />
Subtitle Language<br />
Subtitle Colour<br />
CUSTOM FONTS<br />
You can customize the GUI and Subtitle fonts on the X3. Fonts must be smaller than 500KB in size. For the<br />
GUI font select a fft font and rename it to ‘gui.fft’ - For the Subtitle font select a ttf font and rename it<br />
‘Subtitle.ttf’ - Copy these to the ‘skin’ folder if you are using a custom skin. If not you can copy these to any<br />
folder name. Navigate to this folder and press the ‘Menu’ button and select the ‘Set to Skin’ option. To reset<br />
the fonts back to the default just navigate to this folder and select the ‘Restore Skin Default’ option.<br />
Page38
MUSIC PLAYLISTS<br />
To make music .M3u playlists on your X3 follow the steps in FILE MANAGER - MULTIPLE FILES section<br />
and select the playlists option. Only individual tracks can be added to a music playlist.<br />
FILE MANAGER<br />
NTFS Check/Fix - Before you perform any File Manager functions it is suggested to use the<br />
built in NTFS check/ fix functionality. Open the ‘Devices’ screen and press ‘F1' button on the remote<br />
and select a Drive to check/fix. X3 will scan and fix the NTFS drive.<br />
The X3 has a built in File Manager to manage and transfer files between your media sources. The File<br />
Manager is launched by pressing the “Edit” button on the remote Control while you are Media Library.<br />
To Copy, Delete, Move or Rename a single file focus on the file (that you require to perform the action on)<br />
and press the “Edit” button on the remote control. Select the option you require and press “Enter”. Follow<br />
on-screen instructions.<br />
Page39
FILE MANAGER - MULTIPLE FILES<br />
To Copy, Delete, Move or Rename multiple files just press the “Edit” button on the remote control while you<br />
are in Media Library view. Select “Multiple Select” and a new dialogue screen will open.<br />
Navigate to the files or folders on the left screen “A”. Press the “Play/Pause”<br />
button to select and add the files to the File List “B”.<br />
A<br />
B<br />
A<br />
B<br />
Once you have completed selecting the files or folders in ‘A’ then press the “Right Navigation” button. The focus<br />
will change to “B”. To continue to the next step you must select the “Edit” button and then you can select one of<br />
the available options ie Copy, Delete, Move, DVD Copy, Save Playlist, Save Photo Album, or Edit.<br />
Page40
PICTURES<br />
Press the “View” button on the remote and the Icon strip will light up. Now select the Picture Icon. The page<br />
will re-arrange into a image grid that is optimized for image thumbnail viewing. The X3 supports full Slideshow<br />
functions and you must enable the ‘Slideshow’ option in the Setup Menu. You can now navigate your pictures<br />
as normal and zoom the images to full screen by pressing the “Enter” button on the Remote Control. Once the<br />
image is zoomed to full screen press the “Menu” button on the remote for more options.<br />
You can select audio to play during the Slideshow. Note: The audio source folder must be in the same source<br />
path as the picture folder.<br />
Page41
PLASMA MODE / VIDEO SCREEN TRANSPARENCY<br />
The Plasma Mode has been designed for use with Plasma TV’s that are susceptible to still image “burn in”.<br />
The Plasma control will change the transparency level of the GUI screens and will not have any effect on the<br />
screens during Video Play. The Video Screen Transparency controls the transparency level of all video menus<br />
during Video Play. You have a choice of settings Off, Low or High.<br />
AUTOPLAY<br />
X3 allows for automated folder play when the X3 is switched on. The autoplay<br />
facility is very useful and can turn the X3 into a very effective low cost Digital<br />
Signage Solution.<br />
Autoplay Function<br />
The Autoplay files can be stored on SD Card, USB Drive, or Local HDD. 1. Create a<br />
folder in the root of the drive named “Autoplay” (Case Sensitive) 2. Put either Video<br />
OR Audio files into this folder 3. If you require the files to play in order name them<br />
as following 01name - 02name - 03name - 04name - 05name - 06name - 07name -<br />
08name - 09name - 10name - 11name up<br />
Autoplay Operation<br />
On power up the X3 will look for the “Autoplay” folder and if found it will<br />
automatically play the contents of the “Autoplay” folder. The contents will be played<br />
with the “Repeat All” as default. If a USB Drive is plugged into the X3 it will auto<br />
scan for the “Autoplay” folder and if found it will start the Autoplay function.<br />
INTERNET MEDIA<br />
Internet Media consists of Picassa, Google, Bing, Video Podcasts, Weather, Shoutcast<br />
Radio, Flickr, Yahoo Finance, Web Browser. Internet Media is launched from the Home<br />
Page. The Web Browser requires a USB compatible keyboard /mouse for correct system<br />
operation. Press the Menu button for additional options when using the Web Browser.<br />
Page42
NFS (Network File System)<br />
By default X3 uses Samba to stream content on a local network and this should be more than sufficient for<br />
most users. NFS can be used for higher bittrate streaming from a NAS or PC. On a Windows PC you will<br />
require a NFS client to be running on the host PC. The X3 has been tested and verified with HaneWin but<br />
other NFS Servers should work equally as well. Download HaneWin at http://www.hanewin.net/nfs-e.htm<br />
NFS Mount ‘Auto Scan’<br />
X3 will Scan the NFS servers on the same IP segment, on boot up. Select the NFS tab on the Devices<br />
Page and will see all the NFS mounts that X3 located. You can make a Favourite Link from a NFS shortcut<br />
ie focus on the NFS Link and press the ‘Menu’ button and select option ‘Add to Favourite’ Note the NFS<br />
mount path cannot be added as a shortcut so you may need to create an extra folder as the main mount<br />
with sub folders that can be linked as X3 Shortcuts.<br />
To “Add” “Modify” or “Delete” a NFS shortcut press the “Menu” button and the Menu screen will open.<br />
Select Add NFS Client and a “ADD NFS Dialogue” screen will open. Fill in the IP Address of the Host PC<br />
and the Share Name (Folder Path).<br />
IMPORTANT NOTE:<br />
You may have to enable “Flow Control” or disable “Jumbo Frames” on your Network Card settings if you<br />
are using NFS with a 1GB switch on your network. Once a NFS share has been mounted you can press<br />
‘F1' to display NFS mount information that will look like this .<br />
vers=3,rsize=32768,wsize=32768,proto=udp,port=65535,timeo=7,retrans=3,addr=192.168.10.20<br />
For max streaming performance rsize should be 32768 bytes<br />
Recommended Settings HaneWIN<br />
UDP NFS Server Threads : 32<br />
Max NFS tranfer size : 32768<br />
NFS (Network File System)<br />
Additionally you can perform a manual NFS scan with 'Probe NFS' option in the NFS menu. Select this<br />
option and fill in the IP Address you require to scan and select ‘Probe’. X3 will scan the IP for valid NFS<br />
mounts and then display the mounts it finds.<br />
Page43
Transmission BT Downloader<br />
WARNING: BT Downloader can use a lot of system resources<br />
we suggest you switch it off while using the X3.<br />
In order to use the Transmission BT downloader you will require as foll<br />
1) Internal hard drive that have been formatted in the X3.<br />
2) Valid Internet Connection<br />
3) PC or Mac with Wired / Wireless Network connection to the X3<br />
Navigate to the X3 Setup and select the “Network” tab. Now Select Transmission BT and set it to “on” Open<br />
your PC/Mac web browser and enter the URL as shown on the Transmission on/off setup screen. ie<br />
http://xxx.xxx.xxx.xxx:9091/transmission/web/. The xxx will be the actual IP of your X3 on your network.<br />
Once you enter the above into the address bar of your Browser and Enter it will open the Transmission page<br />
on the X3.<br />
a) Add Torrents<br />
Select the “Open” Icon and screen dialogue will open. Now navigate to the torrent file on your PC and then<br />
select “Upload”. The torrent file will be uploaded to the X3 and a progress bar will be displayed on the<br />
Transmission screen.<br />
b) Manage Torrent Download<br />
You can right click the download bar for available options. The main setup is located on the bottom left of the<br />
Transmission web page and here you can set options such as Download and Upload speed.<br />
All torrent downloads will be saved to the Transmission Download folder<br />
on your Hard Drive. Note -- compressed downloads will have to be unzipped or<br />
unrared on or via your PC and only complete downloads can be played.<br />
You can also open the Transmisson BT page on the X3 built in Web Browser<br />
BUT THE FUNCTIONALITY WILL BE LIMITED. You cannot add bittorents and<br />
certain Setup setting will not work and may cause the X3 to crash.<br />
Page44
Setup<br />
Main Page<br />
Menu Language<br />
Text Encoding<br />
Time<br />
DVD Auto-Play<br />
Screen Saver<br />
DLNA-DMR<br />
DLNA Device name<br />
MiniKBD Language<br />
Keyboard Layout<br />
Resume Play<br />
Format<br />
BD Menu<br />
CEC<br />
Default Application<br />
Restore Default<br />
Audio<br />
Night Mode<br />
HDMI Output<br />
SPDIF Output<br />
Force Decode AAC/MP3<br />
Surround Sound<br />
Lip Sync<br />
Picture<br />
Aspect Ratio<br />
TV System<br />
1080p 24HZ<br />
Auto Frame Rate<br />
Plasma Mode<br />
Screen Size<br />
Network<br />
Wired Lan Setup<br />
Wireless Setup<br />
PCI-E WiFi<br />
PPPoe Setup<br />
Transmission BT<br />
Samba Process<br />
Web Remote<br />
Misc<br />
Version Info<br />
Network Info<br />
HDD Info<br />
USB Upgrade<br />
Save Config<br />
Restore Config<br />
Pin Protection<br />
Folder Protection<br />
Watched Indicator<br />
Subtitle<br />
Slideshow<br />
HDD Spin down<br />
JukeBox View<br />
Auto View<br />
Home Page Text<br />
Password<br />
Match Audio with OSD<br />
Home Widget<br />
--<br />
--<br />
--<br />
--<br />
--<br />
--<br />
--<br />
--<br />
--<br />
--<br />
--<br />
--<br />
--<br />
--<br />
--<br />
--<br />
--<br />
--<br />
--<br />
--<br />
--<br />
--<br />
--<br />
--<br />
--<br />
--<br />
--<br />
--<br />
--<br />
--<br />
--<br />
--<br />
--<br />
--<br />
--<br />
--<br />
--<br />
--<br />
--<br />
--<br />
--<br />
--<br />
--<br />
--<br />
--<br />
--<br />
--<br />
--<br />
--<br />
--<br />
--<br />
Menu Language.<br />
Text Encoding for Subtitles.<br />
Set the Time / Time Zone and daylight saving.<br />
Option for USB DVD drive. If enabled the DVD will Auto Play when inserted.<br />
Set the Screen Saver time period and type of Screen Saver.<br />
Plays media from UPNP servers under the control of external devices.<br />
DLNA Device name.<br />
Keyboard Language.<br />
Default US English other option for possible future update.<br />
If enabled the X3 will prompt the user to continue from the last position.<br />
Format internal Hard Drive Option.<br />
Switch the BD Menu option on/off -- Supported BD Profile 1.0<br />
Switch CEC on/off - One Touch Play - One Touch Standby<br />
Set the Default Application for X3 to launch after Boot Up.<br />
Reset Network and Flash memory settings.<br />
Dynamic Range Control limits the dynamics for night viewing.<br />
HDMI Output Audio output settings.<br />
Force AAC/ Mp3 tp be passed as pcm to AMP/ TV<br />
Optical and Co-Ax Digital Audio output settings.<br />
Settings for 7.1 or 5.1 Surround Sound.<br />
Adjust Audio Delay settings.<br />
Set the Aspect Ratio size of the TV.<br />
Set the Pixel Size Resolution Size of the TV.<br />
24HZ Frame Rate -- Enable this function if your TV supports 1080p 24HZ.<br />
Changes the TVSys output to match the content PAL/NTSC ie 50hz - 60hz (59.94)<br />
Changes the transparency to prevent screen burn in on Plasma Tv’s.<br />
Set the TV Screen size for accurate Video Play size and for zooming about.jpg.<br />
Network Setup -- DHCP IP (Auto) / Fixed IP (<strong>Manual</strong>).<br />
Wireless Setup -- DHCP IP (Auto) / Fixed IP (<strong>Manual</strong>).<br />
PPPoe Setup.<br />
Enable or disable PCIE WiFi<br />
Enable / disable Transmission BT - Requires internal HDD formatted in X3.<br />
Enables X3 to be used as a server to other Network Connected Devices.<br />
If enabled you can control the X3 GUI functions from a Web Browser.<br />
Information about the Firmware Version.<br />
Network connection Information.<br />
Internal Hard Drive Information.<br />
X3 firmware update from USB Flash Drive.<br />
Save your settings to USB Flash Drive before doing a firmware update.<br />
Restore your settings from a Flash Drive after doing a firmware update.<br />
Pin Code Protect the Hard Drive Format Screen<br />
Protect Folders and content by means of a user pin code.<br />
Eye indicator display for watched videos.<br />
Enable or disable Subtitles<br />
Enable or disable Slideshow functionality.<br />
Enable the internal Hard Drive to spin down after the selected period.<br />
If enabled will the X3 will present a XML Jukebox that is launched from<br />
Favourites in a Movie Wall View even if the content is in a nested folder<br />
arrangement.<br />
If enabled the X3 will remember the View of the folders you have navigated.<br />
Enable or disable the localization text on the Home Page<br />
Change Password<br />
Auto select the correct audio track language to match the GUI language<br />
Time/Weather on the Home Page - Set City on AccuWeather page Page45
<strong>Mede8er</strong>_med1000x3d_user_6 Dec_2012<br />
High Definition 3D Multimedia Player<br />
www.mede8erforum.com<br />
www.mede8er.com www.mede8er.eu<br />
For more information or support please visit<br />
www.mede8er.eu/support/<br />
or call +31(0)10-7142861 during business hours.<br />
Europe: IBDL BV.<br />
Fermiweg 9-11, 3208KT Spijkenisse, Netherlands.<br />
Tel: +31(10)7142861. Trade: sales@mede8er.eu Warranty and support: support@mede8er.eu<br />
Sanji Electronics (Pty) Ltd<br />
12 Saddle Drive, Woodmead Office Park, Woodmead, Gauteng, South Africa. Tel: 2711 2028160 Email sales@mede8er.com

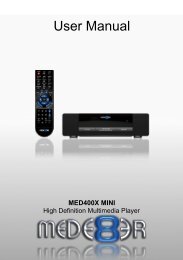


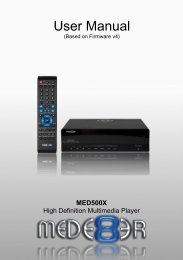
![Review [Media Center]: Mede8er MED500X (+ video)](https://img.yumpu.com/3934389/1/184x260/review-media-center-mede8er-med500x-video.jpg?quality=85)