Download Manual - Silvan Australia
Download Manual - Silvan Australia
Download Manual - Silvan Australia

Create successful ePaper yourself
Turn your PDF publications into a flip-book with our unique Google optimized e-Paper software.
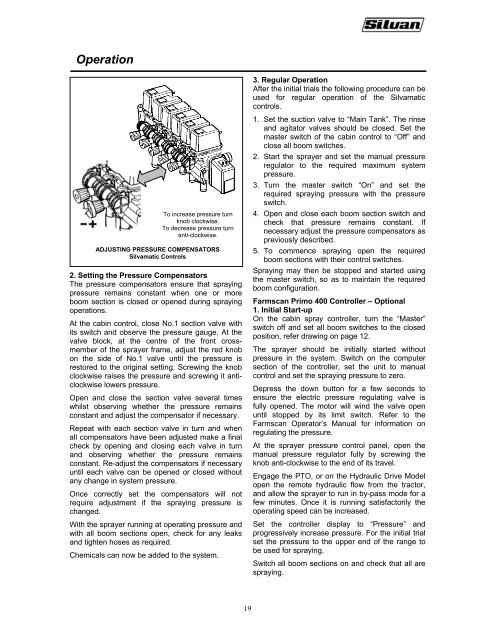
Operation<br />
To increase pressure turn<br />
knob clockwise.<br />
To decrease pressure turn<br />
anti-clockwise.<br />
ADJUSTING PRESSURE COMPENSATORS<br />
Silvamatic Controls<br />
2. Setting the Pressure Compensators<br />
The pressure compensators ensure that spraying<br />
pressure remains constant when one or more<br />
boom section is closed or opened during spraying<br />
operations.<br />
At the cabin control, close No.1 section valve with<br />
its switch and observe the pressure gauge. At the<br />
valve block, at the centre of the front crossmember<br />
of the sprayer frame, adjust the red knob<br />
on the side of No.1 valve until the pressure is<br />
restored to the original setting. Screwing the knob<br />
clockwise raises the pressure and screwing it anticlockwise<br />
lowers pressure.<br />
Open and close the section valve several times<br />
whilst observing whether the pressure remains<br />
constant and adjust the compensator if necessary.<br />
Repeat with each section valve in turn and when<br />
all compensators have been adjusted make a final<br />
check by opening and closing each valve in turn<br />
and observing whether the pressure remains<br />
constant. Re-adjust the compensators if necessary<br />
until each valve can be opened or closed without<br />
any change in system pressure.<br />
Once correctly set the compensators will not<br />
require adjustment if the spraying pressure is<br />
changed.<br />
With the sprayer running at operating pressure and<br />
with all boom sections open, check for any leaks<br />
and tighten hoses as required.<br />
Chemicals can now be added to the system.<br />
3. Regular Operation<br />
After the initial trials the following procedure can be<br />
used for regular operation of the Silvamatic<br />
controls.<br />
1. Set the suction valve to “Main Tank”. The rinse<br />
and agitator valves should be closed. Set the<br />
master switch of the cabin control to “Off” and<br />
close all boom switches.<br />
2. Start the sprayer and set the manual pressure<br />
regulator to the required maximum system<br />
pressure.<br />
3. Turn the master switch “On” and set the<br />
required spraying pressure with the pressure<br />
switch.<br />
4. Open and close each boom section switch and<br />
check that pressure remains constant. If<br />
necessary adjust the pressure compensators as<br />
previously described.<br />
5. To commence spraying open the required<br />
boom sections with their control switches.<br />
Spraying may then be stopped and started using<br />
the master switch, so as to maintain the required<br />
boom configuration.<br />
Farmscan Primo 400 Controller – Optional<br />
1. Initial Start-up<br />
On the cabin spray controller, turn the “Master”<br />
switch off and set all boom switches to the closed<br />
position, refer drawing on page 12.<br />
The sprayer should be initially started without<br />
pressure in the system. Switch on the computer<br />
section of the controller, set the unit to manual<br />
control and set the spraying pressure to zero.<br />
Depress the down button for a few seconds to<br />
ensure the electric pressure regulating valve is<br />
fully opened. The motor will wind the valve open<br />
until stopped by its limit switch. Refer to the<br />
Farmscan Operator’s <strong>Manual</strong> for information on<br />
regulating the pressure.<br />
At the sprayer pressure control panel, open the<br />
manual pressure regulator fully by screwing the<br />
knob anti-clockwise to the end of its travel.<br />
Engage the PTO, or on the Hydraulic Drive Model<br />
open the remote hydraulic flow from the tractor,<br />
and allow the sprayer to run in by-pass mode for a<br />
few minutes. Once it is running satisfactorily the<br />
operating speed can be increased.<br />
Set the controller display to “Pressure” and<br />
progressively increase pressure. For the initial trial<br />
set the pressure to the upper end of the range to<br />
be used for spraying.<br />
Switch all boom sections on and check that all are<br />
spraying.<br />
19