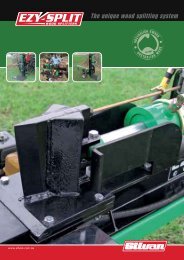
Download Manual - Silvan Australia
Download Manual - Silvan Australia
Download Manual - Silvan Australia

You also want an ePaper? Increase the reach of your titles
YUMPU automatically turns print PDFs into web optimized ePapers that Google loves.
Lubrication and Maintenance<br />
Start-up Inspection<br />
During the first few days of operation, before<br />
starting each day check that all hardware is tight,<br />
in particular the wheel bolts. Inspect for any leaks<br />
whilst running and tighten all hose clamps.<br />
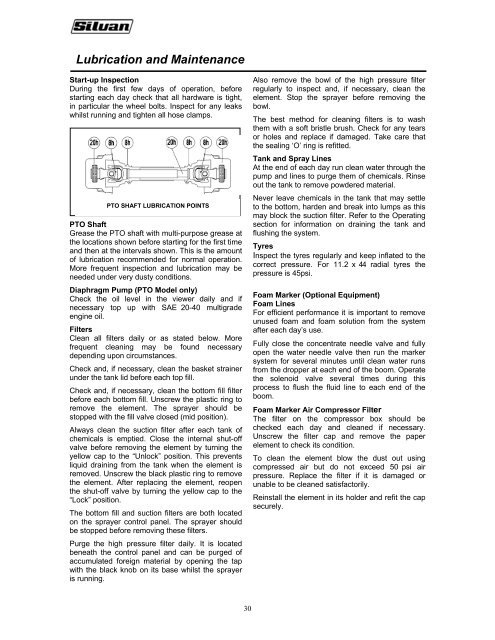
PTO SHAFT LUBRICATION POINTS<br />
PTO Shaft<br />
Grease the PTO shaft with multi-purpose grease at<br />
the locations shown before starting for the first time<br />
and then at the intervals shown. This is the amount<br />
of lubrication recommended for normal operation.<br />
More frequent inspection and lubrication may be<br />
needed under very dusty conditions.<br />
Diaphragm Pump (PTO Model only)<br />
Check the oil level in the viewer daily and if<br />
necessary top up with SAE 20-40 multigrade<br />
engine oil.<br />
Filters<br />
Clean all filters daily or as stated below. More<br />
frequent cleaning may be found necessary<br />
depending upon circumstances.<br />
Check and, if necessary, clean the basket strainer<br />
under the tank lid before each top fill.<br />
Check and, if necessary, clean the bottom fill filter<br />
before each bottom fill. Unscrew the plastic ring to<br />
remove the element. The sprayer should be<br />
stopped with the fill valve closed (mid position).<br />
Always clean the suction filter after each tank of<br />
chemicals is emptied. Close the internal shut-off<br />
valve before removing the element by turning the<br />
yellow cap to the “Unlock” position. This prevents<br />
liquid draining from the tank when the element is<br />
removed. Unscrew the black plastic ring to remove<br />
the element. After replacing the element, reopen<br />
the shut-off valve by turning the yellow cap to the<br />
“Lock” position.<br />
The bottom fill and suction filters are both located<br />
on the sprayer control panel. The sprayer should<br />
be stopped before removing these filters.<br />
Purge the high pressure filter daily. It is located<br />
beneath the control panel and can be purged of<br />
accumulated foreign material by opening the tap<br />
with the black knob on its base whilst the sprayer<br />
is running.<br />
Also remove the bowl of the high pressure filter<br />
regularly to inspect and, if necessary, clean the<br />
element. Stop the sprayer before removing the<br />
bowl.<br />
The best method for cleaning filters is to wash<br />
them with a soft bristle brush. Check for any tears<br />
or holes and replace if damaged. Take care that<br />
the sealing ‘O’ ring is refitted.<br />
Tank and Spray Lines<br />
At the end of each day run clean water through the<br />
pump and lines to purge them of chemicals. Rinse<br />
out the tank to remove powdered material.<br />
Never leave chemicals in the tank that may settle<br />
to the bottom, harden and break into lumps as this<br />
may block the suction filter. Refer to the Operating<br />
section for information on draining the tank and<br />
flushing the system.<br />
Tyres<br />
Inspect the tyres regularly and keep inflated to the<br />
correct pressure. For 11.2 x 44 radial tyres the<br />
pressure is 45psi.<br />
Foam Marker (Optional Equipment)<br />
Foam Lines<br />
For efficient performance it is important to remove<br />
unused foam and foam solution from the system<br />
after each day’s use.<br />
Fully close the concentrate needle valve and fully<br />
open the water needle valve then run the marker<br />
system for several minutes until clean water runs<br />
from the dropper at each end of the boom. Operate<br />
the solenoid valve several times during this<br />
process to flush the fluid line to each end of the<br />
boom.<br />
Foam Marker Air Compressor Filter<br />
The filter on the compressor box should be<br />
checked each day and cleaned if necessary.<br />
Unscrew the filter cap and remove the paper<br />
element to check its condition.<br />
To clean the element blow the dust out using<br />
compressed air but do not exceed 50 psi air<br />
pressure. Replace the filter if it is damaged or<br />
unable to be cleaned satisfactorily.<br />
Reinstall the element in its holder and refit the cap<br />
securely.<br />
30