

1-2066FA INSTALL INSTRUCTIONS - Classic Auto Air
1-2066FA INSTALL INSTRUCTIONS - Classic Auto Air
1-2066FA INSTALL INSTRUCTIONS - Classic Auto Air

Create successful ePaper yourself
Turn your PDF publications into a flip-book with our unique Google optimized e-Paper software.
PAGE<br />
13<br />
A<br />
FIGURE 7<br />
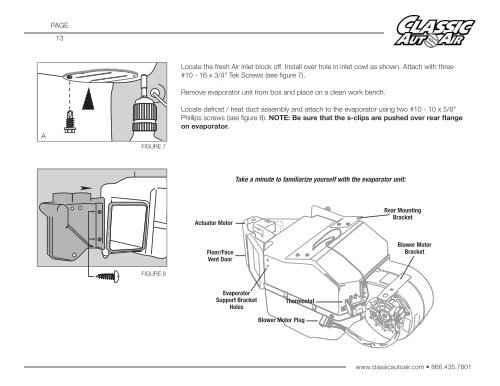
Locate the fresh <strong>Air</strong> inlet block off. Install over hole in inlet cowl as shown. Attach with three<br />
#10 - 16 x 3/4" Tek Screws (see figure 7).<br />
Remove evaporator unit from box and place on a clean work bench.<br />
Locate defrost / heat duct assembly and attach to the evaporator using two #10 - 10 x 5/8"<br />
Phillips screws (see figure 8). NOTE: Be sure that the s-clips are pushed over rear flange<br />
on evaporator.<br />
Take a minute to familiarize yourself with the evaporator unit:<br />
Actuator Motor<br />
Rear Mounting<br />
Bracket<br />
Floor/Face<br />
Vent Door<br />
Blower Motor<br />
Bracket<br />
FIGURE 8<br />
Evaporator<br />
Support Bracket<br />
Holes<br />
Thermostat<br />
Blower Motor Plug<br />
www.classicautoair.com • 866.435.7801


