

1-2066FA INSTALL INSTRUCTIONS - Classic Auto Air
1-2066FA INSTALL INSTRUCTIONS - Classic Auto Air
1-2066FA INSTALL INSTRUCTIONS - Classic Auto Air

You also want an ePaper? Increase the reach of your titles
YUMPU automatically turns print PDFs into web optimized ePapers that Google loves.
PAGE<br />
15<br />
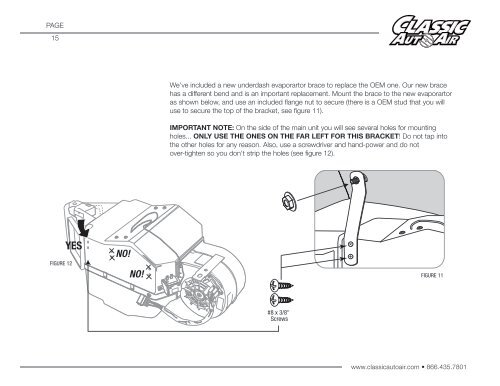
We’ve included a new underdash evaporartor brace to replace the OEM one. Our new brace<br />
has a different bend and is an important replacement. Mount the brace to the new evaporartor<br />
as shown below, and use an included flange nut to secure (there is a OEM stud that you will<br />
use to secure the top of the bracket, see figure 11).<br />
IMPORTANT NOTE: On the side of the main unit you will see several holes for mounting<br />
holes... ONLY USE THE ONES ON THE FAR LEFT FOR THIS BRACKET! Do not tap into<br />
the other holes for any reason. Also, use a screwdriver and hand-power and do not<br />
over-tighten so you don't strip the holes (see figure 12).<br />
FIGURE 12<br />
YES<br />
NO!<br />
NO!<br />
FIGURE 11<br />
#8 x 3/8"<br />
Screws<br />
www.classicautoair.com • 866.435.7801


