

1-2066FA INSTALL INSTRUCTIONS - Classic Auto Air
1-2066FA INSTALL INSTRUCTIONS - Classic Auto Air
1-2066FA INSTALL INSTRUCTIONS - Classic Auto Air

You also want an ePaper? Increase the reach of your titles
YUMPU automatically turns print PDFs into web optimized ePapers that Google loves.
PAGE<br />
7<br />
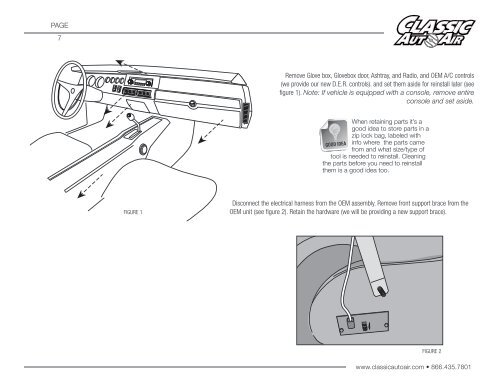
Remove Glove box, Glovebox door, Ashtray, and Radio, and OEM A/C controls<br />
(we provide our new D.E.R. controls). and set them aside for reinstall later (see<br />
figure 1). Note: If vehicle is equipped with a console, remove entire<br />
console and set aside.<br />
When retaining parts it’s a<br />
good idea to store parts in a<br />
zip lock bag, labeled with<br />
info where the parts came<br />
from and what size/type of<br />
tool is needed to reinstall. Cleaning<br />
the parts before you need to reinstall<br />
them is a good idea too.<br />
GOOD IDEA<br />
FIGURE 1<br />
Disconnect the electrical harness from the OEM assembly. Remove front support brace from the<br />
OEM unit (see figure 2). Retain the hardware (we will be providing a new support brace).<br />
FIGURE 2<br />
www.classicautoair.com • 866.435.7801


