direct-vent fireplace (natural/propane/lp) - Desa
direct-vent fireplace (natural/propane/lp) - Desa
direct-vent fireplace (natural/propane/lp) - Desa

You also want an ePaper? Increase the reach of your titles
YUMPU automatically turns print PDFs into web optimized ePapers that Google loves.
BHDV34NA, PA<br />
®<br />
DIRECT-VENT FIREPLACE (NATURAL/PROPANE/LP)<br />
OPERATING<br />
FIREPLACE<br />
Continued<br />
1. After lighting, let pilot flame burn for<br />
about one minute. Turn gas control<br />
knob on the control valve to ON position.<br />
Turn variable control knob anywhere<br />
between HI and LO. Slide the<br />
selector switch to the REMOTE position.<br />
Note: The burners may light if<br />
hand-held remote ON button was on<br />
when selector switch was last turned<br />
off. You can now turn the burners on<br />
and off with either optional hand-held<br />
remote control unit.<br />
IMPORTANT: Do not leave the selector<br />
switch in the REMOTE position<br />
when the pilot is not lit. This will<br />
drain the battery.<br />
IMPORTANT: Be sure to press the<br />
ON/OFF buttons on the hand-held<br />
remote control unit for up to 3 seconds<br />
to assure proper operation.<br />
GHRC Series Operation:<br />
2a. Press the ON/OFF button to turn the<br />
burners on and off. When turning<br />
burners off, the pilot will remain lit.<br />
GHRCT Series Operation:<br />
2b. Select the MAN (manual) or AUTO<br />
button on the hand-held remote control<br />
unit.<br />
• In manual mode, turn burners on<br />
or off by pressing the ON or OFF<br />
buttons on the hand-held remote<br />
control unit.<br />
• In auto mode, the room temperature<br />
is controlled by the thermostat<br />
in the hand-held remote control<br />
unit. To increase the room temperature,<br />
press the top arrow of the<br />
TEMP button. To lower the room<br />
temperature, press the bottom arrow<br />
of the TEMP button. At higher<br />
settings the heater will run more.<br />
IMPORTANT: This remote control<br />
has been specially engineered to take<br />
an air temperature sample every 5.5<br />
minutes in auto mode. It will not respond<br />
immediately to the temperature<br />
setting being turned up or down.<br />
IMPORTANT: The hand-held remote<br />
control unit must be near the heater<br />
but not extremely close to it. The<br />
thermostat on the hand-held remote<br />
control unit will heat up too quickly<br />
and turn the heater off.<br />
3. Use the STATUS button on the handheld<br />
remote control unit to see the<br />
operation mode being used and the<br />
temperature setting selected. A red<br />
light will come on beside the operation<br />
mode being used.<br />
Blower Control Knob<br />
(Optional Accessory)<br />
OFF<br />
ON<br />
ON<br />
OFF<br />
REMOTE<br />
Selector Switch in<br />
Remote Position<br />
Shows Temperature<br />
Setting<br />
Allows Burners to be<br />
Turned On and Off<br />
with the Hand-Held<br />
Remote Unit.<br />
The Heater will<br />
Automatically Cycle<br />
between Pilot and the<br />
Heat Setting that has<br />
been Selected.<br />
Variable<br />
Control Knob<br />
ON<br />
PILOT<br />
MAN<br />
AUTO<br />
OFF<br />
HI<br />
LO<br />
TEMP<br />
ON<br />
OFF<br />
STATUS<br />
L O<br />
Gas Control<br />
Knob in On<br />
Position<br />
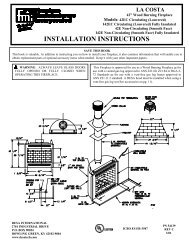
Figure 56 - Setting the Selector Switch, Gas<br />
Control Knob, and Variable Control Knob<br />
for Remote Operation<br />
IH<br />
4. To turn the burners off when operating<br />
in the manual mode, press the OFF<br />
button. If operating in the auto mode,<br />
press the MAN button, then press the<br />
OFF button. The pilot will remain lit.<br />
IMPORTANT: To turn the pilot off,<br />
manually turn the gas control knob on<br />
the heater to the OFF position.<br />
OPERATING<br />
OPTIONAL BLOWER<br />
ACCESSORY<br />
Locate the blower controls by opening<br />
the lower louver panel on the <strong>fireplace</strong>.<br />
Blower controls are located on the left<br />
side of the switch bracket to the left just<br />
inside the louver panel.<br />
Both the GA3700 manual blower and the<br />
DA3610T thermostatically-controlled<br />
blower have an ON setting and an OFF<br />
setting. The blower will only run when the<br />
switch is in the ON position. In the OFF<br />
position, the blower will not operate.<br />
Note for DA3610T Only: If you are<br />
using DA3610T blower with optional thermostat<br />
(wall mount or remote control)<br />
for the <strong>fireplace</strong>, your <strong>fireplace</strong> and<br />
blower will not turn on and off at the<br />
same time. The <strong>fireplace</strong> may run for<br />
several minutes before the blower turns<br />
on. After the heater modulates to the pilot<br />
position, the blower will continue to run.<br />
The blower will shut off after the firebox<br />
temperature decreases.<br />
The blower he<strong>lp</strong>s distribute heated air<br />
from the <strong>fireplace</strong>. Periodically check the<br />
louvers of the firebox and remove any<br />
dust, dirt, or other obstructions that will<br />
hinder the flow of air.<br />
Increases Room<br />
Temperature<br />
Decreases Room<br />
Temperature<br />
Turns Burners<br />
On and Off<br />
Shows Current<br />
Operation Mode<br />
Figure 57 - Hand-Held Thermostat Remote Control Unit Selections<br />
(GHRCT Only)<br />
26 105981