direct-vent fireplace (natural/propane/lp) - Desa
direct-vent fireplace (natural/propane/lp) - Desa
direct-vent fireplace (natural/propane/lp) - Desa

Create successful ePaper yourself
Turn your PDF publications into a flip-book with our unique Google optimized e-Paper software.
BHDV34NA, PA<br />
®<br />
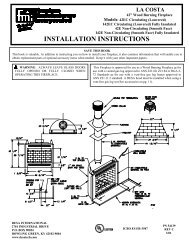
DIRECT-VENT FIREPLACE (NATURAL/PROPANE/LP)<br />
CLEANING AND<br />
MAINTENANCE<br />
WARNING: Turn off <strong>fireplace</strong><br />
and let cool before cleaning.<br />
CAUTION: You must keep control<br />
areas, burners, and circulating<br />
air passageways of <strong>fireplace</strong><br />
clean. Inspect these areas of <strong>fireplace</strong><br />
before each use. Have <strong>fireplace</strong><br />
inspected yearly by a qualified<br />
service person. Fireplace may<br />
need more frequent cleaning due<br />
to excessive lint from carpeting,<br />
bedding material, pet hair, etc.<br />
GLASS DOOR<br />
WARNING: Handle glass door<br />
panel with care. Do not strike,<br />
slam, or otherwise abuse glass.<br />
Do not operate <strong>fireplace</strong> with the<br />
glass door removed, cracked, or<br />
broken.<br />
WARNING: Do not use abrasive<br />
cleaners as this may damage<br />
glass. Use a nonabrasive household<br />
glass cleaner to clean glass.<br />
Do not clean glass when hot.<br />
Glass must be cleaned periodically. During<br />
start-up it is normal for condensation to<br />
form on the inside of the glass causing lint,<br />
dust, and other airborne particles to cling to<br />
the glass surface. During initial start-up a<br />
slight film may form on the glass due to<br />
paint curing. The glass should be cleaned<br />
several times with a non-ammonia, nonabrasive<br />
household cleaner and warm water<br />
after the first two weeks of operation. Thereafter,<br />
clean the glass two or three times<br />
during each heating season, depending on<br />
the usage and circumstances present. Refer<br />
to Removing/Replacing Glass Door on page<br />
22 of this manual when removing glass door<br />
for cleaning.<br />
WARNING: Only parts supplied<br />
by the manufacturer should<br />
be used when replacing broken<br />
or damaged glass door panel (see<br />
Replacement Parts, page 32). This<br />
glass door panel is a complete<br />
unit. No substitute materials may<br />
be used.<br />
CAUTION: Wear gloves and<br />
safety glasses while handling or<br />
removing broken glass. Do not<br />
remove if glass is hot. Keep children<br />
and pets away from glass.<br />
If glass has been broken, carefully remove<br />
glass door (see Removing/Replacing Glass<br />
Door, page 22). Vacuum all glass pieces<br />
with a shop vac.<br />
CAUTION: Do not vacuum if<br />
pieces are hot.<br />
Use only the ceramic glass door replacement<br />
intended for this <strong>fireplace</strong> (see Replacement<br />
Parts, page 32 for detail on ordering).<br />
No substitutions may be made. See<br />
Removing/Replacing Glass Door, page 22<br />
for instructions for replacing glass door.<br />
WARNING: Do not operate<br />
<strong>fireplace</strong> with the glass door removed,<br />
cracked, or broken.<br />
PILOT AND BURNERS<br />
• Remove ember material before cleaning<br />
burners and replace when cleaning is<br />
complete.<br />
• Burner and controls should be cleaned<br />
with compressed air to remove dust, dirt,<br />
or lint.<br />
• Use a vacuum cleaner or small, soft<br />
bristled brush to remove excess dust, dirt,<br />
or lint.logs<br />
• If you remove logs for cleaning, refer to<br />
Installing Logs, Lava Rock, and Glowing<br />
Embers, page 24, to properly replace logs.<br />
• Use a vacuum cleaner to remove any carbon<br />
buildup on logs.<br />
• Replace log(s) if broken. See Replacement<br />
Parts on page 32.<br />
• Replace ember material periodically as<br />
needed. See Replacement Parts on page 32.<br />
VENTING SYSTEM<br />
Conduct annual inspection of the <strong>vent</strong>ing<br />
system following these guidelines:<br />
1. Check areas of <strong>vent</strong>ing system that are<br />
exposed to the weather for corrosion (rust<br />
spots or streaks and, in extreme cases,<br />
holes). Have these items replaced immediately<br />
by a qualified service person.<br />
2. Remove the <strong>vent</strong> cap and shine a flashlight<br />
into the <strong>vent</strong>. Remove any foreign<br />
material.<br />
3. Check for evidence of excessive condensation.<br />
Continuous condensation<br />
can cause corrosion of caps, pipes, and<br />
fittings and can be caused by having<br />
excessive lateral runs, too many elbows,<br />
or exterior portions of the system being<br />
exposed to cold weather.<br />
4. Inspect joints to verify that no pipe section<br />
or fitting has been disturbed and<br />
loosened. Check mechanical supports<br />
such as wall straps for rigidity.<br />
28 105981