Owner's Manual EN Page 2 The above warning is located on the top ...
Owner's Manual EN Page 2 The above warning is located on the top ...
Owner's Manual EN Page 2 The above warning is located on the top ...

You also want an ePaper? Increase the reach of your titles
YUMPU automatically turns print PDFs into web optimized ePapers that Google loves.
Panel Operati<strong>on</strong><br />
5. Press <strong>the</strong> [NEXT] key repeatedly to move <strong>the</strong><br />
cursor to <strong>the</strong> ic<strong>on</strong>, <strong>the</strong>n press <strong>the</strong> [YES]<br />
key.<br />
A c<strong>on</strong>firmati<strong>on</strong> message will appear.<br />
6. To c<strong>on</strong>firm <strong>the</strong> edit, press <strong>the</strong> [YES] key.<br />
<str<strong>on</strong>g>The</str<strong>on</strong>g> unit reflects <strong>the</strong> edit and returns to <strong>the</strong> Scene Edit<br />
d<str<strong>on</strong>g>is</str<strong>on</strong>g>play.<br />
HINT<br />
You can turn protecti<strong>on</strong> <strong>on</strong> and off from <strong>the</strong> DME Designer<br />
applicati<strong>on</strong>.<br />
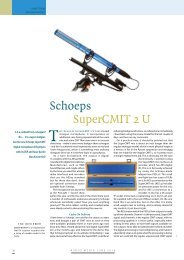
Deleting a scene<br />
Follow <strong>the</strong> steps below to delete a scene:<br />
1. Press <strong>the</strong> [SC<str<strong>on</strong>g>EN</str<strong>on</strong>g>E] key repeatedly until <strong>the</strong><br />
Scene Delete d<str<strong>on</strong>g>is</str<strong>on</strong>g>play appears <strong>on</strong> <strong>the</strong> screen.<br />
2. Press <strong>the</strong> [▲INC]/[▼DEC] keys to select a<br />
scene to delete.<br />
3. Press <strong>the</strong> [NEXT] key to move <strong>the</strong> cursor to<br />
<strong>the</strong> ic<strong>on</strong>, <strong>the</strong>n press <strong>the</strong> [YES] key.<br />
A c<strong>on</strong>firmati<strong>on</strong> message will appear.<br />
4. To c<strong>on</strong>firm <strong>the</strong> operati<strong>on</strong>, press <strong>the</strong> [YES] key.<br />
<str<strong>on</strong>g>The</str<strong>on</strong>g> operati<strong>on</strong> <str<strong>on</strong>g>is</str<strong>on</strong>g> executed and <strong>the</strong> unit returns to <strong>the</strong><br />
Scene Delete d<str<strong>on</strong>g>is</str<strong>on</strong>g>play.<br />
NOTE<br />
SC<str<strong>on</strong>g>EN</str<strong>on</strong>g>E EDIT<br />
ARE YOU SURE<br />
SC<str<strong>on</strong>g>EN</str<strong>on</strong>g>E DELETE<br />
72:FOH(Event A)<br />
SC<str<strong>on</strong>g>EN</str<strong>on</strong>g>E DELETE<br />
ARE YOU SURE<br />
You cannot delete preset scenes, protected scenes, and current<br />
scene.<br />
UTILITY<br />
<str<strong>on</strong>g>The</str<strong>on</strong>g> Utility functi<strong>on</strong> enables you to view <strong>the</strong> word clock status<br />
and make network settings. See page 39 for more informati<strong>on</strong><br />
<strong>on</strong> making network settings.<br />
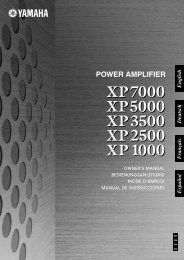
INPUT A/B LINK<br />
Follow <strong>the</strong> steps below to link <strong>the</strong> Input channel A and B parameters:<br />
When INPUT A/B LINK <str<strong>on</strong>g>is</str<strong>on</strong>g> turned On, <strong>the</strong> parameters for<br />
channel A and B are linked and set to <strong>the</strong> same value automatically.<br />
NOTE<br />
<str<strong>on</strong>g>The</str<strong>on</strong>g> channel SUM parameters cannot be linked.<br />
<str<strong>on</strong>g>The</str<strong>on</strong>g> following comp<strong>on</strong>ents will be linked:<br />
• INPUT LEVEL<br />
• INPUT EQ<br />
• INPUT DELAY<br />
1. Press <strong>the</strong> [UTILITY] key to select <strong>the</strong> Utility<br />
d<str<strong>on</strong>g>is</str<strong>on</strong>g>play.<br />
<str<strong>on</strong>g>The</str<strong>on</strong>g> most recently used Utility d<str<strong>on</strong>g>is</str<strong>on</strong>g>play will appear.<br />
2. Press <strong>the</strong> [UTILITY], [NEXT] or [BACK] key<br />
repeatedly until <strong>the</strong> INPUT A/B LINK page<br />
appears.<br />
INPUT A/B LINK<br />
OFF<br />
3. Press <strong>the</strong> [▲INC] key to link <strong>the</strong> parameters.<br />
“ON” flashes <strong>on</strong> <strong>the</strong> screen.<br />
INPUT A/B LINK<br />
ON<br />
4. Press <strong>the</strong> [NEXT] key to move <strong>the</strong> cursor to<br />
<strong>the</strong> ic<strong>on</strong>.<br />
INPUT A/B LINK<br />
ON<br />
Foreword<br />
Introducti<strong>on</strong><br />
to <strong>the</strong> SP2060<br />
<str<strong>on</strong>g>The</str<strong>on</strong>g> C<strong>on</strong>trols<br />
and C<strong>on</strong>nectors<br />
Network Settings Panel Operati<strong>on</strong><br />
References<br />
5. Press <strong>the</strong> [YES] key.<br />
A c<strong>on</strong>firmati<strong>on</strong> message will appear.<br />
INPUT A/B LINK<br />
ARE YOU SURE<br />
SP2060 Owner’s <str<strong>on</strong>g>Manual</str<strong>on</strong>g> 33