You also want an ePaper? Increase the reach of your titles
YUMPU automatically turns print PDFs into web optimized ePapers that Google loves.
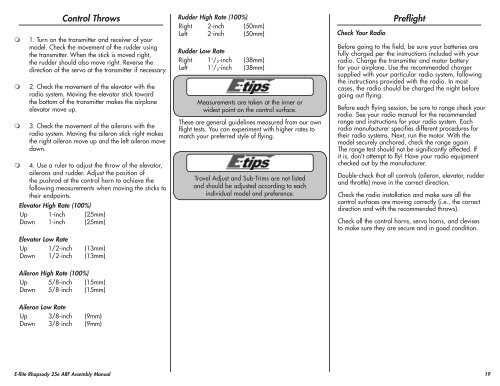
Control Throws<br />
1. Turn on the transmitter and receiver of your<br />
model. Check the movement of the rudder using<br />
the transmitter. When the stick is moved right,<br />
the rudder should also move right. Reverse the<br />
direction of the servo at the transmitter if necessary.<br />
2. Check the movement of the elevator with the<br />
radio system. Moving the elevator stick toward<br />
the bottom of the transmitter makes the airplane<br />
elevator move up.<br />
3. Check the movement of the ailerons with the<br />
radio system. Moving the aileron stick right makes<br />
the right aileron move up and the left aileron move<br />
down.<br />
4. Use a ruler to adjust the throw of the elevator,<br />
ailerons and rudder. Adjust the position of<br />
the pushrod at the control horn to achieve the<br />
following measurements when moving the sticks to<br />
their endpoints.<br />
Elevator High Rate (100%)<br />
Up 1-inch (25mm)<br />
Down 1-inch (25mm)<br />
Elevator Low Rate<br />
Up 1/2-inch (13mm)<br />
Down 1/2-inch (13mm)<br />
Rudder High Rate (100%)<br />
Right 2-inch (50mm)<br />
Left 2-inch (50mm)<br />
Rudder Low Rate<br />
Right 1 1 / 2 -inch (38mm)<br />
Left 1 1 / 2 -inch (38mm)<br />
Measurements are taken at the inner or<br />
widest point on the control surface.<br />
These are general guidelines measured from our own<br />
flight tests. You can experiment with higher rates to<br />
match your preferred style of flying.<br />
Travel Adjust and Sub-Trims are not listed<br />
and should be adjusted according to each<br />
individual model and preference.<br />
Check Your Radio<br />
Preflight<br />
Before going to the field, be sure your batteries are<br />
fully charged per the instructions included with your<br />
radio. Charge the transmitter and motor battery<br />
for your airplane. Use the recommended charger<br />
supplied with your particular radio system, following<br />
the instructions provided with the radio. In most<br />
cases, the radio should be charged the night before<br />
going out flying.<br />
Before each flying session, be sure to range check your<br />
radio. See your radio manual for the recommended<br />
range and instructions for your radio system. Each<br />
radio manufacturer specifies different procedures for<br />
their radio systems. Next, run the motor. With the<br />
model securely anchored, check the range again.<br />
The range test should not be significantly affected. If<br />
it is, don’t attempt to fly! Have your radio equipment<br />
checked out by the manufacturer.<br />
Double-check that all controls (aileron, elevator, rudder<br />
and throttle) move in the correct direction.<br />
Check the radio installation and make sure all the<br />
control surfaces are moving correctly (i.e., the correct<br />
direction and with the recommended throws).<br />
Check all the control horns, servo horns, and clevises<br />
to make sure they are secure and in good condition.<br />
Aileron High Rate (100%)<br />
Up 5/8-inch (15mm)<br />
Down 5/8-inch (15mm)<br />
Aileron Low Rate<br />
Up 3/8-inch (9mm)<br />
Down 3/8-inch (9mm)<br />
E-<strong>flite</strong> <strong>Rhapsody</strong> <strong>25e</strong> <strong>ARF</strong> Assembly Manual<br />
19


