Mechanized Plasmarc Cutting Torch - ESAB Welding & Cutting ...
Mechanized Plasmarc Cutting Torch - ESAB Welding & Cutting ...
Mechanized Plasmarc Cutting Torch - ESAB Welding & Cutting ...
You also want an ePaper? Increase the reach of your titles
YUMPU automatically turns print PDFs into web optimized ePapers that Google loves.
section 5<br />
Maintenance<br />
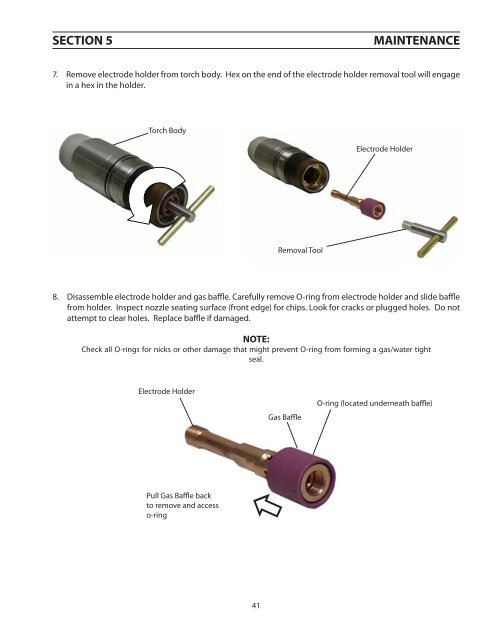
7. Remove electrode holder from torch body. Hex on the end of the electrode holder removal tool will engage<br />
in a hex in the holder.<br />
<strong>Torch</strong> Body<br />
Electrode Holder<br />
Removal Tool<br />
8. Disassemble electrode holder and gas baffle. Carefully remove O-ring from electrode holder and slide baffle<br />
from holder. Inspect nozzle seating surface (front edge) for chips. Look for cracks or plugged holes. Do not<br />
attempt to clear holes. Replace baffle if damaged.<br />
NOTE:<br />
Check all O-rings for nicks or other damage that might prevent O-ring from forming a gas/water tight<br />
seal.<br />
Electrode Holder<br />
Gas Baffle<br />
O-ring (located underneath baffle)<br />
Pull Gas Baffle back<br />
to remove and access<br />
o-ring<br />
41


