Operating Instructions MxxMA-MxERA Three-phase AC ... - Lenze
Operating Instructions MxxMA-MxERA Three-phase AC ... - Lenze
Operating Instructions MxxMA-MxERA Three-phase AC ... - Lenze

Create successful ePaper yourself
Turn your PDF publications into a flip-book with our unique Google optimized e-Paper software.
8<br />
Maintenance/repair<br />
Installation of a spring−applied brake<br />
Assembly of the flange<br />
8.4.5 Assembly of the flange<br />
15<br />
6.1<br />
6<br />
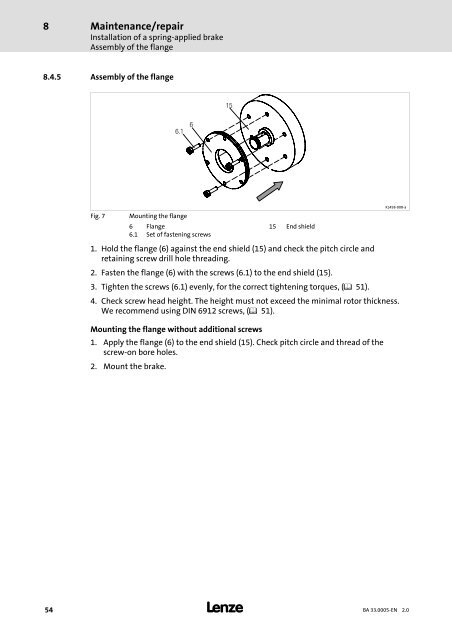
Fig. 7<br />
Mounting the flange<br />
6 Flange 15 End shield<br />
6.1 Set of fastening screws<br />
1. Hold the flange (6) against the end shield (15) and check the pitch circle and<br />
retaining screw drill hole threading.<br />
2. Fasten the flange (6) with the screws (6.1) to the end shield (15).<br />
3. Tighten the screws (6.1) evenly, for the correct tightening torques, ( 51).<br />
4. Check screw head height. The height must not exceed the minimal rotor thickness.<br />
We recommend using DIN 6912 screws, ( 51).<br />
Mounting the flange without additional screws<br />
1. Apply the flange (6) to the end shield (15). Check pitch circle and thread of the<br />
screw−on bore holes.<br />
2. Mount the brake.<br />
KL458−008−a<br />
54 <br />
BA 33.0005−EN 2.0