Teklynx > LABEL MATRIX
Teklynx > LABEL MATRIX
Teklynx > LABEL MATRIX

You also want an ePaper? Increase the reach of your titles
YUMPU automatically turns print PDFs into web optimized ePapers that Google loves.
TEKLYNX ®<br />
<strong>LABEL</strong> <strong>MATRIX</strong>®<br />
VERSION8<br />
I N S T A L L A T I O N G U I D E
The information in this manual is not binding and may be<br />
modified without prior notice.<br />
Supply of the software described in this manual is subject to a<br />
user license. The software may not be used, copied or<br />
reproduced on any medium whatsoever, except in accordance<br />
with this license.<br />
No portion of this manual may be copied, reproduced or<br />
transmitted by any means whatsoever, for purposes other than<br />
the personal use of the buyer, unless written permission is<br />
obtained from Braton Groupe sarl.<br />
© 2006 Braton Groupe sarl.<br />
All rights reserved.<br />
TEKLYNX and its products are trademarks or registered<br />
trademarks of Braton Groupe sarl or its affiliated companies. All<br />
other brands and product names are the trademarks of their<br />
respective owners.<br />
Rev – 9/06
Table of Contents<br />
Chapter 1: Introduction . . . . . . . . . . . . . . . . . . . . . . . . . . . . . . . . . 1-1<br />
Welcome! . . . . . . . . . . . . . . . . . . . . . . . . . . . . . . . . . . . . . . . . . . . . 1-1<br />
What’s New? . . . . . . . . . . . . . . . . . . . . . . . . . . . . . . . . . . . . . . . 1-1<br />
<strong>LABEL</strong> <strong>MATRIX</strong> Editions . . . . . . . . . . . . . . . . . . . . . . . . . . . . . . . . 1-2<br />
Other <strong>LABEL</strong> <strong>MATRIX</strong> Configurations. . . . . . . . . . . . . . . . . . . . . . . . . . 1-3<br />
Full Design and PrintPack Versions . . . . . . . . . . . . . . . . . . . . . . . . 1-3<br />
Single and Network Versions . . . . . . . . . . . . . . . . . . . . . . . . . . . . 1-3<br />
System Requirements. . . . . . . . . . . . . . . . . . . . . . . . . . . . . . . . . . . . 1-4<br />
Product Components . . . . . . . . . . . . . . . . . . . . . . . . . . . . . . . . . . . . 1-4<br />
Viewing the Readme File . . . . . . . . . . . . . . . . . . . . . . . . . . . . . . . . . . 1-4<br />
Chapter 2: Installing <strong>LABEL</strong> <strong>MATRIX</strong> . . . . . . . . . . . . . . . . . . . . . . . 2-1<br />
Before Installing. . . . . . . . . . . . . . . . . . . . . . . . . . . . . . . . . . . . . . . . 2-1<br />
Software Installation . . . . . . . . . . . . . . . . . . . . . . . . . . . . . . . . . . . . 2-1<br />
Full Install . . . . . . . . . . . . . . . . . . . . . . . . . . . . . . . . . . . . . . . . . 2-1<br />
Version Upgrade . . . . . . . . . . . . . . . . . . . . . . . . . . . . . . . . . . . . 2-5<br />
Edition Upgrade or Adding Users . . . . . . . . . . . . . . . . . . . . . . . . . 2-7<br />
Activating the Software. . . . . . . . . . . . . . . . . . . . . . . . . . . . . . . . . . . 2-7<br />
Chapter 3: Network Licensing Setup . . . . . . . . . . . . . . . . . . . . . . . 3-1<br />
License Management . . . . . . . . . . . . . . . . . . . . . . . . . . . . . . . . . . . . 3-1<br />
Setting Up a Network Version . . . . . . . . . . . . . . . . . . . . . . . . . . . . . . 3-6<br />
Using License Manager . . . . . . . . . . . . . . . . . . . . . . . . . . . . . . . . . . . 3-8<br />
Using License Service . . . . . . . . . . . . . . . . . . . . . . . . . . . . . . . . . . . . 3-9<br />
Chapter 4: Printer Setup . . . . . . . . . . . . . . . . . . . . . . . . . . . . . . . . 4-1<br />
Adding a Printer . . . . . . . . . . . . . . . . . . . . . . . . . . . . . . . . . . . . . . . . 4-1<br />
Printer Drivers . . . . . . . . . . . . . . . . . . . . . . . . . . . . . . . . . . . . . . 4-1<br />
Add Printer Wizard . . . . . . . . . . . . . . . . . . . . . . . . . . . . . . . . . . . 4-2<br />
Chapter 5: Setting Up System Security . . . . . . . . . . . . . . . . . . . . . 5-1<br />
Appendix A: Troubleshooting Installation Issues . . . . . . . . . . . . . A-1
Introduction<br />
1<br />
Welcome!<br />
<strong>LABEL</strong> <strong>MATRIX</strong> 8 label design and integration software<br />
provides an easy-to-use, user-friendly solution for printing bar<br />
code labels and tags to meet compliance standards in any<br />
industry.<br />
What’s New?<br />
e<br />
New features in version 8 include:<br />
• Updated Interface - New look and new toolbar buttons<br />
• Advanced RFID Label Printing - Encode both HF and<br />
UHF radio frequency tags<br />
• Enhanced Print Preview - New “live” preview allows you<br />
to view actual variable data as it will print on your labels<br />
• TextArt - Allows text to be “bent” at precise angles to fit<br />
a selected shape type (ellipse, polygon, rectangle, etc.)<br />
and formatted using custom borders and backgrounds<br />
• Label Backgrounds - Use a non-printing “base layer”<br />
outline to make your label design process easier<br />
• Expansion Variables - Create code placeholders to<br />
reduce the size of large expressions with repeating code<br />
• Bundle Save - A label design and its associated files can<br />
be saved as a “bundle” to simplify the process of moving<br />
label files from one PC to another<br />
• SQL Query Builder - Wizard for creating an SQL statement<br />
For a complete listing of all new features, printer drivers and<br />
corrections in <strong>LABEL</strong> <strong>MATRIX</strong> 8, see the program’s Readme.txt<br />
file.
Chapter 1-2<br />
Installation Guide<br />
<strong>LABEL</strong> <strong>MATRIX</strong><br />
Editions<br />
<strong>LABEL</strong> <strong>MATRIX</strong> label design software is available in three<br />
editions — LM QuickDraw, <strong>LABEL</strong> <strong>MATRIX</strong>, and LM PowerPro.<br />
(The edition and release number for your software are printed<br />
on a label located on the <strong>LABEL</strong> <strong>MATRIX</strong> box.) The following<br />
table provides an overview of the main features included in<br />
each edition.<br />
FEATURE LM QuickDraw <strong>LABEL</strong> <strong>MATRIX</strong> LM PowerPro<br />
General<br />
Print-only version • •<br />
Network version • •<br />
Keyless software activation • • •<br />
Live Print Preview (view multiple labels with “live”<br />
variable data displayed)<br />
• •<br />
Label specific security • •<br />
Over 100 compliance label templates • •<br />
Label Background templates with round label<br />
formats<br />
Open Open Open/Edit<br />
Automatic paragraph sizing and scale to fit • •<br />
Bulleted & numbered lists with hanging indents • •<br />
Graphic formats import (bmp, pcx, jpg, tif, etc.) • • •<br />
Color support • • •<br />
Linear bar code support • • •<br />
HIBC support • • •<br />
UCC/EAN 128 and MaxiCode wizards • •<br />
2D bar code support • •<br />
Extended 2D support (TLC 39 and QR Code) •<br />
TextArt Objects/RTF Editor • •<br />
Variables<br />
Keyboard entry at print time • • •<br />
Double entry (verification) ability • •<br />
Pick List data entry • • •<br />
Data retrieved from a database file • • •<br />
Counters (serial numbers) with support for alpha/<br />
numeric<br />
• • •<br />
Counters with custom numbering abilities • •<br />
Date and time stamping using multiple formats • • •<br />
Advanced math, string and logical functions • •<br />
Expansion Variables (use code “shortcuts” in<br />
expressions)<br />
• •<br />
Database<br />
Configure an ODBC/OLE DB data source • •<br />
Sequential database access • • •<br />
Keyed database access • •<br />
SQL query capability/SQL Query Builder Wizard • •<br />
Retrieve data from unlimited number of databases<br />
per label<br />
• •
Introduction Chapter 1-3<br />
FEATURE LM QuickDraw <strong>LABEL</strong> <strong>MATRIX</strong> LM PowerPro<br />
Includes separate Database Editor program • •<br />
Data Grid for viewing database records • • •<br />
Directly edit database records in the Data Grid<br />
•<br />
Printing<br />
Windows driver printer support • • •<br />
Support for over 1000 thermal and thermal transfer<br />
printers<br />
• •<br />
Variable duplicate label count from any origin • • •<br />
Stacked printing ability with multiple labels per<br />
page<br />
•<br />
Reverse the order of pages in a print job<br />
•<br />
Tools<br />
Pocket <strong>LABEL</strong> <strong>MATRIX</strong> support (0 licenses) (1 license)<br />
Directly modify printer code with Job Modifier utility • •<br />
Automatic printing from a source database<br />
(AutoPrint)<br />
• •<br />
Command line support • •<br />
Export image and variable information to a data<br />
file (Write Data)<br />
• •<br />
Save all external attached files with the label<br />
design (Bundle Save)<br />
• •<br />
View & customize reports generated from label log<br />
files (Log Viewer)<br />
•<br />
Code Converter label conversion utility<br />
•<br />
Extended RFID tag support<br />
•<br />
OLE Automation •<br />
Dynamic Data Exchange (DDE)<br />
•<br />
Other <strong>LABEL</strong> <strong>MATRIX</strong> Configurations<br />
Full Design and <strong>LABEL</strong> <strong>MATRIX</strong> is available in a Full Design version and in a<br />
PrintPack Versions PrintPack (print only) version. The Full Design version is<br />
required in order to design, edit and save label design files.<br />
The PrintPack version must be used in conjunction with a Full<br />
Design version. <strong>LABEL</strong> <strong>MATRIX</strong> PrintPack is limited to only<br />
opening and printing labels; you cannot add, move, delete or<br />
edit fields on a label.<br />
Single and<br />
Network Versions<br />
A <strong>LABEL</strong> <strong>MATRIX</strong> Single-User version is a stand-alone program<br />
that is intended to be installed on one PC. The <strong>LABEL</strong> <strong>MATRIX</strong><br />
Network version is a multi-user license. For more information<br />
on the Network version of <strong>LABEL</strong> <strong>MATRIX</strong>, see Chapter 3,<br />
"Network Licensing Setup".
Chapter 1-4<br />
Installation Guide<br />
System Requirements<br />
• IBM-compatible PC, 486 or better<br />
• Microsoft Windows 98 SE, Windows Me, Windows NT 4.0,<br />
Windows 2000, Windows XP or Windows Server 2003<br />
• 32 MB RAM with Windows 98 SE or Windows Me (64 MB<br />
recommended)<br />
• 64 MB RAM with Windows NT 4.0 or Windows 2000 (128<br />
MB recommended)<br />
• 128 MB RAM with Windows XP (256 MB recommended)<br />
• 256 MB RAM with Windows Server 2003 (512 MB recommended)<br />
• Hard drive with at least 150 MB free disk space<br />
• SVGA monitor or better<br />
• CD-ROM drive<br />
• Mouse<br />
Product Components<br />
Your label design software is packaged with the following<br />
components:<br />
• CD-ROM<br />
• Documentation appropriate for the version you purchased<br />
The edition and release number for your software<br />
are printed on a label placed on this guide and<br />
also on the <strong>LABEL</strong> <strong>MATRIX</strong> box.<br />
Viewing the Readme File<br />
The Readme.txt file that installs with the software contains<br />
information about the most recent changes and updates to the<br />
label design software that were made after this manual was<br />
printed. This information supersedes what is contained in this<br />
manual.
Installing <strong>LABEL</strong> <strong>MATRIX</strong><br />
2<br />
Before Installing<br />
• Disable all anti-virus software.<br />
• Close all other applications that are currently running.<br />
Local administrative privileges are required for<br />
proper installation and activation. Contact your<br />
system administrator for assistance.<br />
Software Installation<br />
Note<br />
e<br />
If you have already downloaded and installed the current<br />
<strong>LABEL</strong> <strong>MATRIX</strong> Demo, there is no need to install again from the<br />
CD. Proceed to the "Activating the Software" section on page<br />
2-7 for instructions on activating the software and converting<br />
it from a trial version to a full product.<br />
Full Install To perform a full install:<br />
1 Insert the <strong>LABEL</strong> <strong>MATRIX</strong> 8 CD.<br />
The CD’s opening screen will appear. If the CD does not<br />
automatically open, on the taskbar, click the Start button,<br />
and then click Run. Type the letter of the CD-ROM drive<br />
followed by CDSetup.exe (e.g., D:\CDSetup.exe).
Chapter 2-2<br />
Installation Guide<br />
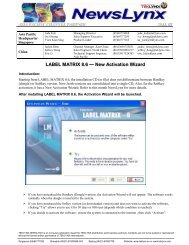
Figure 2-1 <strong>LABEL</strong> <strong>MATRIX</strong> 8 CD Opening Screen<br />
2 On the opening screen of the CD, click on <strong>LABEL</strong> <strong>MATRIX</strong><br />
8, and then click the Install button.<br />
3 Select the desired language for the software interface<br />
screens, and then click OK.<br />
The Preparing to Install screen will appear, followed by<br />
the welcome screen for the installation wizard.<br />
4 Follow the on-screen instructions through the wizard until<br />
you reach the Destination Folder screen.
Installing <strong>LABEL</strong> <strong>MATRIX</strong> Chapter 2-3<br />
Figure 2-2 Set Destination Folder<br />
5 The Destination Folder screen shows the default installation<br />
folder (C:\Program Files\LM8\).<br />
It is recommended that you leave the installation location<br />
at its default setting. If it is necessary to install to a different<br />
location, click the Change button and specify the new<br />
location.<br />
6 Click Next.
Chapter 2-4<br />
Installation Guide<br />
Figure 2-3 Custom Setup<br />
7 On the Custom Setup screen, you can click on a program<br />
feature in the list to view the amount of hard drive space<br />
required to install the feature.<br />
By default, all listed features (graphic files, Pick List files,<br />
conversion utilities, sample labels, etc.) will be installed.<br />
To deselect a feature, click its<br />
This feature will not be available.<br />
icon and then click<br />
Note<br />
Click the Help button on this screen to view the different install<br />
state icons and their meanings.<br />
8 Click Next.<br />
9 Click Install.<br />
The installation wizard installs the <strong>LABEL</strong> <strong>MATRIX</strong> software.<br />
This may take several minutes.
Installing <strong>LABEL</strong> <strong>MATRIX</strong> Chapter 2-5<br />
When the wizard has completed the install, a message<br />
appears to inform you that <strong>LABEL</strong> <strong>MATRIX</strong> 8 has been<br />
installed successfully.<br />
10 Click Finish to exit the wizard.<br />
11 Do one of the following:<br />
• If you are installing a single-user license, you now<br />
have the option to run the software for a trial period of<br />
30 days or 100 executions before activating it. When<br />
you are ready to activate the software, proceed to the<br />
"Activating the Software" section on page 2-7.<br />
• If you are installing a network license, proceed to<br />
Chapter 3, "Network Licensing Setup" to install the<br />
network management utilities and set up users.<br />
All users (including Power Users, Users, Background<br />
Operators, etc.) must have Full Control<br />
permissions to the <strong>LABEL</strong> <strong>MATRIX</strong> “Drivers”<br />
folder (i.e., C:\Program Files\LM8\Drivers). To<br />
check this, use Windows Explorer to browse to<br />
the Drivers folder, right-click on the folder, and<br />
click Properties. Click the Security tab and verify<br />
that Full Control permissions are allowed for<br />
all users.<br />
Version Upgrade<br />
If you are upgrading from <strong>LABEL</strong> <strong>MATRIX</strong> 5.X or <strong>LABEL</strong> <strong>MATRIX</strong><br />
7.X, you must use the Migration Tool on the <strong>LABEL</strong> <strong>MATRIX</strong> CD<br />
to transfer your existing license to a <strong>LABEL</strong> <strong>MATRIX</strong> 8 license.<br />
This license migration is necessary in order to activate the new<br />
version of <strong>LABEL</strong> <strong>MATRIX</strong> you have purchased.<br />
To upgrade your <strong>LABEL</strong> <strong>MATRIX</strong> 5.X or 7.X license to<br />
a <strong>LABEL</strong> <strong>MATRIX</strong> 8 license:<br />
1 Install the new <strong>LABEL</strong> <strong>MATRIX</strong> 8 software according to the<br />
instructions on page 2-1.<br />
2 On the opening screen of the <strong>LABEL</strong> <strong>MATRIX</strong> 8 CD, click on<br />
the Migration Tool installation item.
Chapter 2-6<br />
Installation Guide<br />
Figure 2-4 Migration Tool on the CD<br />
3 If you purchased a Version Upgrade, a Migration Tool<br />
instruction sheet will be included in your product box. In<br />
addition, it is available in PDF format from the opening<br />
screen of the CD by clicking on the Migration Tool item<br />
and then clicking the Documents button.<br />
Follow the steps provided on the Migration Tool instruction<br />
sheet to migrate your license.<br />
4 Activate the software according to the instructions on<br />
page 2-7.<br />
If you are upgrading from a previous <strong>LABEL</strong><br />
<strong>MATRIX</strong> 5.X or 7.X license, you must first install<br />
the new <strong>LABEL</strong> <strong>MATRIX</strong> 8 software, then migrate<br />
your license using the Migration Tool, and finally,<br />
activate the software.
Installing <strong>LABEL</strong> <strong>MATRIX</strong> Chapter 2-7<br />
Edition Upgrade<br />
or Adding Users<br />
If you are performing an Edition Upgrade (e.g., from <strong>LABEL</strong><br />
<strong>MATRIX</strong> version 8 to <strong>LABEL</strong> <strong>MATRIX</strong> PowerPro version 8) or if<br />
you are adding users, you do NOT need to reinstall the<br />
software.<br />
To perform an Edition Upgrade or add users:<br />
• If you have purchased an Edition Upgrade or Add-on<br />
licenses, your product box will contain a “TEKLYNX<br />
Upgrade Program” document that includes a printed label<br />
with your product serial number. To perform the upgrade,<br />
follow the detailed instructions included in this document.<br />
Activating the Software<br />
Once you have installed <strong>LABEL</strong> <strong>MATRIX</strong>, the Activation Wizard<br />
will take you through the process of activating the software.<br />
Note<br />
For network licenses, the software is activated through the<br />
network utility, so the Activation Wizard will not appear when<br />
you start the program as it does with a single-user version.<br />
<br />
To activate the software:<br />
1 Start <strong>LABEL</strong> <strong>MATRIX</strong>.<br />
A welcome screen appears displaying options to activate<br />
the software immediately or to try it for an evaluation<br />
period.
Chapter 2-8<br />
Installation Guide<br />
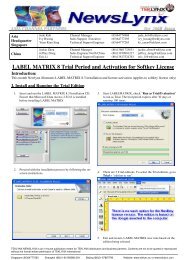
Figure 2-5 Activation Wizard<br />
2 Click Activate, and then click Next.<br />
The Select Activation Mode screen appears.
Installing <strong>LABEL</strong> <strong>MATRIX</strong> Chapter 2-9<br />
Figure 2-6 Select Activation Mode<br />
3 Select from three options for the activation method<br />
(Automatic (Internet), Fax/e-mail, or Telephone),<br />
and then click Next.<br />
4 Depending on the activation method selected, follow the<br />
appropriate steps to complete the activation process.<br />
Note<br />
Once the software has been activated, the Activation Wizard<br />
will no longer appear upon startup, and you will be able to use<br />
the software with all features and functionality enabled.
Chapter 2-10<br />
Installation Guide<br />
Automatic (Internet) Activation Method<br />
1 Fill in all required fields on the User Registration screen,<br />
and then click OK.<br />
2 On the Internet Activation screen, enter the Activation<br />
Code you received with the product, and then click Next.<br />
A message will appear to inform you that activation was<br />
successful. If any problems are encountered, a message<br />
will inform you that activation has failed.<br />
3 Click Finish to complete the activation process.<br />
Fax/e-mail Activation Method<br />
1 Fill in all required fields on the User Registration screen,<br />
and then click OK.<br />
2 On the Activation Code screen, enter the Activation Code<br />
you received with the product, and then click Next.<br />
3 Click the Create Form button.<br />
An Activation Request Form will be created with all of the<br />
required user information. This form must be sent via fax<br />
or e-mail in order to receive a Response Code. For sending<br />
instructions, please refer to the contact information given<br />
on the screen.<br />
4 Click Next.<br />
While waiting for a Response Code, you may choose to<br />
launch your software and begin using it, or close it and<br />
return to the activation process once you have received<br />
your Response Code. (Note: Once you return to the wizard,<br />
all options you previously selected in the wizard will<br />
be retained.)<br />
5 Once you have received your Response Code, you can<br />
return to the activation process by restarting the wizard<br />
and then clicking Next until you reach the screen that<br />
includes the option to Enter the Response Code.
Installing <strong>LABEL</strong> <strong>MATRIX</strong> Chapter 2-11<br />
6 Enter the Response Code provided to you, and then click<br />
Next.<br />
A message will appear to inform you that activation was<br />
successful. If any problems are encountered, a message<br />
will inform you that activation has failed.<br />
7 Click Finish to complete the activation process.<br />
Telephone Activation Method<br />
1 On the Phone Activation screen, enter the Activation<br />
Code you received with the product, and then click Next.<br />
2 Call the appropriate phone number for your area (provided<br />
on the screen).<br />
You will be required to give all user registration information<br />
over the phone, so please have your company information<br />
at hand before calling.<br />
3 Enter the Response Code provided to you, and then click<br />
Next.<br />
A message will appear to inform you that activation was<br />
successful. If any problems are encountered, a message<br />
will inform you that activation has failed.<br />
4 Click Finish to complete the activation process.
Network Licensing Setup<br />
3<br />
License Management<br />
The license management utilities, included with the network<br />
(multi-user) packages, allow you to control access to the label<br />
design software licenses across the network. Using one of<br />
these utilities, you can have many users accessing the label<br />
design software at the same time, from anywhere on the<br />
network. When users are logged onto the program, their user<br />
names will appear in the users list so administrators can keep<br />
track of who is using the program.<br />
e<br />
Depending on your system setup, you may choose to install<br />
one of the following license management utilities:<br />
• The License Manager utility (LMLicenseManager.exe) is<br />
the standard licensing program that must be started manually<br />
each time your system is powered on. License Manager<br />
must be running in order for users on the network to<br />
have full access to the label design software. If this program<br />
is not active, then all users will operate in Demo<br />
Mode.<br />
• The License Service utility (SLicenseCtrl.exe) is similar<br />
to License Manager, but runs as a service, which means it<br />
launches automatically when the system is powered on<br />
and will run as a background task as long as the system is<br />
on.
Chapter 3-2<br />
Installation Guide<br />
<br />
To install the license management utility:<br />
1 Please note the following BEFORE installing License<br />
Manager or License Service:<br />
• In most cases, it is recommended that you install the<br />
<strong>LABEL</strong> <strong>MATRIX</strong> software first, followed by the installation<br />
of the license management utility.<br />
• The license management utility need only be installed<br />
one time in one central location (either on a central<br />
server or other shared workstation with all users<br />
mapped to it).<br />
• Implementation and setup of the license management<br />
utilities require full administrative privileges on the<br />
license server, and cannot be set up remotely (i.e.<br />
cannot be set up using Remote Desktop).<br />
• The installation folder of the license management utility<br />
(by default, C:\Program Files\LM8 Network) must<br />
be a shared and mapped letter drive, allowing<br />
other workstations full control, read/write, and modify<br />
rights. Without full control access, the user will stay<br />
logged into the licensing utility even after closing the<br />
label design software.<br />
• The license management utilities are not compatible<br />
with Novell systems, so Novell network users must<br />
designate a Windows workstation to be the license<br />
server.<br />
2 Insert the <strong>LABEL</strong> <strong>MATRIX</strong> 8 CD on the computer chosen to<br />
act as the license server.<br />
The CD’s opening screen will appear. If the CD does not<br />
automatically open, on the taskbar, click the Start button,<br />
and then click Run. Type the letter of the CD-ROM drive<br />
followed by CDSetup.exe (e.g., D:\CDSetup.exe).<br />
3 On the opening screen of the <strong>LABEL</strong> <strong>MATRIX</strong> CD, select<br />
Network Manager, and then click Install.
Network Licensing Setup Chapter 3-3<br />
Figure 3-1 Network Manager on the CD<br />
The install program begins preparations for the <strong>LABEL</strong><br />
<strong>MATRIX</strong> Network Utilities setup process (this may take a<br />
moment).<br />
4 On the wizard’s Welcome screen, click Next to continue<br />
with the installation of the network licensing utilities.<br />
5 Follow the on-screen instructions through the wizard until<br />
you reach the Destination Folder screen.
Chapter 3-4<br />
Installation Guide<br />
Figure 3-2 Set Destination Folder<br />
6 The Destination Folder screen shows the default installation<br />
folder (C:\Program Files\LM8 Network\).<br />
It is recommended that you leave the installation location<br />
at its default setting. If it is necessary to install to a different<br />
location, click the Change button and specify the new<br />
location.<br />
7 Click Next.<br />
8 Now on the Setup Type screen, choose the setup type<br />
that best suits your needs:<br />
• Select the Complete install option if you want both<br />
license management utilities (License Manager and<br />
License Service) to be installed.<br />
• Select the Custom install option if you want to specify<br />
to install either the License Manager or License Service<br />
utility, or specify to install both utilities.<br />
9 Click Next.<br />
If you selected the Custom install option, the Custom<br />
Setup screen appears.
Network Licensing Setup Chapter 3-5<br />
Figure 3-3 Custom Setup<br />
10 Select the license management utility (or utilities) to<br />
install — either License Manager and/or Service Installation<br />
(License Service) — and then click Next.<br />
11 On the Ready to Install screen, click Install to begin<br />
installing the <strong>LABEL</strong> <strong>MATRIX</strong> Network Utilities.<br />
12 When the installation is complete, click Finish to exit the<br />
install wizard.
Chapter 3-6<br />
Installation Guide<br />
Setting Up a Network Version<br />
1 Install the <strong>LABEL</strong> <strong>MATRIX</strong> software according to the "Software<br />
Installation" section on page 2-1.<br />
2 Install the license management utility (either License<br />
Manager or License Service) according to the "License<br />
Management" section on page 3-1.<br />
Each workstation requires a mapped letter<br />
drive in order to properly access the license<br />
management utility on the license server. The<br />
root directory of the software (i.e., C:\Program<br />
Files\LM8 Network) must be shared and mapped<br />
allowing other workstations full control, read/<br />
write, and modify rights to all potential users.<br />
3 Start the <strong>LABEL</strong> <strong>MATRIX</strong> software. (You may see errors<br />
upon opening, before the network configuration has been<br />
performed).<br />
4 Install and select your printer. (For information on printer<br />
setup, see Chapter 4, "Printer Setup").<br />
5 In <strong>LABEL</strong> <strong>MATRIX</strong>, go to Tools menu > Setup > Network<br />
tab. Check the Network Key box, and use the button<br />
or Auto Find... button to browse to the mapped letter<br />
drive location of the network utility’s root directory (i.e.,<br />
C:\Program Files\LM8 Network\).<br />
6 Close <strong>LABEL</strong> <strong>MATRIX</strong>.<br />
7 On the license server, run the license management utility<br />
you installed — either License Manager<br />
(LMLicenseManager.exe) or License Service<br />
(SLicenseCtrl.exe) — found by clicking the Windows Start<br />
button and then going to All Programs > <strong>Teklynx</strong> ><br />
<strong>LABEL</strong> <strong>MATRIX</strong> 8.<br />
8 The Activation Wizard appears. Follow the instructions in<br />
the "Activating the Software" section on page 2-7 to activate<br />
your network version.
Network Licensing Setup Chapter 3-7<br />
Note<br />
If the license management utility is not activated, <strong>LABEL</strong><br />
<strong>MATRIX</strong> will run in Demo Mode.<br />
9 Start the <strong>LABEL</strong> <strong>MATRIX</strong> software again. If the license<br />
server install was configured properly, <strong>LABEL</strong> <strong>MATRIX</strong> will<br />
open without error, and License Manager or License Service<br />
should reflect one user accessing the program. If<br />
unsuccessful, refer to Appendix A, "Troubleshooting<br />
Installation Issues" before continuing.<br />
10 Install the <strong>LABEL</strong> <strong>MATRIX</strong> software on each workstation<br />
where the label design software will be used (do NOT<br />
install the license management utility on the workstations).<br />
Through Windows, map to the license server (the<br />
network drive where the license management utility is<br />
installed).<br />
Each workstation requires a mapped letter<br />
drive in order to properly access the license<br />
management utility on the license server. Refer to<br />
your Windows documentation or ask your system<br />
administrator for the necessary instructions.<br />
11 For each installation repeat Step 5. Only this time, browse<br />
to the network utility’s root directory on the mapped letter<br />
drive from Step 10.<br />
12 Shut down and restart <strong>LABEL</strong> <strong>MATRIX</strong> to complete the network<br />
installation.
Chapter 3-8<br />
Installation Guide<br />
Using License Manager<br />
1 On the Windows taskbar, go to Start > All Programs ><br />
<strong>Teklynx</strong> > <strong>LABEL</strong> <strong>MATRIX</strong> 8 > License Manager.<br />
The License Manager dialog box appears displaying a list<br />
of users, if any, who are currently using the label design<br />
software.<br />
Figure 3-4 License Manager<br />
2 Use the following buttons to update and display information<br />
in License Manager:<br />
Closes License Manager.<br />
Updates the display to show the users currently<br />
logged into the label design software. (The display is automatically<br />
updated every few seconds.) Note: If the display<br />
is not refreshing correctly to reflect the actual user status,<br />
verify that the users who are logging out have the<br />
required permissions (full control, read/write, and modify<br />
rights) needed to delete their user listings as they log out.<br />
Displays License Manager version information.<br />
3 Click to exit License Manager.
Network Licensing Setup Chapter 3-9<br />
Using License Service<br />
Note<br />
License Service runs only on Windows NT, 2000, XP and<br />
Windows Server 2003 systems.<br />
1 On the Windows taskbar, go to Start > All Programs ><br />
<strong>Teklynx</strong> > <strong>LABEL</strong> <strong>MATRIX</strong> 8 > License Service.<br />
The License Service dialog box appears displaying a list<br />
of users, if any, who are currently using the label design<br />
software.<br />
Figure 3-5 License Service<br />
2 Click Start to start License Service. Once it is started,<br />
from then on the service will launch automatically when<br />
the system is powered on and will run as a background<br />
task as long as the workstation/server is on.
Chapter 3-10<br />
Installation Guide<br />
3 Use the following buttons to update the users list, configure<br />
settings, and display information in License Service:<br />
Updates the display to show the users currently<br />
logged in to the label design software. (The display is<br />
automatically updated every few seconds.) Note: If the<br />
display is not refreshing correctly to reflect the actual user<br />
status, verify that the users who are logging out have the<br />
required permissions (full control, read/write, and modify<br />
rights) needed to delete their user listings as they log out.<br />
Allows you to configure License Service settings<br />
including: specifying the license file path, setting the<br />
option to stop the service when users are connected, and<br />
selecting a display language.<br />
Displays License Service version information.<br />
4 Click to exit License Service.<br />
Note<br />
Exiting the License Service dialog box does NOT stop the<br />
service; it will continue to run as a background task. (To stop<br />
the service, click Stop on the License Service dialog<br />
box.)
Printer Setup<br />
4<br />
<strong>LABEL</strong> <strong>MATRIX</strong> supports over 1,000 specialized thermal and<br />
thermal-transfer label printers and any printer with a valid<br />
Windows driver supplied by the manufacturer. Printer drivers<br />
included with this label design software are installed to the<br />
program’s Drivers directory when the program is installed.<br />
For optimum results when designing and printing labels in this<br />
label design software, use one of the high speed printer drivers<br />
installed with the program.<br />
For thermal and thermal-transfer printers, use<br />
only the drivers that are installed with <strong>LABEL</strong><br />
<strong>MATRIX</strong>. If you use a driver that was installed<br />
through Windows, you may experience slow<br />
printing or encounter errors at print time.<br />
Adding a Printer<br />
e<br />
Printer Drivers<br />
The <strong>LABEL</strong> <strong>MATRIX</strong> and LM PowerPro editions of the software<br />
contain printer drivers for thermal/thermal-transfer printers<br />
from many different printer manufacturers. These printer<br />
drivers are loaded on your computer when the program is<br />
installed.<br />
The printer drivers installed with this program enable you to<br />
maximize your label printer’s capabilities by providing access<br />
to the printer’s resident fonts, making the most efficient use of<br />
the memory available and thereby greatly increasing your<br />
printing speed.
Chapter 4-2<br />
Installation Guide<br />
Depending on the printer you plan to use, there may be<br />
several driver choices available in the software. Printer driver<br />
types are designated in the label design software as follows:<br />
• (L) Native Driver - Driver is a native software driver,<br />
developed specifically for use with this label design software.<br />
• (X) Extended Driver - Driver is from an extended driver<br />
set that provides support for hundreds of additional printers.<br />
• (W) Windows Driver - Driver is a Windows driver<br />
installed through Windows Control Panel.<br />
Some printers include both a native driver and an extended<br />
driver for the same printer model. You may want to try all of<br />
the drivers available for your particular printer model and<br />
determine which one works best for your label printing needs.<br />
To specify a Windows printer as your default label<br />
printer, you must first add its printer driver using<br />
Windows Control Panel.<br />
Add Printer<br />
Wizard<br />
The Add Printer Wizard helps you add printer drivers for use<br />
with <strong>LABEL</strong> <strong>MATRIX</strong>.<br />
<br />
To add a printer using the Add Printer Wizard:<br />
1 On the File menu, click Printer Setup.<br />
2 Click Add.<br />
The Add Printer Wizard appears.<br />
3 Read through the information given on the first screen of<br />
the wizard, and then click Next to continue.
Printer Setup Chapter 4-3<br />
Figure 4-1 Select printer make and model<br />
On the Manufacturer/Printer screen, each printer’s installation<br />
status is indicated by one of the following icons:<br />
Driver is installed on the system and is available for<br />
use with the label design software.<br />
Driver is supported by the label design software, but<br />
is not currently installed. (In most cases the driver can<br />
be downloaded from the Web free of charge using the<br />
Driver Service Pack utility.)<br />
If you do not see your printer manufacturer and model in<br />
the list of available printers, you have several options:<br />
• Your printer may use a Windows printer driver that is<br />
not supplied with the label design software. If so, you<br />
can install it through Windows Control Panel.<br />
• Your printer may be the same as one of the printers<br />
listed, but it may have a different name. Your printer<br />
vendor may be able to suggest alternative printers for<br />
which the driver would be compatible.<br />
• An existing driver may support your printer through<br />
emulation. Your printer vendor may help you determine<br />
if a driver emulates your particular printer.<br />
Note<br />
The Have Disk button allows you to install a printer driver<br />
from a disk or CD.
4 Select the manufacturer and printer that you want to use,<br />
and click Next.<br />
The alias and port selection screen appears.<br />
Figure 4-2 Specify alias and port<br />
5 In the Alias box, type a name for the printer. For example,<br />
“Warehouse Printer 1” or “Shipping Label Format -<br />
HP4”. This name will appear in the list of printers in the<br />
Printer Setup dialog box.<br />
6 Specify the port to which your printer is physically connected.<br />
• Local: Select a local port. Typically, thermal printers<br />
use a serial (COM port) connection such as COM1 or<br />
COM2. Laser and dot matrix printers typically use a<br />
parallel port (LPT) connection such as LPT1 or a USB<br />
port such as USB001.<br />
• UNC: Enter the full UNC path to print using a shared<br />
network printer.<br />
• TCP/IP: Enter the IP address to print using a shared<br />
Telnet connection.<br />
Note<br />
To function properly, many serial printers need to be physically<br />
connected with a null modem cable or null modem adapter on<br />
a standard RS232 cable.
Printer Setup Chapter 4-5<br />
7 If printing to a local port (e.g., COM1, LPT1, or USB001),<br />
the Enable Windows Print Spooling option is available.<br />
Print spooling allows you to send your print jobs to the<br />
Windows Print Spooler, which stores each print job until<br />
the printer is ready. The advantage of using print spooling<br />
is that the label design software will be available for use<br />
much quicker immediately following each print job<br />
because it is not tied up with the direct printing process.<br />
8 Click Next.<br />
9 If you chose a COM port, a COM port settings screen<br />
appears.<br />
Figure 4-3 COM port settings<br />
Adjust the COM port settings if necessary according to<br />
your printer manual specifications. The COM port settings<br />
specified here should match the settings on your printer.<br />
You may be instructed to use Windows Control Panel to<br />
change the connection information if your printer is using<br />
a Windows-supplied driver.<br />
10 Click Next.
Chapter 4-6<br />
Installation Guide<br />
11 You have now entered all the information needed to attach<br />
a printer.<br />
To display printer settings after you exit the wizard, click<br />
the Change printer setup options check box.<br />
12 Click Finish.
Setting Up System Security<br />
5<br />
The system security feature (available only in <strong>LABEL</strong> <strong>MATRIX</strong><br />
and LM PowerPro editions) allows you to restrict users to<br />
certain features of the program. You can set up system<br />
security by assigning a user ID and password and then<br />
selecting the tasks the user may perform. When you restart<br />
the program after setting up a user, the security feature is<br />
enabled, and all users will be required to log in before using<br />
the program.<br />
You can set up secured access to label design functions by<br />
establishing a list of users, each with their own user name and<br />
password. Secured access means that each time the label<br />
design software is started, the user is prompted to enter a user<br />
name and password.<br />
e<br />
The first user to set up a password is automatically granted<br />
administration privileges. That user can then add users by<br />
defining the user name, password, and access privileges for<br />
each user. Thereafter, when a user starts the label design<br />
software, he or she must enter a correct user name and<br />
password to be allowed access to the functions assigned to him<br />
or her.<br />
To each user you can grant access to one or more of these<br />
Design Program areas:<br />
• Design: Allows users to design labels.<br />
• Print: Allows users to print labels.<br />
• Database: Allows users access to the database functions<br />
available on the Label Properties > Database tab, and<br />
allows access to the database module via the Tools menu.
Chapter 5-2<br />
Installation Guide<br />
Note<br />
Without Database access, users that have Design access are<br />
still allowed to attach databases to labels when assigning a<br />
Database origin.<br />
• Edit Grid: Giving users access to the Edit Grid function<br />
allows them to edit database records directly from the<br />
program’s Data Grid. Note that editing is limited to Access<br />
and FoxPro databases.<br />
• Administration: Allows users to add and modify user<br />
security. The first user to set up a password is automatically<br />
granted administration privileges.<br />
To each user you can grant access to one or more of these<br />
Print Only areas:<br />
• Reanalyze Datasource: Allows users to reanalyze a<br />
database for the total number of records and for updated<br />
field property information.<br />
• Save Image Values: Gives users the option of keeping<br />
changes to Counter or Keyboard Input values after printing.<br />
• Change Printer: Allows users to add a printer or change<br />
the selected printer.<br />
<br />
To define users for system access:<br />
1 On the Tools menu, click Setup.<br />
2 Click the Passwords tab.
Setting Up System Security Chapter 5-3<br />
Figure 5-1 Passwords tab<br />
3 Click Add. The Add User dialog box appears.<br />
Figure 5-2 Add Users<br />
Note<br />
If you are the first user to set up a password, the access<br />
options are selected by default.
Chapter 5-4<br />
Installation Guide<br />
4 In the User Name box, type the name that you want the<br />
user to enter to access the system.<br />
5 In the Enter Password box, type the user’s password.<br />
For security, asterisks (*) appear in place of the characters<br />
you type.<br />
6 In the Retype Password box, type the password exactly<br />
as you did before.<br />
7 If the check boxes are available, select the functional<br />
areas to which this user should have access.<br />
8 Click OK.<br />
The user appears in the User List box.<br />
Figure 5-3 User List<br />
9 Click OK.<br />
With password security enabled, users will now be<br />
prompted for a user name and password each time the<br />
program is started.
Troubleshooting<br />
Installation Issues<br />
A<br />
The following table lists the most common error messages, issues, and questions<br />
encountered when installing the <strong>LABEL</strong> <strong>MATRIX</strong> software.<br />
For the most current information on installation issues and troubleshooting tips,<br />
please reference the <strong>LABEL</strong> <strong>MATRIX</strong> FAQs page on the TEKLYNX web site at<br />
http://www.teklynx.com/products/labels/labelmatrix_faq.html. The <strong>LABEL</strong><br />
<strong>MATRIX</strong> FAQs are also available directly from within the <strong>LABEL</strong> <strong>MATRIX</strong> software by<br />
going to Help menu > <strong>Teklynx</strong> Online > Top 10 FAQs.<br />
Problem/Question<br />
Solution<br />
Installation/Activation Issues<br />
I’m trying to install the software<br />
but it’s asking me for a<br />
code<br />
e<br />
in order to “activate” it?<br />
Where do I get this code?<br />
If you are installing a full version of the<br />
software, an Activation Code will be provided<br />
in your product box.<br />
If you are upgrading from <strong>LABEL</strong> <strong>MATRIX</strong><br />
5.X or <strong>LABEL</strong> <strong>MATRIX</strong> 7.X, a Migration Tool<br />
instruction sheet will be included in your<br />
product box. Follow the instruction sheet to<br />
“migrate” your existing license to a <strong>LABEL</strong><br />
<strong>MATRIX</strong> 8 license. At the end of the process<br />
you will receive an Activation Code that will<br />
allow you to activate the software.
Appendix A-2<br />
Installation Guide<br />
(Table continued from previous page)<br />
Problem/Question<br />
What happens if I lose my<br />
Activation Code?<br />
I used the Migration Tool<br />
utility, but I didn’t write<br />
down the Activation Code<br />
given at the end. Now what<br />
do I do?<br />
I installed the software as a<br />
trial version at first, and then<br />
a few days later I activated it<br />
using the code provided in<br />
my product box. The problem<br />
is, after I activated it, several<br />
of the features I was<br />
using in the trial version<br />
were suddenly not available.<br />
Why is this?<br />
Solution<br />
Please contact TEKLYNX Customer Service<br />
at 888-629-4444 or e-mail<br />
customerservice@teklynx.com. You will<br />
need to provide them with the serial number<br />
on your invoice or from the product box.<br />
They can then re-issue an Activation Code.<br />
If an option appears “grayed out” and is not<br />
available for selection in the activated software,<br />
this is most likely because that feature<br />
is not included in the edition you<br />
purchased. When you run the trial version,<br />
it automatically defaults to running the LM<br />
PowerPro (high-end) edition of the software.<br />
When you activate it, it runs the edition<br />
you actually purchased (probably<br />
<strong>LABEL</strong> <strong>MATRIX</strong> or LM QuickDraw).<br />
A detailed listing of features included in<br />
each edition can be found in the "<strong>LABEL</strong><br />
<strong>MATRIX</strong> Editions" section on page 1-2 of<br />
this guide.<br />
What if the PC crashes or I<br />
need to transfer the license<br />
to another PC?<br />
What if the PC crashes in the<br />
middle of the night, over the<br />
weekend, or on a holiday -<br />
how can I reactivate the<br />
product with no down time?<br />
What happens if I uninstall<br />
the software by accident and<br />
need to re-install it on the<br />
same PC later?<br />
You must contact Customer Service and<br />
provide them with your Activation Code.<br />
Another authorization code will be given to<br />
reactivate the product.<br />
By installing the CD on another PC, you<br />
start with a grace period during which you<br />
run the software as a trial version. All product<br />
features will be available during that<br />
period, which gives you time to continue<br />
using the software with no down time, until<br />
you can contact Customer Service to reactivate<br />
your product.<br />
As long as you have not formatted your<br />
hard disk, your product will run without<br />
requiring a new Activation Code.
Troubleshooting Installation Issues Appendix A-3<br />
(Table continued from previous page)<br />
Problem/Question<br />
I lost the CD and I need to<br />
re-install the software. What<br />
do I do?<br />
I installed a demo version<br />
that I downloaded from the<br />
web site. Can I turn this into<br />
a full license without having<br />
to re-install the product?<br />
Error 432: Setup has<br />
detected that InstallShield is<br />
in use. Please close<br />
InstallShield and restart<br />
setup.<br />
Solution<br />
If you lost the CD and need to re-install,<br />
you can download the re-installation files<br />
from the TEKLYNX web site at http://<br />
www.teklynx.com/products/labels/<br />
labelmatrix_downloads.html. As long as you<br />
are installing to the same PC and have not<br />
formatted your hard disk, this is all that is<br />
needed to re-install the software.<br />
Yes. When you purchase a product you will<br />
receive an Activation Code. You can use this<br />
Activation Code to activate the trial version<br />
without having to re-install.<br />
This is an InstallShield error that can occur<br />
for a number of reasons. For information on<br />
resolving this issue, go to<br />
http://consumer.installshield.com and<br />
search on “Error 432”.<br />
General Questions<br />
How do I know that the CD I<br />
received contains the latest<br />
release of the software,<br />
including any recent patches<br />
or updates?<br />
Why are some features and<br />
options grayed out or not<br />
available?<br />
You can verify this by checking your software<br />
version number against the version<br />
number of the <strong>LABEL</strong> <strong>MATRIX</strong> Demo found<br />
at http://www.teklynx.com. The <strong>LABEL</strong><br />
<strong>MATRIX</strong> Demo is always updated with the<br />
most recently released version of the software.<br />
Please verify that your version<br />
matches the Demo version.<br />
Many of the features covered in the <strong>LABEL</strong><br />
<strong>MATRIX</strong> Quick Start Guide and online Help<br />
are available only in the mid-range (<strong>LABEL</strong><br />
<strong>MATRIX</strong>) or high-end (LM PowerPro) editions<br />
of the software. If an option appears<br />
“grayed out” and is not available for selection,<br />
this is most likely because that feature<br />
is not included in the edition you purchased.<br />
A detailed listing of features included in<br />
each edition can be found in the "<strong>LABEL</strong><br />
<strong>MATRIX</strong> Editions" section on page 1-2 of<br />
this guide.
Appendix A-4<br />
Installation Guide<br />
(Table continued from previous page)<br />
Problem/Question<br />
Where can I find sample<br />
labels, training manuals, and<br />
tutorials?<br />
Solution<br />
Sample label design files and compliance<br />
label templates can be found in the program’s<br />
Sample Labels folder (i.e., C:\Program<br />
Files\LM8\Sample Labels). You can<br />
also access many helpful resources directly<br />
from within <strong>LABEL</strong> <strong>MATRIX</strong> by going to the<br />
Help menu > <strong>Teklynx</strong> Online.<br />
In addition, both BASIC and ADVANCED<br />
level training manuals (including step-bystep<br />
tutorials) are available from TEKLYNX<br />
for a fee. For more information, please contact<br />
TEKLYNX Customer Service.<br />
What Technical Support is<br />
available?<br />
From within <strong>LABEL</strong> <strong>MATRIX</strong> go to the Help<br />
menu > <strong>Teklynx</strong> Online. From here you<br />
can quickly access many support resources<br />
including eHelp videos, Technical Support<br />
FAQs, PDF format manuals and guides, and<br />
more.<br />
For phone support, please contact your<br />
label design software supplier.
Setting the Standard<br />
United States<br />
1-414-535-6200<br />
France<br />
33-562-601-080<br />
Germany<br />
49-6103-30026-0<br />
Singapore<br />
65-6477-7293<br />
China<br />
86-21-6100-6588<br />
Japan<br />
81-45-461-3603<br />
For technical support contact your <strong>LABEL</strong> <strong>MATRIX</strong> software reseller. Online support is available free of charge at www.teklynx.com under SUPPORT.<br />
Copyright 2006 Braton Groupe sarl. All rights reserved. Printed in the USA 09/06 . TEKLYNX and <strong>LABEL</strong> <strong>MATRIX</strong> are registered trademarks of<br />
Braton Groupe sarl or its affiliated companies. All other brands and product names are trademarks of their respective owners. (Y531756)<br />
www.teklynx.com