crossmax slr disc 09 - lesrouleuxdewailly - Free
crossmax slr disc 09 - lesrouleuxdewailly - Free
crossmax slr disc 09 - lesrouleuxdewailly - Free

Create successful ePaper yourself
Turn your PDF publications into a flip-book with our unique Google optimized e-Paper software.
36<br />
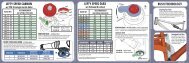
FITTING/REMOVING THE TRACOMP RING AND ITS CLIPS<br />
Tools needed<br />
• TraComp ring tool 996 080 01<br />
• 4 to 5 mm flat screwdriver<br />
• Mallet<br />
To remove the TraComp ring:<br />
Remove the axle following the procedures specific to each hub (refer to www.tech-mavic.com or the technical manuals from previous years);<br />
Place the TraComp ring tool 996 080<br />
01 in the hub so that the illustrated<br />
screwdriver on the tool is visible.<br />
Thread the screwdriver head through<br />
the TraComp ring tool hole.<br />
Insert the screwdriver head through<br />
the slit in the TraComp ring tool in the<br />
TraComp ring groove, exactly between<br />
two clips.<br />
Push the screwdriver handle<br />
downwards to lever out the TraComp<br />
ring.<br />
The spokes can now turn freely and be extracted.<br />
A new ring and clips must be used when refitting:<br />
OK<br />
KO<br />
OK<br />
KO<br />
Position the two clips on two opposite spoke heads with the split part upwards.<br />
Offer the TraComp ring up to the spoke heads with the conical side facing<br />
downwards and the inside groove facing upwards, taking care to slide two clips<br />
between each one<br />
OK<br />
KO<br />
Place the TraComp ring tool 996 080 01<br />
against the ring so that the illustrated<br />
mallet on the tool is visible.<br />
Forcefully fit the TraComp ring into the hub with the mallet. The entire bottom<br />
surface of the TraComp ring must be in contact with the hub body.<br />
Refit the axle following the procedures specific to each hub (refer to www.tech-mavic.com or the technical manuals from previous years).