
You also want an ePaper? Increase the reach of your titles
YUMPU automatically turns print PDFs into web optimized ePapers that Google loves.
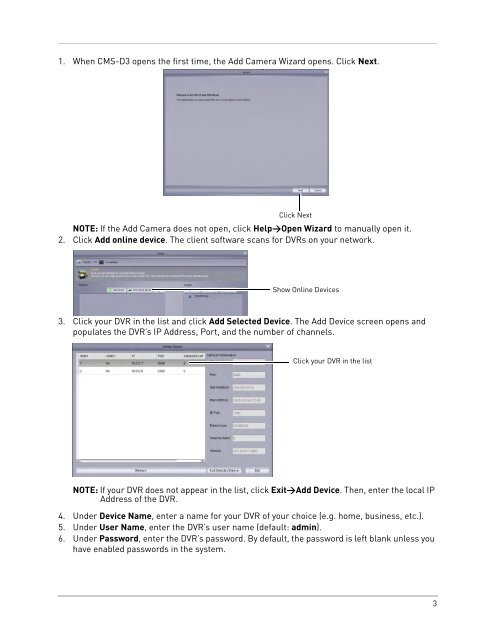
1. When <strong>CMS</strong>-<strong>D3</strong> opens the first time, the Add Camera Wizard opens. Click Next.Click NextNOTE: If the Add Camera does not open, click Help>Open Wizard to manually open it.2. Click Add online device. The client software scans for DVRs on your network.Show Online Devices3. Click your DVR in the list and click Add Selected Device. The Add Device screen opens andpopulates the DVR’s IP Address, Port, and the number of channels.Click your DVR in the listNOTE: If your DVR does not appear in the list, click Exit>Add Device. Then, enter the local IPAddress of the DVR.4. Under Device Name, enter a name for your DVR of your choice (e.g. home, business, etc.).5. Under User Name, enter the DVR’s user name (default: admin).6. Under Password, enter the DVR’s password. By default, the password is left blank unless youhave enabled passwords in the system.3